uconnect settings CHRYSLER PACIFICA 2020 Owners Manual
[x] Cancel search | Manufacturer: CHRYSLER, Model Year: 2020, Model line: PACIFICA, Model: CHRYSLER PACIFICA 2020Pages: 516, PDF Size: 28.69 MB
Page 9 of 516
7
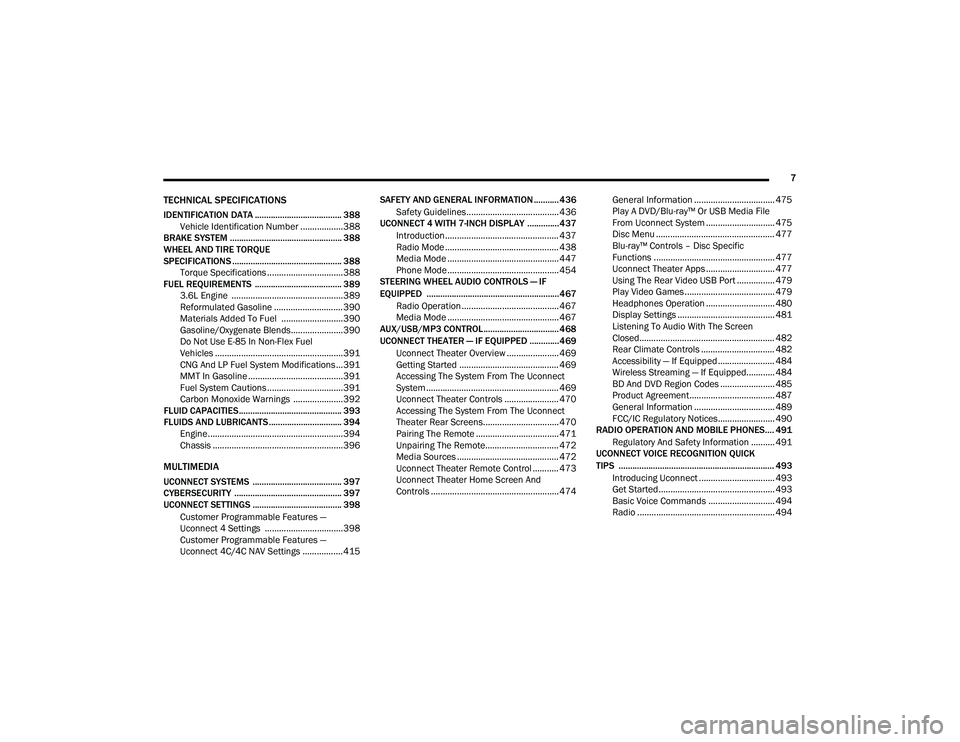
TECHNICAL SPECIFICATIONS
IDENTIFICATION DATA ...................................... 388Vehicle Identification Number ..................388
BRAKE SYSTEM ................................................. 388
WHEEL AND TIRE TORQUE
SPECIFICATIONS ................................................ 388 Torque Specifications ................................388
FUEL REQUIREMENTS ...................................... 389 3.6L Engine ...............................................389Reformulated Gasoline .............................390Materials Added To Fuel ..........................390
Gasoline/Oxygenate Blends......................390
Do Not Use E-85 In Non-Flex Fuel
Vehicles ......................................................391 CNG And LP Fuel System Modifications ...391MMT In Gasoline ........................................391
Fuel System Cautions ................................391Carbon Monoxide Warnings .....................392
FLUID CAPACITIES ............................................. 393
FLUIDS AND LUBRICANTS ................................ 394 Engine.........................................................394
Chassis .......................................................396
MULTIMEDIA
UCONNECT SYSTEMS ....................................... 397
CYBERSECURITY ............................................... 397
UCONNECT SETTINGS ....................................... 398
Customer Programmable Features —
Uconnect 4 Settings .................................398 Customer Programmable Features —
Uconnect 4C/4C NAV Settings ................. 415 SAFETY AND GENERAL INFORMATION ........... 436
Safety Guidelines....................................... 436
UCONNECT 4 WITH 7-INCH DISPLAY ..............437
Introduction................................................ 437
Radio Mode ................................................ 438
Media Mode ............................................... 447Phone Mode ............................................... 454
STEERING WHEEL AUDIO CONTROLS — IF
EQUIPPED ..........................................................467
Radio Operation ......................................... 467
Media Mode ............................................... 467
AUX/USB/MP3 CONTROL ................................. 468
UCONNECT THEATER — IF EQUIPPED ............. 469
Uconnect Theater Overview ...................... 469
Getting Started .......................................... 469Accessing The System From The Uconnect
System ........................................................ 469 Uconnect Theater Controls ....................... 470
Accessing The System From The Uconnect
Theater Rear Screens................................ 470 Pairing The Remote ................................... 471
Unpairing The Remote............................... 472Media Sources ........................................... 472
Uconnect Theater Remote Control ........... 473
Uconnect Theater Home Screen And
Controls ...................................................... 474 General Information .................................. 475
Play A DVD/Blu-ray™ Or USB Media File
From Uconnect System ............................. 475 Disc Menu .................................................. 477
Blu-ray™ Controls – Disc Specific
Functions ................................................... 477 Uconnect Theater Apps ............................. 477
Using The Rear Video USB Port ................ 479
Play Video Games ...................................... 479
Headphones Operation ............................. 480
Display Settings ......................................... 481Listening To Audio With The Screen
Closed......................................................... 482 Rear Climate Controls ............................... 482Accessibility — If Equipped ........................ 484
Wireless Streaming — If Equipped............ 484
BD And DVD Region Codes ....................... 485Product Agreement.................................... 487General Information .................................. 489
FCC/IC Regulatory Notices........................ 490
RADIO OPERATION AND MOBILE PHONES.... 491
Regulatory And Safety Information .......... 491
UCONNECT VOICE RECOGNITION QUICK
TIPS .................................................................... 493
Introducing Uconnect ................................ 493
Get Started................................................. 493Basic Voice Commands ............................ 494Radio .......................................................... 494
20_RU_OM_EN_US_t.book Page 7
Page 16 of 516
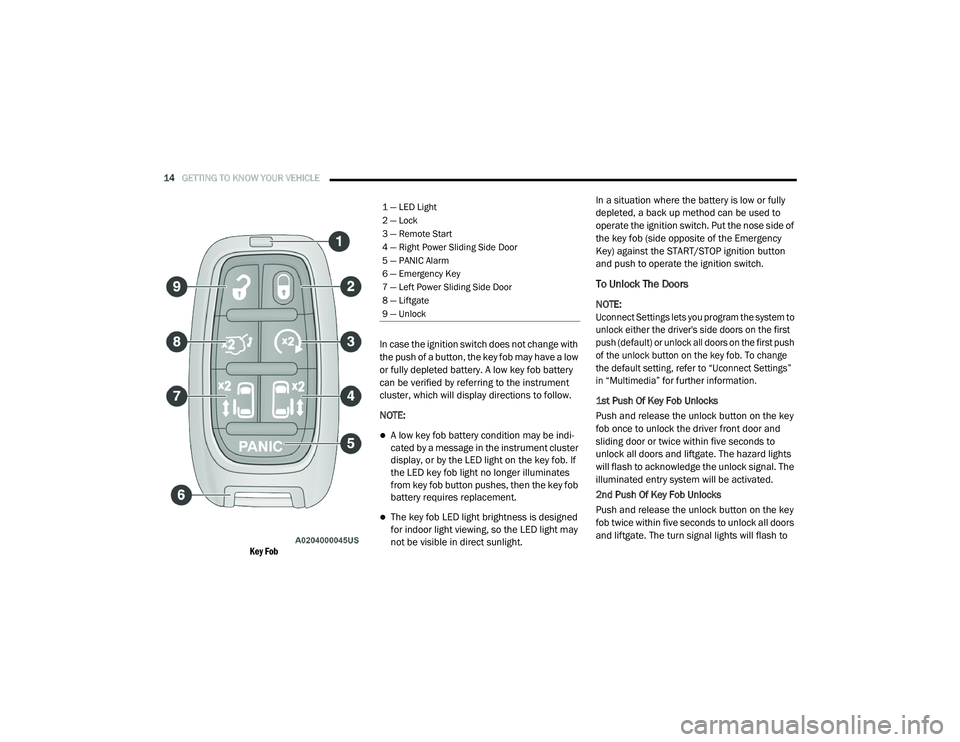
14GETTING TO KNOW YOUR VEHICLE
Key Fob
In case the ignition switch does not change with
the push of a button, the key fob may have a low
or fully depleted battery. A low key fob battery
can be verified by referring to the instrument
cluster, which will display directions to follow.
NOTE:
A low key fob battery condition may be indi
-
cated by a message in the instrument cluster
display, or by the LED light on the key fob. If
the LED key fob light no longer illuminates
from key fob button pushes, then the key fob
battery requires replacement.
The key fob LED light brightness is designed
for indoor light viewing, so the LED light may
not be visible in direct sunlight. In a situation where the battery is low or fully
depleted, a back up method can be used to
operate the ignition switch. Put the nose side of
the key fob (side opposite of the Emergency
Key) against the START/STOP ignition button
and push to operate the ignition switch.
To Unlock The Doors
NOTE:
Uconnect Settings lets you program the system to
unlock either the driver's side doors on the first
push (default) or unlock all doors on the first push
of the unlock button on the key fob. To change
the default setting, refer to “Uconnect Settings”
in “Multimedia” for further information.
1st Push Of Key Fob Unlocks
Push and release the unlock button on the key
fob once to unlock the driver front door and
sliding door or twice within five seconds to
unlock all doors and liftgate. The hazard lights
will flash to acknowledge the unlock signal. The
illuminated entry system will be activated.
2nd Push Of Key Fob Unlocks
Push and release the unlock button on the key
fob twice within five seconds to unlock all doors
and liftgate. The turn signal lights will flash to
1 — LED Light
2 — Lock
3 — Remote Start
4 — Right Power Sliding Side Door
5 — PANIC Alarm
6 — Emergency Key
7 — Left Power Sliding Side Door
8 — Liftgate
9 — Unlock
20_RU_OM_EN_US_t.book Page 14
Page 17 of 516
GETTING TO KNOW YOUR VEHICLE15
acknowledge the unlock signal. The illuminated
entry system will be activated.
This feature lets you program the system to
unlock either the driver's side doors or all doors
on the first push of the unlock button on the key
fob. To change the current setting, refer to
“Uconnect Settings” in “Multimedia” for further
information.
NOTE:
Your vehicle is equipped with Passive Entry;
refer to “Keyless Enter-N-Go — Passive Entry” in
this chapter for further information.
Emergency Key Feature
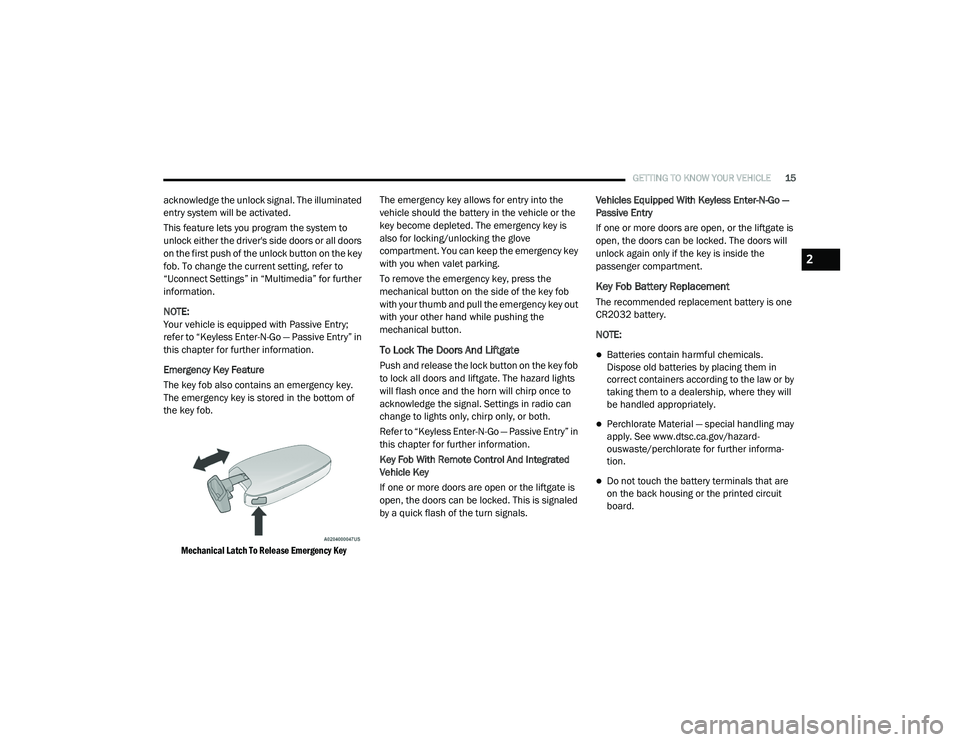
The key fob also contains an emergency key.
The emergency key is stored in the bottom of
the key fob.
Mechanical Latch To Release Emergency Key
The emergency key allows for entry into the
vehicle should the battery in the vehicle or the
key become depleted. The emergency key is
also for locking/unlocking the glove
compartment. You can keep the emergency key
with you when valet parking.
To remove the emergency key, press the
mechanical button on the side of the key fob
with your thumb and pull the emergency key out
with your other hand while pushing the
mechanical button.
To Lock The Doors And Liftgate
Push and release the lock button on the key fob
to lock all doors and liftgate. The hazard lights
will flash once and the horn will chirp once to
acknowledge the signal. Settings in radio can
change to lights only, chirp only, or both.
Refer to “Keyless Enter-N-Go — Passive Entry” in
this chapter for further information.
Key Fob With Remote Control And Integrated
Vehicle Key
If one or more doors are open or the liftgate is
open, the doors can be locked. This is signaled
by a quick flash of the turn signals.
Vehicles Equipped With Keyless Enter-N-Go —
Passive Entry
If one or more doors are open, or the liftgate is
open, the doors can be locked. The doors will
unlock again only if the key is inside the
passenger compartment.
Key Fob Battery Replacement
The recommended replacement battery is one
CR2032 battery.
NOTE:
Batteries contain harmful chemicals.
Dispose old batteries by placing them in
correct containers according to the law or by
taking them to a dealership, where they will
be handled appropriately.
Perchlorate Material — special handling may
apply. See www.dtsc.ca.gov/hazard
-
ouswaste/perchlorate for further informa -
tion.
Do not touch the battery terminals that are
on the back housing or the printed circuit
board.
2
20_RU_OM_EN_US_t.book Page 15
Page 19 of 516
GETTING TO KNOW YOUR VEHICLE17
Duplication of key fobs may be performed at an
authorized dealer. This procedure consists of
programming a blank key fob to the vehicle
electronics. A blank key fob is one that has
never been programmed.
NOTE:
When having the Sentry Key Immobilizer
System serviced, bring all vehicle keys with you
to an authorized dealer.
KeySense Features — If Equipped
This feature provides the vehicle owner with the
ability to customize vehicle settings that can be
applied to determine the driving experience for
other drivers of the vehicle. The vehicle settings
are protected by a unique 4-digit PIN, which the
vehicle owner creates when accessing the
specific settings for the first time.
KeySense also has additional features that are
always enabled when the specific key is in use
that cannot be set by the vehicle owner. While
this specific key fob is in use, the vehicle will
respond accordingly to the customized vehicle settings and mandatory features. This includes
enhanced driving assistance features,
increased driver alerts, and the locking of
certain optional features.
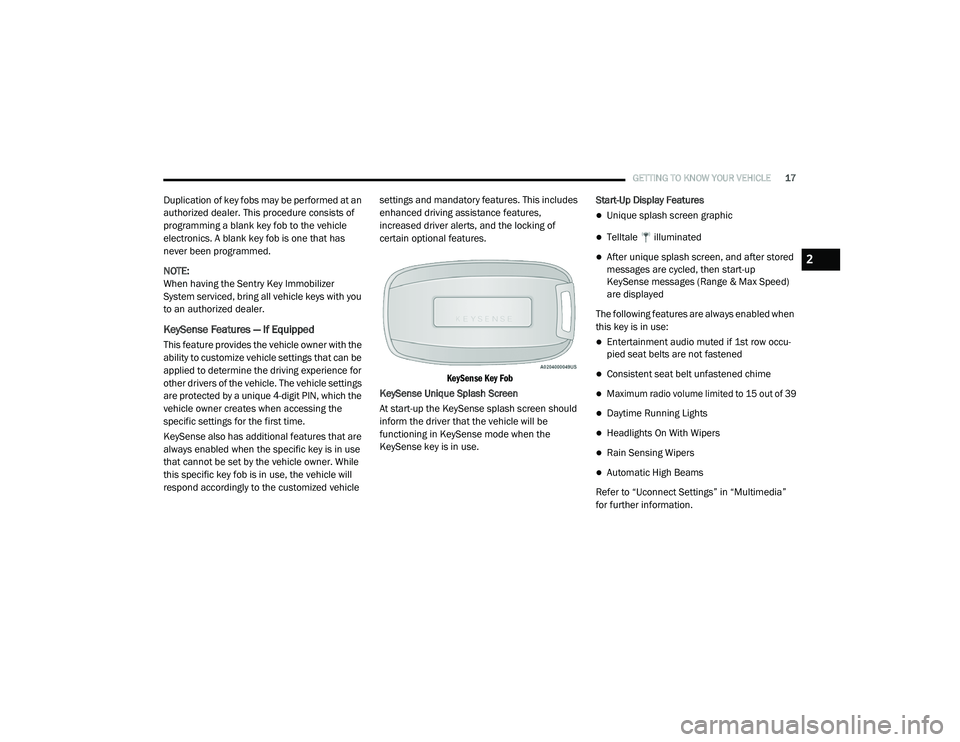
KeySense Key Fob
KeySense Unique Splash Screen
At start-up the KeySense splash screen should
inform the driver that the vehicle will be
functioning in KeySense mode when the
KeySense key is in use. Start-Up Display Features
Unique splash screen graphic
Telltale illuminated
After unique splash screen, and after stored
messages are cycled, then start-up
KeySense messages (Range & Max Speed)
are displayed
The following features are always enabled when
this key is in use:
Entertainment audio muted if 1st row occu -
pied seat belts are not fastened
Consistent seat belt unfastened chime
Maximum radio volume limited to 15 out of 39
Daytime Running Lights
Headlights On With Wipers
Rain Sensing Wipers
Automatic High Beams
Refer to “Uconnect Settings” in “Multimedia”
for further information.
2
20_RU_OM_EN_US_t.book Page 17
Page 29 of 516
GETTING TO KNOW YOUR VEHICLE27
sound if the ignition is in the ACC or ON/RUN
position and a door is open, as a reminder to
place the ignition in the OFF position and
remove the key fob.
Unlock Doors Automatically On Exit — If
Equipped
The Unlock Doors Automatically On Exit feature
unlocks all of the vehicle doors when any door
is opened. This will occur only after the gear
selector has been placed into the PARK
position, after the vehicle has been driven (the
gear selector has been placed out of PARK and
all doors closed).
The Unlock Doors Automatically On Exit feature
will not operate if there is any manual operation
of the door locks (lock or unlock).
For further information, refer to “Uconnect
Settings” in “Multimedia”.
Keyless Enter-N-Go — Passive Entry
The Passive Entry system is an enhancement to
the vehicle’s Remote Keyless Entry (RKE)
system and a feature of Keyless Enter-N-Go.
This feature allows you to lock and unlock the
vehicle’s door(s) without having to push the key
fob lock or unlock buttons. NOTE:
Passive Entry may be programmed on/off.
Refer to “Uconnect Settings” in “Multimedia”
for further information.
If wearing gloves on your hands, or if it has
been raining/snowing on the Passive Entry
door handle, the unlock sensitivity can be
affected, resulting in a slower response time.
If the vehicle is unlocked by Passive Entry
and no door is opened within 60 seconds, the
vehicle will re-lock and will arm the security
alarm (if equipped).
The sliding side doors can be unlocked from
the outside using the hands free or Passive
Entry system.
The key fob may not be able to be detected by
the vehicle passive entry system if it is
located next to a mobile phone, laptop, or
other electronic device; these devices may
block the key fob’s wireless signal and
prevent the passive entry handle from
locking/unlocking the vehicle.
If set by the customer in the Uconnect
Settings, unlocking with Passive Entry will
initiate illuminated approach (low beams,
license plate lamp, position lamps) for the
time 0, 30 (default), 60 or 90 seconds.
Passive Entry also initiates two flashes of the
turn lamps.
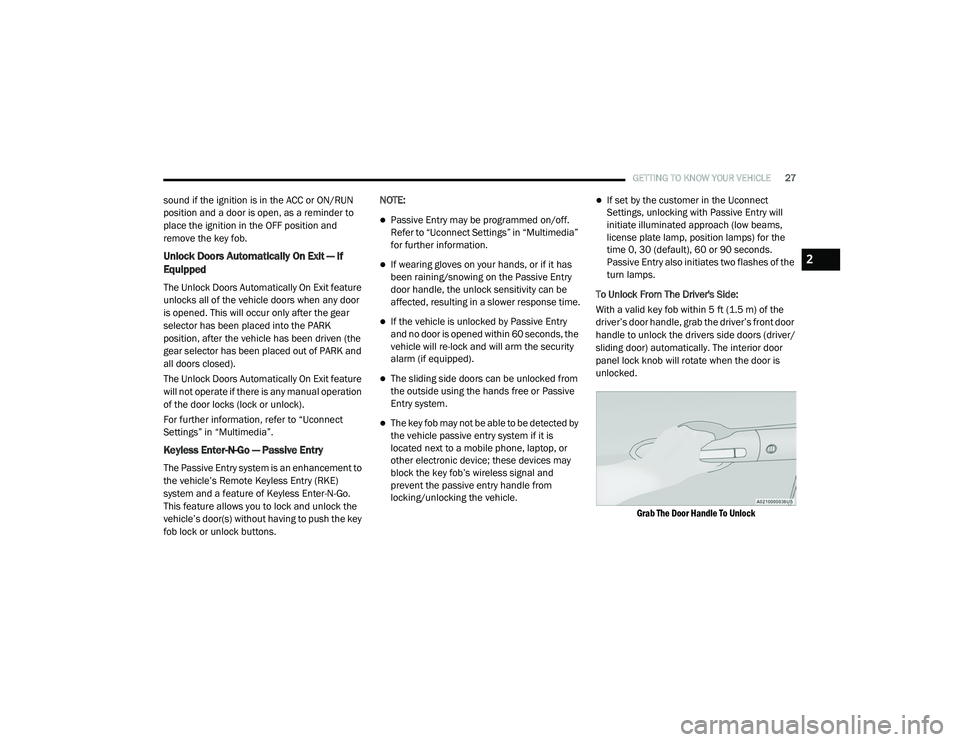
To Unlock From The Driver's Side:
With a valid key fob within 5 ft (1.5 m) of the
driver’s door handle, grab the driver’s front door
handle to unlock the drivers side doors (driver/
sliding door) automatically. The interior door
panel lock knob will rotate when the door is
unlocked.
Grab The Door Handle To Unlock
2
20_RU_OM_EN_US_t.book Page 27
Page 30 of 516
28GETTING TO KNOW YOUR VEHICLE
NOTE:
If “Unlock All Doors 1st Press” is programmed,
all doors and liftgate will unlock when you grab
hold of the driver’s front door handle. To select
between “Unlock Driver Door 1st Press” and
“Unlock All Doors 1st Press,” refer to “Uconnect
Settings” in “Multimedia” for further informa -
tion.
To Unlock From The Passenger Side:
With a valid key fob within 5 ft (1.5 m) of the
passenger door handle, grab the front
passenger door handle to unlock all four doors
and the liftgate automatically. The interior door
panel lock knob will rotate when the door is
unlocked.
NOTE:
All doors will unlock when the front passenger
door handle is grabbed regardless of the
driver’s door unlock preference setting (“Unlock
Driver Door 1st Press” or “Unlock All Doors 1st
Press”). Preventing Inadvertent Locking Of Key Fob In
Vehicle (FOBIK-Safe)
To minimize the possibility of unintentionally
locking a key fob inside your vehicle, the
Passive Entry system is equipped with an
automatic door unlock feature.
FOBIK-Safe only executes in vehicles with
Passive Entry. There are three situations that
trigger a FOBIK-Safe search in any Passive Entry
vehicle:
A lock request is made by a valid key fob
while a door is open.
A lock request is made by the Passive Entry
door handle while a door is open.
A lock request is made by the door panel
switch while the door is open.
When any of these situations occur, after all
open doors are shut, the FOBIK-Safe search will
be executed. If it finds a key fob inside the car,
and it does not find any key fob outside the car,
then the car will unlock and alert the customer.
NOTE:
The vehicle will only unlock the doors when a
valid key fob is detected inside the vehicle, and no valid key fob is detected outside the vehicle.
The vehicle will not unlock the doors when any
of the following conditions are met:
The doors are manually locked using the door
lock knobs.
There is a valid key fob outside the vehicle
and within 5 ft (1.5 m) of either Passive Entry
door handle.
Three attempts are made to lock the doors
using the door panel switch and then close
the doors.
NOTE:
On the third attempt ALL doors will lock and the
key fob can be locked in the vehicle.
To Enter The Liftgate
With a valid key fob within 5 ft (1.5 m) of the
liftgate, cycle the handle to open the liftgate and
pull the liftgate open with one fluid motion.
NOTE:
If “Unlock Driver Door 1st Press” is
programmed, only the liftgate will unlock when
the liftgate release handle is pulled. If “Unlock
All Doors 1st Press” is programmed, all doors
and the liftgate will unlock when the liftgate
20_RU_OM_EN_US_t.book Page 28
Page 31 of 516
GETTING TO KNOW YOUR VEHICLE29
release handle is pulled. To select between
“Unlock Driver Door 1st Press” and “Unlock All
Doors 1st Press,” refer to “Uconnect Settings”
in “Multimedia” for further information.
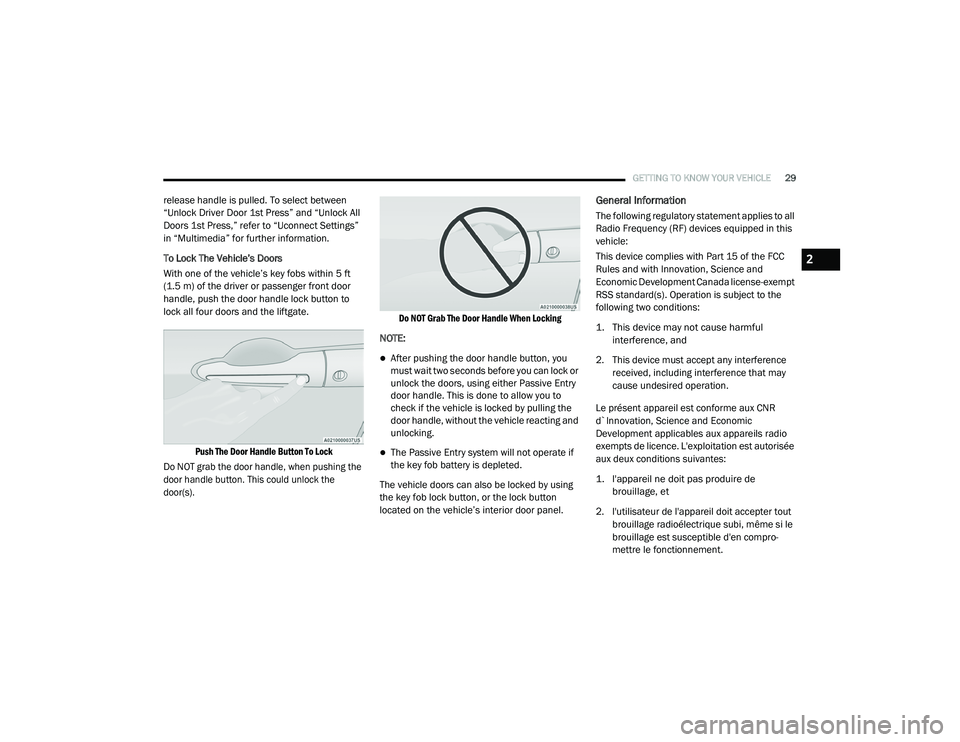
To Lock The Vehicle’s Doors
With one of the vehicle’s key fobs within 5 ft
(1.5 m) of the driver or passenger front door
handle, push the door handle lock button to
lock all four doors and the liftgate.
Push The Door Handle Button To Lock
Do NOT grab the door handle, when pushing the
door handle button. This could unlock the
door(s). Do NOT Grab The Door Handle When Locking
NOTE:
After pushing the door handle button, you
must wait two seconds before you can lock or
unlock the doors, using either Passive Entry
door handle. This is done to allow you to
check if the vehicle is locked by pulling the
door handle, without the vehicle reacting and
unlocking.
The Passive Entry system will not operate if
the key fob battery is depleted.
The vehicle doors can also be locked by using
the key fob lock button, or the lock button
located on the vehicle’s interior door panel.
General Information
The following regulatory statement applies to all
Radio Frequency (RF) devices equipped in this
vehicle:
This device complies with Part 15 of the FCC
Rules and with Innovation, Science and
Economic Development Canada license-exempt
RSS standard(s). Operation is subject to the
following two conditions:
1. This device may not cause harmful interference, and
2. This device must accept any interference received, including interference that may
cause undesired operation.
Le présent appareil est conforme aux CNR
d`Innovation, Science and Economic
Development applicables aux appareils radio
exempts de licence. L'exploitation est autorisée
aux deux conditions suivantes:
1. l'appareil ne doit pas produire de brouillage, et
2. l'utilisateur de l'appareil doit accepter tout brouillage radioélectrique subi, même si le
brouillage est susceptible d'en compro -
mettre le fonctionnement.
2
20_RU_OM_EN_US_t.book Page 29
Page 34 of 516
32GETTING TO KNOW YOUR VEHICLE
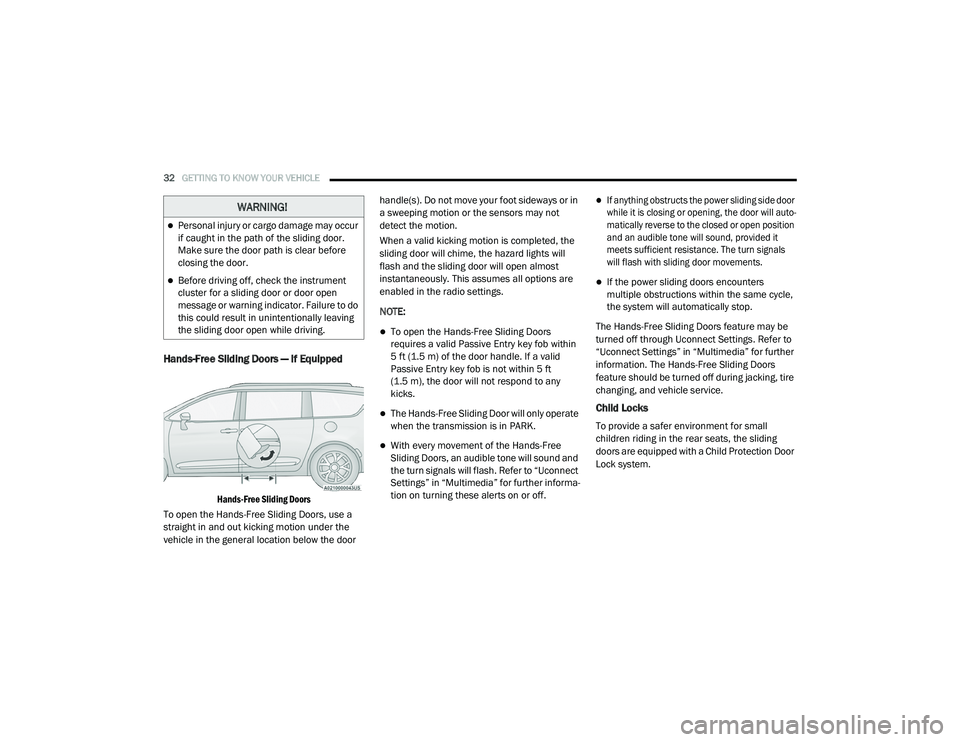
Hands-Free Sliding Doors — If Equipped
Hands-Free Sliding Doors
To open the Hands-Free Sliding Doors, use a
straight in and out kicking motion under the
vehicle in the general location below the door handle(s). Do not move your foot sideways or in
a sweeping motion or the sensors may not
detect the motion.
When a valid kicking motion is completed, the
sliding door will chime, the hazard lights will
flash and the sliding door will open almost
instantaneously. This assumes all options are
enabled in the radio settings.
NOTE:
To open the Hands-Free Sliding Doors
requires a valid Passive Entry key fob within
5 ft (1.5 m) of the door handle. If a valid
Passive Entry key fob is not within 5 ft
(1.5 m), the door will not respond to any
kicks.
The Hands-Free Sliding Door will only operate
when the transmission is in PARK.
With every movement of the Hands-Free
Sliding Doors, an audible tone will sound and
the turn signals will flash. Refer to “Uconnect
Settings” in “Multimedia” for further informa
-
tion on turning these alerts on or off.
If anything obstructs the power sliding side door
while it is closing or opening, the door will auto -
matically reverse to the closed or open position
and an audible tone will sound, provided it
meets sufficient resistance. The turn signals
will flash with sliding door movements.
If the power sliding doors encounters
multiple obstructions within the same cycle,
the system will automatically stop.
The Hands-Free Sliding Doors feature may be
turned off through Uconnect Settings. Refer to
“Uconnect Settings” in “Multimedia” for further
information. The Hands-Free Sliding Doors
feature should be turned off during jacking, tire
changing, and vehicle service.
Child Locks
To provide a safer environment for small
children riding in the rear seats, the sliding
doors are equipped with a Child Protection Door
Lock system.
WARNING!
Personal injury or cargo damage may occur
if caught in the path of the sliding door.
Make sure the door path is clear before
closing the door.
Before driving off, check the instrument
cluster for a sliding door or door open
message or warning indicator. Failure to do
this could result in unintentionally leaving
the sliding door open while driving.
20_RU_OM_EN_US_t.book Page 32
Page 36 of 516
34GETTING TO KNOW YOUR VEHICLE
DRIVER MEMORY SETTINGS — IF EQUIPPED
This feature allows the driver to save up to two
different memory profiles for easy recall
through a memory switch. Each memory profile
saves desired position settings for the following
features:
Driver’s seat
Easy Entry/Exit seat operation (on/off) (if
equipped)
Power steering wheel position (if equipped)
Side mirrors (if equipped)
A set of desired radio station presets
NOTE:
Your vehicle is equipped with two key fobs, each
can be linked to either memory position 1 or 2.
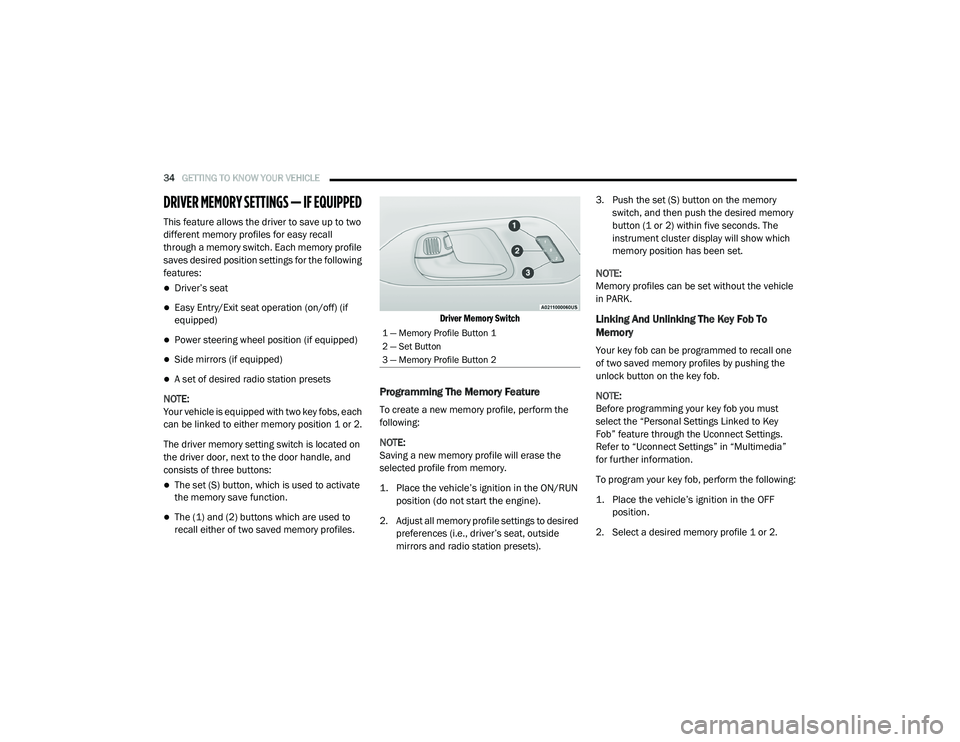
The driver memory setting switch is located on
the driver door, next to the door handle, and
consists of three buttons:
The set (S) button, which is used to activate
the memory save function.
The (1) and (2) buttons which are used to
recall either of two saved memory profiles.
Driver Memory Switch
Programming The Memory Feature
To create a new memory profile, perform the
following:
NOTE:
Saving a new memory profile will erase the
selected profile from memory.
1. Place the vehicle’s ignition in the ON/RUN
position (do not start the engine).
2. Adjust all memory profile settings to desired preferences (i.e., driver’s seat, outside
mirrors and radio station presets). 3. Push the set (S) button on the memory
switch, and then push the desired memory
button (1 or 2) within five seconds. The
instrument cluster display will show which
memory position has been set.
NOTE:
Memory profiles can be set without the vehicle
in PARK.
Linking And Unlinking The Key Fob To
Memory
Your key fob can be programmed to recall one
of two saved memory profiles by pushing the
unlock button on the key fob.
NOTE:
Before programming your key fob you must
select the “Personal Settings Linked to Key
Fob” feature through the Uconnect Settings.
Refer to “Uconnect Settings” in “Multimedia”
for further information.
To program your key fob, perform the following:
1. Place the vehicle’s ignition in the OFF position.
2. Select a desired memory profile 1 or 2.
1 — Memory Profile Button 1
2 — Set Button
3 — Memory Profile Button 2
20_RU_OM_EN_US_t.book Page 34
Page 55 of 516
GETTING TO KNOW YOUR VEHICLE53
Heated Seats
Front Heated Seats — If Equipped
The front heated seats control buttons are
located within the climate or controls screen of
the touchscreen.
You can choose from HI, LO or off heat settings.
The indicator lights in each switch indicate the
level of heat in use. Two indicator lights will
illuminate for HI, one for LO and none for off.
Press the heated seat button once to turn
the HI setting on.
Press the heated seat button a second
time to turn the LO setting on.
Press the heated seat button a third time
to turn the heating elements off.
The level of heat selected will stay on until the
operator changes it.
NOTE:
Once a heat setting is selected, heat will be
felt within two to five minutes.
The engine must be running for the heated
seats to operate. Vehicles Equipped With Remote Start
On models that are equipped with remote start,
the heated seats can be programmed to come
on during a remote start.
This feature can be programmed through the
Uconnect system. Refer to “Uconnect Settings”
in “Multimedia” for further information.
Rear Heated Seats — If Equipped
On some models, the second row seats are
equipped with heaters. There are two heated
seat switches that allow the second row
passengers to operate the seats independently.
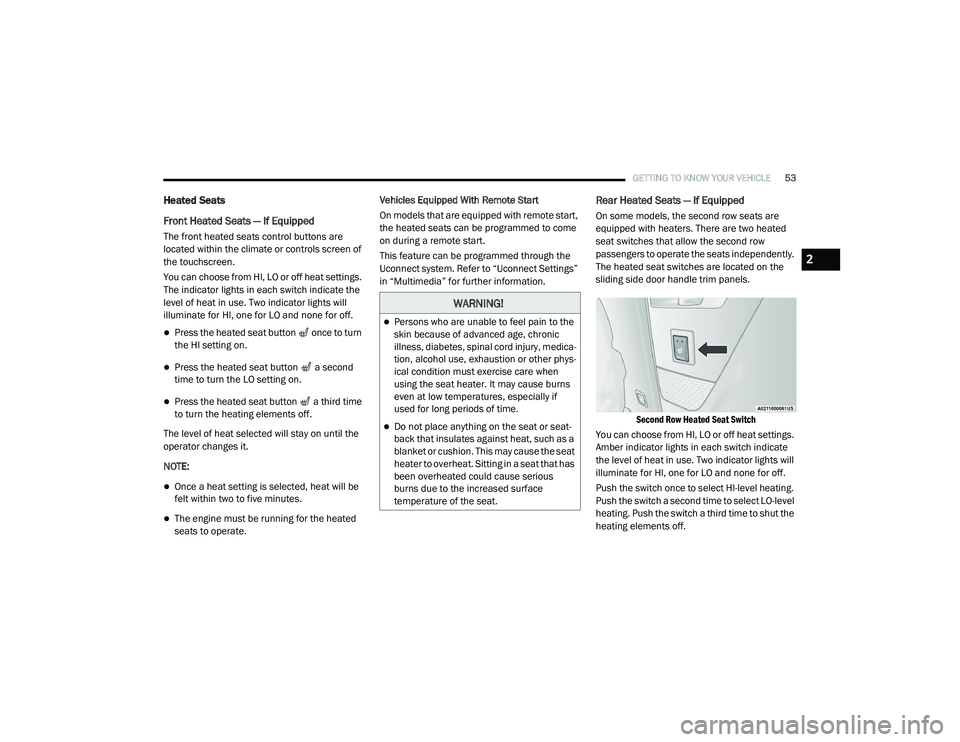
The heated seat switches are located on the
sliding side door handle trim panels.
Second Row Heated Seat Switch
You can choose from HI, LO or off heat settings.
Amber indicator lights in each switch indicate
the level of heat in use. Two indicator lights will
illuminate for HI, one for LO and none for off.
Push the switch once to select HI-level heating.
Push the switch a second time to select LO-level
heating. Push the switch a third time to shut the
heating elements off.
WARNING!
Persons who are unable to feel pain to the
skin because of advanced age, chronic
illness, diabetes, spinal cord injury, medica -
tion, alcohol use, exhaustion or other phys -
ical condition must exercise care when
using the seat heater. It may cause burns
even at low temperatures, especially if
used for long periods of time.
Do not place anything on the seat or seat -
back that insulates against heat, such as a
blanket or cushion. This may cause the seat
heater to overheat. Sitting in a seat that has
been overheated could cause serious
burns due to the increased surface
temperature of the seat.
2
20_RU_OM_EN_US_t.book Page 53