steering wheel adjustment CITROEN BERLINGO VAN 2021 Handbook (in English)
[x] Cancel search | Manufacturer: CITROEN, Model Year: 2021, Model line: BERLINGO VAN, Model: CITROEN BERLINGO VAN 2021Pages: 260, PDF Size: 7.57 MB
Page 4 of 260

2
Contents
■
Overview
Labels 4
■
Eco-driving
Eco-coaching 8
1Instruments
Instrument Panel 9
Warning and indicator lamps 11
Indicators 16
Trip computer 21
Setting the date and time 22
2Access
Electronic key with remote control function and
built-in key, 23
Back-up procedures 27
Central locking / unlocking 30
Doors 31
General recommendations for the sliding
side doors
31
Alarm 33
Electric windows 35
Tilting rear door windows 36
3Ease of use and comfort
General recommendations for the seats 37
Front seats 37
Steering wheel adjustment 40
Mirrors 40
Rear bench seat (row 2) 41
Rear seats (row 2) 42
Rear seats (row 3) 43
Interior fittings 45
Two-position luggage cover shelf (removable) 50
Luggage cover (7-seat) 51
Warning triangle 52
Heating and Ventilation 52
Heating 53
Manual air conditioning 53
Dual-zone automatic air conditioning 53
Front demisting - defrosting 55
Rear screen demisting - defrosting 56
Rear heating and air conditioning 57
Additional heating/ventilation system 57
4Lighting and visibility
Lighting control stalk 61
Direction indicators 62
Automatic illumination of headlamps 62
Daytime running lamps / Sidelamps 63
Parking lamps 63
Automatic headlamp dipping 63
Headlamp beam height adjustment 65
Wiper control stalk 65
Changing a wiper blade 67
Automatic wiping 67
5Safety
General safety recommendations 69
Emergency or assistance call 69
Hazard warning lamps 72
Horn 73
Electronic stability control (ESC) 73
Advanced Grip Control 75
Hill Assist Descent Control 76
Seat belts 77
Airbags 79
Child seats 82
Deactivating the front passenger airbag 84
ISOFIX child seats 87
i-Size child seats 90
Manual child lock 91
Electric child lock 91
6Driving
Driving recommendations 92
Starting/switching off the engine 93
Manual parking brake 96
Electric parking brake 97
Hill start assist 99
5-speed manual gearbox 100
6-speed manual gearbox 100
Automatic gearbox 101
Gear efficiency indicator 104
Stop & Start 104
Under-inflation detection 106
Head-up display 107
Driving and manoeuvring aids - General
recommendations
108
Speed Limit Recognition and
Recommendation
11 0
Speed limiter 11 3
Cruise control - particular recommendations 11 5
Programmable cruise control 11 5
Adaptive Cruise Control 11 8
Memorising speeds 121
Active Safety Brake with Collision Risk Alert
and Intelligent emergency braking assistance
122
Active Lane Departure Warning System 124
Blind Spot Monitoring System 127
Page 7 of 260

5
Overview
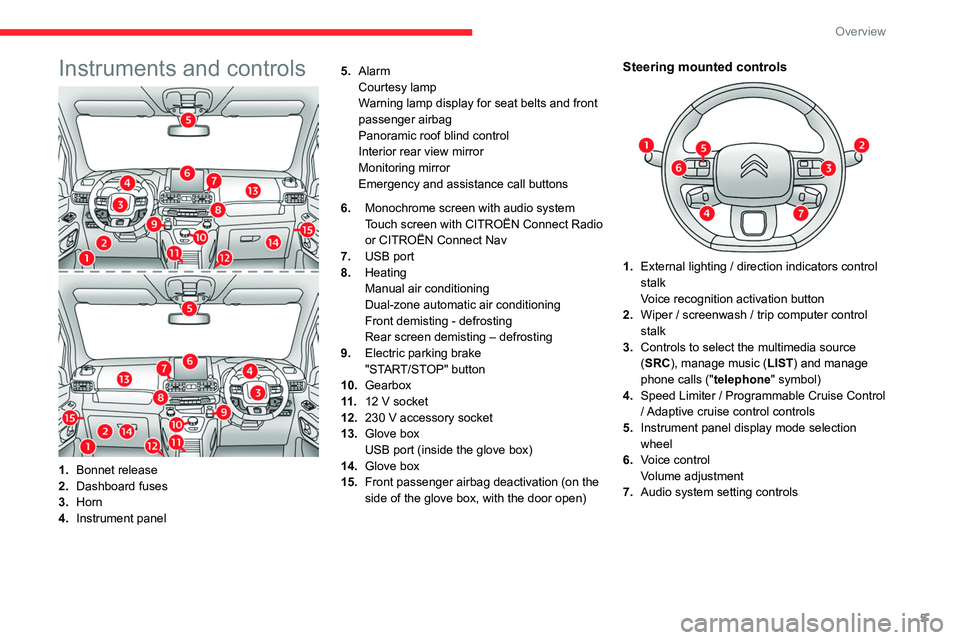
Instruments and controls
1.Bonnet release
2. Dashboard fuses
3. Horn
4. Instrument panel 5.
Alarm
Courtesy lamp
Warning lamp display for seat belts and front
passenger airbag
Panoramic roof blind control
Interior rear view mirror
Monitoring mirror
Emergency and assistance call buttons
6. Monochrome screen with audio system
Touch screen with CITROËN Connect Radio
or CITROËN Connect Nav
7. USB port
8. Heating
Manual air conditioning
Dual-zone automatic air conditioning
Front demisting - defrosting
Rear screen demisting – defrosting
9. Electric parking brake
"START/STOP" button
10. Gearbox
11 . 12 V socket
12. 230 V accessory socket
13. Glove box
USB port (inside the glove box)
14. Glove box
15. Front passenger airbag deactivation (on the
side of the glove box, with the door open)
Steering mounted controls
1.External lighting / direction indicators control
stalk
Voice recognition activation button
2. Wiper / screenwash / trip computer control
stalk
3. Controls to select the multimedia source
(SRC), manage music (LIST) and manage
phone calls (" telephone" symbol)
4. Speed Limiter / Programmable Cruise Control
/ Adaptive cruise control controls
5. Instrument panel display mode selection
wheel
6. Voice control
Volume adjustment
7. Audio system setting controls
Page 39 of 260

37
Ease of use and comfort
3General
recommendations for the
seats
For safety reasons, seat adjustments
must only be made when the vehicle is
stationary.
Folding or unfolding the seat backrests
must only be done with the vehicle
stationary.
Before moving the seat backwards,
ensure that there is no person or object
that might prevent the full travel of the seat.
There is a risk of trapping or pinching
passengers if present in the rear seats or of
jamming the seat if large objects are placed
on the floor behind the seat.
Do not place hard or heavy objects on
the backrests forming a table. They could
become dangerous projectiles in the event of
sudden braking or a collision.
–
Do not remove a head restraint without
stowing it; secure it to a support inside the
vehicle.
–
Check that the seat belts remain accessible
to the passenger and easy to fasten.
–
Passengers must never take their seat
without adjusting and fastening their seat belt.
– In row 3, be careful not to leave your feet
under the row 2 seat while it is being tilted.
–
When a row 3 seat is in the fully folded
position, ensure that the strap is correctly
hooked to the
Top Tether fixing of the row 2
backrest: risk of unexpected tipping of the
seat.
Before carrying out the manoeuvres,
check that nothing and no one is
obstructing the moving elements and their
locking.
To avoid sudden folding, take care to hold the
backrest and support it until it is horizontal.
Never put your hand underneath the seat
cushion to guide the seat downwards or
upwards, you could get your fingers trapped.
Place your hand on the grip/strap (depending
on equipment) at the top of the seat cushion.
Please note: an incorrectly latched
backrest compromises the safety of
passengers in the event of sudden braking or
an impact.
The contents of the boot may be thrown
forward - risk of severe injury!
Front seats
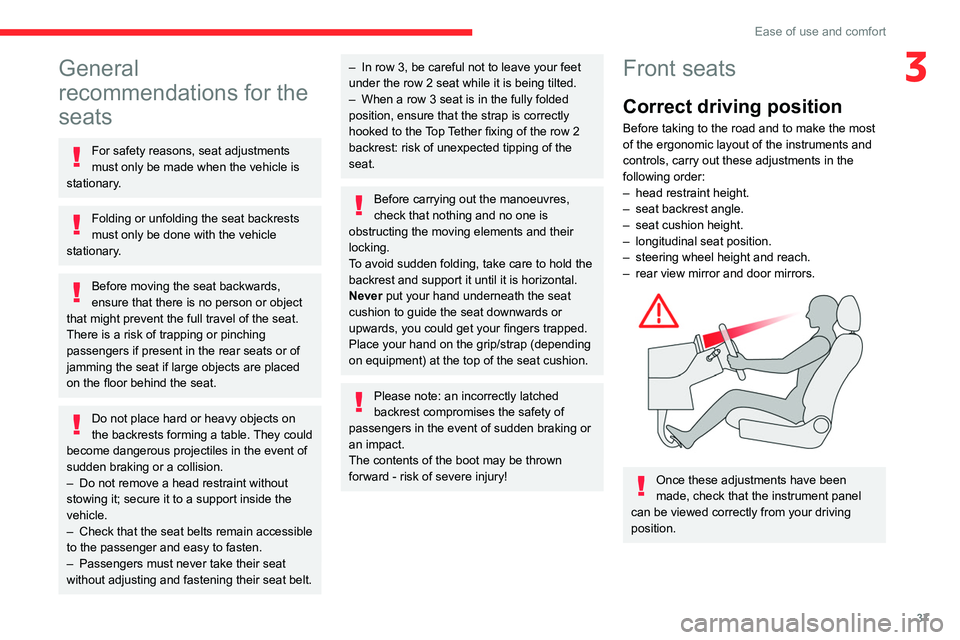
Correct driving position
Before taking to the road and to make the most
of the ergonomic layout of the instruments and
controls, carry out these adjustments in the
following order:
–
head restraint height.
–
seat backrest angle.
–
seat cushion height.
–
longitudinal seat position.
–
steering wheel height and reach.
–
rear view mirror and door mirrors.
Once these adjustments have been
made, check that the instrument panel
can be viewed correctly from your driving
position.
Page 42 of 260

40
Ease of use and comfort
Heated mirrors
► Press this button.
For more information on Rear screen
demisting/defrosting , refer to the
corresponding section.
Interior rear view mirror
Equipped with an anti-dazzle system, which
darkens the mirror glass and reduces the
nuisance to the driver caused by the sun,
headlamps of other vehicles, etc.
Manual model
Day/night position
Steering wheel
adjustment
► When stationary , pull the control lever to
release the steering wheel.
►
Adjust the height and reach.
►
Lower the control lever to lock the steering
wheel.
As a safety precaution, these operations must only be carried out while the vehicle
is stationary.
Mirrors
Door mirrors
Adjustment
► Move control A or turn control C (depending
on the version you have) to the right or to the left
to select the corresponding mirror.
►
Move control
B or C (depending on the
version you have) in any of the four directions to
adjust.
►
Return control A
or C (depending on the
version you have) to its centre position.
As a safety measure, the mirrors should be adjusted to reduce the blind spots.
The objects observed are, in reality, closer
than they appear.
Take this into account when assessing the
distance of vehicles approaching from behind.
Manual folding
You can manually fold the mirrors (parking
obstruction, narrow garage, etc.)
►
T
urn the mirror towards the vehicle.
Electric folding
If the vehicle is so equipped, the mirrors can
be folded electrically from the inside, with the
vehicle parked and the ignition on:
► Place control A in the centre
position.
►
Pull control A
back.
►
Lock the vehicle from the outside.
Electric unfolding
The electric unfolding of the mirrors is via the
remote control or the key when unlocking the
vehicle. Unless folding was selected with control
A, pull the control back again to the central
position.
The folding / unfolding on locking / unlocking can be deactivated. Contact a
CITROËN dealer or a qualified workshop.
If necessary, it is possible to fold the mirrors
manually.
Page 110 of 260

108
Driving
D.If your vehicle is suitably equipped, speed
limit information.
For more information on Navigation,
refer to the section Audio equipment
and telematics.
Selector
1. On.
2. Off (long press).
3. Brightness adjustment.
4. Display height adjustment.
Activation/Deactivation
► With the engine running, press button 1 to
activate the system and deploy the projection
blade.
► Press and hold button 2 to deactivate the
system and retract the projection blade.
The state of the system is saved when the
engine is switched off and restored on restarting.
Height adjustment
► With the engine running, adjust the display to
the desired height using the buttons 4
:
•
up to move the display up,
•
down to move the display down.
Brightness adjustment
► With the engine running, adjust the
brightness of the information display using the
buttons
3:
•
on the "sun" to increase the brightness,
•
on the "moon" to decrease the brightness.
When stationary or while driving, no
objects should be placed around the
projection blade (or in its recess) so as not to
impede its movement and correct operation.
In certain extreme weather conditions
(rain and/or snow, bright sunshine, etc.),
the head-up display may not be legible or
may suffer temporary interference.
Some sunglasses may hamper reading of the
information.
To clean the projection blade, use a clean,
soft cloth (such as a spectacles cloth or
microfibre cloth). Do not use a dry or abrasive
cloth, or detergent or solvent products, due to
the risk of scratching the projection blade or
damaging the non-reflective coating.
This system operates when the engine is running, and the settings are saved when
the ignition is switched off.
Driving and manoeuvring
aids - General
recommendations
Driving and manoeuvring aids cannot, in
any circumstances, replace the need for
vigilance on the part of the driver.
The driver must comply with the Highway
Code, must remain in control of the vehicle in
all circumstances and must be able to retake
control of it at all times. The driver must adapt
the speed to climactic conditions, traffic and
the state of the road.
It is the driver's responsibility to constantly
check the traffic, to assess the relative
distances and speeds of other vehicles and to
anticipate their movements before indicating
and changing lane.
The systems cannot exceed the limits of the
laws of physics.
Driving aids
You should hold the steering wheel
with both hands, always use the interior and
exterior rear view mirrors, always keep the
feet close to the pedals and take a break
every two hours.
Manoeuvring aids
The driver must always check the
surroundings of the vehicle before and during
the whole manoeuvre, in particular using the
mirrors.
Radar
The operation of the radar as well as the
associated functions may be impaired through
the accumulation of dirt (mud, frost, etc.), in
certain difficult weather conditions (very heavy
rain, snow) or if the bumper is damaged.
If the front bumper is to be repainted, contact
a CITROËN dealer or a qualified workshop;
certain types of paint could interfere with the
operation of the radar.
Page 120 of 260

11 8
Driving
To activate the system again, with the vehicle
speed above 25 mph (40 km/h), press button
4.
Switching off
► Turn the thumbwheel 1 to the "0” position: the
cruise control information disappears from the
screen.
Malfunction
Dashes are displayed (flashing, initially, then
fixed) in the event of a cruise control system
malfunction.
Have the system checked by a CITROËN dealer
or a qualified workshop.
Adaptive Cruise Control
Refer to the General recommendations on the
use of driving and manoeuvring aids and to
Cruise control - particular recommendations.
This system automatically maintains the speed
of your vehicle at a value which you set (speed
setting), while keeping a safe distance from the
vehicle in front (target vehicle), and which has
been set beforehand by the driver. The system
automatically manages the acceleration and
deceleration of the vehicle.
With the Stop function , the system manages
the braking until the vehicle comes to a complete
stop.
To do so, it has a camera located at the top of
the windscreen and, depending on version, a
radar located in the front bumper.
Primarily designed for driving on main
roads and motorways, this system only
works with moving vehicles driving in the
same direction as your vehicle.
If the driver operates a direction indicator
to overtake a slower vehicle, the cruise
control allows the vehicle to temporarily
approach the vehicle in front to assist the
overtaking manoeuvre, without ever
exceeding the speed setting.
Some vehicles present on the road may
not be properly seen or may be poorly
interpreted by the camera and/or radar (e.g. a
lorry), which may lead to a poor assessment
of the distances and lead to the vehicle
inappropriately accelerating or braking.
Steering mounted control
1. ON (CRUISE position) / OFF (position0)
2. Activation of cruise control at the current
speed / decrease speed setting
3. Activation of cruise control at the current
speed / increase speed setting
4. Pausing / resumption of cruise control with
the speed setting previously stored
5. Depending on version:
Display of speed thresholds recorded using
Memorising speeds
or
Use the speed suggested by the Speed Limit
Recognition and Recommendation ( (MEM
display)
6. Display and adjustment of the distance
setting to the vehicle in front
Use
Activation of the system (pause)
► With the engine running, turn the knob 1
downwards to the CRUISE position. Cruise
control is ready to operate (grey display).
Switching on of cruise control and choice
of speed setting
With a manual gearbox, your speed must be
between 19 and 99 mph (30 and 160 km/h).
With an automatic gearbox, mode D or M must
be selected and your speed must be between 19
and 112 mph (30 and 180 km/h).
► Press button 2 or 3: the current speed
becomes the speed setting (minimum 19 mph
(30 km/h)) and cruise control is immediately in
operation (green display).
► Press 3 to increase or 2 to decrease the
speed setting (steps of 5 mph (km/h) if held
pressed).
Pressing and holding button 2 or
3 results in a rapid change in the speed
of the vehicle.
Pausing / resumption of cruise control
► Press 4 or press the brake pedal. To pause
cruise control, it is also possible to: • shift from mode D to N;
• press the clutch pedal for more than 10
seconds;
• press the electric parking brake control;
Page 128 of 260

126
Driving
Function statusIndicator lamp Display and/or associated
messageComments
ON
(grey)
Automatic deactivation/standby of the function (for
example, due to detection of a trailer or use of the "space-
saver" spare wheel provided with the vehicle).
ON
(green) Lane marking detection.
Speed above 40 mph (65
km/h).
ON
(orange)/(green)
The system corrects the trajectory on the side where the
risk of unintentional crossing is detected (orange line).
ON
(orange)/(green)
"Hold the wheel" –
If, while correcting the trajectory
, the system detects
that the driver has not held the steering wheel for a few
seconds, it interrupts the correction and returns control to
the driver.
– If, while correcting the trajectory , the system determines
that the correction will not be enough and that a solid line
will be crossed (orange line): the driver is warned that they
must provide additional trajectory adjustment.
The duration of audible warnings will increase if multiple
corrections are performed in quick succession. The
warning will become continuous, persisting until the driver
responds.
This message may also be displayed if you have your
hands on the steering wheel.
Operating limits
The system goes into standby automatically in
the following cases:
– ESC deactivated or operation triggered,
– speed below 40 mph (65 km/h) or greater than
112 mph (180 km/h),
– electrical connection of a trailer,
– use of the "space-saver" spare wheel detected
(as detection is not immediate, deactivation of
the system is recommended),
– dynamic driving style detected, pressure on
the brake or accelerator pedal,
– driving where there are no lane markings,
– activation of the direction indicators,
– crossing the inside line on a bend,
– driving in a tight corner,
– inactivity by the driver detected during
correction.
During a correction, if the driver is
inactive (not holding the steering wheel
for 10 seconds), a warning message appears.
If the driver remains inactive (not holding
the steering wheel for 2 more seconds), the
correction is interrupted.
The following situations may interfere with the operation of the system or
prevent it from working:
– insufficient contrast between the road
surface and the shoulders (e.g. shade),
– lane markings worn, hidden (snow, mud) or
multiple (roadworks, etc.),
Page 239 of 260

237
Alphabetical index
Priming the fuel system 155
Profiles
204, 228
Programmable cruise control
11 5
Protecting children
80, 82–85
Puncture
156, 158
R
Radar (warnings) 109
Radio
184–185, 197, 200, 222
Radio, digital (Digital Audio Broadcasting -
DAB)
185, 199–200, 223
Range, AdBlue
149
RDS
198, 223
Rear screen, demisting
56
Recharging the battery
170–171
Recirculation, air
53–54
Recovery
172
Reduction of electrical load
145
Regeneration of the particle filter
150
Reinitialisation of the under-inflation
detection system
107
Reinitialising the remote control
29
Reminder, key in ignition
96
Reminder, lighting on
61–62
Remote control
23–27, 93
Removing a wheel
159, 161
Removing the mat
45
Replacing bulbs
161–162
Replacing fuses
167–169
Replacing the air filter
150
Replacing the oil filter 150
Replacing the passenger compartment
filter
149
Reservoir, screenwash
149
Reversing camera
109, 132–133
Reversing lamps
166
Roof
46
Roof bars
145
Running out of fuel (Diesel)
155
S
Safety, children 80, 82–85
Saturation of the particle filter (Diesel)
150
Screen menu map
201
Screen, multifunction (with audio system)
183
Screenwash, front
66
Screenwash, rear
66
SCR (Selective Catalytic Reduction)
151
Seat belts
77–78, 85
Seat, rear bench
41, 43
Seats, front
37–39
Seats, heated
39
Seats, rear
37, 41–44, 83
Sensors (warnings)
109
Serial number, vehicle
181
Service indicator
16
Servicing
16, 149
Settings, system
204, 228
Sidelamps
61, 63, 163–164
Side parking sensors
131
Side repeater 163
Sliding side door, electric
26, 32
Snow chains
106, 142
Snow chains, link
142
Socket, 12 V accessory
45, 47
Socket, 220 V
47
Socket, auxiliary
187, 200, 224
Socket, Jack
187, 224
Speed limiter
112–115, 121
Speed limit recognition
11 0 – 111
Speedometer
11 0
Stability control (ESC)
73–76
Starting a Diesel engine
140
Starting the engine
93
Starting the vehicle
94, 96, 101–103
Starting using another battery
170
Station, radio
184, 197, 222–223
Stay, bonnet
146
Steering mounted controls,
audio
183–184, 195, 209
Steering wheel, adjustment
40
Stickers, customising ~ Stickers,
expressive
154
Stopping the vehicle
96, 101–103
Stop & Start
22, 53, 56, 104–106,
140, 146, 149, 169, 172
Storage
46
Storage boxes
49
Stowing rings
51
Sunshine sensor
52
Switching off the engine
93, 95
Synchronising the remote control
29