light CITROEN C-ELYSÉE 2016 User Guide
[x] Cancel search | Manufacturer: CITROEN, Model Year: 2016, Model line: C-ELYSÉE, Model: CITROEN C-ELYSÉE 2016Pages: 260, PDF Size: 7.11 MB
Page 57 of 260
55
C-elysee_en_Chap03_confort_ed01-2016
7. Air flow adjustment
F Press the "Large fan" button to
increase air flow.
F
P
ress the " Small fan " button to
reduce
air flow.
Deactivating the system
F Press the "Small fan" air flow button until
all the bars in the air conditioning screen
g
o off.
This
action deactivates all functions of the air
c
onditioning system.
The
temperature level is no longer controlled.
A
slight flow of air can still be felt however,
r
esulting from the for ward movement of the
v
ehicle.
Pressing
the "Large fan"
air flow button again
r
eactivates the system.
The
air
flow
bars
come
on
progressively.
Avoid
driving for long with the system
d
eactivated (risk of misting and
d
eterioration of air quality).
The
air
flow
bars
go
off
progressively.
3
Comfort
Page 58 of 260

56
C-elysee_en_Chap03_confort_ed01-2016
Front demist - defrost
These markings on the control panel indicate the control positions for rapid demisting or defrosting of the windscreen and side windows.
With the heating /
ventilation systemWith the manual air
conditioning system
(without screen)With electronic air
conditioning
(with screen)
F Put the temperature and air flow controls to t
he dedicated marked position.
F
P
ut the air intake control to the "Exterior air
i
ntake" position
(
manual control moved to the right).
F
P
ut the air distribution control to the
"
Windscreen"
p
osition. F
P ress this button. T
he l amp i n t he b utton c omes o n.
F
P
ress this button again to switch
i
t off.
T
he lamp in the button goes off.
F
P ut the temperature and air flow controls to t
he dedicated marked position.
F
P
ut the air intake control to the "Exterior air
i
ntake" position
(
manual control to the right).
F
P
ut the air distribution control to the
"
Windscreen"
p
osition.
F
S
witch on the air conditioning by pressing
t
he appropriate button; the lighting of the
a
ssociated control comes on.
Comfort
Page 60 of 260

58
C-elysee_en_Chap04_amenagements_ed01-2016
Interior fittings
1. Sun visor
2. Glove box
(
see details on a following page)
3.
D
oor pockets
4.
O
pen storage compar tment
5.
A
shtray / Cup holder
6.
U
SB por t / Jack socket
Ci
garette lighter / 12 V accessor y
socket
(
see details on a following page)
7.
C
entral armrest with storage
or
A
shtray holder / Cup holder / Bottle
holder
Fittings
Page 61 of 260
59
C-elysee_en_Chap04_amenagements_ed01-2016
Glove box
Sun visor
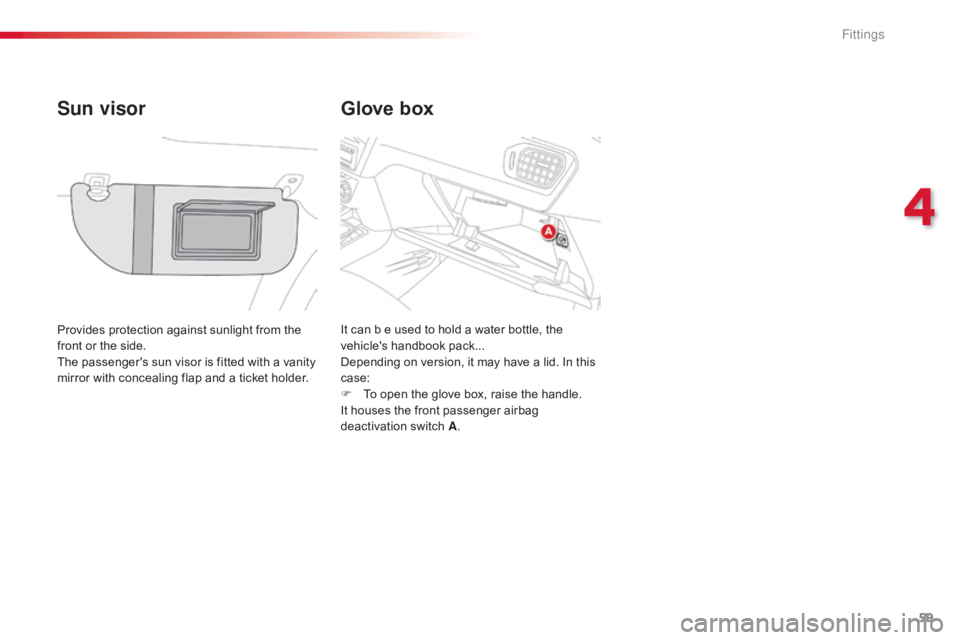
Provides protection against sunlight from the f
ront or the side.
The
passenger's sun visor is fitted with a vanity
m
irror with concealing flap and a ticket holder.It
can b e used to hold a water bottle, the v
ehicle's handbook pack...
Depending
on version, it may have a lid. In this
c
ase:
F
T
o open the glove box, raise the handle.
It
houses the front passenger airbag
d
eactivation
s
witch
A.
4
Fittings
Page 62 of 260
60
C-elysee_en_Chap04_amenagements_ed01-2016
USB port / Jack auxiliary socket
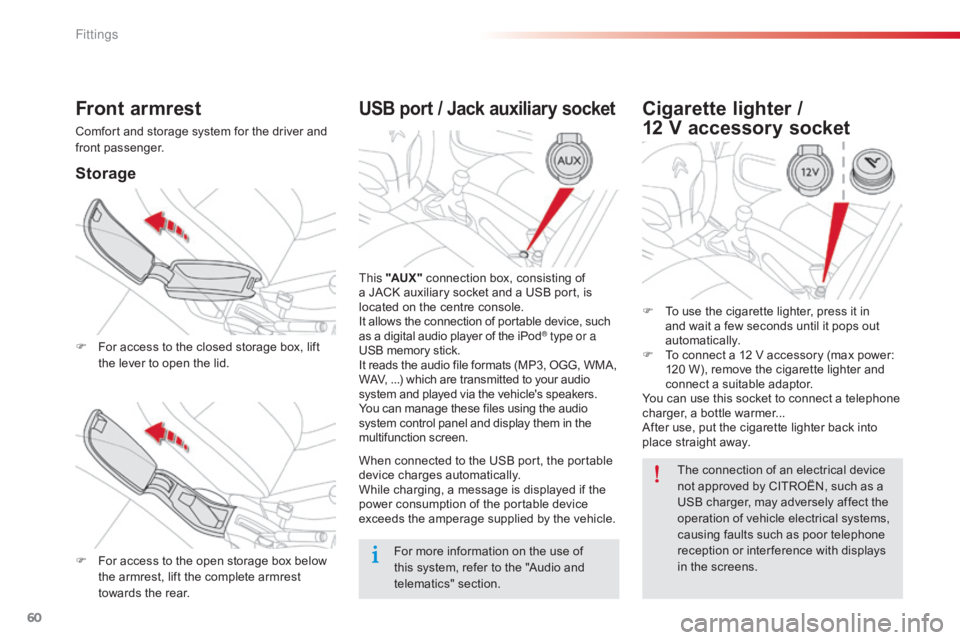
This "AUX " connection box, consisting of a
JACK auxiliary socket and a USB port, is
l
ocated on the centre console.
It
allows the connection of portable device, such
a
s a digital audio player of the iPod
® type or a
USB
memory
stick.
It
reads
the
audio
file
formats
(MP3,
OGG, WMA,
W
AV,
...)
which
are
transmitted
to
your audio
s
ystem
and
played
via
the
vehicle's
speakers.
You
can
manage
these
files
using
the audio
s
ystem
control
panel
and
display
them in the
m
ultifunction
s
creen.
When
connected
to
the
USB
port,
the portable
d
evice
charges
automatically.
While
charging,
a
message
is
displayed if the
p
ower
consumption
of
the
portable device
e
xceeds
the
amperage
supplied
by the vehicle.
Front armrest
Comfort and storage system for the driver and front p assenger.
Storage
F For access to the closed storage box, lift t
he lever to open the lid.
F
F
or access to the open storage box below
t
he armrest, lift the complete armrest
t
owards the rear.
Cigarette lighter /
12 V accessory socket
F To use the cigarette lighter, press it in a
nd wait a few seconds until it pops out
au
tomatically.
F
T
o connect a 12 V accessory (max power:
1
20 W), remove the cigarette lighter and
c
onnect a suitable adaptor.
You
can use this socket to connect a telephone
c
harger, a bottle warmer...
After
use, put the cigarette lighter back into
p
lace straight away.
For
more
information
on
the
use
of
t
his
system,
refer
to
the
"Audio
and
t
elematics"
se
ction. The
connection of an electrical device
n
ot approved by CITROËN, such as a
U
SB charger, may adversely affect the
o
peration of vehicle electrical systems,
c
ausing faults such as poor telephone
r
eception or inter ference with displays
i
n the screens.
Fittings
Page 65 of 260
63
C-elysee_en_Chap05_conduite_ed01-2016
Never drive with the parking brake applied - Risk of overheating and
d
amage to the braking system!
Do
not park or run the engine when
s
tationary in areas where inflammable
s
ubstances and materials (dry grass,
d
ead leaves...) might come into contact
w
ith the hot exhaust system - Risk of
f
ire!
Never
leave a vehicle unsupervised
w
ith the engine running. If you have
t
o leave your vehicle with the engine
r
unning, apply the parking brake
a
nd put the gearbox into neutral or
p
osition
N or P,
depending on the type
o
f gearbox.
Driving recommendations
Observe the driving regulations and remain vigilant whatever the traffic conditions.
Pay
close attention to the traffic and keep your
h
ands on the wheel so that you are ready to
r
eact at any time to any eventuality.
On
a long journey, a break every two hours is
s
trongly
re
commended.
In
difficult weather, drive smoothly, anticipate
t
he need to brake and increase the distance
f
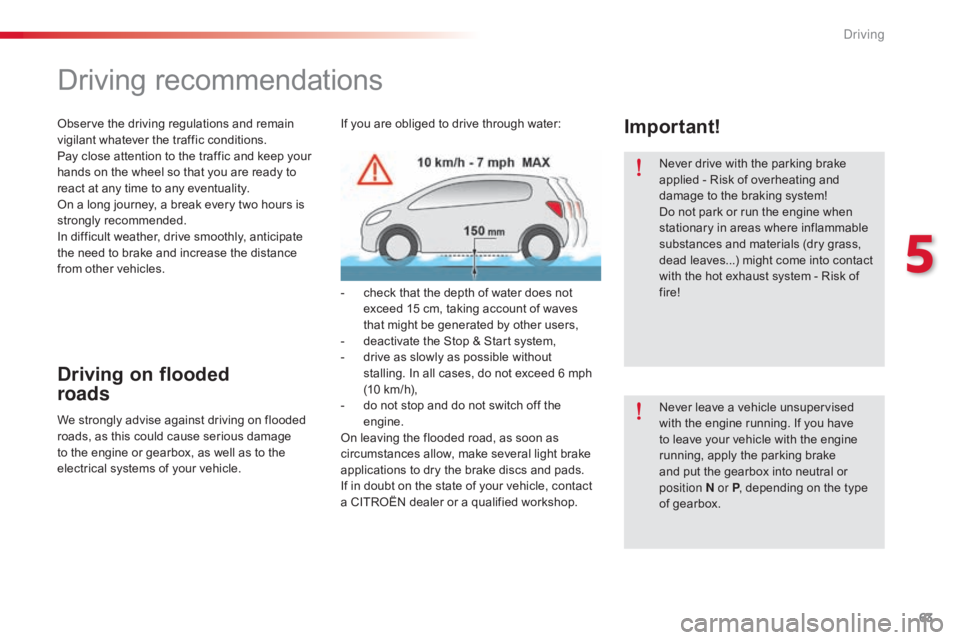
rom other vehicles. If
you are obliged to drive through water:
-
c
heck that the depth of water does not
e
xceed 15 cm, taking account of waves
t
hat might be generated by other users,
-
d
eactivate the Stop & Start system,
-
d
rive as slowly as possible without
s
talling. In all cases, do not exceed 6 mph
(
10 km/h),
-
d
o not stop and do not switch off the
e
ngine.
On
leaving the flooded road, as soon as
c
ircumstances allow, make several light brake
a
pplications to dry the brake discs and pads.
If
in doubt on the state of your vehicle, contact
a
CITROËN dealer or a qualified workshop.Important!
Driving on flooded
roads
We strongly advise against driving on flooded r
oads, as this could cause serious damage
t
o the engine or gearbox, as well as to the
e
lectrical systems of your vehicle.
5
Driving
Page 84 of 260

82
C-elysee_en_Chap05_conduite_ed01-2016
Stop & Start
Operation
Going into engine STOP mode
The "ECO" warning lamp comes o
n in the instrument panel and the
e
ngine goes into standby:
-
w
ith a 5-speed electronic gearbox , with
the vehicle stationary, when you press
the
brake pedal or put the gear selector in
p
osition N .
A
time
counter calculates the sum of the
p
eriods
in
STOP mode during a journey. It rests
i
tself
to
zero every time the ignition is switched
o
n
with
the key.
The
Stop
&
Start system
puts
the
engine
t
emporarily
into
standby
-
STOP
mode
-
during
s
tops
in
the
traffic
(red
lights,
traffic
jams,
or
o
ther...).
The
engine
restarts
automatically
-
S
TART
mode
-
as
soon
as
you
want
to
move
o
ff.
The
restart
takes
place
instantly,
quickly
a
nd
silently.
Per fect
for
urban
use,
the
Stop
&
Start
system
r
educes
fuel
consumption
and
exhaust
e
missions
as
well
as
the
noise
level
when
s
tationary. Never
refuel with the engine in
S
TOP mode; you must switch off the
i
gnition with the key.
For
your comfort, during parking
m
anoeuvres, STOP mode is not
a
vailable for a few seconds after
c
oming out of reverse gear.
STOP
mode does not affect the
f
unctionality of the vehicle, such as for
example,
braking, power steering...
Driving
Page 93 of 260

91
C-elysee_en_Chap06_visibilite_ed01-2016
Lighting controlSystem for selection and control of the various front and rear lights providing the vehicle's lighting.
Main lighting
The various front and rear lamps of the vehicle are designed to adapt the driver's visibility
p
rogressively in relation to the climatic and light
c
onditions:
-
s
idelamps, to be seen,
-
d
ipped beam headlamps to see without
d
azzling
o
ther
d
rivers,
-
m
ain beam headlamps to see clearly when
t
he road is clear.
Additional lighting
Other lamps are installed to fulfil the requirements of particular conditions of
v
isibility:
-
a
rear foglamp,
-
f
ront foglamps.
In
some
weather
conditions
(e.g.
low
t
emperature
or
humidity),
the
presence
o
f
misting
on
the
internal
sur face
of
the
g
lass
of
the
headlamps
and
rear
lamps
i
s
normal;
it
disappears
after
the
lamps
h
ave
been
on
for
a
few
minutes.
6
V
Page 94 of 260

92
C-elysee_en_Chap06_visibilite_ed01-2016
Selection ring for main lighting
mode
Turn the ring to align the desired symbol with the ma rking.
Lighting
off (ignition off) / Daytime
r
unning lamps (engine running).
Sidelamps
o
nly.
Dipped
or main beam headlamps.
Dipping the headlamps
Pull the stalk to switch the lighting between dipped / main beam headlamps.
In
the lighting off and sidelamps modes, the
d
river can switch on the main beam headlamps
t
emporarily ("headlamp flash") by maintaining a
p
ull on the stalk.
Display
Illumination of the corresponding indicator lamp in the instrument panel confirms the lighting
s
witched on.
Visibility
Page 96 of 260
94
C-elysee_en_Chap06_visibilite_ed01-2016
In good or rainy weather, both day and night, the front foglamps and the
r
ear foglamp are prohibited. In these
s
ituations, the power of their beams
m
ay dazzle other drivers. They should
o
nly be used in fog or snow.
In
these weather conditions, it is your
r
esponsibility to switch on the foglamps
a
nd dipped beam headlamps manually
a
s the sunshine sensor may detect
s
ufficient light.
Do
not forget to switch off the front
f
oglamps and the rear foglamp when
t
hey are no longer necessary.Switching on the lamps
after the ignition is
switched off
To reactivate the lighting control, rotate the ring to the "0" position - lamps off,
t
hen to the desired position.
On
opening the driver's door a
t
emporary audible signal warns the
d
river that the lighting is on.
The
lamps, with the exception of the
s
idelamps, switch off automatically after
a
maximum duration of thirty minutes to
p
revent discharging of the battery.
Switching off the lamps
when the ignition is
switched off
On switching off the ignition, all of the lamps turn off immediately, except for
d
ipped beam if guide-me-home lighting
i
s activated.
Visibility