radio CITROEN C-ELYSÉE 2017 Handbook (in English)
[x] Cancel search | Manufacturer: CITROEN, Model Year: 2017, Model line: C-ELYSÉE, Model: CITROEN C-ELYSÉE 2017Pages: 306, PDF Size: 9.34 MB
Page 5 of 306
3
.
.Starting-switching off the engine 102
Parking brake 1 05
Manual gearbox
1
05
Electronic gearbox
1
06
Automatic gearbox (EAT6)
1
10
Gear shift indicator
1
15
Stop & Start
1
16
Speed limiter
1
19
Cruise control
1
22
Rear parking sensors
1
25
Reversing camera
1
27
Fuel
129
Misfuel prevention (Diesel)
1
30
Compatibility of fuels
1
31
AdBlue
® and SCR system (Diesel BlueHDi) 1 32
Snow chains 1 36
Energy savings mode
1
37
Changing a window wiper
1
38
Towing a trailer
1
39
Advice on care and maintenance
1
40
Roof bars
1
40
Bonnet
141
Engines
142
Checking levels
1
43
Checks
1
46
Running out of fuel (Diesel)
1
48
Temporary puncture repair kit
1
49Spare wheel
1
54
Changing a bulb
1
61
Changing a fuse
1
67
12 V batter y
1
72
Towing the vehicle
1
77
Engines and specifications
1
79
Weights and towed loads
1
79
Dimensions
182
Identification markings
1
83
Audio system / Bluetooth
1
84
Audio system 2 08To find out about the
CITROËN Connect
Nav or the CITROËN Connect Radio,
please visit:
http://service.citroen.com/ddb/
Driving
Practical information In the event of a breakdown
Technical dataAudio and telematics
Alphabetical index
.
Contents
Page 33 of 306
31
Date and time adjustment
Instrument PanelAudio system / Bluetooth
With
CITROËN Connect
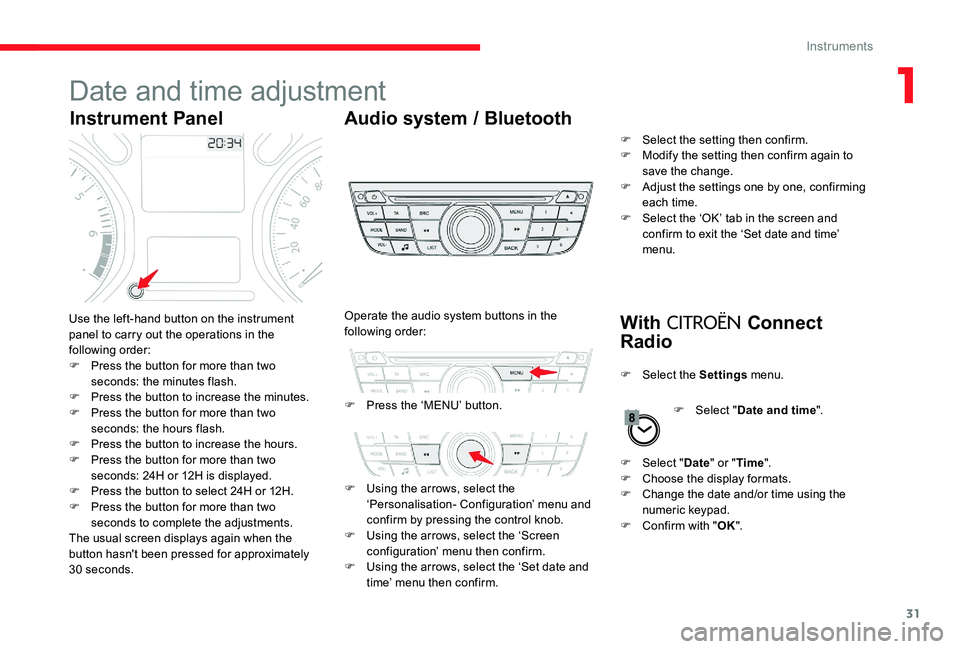
RadioUse the left-hand button on the instrument
panel to carry out the operations in the
following order:
F
P
ress the button for more than two
seconds: the minutes flash.
F
P
ress the button to increase the minutes.
F
P
ress the button for more than two
seconds: the hours flash.
F
P
ress the button to increase the hours.
F
P
ress the button for more than two
seconds: 24H or 12H is displayed.
F
P
ress the button to select 24H or 12H.
F
P
ress the button for more than two
seconds to complete the adjustments.
The usual screen displays again when the
button hasn't been pressed for approximately
30 seconds. F
P
ress the ‘MENU’ button.
Operate the audio system buttons in the
following order:
F
U
sing the arrows, select the
‘Personalisation- Configuration’ menu and
confirm by pressing the control knob.
F
U
sing the arrows, select the ‘Screen
configuration’ menu then confirm.
F
U
sing the arrows, select the ‘Set date and
time’ menu then confirm. F
S
elect the setting then confirm.
F
M
odify the setting then confirm again to
save the change.
F
A
djust the settings one by one, confirming
each time.
F
S
elect the ‘OK’ tab in the screen and
confirm to exit the ‘Set date and time’
menu.
F
Sel
ect the Settings menu.
F
Sel
ect "Date " or "Time ".
F
C
hoose the display formats.
F
C
hange the date and/or time using the
numeric keypad.
F
C
onfirm with "OK".
F
Sel
ect "Date and time ".
1
Instruments
Page 72 of 306
70
General safety recommendations
Labels are attached in different places of
your vehicle. They include safety warnings
as well as identification information of your
vehicle. Do not remove them: they are an
integral part of your vehicle.
For any work on your vehicle, use a
qualified workshop that has the technical
information, skills and equipment required,
all of which a
CITROËN dealer is able to
provide. We draw your attention to the following
points:
-
T
he fitting of electrical equipment or
accessories not listed by
CITROËN
may cause excessive current
consumption and faults and failures
with the electrical system of your
vehicle. Contact a
CITROËN dealer
for information on the range of
recommended accessories.
-
A
s a safety measure, access to
the diagnostic socket, used for the
vehicle's electronic systems, is
reserved strictly for
CITROËN dealers
or qualified workshops equipped
with the special tools required (risk
of malfunctions of the vehicle's
electronic systems that could cause
breakdowns or serious accidents).
The manufacturer cannot be held
responsible if this advice is not
followed.
-
A
ny modification or adaptation not
intended or authorised by
CITROËN
or carried out without meeting the
technical requirements defined
by the manufacturer will result in
the suspension of the legal and
contractual warranties. Installation of accessory radio
communication transmitters
Before installing a radio communication
transmitter, you must contact a
CITROËN
dealer for the specification of transmitters
which can be fitted (frequency, maximum
power, aerial position, specific installation
requirements), in line with the Vehicle
Electromagnetic Compatibility Directive
(2004/104/EC).
Depending on country regulations, some
safety equipment may be compulsory:
high visibility safety vests, warning
triangles, breathalysers, spare bulbs,
spare fuses, fire extinguisher, first aid kit,
mud flaps at the rear of the vehicle, etc.
Safety
Page 171 of 306
169
Fuses in the dashboard
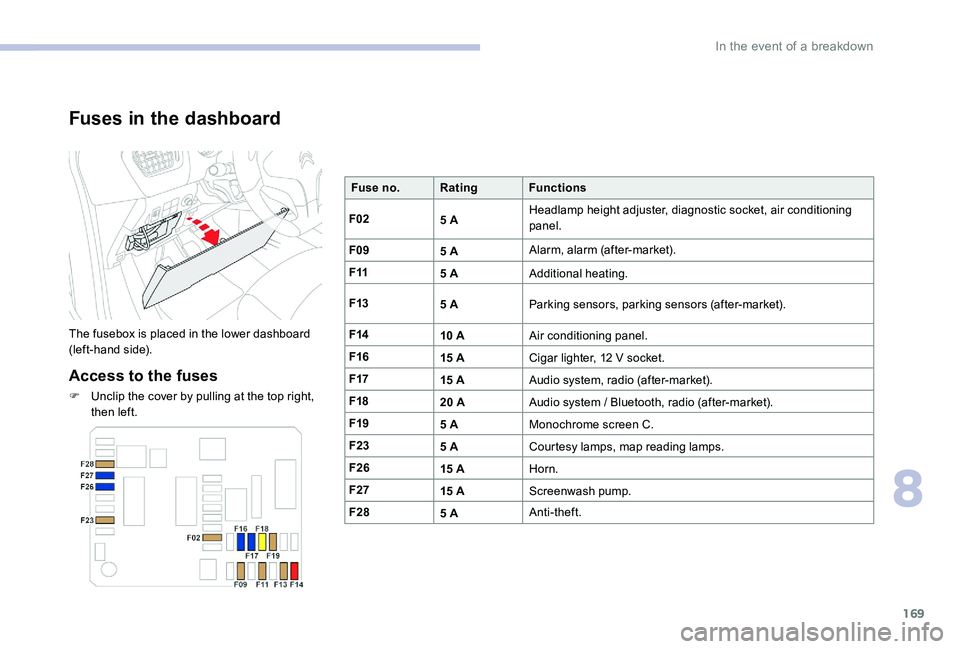
The fusebox is placed in the lower dashboard
(left-hand side).
Access to the fuses
F Unclip the cover by pulling at the top right, then left. Fuse no.
Rating Functions
F02 5 AHeadlamp height adjuster, diagnostic socket, air conditioning
panel.
F09 5 AAlarm, alarm (after-market).
F11 5 AAdditional heating.
F13 5 AParking sensors, parking sensors (after-market).
F14 10 AAir conditioning panel.
F16 15 ACigar lighter, 12 V socket.
F17 15 AAudio system, radio (after-market).
F18 20 AAudio system / Bluetooth, radio (after-market).
F19 5 AMonochrome screen C.
F23 5 ACourtesy lamps, map reading lamps.
F26 15 AHorn.
F27 15 AScreenwash pump.
F28 5 AAnti-theft.
8
In the event of a breakdown
Page 178 of 306
176
After reconnecting the
battery
After reconnecting the battery, turn on the
ignition and wait 1 minute before starting
the engine, in order to enable the electronic
systems to initialise.
If minor problems nevertheless persist
following this operation, contact a
CITROËN
dealer or a qualified workshop.
Referring to the corresponding section, you
must reset certain systems yourself, such as:
-
T
he key with remote control.
-
T
he date and time.
-
T
he preset radio stations.
On the journey following the initial engine
start-up, the Stop & Start may not be
operational.
In this case, the system will only be
available again after a continuous
period of immobilisation of the vehicle,
a period which depends on the ambient
temperature and the state of charge of the
battery (up to about 8 hours).
In the event of a breakdown
Page 186 of 306
184
BACK
VOL+
TA
Audio system /
Bluetooth
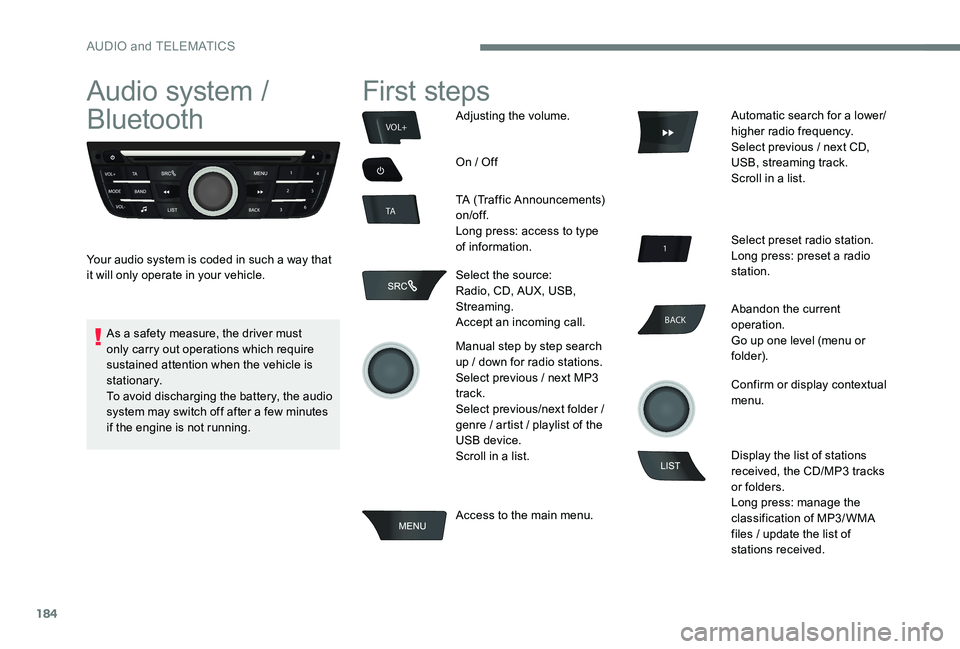
Your audio system is coded in such a way that
it will only operate in your vehicle.
First steps
Adjusting the volume.
On / Off
TA (Traffic Announcements)
on/of f.
Long press: access to type
of information.
Select the source:
Radio, CD, AUX, USB,
Streaming.
Accept an incoming call.
Manual step by step search
up / down for radio stations.
Select previous / next MP3
track.
Select previous/next folder /
genre / artist / playlist of the
USB device.
Scroll in a list.
Access to the main menu. Automatic search for a lower/
higher radio frequency.
Select previous / next CD,
USB, streaming track.
Scroll in a list.
Select preset radio station.
Long press: preset a radio
station.
Abandon the current
operation.
Go up one level (menu or
folder).
Confirm or display contextual
menu.
Display the list of stations
received, the CD/MP3 tracks
or folders.
Long press: manage the
classification of MP3/ WMA
files / update the list of
stations received.
As a safety measure, the driver must
only carry out operations which require
sustained attention when the vehicle is
stationary.
To avoid discharging the battery, the audio
system may switch off after a few minutes
if the engine is not running.
AUDIO and TELEMATICS
Page 187 of 306
185
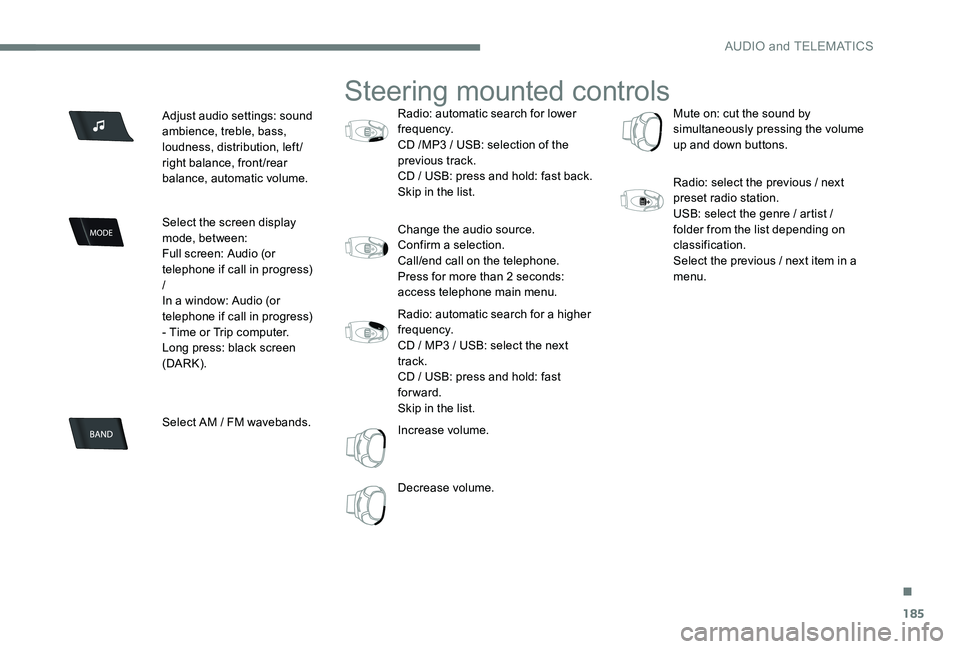
Adjust audio settings: sound
ambience, treble, bass,
loudness, distribution, left/
right balance, front/rear
balance, automatic volume.
Select the screen display
mode, between:
Full screen: Audio (or
telephone if call in progress)
/
In a window: Audio (or
telephone if call in progress)
- Time or Trip computer.
Long press: black screen
(DARK).
Select AM / FM wavebands.
Steering mounted controls
Radio: automatic search for lower
frequency.
CD /MP3 / USB: selection of the
previous track.
CD / USB: press and hold: fast back.
Skip in the list.
Change the audio source.
Confirm a selection.
Call/end call on the telephone.
Press for more than 2 seconds:
access telephone main menu.
Radio: automatic search for a higher
frequency.
CD / MP3 / USB: select the next
track.
CD / USB: press and hold: fast
forward.
Skip in the list.
Increase volume.
Decrease volume.Mute on: cut the sound by
simultaneously pressing the volume
up and down buttons.
Radio: select the previous / next
preset radio station.
USB: select the genre / artist /
folder from the list depending on
classification.
Select the previous / next item in a
menu.
.
AUDIO and TELEMATICS
Page 188 of 306
186
Main menu
Screen C
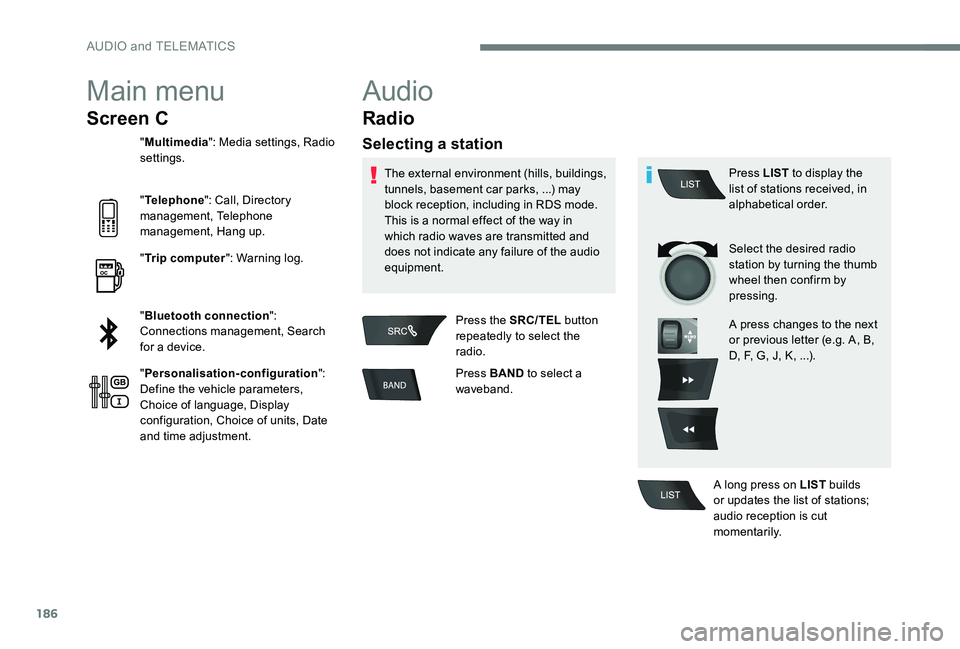
"Multimedia ": Media settings, Radio
settings.
" Telephone ": Call, Directory
management, Telephone
management, Hang up.
" Trip computer ": Warning log.
" Bluetooth connection ":
Connections management, Search
for a device.
" Personalisation-configuration ":
Define the vehicle parameters,
Choice of language, Display
configuration, Choice of units, Date
and time adjustment.
Audio
Radio
Selecting a station
The external environment (hills, buildings,
tunnels, basement car parks, ...) may
block reception, including in RDS mode.
This is a normal effect of the way in
which radio waves are transmitted and
does not indicate any failure of the audio
equipment.
Press the SRC/TEL button
repeatedly to select the
radio.
Press BAND to select a
waveband. Press LIST
to display the
list of stations received, in
alphabetical order.
Select the desired radio
station by turning the thumb
wheel then confirm by
pressing.
A press changes to the next
or previous letter (e.g. A, B,
D, F, G, J, K, ...).
A long press on LIST builds
or updates the list of stations;
audio reception is cut
m o m e nt a r i l y.
AUDIO and TELEMATICS
Page 189 of 306
187
TA
RDS
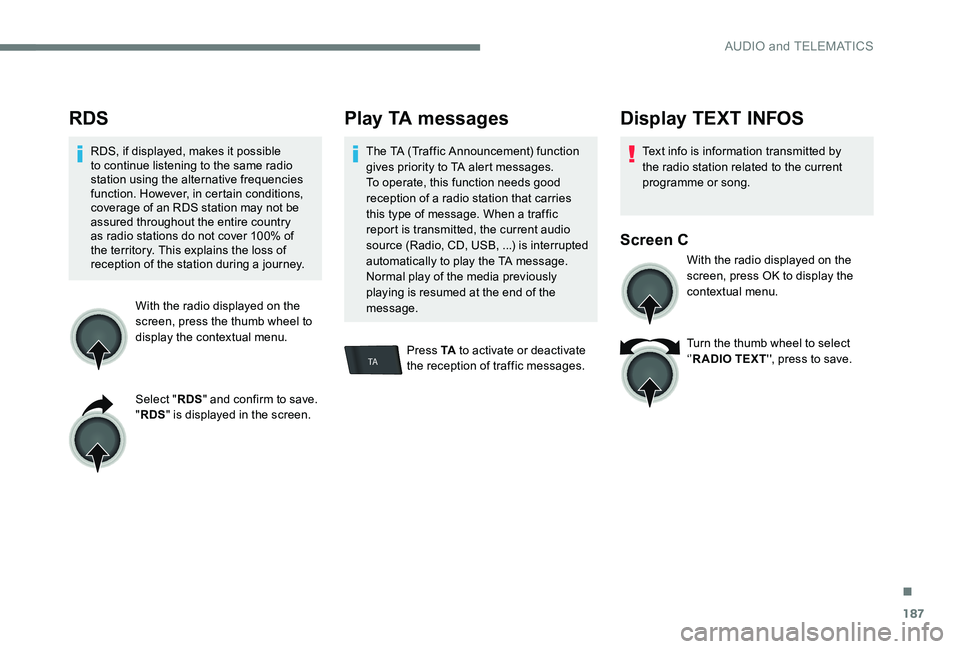
RDS, if displayed, makes it possible
to continue listening to the same radio
station using the alternative frequencies
function. However, in certain conditions,
coverage of an RDS station may not be
assured throughout the entire country
as radio stations do not cover 100% of
the territory. This explains the loss of
reception of the station during a journey.With the radio displayed on the
screen, press the thumb wheel to
display the contextual menu.
Select "RDS" and confirm to save.
" RDS " is displayed in the screen.
Play TA messages
The TA (Traffic Announcement) function
gives priority to TA alert messages.
To operate, this function needs good
reception of a radio station that carries
this type of message. When a traffic
report is transmitted, the current audio
source (Radio, CD, USB, ...) is interrupted
automatically to play the TA message.
Normal play of the media previously
playing is resumed at the end of the
message.
Press TA to activate or deactivate
the reception of traffic messages.
Display TEXT INFOS
Text info is information transmitted by
the radio station related to the current
programme or song.
Screen C
With the radio displayed on the
screen, press OK to display the
contextual menu.
Turn the thumb wheel to select
‘’ R ADIO TEXT '', press to save.
.
AUDIO and TELEMATICS
Page 204 of 306
202
Audio settings
Screen C
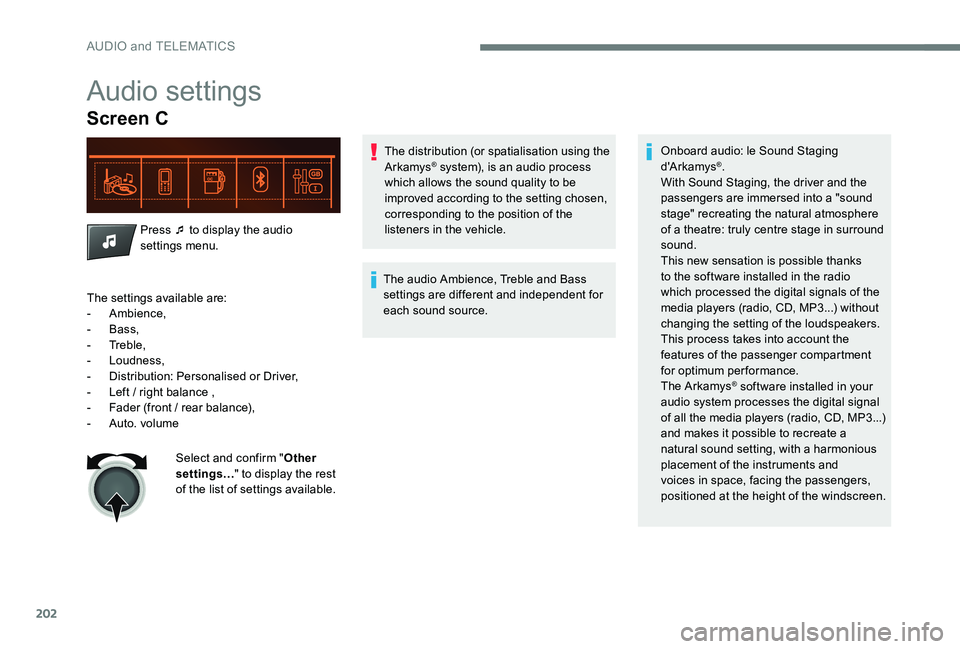
Press ¯ to display the audio
settings menu.The distribution (or spatialisation using the
Arkamys
® system), is an audio process
which allows the sound quality to be
improved according to the setting chosen,
corresponding to the position of the
listeners in the vehicle.
The audio Ambience, Treble and Bass
settings are different and independent for
each sound source. Onboard audio: le Sound Staging
d'A r kamys®.
With Sound Staging, the driver and the
passengers are immersed into a "sound
stage" recreating the natural atmosphere
of a theatre: truly centre stage in surround
sound.
This new sensation is possible thanks
to the software installed in the radio
which processed the digital signals of the
media players (radio, CD, MP3...) without
changing the setting of the loudspeakers.
This process takes into account the
features of the passenger compartment
for optimum performance.
The Arkamys
® software installed in your
audio system processes the digital signal
of all the media players (radio, CD, MP3...)
and makes it possible to recreate a
natural sound setting, with a harmonious
placement of the instruments and
voices in space, facing the passengers,
positioned at the height of the windscreen.
The settings available are:
-
Ambience,
-
Bass,
-
Treble,
-
Loudness,
-
D
istribution: Personalised or Driver,
-
L
eft / right balance ,
-
F
ader (front / rear balance),
-
Aut
o. volume Select and confirm " Other
settings… " to display the rest
of the list of settings available.
AUDIO and TELEMATICS