Citroen C1 2016 1.G Service Manual
Manufacturer: CITROEN, Model Year: 2016, Model line: C1, Model: Citroen C1 2016 1.GPages: 269, PDF Size: 7.63 MB
Page 41 of 269
39
C1_en_Chap02_ouvertures_ed01-2016
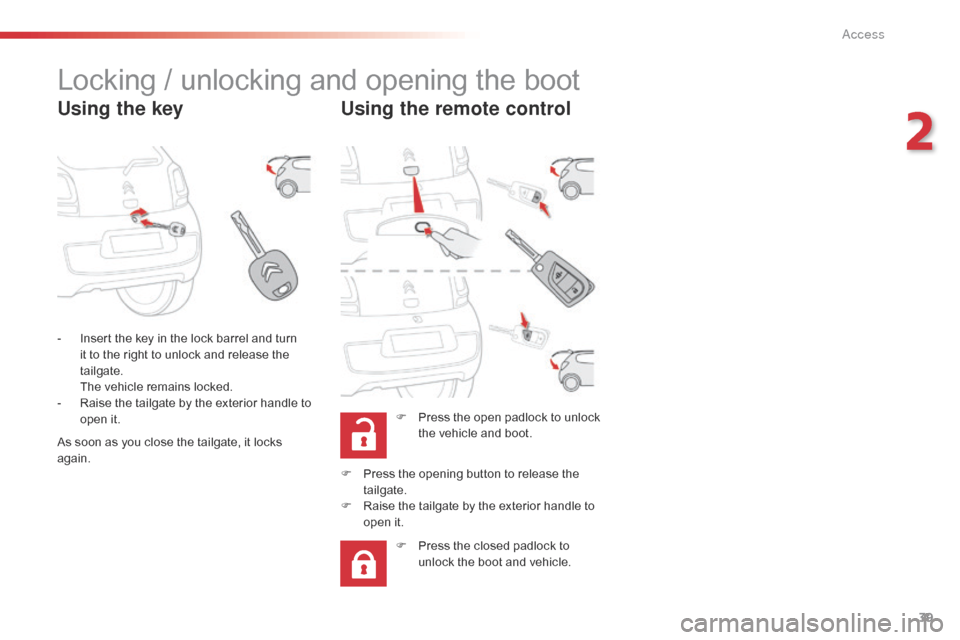
Locking / unlocking and opening the boot
Using the keyUsing the remote control
F Press the open padlock to unlock t
he vehicle and boot.
-
I
nsert
the
key
in
the
lock
barrel
and
turn
i
t
to
the
right
to
unlock
and
release
the
t
ailgate.
T
he
vehicle
remains
locked.
-
R
aise
the
tailgate
by
the
exterior
handle
to
o
pen
it.
F
P
ress
the opening button to release the
t
ailgate.
F
R
aise
the tailgate by the exterior handle to
o
pen
it. F
P
ress the closed padlock to
u
nlock the boot and vehicle.
As
soon
as
you
close
the
tailgate,
it
locks
ag
ain.
2
Access
Page 42 of 269
40
C1_en_Chap02_ouvertures_ed01-2016
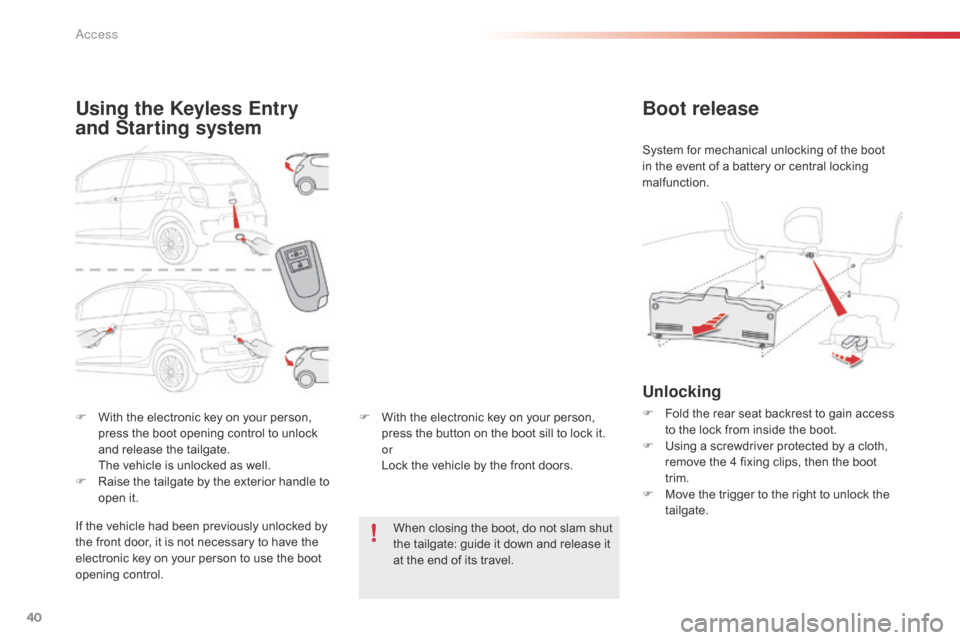
F With the electronic key on your person, p
ress the boot opening control to unlock
a
nd release the tailgate.
T
he vehicle is unlocked as well.
F
R
aise the tailgate by the exterior handle to
o
pen it.
Using the Keyless Entry
and Starting system
If the vehicle had been previously unlocked by the front door, it is not necessary to have the
e
lectronic key on your person to use the boot
ope
ning
c
ontrol. F
W
ith the electronic key on your person,
p
ress the button on the boot sill to lock it.
or
L
ock the vehicle by the front doors.
When closing the boot, do not slam shut
t
he tailgate: guide it down and release it
a
t the end of its travel.
Boot release
System for mechanical unlocking of the boot in the event of a battery or central locking
m
alfunction.
Unlocking
F Fold the rear seat backrest to gain access t
o the lock from inside the boot.
F
U
sing a screwdriver protected by a cloth,
r
emove the 4 fixing clips, then the boot
t
rim.
F
M
ove the trigger to the right to unlock the
t
ailgate.
Access
Page 43 of 269
41
C1_en_Chap02_ouvertures_ed01-2016
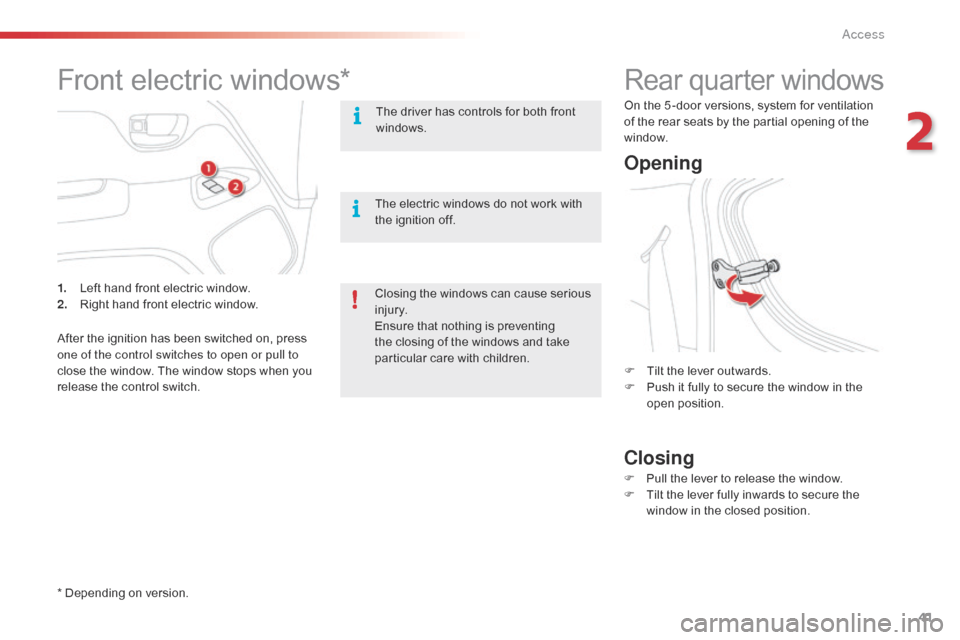
Rear quarter windows
Opening
Closing
F Tilt the lever outwards.
F P ush it fully to secure the window in the
ope
n
p
osition.
F
P
ull the lever to release the window.
F
T
ilt the lever fully inwards to secure the
w
indow in the closed position.
On
the 5 -door versions, system for ventilation
o
f the rear seats by the partial opening of the
w
indow.
Front electric windows*
The driver has controls for both front w
indows.
The
electric windows do not work with
t
he ignition off.
1.
L
eft
hand
front
electric
window.
2.
R
ight
hand
front
electric
window.
After
the
ignition
has
been
switched
on,
press
o
ne of the control switches to open or pull to
close
the
window.
The
window
stops
when
you
r
elease
the
control
switch.
*
Depending
on
version. Closing
the windows can cause serious
in
jury.
Ensure
that nothing is preventing
t
he closing of the windows and take
p
articular care with children.
2
Access
Page 44 of 269
42
C1_en_Chap02_ouvertures_ed01-2016
* Depending on version.
Y our vehicle may be fitted with an electrically operated fabric roof.
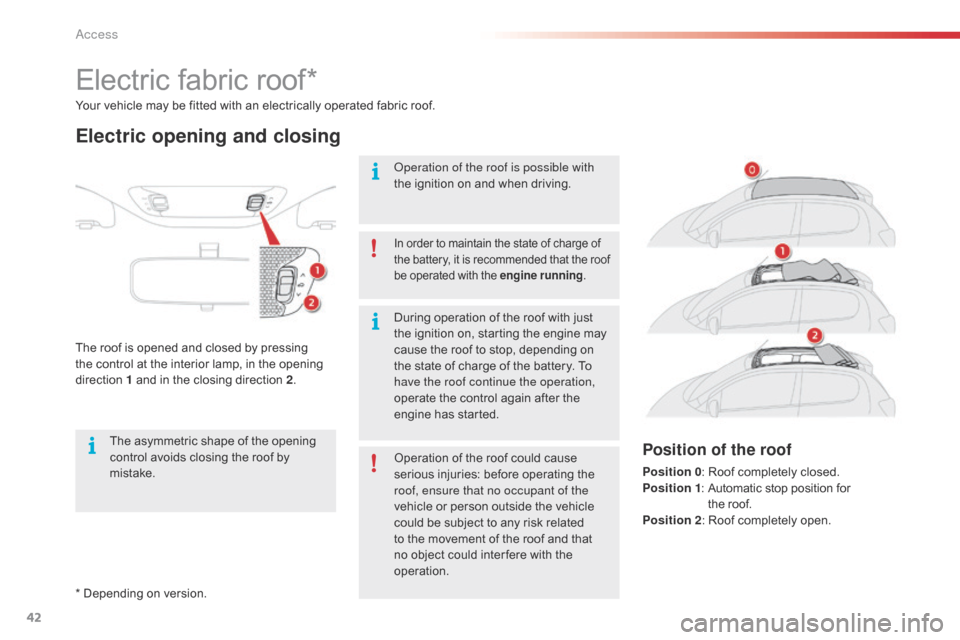
Electric fabric ro
of*
Electric opening and closing
The roof is opened and closed by pressing t
he control at the interior lamp, in the opening
d
irection
1
and in the closing direction 2.
In order to maintain the state of charge of t
he battery, it is recommended that the roof b
e operated with the engine running.
Operation of the roof is possible with
the
ignition on and when driving.
Operation
of the roof could cause
s
erious injuries: before operating the
r
oof, ensure that no occupant of the
vehicle
or person outside the vehicle
c
ould be subject to any risk related
t
o the movement of the roof and that
n
o object could inter fere with the
ope
ration.
During
operation of the roof with just
t
he ignition on, starting the engine may
c
ause the roof to stop, depending on
t
he state of charge of the battery. To
h
ave the roof continue the operation,
operate
the control again after the
e
ngine has started.
The
asymmetric
shape
of
the
opening
c
ontrol
avoids
closing
the
roof
by
m
istake.
Position of the roof
Position 0 : Roof completely closed.
Position 1 :
A utomatic stop position for
t
he roof.
Position 2 :
Roof completely open.
Access
Page 45 of 269
43
C1_en_Chap02_ouvertures_ed01-2016
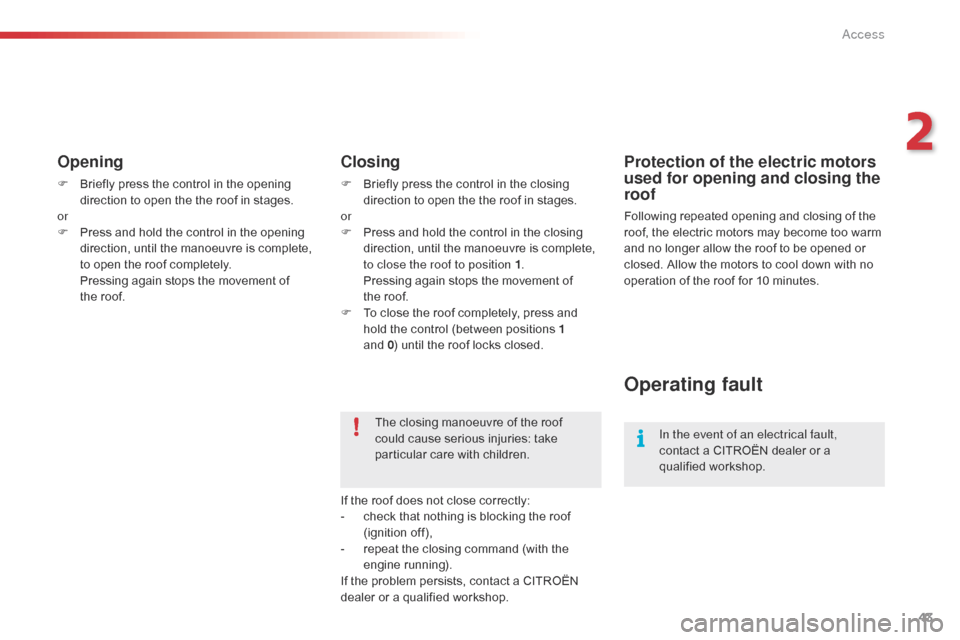
Opening
F Briefly press the control in the opening d
irection to open the the roof in stages.
or
F
P
ress and hold the control in the opening
d
irection, until the manoeuvre is complete,
t
o open the roof completely.
P
ressing again stops the movement of
the
roof.
Closing
F Briefly press the control in the closing d
irection to open the the roof in stages.
or
F
P
ress and hold the control in the closing
d
irection, until the manoeuvre is complete,
t
o close the roof to position 1 .
P
ressing again stops the movement of
t
he roof.
F
T
o close the roof completely, press and
h
old the control (between positions 1
and
0)
until the roof locks closed.
The
closing manoeuvre of the roof
c
ould cause serious injuries: take
p
articular care with children.
If
the roof does not close correctly:
-
c
heck that nothing is blocking the roof
(
ignition
o
ff),
-
r
epeat the closing command (with the
e
ngine
r
unning).
If
the problem persists, contact a CITROËN
d
ealer or a qualified workshop.
Operating fault
In the event of an electrical fault,
contact a CITROËN dealer or a
q
ualified
w
orkshop.
Protection of the electric motors
used for opening and closing the
roof
Following repeated opening and closing of the roof, the electric motors may become too warm
a
nd no longer allow the roof to be opened or
c
losed. Allow the motors to cool down with no
o
peration of the roof for 10 minutes.
2
Access
Page 46 of 269
44
C1_en_Chap02_ouvertures_ed01-2016
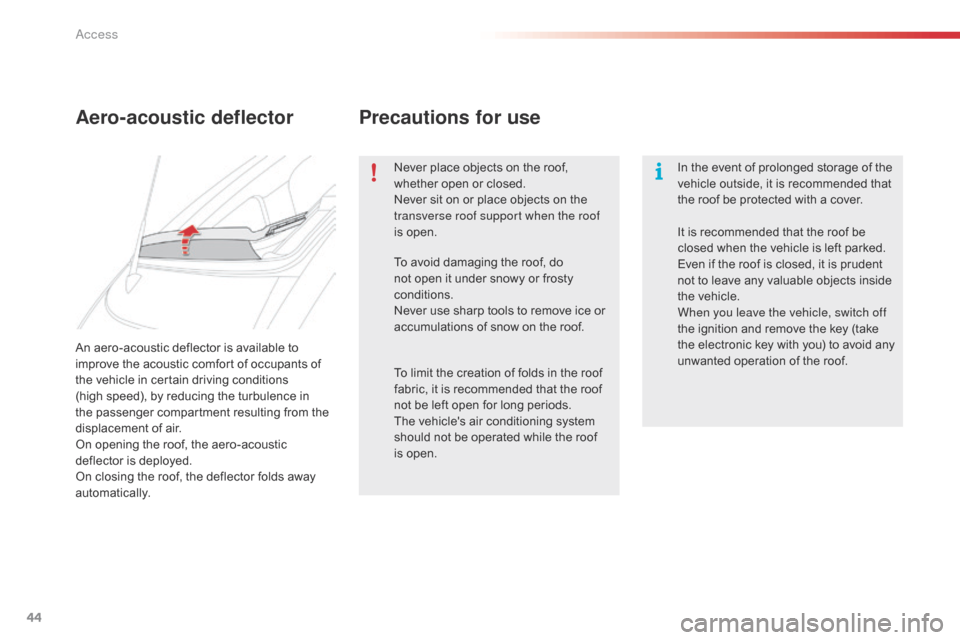
An aero-acoustic deflector is available to improve the acoustic comfort of occupants of
t
he vehicle in certain driving conditions
(high
speed), by reducing the turbulence in
t
he passenger compartment resulting from the
d
isplacement of air.
On
opening the roof, the aero-acoustic
d
eflector is deployed.
On
closing the roof, the deflector folds away
au
tomatically.
Aero-acoustic deflector Precautions for use
Never place objects on the roof, w
hether open or closed.
Never
sit on or place objects on the
t
ransverse roof support when the roof
is
open. In
the event of prolonged storage of the v
ehicle outside, it is recommended that
t
he roof be protected with a cover.
To
avoid damaging the roof, do
n
ot open it under snowy or frosty
c
onditions.
Never
use sharp tools to remove ice or
a
ccumulations of snow on the roof.
To
limit the creation of folds in the roof
f
abric, it is recommended that the roof
n
ot be left open for long periods.
The
vehicle's air conditioning system
s
hould not be operated while the roof
i
s open. It
is recommended that the roof be
c
losed when the vehicle is left parked.
Even
if the roof is closed, it is prudent
n
ot to leave any valuable objects inside
t
he vehicle.
When you leave the vehicle, switch off
the
ignition and remove the key (take
t
he electronic key with you) to avoid any
u
nwanted operation of the roof.
Access
Page 47 of 269
45
C1_en_Chap02_ouvertures_ed01-2016
Recommendations on care of your vehicle
The general recommendations on the care of your vehicle are given in the maintenance and warranty guide.
Fabric roof
To avoid damaging the roof.
- n ever use a high pressure jet wash,
-
n
ever wash your vehicle in an
a
utomatic roller-brush car wash.Remove
bird droppings or tree resins as
t
heir acidity may damage the roof.Never
use chemical products,
d
etergents, stain removers, solvents,
a
lcohol, petrol, ... to clean the roof.
We recommend that you clean the
a
ero-acoustic defector with care
using
a
soft brush.
Before
washing the fabric roof, first
r
emove as much dirt as possible from
t
he sur face using a soft brush or a
v
acuum cleaner.
To waterproof the roof, use only special
waterproofing products for fabric roofs.
To
remove marks, sponge them
(but never rub them) using soapy water,
t
hen immediately rinse with clean water.
Allow the vehicle to dry in a shaded
a
rea and avoid direct exposure to
t
he sun. For
the regular maintenance of the
f
abric roof and to conserve its original
a
ppearance, we recommend an
e
cological "Fly remover - Fabric roof
c
leaner" from the "TECHNATURE"
r
ange. To obtain this product go to a
C
ITROËN dealer.
Aero-acoustic deflector
2
Access
Page 48 of 269
46
C1_en_Chap03_ergonomie-confort_ed01-2016
Front seats with manual adjustments
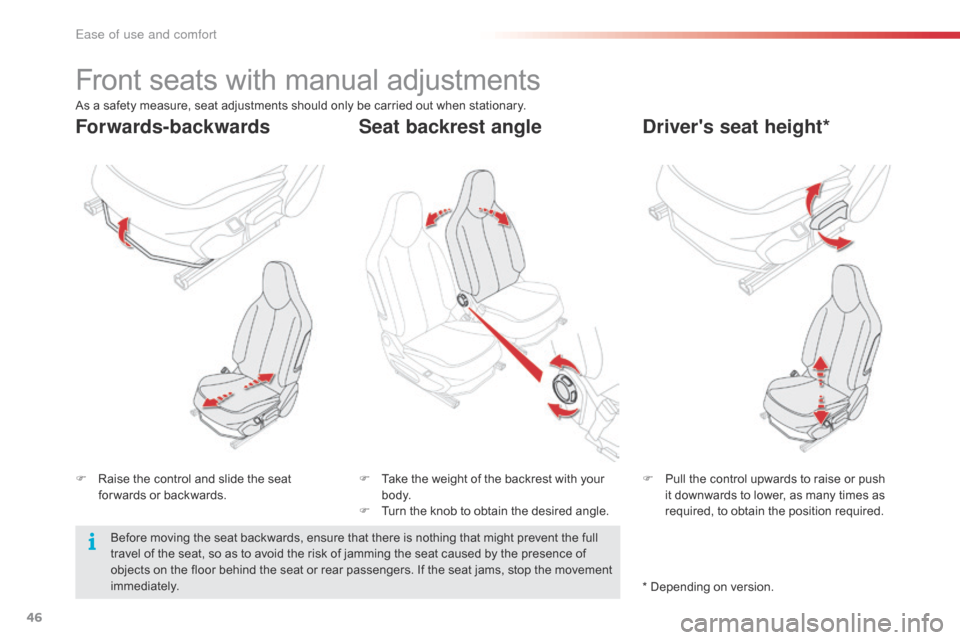
F Raise the control and slide the seat f
or wards or backwards. F
P ull the control upwards to raise or push i
t downwards to lower, as many times as
r
equired, to obtain the position required.
F
T ake the weight of the backrest with your b
o dy.
F
T
urn the knob to obtain the desired angle.
Forwards-backwardsDriver's seat height*
Seat backrest angle
As a safety measure, seat adjustments should only be carried out when stationary.
B efore moving the seat backwards, ensure that there is nothing that might prevent the full
t
ravel of the seat, so as to avoid the risk of jamming the seat caused by the presence of
o
bjects on the floor behind the seat or rear passengers. If the seat jams, stop the movement
i
mmediately. *
Depending on version.
Ease of use and comfort
Page 49 of 269
47
C1_en_Chap03_ergonomie-confort_ed01-2016
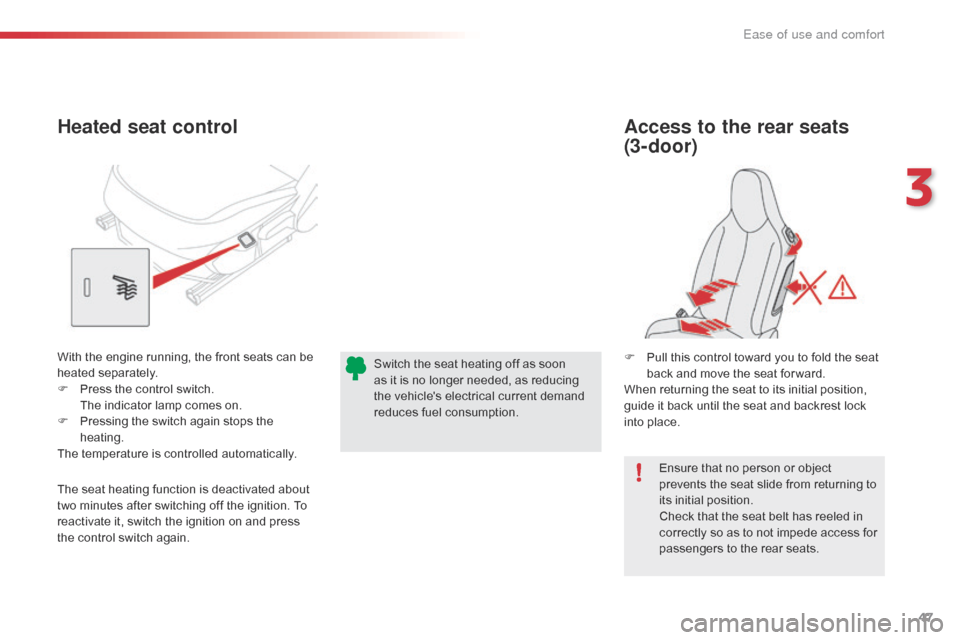
Ensure that no person or object prevents the seat slide from returning to
it
s
in
itial
p
osition.
Check
that the seat belt has reeled in
c
orrectly so as to not impede access for
p
assengers to the rear seats.
Heated seat control Access to the rear seats
(3-door)
F Pull this control toward you to fold the seat b
ack and move the seat for ward.
When
returning the seat to its initial position,
g
uide it back until the seat and backrest lock
i
nto place.
With
the
engine
running,
the
front
seats
can
be
h
eated s
eparately.
F
P
ress
the
control
switch.
T
he
indicator
lamp
comes
on.
F
P
ressing
the
switch
again
stops
the
hea
ting.
The
temperature
is
controlled
automatically.
The
seat
heating
function
is
deactivated
about
t
wo
minutes
after
switching
off
the
ignition.
To
r
eactivate
it,
switch
the
ignition
on
and
press
t
he
control
switch
again. Switch
the
seat
heating
off
as
soon
a
s
it
is
no
longer
needed,
as
reducing
t
he
vehicle's
electrical
current
demand
r
educes
fuel
consumption.
3
Ease of use and comfort
Page 50 of 269
48
C1_en_Chap03_ergonomie-confort_ed01-2016
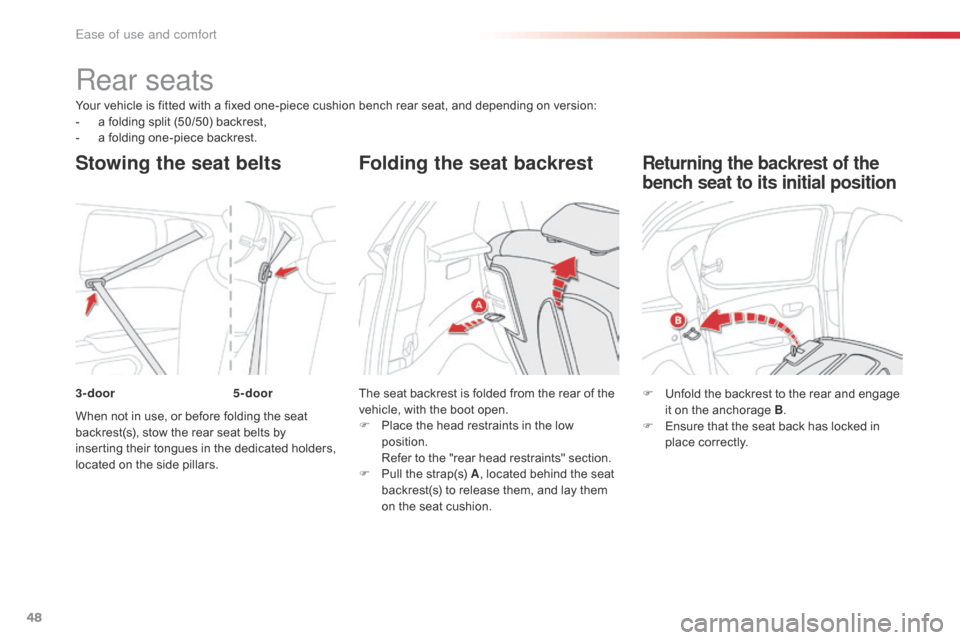
Your vehicle is fitted with a fixed one-piece cushion bench rear seat, and depending on version:
- a folding split (50/50) backrest,
-
a
folding one-piece backrest.
When
not in use, or before folding the seat
b
ackrest(s), stow the rear seat belts by
i
nserting
t
heir
t
ongues
i
n
t
he
d
edicated
h
olders,
l
ocated on the side pillars. The
seat backrest is folded from the rear of the
v
ehicle, with the boot open.
F
P
lace the head restraints in the low
p
osition.
R
efer to the "rear head restraints" section.
F
P
ull the strap(s) A,
located behind the seat
b
ackrest(s) to release them, and lay them
o
n the seat cushion.
Rear seats
Stowing the seat belts Folding the seat backrest
F Unfold the backrest to the rear and engage i
t on the anchorage B.
F
E
nsure that the seat back has locked in
p
lace correctly.
Returning the backrest of the
bench seat to its initial position
3-door 5-door
Ease of use and comfort