instrument panel CITROEN C5 AIRCROSS 2022 Handbook (in English)
[x] Cancel search | Manufacturer: CITROEN, Model Year: 2022, Model line: C5 AIRCROSS, Model: CITROEN C5 AIRCROSS 2022Pages: 276, PDF Size: 7.92 MB
Page 23 of 276
21
Instruments
1when the driver's door is opened and when the
vehicle is locked or unlocked.
When travelling abroad, you may need to
change the units of distance and speed:
The display of distance and speed must be
expressed in the official unit of the country
(km or miles). The change of units is done via
the screen configuration menu, with the
vehicle stationary.
Total distance recorder
It measures the total distance travelled by the
vehicle since its first registration.
Trip distance recorder
This measures the distance travelled since it was
last reset by the driver.
Resetting the trip recorder
► With the ignition on, press the button until
zeros appear
.
Manual test on the
instrument panel
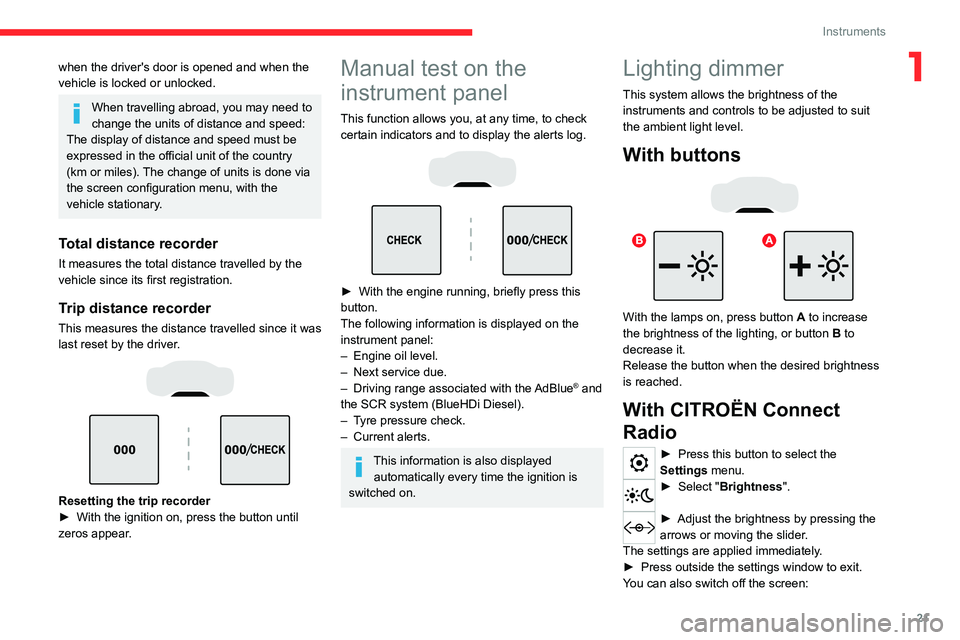
This function allows you, at any time, to check
certain indicators and to display the alerts log.
► With the engine running, briefly press this
button.
The following information is displayed on the
instrument panel:
–
Engine oil level.
–
Next service due.
–
Driving range associated with the
AdBlue® and
the SCR system (BlueHDi Diesel).
–
T
yre pressure check.
–
Current alerts.
This information is also displayed automatically every time the ignition is
switched on.
Lighting dimmer
This system allows the brightness of the
instruments and controls to be adjusted to suit
the ambient light level.
With buttons
With the lamps on, press button A to increase
the brightness of the lighting, or button B to
decrease it.
Release the button when the desired brightness
is reached.
With CITROËN Connect
Radio
► Press this button to select the
Settings menu.
► Select " Brightness".
► Adjust the brightness by pressing the
arrows or moving the slider .
The settings are applied immediately.
►
Press outside the settings window to exit.
Y
ou can also switch off the screen:
Page 24 of 276
22
Instruments
► Press this button to select the
Settings menu.
► Select " Dark".
The screen goes off completely.
►
Press the screen again (anywhere on its
surface) to turn it on.
With CITROËN Connect Nav
► Press this button to select the
Settings menu.
►
Select "
OPTIONS".
► Select " Screen configuration".
►
Select the "
Brightness" tab.
► Adjust the brightness by pressing the
arrows or moving the slider .
► Press this button to save and exit.
You can also switch off the screen:
► Press this button to select the
Settings menu.
► Select " Turn off screen".
The screen goes off completely.
►
Press the screen again (anywhere on its
surface) to activate it.
Trip computer
Displays information related to the current trip
(range, fuel consumption, average speed, etc.).
Data displayed on the
instrument panel
With instrument panels with dials
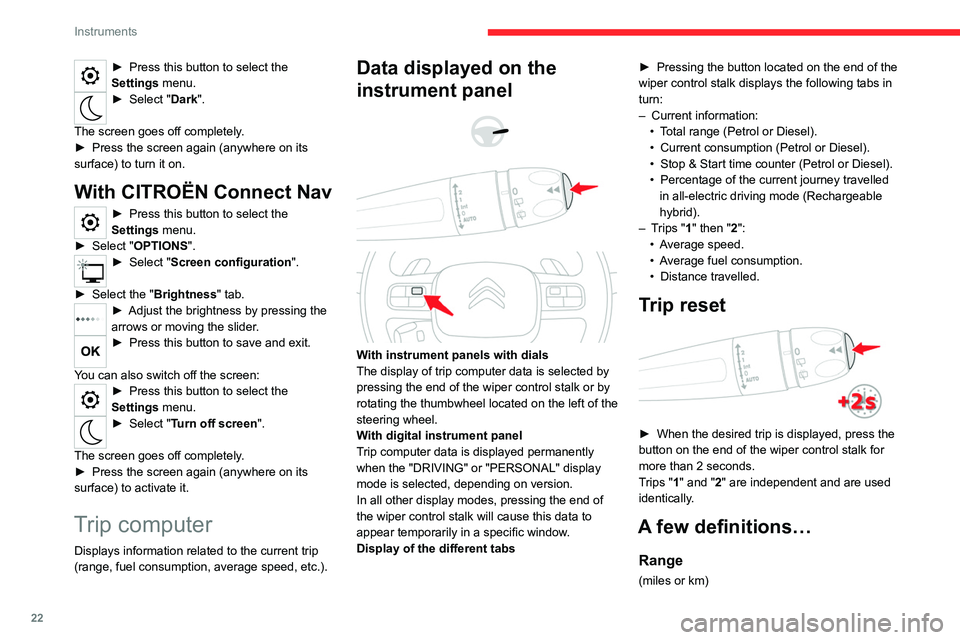
The display of trip computer data is selected by
pressing the end of the wiper control stalk or by
rotating the thumbwheel located on the left of the
steering wheel.
With digital instrument panel
Trip computer data is displayed permanently
when the "DRIVING" or "PERSONAL" display
mode is selected, depending on version.
In all other display modes, pressing the end of
the wiper control stalk will cause this data to
appear temporarily in a specific window.
Display of the different tabs ►
Pressing the button located on the end of the
wiper control stalk displays the following tabs in
turn:
–
Current information:
•
T
otal range (Petrol or Diesel).
•
Current consumption (Petrol or Diesel).
•
Stop & Start time counter (Petrol or Diesel).
•
Percentage of the current journey travelled
in all-electric driving mode (Rechargeable
hybrid).
–
T
rips "1" then "2":
•
A
verage speed.
•
A
verage fuel consumption.
•
Distance travelled.
Trip reset
► When the desired trip is displayed, press the
button on the end of the wiper control stalk for
more than 2 seconds.
T
rips "1" and "2" are independent and are used
identically.
A few definitions…
Range
(miles or km)
Page 26 of 276
24
Instruments
Menus
Press the touch screen with three fingers
to show all of the menu buttons.
For more information about the menus,
refer to the sections describing the audio
and telematics systems.
Radio/Media
Climate
Settings for temperature, air flow, etc.
For more information on Manual air
conditioning and Dual-zone automatic air
conditioning , refer to the corresponding
sections.
Navigation (Depending on equipment)
Driving or Vehicle (Depending on
equipment)
Activation, deactivation and settings for certain
functions.
The functions are organised in 2 tabs: " Driving
functions" and "Vehicle settings".
Telephone
Applications
Display of available connected services
and access to the Eco-coaching function.
Settings
Main settings for the audio system, touch
screen and digital instrument panel.
Energy
Access to the rechargeable hybrid system
features (energy flow, consumption statistics,
deferred charging, eSave function).
Energy menu
Flow
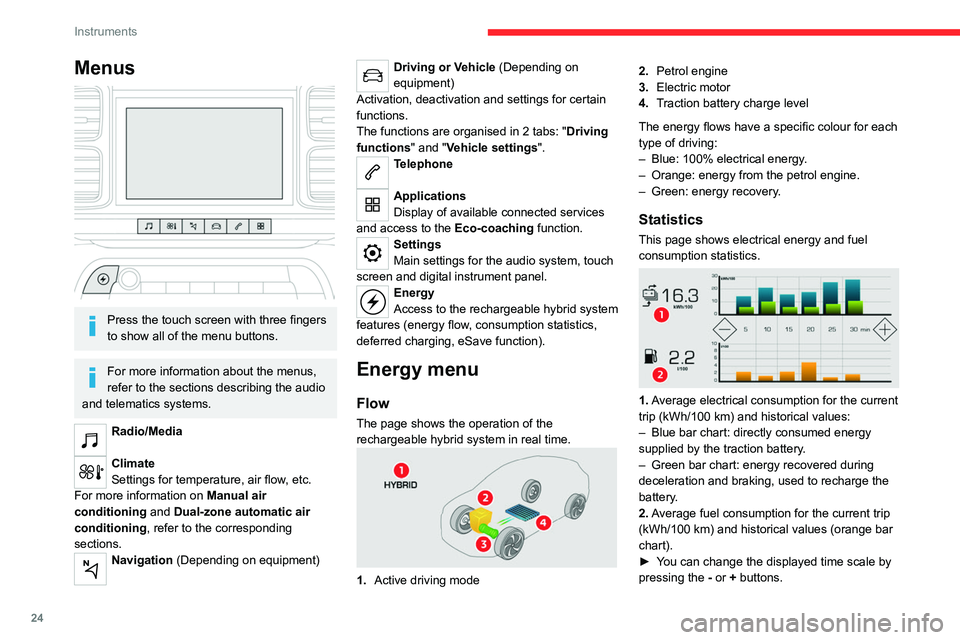
The page shows the operation of the
rechargeable hybrid system in real time.
1. Active driving mode 2.
Petrol engine
3. Electric motor
4. Traction battery charge level
The energy flows have a specific colour for each
type of driving:
–
Blue: 100% electrical energy
.
–
Orange: energy from the petrol engine.
–
Green: energy recovery
.
Statistics
This page shows electrical energy and fuel
consumption statistics.
1. Average electrical consumption for the current
trip (kWh/100
km) and historical values:
–
Blue bar chart: directly consumed energy
supplied by the traction battery
.
–
Green bar chart: energy recovered during
deceleration and braking, used to recharge the
battery
.
2. Average fuel consumption for the current trip
(kWh/100
km) and historical values (orange bar
chart).
►
Y
ou can change the displayed time scale by
pressing the
-
or + buttons.
Page 27 of 276
25
Instruments
1A current trip is any trip of more than 20 minutes without switching off the ignition.
Deferred charging
By default, charging begins when the nozzle is
connected.
Deferred charging may be programmed via the
touch screen.
Deferred charging is then activated by a button
located in the charging flap.
You can also programme the deferred charging function using a smartphone, via
the MyCitroën application.
For more information on Charging the traction
battery (Rechargeable hybrid), refer to the
corresponding section.
eSave
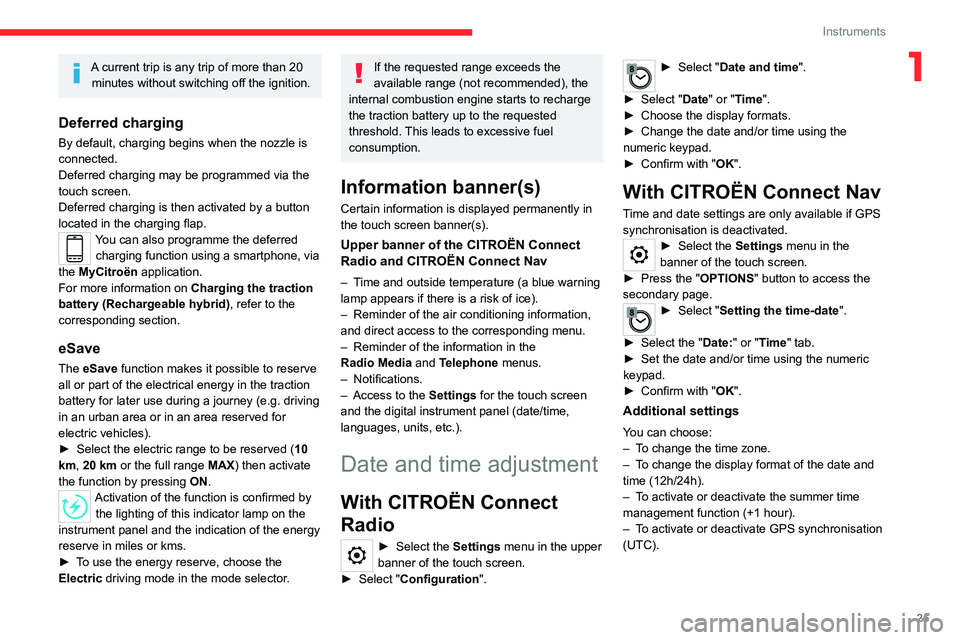
The eSave function makes it possible to reserve
all or part of the electrical energy in the traction
battery for later use during a journey (e.g. driving
in an urban area or in an area reserved for
electric vehicles).
►
Select the electric range to be reserved ( 10
km
, 20 km or the full range MAX) then activate
the function by pressing ON.
Activation of the function is confirmed by
the lighting of this indicator lamp on the
instrument panel and the
indication of the energy
reserve in miles or kms.
►
T
o use the energy reserve, choose the
Electric driving mode in the mode selector.
If the requested range exceeds the
available range (not recommended), the
internal combustion engine starts to recharge
the traction battery up to the requested
threshold. This leads to excessive fuel
consumption.
Information banner(s)
Certain information is displayed permanently in
the touch screen banner(s).
Upper banner of the CITROËN Connect
Radio and CITROËN Connect Nav
– Time and outside temperature (a blue warning
lamp appears if there is a risk of ice).
–
Reminder of the air conditioning information,
and direct access to the corresponding menu.
–
Reminder of the information in the
Radio
Media and Telephone menus.
–
Notifications.
–
Access to the
Settings for the touch screen
and the digital instrument panel (date/time,
languages, units, etc.).
Date and time adjustment
With CITROËN Connect
Radio
► Select the Settings menu in the upper
banner of the touch screen.
►
Select "
Configuration ".
► Select "Date and time".
►
Select "
Date" or "Time".
►
Choose the display formats.
►
Change the date and/or time using the
numeric keypad.
►
Confirm with "
OK".
With CITROËN Connect Nav
Time and date settings are only available if GPS
synchronisation is deactivated.
► Select the Settings menu in the
banner of the touch screen.
►
Press the "
OPTIONS " button to access the
secondary page.
► Select " Setting the time-date".
►
Select the "
Date:" or "Time" tab.
►
Set the date and/or time using the numeric
keypad.
►
Confirm with "
OK".
Additional settings
You can choose:
– T o change the time zone.
–
T
o change the display format of the date and
time (12h/24h).
–
T
o activate or deactivate the summer time
management function (+1 hour).
–
T
o activate or deactivate GPS synchronisation
(UTC).
Page 35 of 276

33
Access
2Central locking not
functioning
Use these procedures in the following cases:
– Central locking malfunction.
–
Battery disconnected or discharged.
In the event of a malfunction of the
central locking system, the battery must
be disconnected to ensure that the vehicle is
locked fully.
Front left-hand door
► Insert the key into the lock and turn it towards
the rear of the vehicle to lock the door , or
towards the front to unlock it.
Passenger doors
Unlocking
► Pull the interior door opening control.
Locking
► Open the doors.
► For the rear doors, check that the child lock
is not on.
Refer to the corresponding section.
►
Remove the black cap
, located on the edge
of the door, using the key.
►
Insert the key into the socket without forcing
it, then turn the latch towards the inside of the
door
.
►
Remove the key and refit the black cap.
►
Close the doors and check from the outside
that the vehicle is locked.
Changing the battery
A message is displayed on the instrument panel
when the battery needs changing.
Battery type: CR2032/3 volts.
Without
Keyless Entry and Starting
With Keyless Entry and Starting
► Unclip the cover by inserting a small
screwdriver in the slot and lift the cover .
►
Remove the flat battery from its housing.
►
Put the new battery in place, respecting the
polarity
. Start by inserting it into the contacts
Page 46 of 276

44
Ease of use and comfort
Correct driving position
Before taking to the road and to make the most
of the ergonomic layout of the instruments and
controls, carry out these adjustments in the
following order:
–
the height of the head restraint,
–
the seat backrest angle,
–
the seat cushion height,
–
the longitudinal position of the seat,
–
the height and reach of the steering wheel,
–
the rear view mirror and door mirrors.
Once these adjustments have been
made, check the instrument panel can be
viewed correctly from your driving position.
Front seats
Caution when moving the
front seats
For safety reasons, only adjust seats
when the vehicle is stationary.
Before moving the seat backwards,
ensure that there is no person or object
that might prevent the full travel of the seat.
There is a risk of trapping or pinching
passengers if present in the rear seats or of
jamming the seat if large objects are placed
on the floor behind the seat.
Front head restraints
Adjusting the height
The adjustment is correct when the upper edge of the head restraint is level
with the top of the head.
‘Two-way’ adjustment model
Upwards:
► pull the head restraint up to the desired
position; the head restraint can be felt to click
into position.
Downwards:
►
press lug
A and push the head restraint down
to the desired position.
‘Four-way’ adjustment model
Upwards:
► pull the head restraint up to the desired
position; the head restraint can be felt to click
into position.
Downwards:
► press and hold button B and push the head
restraint down to the desired position.
Adjusting the angle
“Four-way” adjustment model
► press and hold button B and push the lower
part of the head restraint forwards or backwards.
Removing a head restraint
► Pull the head restraint up as far as it will go.
► Press the lug(s) A (depending on version)
to unlock the head restraint and remove it
completely,
► Stow the head restraint securely.
Page 69 of 276

67
Lighting and visibility
4Exterior lighting control
stalk
Main lighting
Automatic illumination of lamps/daytime running lamps
Sidelamps only
Dipped or main beam headlamps
Headlamp dipping
► Pull the stalk to switch between dipped and
main beam headlamps.
Displays
Illumination of the corresponding indicator
lamp on the instrument panel confirms that the
selected lighting is on.
A fault with a lamp is signalled by the permanent illumination of this warning
lamp, accompanied by the display of a message
and an audible signal.
Foglamps
Rear foglamps
They only work if the dipped or main beam headlamps are on.
► Rotate the ring forwards to switch them on
and backwards to switch them off.
When the lamps are switched off automatically
("
AUTO" position), the foglamps and the dipped
beam headlamps will remain on.
Front foglamps/Rear foglamps
They operate with the sidelamps, dipped or main beam headlamps on.
► Rotate the ring forwards:
• once to switch on the front foglamps,
•
a second time to switch on the rear
foglamps.
►
T
urn in the opposite direction to switch off.
If the lighting is switched off automatically
("AUTO" position) or the dipped beam
headlamps are switched off manually, the
foglamps and sidelamps remain on.
►
Rotate the ring backwards to switch the
foglamps off; the sidelamps will then switch off.
Switching on the foglamps is prohibited
in clear weather or in rain, both day and
night. In these situations, the power of their
beams may dazzle other drivers. They must
only be used in fog or falling snow (rules may
vary depending on country).
Do not forget to switch off the foglamps when
they are no longer necessary.
Switching on the lamps after
switching off the ignition
To reactivate the lighting control, rotate the
ring to the "AUTO" position, then to the
desired position.
Page 70 of 276
68
Lighting and visibility
This is confirmed by an audible signal and
illumination of the corresponding direction
indicator lamp in the instrument panel.
To switch off the parking lamps, return the
lighting control stalk to the central position.
Automatic illumination of headlamps
When the ring is at the “AUTO" position and
a low level of ambient light is detected by the
rain/sunshine sensor, the number plate lamps,
sidelamps and dipped beam headlamps are
switched on automatically, without any action on
the part of the driver. They may also come on if
rain is detected, at the same time as automatic
operation of the windscreen wipers.
As soon as the brightness returns to a sufficient
level or after the windscreen wipers are switched
off, the lamps are switched off automatically.
Malfunction
In the event of a malfunction of the
sunshine sensor, the lighting comes on
and this warning lamp is displayed in the
instrument panel, accompanied by an audible
signal and/or a message.
Contact a CITROËN dealer or a qualified
workshop.
Do not cover the sunshine sensor, linked
with the rain sensor and located at the
top centre of the windscreen behind the
If the driver's door is opened, a temporary
audible signal warns the driver that the lamps
are on.
They will go off automatically after a period
of time that depends on the level of charge in
the battery (entering energy economy mode).
Switching off of the lamps when the
ignition is switched off
When the ignition is switched off, all of the
lamps turn off immediately, except for dipped
beam headlamps if automatic guide-me-home
lighting is activated.
In some weather conditions (e.g. low
temperature or humidity), misting on the
internal surface of the glass of the headlamps
and rear lamps is normal, and will disappear
after the lamps have been on for a few
minutes.
Never look too closely at the light beam
of LED technology lamps - risk of serious
eye injury!
Travelling abroad
Vehicles equipped with manual
headlamp beam height adjustment:
If planning to use your vehicle in a country
that drives on the other side of the road, the
dipped beam headlamps must be adjusted to
avoid dazzling oncoming drivers. Contact a
CITROËN dealer or a qualified workshop.
Direction indicators
► Left or right: lower or raise the lighting control
stalk, beyond the point of resistance.
If you forget to cancel the direction
indicators for more than 20 seconds, the
volume of the audible signal will increase if
the speed is above 50 mph (80 km/h).
Three flashes
► Press briefly upwards or downwards, without
going beyond the point of resistance; the
direction indicators will flash 3 times.
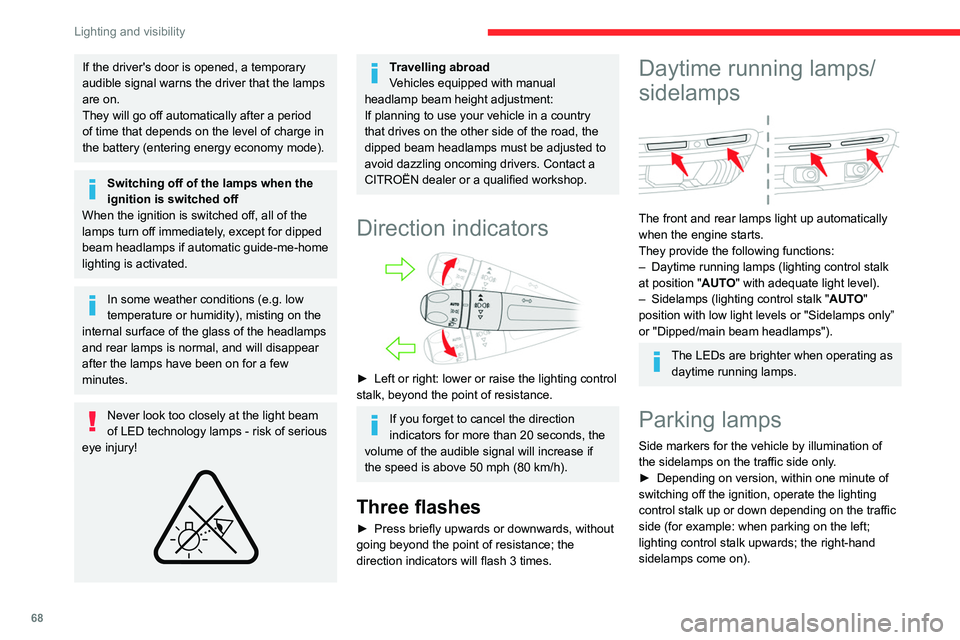
Daytime running lamps/
sidelamps
The front and rear lamps light up automatically
when the engine starts.
They provide the following functions:
–
Daytime running lamps (lighting control stalk
at position "
AUTO" with adequate light level).
–
Sidelamps (lighting control stalk " AUT
O"
position with low light levels or "Sidelamps only”
or "Dipped/main beam headlamps").
The LEDs are brighter when operating as daytime running lamps.
Parking lamps
Side markers for the vehicle by illumination of
the sidelamps on the traffic side only.
►
Depending on version, within one minute of
switching off the ignition, operate the lighting
control stalk up or down depending on the traffic
side (for example: when parking on the left;
lighting control stalk upwards; the right-hand
sidelamps come on).
Page 71 of 276

69
Lighting and visibility
4This is confirmed by an audible signal and
illumination of the corresponding direction
indicator lamp in the instrument panel.
To switch off the parking lamps, return the
lighting control stalk to the central position.
Automatic illumination of headlamps
When the ring is at the “AUTO" position and
a low level of ambient light is detected by the
rain/sunshine sensor, the number plate lamps,
sidelamps and dipped beam headlamps are
switched on automatically, without any action on
the part of the driver. They may also come on if
rain is detected, at the same time as automatic
operation of the windscreen wipers.
As soon as the brightness returns to a sufficient
level or after the windscreen wipers are switched
off, the lamps are switched off automatically.
Malfunction
In the event of a malfunction of the
sunshine sensor, the lighting comes on
and this warning lamp is displayed in the
instrument panel, accompanied by an audible
signal and/or a message.
Contact a CITROËN dealer or a qualified
workshop.
Do not cover the sunshine sensor, linked
with the rain sensor and located at the
top centre of the windscreen behind the
interior rear view mirror; the associated
functions would no longer be controlled.
In fog or snow, the sunshine sensor may
detect sufficient light. In this case, the
lighting will not come on automatically.
Guide-me-home and
welcome lighting
Automatic
With the ring in the "AUTO" position and when
the light is poor, the dipped beam headlamps
come on automatically when the ignition is
switched off.
The activation, deactivation and duration of the guide-me-home lighting are set in
the Driving/Vehicle touch screen menu.
Manual
Switching on / off ►
With the ignition off, "flash" the headlamps
using the lighting control stalk to switch the
function on / off.
Manual guide-me-home lighting goes off
automatically at the end of a given period of
time.
Automatic exterior welcome lighting
With the "Automatic illumination of lamps"
function activated and when the light is poor, the
sidelamps, dipped beam headlamps and door
mirror spotlamps come on automatically when
the vehicle is unlocked.
The activation, deactivation and duration
of the exterior welcome lighting are set in
the Driving/Vehicle
touch screen menu.
Welcome lighting
Availability of this function depends on version.► Make a short press on this remote
control button.
The sidelamps, dipped beam headlamps,
number plate lamps and door mirror spotlamps
come on for 30 seconds.
Pressing again before the end of the timed
period switches off the lighting immediately
.
Door mirror spotlamps
These spotlamps facilitate access to the vehicle
by lighting the ground near the front doors.
Page 72 of 276

70
Lighting and visibility
– if the windscreen is dirty, misted or
obscured (by a sticker, etc.) in front of the
camera,
– if the vehicle is facing highly reflective
signs.
When the system detects thick fog, it
temporarily deactivates the function.
The system is not able to detect:
– road users that do not have their own
lighting, such as pedestrians,
– vehicles whose lighting is obscured (for
example: vehicles running behind a safety
barrier on a motorway),
– vehicles at the top or bottom of a steep
slope, on winding roads, on crossroads.
Headlamp adjustment
Manual headlamp
adjustment
When the front courtesy lamp switch is in
this position, the spotlamps come on
automatically:
–
when the vehicle is unlocked.
–
when a door is opened.
–
when a request to locate the vehicle is
received from the remote control.
Whatever the position of the front courtesy lamp
switch, they also come on with the welcome
lighting and guide-me-home lighting functions.
They go off automatically after 30 seconds.
Automatic headlamp dipping
This system automatically changes between
dipped and main beam headlamps according to
the brightness and driving conditions, using a
camera located at the top of the windscreen.
This system is a driving aid.
The driver remains responsible for
the vehicle's lighting, its correct use for the
prevailing conditions of light, visibility and
traffic, and for observation of driving and
vehicle regulations.
The system will be operational as soon as you exceed 16 mph (25 km/h).
If the speed drops below 9 mph (15
km/h), the
system no longer operates.
Activation / Deactivation
► Turn the lighting control stalk ring to the
"AUTO" position.
► In the Vehicle / Driving menu, select
the "Driving functions " tab, then
"Automatic headlamp dip ".
Until deactivated, the lighting system changes to
"automatic illumination of headlamps" mode:
The status of the system remains in memory
when the ignition is switched off.
Operation
If the ambient light level is sufficient and/or the
traffic conditions do not allow the main beam
headlamps to be lit:
– The dipped beam head lamps
remain lit. These indicator lamps
come on on the instrument panel.
If the ambient light level is very low and traffic
conditions permit:
– The main beam headla mps
come on automatically. These
indicator lamps come on on the instrument
panel.
The function is deactivated if the foglamps are
switched on or the system detects thick fog.
When the foglamps are switched off or the
vehicle leaves the area of thick fog, the function
is automatically reactivated.
This indicator lamp goes out when the function is deactivated.
Pause
If the situation requires a change of headlamp
beam, the driver can take over at any time.
►
Flashing the headlamps pauses the
function and the system changes to "automatic
illumination of headlamps" mode: •
if the "AUT
O" and "Dipped beam" indicator
lamps are on, the system changes to main
beam,
•
if the "AUT
O" and "Main beam" indicator
lamps are on, the system changes to dipped
beam.
To reactivate the function, flash the headlamps
again.
The system may suffer interference or not work correctly:
–
under poor visibility conditions (snow
,
heavy rain, etc.),