CITROEN DS3 2018 Handbook (in English)
Manufacturer: CITROEN, Model Year: 2018, Model line: DS3, Model: CITROEN DS3 2018Pages: 248, PDF Size: 8.79 MB
Page 81 of 248
79
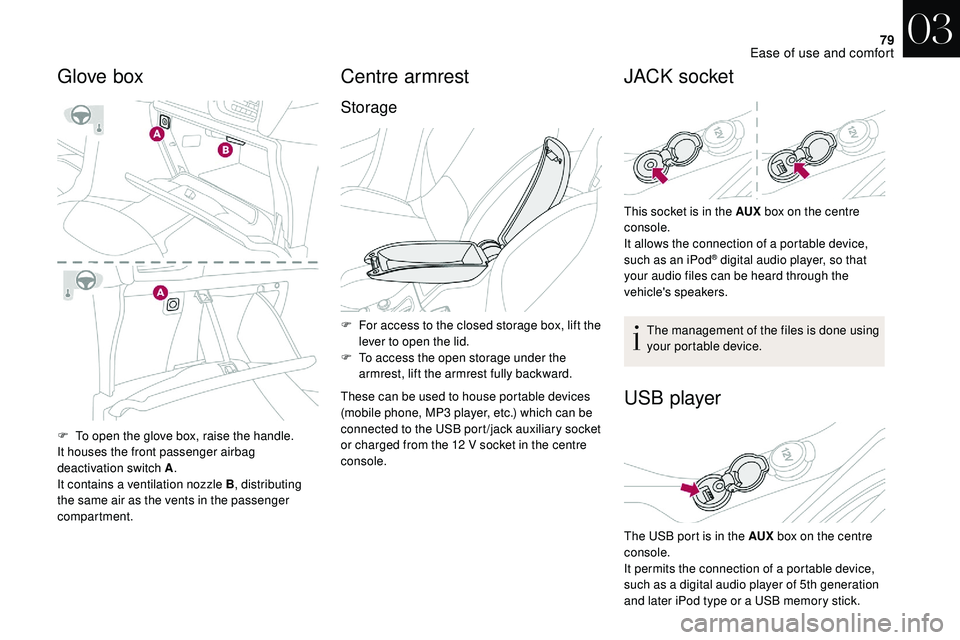
F To open the glove box, raise the handle.
It houses the front passenger airbag
deactivation switch A.
It contains a
ventilation nozzle B , distributing
the same air as the vents in the passenger
compartment.
Centre armrest
Storage
F For access to the closed storage box, lift the lever to open the lid.
F
T
o access the open storage under the
armrest, lift the armrest fully backward.
These can be used to house portable devices
(mobile phone, MP3
player, etc.) which can be
connected to the USB port /jack auxiliary socket
or charged from the 12
V socket in the centre
console.
JACK socket
Glove box
This socket is in the AUX box on the centre
console.
It allows the connection of a
portable device,
such as an
iPod
® digital audio player, so that
your audio files can be heard through the
vehicle's speakers.
The management of the files is done using
your portable device.
USB player
The USB port is in the AUX box on the centre
console.
It permits the connection of a
portable device,
such as a
digital audio player of 5th generation
and later iPod type or a
USB memory stick.
03
Ease of use and comfort
Page 82 of 248
80
It reads the audio file formats (mp3, ogg, wma,
wav, etc.) sent to your audio system, to be
listened to via the vehicle's loudspeakers.
You can manage these files using the steering
mounted controls or the audio system control
panel and display them in the instrument panel
screen.While it is being used, the portable device
can recharge automatically.
12 V accessory socket
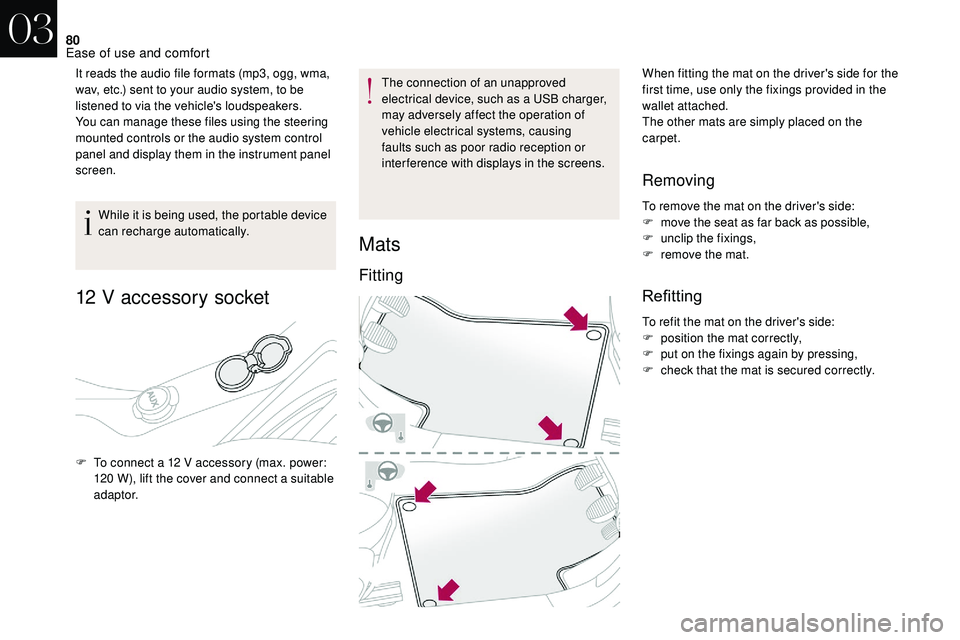
F To connect a 12 V accessory (max. power:
120 W), lift the cover and connect a suitable
adaptor. The connection of an unapproved
electrical device, such as a
USB charger,
may adversely affect the operation of
vehicle electrical systems, causing
faults such as poor radio reception or
interference with displays in the screens.
Mats
Fitting
When fitting the mat on the driver's side for the
first time, use only the fixings provided in the
wallet attached.
The other mats are simply placed on the
carpet.
Removing
To remove the mat on the driver's side:
F m ove the seat as far back as possible,
F
un
clip the fixings,
F
r
emove the mat.
Refitting
To refit the mat on the driver's side:
F p osition the mat correctly,
F
p
ut on the fixings again by pressing,
F
c
heck that the mat is secured correctly.
03
Ease of use and comfort
Page 83 of 248
81
To avoid any risk of jamming of the pedals:
- o nly use mats which are suited to the
fixings already present in the vehicle;
these fixings must be used,
-
n
ever place one mat on top of another.
The use of unapproved mats may inter fere
with access to the pedals and hinder the
operation of the cruise control/speed
limiter.
The approved mats have two fixings
located below the seat.
Boot fittings
Rear shelf
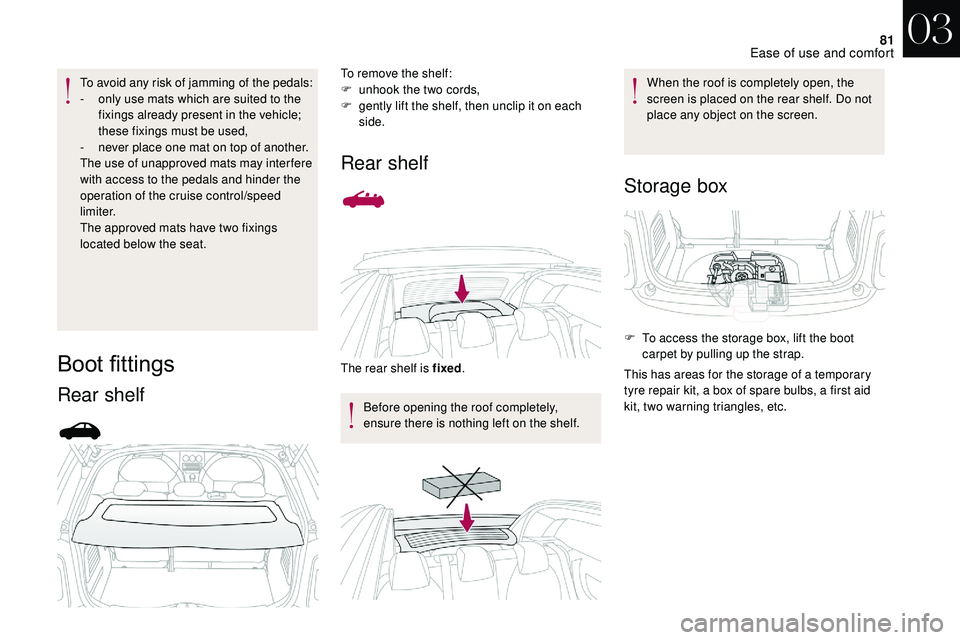
To remove the shelf:
F u nhook the two cords,
F
g
ently lift the shelf, then unclip it on each
side.
Rear shelf
The rear shelf is fixed .
Before opening the roof completely,
ensure there is nothing left on the shelf. When the roof is completely open, the
screen is placed on the rear shelf. Do not
place any object on the screen.
Storage box
F To access the storage box, lift the boot
carpet by pulling up the strap.
This has areas for the storage of a
temporary
tyre repair kit, a box of spare bulbs, a first aid
kit, two warning triangles, etc.
03
Ease of use and comfort
Page 84 of 248
82
Stowing ringsLuggage retaining strap
Boot lighting
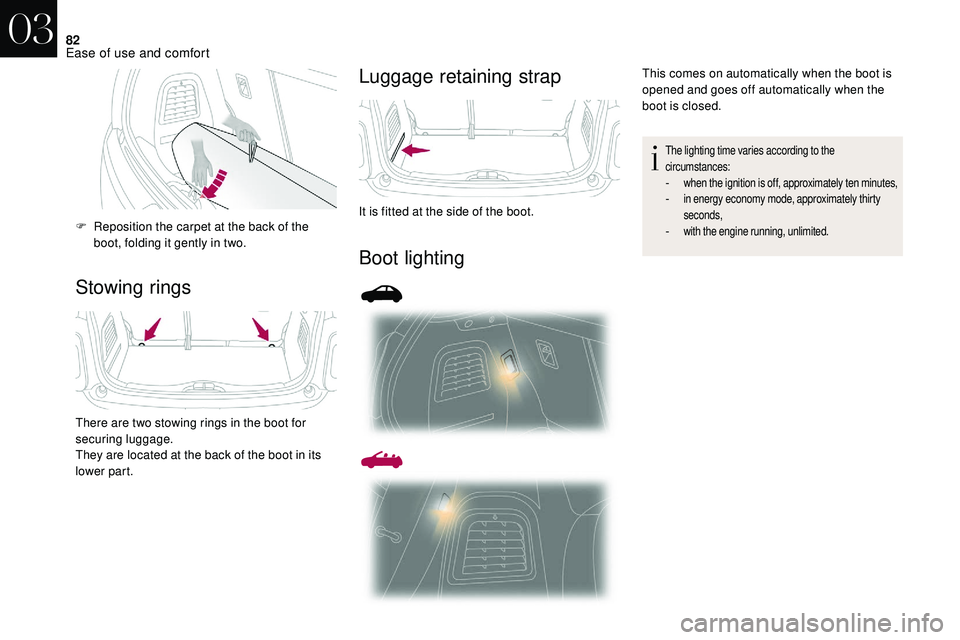
F Reposition the carpet at the back of the
boot, folding it gently in two.
There are two stowing rings in the boot for
securing luggage.
They are located at the back of the boot in its
lower part. It is fitted at the side of the boot.
This comes on automatically when the boot is
opened and goes off automatically when the
boot is closed.
The lighting time varies according to the
circumstances:
- when the ignition is off, approximately ten minutes,- in energy economy mode, approximately thirty
seconds,
- with the engine running, unlimited.
03
Ease of use and comfort
Page 85 of 248

LIGHTING AND VISIBILITY
04
Page 86 of 248
84
Lighting control stalk
Main lighting
The various front and rear lamps of the vehicle
are designed to adapt the driver's visibility
progressively according to the climatic
conditions:
-
s
idelamps, to be seen,
-
d
ipped beam headlamps to see without
dazzling other drivers,
-
m
ain beam headlamps to see clearly when
the road is clear.
Additional lighting
Other lamps are installed to fulfil the
requirements of particular conditions of
visibility:
-
a r
ear foglamp to be seen from afar,
-
f
ront foglamps for greater visibility,
-
L
ED daytime running lamps, to be seen
during the day.
Programming
You can adjust the settings of certain functions:
- gu ide-me-home lighting,
-
a
utomatic illumination of headlamps, In some climatic conditions (low
temperature, humidity), the presence
of mist on the internal sur face of the
headlamp and rear lamp glass is normal;
this disappears a
few minutes after the
lighting is switched on.
Travelling abroad
LED/Xenon headlamps
If planning to use your vehicle in a
country
that drives on the other side of the road, the
headlamp dipped beams must be adjusted to
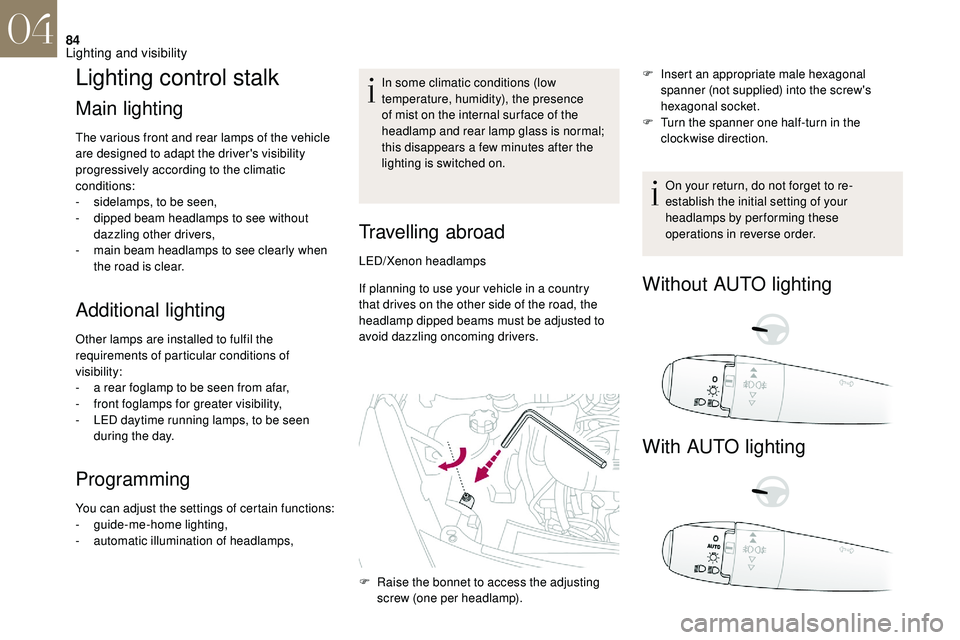
avoid dazzling oncoming drivers. F
I
nsert an appropriate male hexagonal
spanner (not supplied) into the screw's
hexagonal socket.
F
T
urn the spanner one half-turn in the
clockwise direction.
On your return, do not forget to re-
establish the initial setting of your
headlamps by performing these
operations in reverse order.
Without AUTO lighting
With AUTO lighting
F Raise the bonnet to access the adjusting screw (one per headlamp).
04
Lighting and visibility
Page 87 of 248
85
Selection of main lighting
mode
Turn the ring to align the desired symbol with
the marking.
Lighting off (ignition off) /
Daytime running lamps (engine running).
Automatic illumination of headlamps.
Sidelamps only.
Dipped or main beam headlamps.
Headlamp dipping
Pull the stalk towards you to switch between
dipped and main beam headlamps.
When the lighting is off or only the sidelamps
are on, the driver can directly switch on the
main beam headlamps (headlamp flash) for as
long as the lever is kept pulled.
Displays
Illumination of the corresponding indicator
lamp in the instrument panel confirms that the
lighting selected is on.
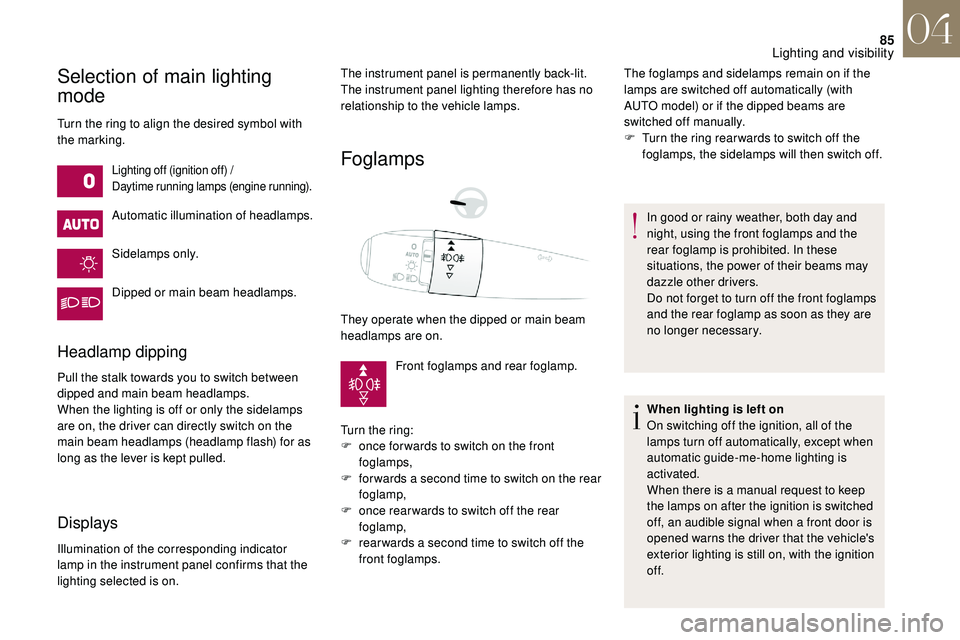
Foglamps
The instrument panel is permanently back-lit.
The instrument panel lighting therefore has no
relationship to the vehicle lamps.
They operate when the dipped or main beam
headlamps are on.Front foglamps and rear foglamp.
Turn the ring:
F
o
nce for wards to switch on the front
foglamps,
F
f
or wards a second time to switch on the rear
foglamp,
F
o
nce rear wards to switch off the rear
foglamp,
F
r
ear wards a second time to switch off the
front foglamps. The foglamps and sidelamps remain on if the
lamps are switched off automatically (with
AUTO model) or if the dipped beams are
switched off manually.
F
T
urn the ring rear wards to switch off the
foglamps, the sidelamps will then switch off.
In good or rainy weather, both day and
night, using the front foglamps and the
rear foglamp is prohibited. In these
situations, the power of their beams may
dazzle other drivers.
Do not forget to turn off the front foglamps
and the rear foglamp as soon as they are
no longer necessary.
When lighting is left on
On switching off the ignition, all of the
lamps turn off automatically, except when
automatic guide-me-home lighting is
activated.
When there is a
manual request to keep
the lamps on after the ignition is switched
off, an audible signal when a
front door is
opened warns the driver that the vehicle's
exterior lighting is still on, with the ignition
of f.
04
Lighting and visibility
Page 88 of 248
86
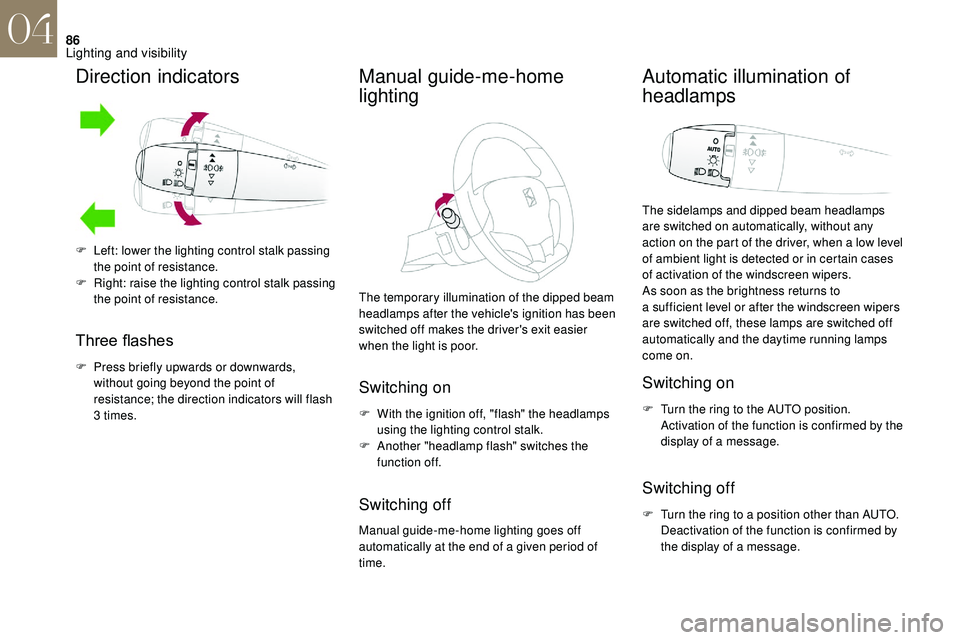
Direction indicators
Three flashes
F Press briefly upwards or downwards, without going beyond the point of
resistance; the direction indicators will flash
3
times.
Manual guide-me-home
lighting
The temporary illumination of the dipped beam
headlamps after the vehicle's ignition has been
switched off makes the driver's exit easier
when the light is poor.
Switching on
F With the ignition off, "flash" the headlamps using the lighting control stalk.
F
A
nother "headlamp flash" switches the
function off.
Switching off
Manual guide-me-home lighting goes off
automatically at the end of a given period of
time.
Automatic illumination of
headlamps
The sidelamps and dipped beam headlamps
are switched on automatically, without any
action on the part of the driver, when a
low level
of ambient light is detected or in certain cases
of activation of the windscreen wipers.
As soon as the brightness returns to
a
sufficient level or after the windscreen wipers
are switched off, these lamps are switched off
automatically and the daytime running lamps
come on.
Switching on
F Turn the ring to the AUTO position. Activation of the function is confirmed by the
display of a
message.
Switching off
F Turn the ring to a position other than AUTO.
Deactivation of the function is confirmed by
the display of a
message.
F
L
eft: lower the lighting control stalk passing
the point of resistance.
F
R
ight: raise the lighting control stalk passing
the point of resistance.
04
Lighting and visibility
Page 89 of 248
87
Operating fault
In the event of a fault with the
s unshine sensor, the lighting comes
on, this warning lamp is displayed
in the instrument panel and/or
a
message appears in the screen,
accompanied by an audible signal.
Contact the dealer network or a
qualified
workshop.
Do not cover the sunshine sensor, linked
with the rain sensor and located in the
centre of the windscreen behind the
interior mirror, as this would disable the
associated functions.
In fog or snow, the sunshine sensor may
detect sufficient light. In this case, the
lighting will not come on automatically.
Automatic guide-me-home
lighting
When the automatic illumination of headlamps
is activated, if the ambient light level is low,
the dipped beam headlamps remain lit when
switching off the ignition.
Programming
Activation, deactivation and the
duration of the guide-me-home
lighting are set in the vehicle
configuration or parameters menu
(except monochrome screen A
where the duration is fixed: 60
s).
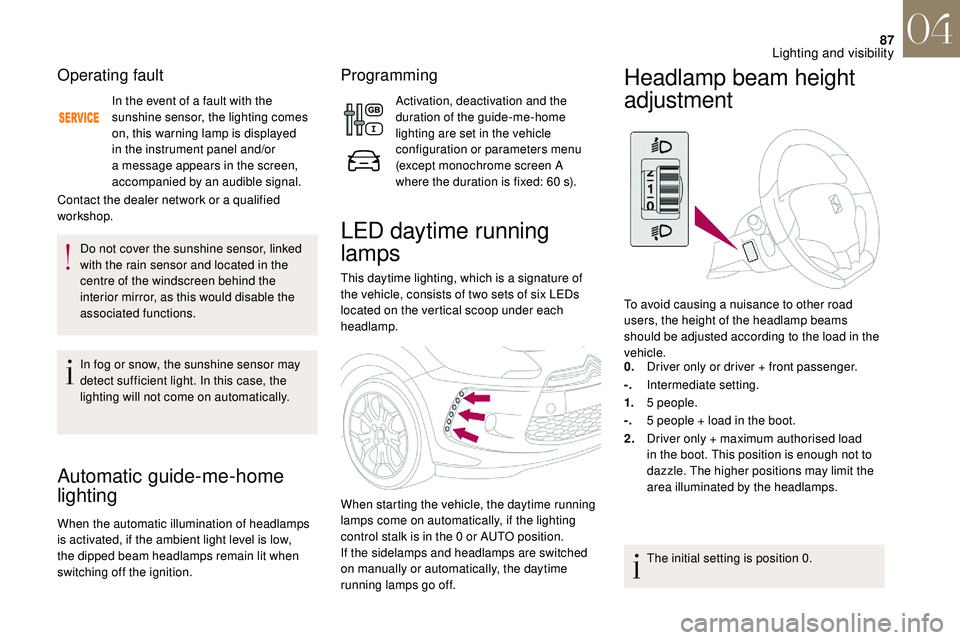
LED daytime running
lamps
This daytime lighting, which is a signature of
t he vehicle, consists of two sets of six LEDs
located on the vertical scoop under each
headlamp.
When starting the vehicle, the daytime running
lamps come on automatically, if the lighting
control stalk is in the 0
or AUTO position.
If the sidelamps and headlamps are switched
on manually or automatically, the daytime
running lamps go off.
Headlamp beam height
adjustment
To avoid causing a nuisance to other road
u sers, the height of the headlamp beams
should be adjusted according to the load in the
vehicle.
0. Driver only or driver + front passenger.
-. Intermediate setting.
1. 5
people.
-. 5
people + load in the boot.
2. Driver only + maximum authorised load
in the boot. This position is enough not to
dazzle. The higher positions may limit the
area illuminated by the headlamps.
The initial setting is position 0.
04
Lighting and visibility
Page 90 of 248
88
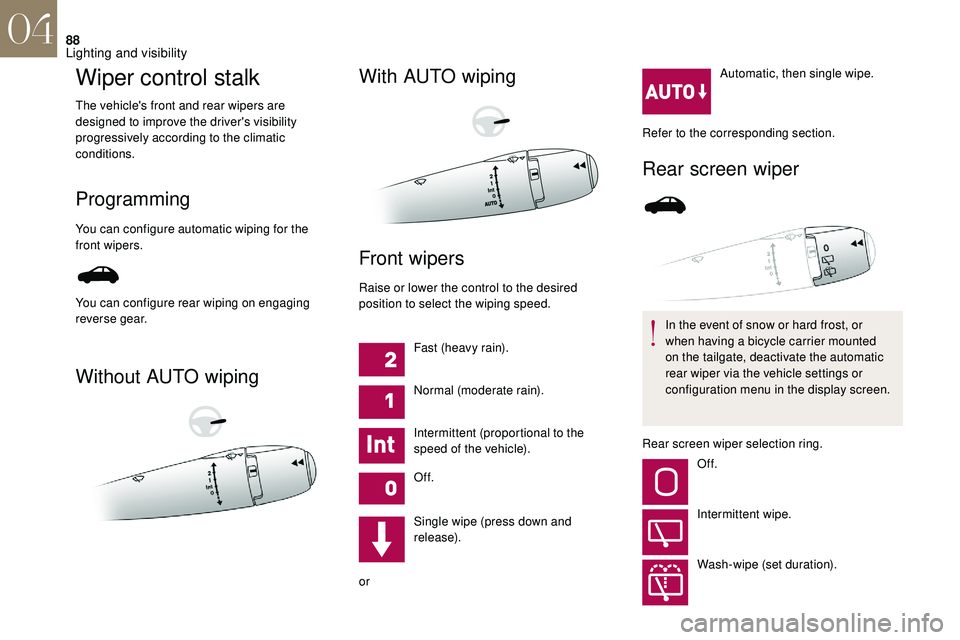
Wiper control stalk
The vehicle's front and rear wipers are
designed to improve the driver's visibility
progressively according to the climatic
conditions.
Programming
You can configure automatic wiping for the
front wipers.
Without AUTO wipingWith AUTO wiping
Front wipers
Raise or lower the control to the desired
position to select the wiping speed.
Fast (heavy rain).
Normal (moderate rain).
Intermittent (proportional to the
speed of the vehicle).
Of f.
Single wipe (press down and
release).
or Automatic, then single wipe.
Refer to the corresponding section.
Rear screen wiper
In the event of snow or hard frost, or
when having a bicycle carrier mounted
on the tailgate, deactivate the automatic
rear wiper via the vehicle settings or
configuration menu in the display screen.
Rear screen wiper selection ring. Of f.
Intermittent wipe.
Wash-wipe (set duration).
You can configure rear wiping on engaging
reverse gear.
04
Lighting and visibility