USB CITROEN DS3 2018 Handbook (in English)
[x] Cancel search | Manufacturer: CITROEN, Model Year: 2018, Model line: DS3, Model: CITROEN DS3 2018Pages: 248, PDF Size: 8.79 MB
Page 35 of 248
33
As a safety measure, configuration of the
m ultifunction screens by the driver must
only be done when stationary.
Monochrome screen C
Displays on the screen
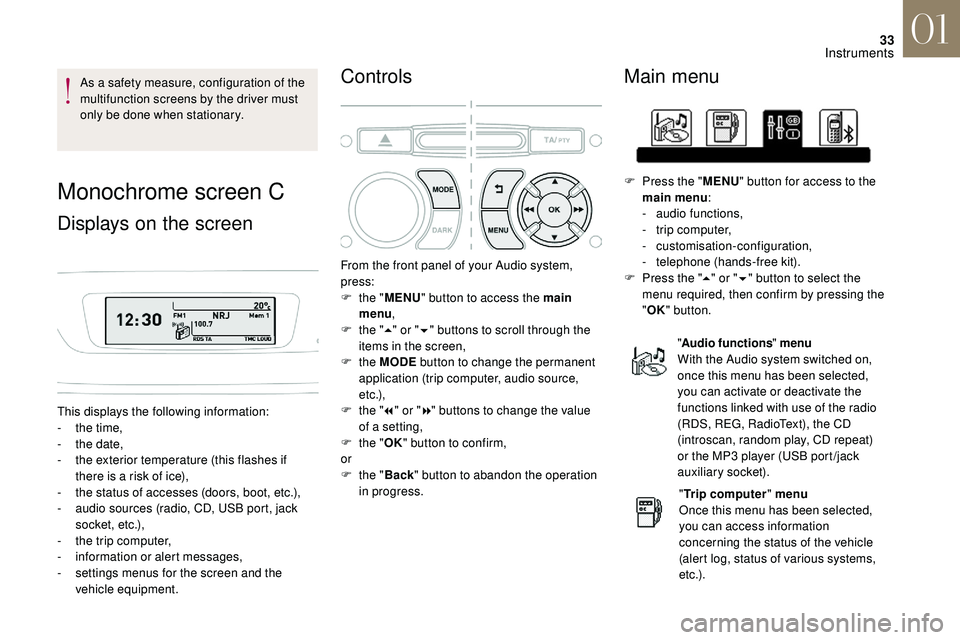
This displays the following information:
- t he time,
-
t
he date,
-
t
he exterior temperature (this flashes if
there is a
risk of ice),
-
t
he status of accesses (doors, boot, etc.),
-
a
udio sources (radio, CD, USB port, jack
socket, etc.),
-
t
he trip computer,
-
i
nformation or alert messages,
-
s
ettings menus for the screen and the
vehicle equipment.
Controls Main menu
"Audio functions " menu
With the Audio system switched on,
once this menu has been selected,
you can activate or deactivate the
functions linked with use of the radio
(RDS, REG, RadioText), the CD
(introscan, random play, CD repeat)
or the MP3
player (USB port /jack
auxiliary socket).
" Trip computer " menu
Once this menu has been selected,
you can access information
concerning the status of the vehicle
(alert log, status of various systems,
e t c .) .
From the front panel of your Audio system,
press:
F
t
he "
MENU " button to access the main
menu ,
F
t
he "
5" or " 6" buttons to scroll through the
items in the screen,
F
the MODE button to change the permanent
application (trip computer, audio source,
e t c .),
F
t
he " 7" or " 8" buttons to change the value
of a
setting,
F
t
he " OK" button to confirm,
or
F
t
he " Back " button to abandon the operation
in progress. F
P
ress the "
MENU" button for access to the
main menu :
-
a
udio functions,
-
t
rip computer,
-
customisation-configuration,
-
t
elephone (hands-free kit).
F
P
ress the "
5" or " 6" button to select the
menu required, then confirm by pressing the
" OK " button.
01
Instruments
Page 80 of 248
78
Switching off
The mood lighting switches off automatically
when the sidelamps are switched off.
It can be switched off manually by using the
lighting dimmer button on the instrument panel.
F
W
ith the lamps on, press the left-hand
button on the instrument panel several
times to progressively reduce the brightness
of the instruments and controls.
F
P
ress again to reduce the brightness to
a
minimum and switch off the mood lighting.
Programming
The function is activated or deactivated via the
vehicle configuration menu.
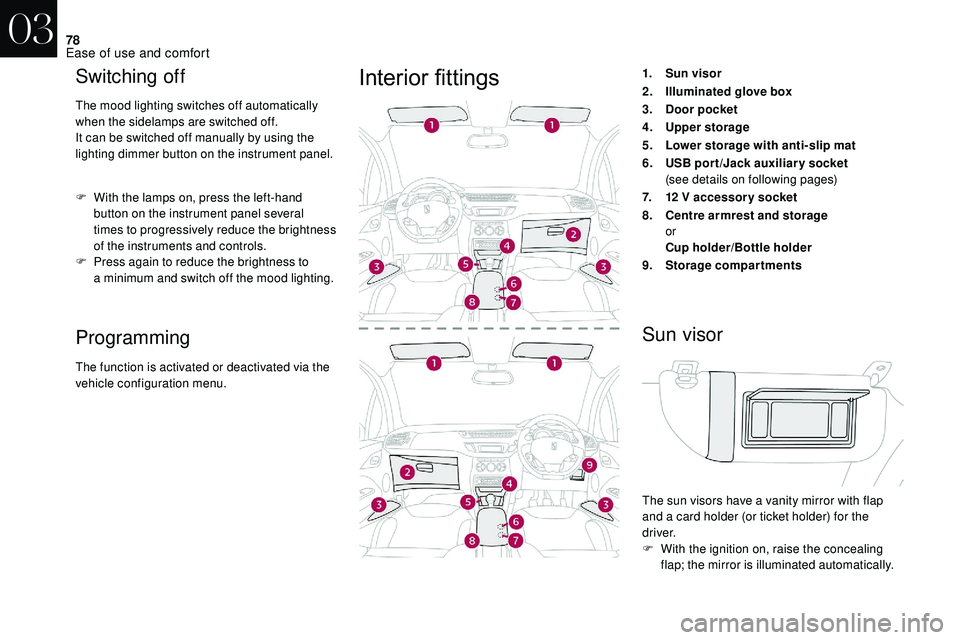
Interior fittings1.Sun visor
2. Illuminated glove box
3. Door pocket
4. Upper storage
5. Lower storage with anti-slip mat
6. USB por t /Jack auxiliar y socket
(see details on following pages)
7. 12
V accessory socket
8. Centre armrest and storage
or
Cup holder/Bottle holder
9. Storage compartments
Sun visor
The sun visors have a vanity mirror with flap
a nd a card holder (or ticket holder) for the
driver.
F
W
ith the ignition on, raise the concealing
flap; the mirror is illuminated automatically.
03
Ease of use and comfort
Page 81 of 248
79
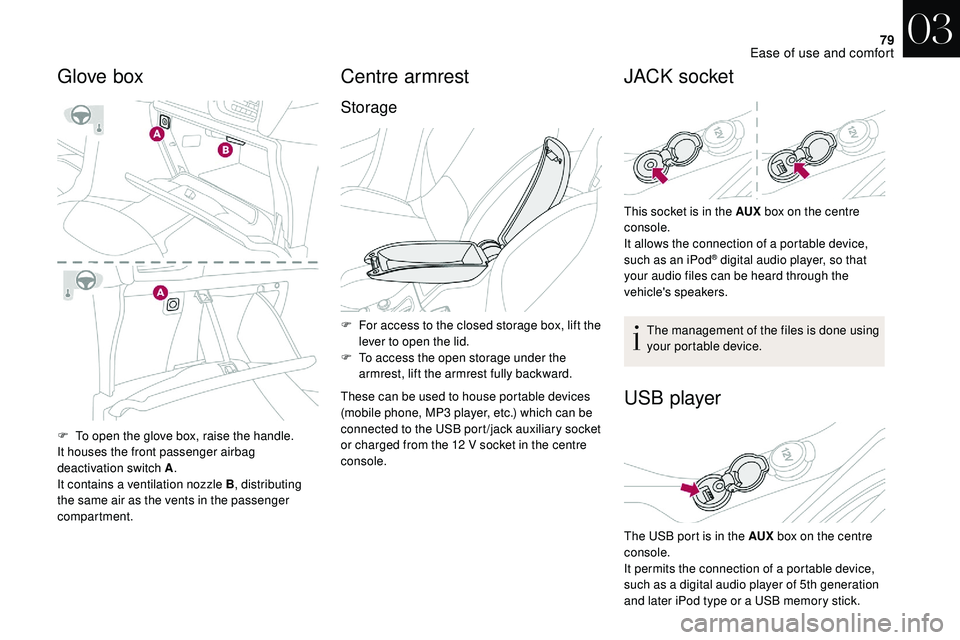
F To open the glove box, raise the handle.
It houses the front passenger airbag
deactivation switch A.
It contains a
ventilation nozzle B , distributing
the same air as the vents in the passenger
compartment.
Centre armrest
Storage
F For access to the closed storage box, lift the lever to open the lid.
F
T
o access the open storage under the
armrest, lift the armrest fully backward.
These can be used to house portable devices
(mobile phone, MP3
player, etc.) which can be
connected to the USB port /jack auxiliary socket
or charged from the 12
V socket in the centre
console.
JACK socket
Glove box
This socket is in the AUX box on the centre
console.
It allows the connection of a
portable device,
such as an
iPod
® digital audio player, so that
your audio files can be heard through the
vehicle's speakers.
The management of the files is done using
your portable device.
USB player
The USB port is in the AUX box on the centre
console.
It permits the connection of a
portable device,
such as a
digital audio player of 5th generation
and later iPod type or a
USB memory stick.
03
Ease of use and comfort
Page 82 of 248
80
It reads the audio file formats (mp3, ogg, wma,
wav, etc.) sent to your audio system, to be
listened to via the vehicle's loudspeakers.
You can manage these files using the steering
mounted controls or the audio system control
panel and display them in the instrument panel
screen.While it is being used, the portable device
can recharge automatically.
12 V accessory socket
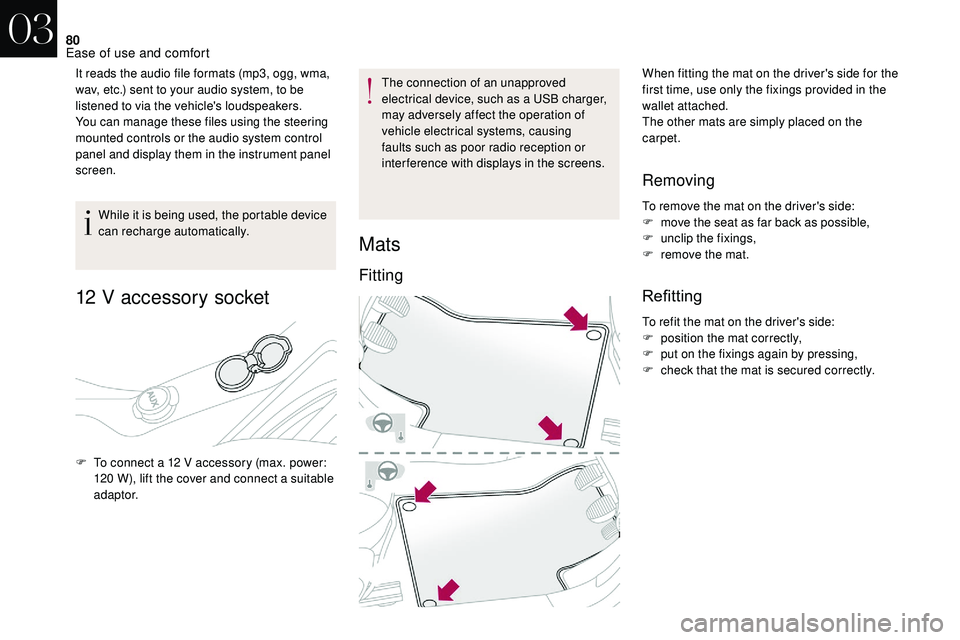
F To connect a 12 V accessory (max. power:
120 W), lift the cover and connect a suitable
adaptor. The connection of an unapproved
electrical device, such as a
USB charger,
may adversely affect the operation of
vehicle electrical systems, causing
faults such as poor radio reception or
interference with displays in the screens.
Mats
Fitting
When fitting the mat on the driver's side for the
first time, use only the fixings provided in the
wallet attached.
The other mats are simply placed on the
carpet.
Removing
To remove the mat on the driver's side:
F m ove the seat as far back as possible,
F
un
clip the fixings,
F
r
emove the mat.
Refitting
To refit the mat on the driver's side:
F p osition the mat correctly,
F
p
ut on the fixings again by pressing,
F
c
heck that the mat is secured correctly.
03
Ease of use and comfort
Page 186 of 248
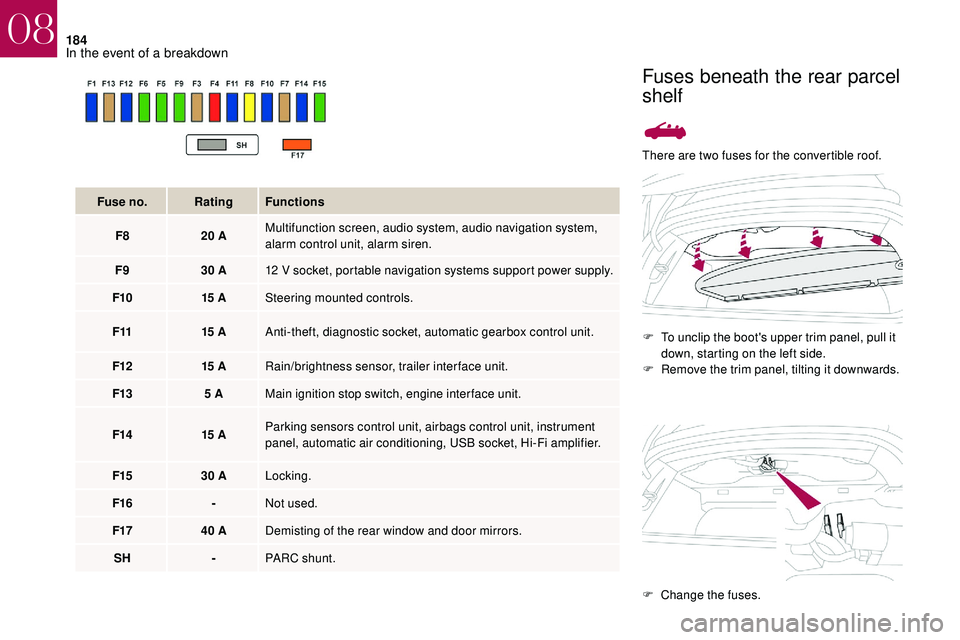
184
There are two fuses for the convertible roof.F
T
o unclip the boot's upper trim panel, pull it
down, starting on the left side.
F
R
emove the trim panel, tilting it downwards.
Fuse no.
Rating Functions
F8 20
A Multifunction screen, audio system, audio navigation system,
alarm control unit, alarm siren.
F9 30
A 12
V socket, portable navigation systems support power supply.
F10 15
A Steering mounted controls.
F11 15
A Anti-theft, diagnostic socket, automatic gearbox control unit.
F12 15
A Rain/brightness sensor, trailer interface unit.
F13 5
A Main ignition stop switch, engine interface unit.
F14 15
A Parking sensors control unit, airbags control unit, instrument
panel, automatic air conditioning, USB socket, Hi-Fi amplifier.
F15 30
A Locking.
F16 -Not used.
F17 40
A Demisting of the rear window and door mirrors.
SH -PARC shunt.
Fuses beneath the rear parcel
shelf
F Change the fuses.
08
In the event of a breakdown
Page 208 of 248
4
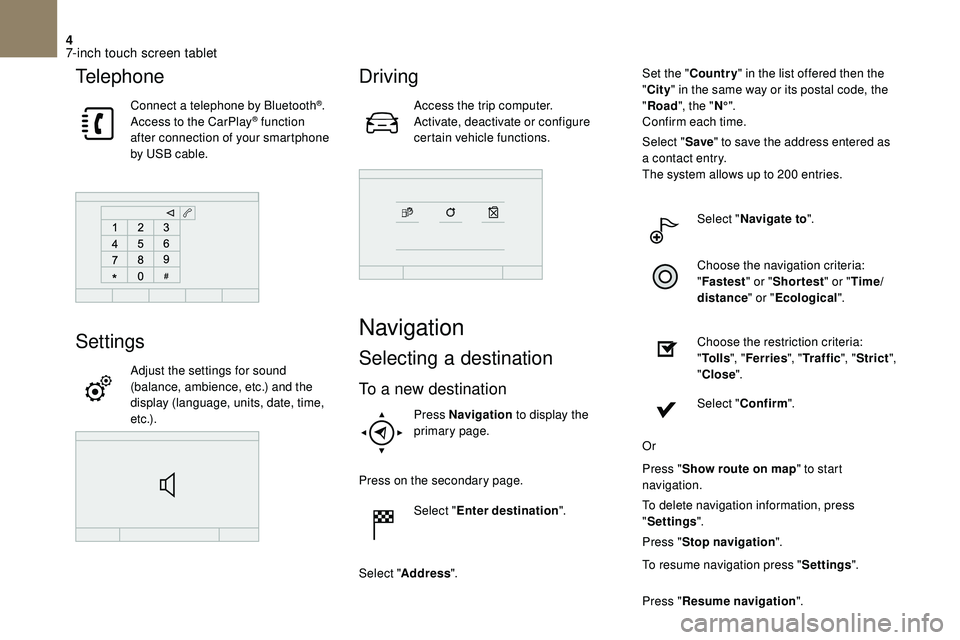
Telephone
Connect a telephone by Bluetooth®.
Access to the CarPlay® function
after connection of your smartphone
by USB cable.
Settings
Adjust the settings for sound
(balance, ambience, etc.) and the
display (language, units, date, time,
e t c .) .
Driving
Access the trip computer.
Activate, deactivate or configure
certain vehicle functions.
Navigation
Selecting a destination
To a new destination
Press Navigation to display the
primary page.
Press on the secondary page. Select "Enter destination ".
Select " Address ". Set the "
Country " in the list offered then the
" City " in the same way or its postal code, the
" Road ", the " N°".
Confirm each time.
Select " Save" to save the address entered as
a contact entry.
The system allows up to 200 entries.
Select " Navigate to ".
Choose the navigation criteria:
" Fastest " or "Shortest " or "Time/
distance " or "Ecological".
Choose the restriction criteria:
" To l l s ", "Ferries ", "Traffic ", "Strict ",
" Close ".
Select " Confirm ".
Or
Press " Show route on map " to start
navigation.
To delete navigation information, press
" Settings ".
Press " Stop navigation ".
To resume navigation press " Settings".
Press " Resume navigation ".
7-inch touch screen tablet
Page 212 of 248
8
Radio reception may be affected by the
use of electrical equipment not approved
by DS AUTOMOBILES, such as a USB
charger connected to the 12
V socket.
The external environment (hills, buildings,
tunnels, basement car parks, etc.) may
block reception, including in RDS mode.
This is a
normal effect of the way in
which radio waves are transmitted and
does not indicate any failure of the audio
equipment.
Changing a frequency
Press Radio Media to display the
primary page.
By automatic frequency search
Press 3
or 4 to move the cursor for an
automatic search down or up for a
radio
frequency.
THEN
Select change source.
Select "FM Radio ".
Or "
AM Radio ".
OR Press Radio Media to display the
primary page.
Press on the secondary page.
Press " Frequency ".
THEN Enter the frequency in full (e.g.
92.10 MHz) using the keypad then
" Confirm ".
Changing radio station
Pressing the name of the current radio station
brings up a list.
To change radio station press the name of the
desired station.
Presetting a station
Select a radio station or frequency (refer to the
c orresponding section).
Press " Preset".
Select a
number in the list to preset the
previously chosen/adjusted radio station.
A long press on a
number saves (presets) the
station. Or
A press on the button in the upper-right part of
the screen presets all of the stations one after
the other.
Recalling preset stations
Press Radio Media
to display the
primary page.
Select " Preset".
Activating/Deactivating RDS
Press Radio Media to display the
primary page.
Press on the secondary page. Select "Settings ".
Select " Radio".
Activate/Deactivate " RDS options".
RDS, if activated, allows you to continue
listening to the same station by automatically
retuning to alternative frequencies. However,
in certain conditions, coverage of an RDS
station may not be assured throughout the
entire country as radio stations do not cover
100% of the territory. This explains the loss of
reception of the station during a
journey.
7-inch touch screen tablet
Page 213 of 248
9
DAB (Digital Audio
Broadcasting) radio
Digital radio
Digital radio provides higher quality
reception and also the graphical display
of current information on the radio station
being listened to. Select "List" in the
primary page.
The different multiplexes offer a choice
of radio stations arranged in alphabetical
o r d e r.
Press Radio Media to display the
primary page.
Select change of source. Select "DAB Radio ".
Select " List" in the primary page.
or
Select " Radio list " on the
secondary page.
Select a
radio station from the list offered.
DAB/FM station tracking
"DAB" does not cover 100% of the
te r r i to r y.
When the digital radio signal is poor,
the "DAB/FM station tracking" allows
you to continue listening to the same
station, by automatically switching to the
corresponding FM analogue station (if
there is one). Press Radio Media to display the
primary page.
Press on the secondary page. Select "Settings ".
Select " Radio".
Select " Digital/FM auto tracking " then
" Confirm ".
If "DAB/FM station tracking" is enabled,
there is a
lag of a few seconds when the
system switches to analogue radio "FM",
sometimes with a
change in volume.
Once the digital signal quality is restored,
the system automatically changes back
to " DA B ". If the "DAB" station being listened to is
not available on "FM" ("
DAB/FM" option
greyed out), or "DAB/FM station tracking"
is not activated, the sound will cut out
while the digital signal is too weak.
Media
USB port
Insert the USB memory stick into the USB port
or connect the USB device to the USB port
using a
suitable cable (not supplied).
To protect the system, do not use a
USB
hub.
The system builds playlists (in temporary
memory), an operation which can take from
a
few seconds to several minutes at the first
connection.
7-inch touch screen tablet
Page 214 of 248
10
Reduce the number of non-music files and the
number of folders to reduce the waiting time.
The playlists are updated every time the
ignition is switched off or a USB memory stick
is connected. The lists are memorised: if they
are not modified, the subsequent loading time
will be shorter.
Auxiliary socket (AUX)
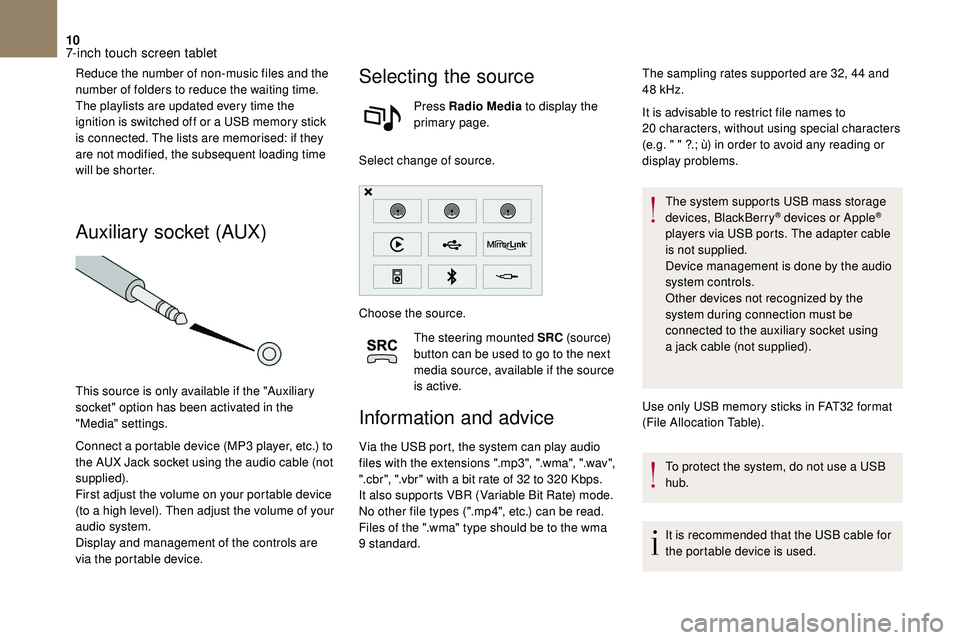
This source is only available if the "Auxiliary
socket" option has been activated in the
"Media" settings.
Connect a
portable device (MP3 player, etc.) to
the AUX Jack socket using the audio cable (not
supplied).
First adjust the volume on your portable device
(to a
high level). Then adjust the volume of your
audio system.
Display and management of the controls are
via the portable device.
Selecting the source
Press Radio Media to display the
primary page.
Select change of source.
Choose the source. The steering mounted SRC (s o u r c e)
button can be used to go to the next
media source, available if the source
is active.
Information and advice
Via the USB port, the system can play audio
files with the extensions ".mp3", ".wma", ".wav",
".cbr", ".vbr" with a
bit rate of 32 to 320 Kbps.
It also supports VBR (Variable Bit Rate) mode.
No other file types (".mp4", etc.) can be read.
Files of the ".wma" type should be to the wma
9
standard. It is advisable to restrict file names to
20
characters, without using special characters
(e.g. " " ?.; ù) in order to avoid any reading or
display problems.
The system supports USB mass storage
devices, BlackBerry
® devices or Apple®
players via USB ports. The adapter cable
is not supplied.
Device management is done by the audio
system controls.
Other devices not recognized by the
system during connection must be
connected to the auxiliary socket using
a
jack cable (not supplied).
Use only USB memory sticks in FAT32
format
(File Allocation Table).
To protect the system, do not use a
USB
hub.
It is recommended that the USB cable for
the portable device is used.
The sampling rates supported are 32, 44
and
48
kHz.
7-inch touch screen tablet
Page 215 of 248
11
Bluetooth® audio streaming
Streaming allows you to listen to audio files on
your smartphone using the vehicle's speakers.
Connect the telephone: see the "Telephone"
section then "Bluetooth
®".
Choose the " Audio" or "All" profile.
If playback does not start automatically, it may
be necessary to start the audio playback from
the telephone.
Control is from the portable device or by using
the audio system buttons.
Once connected in streaming mode, the
telephone is considered to be a
media
source.
It is recommended that you activate
" Repeat " on the Bluetooth
® peripheral.
Connecting Apple® players
Play starts automatically.
Control is via the audio system.
The classifications available are those of
the portable device connected (artists/
albums/genres/playlists/audiobooks/
podcasts).
The default classification used is by
artists. To modify the classification used,
return to the first level of the menu then
select the desired classification (playlists
for example) and confirm to go down
through the menu to the desired track.
The version of software in the audio system
may not be compatible with the generation of
your Apple
® p l aye r.
Configuration
Audio settings
Press Settings to display the
primary page.
Select " Audio settings ".
Connect the Apple
® player to the USB port
using a
suitable cable (not supplied). Select "
Ambience ".
Or
" Balance ".
Or
" Sound effects ".
Or
" Ringtones ".
Or
" Voice ".
The sound distribution (or spatialisation
with the Arkamys
© system) is audio
processing that allows the quality of the
sound to be adapted according to the
number of passengers in the vehicle.
Available only with the 6 -speaker
configuration.
The audio settings ( Ambience, Bass,
Tr e b l e and Loudness ) are different and
independent for each sound source.
The settings for " Distribution" and
" Balance " are common to all sources.
7-inch touch screen tablet