ignition CITROEN DS3 CABRIO 2018 Handbook (in English)
[x] Cancel search | Manufacturer: CITROEN, Model Year: 2018, Model line: DS3 CABRIO, Model: CITROEN DS3 CABRIO 2018Pages: 248, PDF Size: 8.79 MB
Page 53 of 248
51
Unlocking the passenger door
F Pull the interior door opening control.
Convertible roof
Your vehicle is equipped with an electrically
operated convertible roof.Electrically operated opening
and closing
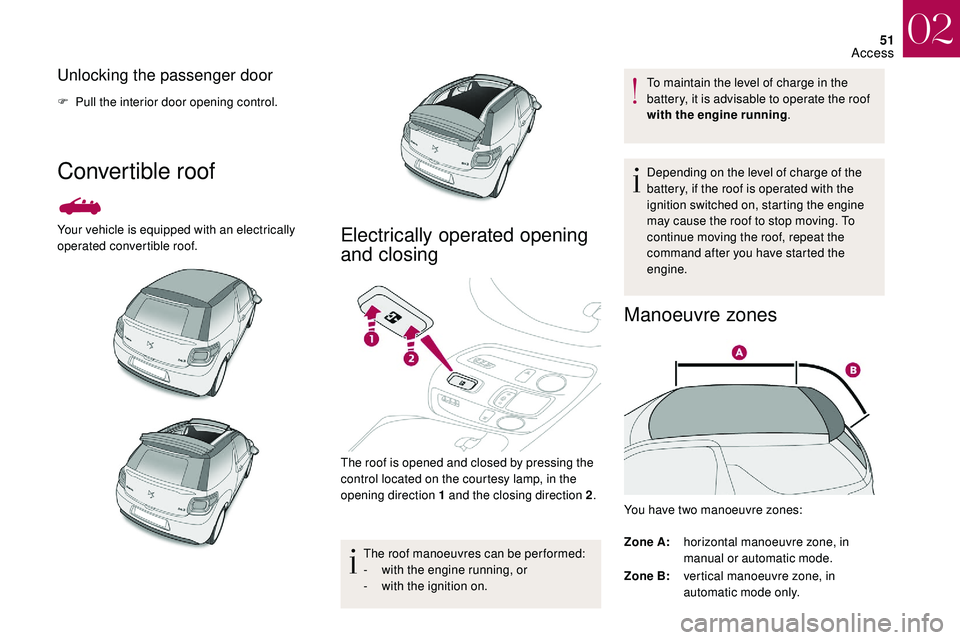
The roof is opened and closed by pressing the
control located on the courtesy lamp, in the
opening direction 1 and the closing direction 2 .
The roof manoeuvres can be per formed:
-
w
ith the engine running, or
-
w
ith the ignition on. To maintain the level of charge in the
battery, it is advisable to operate the roof
with the engine running
.
Depending on the level of charge of the
battery, if the roof is operated with the
ignition switched on, starting the engine
may cause the roof to stop moving. To
continue moving the roof, repeat the
command after you have started the
engine.
Manoeuvre zones
You have two manoeuvre zones:
Zone A: horizontal manoeuvre zone, in
manual or automatic mode.
Zone B: vertical manoeuvre zone, in
automatic mode only.
02
Access
Page 59 of 248
57
If the vehicle is to be parked outside for
a long period, it is advisable to protect the
roof using a
tarpaulin.
It is advisable to close the roof when you
park the vehicle.
Even if the roof is closed, it is safer not to
leave any valuables inside the vehicle.
Remove the ignition key when you leave
the vehicle to prevent any involuntary roof
movement.
If your vehicle has a
voice command
system, it may be affected if you drive with
the roof open.
Protection of electric motors that control
roof opening and closure: during repeated
opening and closing movements of the
roof, it is possible that heating up of the
electric motors no longer allows the roof to
be opened or closed. Allow the motors to
cool by not trying to move the roof for ten
minutes.Boot
Opening
Closing
- when the engine is running ,
this warning lamp comes on,
accompanied by a
message in
the multifunction screen for a
few
seconds,
-
w
hen the vehicle is moving
(speed higher than 6
mph
(10
km/h)), this warning lamp
comes on, accompanied by an
audible signal and a
message in
the multifunction screen for a
few
seconds.
Back-up control
Unlocking
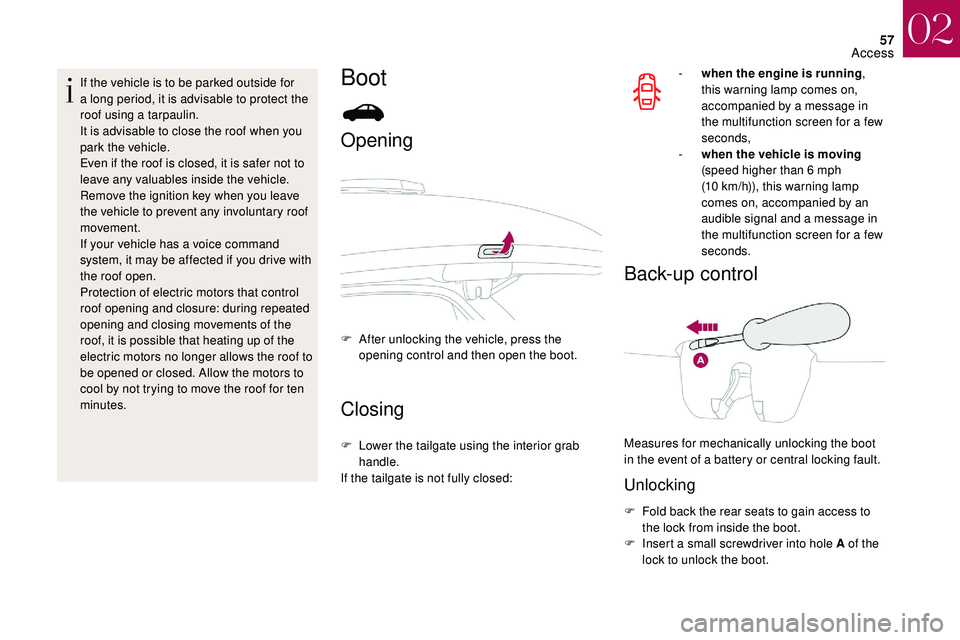
F Fold back the rear seats to gain access to the lock from inside the boot.
F
I
nsert a small screwdriver into hole A of the
lock to unlock the boot.
F
A
fter unlocking the vehicle, press the
opening control and then open the boot.
F
L
ower the tailgate using the interior grab
handle.
If the tailgate is not fully closed: Measures for mechanically unlocking the boot
in the event of a battery or central locking fault.
02
Access
Page 69 of 248
67
Steering wheel adjustment
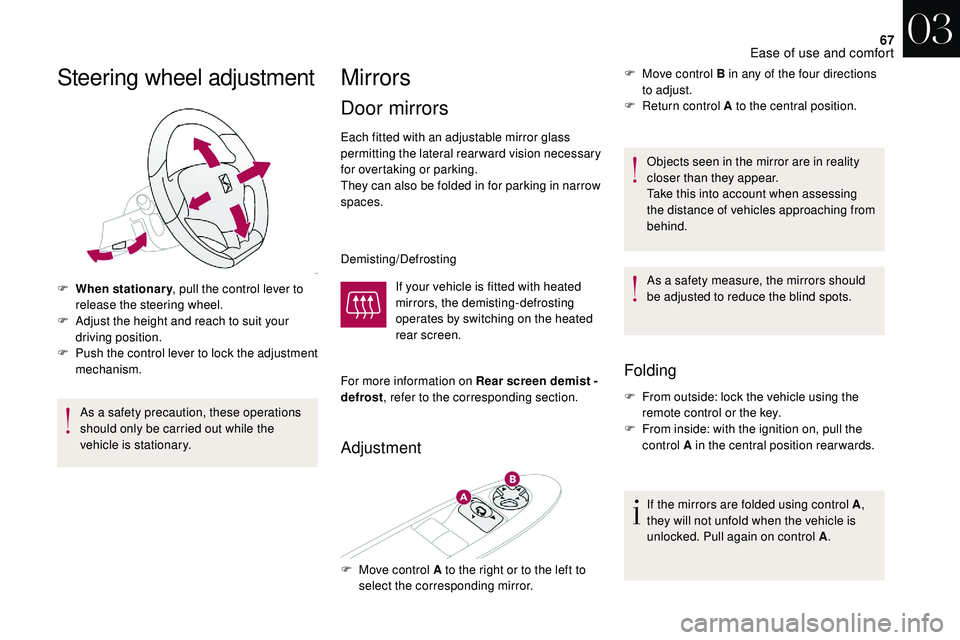
F When stationary, pull the control lever to
release the steering wheel.
F
A
djust the height and reach to suit your
driving position.
F
P
ush the control lever to lock the adjustment
mechanism.
As a
safety precaution, these operations
should only be carried out while the
vehicle is stationary.
Mirrors
Door mirrors
Each fitted with an adjustable mirror glass
permitting the lateral rearward vision necessary
for overtaking or parking.
They can also be folded in for parking in narrow
spaces.
Demisting/Defrosting
If your vehicle is fitted with heated
mirrors, the demisting-defrosting
operates by switching on the heated
rear screen.
For more information on Rear screen demist -
defrost , refer to the corresponding section.
Adjustment
F Move control B in any of the four directions
to adjust.
F
R
eturn control A to the central position.
Objects seen in the mirror are in reality
closer than they appear.
Take this into account when assessing
the distance of vehicles approaching from
behind.
As a
safety measure, the mirrors should
be adjusted to reduce the blind spots.
Folding
F From outside: lock the vehicle using the remote control or the key.
F
F
rom inside: with the ignition on, pull the
control A in the central position rearwards.
If the mirrors are folded using control A ,
they will not unfold when the vehicle is
unlocked. Pull again on control A .
F
M
ove control A to the right or to the left to
select the corresponding mirror.
03
Ease of use and comfort
Page 70 of 248
68
Unfolding
F From outside: unlock the vehicle using the remote control or the key.
F
F
rom inside: with the ignition on, pull the
control A in the central position rearwards.
The folding and unfolding of the door
mirrors using the remote control can be
deactivated in the dealer network or by
a
qualified workshop.
If necessary the mirrors can be folded
manually.
Rear view mirror
Equipped with an anti-dazzle system, which
darkens the mirror glass and reduces the
nuisance to the driver caused by the sun,
headlamps from other vehicles, etc.
Manual model
Adjustment
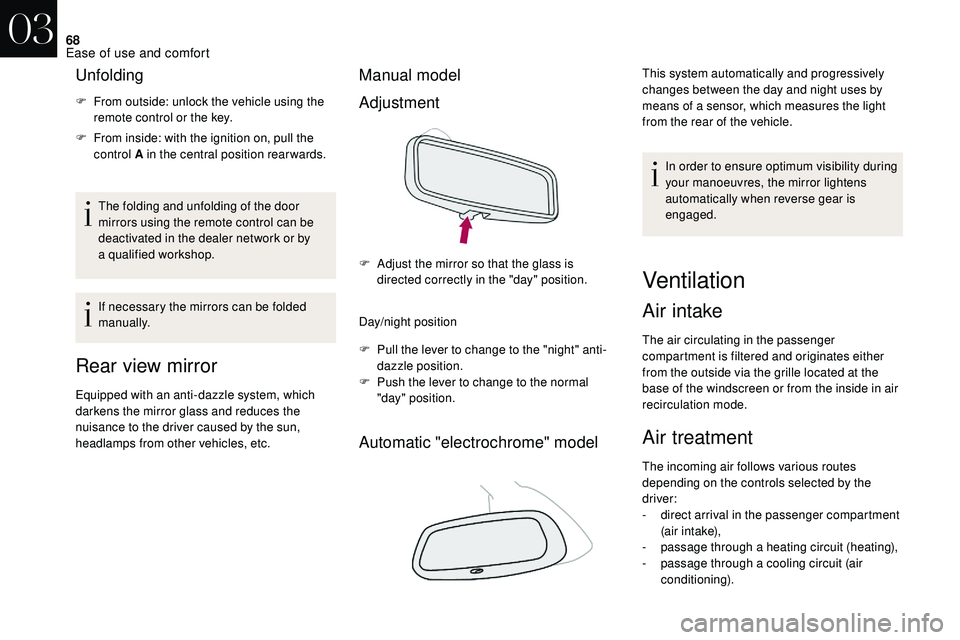
Day/night position
F
P
ull the lever to change to the "night" anti-
dazzle position.
F
P
ush the lever to change to the normal
"day" position.
Automatic "electrochrome" model
This system automatically and progressively
changes between the day and night uses by
means of a
sensor, which measures the light
from the rear of the vehicle.
In order to ensure optimum visibility during
your manoeuvres, the mirror lightens
automatically when reverse gear is
engaged.
F
A
djust the mirror so that the glass is
directed correctly in the "day" position.
Ventilation
Air intake
The air circulating in the passenger
compartment is filtered and originates either
from the outside via the grille located at the
base of the windscreen or from the inside in air
recirculation mode.
Air treatment
The incoming air follows various routes
depending on the controls selected by the
driver:
-
d
irect arrival in the passenger compartment
(air intake),
-
p
assage through a
heating circuit (heating),
-
p
assage through a cooling circuit (air
conditioning).
03
Ease of use and comfort
Page 79 of 248
77
Courtesy lamp
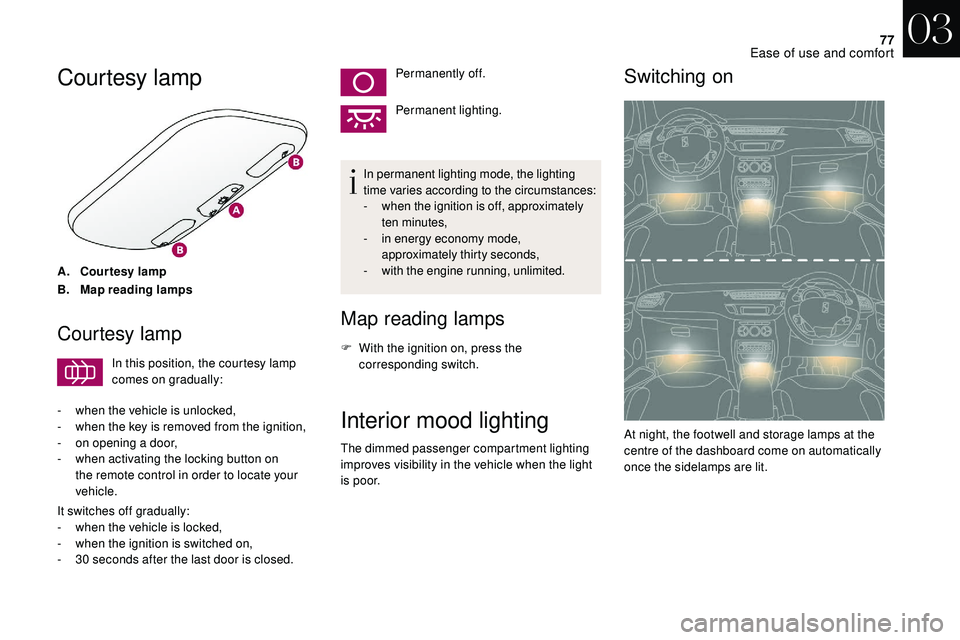
A.Courtesy lamp
B. Map reading lamps
Courtesy lamp
In this position, the courtesy lamp
comes on gradually:
-
w
hen the vehicle is unlocked,
-
w
hen the key is removed from the ignition,
-
o
n opening a door,
-
w
hen activating the locking button on
the remote control in order to locate your
vehicle.
It switches off gradually:
-
w
hen the vehicle is locked,
-
w
hen the ignition is switched on,
-
3
0
seconds after the last door is closed. Permanently off.
Permanent lighting.
In permanent lighting mode, the lighting
time varies according to the circumstances:
-
w
hen the ignition is off, approximately
ten minutes,
-
i
n energy economy mode,
approximately thirty seconds,
-
w
ith the engine running, unlimited.
Map reading lamps
F With the ignition on, press the
corresponding switch.
Interior mood lighting
The dimmed passenger compartment lighting
improves visibility in the vehicle when the light
i s p o o r.
Switching on
At night, the footwell and storage lamps at the
centre of the dashboard come on automatically
once the sidelamps are lit.
03
Ease of use and comfort
Page 80 of 248
78
Switching off
The mood lighting switches off automatically
when the sidelamps are switched off.
It can be switched off manually by using the
lighting dimmer button on the instrument panel.
F
W
ith the lamps on, press the left-hand
button on the instrument panel several
times to progressively reduce the brightness
of the instruments and controls.
F
P
ress again to reduce the brightness to
a
minimum and switch off the mood lighting.
Programming
The function is activated or deactivated via the
vehicle configuration menu.
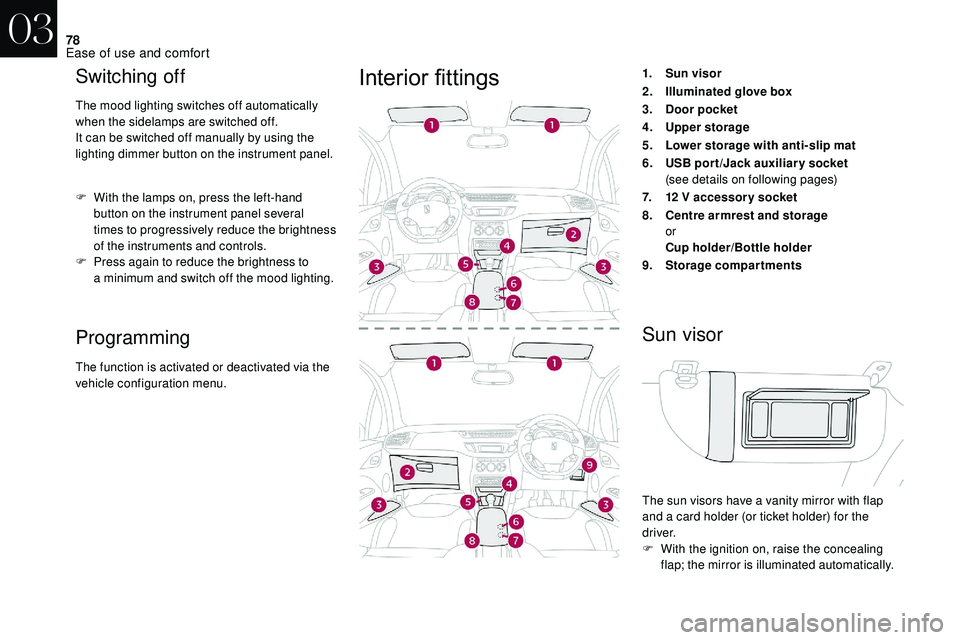
Interior fittings1.Sun visor
2. Illuminated glove box
3. Door pocket
4. Upper storage
5. Lower storage with anti-slip mat
6. USB por t /Jack auxiliar y socket
(see details on following pages)
7. 12
V accessory socket
8. Centre armrest and storage
or
Cup holder/Bottle holder
9. Storage compartments
Sun visor
The sun visors have a vanity mirror with flap
a nd a card holder (or ticket holder) for the
driver.
F
W
ith the ignition on, raise the concealing
flap; the mirror is illuminated automatically.
03
Ease of use and comfort
Page 84 of 248
82
Stowing ringsLuggage retaining strap
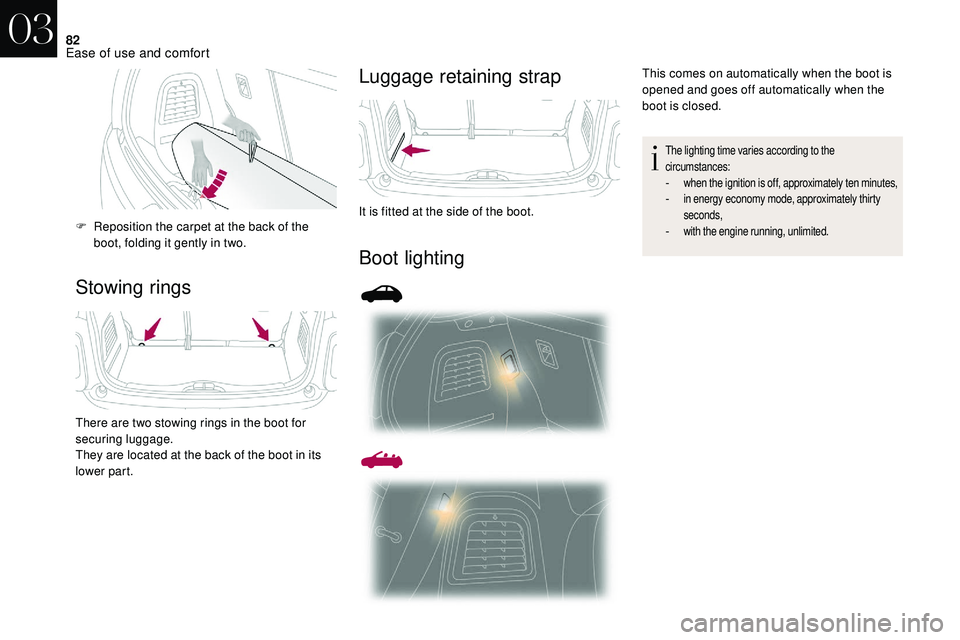
Boot lighting
F Reposition the carpet at the back of the
boot, folding it gently in two.
There are two stowing rings in the boot for
securing luggage.
They are located at the back of the boot in its
lower part. It is fitted at the side of the boot.
This comes on automatically when the boot is
opened and goes off automatically when the
boot is closed.
The lighting time varies according to the
circumstances:
- when the ignition is off, approximately ten minutes,- in energy economy mode, approximately thirty
seconds,
- with the engine running, unlimited.
03
Ease of use and comfort
Page 87 of 248
85
Selection of main lighting
mode
Turn the ring to align the desired symbol with
the marking.
Lighting off (ignition off) /
Daytime running lamps (engine running).
Automatic illumination of headlamps.
Sidelamps only.
Dipped or main beam headlamps.
Headlamp dipping
Pull the stalk towards you to switch between
dipped and main beam headlamps.
When the lighting is off or only the sidelamps
are on, the driver can directly switch on the
main beam headlamps (headlamp flash) for as
long as the lever is kept pulled.
Displays
Illumination of the corresponding indicator
lamp in the instrument panel confirms that the
lighting selected is on.
Foglamps
The instrument panel is permanently back-lit.
The instrument panel lighting therefore has no
relationship to the vehicle lamps.
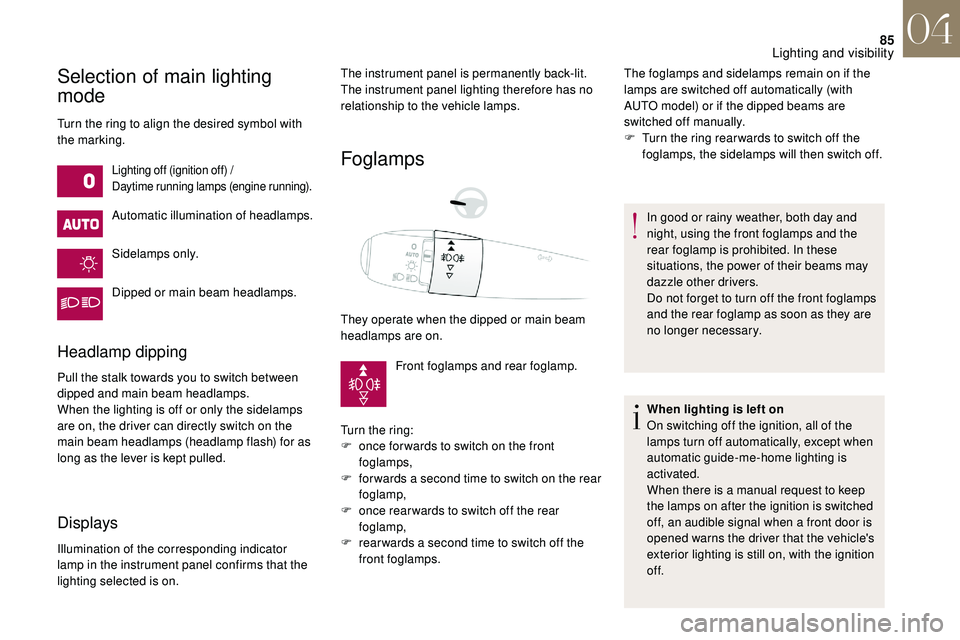
They operate when the dipped or main beam
headlamps are on.Front foglamps and rear foglamp.
Turn the ring:
F
o
nce for wards to switch on the front
foglamps,
F
f
or wards a second time to switch on the rear
foglamp,
F
o
nce rear wards to switch off the rear
foglamp,
F
r
ear wards a second time to switch off the
front foglamps. The foglamps and sidelamps remain on if the
lamps are switched off automatically (with
AUTO model) or if the dipped beams are
switched off manually.
F
T
urn the ring rear wards to switch off the
foglamps, the sidelamps will then switch off.
In good or rainy weather, both day and
night, using the front foglamps and the
rear foglamp is prohibited. In these
situations, the power of their beams may
dazzle other drivers.
Do not forget to turn off the front foglamps
and the rear foglamp as soon as they are
no longer necessary.
When lighting is left on
On switching off the ignition, all of the
lamps turn off automatically, except when
automatic guide-me-home lighting is
activated.
When there is a
manual request to keep
the lamps on after the ignition is switched
off, an audible signal when a
front door is
opened warns the driver that the vehicle's
exterior lighting is still on, with the ignition
of f.
04
Lighting and visibility
Page 88 of 248
86
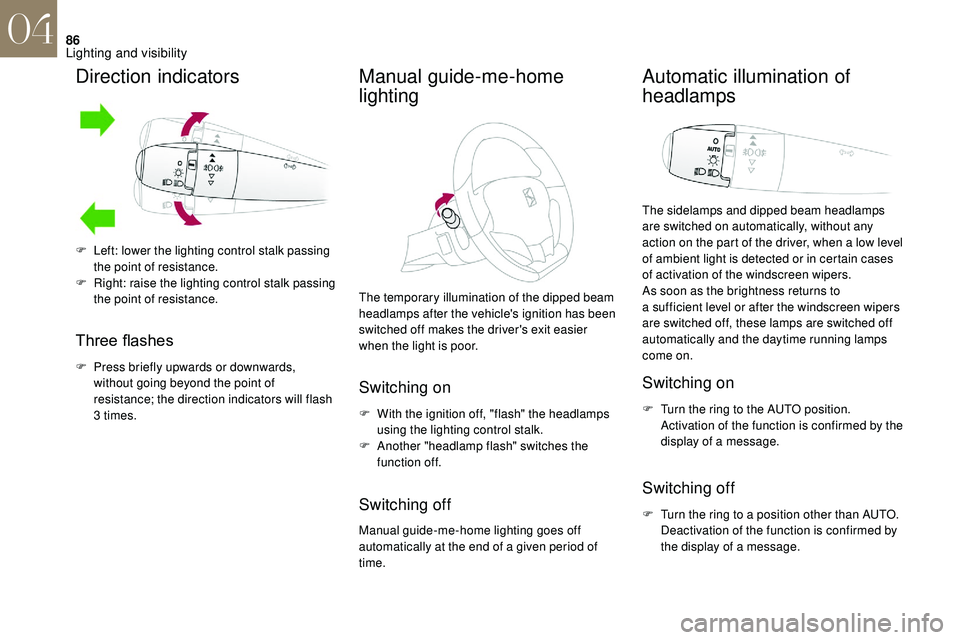
Direction indicators
Three flashes
F Press briefly upwards or downwards, without going beyond the point of
resistance; the direction indicators will flash
3
times.
Manual guide-me-home
lighting
The temporary illumination of the dipped beam
headlamps after the vehicle's ignition has been
switched off makes the driver's exit easier
when the light is poor.
Switching on
F With the ignition off, "flash" the headlamps using the lighting control stalk.
F
A
nother "headlamp flash" switches the
function off.
Switching off
Manual guide-me-home lighting goes off
automatically at the end of a given period of
time.
Automatic illumination of
headlamps
The sidelamps and dipped beam headlamps
are switched on automatically, without any
action on the part of the driver, when a
low level
of ambient light is detected or in certain cases
of activation of the windscreen wipers.
As soon as the brightness returns to
a
sufficient level or after the windscreen wipers
are switched off, these lamps are switched off
automatically and the daytime running lamps
come on.
Switching on
F Turn the ring to the AUTO position. Activation of the function is confirmed by the
display of a
message.
Switching off
F Turn the ring to a position other than AUTO.
Deactivation of the function is confirmed by
the display of a
message.
F
L
eft: lower the lighting control stalk passing
the point of resistance.
F
R
ight: raise the lighting control stalk passing
the point of resistance.
04
Lighting and visibility
Page 89 of 248
87
Operating fault
In the event of a fault with the
s unshine sensor, the lighting comes
on, this warning lamp is displayed
in the instrument panel and/or
a
message appears in the screen,
accompanied by an audible signal.
Contact the dealer network or a
qualified
workshop.
Do not cover the sunshine sensor, linked
with the rain sensor and located in the
centre of the windscreen behind the
interior mirror, as this would disable the
associated functions.
In fog or snow, the sunshine sensor may
detect sufficient light. In this case, the
lighting will not come on automatically.
Automatic guide-me-home
lighting
When the automatic illumination of headlamps
is activated, if the ambient light level is low,
the dipped beam headlamps remain lit when
switching off the ignition.
Programming
Activation, deactivation and the
duration of the guide-me-home
lighting are set in the vehicle
configuration or parameters menu
(except monochrome screen A
where the duration is fixed: 60
s).
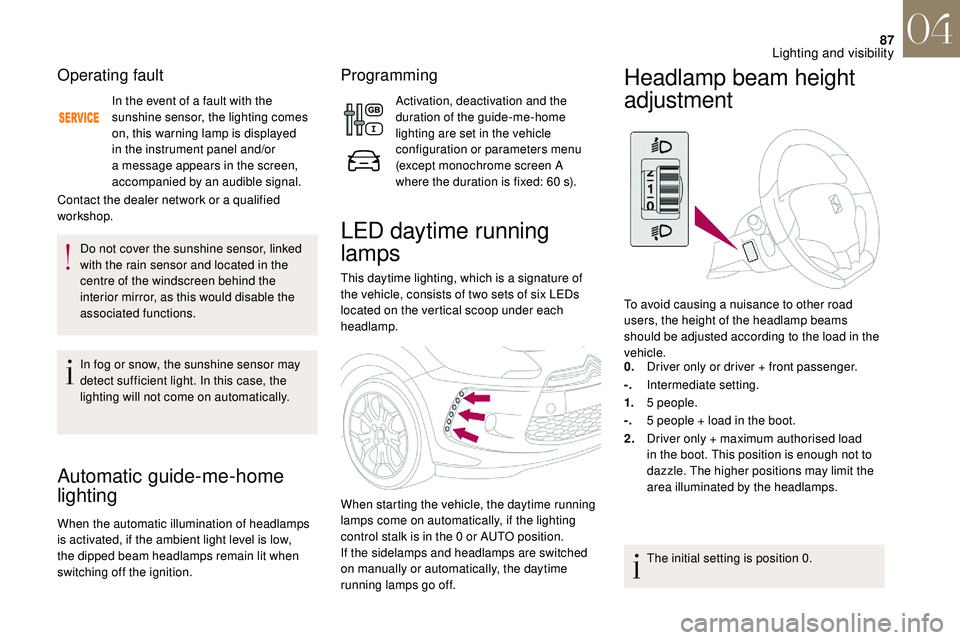
LED daytime running
lamps
This daytime lighting, which is a signature of
t he vehicle, consists of two sets of six LEDs
located on the vertical scoop under each
headlamp.
When starting the vehicle, the daytime running
lamps come on automatically, if the lighting
control stalk is in the 0
or AUTO position.
If the sidelamps and headlamps are switched
on manually or automatically, the daytime
running lamps go off.
Headlamp beam height
adjustment
To avoid causing a nuisance to other road
u sers, the height of the headlamp beams
should be adjusted according to the load in the
vehicle.
0. Driver only or driver + front passenger.
-. Intermediate setting.
1. 5
people.
-. 5
people + load in the boot.
2. Driver only + maximum authorised load
in the boot. This position is enough not to
dazzle. The higher positions may limit the
area illuminated by the headlamps.
The initial setting is position 0.
04
Lighting and visibility