ignition CITROEN DS3 CABRIO 2018 Handbook (in English)
[x] Cancel search | Manufacturer: CITROEN, Model Year: 2018, Model line: DS3 CABRIO, Model: CITROEN DS3 CABRIO 2018Pages: 248, PDF Size: 8.79 MB
Page 139 of 248

137
The programmed speed can be exceeded
temporarily by pressing the accelerator firmly.
To return to the set speed, simply slow down to
a
speed below the programmed speed.
The set speed remains in the system memory
when the ignition is switched off.
The speed limiter cannot, in any circumstances,
replace the need to obser ve speed limits, nor can it
replace the need for vigilance on the part of the driver.
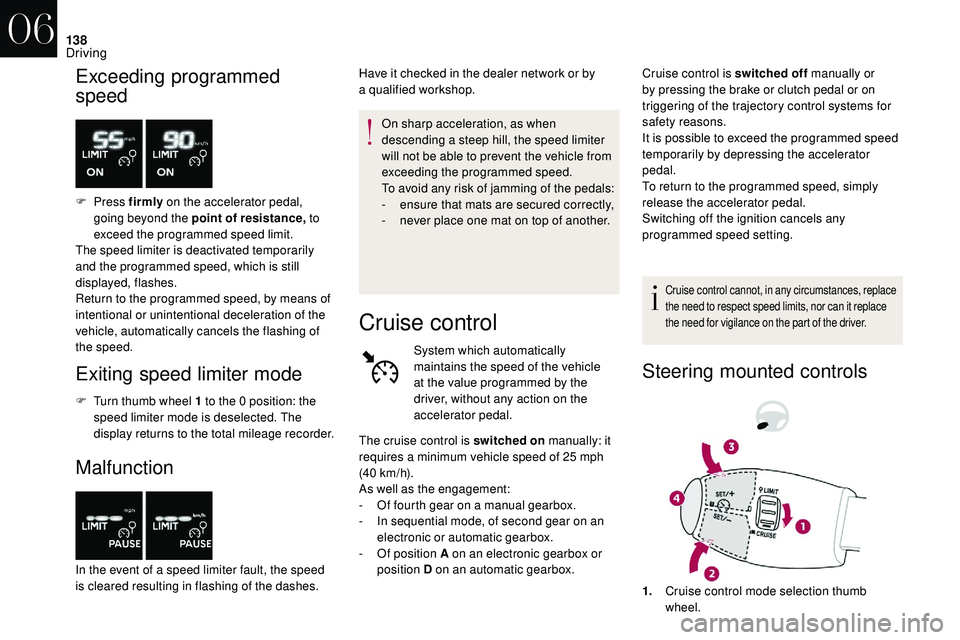
Steering mounted controls
1. Speed limiter mode selection thumb
wheel.
2. Value decrease button.
3. Value increase button.
4. Button to start /stop the speed limiter.
Displays in the instrument panel
The programmed information is grouped
together in the instrument panel screen.
5.Speed limiter on/off indication.
6. Speed limiter mode selected.
7. Programmed speed value.
Programming
F Turn thumb wheel 1 to the "LIMIT" position:
the speed limiter mode is selected but is not
switched on (PAUSE).
You do not have to switch the speed limiter on
in order to set the speed.
F
Set the speed value by pressing button 2 or 3
(e.g. 55 mph (90 km/h)).
You can change the programmed speed further
using buttons 2
and 3:
- by + or - 1 mph (km/h) = short press,- by + or - 5 mph (km/h) = long press,- in steps of + or - 5 mph (km/h) = maintained
press.
F Switch the speed limiter on by pressing button 4 .
F Switch the speed limiter off by pressing button 4 : a
confirmation message appears on the screen (PAUSE).
F Switch the speed limiter back on by pressing button 4
again.
06
Driving
Page 140 of 248
138
Exceeding programmed
speed
F Press firmly on the accelerator pedal,
going beyond the point of resistance, to
exceed the programmed speed limit.
The speed limiter is deactivated temporarily
and the programmed speed, which is still
displayed, flashes.
Return to the programmed speed, by means of
intentional or unintentional deceleration of the
vehicle, automatically cancels the flashing of
the speed.
Exiting speed limiter mode
F Turn thumb wheel 1 to the 0 position: the
speed limiter mode is deselected. The
display returns to the total mileage recorder.
Malfunction
In the event of a speed limiter fault, the speed
i s cleared resulting in flashing of the dashes. On sharp acceleration, as when
descending a
steep hill, the speed limiter
will not be able to prevent the vehicle from
exceeding the programmed speed.
To avoid any risk of jamming of the pedals:
-
e
nsure that mats are secured correctly,
-
n
ever place one mat on top of another.
Have it checked in the dealer network or by
a
qualified workshop.
Cruise control
System which automatically
maintains the speed of the vehicle
at the value programmed by the
driver, without any action on the
accelerator pedal.
Cruise control is switched off
manually or
by pressing the brake or clutch pedal or on
triggering of the trajectory control systems for
safety reasons.
It is possible to exceed the programmed speed
temporarily by depressing the accelerator
pedal.
To return to the programmed speed, simply
release the accelerator pedal.
Switching off the ignition cancels any
programmed speed setting.
Cruise control cannot, in any circumstances, replace
the need to respect speed limits, nor can it replace
the need for vigilance on the part of the driver.
Steering mounted controls
The cruise control is switched on manually: it
requires a minimum vehicle speed of 25 mph
(40
km/h).
As well as the engagement:
-
O
f fourth gear on a manual gearbox.
-
I
n sequential mode, of second gear on an
electronic or automatic gearbox.
-
O
f position A on an electronic gearbox or
position D on an automatic gearbox.
1.Cruise control mode selection thumb
wheel.
06
Driving
Page 143 of 248
141
Operation
- the braking assistance systems (ABS, EBFD, EBA) are not faulty.
-
t
he trajectory control systems (ASR, DSC)
are not deactivated or faulty,
-
t
he vehicle is not making a sharp turn,
-
t
he system has not triggered in the last ten
seconds.
When your vehicle is too close to or
approaches the vehicle ahead too quickly, the
system automatically applies the brakes to
avoid a
collision.
You are then warned by the display of
a
message.
The brake lamps of your vehicle are lit to warn
other users.
The collision can be avoided if the speed
difference between your vehicle and the one
ahead is not more than 9
mph (15 km/h).
Above this threshold, the system will do
what is possible to avoid or reduce the
accident by lowering the speed of impact.
The automatic braking can lead to the complete
stop of the vehicle if the situation requires it. In this case, the vehicle is held stationary
temporarily (for about 1.5
seconds) to allow
the driver to take back control by pressing the
brake pedal.
Unless the driver depresses the clutch
pedal quickly enough during automatic
braking, triggering of the system may
cause the engine to stall.
During automatic braking, the driver can
always obtain a
higher rate of deceleration
than that controlled by the system, by
pressing firmly on the brake pedal.
After an impact, the system is
automatically put out of ser vice: it no
longer operates.
You must go to a
member of the dealer
network or a
qualified workshop to have
the system made operational again.Deactivation
The system is deactivated in the vehicle
configuration menu, accessible with the ignition on.
Its state is memorised when the ignition is switched
of f.
When the system is deactivated, a
message is displayed every time the
ignition is switched on, to warn you.
With monochrome screen C
F Press the MENU button for access to the
main menu.
F
Sel
ect "Personalisation-configuration ",
F
Sel
ect "Define the vehicle parameters ".
F
Sel
ect "Driving assistance ".
F
Sel
ect "Automatic emergency braking :
OFF " or " Automatic emergency braking :
ON ".
F
P
ress the " 7" or " 8" buttons to check or
uncheck the box and respectively activate
or deactivate the system.
F
P
ress the " 5" or " 6" button, then the OK
button to select the OK box and confirm or
the Back button to cancel.
06
Driving
Page 146 of 248
144
Deactivation/activation of the
front and rear parking sensors
You can activate or deactivate the function via
the vehicle configuration or settings menu.
The system's status is saved when the ignition
is switched off.The function will be deactivated
automatically if a
trailer is being towed or
a
bicycle carrier is fitted (vehicle fitted with
a
towbar or an approved bicycle carrier).
Malfunction
In the event of a system fault when
enga ging reverse gear, this warning
lamp is displayed in the instrument
panel and/or a
message appears
in the screen, accompanied by an
audible signal (short beep).
Contact the dealer network or
a
qualified workshop to have the
system checked.
In bad or wintry weather, ensure that the
sensors are not covered with mud, ice or
snow. When reverse gear is engaged, an
audible signal (long beep) indicates that
the sensors may be dirty.
Certain sound sources (motorcycle,
lorry, pneumatic drill, etc.) may trigger
the audible signals of the parking sensor
system.
The front parking sensors are interrupted if
the vehicle stops for more than three seconds
in for ward gear, if no further obstacles are
detected or when the speed of the vehicle
exceeds 6
mph (10
km/h).
The sound from the loudspeaker (front
or rear) helps to indicate whether the
obstacle is in front or behind.
Reversing camera
The reversing camera is only an aid and
the driver must remain cautious at all times.
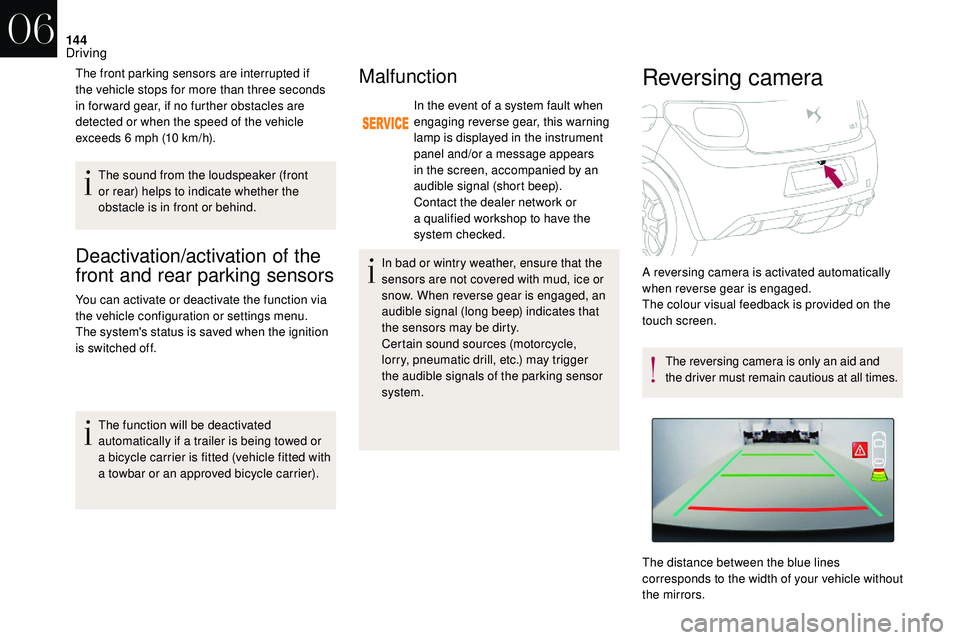
The distance between the blue lines
corresponds to the width of your vehicle without
the mirrors. A reversing camera is activated automatically
when reverse gear is engaged.
The colour visual feedback is provided on the
touch screen.
06
Driving
Page 150 of 248
148
Fuel tank
Capacity of the tank:
- Pe trol: approximately 30 or 50 litres
(depending on version).
-
D
iesel: approximately 30 or 46 litres
(depending on version).
Low fuel level
When the low fuel level is reached
in the fuel tank, this warning lamp
comes on in the instrument panel.
When it is first lit, approximately
5
litres of fuel remain in the tank.
Refuel as soon as possible to avoid
running out.
If you have put the wrong fuel in your
vehicle, you must have the fuel tank
drained and filled with the correct fuel
before star ting the engine.
Refilling
A self-adhesive label on the inner face of the
filler flap reminds you of the type of fuel to use,
depending on your engine.
Additions of fuel must be of at least 7 litres, in
order to be registered by the fuel gauge. With Stop & Start, never refuel with the
system in STOP mode; you must switch
off the ignition with the key.
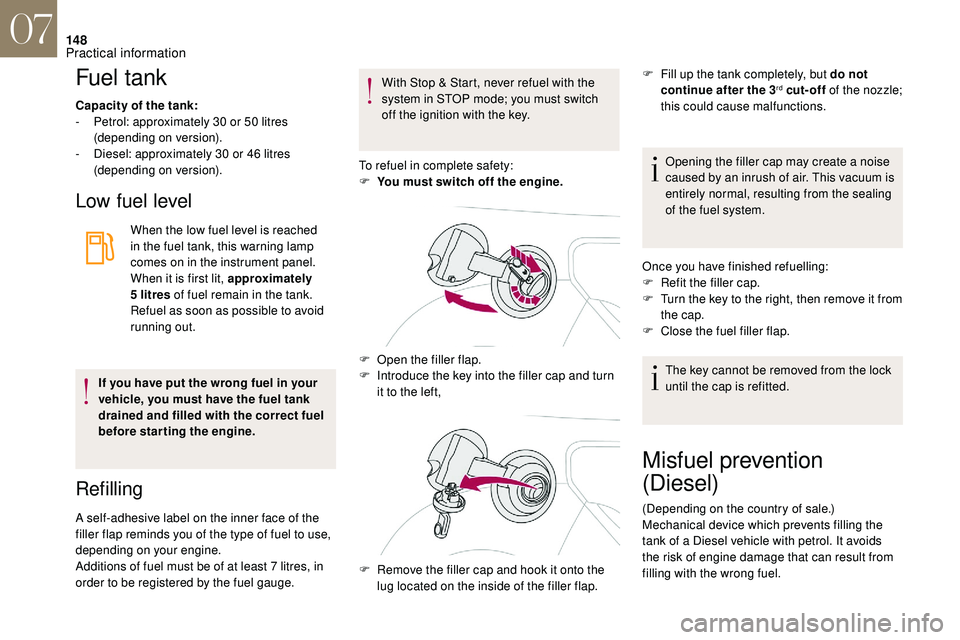
To refuel in complete safety:
F
Y
ou must switch off the engine.
F
O
pen the filler flap.
F
I
ntroduce the key into the filler cap and turn
it to the left, Opening the filler cap may create a noise
caused by an inrush of air. This vacuum is
entirely normal, resulting from the sealing
of the fuel system.
Once you have finished refuelling:
F
R
efit the filler cap.
F
T
urn the key to the right, then remove it from
the cap.
F
C
lose the fuel filler flap.
The key cannot be removed from the lock
until the cap is refitted.
F
R
emove the filler cap and hook it onto the
lug located on the inside of the filler flap. F
F
ill up the tank completely, but do not
continue after the 3
rd cut-off of the nozzle;
this could cause malfunctions.
Misfuel prevention
(Diesel)
(Depending on the country of sale.)
Mechanical device which prevents filling the
tank of a Diesel vehicle with petrol. It avoids
the risk of engine damage that can result from
filling with the wrong fuel.
07
Practical information
Page 155 of 248
153
Energy economy mode
System which manages the duration of use of
certain functions to conser ve a sufficient level
of charge in the battery.
After the engine has stopped, you can still
use functions such as the audio equipment,
windscreen wipers, dipped beam headlamps,
courtesy lamps, etc. for a
maximum combined
period of thirty minutes.
This period may be greatly reduced if the
battery is not fully charged.
Switching to this mode
Once this period has elapsed, a message
appears in the screen indicating that the
vehicle has switched to economy mode and the
active functions are put on standby.
Exiting the mode
These functions are reactivated automatically
next time the vehicle is driven.
F
T
o restore these functions immediately, start
the engine and let it run briefly. If the telephone is being used at the same
time, it will be interrupted after 10
minutes.The engine will not start if the battery is
discharged.
The time available to you will then be double
the period for which the engine is left running.
However, this period will always be between
five and thirty minutes.
Changing front or rear
wiper blades
Procedure for replacing a used window wiper
w ith a new one without tools.
Before removing a front wiper
F Within one minute after switching off the ignition, operate the wiper stalk to
position the wiper blades vertically on the
windscreen.
This position is used to avoid damage to the
wiper and the bonnet.
Removing
F Lift the corresponding wiper arm.
F U nclip and remove the wiper blade.
Refitting
F At the front, check the size of the wiper, because the shortest wiper is fitted to the
passenger side of the vehicle.
F
P
osition and clip the new wiper blade to the
arm.
F
C
arefully lower the wiper arm.
After refitting a front wiper
F Switch on the ignition.
F O perate the wiper stalk again to park the
wiper blades.
Bonnet
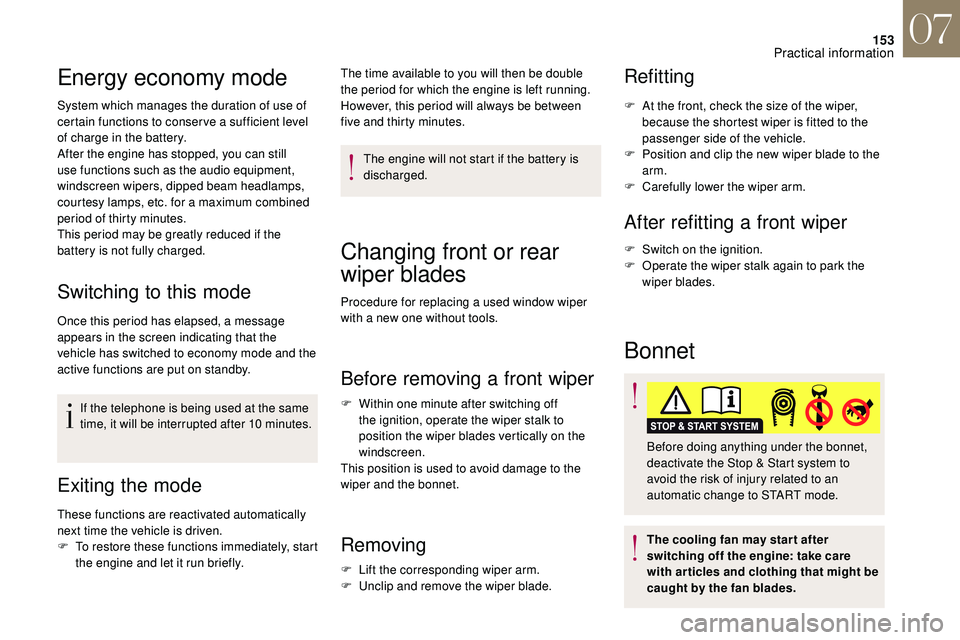
Before doing anything under the bonnet,
deactivate the Stop & Start system to
avoid the risk of injury related to an
automatic change to START mode.
The cooling fan may star t after
switching off the engine: take care
with articles and clothing that might be
caught by the fan blades.
07
Practical information
Page 157 of 248
155
3A i r f i l t e r.
4 Brake fluid reser voir.
5 Battery.
6 Fusebox.
7 Engine oil dipstick.
8 Engine oil filler cap.
9 Priming pump (on diesel filter)*.
The Diesel circuit is under very high
pressure.
All work on this circuit must be carried out
only in the dealer network or a
qualified
workshop.
*
D
epending on engine.
Checking levels
Check all of these levels regularly, in line with
the manufacturer's service schedule. Top them
up if necessary, unless other wise indicated.
If a level drops significantly, have the
corresponding system checked by the dealer
network or a
qualified workshop.
The liquids must comply with the
manufacturer's recommendations and with
the vehicle's engine. Take care when working under the bonnet,
as certain areas of the engine may be
extremely hot (risk of burns) and the
cooling fan could start at any time (even
with the ignition off).
Used products
Avoid prolonged contact of used oil or
fluids with the skin.
Most of these fluids are harmful to health
or indeed very corrosive.
Do not discard used oil or fluids into
sewers or onto the ground.
Return used oil to the dealer network or
a
qualified workshop and dispose of it in
the containers reser ved for this purpose.
Engine oil level
The check is carried out either when
the ignition is switched on using the
oil level indicator in the instrument
panel for vehicles equipped with an
electric gauge, or using the dipstick. To ensure that the reading is correct, your
vehicle must be parked on a
level sur face
with the engine stopped for more than
30
minutes.
It is normal to top up the oil level between two
ser vices (or oil changes). We recommend that
you check the level, and top up if necessary,
every 3,000 miles (5,000 km).
Checking using the dipstick
The location of the dipstick is shown in the
corresponding underbonnet layout view.
F
H
old the dipstick by its coloured grip and
pull it out completely.
F
W
ipe the end of the dipstick using a clean
non-fluffy cloth.
F
R
efit the dipstick and push fully down, then
pull it out again to make the visual check:
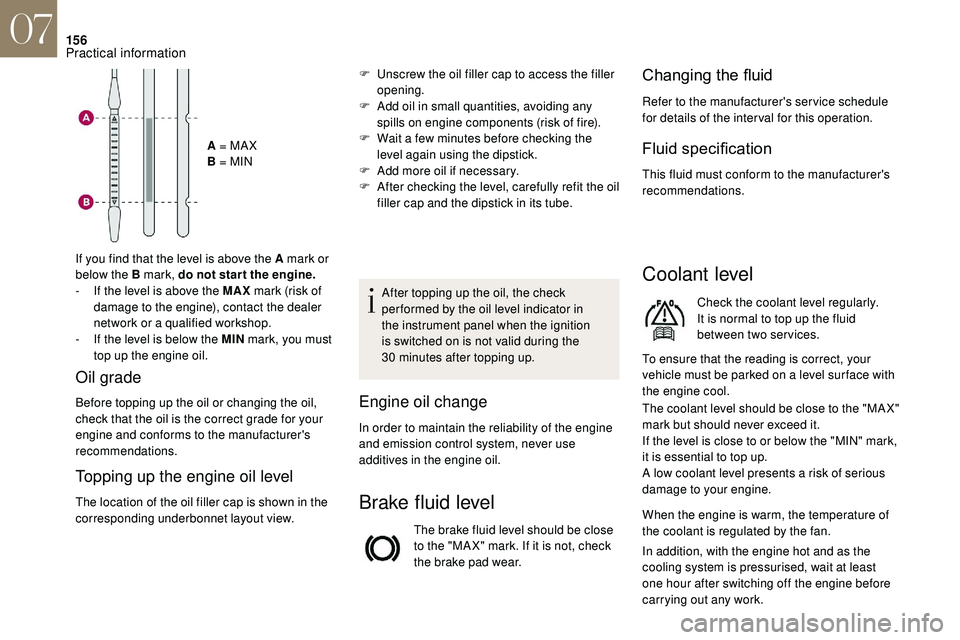
the correct level is between marks A and B .
07
Practical information
Page 158 of 248
156
A = MA X
B = MIN
If you find that the level is above the A mark or
below the B mark, do not star t the engine.
-
I
f the level is above the MAX mark (risk of
damage to the engine), contact the dealer
network or a
qualified workshop.
-
I
f the level is below the MIN mark, you must
top up the engine oil.
Topping up the engine oil level
The location of the oil filler cap is shown in the
corresponding underbonnet layout view. After topping up the oil, the check
per formed by the oil level indicator in
the instrument panel when the ignition
is switched on is not valid during the
30
minutes after topping up.
Engine oil change
In order to maintain the reliability of the engine
and emission control system, never use
additives in the engine oil.
Brake fluid level
The brake fluid level should be close
to the "MA X" mark. If it is not, check
the brake pad wear.
Changing the fl
uid
Refer to the manufacturer's service schedule
for details of the inter val for this operation.
Fluid specification
This fluid must conform to the manufacturer's
recommendations.
Coolant level
Check the coolant level regularly.
It is normal to top up the fluid
between two services.
To ensure that the reading is correct, your
vehicle must be parked on a
level sur face with
the engine cool.
The coolant level should be close to the "MA X"
mark but should never exceed it.
If the level is close to or below the "MIN" mark,
it is essential to top up.
A low coolant level presents a
risk of serious
damage to your engine.
When the engine is warm, the temperature of
the coolant is regulated by the fan.
F
U
nscrew the oil filler cap to access the filler
opening.
F
A
dd oil in small quantities, avoiding any
spills on engine components (risk of fire).
F
W
ait a
few minutes before checking the
level again using the dipstick.
F
A
dd more oil if necessary.
F
A
fter checking the level, carefully refit the oil
filler cap and the dipstick in its tube.
Oil grade
Before topping up the oil or changing the oil,
check that the oil is the correct grade for your
engine and conforms to the manufacturer's
recommendations.
In addition, with the engine hot and as the
cooling system is pressurised, wait at least
one hour after switching off the engine before
carrying out any work.
07
Practical information
Page 163 of 248
161
Bottles or containers are available from the
dealer network or a qualified workshop.
Never top up from an AdBlue
® dispenser
reserved for heavy goods vehicles.
Recommendations on storage
AdBlue® freezes below around -11°C and
deteriorates above 25°C. It is recommended
that bottles or containers be stored in a
cool
place and protected from direct sunlight.
Under these conditions, the fluid can be kept
for at least a
year.
If the fluid has frozen, it can be used once
it has completely thawed out at ambient
temperature.
Never store bottles or containers of
AdBlue
® in your vehicle.
Do not dispose of AdBlue
® bottles or
containers in the household waste.
Place them in a
container provided for
this purpose or take them to your dealer.
Procedure
Before topping up, ensure that the vehicle is
parked on a flat and level sur face.
In wintry conditions, ensure that the
temperature of the vehicle is above -11°C.
Otherwise the AdBlue
® may be frozen and
so cannot be poured into its tank. Park your
vehicle in a
warmer area for a few hours to
allow the top up to be carried out.
F
S
witch off the ignition and remove the key.
F
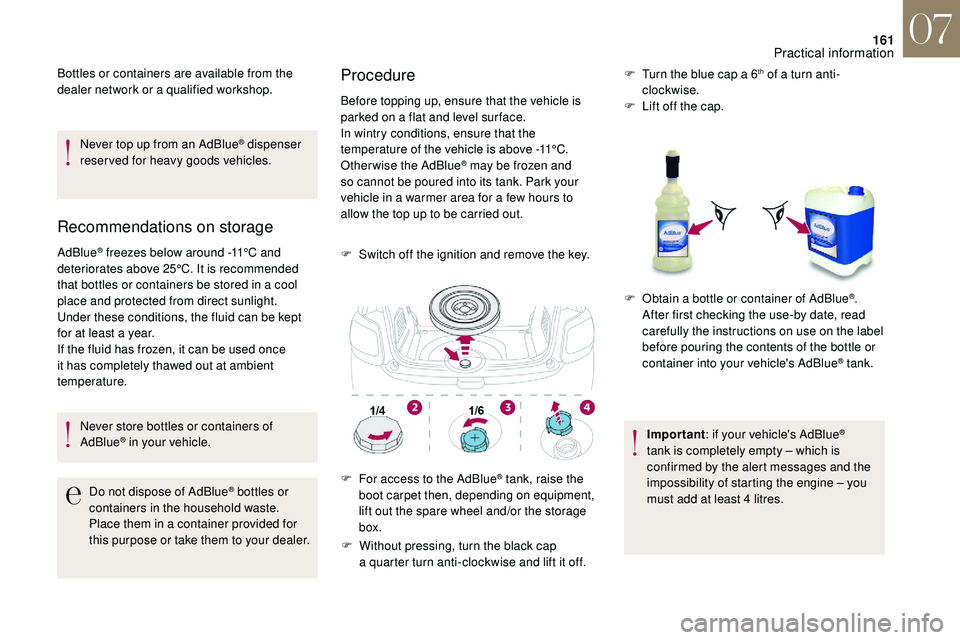
W
ithout pressing, turn the black cap
a
quarter turn anti-clockwise and lift it off. F
T
urn the blue cap a 6
th of a turn anti-
c
lockwise.
F
L
ift off the cap.
Important : if your vehicle's AdBlue
®
tank is completely empty – which is
confirmed by the alert messages and the
impossibility of starting the engine – you
must add at least 4
litres.
F
F
or access to the AdBlue
® tank, raise the
boot carpet then, depending on equipment,
lift out the spare wheel and/or the storage
box. F
O
btain a bottle or container of AdBlue
®.
After first checking the use-by date, read
carefully the instructions on use on the label
before pouring the contents of the bottle or
container into your vehicle's AdBlue
® tank.
07
Practical information
Page 164 of 248
162
F After emptying the bottle or container, wipe away any spillage around the tank filler
using a
damp cloth.
If any AdBlue
® additive is spilt or splashed,
wash immediately with cold water or wipe
with a
damp cloth.
If the AdBlue
® has crystallised, clean it off
using a
sponge and hot water.
F
R
efit the blue cap to the tank filler and turn it
a
6
th of a turn clockwise, to its stop.
F
D
epending on equipment, return the spare
wheel and/or the storage box to the bottom
of the boot.
F
R
efit the boot carpet and close the tailgate.
Important: when topping up after
running out of AdBlue
®, you must wait
for around 5 minutes before switching
on the ignition, without opening the
driver's door , or unlocking the vehicle ,
or placing the key in the ignition
switch .
Switch on the ignition, then after
10
seconds, start the engine.
Advice on care and
maintenance
Recommendations on the care and
maintenance of your vehicle are given in the
Maintenance and Warranty Guide.
Textured paint
Textured paint reacts to light with variations of
appearance and finish that emphasise the car's
lines and form. This paint coating has particles
that remain visible and create a unique satin
relief effect. Its lightly granulated texture gives
it a
surprising feel. Observe the following recommendations
to avoid damaging the paint finish:
-
c
hoose a high pressure wash, or at
least a high water delivery; roller brush
washing is compatible.
-
g
ently wipe the body with a clean
microfibre cloth.
-
c
arefully wipe off any fuel spilt on the
body using a soft cloth, then allow to
d r y.
-
c
lean off minor marks (for example,
finger marks), using the product in the
"TECHNATURE" range intended for
removing insects.
H o w eve r,
-
d
o not select the programme with hot
wax finish.
-
d
o not use waterless cleaning.
-
n
ever polish the vehicle.
-
d
o not use paint restorers, abrasive
or polishing products, or bright paint
preser vers (wax polish, for example).
It is always preferable to have paint
repairs carried out in the dealer network or
by a
qualified workshop.
07
Practical information