ESP CITROEN DS4 2023 Owners Manual
[x] Cancel search | Manufacturer: CITROEN, Model Year: 2023, Model line: DS4, Model: CITROEN DS4 2023Pages: 296, PDF Size: 9.91 MB
Page 15 of 296
13
Warning and indicator lamps
Visual indicators informing the driver that a
system is in operation, switched off (on/off
indicator lamps) or has a fault (warning lamp).
When the ignition is switched on
Certain warning lamps come on for a few
seconds in the instrument panel when the
vehicle's ignition is switched on.
When the engine is started, these warning
lamps should go off.
If they remain on, before driving refer to the
information on the warning lamp concerned.
Associated warnings
The switching on of certain warning lamps may
be accompanied by an audible signal and a
message.
There are two types of lighting for warning
lamps, fixed (continuous) or flashing.Some warning lamps may present both
types: fixed or flashing.
Only by relating the type of lighting to the
operating state of the vehicle can it be
decided whether the situation is normal or
whether a fault has occurred. In the event
of a fault, the illumination of the warning
lamp may be accompanied by a message.
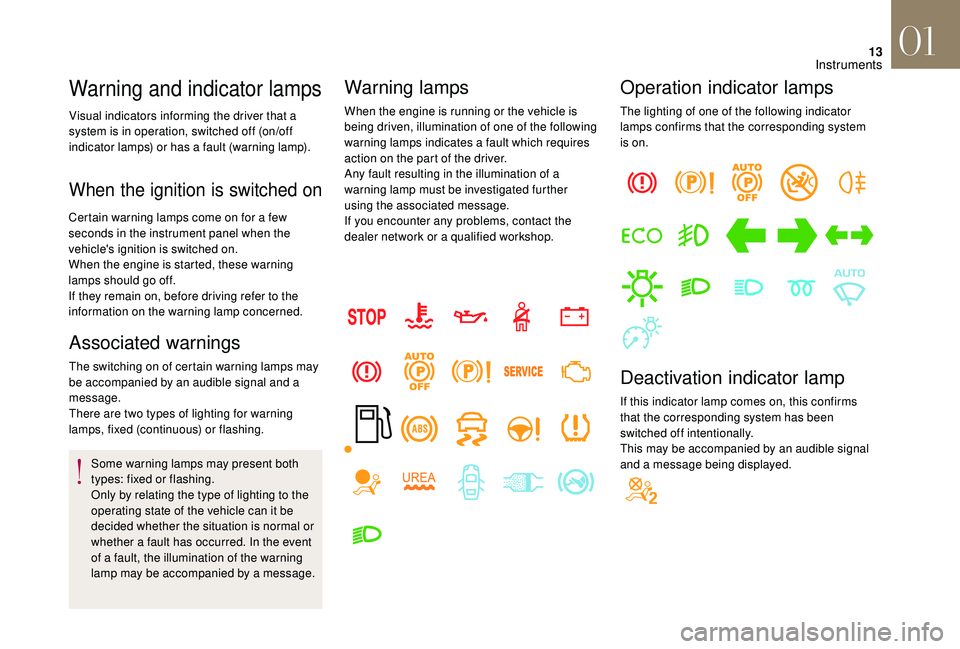
Warning lamps
When the engine is running or the vehicle is
being driven, illumination of one of the following
warning lamps indicates a fault which requires
action on the part of the driver.
Any fault resulting in the illumination of a
warning lamp must be investigated further
using the associated message.
If you encounter any problems, contact the
dealer network or a qualified workshop.
Operation indicator lamps
The lighting of one of the following indicator
lamps confirms that the corresponding system
is on.
Deactivation indicator lamp
If this indicator lamp comes on, this confirms
that the corresponding system has been
switched off intentionally.
This may be accompanied by an audible signal
and a message being displayed.
01
Instruments
Page 17 of 296
15
Warning/indicator lampStateCause Action/Observations
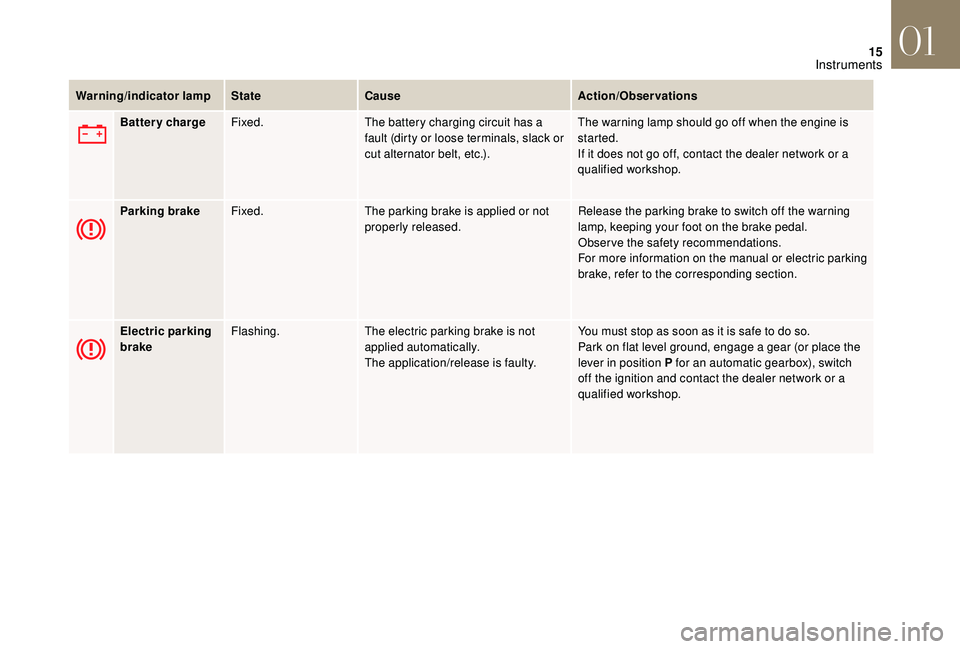
Battery charge Fixed. The battery charging circuit has a
fault (dirty or loose terminals, slack or
cut alternator belt, etc.). The warning lamp should go off when the engine is
started.
If it does not go off, contact the dealer network or a
qualified workshop.
Parking brake Fixed. The parking brake is applied or not
properly released. Release the parking brake to switch off the warning
lamp, keeping your foot on the brake pedal.
Observe the safety recommendations.
For more information on the manual or electric parking
brake, refer to the corresponding section.
Electric parking
brake Flashing.
The electric parking brake is not
applied automatically.
The application/release is faulty. You must stop as soon as it is safe to do so.
Park on flat level ground, engage a gear (or place the
lever in position P for an automatic gearbox), switch
off the ignition and contact the dealer network or a
qualified workshop.
01
Instruments
Page 22 of 296

20
Warning/indicator lampStateCause Action/Observations
AdBlue
®
(BlueHDi Diesel) Fixed, on switching
on the ignition,
accompanied by an
audible signal and a
message indicating
the remaining driving
range. The remaining driving range is
between 370 miles and 1,500 miles
(600 km and 2,400 km).
Have the AdBlue
® tank topped up as soon as possible:
go to a member of the dealer network or a qualified
workshop, or carry out this operation yourself.
+ Flashing, associated
with the SERVICE
warning lamp,
accompanied by an
audible signal and a
message indicating
the remaining driving
range.The remaining driving range is
between 0 and 370 miles (0 and
6 0 0
k m). You must top up the AdBlue
® tank to avoid a
breakdown : go to a member of the dealer network
or a qualified workshop, or carry out this operation
yourself.
Flashing, associated
with the SERVICE
warning lamp,
accompanied by an
audible signal and a
message indicating
that starting is
prevented. The AdBlue
® tank is empty: the
starting inhibition system required
by legislation prevents starting of the
engine. To be able to start the engine, you must top up the
AdBlue® tank: go to the dealer network or a qualified
workshop, or carry out this operation yourself.
It is essential to add at least 4 litres of AdBlue
® to the
corresponding tank.
For topping-up or for more information on AdBlue
®, refer to the corresponding section.
01
Instruments
Page 24 of 296
22
Warning/indicator lampStateCause Action/Observations
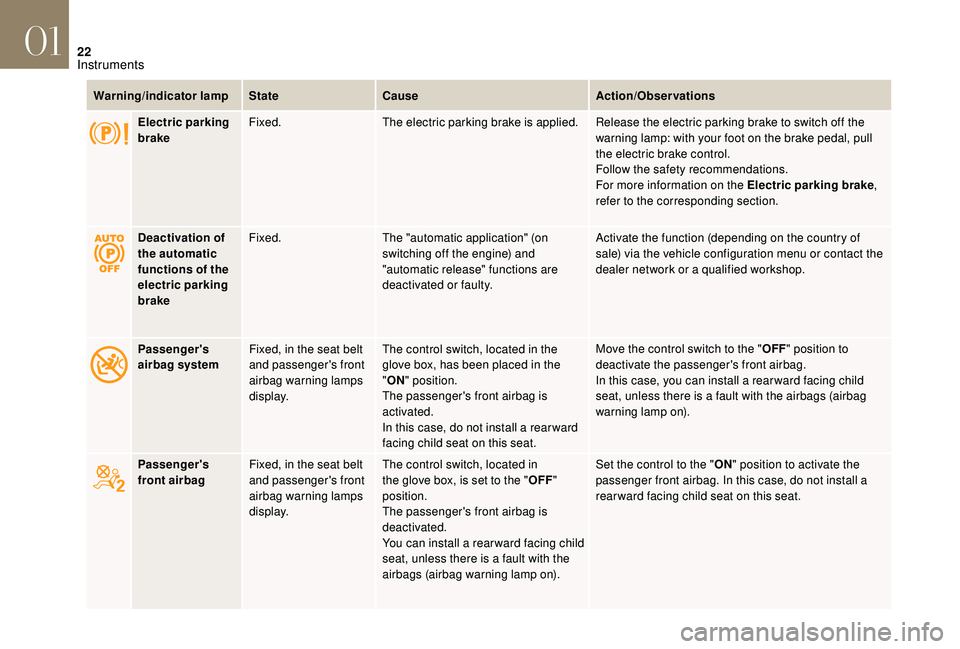
Electric parking
brake Fixed.
The electric parking brake is applied. Release the electric parking brake to switch off the
warning lamp: with your foot on the brake pedal, pull
the electric brake control.
Follow the safety recommendations.
For more information on the Electric parking brake ,
refer to the corresponding section.
Deactivation of
the automatic
functions of the
electric parking
brake Fixed.
The "automatic application" (on
switching off the engine) and
"automatic release" functions are
deactivated or faulty. Activate the function (depending on the country of
sale) via the vehicle configuration menu or contact the
dealer network or a qualified workshop.
Passenger's
airbag system Fixed, in the seat belt
and passenger's front
airbag warning lamps
display. The control switch, located in the
glove box, has been placed in the
"
ON " position.
The passenger's front airbag is
activated.
In this case, do not install a rear ward
facing child seat on this seat. Move the control switch to the "
OFF" position to
deactivate the passenger's front airbag.
In this case, you can install a rear ward facing child
seat, unless there is a fault with the airbags (airbag
warning lamp on).
Passenger's
front airbag Fixed, in the seat belt
and passenger's front
airbag warning lamps
display. The control switch, located in
the glove box, is set to the "
OFF"
position.
The passenger's front airbag is
deactivated.
You can install a rear ward facing child
seat, unless there is a fault with the
airbags (airbag warning lamp on). Set the control to the "
ON" position to activate the
passenger front airbag. In this case, do not install a
rear ward facing child seat on this seat.
01
Instruments
Page 25 of 296

23
Warning/indicator lampStateCause Action/Observations
Rear foglamps Fixed. The rear foglamps have been
switched on using the ring on the
lighting control stalk. Turn the ring on the lighting control stalk rear ward to
switch off the rear foglamps.
Stop & Star t Fixed.
On stopping the vehicle (red lights,
traffic jams,...) the Stop & Start system
has put the engine into STOP mode.The warning lamp goes off and the engine restarts
automatically in START mode, as soon as you want to
move off.
Flashes for a few
seconds, then goes
of f. STOP mode is temporarily
unavailable.
or
START mode is triggered
automatically. For more information on Stop & Star t
, refer to the
corresponding section.
Front foglamps Fixed. The front foglamps are switched on
using the ring on the lighting control
stalk. Turn the ring on the lighting control stalk rear ward
twice to switch off the front foglamps.
Left-hand
direction
indicator Flashing with audible
signal.
The lighting control stalk has been
moved down.
Right-hand
direction
indicator Flashing with audible
signal.
The lighting control stalk has been
moved up.
Hazard warning
lamps Flashing with buzzer. The hazard warning lamps switch,
located on the dashboard, has been
operated. The left-hand and right-hand direction indicators and
their associated warning lamps flash simultaneously.
01
Instruments
Page 31 of 296

29
For more information on the use of the Electric parking brake, refer to the corresponding section.
Warning/indicator lamp StateCause Action/Observations
+ They light up,
accompanied by the
display of the message
"Parking brake fault". The manual application/release of
the electric parking brake and the
emergency braking are not available.
Only the automatic application on switching off the engine and
automatic release on acceleration functions are available.
Contact the dealer network or a qualified workshop.
It lights up,
accompanied by the
display of the message
"Faulty battery". A discharged battery no longer allows
the use of the electric parking brake.
Stop the vehicle as soon as it is safe to do so.
Apply the electric parking brake before switching off the engine, then
immobilise the vehicle:
F
W
ith a manual gearbox, engage a gear.
F
W
ith an automatic gearbox, put a chock against one of the wheels.
Contact the dealer network or a qualified workshop.
01
Instruments
Page 34 of 296
32
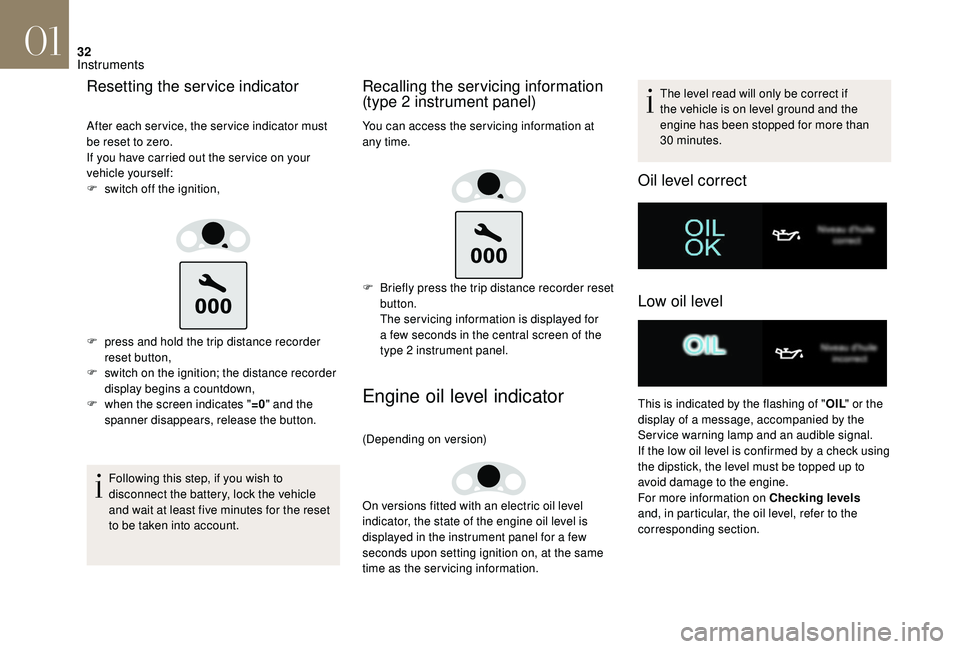
Resetting the service indicator
After each service, the service indicator must
be reset to zero.
If you have carried out the ser vice on your
vehicle yourself:
F
s
witch off the ignition,
F
p
ress and hold the trip distance recorder
reset button,
F
s
witch on the ignition; the distance recorder
display begins a countdown,
F
w
hen the screen indicates " =0" and the
spanner disappears, release the button.
Following this step, if you wish to
disconnect the battery, lock the vehicle
and wait at least five minutes for the reset
to be taken into account.
Recalling the servicing information
(type 2 instrument panel)
You can access the ser vicing information at
any time.
F
B
riefly press the trip distance recorder reset
button.
The ser vicing information is displayed for
a few seconds in the central screen of the
type 2 instrument panel.
Engine oil level indicator
(Depending on version)
On versions fitted with an electric oil level
indicator, the state of the engine oil level is
displayed in the instrument panel for a few
seconds upon setting ignition on, at the same
time as the servicing information. The level read will only be correct if
the vehicle is on level ground and the
engine has been stopped for more than
30
minutes.
Oil level correct
Low oil level
This is indicated by the flashing of "
OIL" or the
display of a message, accompanied by the
Service warning lamp and an audible signal.
If the low oil level is confirmed by a check using
the dipstick, the level must be topped up to
avoid damage to the engine.
For more information on Checking levels
and, in particular, the oil level, refer to the
corresponding section.
01
Instruments
Page 35 of 296
33
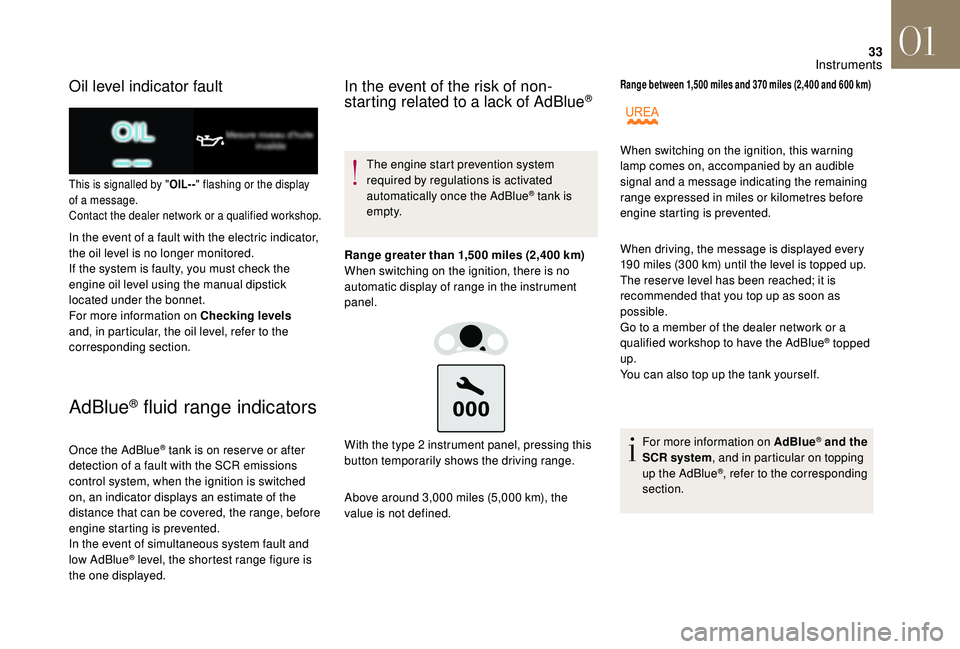
Oil level indicator fault
This is signalled by "OIL- -" flashing or the display
of a message.
Contact the dealer network or a qualified workshop.
In the event of a fault with the electric indicator,
the oil level is no longer monitored.
If the system is faulty, you must check the
engine oil level using the manual dipstick
located under the bonnet.
For more information on Checking levels
and, in particular, the oil level, refer to the
corresponding section.
AdBlue® fluid range indicators
Once the AdBlue® tank is on reser ve or after
detection of a fault with the SCR emissions
control system, when the ignition is switched
on, an indicator displays an estimate of the
distance that can be covered, the range, before
engine starting is prevented.
In the event of simultaneous system fault and
low AdBlue
® level, the shortest range figure is
the one displayed.
In the event of the risk of non-
starting related to a lack of AdBlue®
The engine start prevention system
required by regulations is activated
automatically once the AdBlue
® tank is
e m pt y.
Range greater than 1,500 miles (2,400 km)
When switching on the ignition, there is no
automatic display of range in the instrument
panel.
Above around 3,000 miles (5,000 km), the
value is not defined. With the type 2 instrument panel, pressing this
button temporarily shows the driving range.
Range between 1,500 miles and 370 miles (2,400 and 600 km)
When driving, the message is displayed every
190 miles (300 km) until the level is topped up.
The reser ve level has been reached; it is
recommended that you top up as soon as
possible.
Go to a member of the dealer network or a
qualified workshop to have the AdBlue
® topped
up.
You can also top up the tank yourself.
For more information on AdBlue
® and the
SCR system , and in particular on topping
up the AdBlue
®, refer to the corresponding
section.
When switching on the ignition, this warning
lamp comes on, accompanied by an audible
signal and a message indicating the remaining
range expressed in miles or kilometres before
engine starting is prevented.
01
Instruments
Page 36 of 296
34
Range below 370 miles (600 km)
When driving, this message is displayed every
30 seconds until the AdBlue level has been
topped up.
Go to a member of the dealer network or a
qualified workshop to have the AdBlue
® topped
up.
You can also top up the tank yourself.
Other wise you will not be able to restart the
vehicle.
For more information on the AdBlue
®
(BlueHDi engines) , and in particular on
topping up, refer to the corresponding
section. Breakdown due to a lack of AdBlue
®
The AdBlue® tank is empty: the starting
inhibition system required by legislation
prevents starting of the engine.
To be able to start the engine, we
recommend that you call on a dealer or a
qualified workshop for the top-up required.
If you carry out the top-up yourself, it is
essential to add at least 4 litres of AdBlue
®
to the tank.
For more information on the AdBlue
® (BlueHDi
engines) , and in particular on topping up, refer
to the corresponding section.
When switching on the ignition, this warning
lamp flashes and the Service warning lamp
comes on, accompanied by an audible signal
and the temporary display of a message in the
instrument panel indicating the remaining range
expressed in miles or kilometres before engine
starting is prevented.
When switching on the ignition, this warning
lamp flashes and the Service warning lamp
comes on, accompanied by an audible signal
and the temporary display of a message in the
instrument panel indicating that starting the
vehicle has been prevented.
In the event of a fault with the SCR
emissions control system
A system that prevents engine starting is
activated automatically from 680 miles
(1,100 km) after confirmation of a fault with
the SCR emissions control system.
Have the system checked by the dealer
network or a qualified workshop as soon
as possible.
In the event of the detection of a fault
If it is a temporary fault, the alert
disappears during the next journey,
after self-diagnostic checks of the SCR
emissions control system.
These warning lamps come on, accompanied
by an audible signal and the display of the
message "Emissions control fault".
The alert is triggered while driving as soon
as the fault is detected for the first time, then
when switching on the ignition for subsequent
journeys, while the fault persists.
01
Instruments
Page 51 of 296

49
This will switch on the courtesy lamps and the
direction indicators will flash for around ten
seconds.
Back-up control
System allowing mechanical door locking and
unlocking in the event of a malfunction of the
central locking system or battery failure.
Locking the driver's door
F Insert the key in the door lock, then turn it to the rear.
You can also apply this procedure for the
passenger doors.
Unlocking the driver's door
F Insert the key in the door lock, then turn it to the front.
Locking the passenger doors
F Open the doors.
F O n the rear doors, check that the child lock
is not on.
For more information on the Child lock , refer
to the corresponding section.
When closing the windows using the
remote control you must ensure that
nothing prevents them from closing
c o r r e c t l y.
If you want to leave the windows partly
open, you must deactivate the volumetric
alarm monitoring.
Locating your vehicle
This function allows you to identify your vehicle
from a distance, particularly in poor light. Your
vehicle must be locked.
F
P
ress this button. F
R
emove the black cap on the edge of the
door, using the key.
F
W
ithout forcing, insert the key into the
aperture; then, without turning it, move the
latch sideways towards the inside of the
d o o r.
F
R
emove the key and refit the cap.
F
C
lose the doors and check from the outside
that the vehicle is locked.
In the event of a fault with the central
locking system, it is essential to
disconnect the battery to lock the boot and
so ensure complete locking of the vehicle.
02
Access