ECO mode CITROEN RELAY 2017 Handbook (in English)
[x] Cancel search | Manufacturer: CITROEN, Model Year: 2017, Model line: RELAY, Model: CITROEN RELAY 2017Pages: 292, PDF Size: 9.04 MB
Page 157 of 292
155
refit the filler cap
-
Refit the blue cap to the tank and turn it
a 6
th of a turn clockwise, to its stop.
-
Close the filler flap.
r
estart the engine
-
Switch the ignition on, without starting.
-
W
ait 10 seconds before starting the
engine.
Keep AdBlue
® out of the reach of
children, in its original container.
Never transfer AdBlue
® to another container:
it would loose its purity.
Never dilute the fluid with water.
Never pour the fluid into the Diesel fuel tank.
recommendations on storage
Never store containers or bottles of
AdBlue® in your vehicle.
Freezing of the AdBlue
®
The SCR system includes an AdBlue®
tank heater that ensures operation of
the vehicle in normal conditions.
In exceptional situations, such as when the
vehicle is kept at temperatures below -15°C
(5°F) for a long period, there may be an
emission fault alert related to freezing of the
AdBlue
® additive.
Park the vehicle in an area at a more
moderate temperature for a few hours until
the AdBlue
® becomes a fluid again.
The emissions warning lamp does not go off
immediately, but does so after a few miles
of driving.
Never dispose of AdBlue® fluid bottles
in the household waste.
Place them in a special container provided
this purpose or take them to your dealer.
AdBlue® freezes at about -11°C
(12.2° F) and deteriorates above 25°C
(77°F).
It is recommended that containers and
bottles be stored in a cool area and
protected from direct sunlight.
Under these conditions, the fluid can be kept
for at least a year.
Additive that has been frozen can be used
once it has thawed out in ambient air.
AdBlue®
7
cHEcKS
Page 172 of 292
170
Parking the vehicle
Where possible, park the vehicle on level,
stable and non-slippery ground.
Apply the parking brake, switch off the
ignition and engage first gear.
Wear a high visibility vest and position the
warning triangle on the road.
You must ensure that the occupants get out
of the vehicle and wait in a safe location.
tools
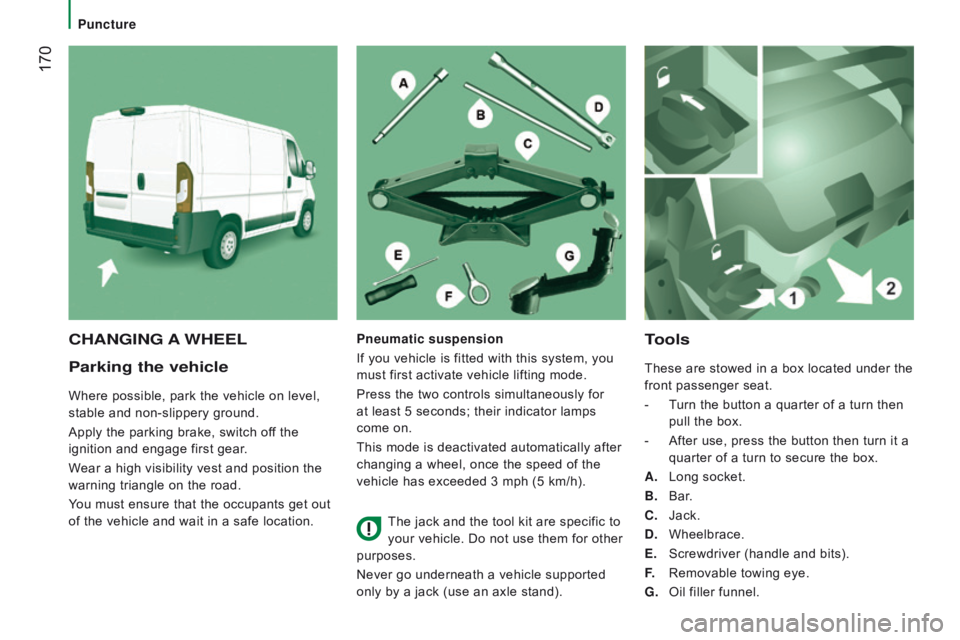
These are stowed in a box located under the
front passenger seat.
-
T
urn the button a quarter of a turn then
pull the box.
-
After use, press the button then turn it a
quarter of a turn to secure the box.
A.
Long socket.
B.
Bar
.
c
.
Jack.
d
.
Wheelbrace.
E.
Screwdriver (handle and bits).
F.
Removable towing eye.
G.
Oil filler funnel.
cHAnGInG A WHEELPneumatic suspension
If you vehicle is fitted with this system, you
must first activate vehicle lifting mode.
Press the two controls simultaneously for
at least 5 seconds; their indicator lamps
come on.
This mode is deactivated automatically after
changing a wheel, once the speed of the
vehicle has exceeded 3 mph (5 km/h).
The jack and the tool kit are specific to
your vehicle. Do not use them for other
purposes.
Never go underneath a vehicle supported
only by a jack (use an axle stand).
Puncture
Page 195 of 292

193WEIGHtS And tOWE d LOA d S
Refer to your registration certificate and the vehicle's chassis plate.
In each country, it is imperative that the towed loads permitted by local legislation are complied with. For information regarding your
vehicle's towing possibilities and its gross train weight, contact a CITROËN dealer.
The maximum authorised speed is reduced when towing (comply with the legislation in force in your country).
High ambient temperatures may result in a reduction in the performance of the vehicle, to protect the engine. When the ambient
temperature is higher than 37 °C, limit the weight towed.
In all cases, do not exceed the trailer weight or the maximum weight for the vehicle plus trailer (the Gross Train Weight or GTW) indicated.
Observe the towing limits of your vehicle.
These tables present the type-approved weights (in kg) according to the vehicle model and dimensions.
Minibus
d
imensions Model name GVW
u
nbraked trailer
r
ecommended nose weight
L3 H2 4404 005 X X
L4 H2 4424 250 X X
c
ombi 5-6 seat
d
imensions Model name GVW
u
nbraked trailer
r
ecommended nose weight
L1 H1 30
3 000 750 100
33 3 300 750 100
L2 H2 33
3 300 750 100
435 3 500 750 120
c
ombi 7-8-9 seat
d
imensions Model name GVW
u
nbraked trailer
r
ecommended nose weight
L1 H1 303 150 750 100
L2 H2 333 300 750 100
9
tEcHnIcAL dAtA
Weights
Page 196 of 292

194Va n
d
imensions Model name GVW
u
nbraked trailer
r
ecommended nose weight
L1 H1 28
2 800 750 100
30 3 000 750 100
33 3 300 750 100
35 3 500 750 100
435 3 500 750 120
440 4 005 750 120
L1 H2 30
3 000 750 100
33 3 300 750 100
35 3 500 750 100
L2 H1 30
3 000 750 100
33 3 300 750 100
35 3 500 750 100
435 3 500 750 120
L2 H2 30
3 000 750 100
33 3 300 750 100
35 3 500 750 100
435 3 500 750 120
440 4 005 750 120
Weights
Page 197 of 292

195Va n
d
imensions Model name GVW
u
nbraked trailer
r
ecommended nose weight
L3 H2 33
3 300 750 100
35 3 500 750 100
435 3 500 750 120
440 4 005 750 120
L3 H3 33
3 300 750 100
35 3 500 750 100
435 3 500 750 120
440 4 005 750 120
L4 H2 435
3 500 750 120
440 4 005 750 120
L4 H3 435
3 500 750 120
440 4 005 750 120
9
tEcHnIcAL dAtA
Weights
Page 221 of 292
219Touch screen Audio-Telematic system
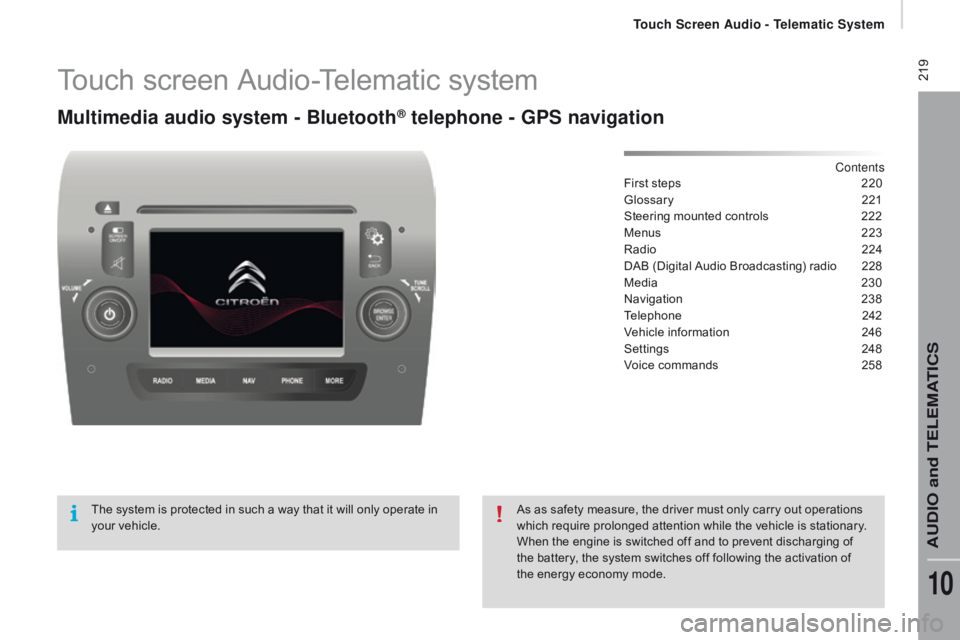
Multimedia audio system - Bluetooth® telephone - GPS navigation
Contents
First steps
2 20
Glossary
2
21
Steering mounted controls
2
22
Menus
2
23
Radio
2
24
DAB (Digital Audio Broadcasting) radio
2
28
Media
23
0
Navigation
2
38
Telephone
2
42
Vehicle information
2
46
Settings
2
48
Voice commands
2
58
The system is protected in such a way that it will only operate in
your vehicle. As as safety measure, the driver must only carry out operations
which require prolonged attention while the vehicle is stationary.
When the engine is switched off and to prevent discharging of
the battery, the system switches off following the activation of
the energy economy mode.
touch Screen Audio - telematic System
AudIO and tELEMAtIcS
10
Page 237 of 292

235
Selection of source
Select the source.
Select the "
Source" tab to display
the carousel of audio sources. Press on " MEd
I
A
".
Use the play settings in the screen.
Press the "
ra
ndom " and/or "
rep
eat" button to
activate them, press again to deactivate them. The audio system plays audio files with
".wav, .wma, .mp3" extensions and bit rate
between
32 Kbps and 320 Kbps.
With audio files .aac, .m4a, .m4b, .mp4
extensions, the sampling rates supported
are 8 - 96 KHz.
It also supports .m3u and .wpl mode.
Use only USB memory sticks formatted FAT32
(File Allocation Table).
The system does not manage devices with a
capacity greater than 64 GB.
It is advisable to restrict file names to
20
characters, without using of special
characters (e.g.: " " ?
; ù) to avoid any playing
and displaying problems.
Information and advice
The system supports USB mass
storage devices, BlackBerry® devices
or Apple® players via USB ports. The
adaptor cable is not supplied.
Control of the peripheral device is with
the audio system controls.
Other peripherals, not recognised on
connection, must be connected to the
auxiliary socket using a Jack cable (not
supplied).
It is recommended that official Apple
®
USB cables are used to ensure correct
operation. The system does not support two
identical devices connected at the
same time (two memory sticks, two
Apple
® players) but it is possible to
c
onnect one memory stick and one
Apple
® player at the same time.
touch Screen Audio - telematic System
AudIO and tELEMAtIcS
10
Page 243 of 292
241Level 1Level 2 Level 3co mment
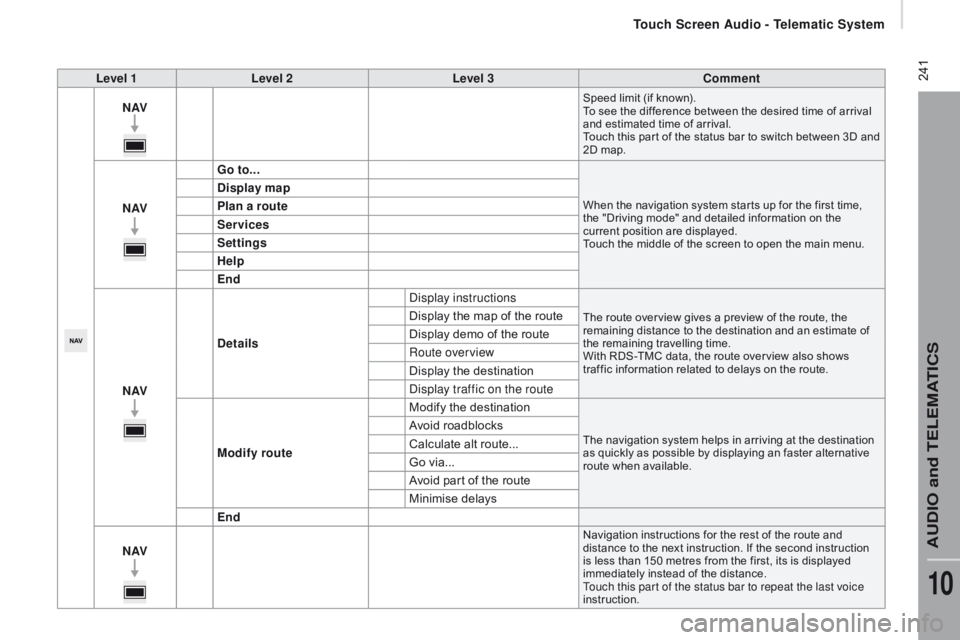
nAVSpeed limit (if known).
To see the difference between the desired time of arrival
and estimated time of arrival.
Touch this par t of the status bar to switch between 3D and
2D map.
nAVG o to...When the navigation system star ts up for the first time,
the "Driving mode" and detailed information on the
current position are displayed.
Touch the middle of the screen to open the main menu.
display map
P lan a route
Services
Settings
Help
End
nAV
de
tails Display instructions
The route over view gives a preview of the route, the
remaining distance to the destination and an estimate of
the remaining travelling time.
With RDS-TMC data, the route over view also shows
traffic information related to delays on the route.Display the map of the route
Display demo of the route
Route overview
Display the destination
Display traffic on the route
Modify route Modify the destination
The navigation system helps in arriving at the destination
as quickly as possible by displaying an faster alternative
route when available.Avoid roadblocks
Calculate alt route...
Go via...
Avoid part of the route
Minimise delays
End
nAV
Navigation instructions for the rest of the route and
distance to the next instruction. If the second instruction
is less than 150 metres from the first, its is displayed
immediately instead of the distance.
Touch this par t of the status bar to repeat the last voice
instruction.
touch Screen Audio - telematic System
AudIO and tELEMAtIcS
10
Page 246 of 292
244
Pairing a Bluetooth®
telephone
For reasons of safety and because they
require prolonged attention on the part
of the driver, the operations for pairing
a Bluetooth mobile telephone to the
hands-free system of the audio system
must be carried out with the vehicle
stationary .
Switch on the Bluetooth function of your
telephone and ensure that it is "visible to all"
(telephone configuration).
Select "Yes" to start the pairing procedure,
and search for the name of the system in the
telephone (other wise selecting "No", the main
Telephone screen page is displayed). When the pairing procedure has
finished successfully, a screen page
appears:
-
r
eply "Yes" to the question, the
mobile phone is saved as the
favourite (this telephone will have
priority over other telephones
paired subsequently).
-
i
f no other device has been
paired, the system considers
the first device paired to be the
favourite.
When pairing, a screen page is displayed
showing progress in the operation.
The services available depend on the network,
the SIM card and the compatibility of the
Bluetooth device used. Check the instructions
for your telephone and with your service
provider for the services to which you have
access.
Select the name of the system and, depending
on the telephone, using the telephone's
keypad, enter the PIN displayed in the screen
of the system or confirm in the telephone the
PIN displayed. Press "
PHO
nE".
I
f no telephone has yet been paired
in the system, a special page is
displayed in the screen. If the operation fails, we recommend
switching the Bluetooth function of
your telephone off and then on again.
For telephones not set as favourite, the
order of priority is determined in the
order of connection. The last telephone
connected has the highest priority. The profiles compatible with the system are:
HFP, OPP, PBAP, A2DP, AVRCP, MAP. When you return to your vehicle, the last
telephone connected reconnects automatically,
within around 30 seconds of switching on the
ignition (with Bluetooth switched on).
To modify the automatic connection profile,
select the telephone in the list then select the
desired setting.
Automatic reconnection
When the ignition is switched on, the telephone
connected when the ignition was last switched
off reconnects automatically, if this connection
mode had been set during the pairing
procedure (see previous pages).
Connection is conformed by the display of a
message and the name of the telephone.
touch Screen Audio - telematic System
Page 260 of 292

258Voice commands
Steering mounted controls
Information - using the system
Instead of touching the screen, you can
use your voice to issue commands to
the system. Voice interaction can be quickly used
if these buttons are pressed during
a voice message from the system; It
allows a voice command to be issued
di r e c t l y.
For example, if the system is speaking
a voice help message and if you want
to know the command to give the
system, by pressing these buttons, the
voice message is interrupted and the
desired voice command can be spoken
directly (so avoiding the need to listed
to the complete voice help message).
When the system is waiting for a voice
command from the user, pressing these
buttons closes the voice session.
To ensure that your voice commands
are always recognised by the system,
we recommend that you follow the
advice below:
-
s
peak with a normal tone of voice,
-
b
efore speaking, always wait for
the "beep" (audible signal),
-
t
he system is able to recognise
the voice commands delivered,
independent off gender, tone and
inflexion of the voice of the person
speaking,
-
k
eep the noise level inside the
vehicle as low as possible,
-
b
efore speaking a voice command,
ask other passengers not to speak.
As the system recognizes voice
commands whatever is said, when
more than one person speaks
at the same time, it is possible
that the system will recognise
commands different or additional to
the one intended, Every time a button is pressed, a
"beep" (audible signal) is produced
and the screen displays a page of
suggestions asking the user to speak a
command.
-
f or best operation, it is
recommended that the windows
and opening roof (for versions/
markets where it is available) be
closed to avoid inter ference from
extraneous noises.
This button switches on the
"Telephone" voice recognition mode,
which makes it possible to start calls,
view the log of recent /received/made,
display contacts, etc.
This button switches on the "Radio/
Media" voice recognition mode,
which makes it possible to tune to a
specific radio station radio or specific
AM/FM radio frequency, play a track
or an album on a USB memory stick /
iPod/MP3 CD.
touch Screen Audio - telematic System