key CITROEN RELAY 2019 Handbook (in English)
[x] Cancel search | Manufacturer: CITROEN, Model Year: 2019, Model line: RELAY, Model: CITROEN RELAY 2019Pages: 232, PDF Size: 8.21 MB
Page 3 of 232
Welcome
Thank you for choosing a Citroën Jumper – Relay.
T his document presents the information and recommendations required
for you to be able to explore your vehicle in complete safety.
Your vehicle will be fitted with only some of the equipment described in
this document, depending on its trim level, model and the specification
for the country in which it was sold.
The descriptions and illustrations are given without any obligation.
Automobiles CITROËN reser ves the right to modify the technical
specifications, equipment and accessories without having to update this
edition of the guide.
If ownership of your vehicle is transferred, please ensure this Complete
Handbook is passed on to the new owner.
In this document, you will find all of the instructions and
recommendations on use that will allow you to enjoy your vehicle to the
fullest. It is strongly recommended that you familiarise yourself with it,
as well as the Maintenance and Warranty Guide which will provide you
with information about warranties, servicing and roadside assistance
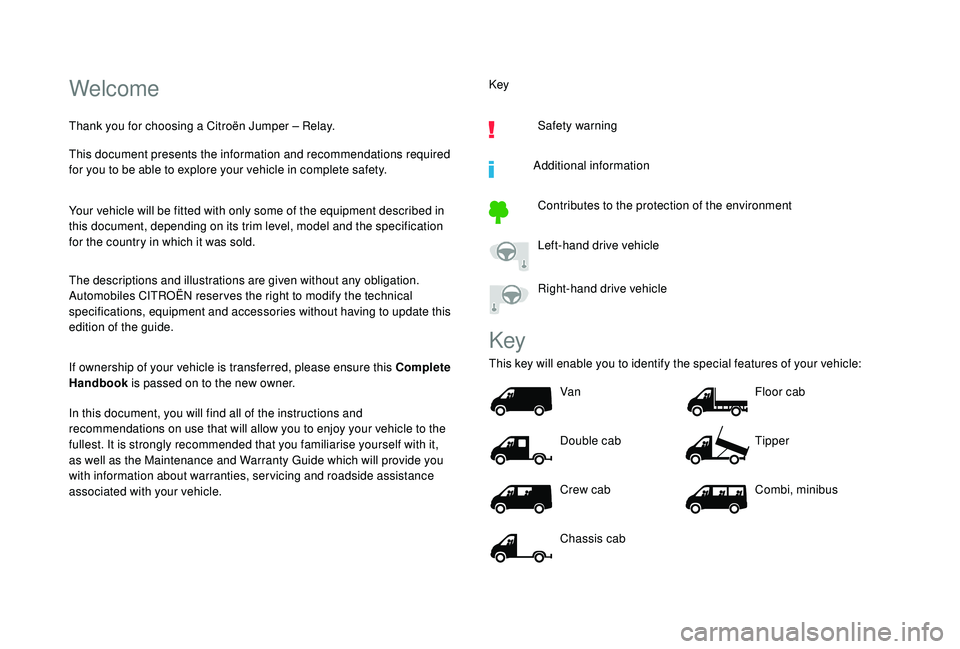
associated with your vehicle. Key
Safety warning
Additional information Contributes to the protection of the environment
Left-hand drive vehicle
Right-hand drive vehicle
Key
This key will enable you to identify the special features of your vehicle: Van
Double cab
Crew cab
Chassis cab Floor cab
Tipper
Combi, minibus
Page 16 of 232
14
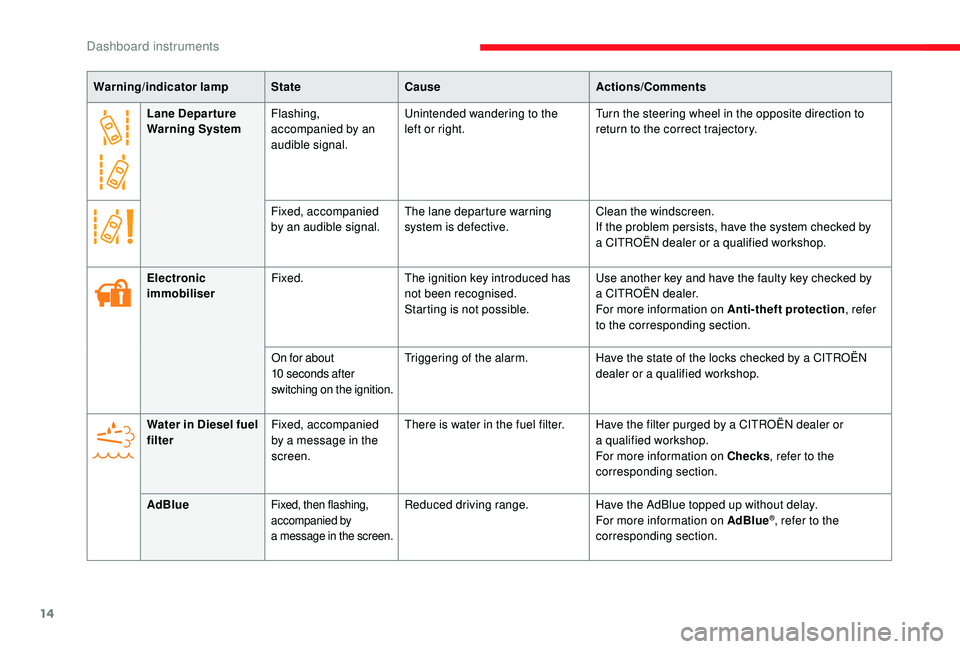
Lane Depar ture
Warning SystemFlashing,
accompanied by an
audible signal. Unintended wandering to the
left or right.
Turn the steering wheel in the opposite direction to
return to the correct trajectory.
Fixed, accompanied
by an audible signal. The lane departure warning
system is defective. Clean the windscreen.
If the problem persists, have the system checked by
a
CITROËN dealer or a qualified workshop.
Warning/indicator lamp
StateCause Actions/Comments
Electronic
immobiliser Fixed.
The ignition key introduced has
not been recognised.
Starting is not possible. Use another key and have the faulty key checked by
a
CITROËN dealer.
For more information on Anti-theft protection , refer
to the corresponding section.
On for about
10
seconds after
switching on the ignition. Triggering of the alarm.
Have the state of the locks checked by a
CITROËN
dealer or a
qualified workshop.
Water in Diesel fuel
filter Fixed, accompanied
by a
message in the
screen. There is water in the fuel filter. Have the filter purged by a
CITROËN dealer or
a
qualified workshop.
For more information on Checks , refer to the
corresponding section.
AdBlue
Fixed, then flashing,
accompanied by
a message in the screen.Reduced driving range. Have the AdBlue topped up without delay.
For more information on AdBlue®, refer to the
corresponding section.
Dashboard instruments
Page 20 of 232
18
Indicators
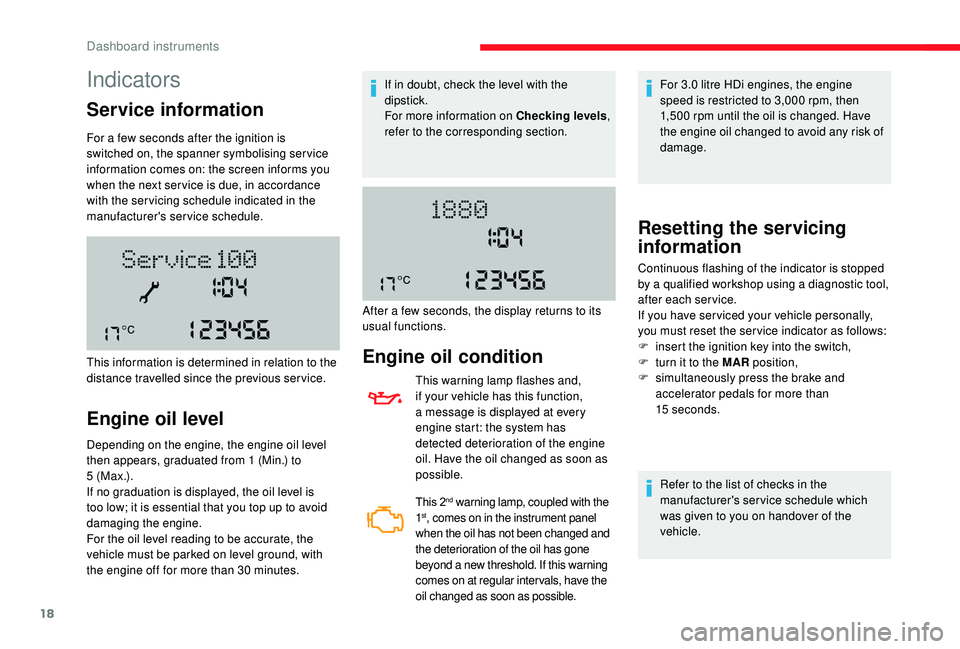
Service information
For a few seconds after the ignition is
s witched on, the spanner symbolising ser vice
information comes on: the screen informs you
when the next ser vice is due, in accordance
with the ser vicing schedule indicated in the
manufacturer's service schedule.
Engine oil level
Depending on the engine, the engine oil level
then appears, graduated from 1 (Min.) to
5
( M a x .) .
If no graduation is displayed, the oil level is
too low; it is essential that you top up to avoid
damaging the engine.
For the oil level reading to be accurate, the
vehicle must be parked on level ground, with
the engine off for more than 30
minutes.
This information is determined in relation to the
distance travelled since the previous service. If in doubt, check the level with the
dipstick.
For more information on Checking levels
,
refer to the corresponding section.
Engine oil condition
This warning lamp flashes and,
if your vehicle has this function,
a message is displayed at every
engine start: the system has
detected deterioration of the engine
oil. Have the oil changed as soon as
possible.
This 2nd warning lamp, coupled with the
1st, comes on in the instrument panel
when the oil has not been changed and
the deterioration of the oil has gone
beyond a
new threshold. If this warning
comes on at regular inter vals, have the
oil changed as soon as possible.
For 3.0 litre HDi engines, the engine
s peed is restricted to 3,000 rpm, then
1,500
rpm until the oil is changed. Have
the engine oil changed to avoid any risk of
damage.
After a
few seconds, the display returns to its
usual functions.
Resetting the servicing
information
Refer to the list of checks in the
manufacturer's service schedule which
was given to you on handover of the
vehicle.
Continuous flashing of the indicator is stopped
by a
qualified workshop using a diagnostic tool,
after each service.
If you have ser viced your vehicle personally,
you must reset the ser vice indicator as follows:
F
i
nsert the ignition key into the switch,
F
t
urn it to the MAR position,
F
s
imultaneously press the brake and
accelerator pedals for more than
15
seconds.
Dashboard instruments
Page 32 of 232
30
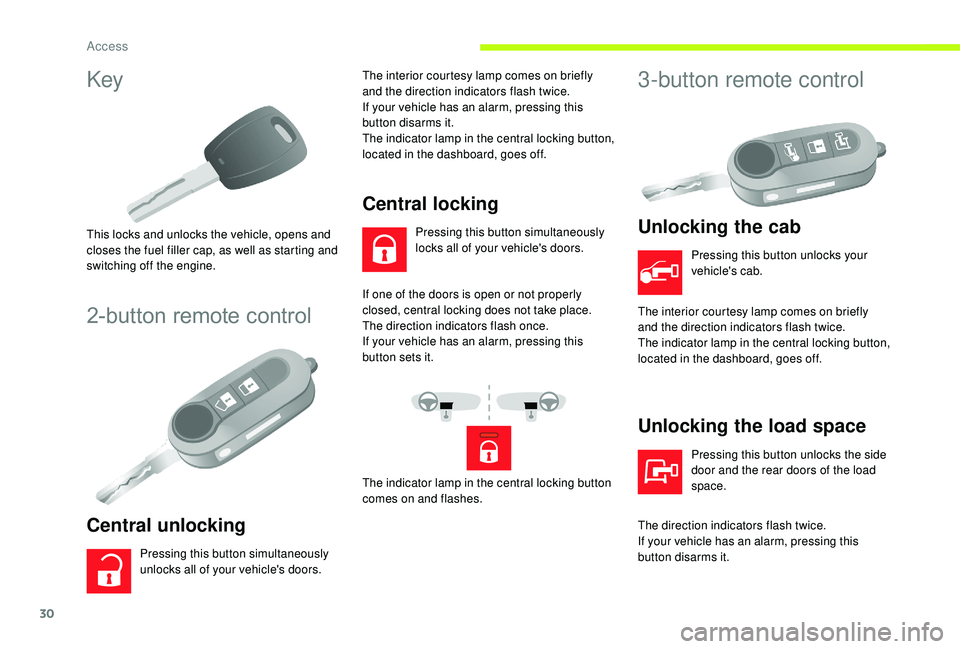
Key
This locks and unlocks the vehicle, opens and
closes the fuel filler cap, as well as starting and
switching off the engine.
2-button remote control
Central unlocking
Pressing this button simultaneously
unlocks all of your vehicle's doors.The interior courtesy lamp comes on briefly
and the direction indicators flash twice.
If your vehicle has an alarm, pressing this
button disarms it.
The indicator lamp in the central locking button,
located in the dashboard, goes off.
Central locking
Pressing this button simultaneously
locks all of your vehicle's doors.
If one of the doors is open or not properly
closed, central locking does not take place.
The direction indicators flash once.
If your vehicle has an alarm, pressing this
button sets it.
The indicator lamp in the central locking button
comes on and flashes.
3-button remote control
Unlocking the cab
Pressing this button unlocks your
vehicle's cab.
The interior courtesy lamp comes on briefly
and the direction indicators flash twice.
The indicator lamp in the central locking button,
located in the dashboard, goes off.
Unlocking the load space
Pressing this button unlocks the side
door and the rear doors of the load
space.
The direction indicators flash twice.
If your vehicle has an alarm, pressing this
button disarms it.
Access
Page 33 of 232

31
If one of the doors is open or not properly
closed, central locking does not take place.
The direction indicators flash once.
If your vehicle has an alarm, pressing this
button sets it.
Folding/Unfolding the key
F Press this button to fold/unfold the key.
If you do not press the button, there is
a
risk of damaging the mechanism.
Central locking
Pressing this button locks all of your
vehicle's doors, cab and load space.
The indicator lamp in the central locking button
comes on and flashes.
Deadlocking
Pressing this button twice in
succession deadlocks the vehicle.
It is then impossible to open the doors from the
inside or the outside.
The direction indicators flash three times. Never leave anyone inside the vehicle
when it is deadlocked.
Changing the battery
F Press the button to eject the key.
F T urn the screw 1 of the closed padlock
towards the open padlock using
a
screwdriver with a fine tip.
F
U
se the screwdriver as a lever to extract the
battery holder housing 2 . There is a
risk of damage if the replacement
battery is not of the correct type.
Only use batteries which are identical or of
an equivalent type to those recommended
by a CITROËN dealer. Take used batteries
to an authorised collection point.
Type: CR 2032/3 Volts. F
R
emove the housing and change the
battery 3 making sure that the polarities are
correct.
F
C
lose the battery holder 2 on the inside of
the key and lock it by turning the screw 1 .
2
Access
Page 34 of 232
32
Main functions of the key
Type of keyUnlocking the cab Locking the doorsUnlocking the rear
doors
Mechanical key Turn anti-clockwise
(driver's side). Turn clockwise
(driver's side). -
Key with remote control -
Signalling
Direction indicators 2
flashes.1
flash.2
flashes.
Indicator lamp in
the central locking
control button on the dashboard Of f.
On fixed for about
3
seconds, then flashing. Flashing.
Using the mechanical key in the drivers' door lock barrel does not activate (set) or deactivate
the alarm.
Locking/Unlocking from
inside
Cab and load space
The doors can still be opened from the inside. If one of the doors is open or not properly
closed, central locking does not take
place.
The indicator lamp in the control:
-
c
omes on when the doors are locked and
the ignition is switched on,
-
t
hen flashes when the doors are locked
when stationary with the engine off.
This button is inoperative if the vehicle
has been locked or deadlocked from
outside (using the key or remote control,
depending on equipment).
F
P
ress this button to lock /unlock the cab and
load space doors.
Access
Page 35 of 232

33
If you decide to drive with the doors
locked, be aware that this could make
access to the vehicle by the emergency
services more difficult in an emergency.
Load space
F Press this button to lock /unlock the side door and the rear doors from the cab.
The indicator lamp remains on when locked.
Anti-intrusion security
When the vehicle is started, the system locks
the cab and load space doors automatically
when you reach approximately 12
mph
(20
km/h).
If none of the doors are opened during the
journey, the locking remains active.
Activation/deactivation of
the system
This system can be configured using the
MODE button:
F
I
n the "Autoclose" menu, select "ON" or
"OFF".
For more information on Vehicle
configuration , refer to the corresponding
section.
Front doors
F Use the corresponding button on the remote control or use the key in the driver's door
lock to unlock.
F
P
ull the handle towards you.
Sliding side door
Take care not to block the guide space
on the floor to allow the door to slide
c o r r e c t l y.
Opening
From outside
F Pull the handle towards you then towards the rear.
2
Access
Page 38 of 232

36
Deactivation using the
remote control
F Press this button.
Deactivation of the anti-tilt
protection
F Press this control to deactivate the protection (when towing the
vehicle with the alarm on, for
example).
Failure of the remote
control
F Unlock the doors by using the key in the door lock; the alarm is triggered.
F
S
witch on the ignition, recognition of the key
code stops the alarm.
Deactivation occurs when the vehicle is
unlocked.
(Depending on engine).
The protection remains active until the doors
are unlocked with the central locking.
Locking the doors using the key in the
door lock does not set the alarm. To deactivate the siren quickly
following a
false alarm:
F
s
witch on the ignition, recognition of
the key code stops the alarm,
F
p
ress the unlocking button (cab and
key) on the remote control.
To avoid setting the alarm, when washing
the vehicle for example, lock the vehicle
using the key.
Unlocking the vehicle using the remote
control deactivates the siren automatically.
Electric windows
A. Driver's window control
B. Passenger's window control
Manual operation
F To open or close the window, press or pull
switch A/B gently, without passing the
resistance point. The window stops as soon
as the switch is released.
Automatic operation
F To open or close the window, press or pull the control A fully, beyond the resistance
point: the window opens or closes
completely when the switch is released.
Pressing the switch again stops the
movement of the window.
Always remove the key from the ignition
when leaving the vehicle, even for a
short
time.
If an obstacle is encountered during
operation of the electric windows, you must
reverse the movement of the window. To do
this, press the window control concerned.
When the driver operates the passenger
electric windows, they must ensure that
no-one is preventing correct closing of the
windows.
The driver must ensure that the passengers
use the electric windows correctly.
Be particularly aware of children when
operating the windows.
Access
Page 44 of 232

42
Mirrors
Door mirrors
These are divided into two zones:
A -Upper mirror
B - Lower mirror
Electric adjustments
The key must be in the MAR position.
Left-hand mirror:
A1 - Upper mirror
B1 - Lower mirror
Right-hand mirror:
A2 - Upper mirror
B2 - Lower mirror
F
T
hen move the control in the direction of the
adjustment required.
The rear view mirror glass is spherical in
order to widen the lateral field of view. The
objects obser ved are, in reality, closer than
they appear. Therefore, this must be taken
into account in order to assess the distance
c o r r e c t l y.
The shell incorporates the direction indicator
side repeater and aerials, depending on the
equipment available on board (GPS, GSM,
Radio, etc.). F
T
urn the control to select the mirror zone.
Electric folding
F Press this control.
Defrosting the mirrors
F Press the heated rear window button.
Rear view mirror
The lever located on the lower edge moves the
mirror into two positions.
For the day position, the lever is pushed.
For the night position to prevent dazzle, pull the
lever towards you.
Ease of use and comfort
Page 61 of 232

59
Glazed partition
Depending on the country of sale, a glazed
partition separates the cabin from the load
space.
However, you can use the control to open/close
its sliding window.
To r c h
Remove the torch from its base by pressing the
button then pivoting the torch downwards by
90
de
grees.
To switch on the torch, slide the switch
forwards.
To change the 4
batteries (NiMH type), remove
the protective cover, located on the torch.
To put the torch back in place, engage it in the
notches on the base and pivot it upwards.
If your vehicle has one, the magnetic torch is
located at the rear courtesy lamp.
A light is installed in the centre of the torch
base. With the vehicle stationary, key in the
ignition switch or removed, recharging
of and lighting from the torch stops after
around 15
minutes.
The torch batteries recharge automatically
while driving.Sliding side windows
While driving, the window must be closed
or secured in an intermediate position.
Do not project long objects outside the
vehicle through the window.
Depending on the vehicle's equipment, the side
windows of row 2
can be opened.
F
S
queeze the two controls then slide the
window.
3
Ease of use and comfort