ECO mode DODGE CHARGER 2015 7.G Owner's Manual
[x] Cancel search | Manufacturer: DODGE, Model Year: 2015, Model line: CHARGER, Model: DODGE CHARGER 2015 7.GPages: 236, PDF Size: 35.67 MB
Page 97 of 236
Direct Tune
•Tunedirectlytoaradiostationbypressingthe“Tune”buttononthescreen,and
entering the desired station number.
Store Radio Presets
Yo u r r a d i o c a n s t o r e 3 6 t o t a l p r e s e t s t a t i o n s , 1 2 p r e s e t s p e r b a n d ( A M , F M a n d S X M ) .
They are shown at the top of your radio screen.
•Toseethe12presetstationsperband,pressthe“arrow”buttononthetouchscreenat
the top right of the screen to toggle between the two sets of six presets.
•Tosetastationintomemorypressandholdthedesirednumberedbuttononthe
touchscreen for more than two seconds or until you hear a confirmation beep.
SiriusXM Premier Over 160 Channels
Get every channel available on your satellite radio, and enjoy all you want, all in one place.
Hear commercial-free music plus sports, news, talk and entertainment. Get all the
premium programming, including Howard Stern, every NFL game, Oprah Radio®,every
MLB®and NHL®game, every NASCAR®race and more. And get 20+ Xtra channels,
including SiriusXM Latino, a selection of channels dedicated to Spanish language
programming.
•ToaccessSiriusXMSatelliteRadio,pressthe“SXM”buttononthetouchscreenonthe
main Radio screen.
The following describes features that are available when in SiriusXM Satellite Radio
mode.
Seek Up/Seek Down
•Pressthe“Seekarrow”buttononthetouchscreenforlessthantwosecondstoseek
through channels in SXM mode.
•Pressandholdeither“Seekarrow”buttononthetouchscreenformorethantwo
seconds to bypass channels without stopping. The radio will stop at the next listenable
channel once the arrow button on the touchscreen is released.
Direct Tune
•TunedirectlytoaSXMchannelbypressingthe“Tune”buttononthetouchscreen,and
entering the desired station number.
Jump
Jump automatically tells you when Traffic & Weather for a favorite city is available, and
gives you the option to switch to that channel.
•Press“Jump”toactivatethefeature.AfterlisteningtoTrafficandWeather,press
“Jump” again to return to the previous channel.
ELECTRONICS
95
Page 100 of 236
When connected, the iPod®/compatible USB device can be controlled using the radio or
Steering Wheel Audio Controls to play, skip to the next or previous track, browse, and list
the contents.
The iPod®battery charges when plugged into the USB port (if supported by the specific
device).
There are also two USB Charge Only ports located on the back of the center console for
rear passengers.
To r o u t e t h e U S B / i P o d®cable out of the center console, use the access cut out.
NOTE:
•WhenconnectingyouriPod®device for the first time, the system may take several
minutes to read your music, depending on the number of files. For example, the system
will take approximately five minutes for every 1,000 songs loaded on the device. Also
during the reading process, the Shuffle and Browse functions will be disabled. This
process is needed to ensure the full use of your iPod®features and only happens the
first time it is connected. After the first time, the reading process of your iPod®will take
considerably less time unless changes are made or new songs are added to the playlist.
•TheUSBportsupportscertainMini,Classic,Nano,Touch,andiPhone®devices. The
USB port also supports playing music from compatible external USB Mass Storage
Class memory devices. Some iPod®software versions may not fully support the USB
port features. Please visit Apple’s website for iPod®software updates.
Audio Jack (AUX)
The AUX allows a portable device, such as an MP3 player or an iPod®,tobepluggedinto
the radio and utilize the vehicle’s sound system, using a 3.5 mm stereo audio cable, to
amplify the source and play through the vehicle speakers.
•Pressingthe“AUX”buttononthetouchscreenwillchangethemodetoauxiliarydevice
if the audio jack is connected, allowing the music from your portable device to be heard
through the vehicle's speakers. To activate the AUX, plug in the audio jack.
•Thefunctionsoftheportabledevicearecontrolledusingthedevicebuttons.The
volume may be controlled using the radio or portable device.
•Toroutetheaudiocableoutofthecenterconsole,usetheaccesscutoutinthefront
of the console.
Bluetooth® Streaming Audio
If using a Bluetooth®-equippeddevice,youmayalsobeabletostreammusictoyour
vehicle's sound system. Your connected device must be Bluetooth-compatible, and paired
with your system (see Uconnect®Phone for pairing instructions).
•YoucanaccessthemusicfromyourconnectedBluetooth®device by pressing the
“Bluetooth®”button on the touchscreen while in Media mode.
ELECTRONICS
98
Page 124 of 236
Direct Tune
•Tunedirectlytoaradiostationbypressingthe“Tune”buttononthescreen,and
entering the desired station number.
Store Radio Presets
Yo u r r a d i o c a n s t o r e 3 6 t o t a l p r e s e t s t a t i o n s , 1 2 p r e s e t s p e r b a n d ( A M , F M a n d S X M ) . T h e y
are shown at the top of your radio screen.
•Toseethe12presetstationsperband,pressthe“arrow”buttononthetouchscreenat
the top right of the screen to toggle between the two sets of six presets.
•Tosetastationintomemorypressandholdthedesirednumberedbuttononthe
touchscreen for more than two seconds or until you hear a confirmation beep.
HD Radio
HD Radio technology (available on Uconnect®8.4AN) allows broadcasters to transmit a
high-quality digital signal.
With an HD radio receiver, the listener is provided with a clear sound that enhances the
listening experience. HD radio can also transmit data such as song title or artist.
SiriusXM Premier Over 160 Channels
Get every channel available on your satellite radio, and enjoy all you want, all in one place.
Hear commercial-free music plus sports, news, talk and entertainment. Get all the
premium programming, including Howard Stern, every NFL game, Oprah Radio®,every
MLB®and NHL®game, every NASCAR®race and more. And get 20+ Xtra channels,
including SiriusXM Latino, a selection of channels dedicated to Spanish language
programming.
•ToaccessSiriusXMSatelliteRadio,pressthe“SXM”buttononthetouchscreenonthe
main Radio screen.
The following describes features that are available when in SiriusXM Satellite Radio
mode.
Seek Up/Seek Down
•Pressthe“Seekarrow”buttononthetouchscreenforlessthantwosecondstoseek
through channels in SXM mode.
•Pressandholdeither“Seekarrow”buttononthetouchscreenformorethantwo
seconds to bypass channels without stopping. The radio will stop at the next listenable
channel once the arrow button on the touchscreen is released.
Direct Tune
•TunedirectlytoaSXMchannelbypressingthe“Tune”buttononthetouchscreen,and
entering the desired station number.
ELECTRONICS
122
Page 127 of 236
When connected, the iPod®/compatible USB device can be controlled using the radio or
Steering Wheel Audio Controls to play, skip to the next or previous track, browse, and list
the contents.
The iPod®battery charges when plugged into the USB port (if supported by the specific
device.)
To r o u t e t h e U S B / i P o d®cable out of the center console, use the access cut out.
NOTE:
•WhenconnectingyouriPod®device for the first time, the system may take several
minutes to read your music, depending on the number of files. For example, the system
will take approximately five minutes for every 1,000 songs loaded on the device. Also
during the reading process, the Shuffle and Browse functions will be disabled. This
process is needed to ensure the full use of your iPod®features and only happens the
first time it is connected. After the first time, the reading process of your iPod®will take
considerably less time unless changes are made or new songs are added to the playlist.
•TheUSBportsupportscertainMini,Classic,Nano,Touch,andiPhone®devices. The
USB port also supports playing music from compatible external USB Mass Storage
Class memory devices. Some iPod®software versions may not fully support the USB
port features. Please visit Apple’s website for iPod®software updates.
Audio Jack (AUX)
The AUX allows a portable device, such as an MP3 player or an iPod®,tobepluggedinto
the radio and utilize the vehicle’s sound system, using a 3.5 mm audio cable, to amplify
the source and play through the vehicle speakers.
•Pressingthe“AUX”buttononthetouchscreenwillchangethemodetoauxiliarydevice
if the audio jack is connected, allowing the music from your portable device to be heard
through the vehicle's speakers. In order to activate the AUX, plug in the audio jack.
•Thefunctionsoftheportabledevicearecontrolledusingthedevicebuttons.The
volume may be controlled using the radio or portable device.
•Toroutetheaudiocableoutofthecenterconsole,usetheaccesscutoutinthefront
of the console.
Bluetooth® Streaming Audio
If using a Bluetooth®-equippeddevice,youmayalsobeabletostreammusictoyour
vehicle's sound system. Your connected device must be Bluetooth-compatible, and paired
with your system (see Uconnect®Phone for pairing instructions).
•YoucanaccessthemusicfromyourconnectedBluetooth®device by pressing the
“Bluetooth®”button on the touchscreen while in Media mode.
ELECTRONICS
125
Page 144 of 236
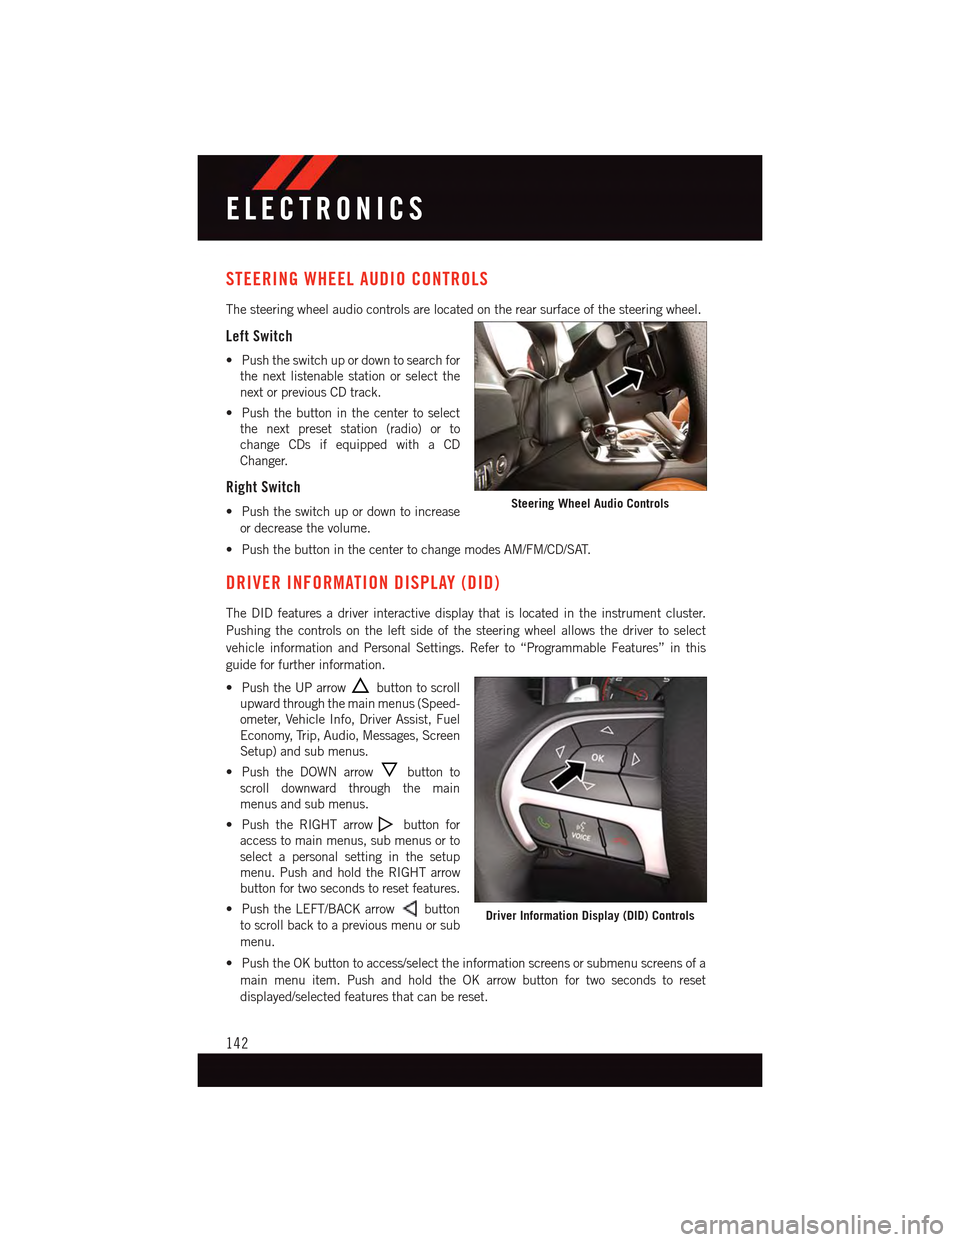
STEERING WHEEL AUDIO CONTROLS
The steering wheel audio controls are located on the rear surface of the steering wheel.
Left Switch
•Pushtheswitchupordowntosearchfor
the next listenable station or select the
next or previous CD track.
•Pushthebuttoninthecentertoselect
the next preset station (radio) or to
change CDs if equipped with a CD
Changer.
Right Switch
•Pushtheswitchupordowntoincrease
or decrease the volume.
•PushthebuttoninthecentertochangemodesAM/FM/CD/SAT.
DRIVER INFORMATION DISPLAY (DID)
The DID features a driver interactive display that is located in the instrument cluster.
Pushing the controls on the left side of the steering wheel allows the driver to select
vehicle information and Personal Settings. Refer to “Programmable Features” in this
guide for further information.
•PushtheUParrowbutton to scroll
upward through the main menus (Speed-
ometer, Vehicle Info, Driver Assist, Fuel
Economy, Trip, Audio, Messages, Screen
Setup) and sub menus.
•PushtheDOWNarrowbutton to
scroll downward through the main
menus and sub menus.
•PushtheRIGHTarrowbutton for
access to main menus, sub menus or to
select a personal setting in the setup
menu. Push and hold the RIGHT arrow
button for two seconds to reset features.
•PushtheLEFT/BACKarrowbutton
to scroll back to a previous menu or sub
menu.
•PushtheOKbuttontoaccess/selecttheinformationscreensorsubmenuscreensofa
main menu item. Push and hold the OK arrow button for two seconds to reset
displayed/selected features that can be reset.
Steering Wheel Audio Controls
Driver Information Display (DID) Controls
ELECTRONICS
142
Page 149 of 236
PROGRAMMABLE FEATURES
Driver Information Display (DID)
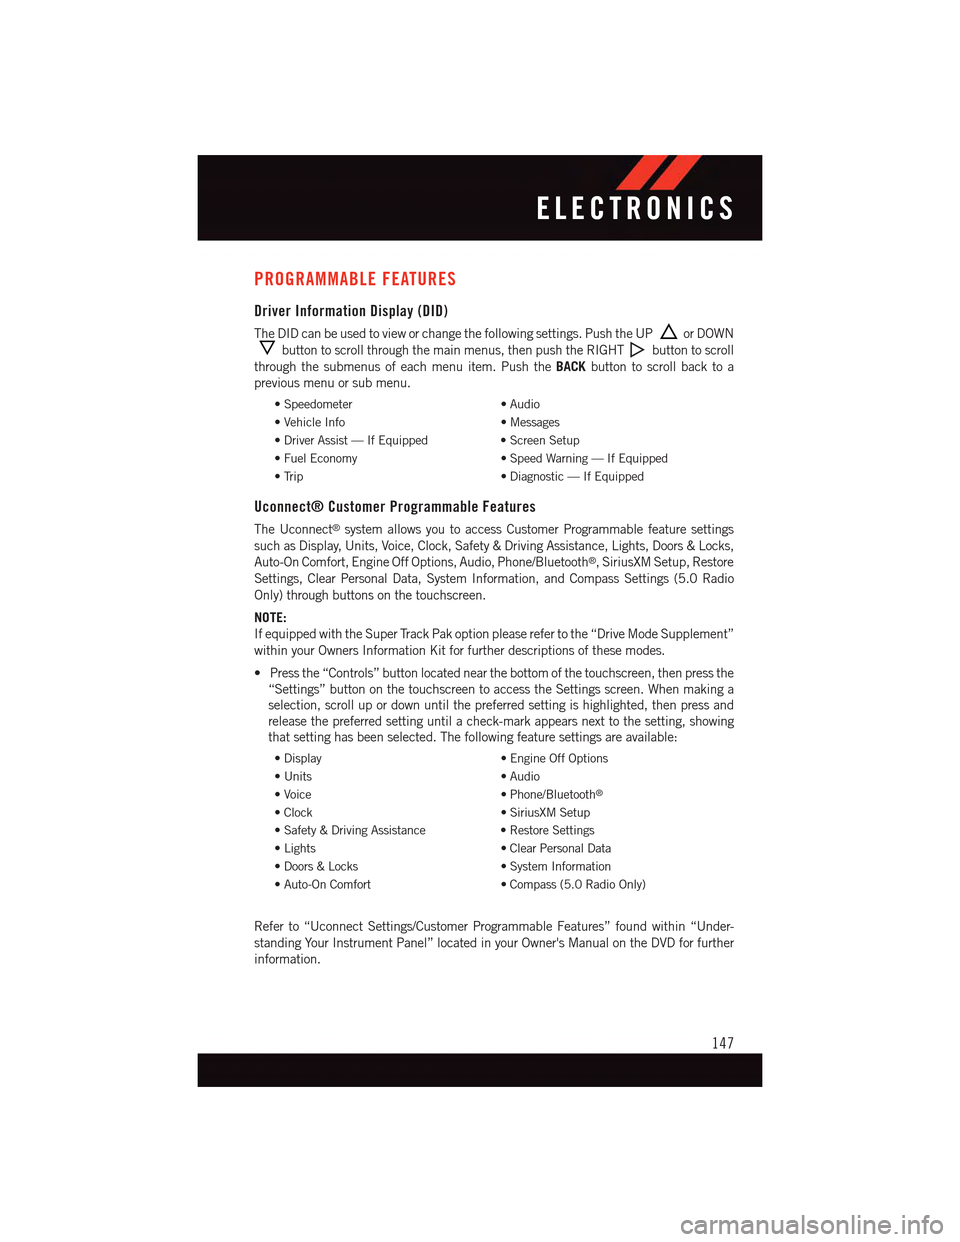
The DID can be used to view or change the following settings. Push the UPor DOWN
button to scroll through the main menus, then push the RIGHTbutton to scroll
through the submenus of each menu item. Push theBACKbutton to scroll back to a
previous menu or sub menu.
•Speedometer•Audio
•VehicleInfo•Messages
•DriverAssist—IfEquipped•ScreenSetup
•FuelEconomy•SpeedWarning—IfEquipped
•Trip•Diagnostic—IfEquipped
Uconnect® Customer Programmable Features
The Uconnect®system allows you to access Customer Programmable feature settings
such as Display, Units, Voice, Clock, Safety & Driving Assistance, Lights, Doors & Locks,
Auto-On Comfort, Engine Off Options, Audio, Phone/Bluetooth®,SiriusXMSetup,Restore
Settings, Clear Personal Data, System Information, and Compass Settings (5.0 Radio
Only) through buttons on the touchscreen.
NOTE:
If equipped with the Super Track Pak option please refer to the “Drive Mode Supplement”
within your Owners Information Kit for further descriptions of these modes.
•Pressthe“Controls”buttonlocatednearthebottomofthetouchscreen,thenpressthe
“Settings” button on the touchscreen to access the Settings screen. When making a
selection, scroll up or down until the preferred setting is highlighted, then press and
release the preferred setting until a check-mark appears next to the setting, showing
that setting has been selected. The following feature settings are available:
•Display•EngineOffOptions
•Units•Audio
•Voice•Phone/Bluetooth®
•Clock•SiriusXMSetup
•Safety&DrivingAssistance•RestoreSettings
•Lights•ClearPersonalData
•Doors&Locks•SystemInformation
•Auto-OnComfort•Compass(5.0RadioOnly)
Refer to “Uconnect Settings/Customer Programmable Features” found within “Under-
standing Your Instrument Panel” located in your Owner's Manual on the DVD for further
information.
ELECTRONICS
147
Page 156 of 236
![DODGE CHARGER 2015 7.G Owners Manual In AutoStick mode, the transmission will shift up or down when (+/-) is manually selected
by the driver (using the shift lever, or the shift paddles [if equipped]), unless an engine
lugging or overspe DODGE CHARGER 2015 7.G Owners Manual In AutoStick mode, the transmission will shift up or down when (+/-) is manually selected
by the driver (using the shift lever, or the shift paddles [if equipped]), unless an engine
lugging or overspe](/img/12/5581/w960_5581-155.png)
In AutoStick mode, the transmission will shift up or down when (+/-) is manually selected
by the driver (using the shift lever, or the shift paddles [if equipped]), unless an engine
lugging or overspeed condition would result. It will remain in the selected gear until
another upshift or downshift is chosen, except as described below.
•IntemporaryAutoStickmode(shiftleverinDRIVE),thetransmissionwillautomatically
shift up when maximum engine speed is reached. If the accelerator is fully depressed,
the transmission will downshift when possible (based on current vehicle speed and
gear, except 6.4L models). Lack of accelerator pedal activity will cause the transmis-
sion to revert to automatic operation.
•IfnormalAutoStickmodeisengaged(shiftleverinMANUALposition),manualgear
selection will be maintained until the shift lever is returned to DRIVE, or as described
below. The transmission will not upshift automatically at redline in this mode, nor will
downshifts be obtained if the accelerator pedal is pressed to the floor.
•Thetransmissionwillautomaticallydownshiftasthevehicleslows(topreventengine
lugging) and will display the current gear.
•Thetransmissionwillautomaticallydownshifttofirstgearwhencomingtoastop.After
astop,thedrivershouldmanuallyupshift(+)thetransmissionasthevehicleis
accelerated.
•Youcanstartout,fromastop,infirstorsecondgear.Tapping(+)(atastop)willallow
starting in second gear. Starting out in second gear can be helpful in snowy or icy
conditions.
•Ifarequesteddownshiftwouldcausetheenginetoover-speed,thatshiftwillnotoccur.
•Thesystemwillignoreattemptstoupshiftattoolowofavehiclespeed.
•Holdingthe(-)paddledepressed(ifequipped),orholdingtheshiftleverinthe(-)
position, will downshift the transmission to the lowest gear possible at the current
speed.
•TransmissionshiftingwillbemorenoticeablewhenAutoStickisengaged.
•Thesystemmayreverttoautomaticshiftmodeifafaultoroverheatconditionis
detected.
To d i s e n g a g e A u t o S t i c k m o d e , r e t u r n t h e s h i f t l e v e r t o t h e D R I V E p o s i t i o n , o r p r e s s a n d
hold the (+) shift paddle (if equipped, and the shift lever is already in DRIVE) until “D” is
once again indicated in the instrument cluster. You can shift in or out of the AutoStick
mode at any time without taking your foot off the accelerator pedal.
WARNING!
Do not downshift for additional engine braking on a slippery surface. The drive wheels
could lose their grip and the vehicle could skid, causing a collision or personal injury.
SRT
154
Page 157 of 236
DRIVE MODES
Yo u r S RT v e h i c l e i s e q u i p p e d w i t h a S RT D r i v e M o d e f e a t u r e . T h i s f e a t u r e g i v e s t h e d r i v e r
control over the systems in the vehicle which affect its performance, enabling the driver
to tune it for desired driving scenarios.
NOTE:
Refer to the “Drive Mode Supplement” within your Owners Information kit for further
descriptions of these modes.
SRT PERFORMANCE FEATURES
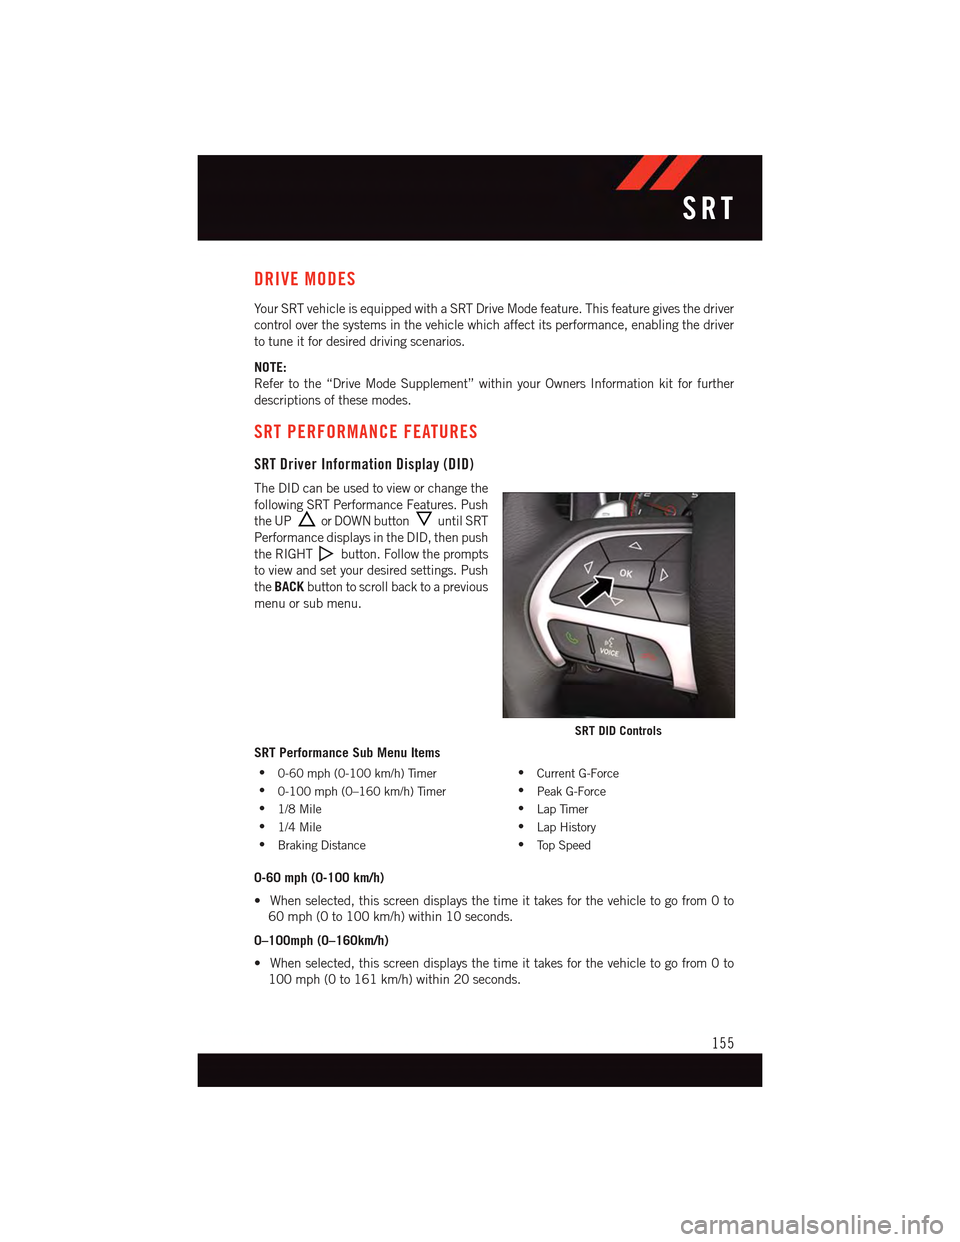
SRT Driver Information Display (DID)
The DID can be used to view or change the
following SRT Performance Features. Push
the UPor DOWN buttonuntil SRT
Performance displays in the DID, then push
the RIGHTbutton. Follow the prompts
to view and set your desired settings. Push
theBACKbutton to scroll back to a previous
menu or sub menu.
SRT Performance Sub Menu Items
•0-60 mph (0-100 km/h) Timer•Current G-Force
•0-100 mph (0–160 km/h) Timer•Peak G-Force
•1/8 Mile•Lap Timer
•1/4 Mile•Lap History
•Braking Distance•To p S p e e d
0-60 mph (0-100 km/h)
•Whenselected,thisscreendisplaysthetimeittakesforthevehicletogofrom0to
60 mph (0 to 100 km/h) within 10 seconds.
0–100mph (0–160km/h)
•Whenselected,thisscreendisplaysthetimeittakesforthevehicletogofrom0to
100 mph (0 to 161 km/h) within 20 seconds.
SRT DID Controls
SRT
155
Page 158 of 236
1/8 Mile, 1/4 Mile
•Whenselected,thisscreendisplaysthetimeittakesthevehicletotravel1/8mile
(1/4 mile) within 30 seconds and the vehicle's speed when it reaches 1/8 mile
(1/4 mile).
Braking Distance
•Whenselected,thisscreendisplaysthevehicle'sbrakingdistanceandthespeedat
which the brake pedal was depressed.
Current G-Force
•Whenselected,thisscreendisplaysthecurrentG-Force(lateralandlongitudinal)along
with a friction circle that displays the directions of the forces.
Peak G-Force
•Whenselected,thisscreendisplaysallfourG-Forcevalues(twolateralandtwo
longitudinal).
Lap Timer
•WhenselectedtheLapTimerpagewillshowthetimeralwaysat0:00.00withthe
previous Best and Last time data (unless the driver has cleared it via hold to Reset)
Lap History
•Whenselected,thisscreendisplaystheLapHistory,andwillcolorhighlightthetime
that is the best time from the Timer Page.
Top Speed
•Whenselected,thisscreendisplaystheTopSpeedsincelastreset.
Uconnect® SRT PERFORMANCE PAGES
To a c c e s s t h e S R T P e r f o r m a n c e P a g e s , p r e s s t h e “ S R T & A p p s ” b u t t o n o n t h e t o u c h -
screen then press the “SRT Performance” button on the touchscreen. Press the feature
button on the touchscreen to select that feature.
The Performance Pages includes the following menus:
•Home•Gauges 2
•Ti m e r s•G–Force
•Gauges 1•Engine
Home
When Home is selected, the following options will be available:
•Aseriesofsiximageswhichcanbeselectedbytheuser.
•Aleftandrightarrowtoallowtheusertoscrollthroughvehicleimages.
•Ashort-cuttotheSRTDriveModesfeature.
SRT
156
Page 167 of 236
NOTE:
If the indicator message illuminates when you start the vehicle, the oil change indicator
system did not reset. If necessary, repeat this procedure.
NOTE:
Resetting the oil life can also be done within the "Oil Life" menu under “Vehicle Info.”
IF YOUR ENGINE OVERHEATS
In any of the following situations, you can reduce the potential for overheating by taking
the appropriate action:
•Onthehighways—slowdown.
•Incitytraffic—whilestopped,shiftthetransmissiontoNEUTRAL,butdonotincrease
engine idle speed.
NOTE:
There are steps that you can take to slow down an impending overheat condition:
•Ifyourairconditioner(A/C)ison,turnitoff.TheA/Csystemaddsheattotheengine
cooling system and turning the A/C off can help remove this heat.
•Youcanalsoturnthetemperaturecontroltomaximumheat,themodecontroltofloor
and the blower control to high. This allows the heater core to act as a supplement to the
radiator and aids in removing heat from the engine cooling system.
CAUTION!
Driving with a hot cooling system could damage your vehicle. If the temperature gauge
reads HOT (H), pull over and stop the vehicle. Idle the vehicle with the air conditioner
turned off until the pointer drops back into the normal range. If the pointer remains on
HOT (H), and you hear continuous chimes, turn the engine off immediately, and call for
service.
WARNING!
Yo u o r o t h e r s c a n b e b a d l y b u r n e d b y h o t e n g i n e c o o l a n t ( a n t i f r e e z e ) o r s t e a m f r o m y o u r
radiator. If you see or hear steam coming from under the hood, do not open the hood
until the radiator has had time to cool. Never try to open a cooling system pressure cap
when the radiator or coolant bottle is hot.
WHAT TO DO IN EMERGENCIES
165