turn signal DODGE DART 2015 PF / 1.G User Guide
[x] Cancel search | Manufacturer: DODGE, Model Year: 2015, Model line: DART, Model: DODGE DART 2015 PF / 1.GPages: 664, PDF Size: 16.96 MB
Page 136 of 664
Blind Spot Alert Lights/Chime
When operating in Blind Spot Alert Lights/Chime mode,
the BSM system will provide a visual alert in the appro-
priate side view mirror based on a detected object. If the
turn signal is then activated, and it corresponds to an
alert present on that side of the vehicle, an audible chime
will also be sounded. Whenever a turn signal and de-
tected object are present on the same side at the same
time, both the visual and audio alerts will be issued. In
addition to the audible alert the radio (if on) volume will
be muted.
NOTE:
•Whenever an audible alert is requested by the BSM
system, the radio volume is muted.
•If the hazard flashers are on, the system will request
the appropriate visual alert only.
When the system is in RCP, the system shall respond with
both visual and audible alerts when a detected object is
present. Whenever an audible alert is requested, the radio
volume is reduced. Turn/hazard signal status is ignored;
the RCP state always requests the chime.
Blind Spot Alert Off
When the BSM system is turned off there will be no
visual or audible alerts from either the BSM or RCP
systems.
NOTE:The BSM system will store the current operating
mode when the vehicle is shut off. Each time the vehicle
is started the previously stored mode will be recalled and
used.
134 UNDERSTANDING THE FEATURES OF YOUR VEHICLE
Page 138 of 664
For additional information on Uconnect®:
•U.S. residents - visitDriveUconnect.com or call
1-877-855-8400.
•Canadian Residents - visitDriveUconnect.ca or call,
1-800-465-2001 (English) or 1-800-387-9983 (French).
Uconnect® Phone allows you to transfer calls between
the system and your mobile phone as you enter or exit
your vehicle and enables you to mute the system’s
microphone for private conversation.
Uconnect® features Bluetooth® technology - the global
standard that enables different electronic devices to con-
nect to each other without wires or a docking station, so
Uconnect® Phone works no matter where you stow your
mobile phone (be it your purse, pocket, or briefcase), as
long as your phone is turned on and has been paired to
the vehicle’s Uconnect® Phone. The Uconnect® Phone
allows up to seven mobile phones to be linked to the
system. Only one linked (or paired) mobile phone can be
used with the system at a time. The system is available in
English, Spanish, or French languages.
WARNING!
Any voice commanded system should be used only
in safe driving conditions following all applicable
laws, including laws regarding phone use. Your at-
tention should be focused on safely operating the
vehicle. Failure to do so may result in a collision
causing serious injury or death.
Uconnect® Phone Button
The steering wheel controls will contain the two
control buttons (Uconnect® Phonebutton
and Voice Commandbutton) that will
enable you to access the system. When you
push the Uconnect® Phonebutton you will hear a
BEEP. The beep is your signal to give a command.
136 UNDERSTANDING THE FEATURES OF YOUR VEHICLE
Page 154 of 664
Uconnect® Phone will then send the corresponding
phone number associated with the phonebook entry,
as tones over the phone.
NOTE:
•You may not hear all of the tones due to mobile phone
network configurations. This is normal.
•Some paging and voice mail systems have system time
out settings that are too short and may not allow the
use of this feature.
Barge In — Overriding Prompts
The “Voice Command” button can be used when you
wish to skip part of a prompt and issue your voice
command immediately. For example, if a prompt is
asking “Would you like to pair a phone, clear a...,” you
could push the Voice Commandbutton and say,
“Pair a Phone” to select that option without having to
listen to the rest of the voice prompt.
Turning Confirmation Prompts ON/OFF
Turning confirmation prompts off will stop the system
from confirming your choices (e.g., the Uconnect® Phone
will not repeat a phone number before you dial it).
1. Push the Phonebutton to begin.
2. After the “Ready” prompt and the following beep, say
one of the following:
•“Setup Confirmation Prompts On”
•“Setup Confirmation Prompts Off”
Phone And Network Status Indicators
If available on the radio and/or on a premium display
such as the instrument panel cluster, and supported by
your mobile phone, the Uconnect® Phone will provide
notification to inform you of your phone and network
status when you are attempting to make a phone call
using Uconnect® Phone. The status is given for network
signal strength, phone battery strength, etc.
152 UNDERSTANDING THE FEATURES OF YOUR VEHICLE
Page 171 of 664
mobile phone (be it your purse, pocket, or briefcase), as
long as your phone is turned on and has been paired to
the vehicle’s Uconnect® Phone. The Uconnect® Phone
allows up to ten mobile phones or audio devices to be
linked to the system. Only one linked (or paired) mobile
phone and one audio device can be used with the system
at a time. The system is available in English, Spanish, or
French languages.
Uconnect® Phone Button
The Uconnect® Phonebutton is used to
enter the phone mode and make calls, show
recent, incoming, outgoing calls, view
phonebook etc., When you push the button
you will hear a BEEP. The beep is your signal to give
a command.
Uconnect® Voice Command Button
The Uconnect® Voice Commandbutton
is only used for “barge in” and when you are
already in a call and you want to send Tones
or make another call.
The Voice Commandbutton is also used to access
the Voice Commands for the Uconnect® Voice Com-
mand features if your vehicle is equipped. Please see
the Uconnect® Voice Command section for direction
on how to use the Voice Commandbutton.
The Uconnect® Phone is fully integrated with the ve-
hicles audio system. The volume of the Uconnect® Phone
can be adjusted either from the radio volume control
knob or from the steering wheel radio control (right
switch), if so equipped.
3
UNDERSTANDING THE FEATURES OF YOUR VEHICLE 169
Page 244 of 664
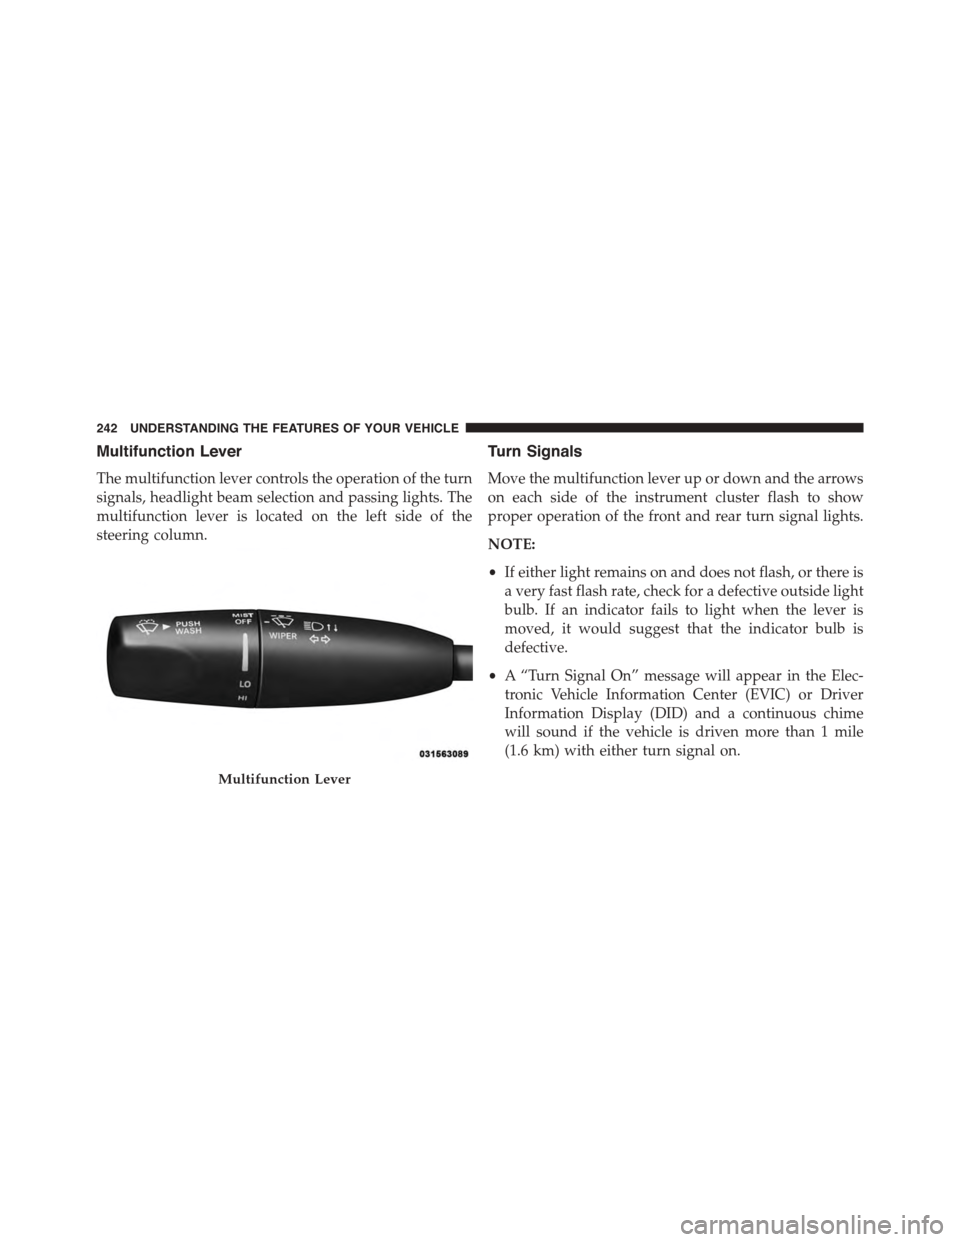
Multifunction Lever
The multifunction lever controls the operation of the turn
signals, headlight beam selection and passing lights. The
multifunction lever is located on the left side of the
steering column.
Turn Signals
Move the multifunction lever up or down and the arrows
on each side of the instrument cluster flash to show
proper operation of the front and rear turn signal lights.
NOTE:
•If either light remains on and does not flash, or there is
a very fast flash rate, check for a defective outside light
bulb. If an indicator fails to light when the lever is
moved, it would suggest that the indicator bulb is
defective.
•A “Turn Signal On” message will appear in the Elec-
tronic Vehicle Information Center (EVIC) or Driver
Information Display (DID) and a continuous chime
will sound if the vehicle is driven more than 1 mile
(1.6 km) with either turn signal on.
Multifunction Lever
242 UNDERSTANDING THE FEATURES OF YOUR VEHICLE
Page 245 of 664
Lane Change Assist
Tap the lever up or down once, without moving beyond
the detent, and the turn signal (right or left) will flash
three times then automatically turn off.
High/Low Beam Switch
Push the multifunction lever away from you to switch
the headlights to high beam. Pull the multifunction lever
toward you to switch the headlights back to low beam.
Flash-To-Pass
You can signal another vehicle with your headlights by
lightly pulling the multifunction lever toward you. This
will turn on the high beams headlights until the lever is
released.
NOTE:If the flash to pass is held for 20 seconds the
feature will deactivate.
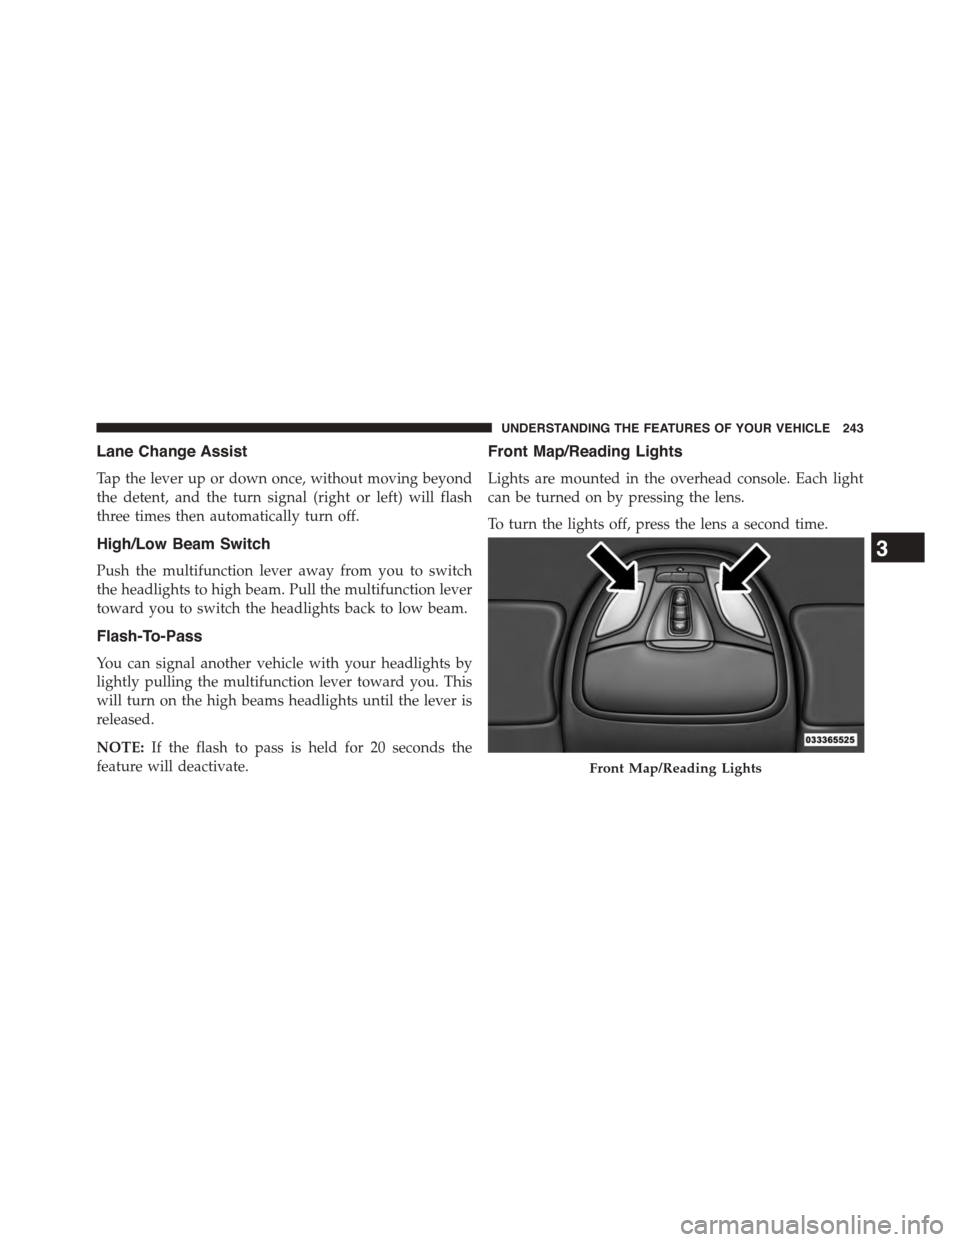
Front Map/Reading Lights
Lights are mounted in the overhead console. Each light
can be turned on by pressing the lens.
To turn the lights off, press the lens a second time.
Front Map/Reading Lights
3
UNDERSTANDING THE FEATURES OF YOUR VEHICLE 243
Page 311 of 664
approximately one minute and then remain continuously
illuminated. This sequence will continue upon subse-
quent vehicle start-ups as long as the malfunction exists.
When the malfunction indicator is illuminated, the sys-
tem may not be able to detect or signal low tire pressure
as intended. TPMS malfunctions may occur for a variety
of reasons, including the installation of replacement or
alternate tires or wheels on the vehicle that prevent the
TPMS from functioning properly. Always check the
TPMS malfunction telltale after replacing one or more
tires or wheels on your vehicle, to ensure that the
replacement or alternate tires and wheels allow the TPMS
to continue to function properly.
CAUTION!
The TPMS has been optimized for the original
equipment tires and wheels. TPMS pressures and
(Continued)
CAUTION!(Continued)
warning have been established for the tire size
equipped on your vehicle. Undesirable system opera-
tion or sensor damage may result when using re-
placement equipment that is not of the same size,
type, and/or style. Aftermarket wheels can cause
sensor damage. Do not use tire sealant from a can or
balance beads if your vehicle is equipped with a
TPMS, as damage to the sensors may result.
3. Turn Signal Indicators
The arrow will flash with the exterior turn
signal when the turn signal lever is operated.
If the vehicle electronics sense that the vehicle
is driven more than 1 mile (1.6 km) with either turn signal
on, a continuous chime will sound to alert you to turn the
signals off. If either indicator flashes at a rapid rate, check
for a defective outside light bulb.
4
UNDERSTANDING YOUR INSTRUMENT PANEL 309
Page 323 of 664
31. Red Driver Information Display (DID) Reconfigu-
rable Telltales
This area will show reconfigurable red telltales (Door(s)
Ajar, Oil Pressure Warning Telltale, Charging System
Telltale, Electronic Throttle Control (ETC) Telltale, Engine
Temperature Warning Telltale, Electric Power Steering
Malfunction). For further information, refer to “Driver
Information Display (DID)”.
ELECTRONIC VEHICLE INFORMATION CENTER
(EVIC)
The Electronic Vehicle Information Center (EVIC) fea-
tures a driver-interactive display that is located in the
instrument cluster.
The main display area will normally display the main
menu or the screens of a selected feature of the main
menu. The main display area also displays#pop up#
messages that consist of approximately 60 possible warn-
ing or information messages. These pop up messages fall
into several categories:
•Five Second Stored Messages
When the appropriate conditions occur, this type of
message takes control of the main display area for five
seconds and then returns to the previous screen. Most of
the messages of this type are then stored (as long as the
condition that activated it remains active) and can be
reviewed from the#Messages#main menu item. Ex-
amples of this message type are#Right Front Turn Signal
Lamp Out#and#Low Tire Pressure#.
•Unstored Messages
This message type is displayed indefinitely or until the
condition that activated the message is cleared. Examples
of this message type are#Turn Signal On#(if a turn signal
is left on) and#Lights On#(if driver leaves the vehicle).
4
UNDERSTANDING YOUR INSTRUMENT PANEL 321
Page 326 of 664
•UP Arrow Button
Push and release the UP arrow button to scroll
upward through the main menus (Odometer,
Digital Vehicle Speed, Trip Info, Range To
Empty, Average Fuel Economy, Current Fuel
Economy, Stored Messages, Settings).
•RIGHT Arrow Button
Push and release the RIGHT arrow button to
access the sub-menu screens of a main menu
item. Push and hold the RIGHT arrow button
for two seconds to reset displayed/selected
features that can be reset.
Electronic Vehicle Information Center (EVIC)
Messages
•Key Fob Battery Low
•Wrong Key Fob
•Key Fob Damaged
•Key In Ignition
•Left Turn Signal Out
•Right Turn Signal Out
•Turn Signal On
•Lights On
•Low Beam Headlight Out
•High Beam Headlight Out
•License Plate Light Out
•Backup Light Out
•Brake Light Out
•Parking Light Out
•Service Air Bag System
324 UNDERSTANDING YOUR INSTRUMENT PANEL
Page 334 of 664
DRIVER INFORMATION DISPLAY DID
The DRIVER INFORMATION DISPLAY (DID) features an
interactive display that is located in the instrument cluster.
The main display area will normally display the main
menu or the screens of a selected feature of the main
menu. The main display area also displays#pop up#
messages that consist of approximately 60 possible warn-
ing or information messages. These pop up messages fall
into several categories:
•Five Second Stored Messages
When the appropriate conditions occur, this type of
message takes control of the main display area for five
seconds and then returns to the previous screen. Most of
the messages of this type are then stored (as long as the
condition that activated it remains active) and can be
reviewed from the#Messages#main menu item. As long
as there is a stored message, an#i#will be displayed in the
DID’s compass/outside temp line. Examples of this
message type are#Right Front Turn Signal Lamp Out#
and#Low Tire Pressure#.
•Unstored Messages
This message type is displayed indefinitely or until the
condition that activated the message is cleared. Examples
of this message type are#Turn Signal On#(if a turn signal
is left on) and#Lights On#(if driver leaves the vehicle).
•Unstored Messages Until RUN
These messages deal primarily with the Remote Start
feature. This message type is displayed until the ignition
is in the RUN state. Examples of this message type are
#Remote Start Aborted - Door Ajar#and#Press Brake
Pedal and Push Button to Start#.
•Five Second Unstored Messages
When the appropriate conditions occur, this type of mes-
sage takes control of the main display area for five seconds
332 UNDERSTANDING YOUR INSTRUMENT PANEL