warning light DODGE DURANGO 2020 Repair Manual
[x] Cancel search | Manufacturer: DODGE, Model Year: 2020, Model line: DURANGO, Model: DODGE DURANGO 2020Pages: 464, PDF Size: 22.14 MB
Page 203 of 464

STARTING AND OPERATING201
For additional information on the appropriate
use of each transfer case mode position, see
the information below:
AWD Auto
All-Wheel Drive Auto Range – This range sends
power to the rear wheels. The all-wheel drive
system will be automatically engaged when the
vehicle senses a loss of traction. Additional
traction for varying road conditions.
LOW Range
All-Wheel Drive Low Range – This range
provides low speed all-wheel drive. Locks the
front and rear driveshafts together forcing the
front and rear wheels to rotate at the same
speed. Additional traction and maximum pulling
power for loose, slippery road surfaces only. Do
not exceed 25 mph (40 km/h).
NEUTRAL (N)
This range disengages both the front and rear
driveshafts from the powertrain. To be used for
flat towing behind another vehicle. Refer to
“Recreational Towing” in this chapter for further
information.
SHIFTING PROCEDURE
NOTE:
If any of the requirements to select a new
transfer case position have not been met, the
transfer case will not shift. The position indi -
cator light for the previous position will
remain on and the newly selected position
indicator light will continue to flash until all
the requirements for the selected position
have been met. To retry a shift: return the control switch back
to the original position, make certain all shift
requirements have been met, wait five
seconds and try the shift again.
If all the requirements to select a new
transfer case position have been met, the
current position indicator light will turn off,
the selected position indicator light will flash
until the transfer case completes the shift.
When the shift is complete, the position indi
-
cator light for the selected position will stop
flashing and remain on.
AWD Auto To Low Range
NOTE:
When shifting into or out of LOW RANGE some
gear noise may be heard. This noise is normal
and is not detrimental to the vehicle or occu -
pants.
Shifting can be performed with the vehicle
rolling 2 to 3 mph (3 to 5 km/h) or completely
stopped. Use either of the following procedures:
WARNING!
You or others could be injured or killed if you
leave the vehicle unattended with the transfer
case in the NEUTRAL position without first
fully engaging the parking brake. The transfer
case NEUTRAL position disengages both the
front and rear drive shafts from the
powertrain and will allow the vehicle to roll,
even if the transmission is in PARK. The
parking brake should always be applied when
the driver is not in the vehicle.
5
20_WD_OM_EN_USC_t.book Page 201
Page 205 of 464
STARTING AND OPERATING203
Alternate electric power steering efforts can be
selected through the Uconnect System. Refer to
”Customer Programmable Features” within
“Uconnect Settings” in “Multimedia” for further
information.
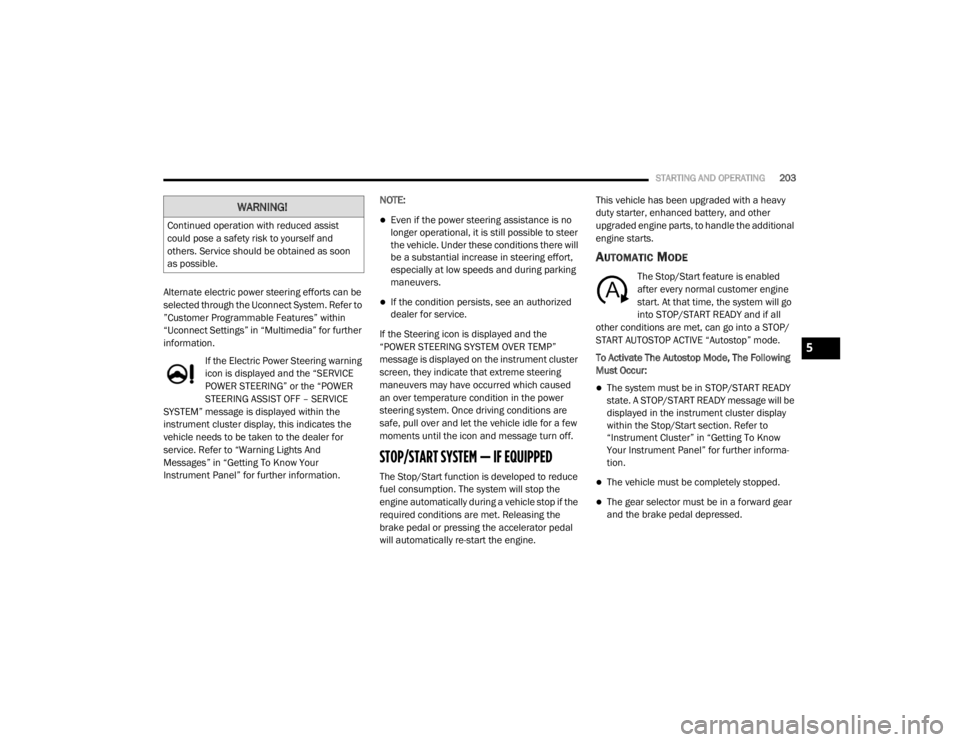
If the Electric Power Steering warning
icon is displayed and the “SERVICE
POWER STEERING” or the “POWER
STEERING ASSIST OFF – SERVICE
SYSTEM” message is displayed within the
instrument cluster display, this indicates the
vehicle needs to be taken to the dealer for
service. Refer to “Warning Lights And
Messages” in “Getting To Know Your
Instrument Panel” for further information. NOTE:
Even if the power steering assistance is no
longer operational, it is still possible to steer
the vehicle. Under these conditions there will
be a substantial increase in steering effort,
especially at low speeds and during parking
maneuvers.
If the condition persists, see an authorized
dealer for service.
If the Steering icon is displayed and the
“POWER STEERING SYSTEM OVER TEMP”
message is displayed on the instrument cluster
screen, they indicate that extreme steering
maneuvers may have occurred which caused
an over temperature condition in the power
steering system. Once driving conditions are
safe, pull over and let the vehicle idle for a few
moments until the icon and message turn off.
STOP/START SYSTEM — IF EQUIPPED
The Stop/Start function is developed to reduce
fuel consumption. The system will stop the
engine automatically during a vehicle stop if the
required conditions are met. Releasing the
brake pedal or pressing the accelerator pedal
will automatically re-start the engine. This vehicle has been upgraded with a heavy
duty starter, enhanced battery, and other
upgraded engine parts, to handle the additional
engine starts.
AUTOMATIC MODE
The Stop/Start feature is enabled
after every normal customer engine
start. At that time, the system will go
into STOP/START READY and if all
other conditions are met, can go into a STOP/
START AUTOSTOP ACTIVE “Autostop” mode.
To Activate The Autostop Mode, The Following
Must Occur:
The system must be in STOP/START READY
state. A STOP/START READY message will be
displayed in the instrument cluster display
within the Stop/Start section. Refer to
“Instrument Cluster” in “Getting To Know
Your Instrument Panel” for further informa -
tion.
The vehicle must be completely stopped.
The gear selector must be in a forward gear
and the brake pedal depressed.
WARNING!
Continued operation with reduced assist
could pose a safety risk to yourself and
others. Service should be obtained as soon
as possible.
5
20_WD_OM_EN_USC_t.book Page 203
Page 209 of 464
STARTING AND OPERATING207
Metric Speed (km/h)
Pushing the SET (+) button once will result in
a 1 km/h increase in set speed. Each subse -
quent tap of the button results in an increase
of 1 km/h.
If the button is continually pushed, the set
speed will continue to increase until the
button is released, then the new set speed
will be established.
To Decrease Speed
When the Speed Control is set, you can
decrease speed by pushing the SET (-) button.
The driver's preferred units can be selected
through the instrument cluster display. Refer to
“Getting To Know Your Instrument Panel” for
more information. The speed decrement shown
is dependent on the chosen speed unit of U.S.
(mph) or Metric (km/h):
U.S. Speed (mph)
Pushing the SET (-) button once will result in
a 1 mph decrease in set speed. Each subse -
quent tap of the button results in a decrease
of 1 mph.
If the button is continually pushed, the set
speed will continue to decrease until the
button is released, then the new set speed
will be established.
Metric Speed (km/h)
Pushing the SET (-) button once will result in
a 1 km/h decrease in set speed. Each subse -
quent tap of the button results in a decrease
of 1 km/h.
If the button is continually pushed, the set
speed will continue to decrease until the
button is released, then the new set speed
will be established.
TO ACCELERATE FOR PASSING
Press the accelerator as you would normally.
When the pedal is released, the vehicle will
return to the set speed.
Using Speed Control On Hills
The transmission may downshift on hills to
maintain the vehicle set speed.
NOTE:
The Speed Control system maintains speed up
and down hills. A slight speed change on
moderate hills is normal. On steep hills, a greater speed loss or gain may
occur so it may be preferable to drive without
Speed Control.
TO RESUME SPEED
To resume a previously set speed, push the RES
button and release. Resume can be used at any
speed above 20 mph (32 km/h).
TO DEACTIVATE
A soft tap on the brake pedal, pushing the CANC
button, or normal brake pressure while slowing
the vehicle will deactivate the Speed Control
without erasing the set speed from memory.
Pushing the on/off button or placing the ignition
in the OFF position, erases the set speed from
memory.
WARNING!
Speed Control can be dangerous where the
system cannot maintain a constant speed.
Your vehicle could go too fast for the
conditions, and you could lose control and
have an accident. Do not use Speed Control
in heavy traffic or on roads that are winding,
icy, snow-covered or slippery.
5
20_WD_OM_EN_USC_t.book Page 207
Page 210 of 464

208STARTING AND OPERATING
(Continued)
The following conditions will also deactivate the
Speed Control without erasing the set speed
from memory:
Vehicle parking brake is applied
Stability event occurs
Gear selector is moved out of DRIVE
Engine overspeed occurs
ADAPTIVE CRUISE CONTROL (ACC) — IF
EQUIPPED
Adaptive Cruise Control (ACC) increases the
driving convenience provided by cruise control
while traveling on highways and major
roadways. However, it is not a safety system
and not designed to prevent collisions. Speed
Control function performs differently. Please
refer to the proper section within this chapter.
ACC will allow you to keep cruise control
engaged in light to moderate traffic conditions
without the constant need to reset your cruise
control. ACC utilizes a radar sensor and a
forward facing camera designed to detect a
vehicle directly ahead of you. NOTE:
If the sensor does not detect a vehicle ahead
of you, ACC will maintain a fixed set speed.
If the ACC sensor detects a vehicle ahead,
ACC will apply limited braking or accelerate
(not to exceed the original set speed) auto
-
matically to maintain a preset following
distance, while matching the speed of the
vehicle ahead.
The Cruise Control system has two control
modes:
Adaptive Cruise Control mode for main -
taining an appropriate distance between
vehicles.
Normal (Fixed Speed) Cruise Control mode
for cruising at a constant preset speed. For
additional information, refer to “Normal
(Fixed Speed) Cruise Control Mode” in this
section.
NOTE:
Normal (Fixed Speed) Cruise Control will not
react to preceding vehicles. Always be aware of
the mode selected. You can change the mode by using the Cruise
Control buttons. The two control modes
function differently. Always confirm which mode
is selected.
WARNING!
Adaptive Cruise Control (ACC) is a conve
-
nience system. It is not a substitute for
active driver involvement. It is always the
driver’s responsibility to be attentive of
road, traffic, and weather conditions,
vehicle speed, distance to the vehicle
ahead; and, most importantly, brake opera -
tion to ensure safe operation of the vehicle
under all road conditions. Your complete
attention is always required while driving to
maintain safe control of your vehicle.
Failure to follow these warnings can result
in a collision and death or serious personal
injury.
20_WD_OM_EN_USC_t.book Page 208
Page 241 of 464
STARTING AND OPERATING239
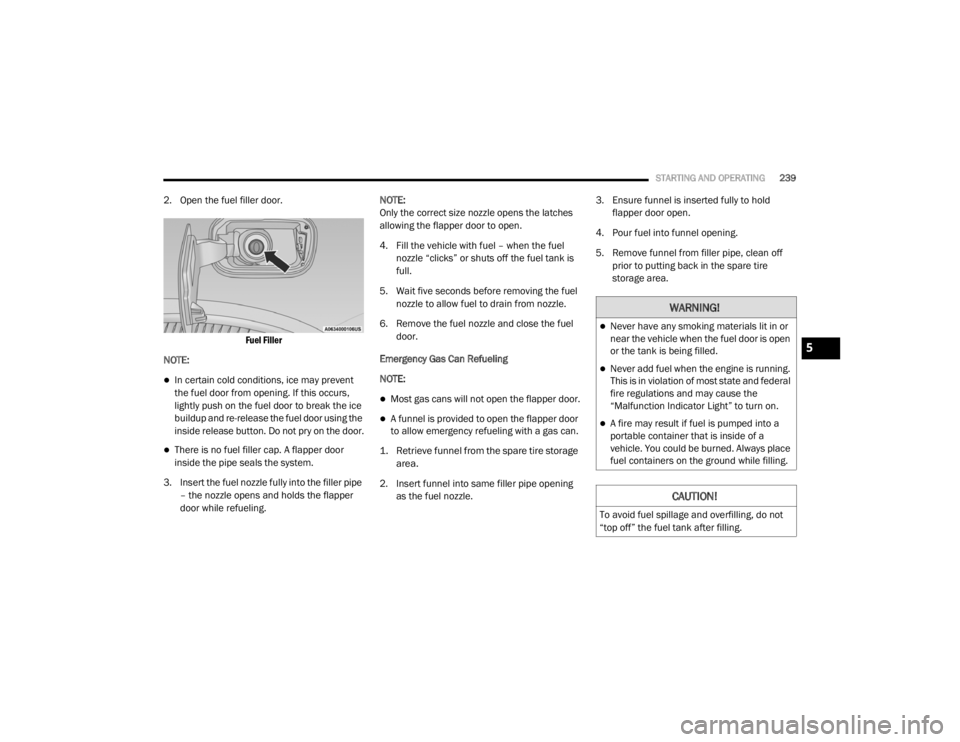
2. Open the fuel filler door.
Fuel Filler
NOTE:
In certain cold conditions, ice may prevent
the fuel door from opening. If this occurs,
lightly push on the fuel door to break the ice
buildup and re-release the fuel door using the
inside release button. Do not pry on the door.
There is no fuel filler cap. A flapper door
inside the pipe seals the system.
3. Insert the fuel nozzle fully into the filler pipe – the nozzle opens and holds the flapper
door while refueling. NOTE:
Only the correct size nozzle opens the latches
allowing the flapper door to open.
4. Fill the vehicle with fuel – when the fuel
nozzle “clicks” or shuts off the fuel tank is
full.
5. Wait five seconds before removing the fuel nozzle to allow fuel to drain from nozzle.
6. Remove the fuel nozzle and close the fuel door.
Emergency Gas Can Refueling
NOTE:
Most gas cans will not open the flapper door.
A funnel is provided to open the flapper door
to allow emergency refueling with a gas can.
1. Retrieve funnel from the spare tire storage area.
2. Insert funnel into same filler pipe opening as the fuel nozzle. 3. Ensure funnel is inserted fully to hold
flapper door open.
4. Pour fuel into funnel opening.
5. Remove funnel from filler pipe, clean off prior to putting back in the spare tire
storage area.
WARNING!
Never have any smoking materials lit in or
near the vehicle when the fuel door is open
or the tank is being filled.
Never add fuel when the engine is running.
This is in violation of most state and federal
fire regulations and may cause the
“Malfunction Indicator Light” to turn on.
A fire may result if fuel is pumped into a
portable container that is inside of a
vehicle. You could be burned. Always place
fuel containers on the ground while filling.
CAUTION!
To avoid fuel spillage and overfilling, do not
“top off” the fuel tank after filling.
5
20_WD_OM_EN_USC_t.book Page 239
Page 254 of 464
252STARTING AND OPERATING
Automatic Transmission
Select the DRIVE (D) range when towing. The
transmission controls include a drive strategy to
avoid frequent shifting when towing. However, if
frequent shifting does occur while in DRIVE, you
can use the AutoStick shift control to manually
select a lower gear.
NOTE:
Using a lower gear while operating the vehicle
under heavy loading conditions, will improve
performance and extend transmission life by
reducing excessive shifting and heat buildup.
This action will also provide better engine
braking.
AutoStick
When using the AutoStick shift control, select
the highest gear that allows for adequate
performance and avoids frequent down -
shifts. For example, choose “5” if the desired
speed can be maintained. Choose “4” or “3”
if needed to maintain the desired speed.
To prevent excess heat generation, avoid
continuous driving at high RPM. Reduce
vehicle speed as necessary to avoid
extended driving at high RPM. Return to a
higher gear or vehicle speed when grade and
road conditions allow.
Speed Control — If Equipped
Do not use on hilly terrain or with heavy
loads.
When using the Speed Control, if you experi -
ence speed drops greater than 10 mph
(16 km/h), disengage until you can get back
to cruising speed.
Use Speed Control in flat terrain and with
light loads to maximize fuel efficiency.
Cooling System
To reduce potential for engine and transmission
overheating, take the following actions:
City Driving
In city traffic — while stopped, place the trans -
mission in NEUTRAL (N), but do not increase
engine idle speed. Highway Driving
Reduce speed.
Temporarily turn off air conditioning.
SNOW PLOW
Snow plows, winches, and other aftermarket
equipment should
not be added to the front end
of your vehicle. The airbag crash sensors may
be affected by the change in the front end
structure. The airbags could deploy
unexpectedly or could fail to deploy during a
collision.
WARNING!
Do not add a snow plow, winches, or any
other aftermarket equipment to the front of
your vehicle. This could adversely affect the
functioning of the airbag system and you
could be injured.
20_WD_OM_EN_USC_t.book Page 252
Page 257 of 464
STARTING AND OPERATING255
Shifting Into NEUTRAL (N)
Use the following procedure to prepare your
vehicle for recreational towing.
1. Bring the vehicle to a complete stop on
level ground, with the engine running.
2. Press and hold the brake pedal.
3. Shift the transmission into NEUTRAL.
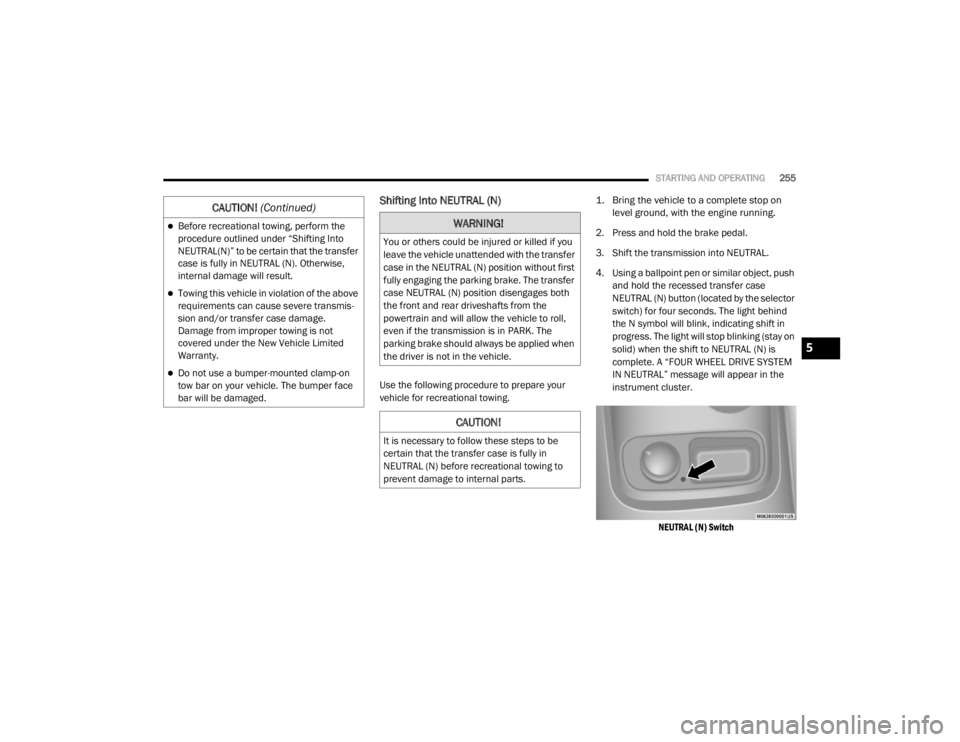
4. Using a ballpoint pen or similar object, push and hold the recessed transfer case
NEUTRAL (N) button (located by the selector
switch) for four seconds. The light behind
the N symbol will blink, indicating shift in
progress. The light will stop blinking (stay on
solid) when the shift to NEUTRAL (N) is
complete. A “FOUR WHEEL DRIVE SYSTEM
IN NEUTRAL” message will appear in the
instrument cluster.
NEUTRAL (N) Switch
Before recreational towing, perform the
procedure outlined under “Shifting Into
NEUTRAL(N)” to be certain that the transfer
case is fully in NEUTRAL (N). Otherwise,
internal damage will result.
Towing this vehicle in violation of the above
requirements can cause severe transmis -
sion and/or transfer case damage.
Damage from improper towing is not
covered under the New Vehicle Limited
Warranty.
Do not use a bumper-mounted clamp-on
tow bar on your vehicle. The bumper face
bar will be damaged.
CAUTION! (Continued)
WARNING!
You or others could be injured or killed if you
leave the vehicle unattended with the transfer
case in the NEUTRAL (N) position without first
fully engaging the parking brake. The transfer
case NEUTRAL (N) position disengages both
the front and rear driveshafts from the
powertrain and will allow the vehicle to roll,
even if the transmission is in PARK. The
parking brake should always be applied when
the driver is not in the vehicle.
CAUTION!
It is necessary to follow these steps to be
certain that the transfer case is fully in
NEUTRAL (N) before recreational towing to
prevent damage to internal parts.
5
20_WD_OM_EN_USC_t.book Page 255
Page 261 of 464
STARTING AND OPERATING259
Driving In Snow, Mud And Sand
In heavy snow, when pulling a load, or for
additional control at slower speeds, shift the
transmission to a low gear and shift the transfer
case to LOW if necessary. Refer to “All-Wheel
Drive Operation” in “Starting And Operating” for
further information. Do not shift to a lower gear
than necessary to maintain forward motion.
Over-revving the engine can spin the wheels
and traction will be lost.
Avoid abrupt downshifts on icy or slippery roads,
because engine braking may cause skidding
and loss of control.
Hill Climbing
NOTE:
Before attempting to climb a hill, determine the
conditions at the crest and/or on the other side.
Before climbing a steep hill, shift the
transmission to a lower gear and shift the
transfer case to LOW. Use FIRST gear and LOW
for very steep hills. If you stall or begin to lose forward motion while
climbing a steep hill, allow your vehicle to come
to a stop and immediately apply the brakes.
Restart the engine, and shift into REVERSE.
Back slowly down the hill, allowing the
compression braking of the engine to help
regulate the speed. If the brakes are required to
control vehicle speed, apply them lightly and
avoid locking or skidding the tires.
Remember, never drive diagonally across a hill;
always drive straight up or down.
If the wheels start to slip as you approach the
crest of a hill, ease off the accelerator and
maintain forward motion by turning the front
wheels slowly. This may provide a fresh “bite”
into the surface and will usually provide traction
to complete the climb.
Traction Downhill
Shift the transmission into a low gear, and the
transfer case into LOW range. Let the vehicle go
slowly down the hill with all four wheels turning
against engine compression drag. This will
permit you to control the vehicle speed and
direction.
When descending mountains or hills, repeated
braking can cause brake fade with loss of
braking control. Avoid repeated heavy braking
by downshifting the transmission whenever
possible.WARNING!
If the engine stalls, you lose forward motion,
or cannot make it to the top of a steep hill or
grade, never attempt to turn around. To do so
may result in tipping and rolling the vehicle.
Always back carefully straight down a hill in
REVERSE gear. Never back down a hill in
NEUTRAL using only the brake.5
20_WD_OM_EN_USC_t.book Page 259
Page 264 of 464

262IN CASE OF EMERGENCY
NOTE:
Your vehicle may be transmitting data as
authorized by the subscriber.
The SOS and ASSIST buttons will only func -
tion if you are connected to an operable LTE
(voice/data) or 4G (data) network. Other
Uconnect services will only be operable if
your SiriusXM Guardian™ service is active
and you are connected to an operable LTE
(voice/data) or 4G (data) network. ASSIST Call
The ASSIST Button is used to automatically
connect you to any one of the following support
centers:
Roadside Assistance – If you get a flat tire, or
need a tow, just push the ASSIST button and
you will be connected to a representative for
assistance. Roadside Assistance will know
what vehicle you’re driving and its location.
Additional fees may apply for roadside assis
-
tance.
SiriusXM Guardian™ Customer Care –
In-vehicle support for SiriusXM Guardian™.
Vehicle Customer Care – Total support for all
other vehicle issues.
SOS Call
1. Push the SOS Call button on the Rearview Mirror.
NOTE:
In case the SOS Call button is pushed in error,
there will be a 10 second delay before the SOS
Call system initiates a call to a SOS operator. To cancel the SOS Call connection, push the
SOS call button on the Rearview Mirror or press
the cancellation button on the Device Screen.
Termination of the SOS Call will turn off the
green LED light on the Rearview Mirror.
2. The LED light located between the ASSIST
and SOS buttons on the Rearview Mirror will
turn green once a connection to a SOS
operator has been made.
3. Once a connection between the vehicle and a SOS operator is made, the SOS Call
system may transmit the following
important vehicle information to a SOS
operator: Indication that the occupant placed a
SOS Call
The vehicle brand
The last known GPS coordinates of the
vehicle
4. You should be able to speak with the SOS operator through the vehicle audio system
to determine if additional assistance is
needed.
WARNING!
ALWAYS obey traffic laws and pay attention to
the road. ALWAYS drive safely with your hands
on the steering wheel. You have full
responsibility and assume all risks related to
the use of the features and applications in
this vehicle. Only use the features and
applications when it is safe to do so. Failure
to do so may result in an accident involving
serious injury or death.
20_WD_OM_EN_USC_t.book Page 262
Page 266 of 464
264IN CASE OF EMERGENCY
SOS Call System Limitations
Vehicles sold in Mexico DO NOT have SOS Call
system capabilities.
SOS or other emergency line operators in
Mexico may not answer or respond to SOS
system calls.
If the SOS Call system detects a malfunction,
any of the following may occur at the time the
malfunction is detected, and at the beginning of
each ignition cycle:
The Rearview Mirror light located between
the ASSIST and SOS buttons will continuously
illuminate red.
The Device Screen will display the following
message “Vehicle device requires service.
Please contact an authorized dealer.”
An In-Vehicle Audio message will state
“Vehicle device requires service. Please
contact an authorized dealer.” Even if the SOS Call system is fully functional,
factors beyond FCA US LLC’s control may
prevent or stop the SOS Call system operation.
These include, but are not limited to, the
following factors:
The ignition is in the OFF position
The vehicle’s electrical systems are not intact
The SOS Call system software and/or hard
-
ware are damaged during a crash
The vehicle battery loses power or becomes
disconnected during a vehicle crash
LTE (voice/data) or 4G (data) network and/or
Global Positioning Satellite signals are
unavailable or obstructed
Equipment malfunction at the SOS operator
facility
Operator error by the SOS operator
LTE (voice/data) or 4G (data) network
congestion
Weather
Buildings, structures, geographic terrain, or
tunnels
WARNING!
Ignoring the Rearview Mirror light could
mean you will not have SOS Call services. If
the Rearview Mirror light is illuminated,
have an authorized dealer service the SOS
Call system immediately.
The Occupant Restraint Control module
turns on the air bag Warning Light on the
instrument panel if a malfunction in any
part of the system is detected. If the Air Bag
Warning Light is illuminated, have an
authorized dealer service the Occupant
Restraint Control system immediately.
WARNING!
ALWAYS obey traffic laws and pay attention to
the road. ALWAYS drive safely with your hands
on the steering wheel. You have full
responsibility and assume all risks related to
the use of the features and applications in
this vehicle. Only use the features and
applications when it is safe to do so. Failure
to do so may result in an accident involving
serious injury or death.
20_WD_OM_EN_USC_t.book Page 264