ESP DODGE JOURNEY 2020 Owner's Manual
[x] Cancel search | Manufacturer: DODGE, Model Year: 2020, Model line: JOURNEY, Model: DODGE JOURNEY 2020Pages: 396, PDF Size: 25.53 MB
Page 137 of 396
SAFETY 135
The SABICs may help reduce the risk of partial
or complete ejection of vehicle occupants
through side windows in certain side impact
events. Side Impacts
The Side Air Bags are designed to activate in
c
e
rtain side impacts. The Occupant Restraint
Controller (ORC) determines whether the
deployment of the Side Air Bags in a particular
impact event is appropriate, based on the
severity and type of collision. The side impact
sensors aid the ORC in determining the
appropriate response to impact events.
The system is calibrated to deploy the Side Air
B a
gs on the impact side of the vehicle during
impacts that require Side Air Bag occupant
protection. In side impacts, the Side Air Bags
deploy independently; a left side impact deploys
the left Side Air Bags only and a right-side impact
deploys the right Side Air Bags only. Vehicle
damage by itself is not a good indicator of
whether or not Side Air Bags should have
deployed.
The Side Air Bags will not deploy in all side
c o
llisions, including some collisions at certain
angles, or some side collisions that do not
impact the area of the passenger compartment.
The Side Air Bags may deploy during angled or
offset frontal collisions where the front air bags
deploy. Side Air Bags are a supplement to the seat belt
r
e
straint system. Side Air Bags deploy in less
time than it takes to blink your eyes.
WARNING!
Do not mount equipment, or stack luggage
or other cargo up high enough to block the
deployment of the SABICs. The trim
covering above the side windows where the
SABIC and its deployment path are located
should remain free from any obstructions.
In order for the SABICs to work as intended,
do not install any accessory items in your
vehicle which could alter the roof. Do not
add an aftermarket sunroof to your vehicle.
Do not add roof racks that require perma -
nent attachments (bolts or screws) for
i n
stallation on the vehicle roof. Do not drill
into the roof of the vehicle for any reason.
WARNING!
Occupants, including children, who are up
against or very close to Side Air Bags can be
seriously injured or killed. Occupants,
including children, should never lean on or
sleep against the door, side windows, or
area where the side air bags inflate, even if
they are in an infant or child restraint.
Seat belts (and child restraints where
appropriate) are necessary for your protec -
tion in all collisions. They also help keep
y o
u in position, away from an inflating Side
Air Bag. To get the best protection from the
Side Air Bags, occupants must wear their
seat belts properly and sit upright with their
backs against the seats. Children must be
properly restrained in a child restraint or
booster seat that is appropriate for the size
of the child.
4
Page 139 of 396
SAFETY 137
If you do have a collision which deploys the air
bags, any or all of the following may occur:
The air bag material may sometimes cause
abrasions and/or skin reddening to the occu -
pants as the air bags deploy and unfold. The
a b
rasions are similar to friction rope burns or
those you might get sliding along a carpet or
gymnasium floor. They are not caused by
contact with chemicals. They are not perma -
nent and normally heal quickly. However, if
y o
u haven’t healed significantly within a few
days, or if you have any blistering, see your
doctor immediately.
As the air bags deflate, you may see some
smoke-like particles. The particles are a
normal by-product of the process that gener -
ates the non-toxic gas used for air bag infla -
tion. These airborne particles may irritate the
s k
in, eyes, nose, or throat. If you have skin or
eye irritation, rinse the area with cool water.
For nose or throat irritation, move to fresh air.
If the irritation continues, see your doctor.
If these particles settle on your clothing,
f o
llow the garment manufacturer’s instruc -
tions for cleaning. Do not drive your vehicle after the air bags have
d
e
ployed. If you are involved in another
collision, the air bags will not be in place to
protect you.
NOTE:
Air bag covers may not be obvious in the inte -
rior trim, but they will open during air bag
d e
ployment.
After any collision, the vehicle should be
taken to an authorized dealer immediately.
Enhanced Accident Response System
In the event of an impact, if the communication
network remains intact, and the power remains
intact, depending on the nature of the event,
the ORC will determine whether to have the
Enhanced Accident Response System perform
the following functions:
Cut off fuel to the engine (if equipped)
Cut off battery power to the electric motor
(if equipped)
Flash hazard lights as long as the battery has
power
Turn on the interior lights, which remain on
as long as the battery has power or for
15 minutes from the intervention of the
E n
hanced Accident Response System
Unlock the power door locks
WARNING!
Deployed air bags and seat belt pretensioners
cannot protect you in another collision. Have
the air bags, seat belt pretensioners, and the
seat belt retractor assemblies replaced by an
authorized dealer immediately. Also, have the
Occupant Restraint Controller System serviced
as well.
4
Page 140 of 396
138 SAFETY
(Continued)
Your vehicle may also be designed to perform
any of these other functions in response to the
Enhanced Accident Response System:
Turn off the Fuel Filter Heater, Turn off the
HVAC Blower Motor, Close the HVAC Circula-
tion Door
Cut off battery power to the:
Engine
Electric Motor (if equipped)
Electric power steering
Brake booster
Electric park brake
Automatic transmission gear selector
Horn
Front wiper
Headlamp washer pump NOTE:
After an accident, remember to cycle the ignition
t o
the STOP (OFF/LOCK) position and remove the
key from the ignition switch to avoid draining the
battery. Carefully check the vehicle for fuel leaks
in the engine compartment and on the ground
near the engine compartment and fuel tank
before resetting the system and starting the
engine. If there are no fuel leaks or damage to
the vehicle electrical devices (e.g. headlights)
after an accident, reset the system by following
the procedure described below. If you have any
doubt, contact an authorized dealer.
Enhanced Accident Response System
Reset Procedure
In order to reset the Enhanced Accident
Response System functions after an event, the
ignition switch must be changed from ignition
START or ON/RUN to ignition OFF. Carefully
check the vehicle for fuel leaks in the engine
compartment and on the ground near the
engine compartment and fuel tank before
resetting the system and starting the engine.
Maintaining Your Air Bag System
WARNING!
Modifications to any part of the air bag
system could cause it to fail when you need
it. You could be injured if the air bag system
is not there to protect you. Do not modify
the components or wiring, including adding
any kind of badges or stickers to the
steering wheel hub trim cover or the upper
passenger side of the instrument panel.
Do not modify the front bumper, vehicle
bo
dy structure, or add aftermarket side
steps or running boards.
It is dangerous to try to repair any part of
the air bag system yourself. Be sure to tell
anyone who works on your vehicle that it
has an air bag system.
Page 165 of 396
STARTING AND OPERATING 163
FOUR-SPEED AUTOMATIC
T
RANSMISSION
The transmission gear position display (located in
the instrument cluster) indicates the
transmission gear range. You must press the
brake pedal to move the gear selector out of
PARK (refer to “Brake/Transmission Shift
Interlock System” in this section). To drive, move
the gear selector from PARK or NEUTRAL to the
DRIVE position.
The electronically-controlled transmission
p r
ovides a precise shift schedule. The
transmission electronics are self-calibrating;
therefore, the first few shifts on a new vehicle
may be somewhat abrupt. This is a normal
condition, and precision shifts will develop within
a few hundred miles (kilometers).
Only shift from DRIVE to PARK or REVERSE when
t h
e accelerator pedal is released and the vehicle
is stopped. Be sure to keep your foot on the brake
pedal when shifting between these gears.
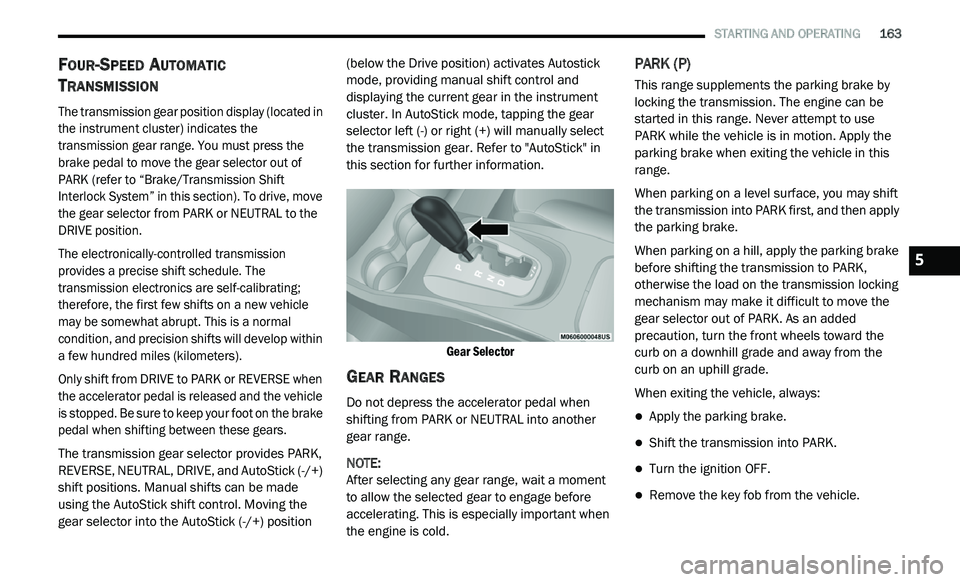
The transmission gear selector provides PARK,
R E
VERSE, NEUTRAL, DRIVE, and AutoStick (-/+)
shift positions. Manual shifts can be made
using the AutoStick shift control. Moving the
gear selector into the AutoStick (-/+) position (below the Drive position) activates Autostick
mode, providing manual shift control and
displaying the current gear in the instrument
cluster. In AutoStick mode, tapping the gear
selector left (-) or right (+) will manually select
the transmission gear. Refer to "AutoStick" in
this section for further information.
Gear Selector
GEAR RANGES
Do not depress the accelerator pedal when
shifting from PARK or NEUTRAL into another
gear range.
NOTE:
After selecting any gear range, wait a moment
to
allow the selected gear to engage before
accelerating. This is especially important when
the engine is cold.
PARK (P)
This range supplements the parking brake by
locking the transmission. The engine can be
started in this range. Never attempt to use
PARK while the vehicle is in motion. Apply the
parking brake when exiting the vehicle in this
range.
When parking on a level surface, you may shift
t h
e transmission into PARK first, and then apply
the parking brake.
When parking on a hill, apply the parking brake
b e
fore shifting the transmission to PARK,
otherwise the load on the transmission locking
mechanism may make it difficult to move the
gear selector out of PARK. As an added
precaution, turn the front wheels toward the
curb on a downhill grade and away from the
curb on an uphill grade.
When exiting the vehicle, always:
Apply the parking brake.
Shift the transmission into PARK.
Turn the ignition OFF.
Remove the key fob from the vehicle.
5
Page 167 of 396
STARTING AND OPERATING 165
The following indicators should be used to
ensure that you have properly engaged the
transmission into the PARK position:
When shifting into PARK, firmly move the
gear selector all the way forward and to the
left until it stops and is fully seated.
Look at the transmission gear position
display and verify that it indicates the PARK
position.
With brake pedal released, verify that the
gear selector will not move out of PARK.
REVERSE (R)
This range is for moving the vehicle backward.
Shift into REVERSE only after the vehicle has
come to a complete stop.
NEUTRAL (N)
Use this range when the vehicle is standing for
prolonged periods with the engine running. The
engine may be started in this range. Apply the
parking brake and shift the transmission into
PARK if you must exit the vehicle.DRIVE (D)
This range should be used for most city and
highway driving. It provides the smoothest
upshifts and downshifts, and the best fuel
economy. The transmission automatically
upshifts through all forward gears. The DRIVE
position provides optimum driving characteristics
under all normal operating conditions.
When frequent transmission shifting occurs
(
s
uch as when operating the vehicle under
heavy loading conditions, in hilly terrain,
traveling into strong head winds, or while towing
a heavy trailer), use the AutoStick shift control
(refer to “AutoStick” in this section for further
information) to select a lower gear. Under these
conditions, using a lower gear will improve
performance and extend transmission life by
reducing excessive shifting and heat buildup.
If the transmission temperature exceeds
n o
rmal operating limits, the powertrain
controller will modify the transmission shift
schedule and expand the range of torque
converter clutch engagement. This is done
to prevent transmission damage due to
o v
erheating.
During cold temperatures, transmission
o p
eration may be modified depending on
engine and transmission temperature as well
as vehicle speed. This feature improves warm
up time of the engine and transmission to
achieve maximum efficiency. Engagement of
the torque converter clutch is inhibited until the
transmission fluid is warm (refer to the “Note”
under “Torque Converter Clutch” in this
section). During extremely cold temperatures
WARNING!
Do not coast in NEUTRAL and never turn off the
ignition to coast down a hill. These are unsafe
practices that limit your response to changing
traffic or road conditions. You might lose
control of the vehicle and have a collision.
CAUTION!
Towing the vehicle, coasting, or driving for any
other reason with the transmission in NEUTRAL
can cause severe transmission damage.
Refer to “Recreational Towing” in “Starting
An
d Operating” and “Towing A Disabled
Vehicle” in “In Case Of Emergency” for further
information.
5
Page 169 of 396
STARTING AND OPERATING 167
Transmission Limp Home Mode
Transmission function is monitored
electronically for abnormal conditions. If a
condition is detected that could result in
transmission damage, Transmission Limp
Home Mode is activated. In this mode, the
transmission remains in SECOND gear
regardless of which forward gear is selected.
PARK, REVERSE, and NEUTRAL will continue to
operate. The Malfunction Indicator Light (MIL)
may be illuminated. Limp Home Mode allows
the vehicle to be driven to an authorized dealer
for service without damaging the transmission.
In the event of a momentary problem, the
tr
ansmission can be reset to regain all forward
gears by performing the following steps:
1. S top the vehicle.
2
. S hift the transmission into PARK.
3
. T urn the ignition OFF.
4
. W ait approximately 10 seconds.
5
. R estart the engine.
6
. S hift into the desired gear range. If the
p
roblem is no longer detected, the
transmission will return to normal operation.
NOTE:
Even if the transmission can be reset, we
r e
commend that you visit an authorized dealer
at your earliest possible convenience. An autho -
rized dealer has diagnostic equipment to
a s
sess the condition of your transmission.
If the transmission cannot be reset, authorized
d e
aler service is required.
Overdrive Operation
The automatic transmission includes an
electronically controlled Overdrive (top gear).
The transmission will automatically shift into
Overdrive if the following conditions are
present:
The gear selector is in the DRIVE position.
The transmission fluid has reached an
adequate temperature.
The engine coolant has reached an adequate
temperature.
The vehicle speed is sufficiently high.
The driver is not heavily pressing the acceler -
ator.
Torque Converter Clutch
A feature designed to improve fuel economy
has been included in the automatic
transmission on your vehicle. A clutch within the
torque converter engages automatically at
calibrated speeds. This may result in a slightly
different feeling or response during normal
operation in the upper gears. When the vehicle
speed drops or during some accelerations, the
clutch automatically disengages.
NOTE:
The torque converter clutch will not engage until
t h
e transmission fluid and engine coolant are
warm (usually after 1 to 3 miles [2 to 5 km] of
d r
iving). Because the engine speed is higher
when the torque converter clutch is not
engaged, it may seem as if the transmission is
not shifting into Overdrive when cold. This is
normal. Using the AutoStick shift control, when
the transmission is sufficiently warm, will
demonstrate that the transmission is able to
shift into and out of Overdrive.
5
Page 170 of 396
168 STARTING AND OPERATING
POWER STEERING
The standard power steering system will give
you good vehicle response and increased ease
of maneuverability in tight spaces. The system
will provide mechanical steering capability if
power assist is lost.
If for some reason the power assist is
in
terrupted, it will still be possible to steer
your vehicle. Under these conditions, you will
o b
serve a substantial increase in steering
effort, especially at very low vehicle speeds
and during parking maneuvers.
NOTE:
Increased noise levels at the end of the
steering wheel travel are considered normal
and do not indicate that there is a problem
with the power steering system.
Upon initial start-up in cold weather, the
power steering pump may make noise for a
short amount of time. This is due to the cold,
thick fluid in the steering system. This noise
should be considered normal, and it does not
in any way damage the steering system.
POWER STEERING FLUID CHECK
Checking the power steering fluid level at a
defined service interval is not required. The fluid
should only be checked if a leak is suspected,
abnormal noises are apparent, and/or the
system is not functioning as anticipated.
Coordinate inspection efforts through an
authorized dealer. If necessary, add fluid to restore to the proper
in
dicated level. With a clean cloth, wipe any
spilled fluid from all surfaces. Refer to “Fluids
And Lubricants” in “Technical Specifications”
for the correct fluid type.
SPEED CONTROL — IF EQUIPPED
When engaged, the Speed Control takes over
accelerator operations at speeds greater than
25 mph (40 km/h).
The Speed Control buttons are located on the
r i
ght side of the steering wheel.
CAUTION!
Prolonged operation of the steering system at
the end of the steering wheel travel will
increase the steering fluid temperature and it
should be avoided when possible. Damage to
the power steering pump may occur.
WARNING!
Fluid level should be checked on a level
surface and with the engine off to prevent
injury from moving parts and to ensure
accurate fluid level reading. Do not overfill.
Use only manufacturer's recommended
power steering fluid.
CAUTION!
Do not use chemical flushes in your power
steering system as the chemicals can
damage your power steering components.
Such damage is not covered by the New
Vehicle Limited Warranty.
Page 176 of 396
174 STARTING AND OPERATING
(Continued)
PARK ASSIST", OR "SERVICE PARK ASSIST
SYSTEM" messages for as long as the vehicle is
in REVERSE. Under this condition, ParkSense
will not operate.
If “CLEAN PARK ASSIST” appears in the
in
strument cluster display, make sure the outer
surface and the underside of the rear fascia/
bumper are clean and clear of snow, ice, mud,
dirt or other obstruction. Then, cycle the
ignition. If the message continues to appear,
see an authorized dealer.
If “SERVICE PARK ASSIST” or “SERVICE PARK
A S
SIST SYSTEM” appears in the instrument
cluster display, see an authorized dealer.
CLEANING THE PARKSENSE SYSTEM
Clean the ParkSense sensors with water, car
wash soap and a soft cloth. Do not use rough or
hard cloths. Do not scratch or poke the sensors.
Otherwise, you could damage the sensors.
PARKSENSE SYSTEM USAGE
P
RECAUTIONS
NOTE:
Ensure that the rear bumper is free of snow, ice,
mud, dirt and debris to keep the ParkSense
system operating properly.
Jackhammers, large trucks, and other vibrations
could affect the performance of ParkSense.
When you turn ParkSense off, the instrument
cluster display will read “PARK ASSIST
SYSTEM OFF.” Furthermore, once you turn
ParkSense off, it remains off until you turn it
on again, even if you cycle the ignition key.
When you move the gear selector to the
REVERSE position and ParkSense is turned
off, the instrument cluster display will show
the “PARK ASSIST SYSTEM OFF” message for
as long as the vehicle is in REVERSE.
Clean the ParkSense sensors regularly,
taking care not to scratch or damage them.
The sensors must not be covered with ice,
snow, slush, mud, dirt or debris. Failure to do
so can result in the system not working prop -erly. The ParkSense system might not detect
a
n
obstacle behind the fascia/bumper, or it
could provide a false indication that an
obstacle is behind the fascia/bumper.
Ensure the ParkSense system is off if objects
such as bicycle carriers, trailer hitches, etc.,
are placed within 12 inches (30 cm) from the
r e
ar fascia/bumper. Failure to do so can
result in the system misinterpreting a close
object as a sensor problem, causing the
“SERVICE PARK ASSIST SYSTEM” message
to appear in the instrument cluster display.
WARNING!
Drivers must be careful when backing up
even when using ParkSense. Always check
carefully behind your vehicle, look behind
you, and be sure to check for pedestrians,
animals, other vehicles, obstructions, and
blind spots before backing up. You are
responsible for safety and must continue to
pay attention to your surroundings. Failure to
do so can result in serious injury or death.
Page 178 of 396
176 STARTING AND OPERATING
The following table shows the approximate
distances for each zone:
NOTE:
If snow, ice, mud, or any foreign substance
bu
ilds up on the camera lens, clean the lens,
rinse with water, and dry with a soft cloth. Do
not cover the lens.
REFUELING THE VEHICLE
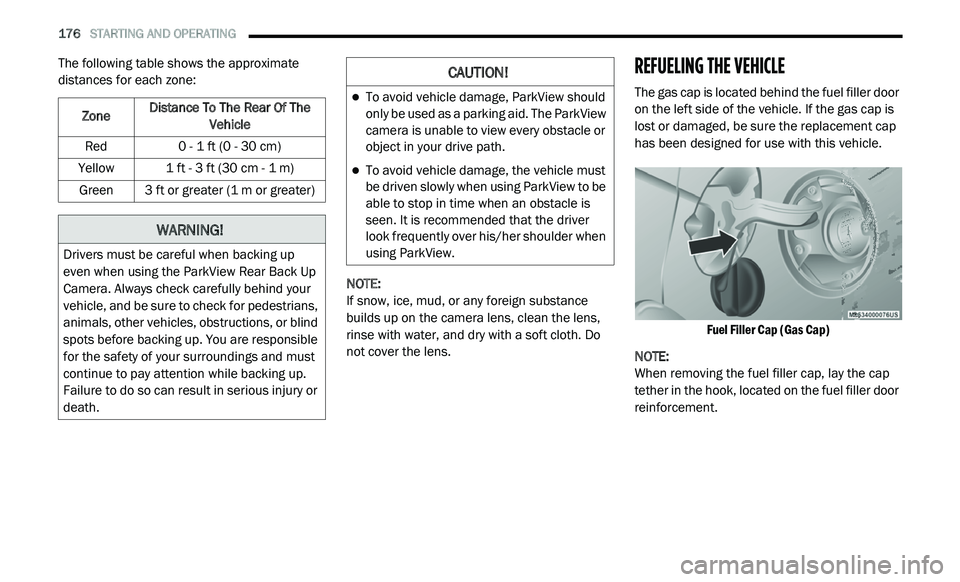
The gas cap is located behind the fuel filler door
on the left side of the vehicle. If the gas cap is
lost or damaged, be sure the replacement cap
has been designed for use with this vehicle.
Fuel Filler Cap (Gas Cap)
NOTE:
When removing the fuel filler cap, lay the cap
t e
ther in the hook, located on the fuel filler door
reinforcement.
Zone
Distance To The Rear Of The
Ve
hicle
Red 0 - 1 ft (0 - 30 cm)
Yellow 1 ft - 3 ft (30 cm - 1 m)
Green 3 ft or greater (1 m or greater)
WARNING!
Drivers must be careful when backing up
even when using the ParkView Rear Back Up
Camera. Always check carefully behind your
vehicle, and be sure to check for pedestrians,
animals, other vehicles, obstructions, or blind
spots before backing up. You are responsible
for the safety of your surroundings and must
continue to pay attention while backing up.
Failure to do so can result in serious injury or
death.
CAUTION!
To avoid vehicle damage, ParkView should
only be used as a parking aid. The ParkView
camera is unable to view every obstacle or
object in your drive path.
To avoid vehicle damage, the vehicle must
be driven slowly when using ParkView to be
able to stop in time when an obstacle is
seen. It is recommended that the driver
look frequently over his/her shoulder when
using ParkView.
Page 217 of 396
IN CASE OF EMERGENCY 215
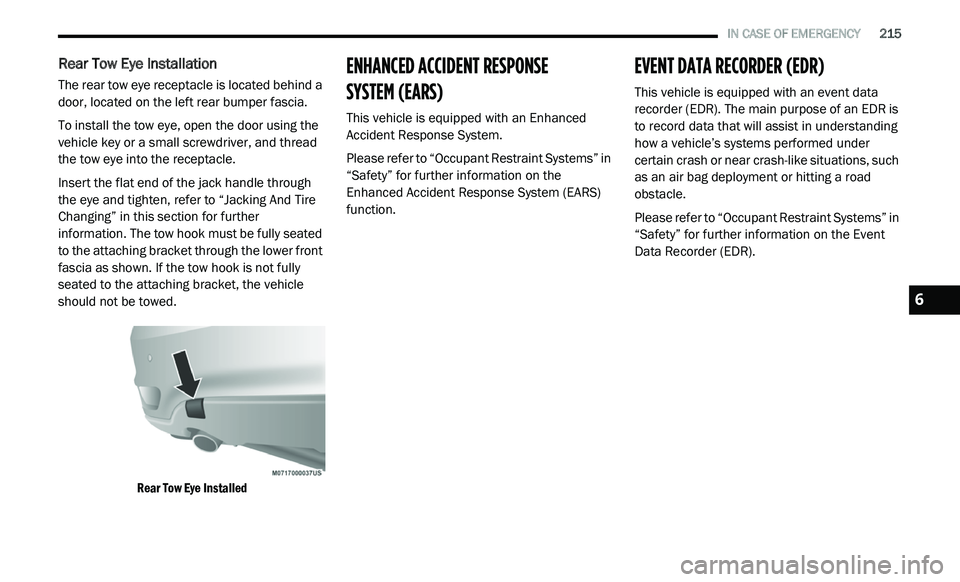
Rear Tow Eye Installation
The rear tow eye receptacle is located behind a
door, located on the left rear bumper fascia.
To install the tow eye, open the door using the
ve
hicle key or a small screwdriver, and thread
the tow eye into the receptacle.
Insert the flat end of the jack handle through
t h
e eye and tighten, refer to “Jacking And Tire
Changing” in this section for further
information. The tow hook must be fully seated
to the attaching bracket through the lower front
fascia as shown. If the tow hook is not fully
seated to the attaching bracket, the vehicle
should not be towed.
Rear Tow Eye Installed
ENHANCED ACCIDENT RESPONSE
SYSTEM (EARS)
This vehicle is equipped with an Enhanced
Accident Response System.
Please refer to “Occupant Restraint Systems” in
“ S
afety” for further information on the
Enhanced Accident Response System (EARS)
function.
EVENT DATA RECORDER (EDR)
This vehicle is equipped with an event data
recorder (EDR). The main purpose of an EDR is
to record data that will assist in understanding
how a vehicle’s systems performed under
certain crash or near crash-like situations, such
as an air bag deployment or hitting a road
obstacle.
Please refer to “Occupant Restraint Systems” in
“ S
afety” for further information on the Event
Data Recorder (EDR).
6