ECO mode DODGE JOURNEY 2020 Service Manual
[x] Cancel search | Manufacturer: DODGE, Model Year: 2020, Model line: JOURNEY, Model: DODGE JOURNEY 2020Pages: 396, PDF Size: 25.53 MB
Page 227 of 396

SERVICING AND MAINTENANCE 225
Refrigerant Recovery And Recycling —
R-1234yf
R-1234yf Air Conditioning Refrigerant is a
hydrofluoroolefin (HFO) that is endorsed by
the Environmental Protection Agency and
is an ozone-friendly substance with a low
g l
obal-warming potential. The manufacturer
recommends that air conditioning service be
performed by an authorized dealer using
recovery and recycling equipment.
NOTE:
Use only manufacturer approved A/C system
P A
G compressor oil, and refrigerants.
ACCESSORY DRIVE BELT INSPECTION
When inspecting accessory drive belts, small
cracks that run across the ribbed surface of the
belt from rib to rib, are considered normal.
These are not a reason to replace the belt.
However, cracks running along a rib (not across)
are not normal. Any belt with cracks running
along a rib must be replaced. Also have the belt
replaced if it has excessive wear, frayed cords
or severe glazing.
Accessory Belt (Serpentine Belt)
Conditions that would require replacement:
Rib chunking (one or more ribs has sepa -
rated from belt body)
Rib or belt wear
Longitudinal belt cracking (cracks between
two ribs)
Belt slips
“Groove jumping" (belt does not maintain
correct position on pulley)
Belt broken (Identify and correct problem
before new belt is installed)
Noise (objectionable squeal, squeak, or
rumble is heard or felt while drive belt is in
operation)
CAUTION!
Do not use chemical flushes in your air
conditioning system as the chemicals can
damage your air conditioning components.
Such damage is not covered by the New
Vehicle Limited Warranty.WARNING!
Do not attempt to inspect an accessory
drive belt with vehicle running.
When working near the radiator cooling fan,
disconnect the fan motor lead. The fan is
temperature controlled and can start at any
time regardless of ignition mode. You could
be injured by the moving fan blades.
You can be badly injured working on or
around a motor vehicle. Only do service
work for which you have the knowledge and
the proper equipment. If you have any
doubt about your ability to perform a
service job, take your vehicle to a compe -
tent mechanic.
7
Page 228 of 396
226 SERVICING AND MAINTENANCE
Some conditions can be caused by a faulty
component such as a belt pulley. Belt pulleys
should be carefully inspected for damage and
proper alignment.
Belt replacement on some models requires the
us
e of special tools, we recommend having your
vehicle serviced at an authorized dealer.
BODY LUBRICATION
Locks and all body pivot points, including such
items as seat tracks, door hinge pivot points
and rollers, liftgate, tailgate, decklid, sliding
doors and hood hinges, should be lubricated
periodically with a lithium based grease, such
as Mopar Spray White Lube to ensure quiet,
easy operation and to protect against rust and
wear. Prior to the application of any lubricant,
the parts concerned should be wiped clean to
remove dust and grit; after lubricating, excess
oil and grease should be removed. Particular
attention should also be given to hood latching
components to ensure proper function. When
performing other underhood services, the hood
latch, release mechanism and safety catch
should be cleaned and lubricated.
The external lock cylinders should be lubricated
t w
ice a year, preferably in the Autumn and Spring. Apply a small amount of a high quality
lubricant, such as Mopar Lock Cylinder
Lubricant directly into the lock cylinder.
WINDSHIELD WIPER BLADES
Clean the rubber edges of the wiper blades and
the windshield periodically with a sponge or soft
cloth and a mild nonabrasive cleaner. This will
remove accumulations of salt or road film.
Operation of the wipers on dry glass for long
p
e
riods may cause deterioration of the wiper
blades. Always use washer fluid when using
the wipers to remove salt or dirt from a dry
w i
ndshield.
Avoid using the wiper blades to remove frost or
i c
e from the windshield. Keep the blade rubber
out of contact with petroleum products such as
engine oil, gasoline, etc.
NOTE:
Life expectancy of wiper blades varies
d e
pending on geographical area and frequency
of use. Poor performance of blades may be
present with chattering, marks, water lines or
wet spots. If any of these conditions are
present, clean the wiper blades or replace as
necessary.
Rear Wiper Blade Removal/Installation
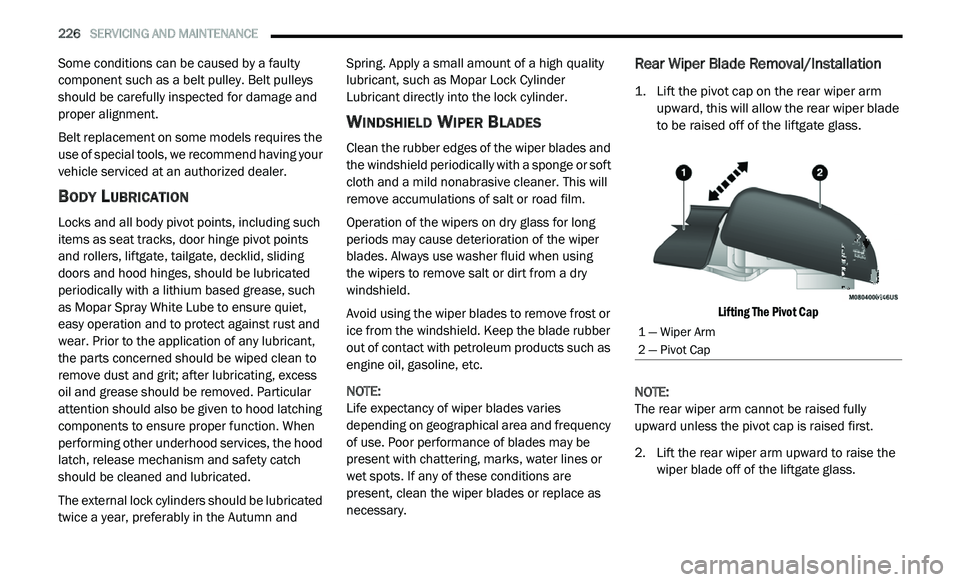
1. Lift the pivot cap on the rear wiper arm upward, this will allow the rear wiper blade
to be raised off of the liftgate glass.
Lifting The Pivot Cap
NOTE:
The rear wiper arm cannot be raised fully
u p
ward unless the pivot cap is raised first.
2. Li ft the rear wiper arm upward to raise the
w
iper blade off of the liftgate glass.
1 — Wiper Arm
2 — Pivot Cap
Page 230 of 396
228 SERVICING AND MAINTENANCE
(Continued)
Under normal operating conditions, the catalytic
converter will not require maintenance. However,
it is important to keep the engine properly tuned
to ensure proper catalyst operation and prevent
possible catalyst damage.
NOTE:
Intentional tampering with emissions control
s y
stems can result in civil penalties being
assessed against you.
In unusual situations involving grossly
m a
lfunctioning engine operation, a scorching odor
may suggest severe and abnormal catalyst
overheating. If this occurs, stop the vehicle, turn off
the engine and allow it to cool. Service, including a
tune-up to manufacturer's specifications, should be
obtained immediately.
To minimize the possibility of catalytic converter
d a
mage:
Do not interrupt the ignition when the trans -
mission is in gear and the vehicle is in
m o
tion.
Do not try to start the vehicle by pushing or
towing the vehicle.
Do not idle the engine with any ignition
components disconnected or removed, such
as when diagnostic testing, or for prolonged
periods during very rough idle or malfunc -
tioning operating conditions.
COOLING SYSTEM
Coolant Checks
Check the engine coolant (antifreeze) protection
every 12 months (before the onset of freezing
w e
ather, where applicable). If the engine coolant
(antifreeze) is dirty or rusty in appearance, the
system should be drained, flushed, and refilled
with fresh engine coolant (antifreeze). Check the
front of the A/C condenser for any accumulation
of bugs, leaves, etc. If dirty, clean by gently
spraying water from a garden hose vertically
down the face of the condenser.
Check the coolant recovery bottle tubing for
b r
ittle rubber, cracking, tears, cuts, and
tightness of the connection at the bottle and
radiator. Inspect the entire system for leaks.
WARNING!
You or others can be badly burned by hot
engine coolant (antifreeze) or steam from your
radiator. If you see or hear steam coming from
under the hood, do not open the hood until the
radiator has had time to cool. Never open a
cooling system pressure cap when the radiator
or coolant bottle is hot.
Keep hands, tools, clothing, and jewelry
away from the radiator cooling fan when
the hood is raised. The fan starts automati -
cally and may start at any time, whether the
e n
gine is running or not.
When working near the radiator cooling fan,
disconnect the fan motor lead or turn the
ignition to the OFF mode. The fan is
temperature controlled and can start at any
time the ignition is in the ON mode.
WARNING!
The warning words “DO NOT OPEN HOT” on
the cooling system pressure cap are a
safety precaution. Never add engine
coolant (antifreeze) when the engine is
overheated. Do not loosen or remove the
cap to cool an overheated engine. Heat
causes pressure to build up in the cooling
system. To prevent scalding or injury, do not
remove the pressure cap while the system
is hot or under pressure.
Page 246 of 396
244 SERVICING AND MAINTENANCE
Tire Repair
If your tire becomes damaged, it may be
re
paired if it meets the following criteria:
The tire has not been driven on when flat.
The damage is only on the tread section of
your tire (sidewall damage is not repairable).
The puncture is no greater than a ¼ of an
inch (6 mm).
Consult an authorized tire dealer for tire repairs
a n
d additional information.
Damaged Run Flat tires, or Run Flat tires that
h a
ve experienced a loss of pressure should be
replaced immediately with another Run Flat tire
of identical size and service description (Load
Index and Speed Symbol). Replace the tire
pressure sensor as well as it is not designed to
be reused.
Run Flat Tires — If Equipped
Run Flat tires allow you the capability to drive
50 miles (80 km) at 50 mph (80 km/h) after a
r a
pid loss of inflation pressure. This rapid loss
of inflation is referred to as the Run Flat mode.
A Run Flat mode occurs when the tire inflation
pressure is of/or below 14 psi (96 kPa). Once a
Run Flat tire reaches the run flat mode it has
limited driving capabilities and needs to be
replaced immediately. A Run Flat tire is not
repairable. When a run flat tire is changed after
driving with underinflated tire condition, please
replace the Tire Pressure Monitoring (TPM)
sensor as it is not designed to be reused when
driven under run flat mode 14 psi (96 kPa)
condition.
NOTE:
TPM Sensor must be replaced after driving the
v e
hicle on a flat tire condition.
It is not recommended driving a vehicle loaded
a t
full capacity or to tow a trailer while a tire is in
the run flat mode.
Refer to “Tire Pressure Monitoring” in “Safety”
f o
r further information.
Tire Spinning
When stuck in mud, sand, snow, or ice
conditions, do not spin your vehicle's wheels
above 30 mph (48 km/h) or for longer than
30 seconds continuously without stopping.
Refer to “Freeing A Stuck Vehicle” in “In Case Of
E m
ergency” for further information.
WARNING!
Fast spinning tires can be dangerous. Forces
generated by excessive wheel speeds may
cause tire damage or failure. A tire could
explode and injure someone. Do not spin your
vehicle's wheels faster than 30 mph (48 km/h)
f o
r more than 30 seconds continuously when
you are stuck, and do not let anyone near a
spinning wheel, no matter what the speed.
Page 261 of 396
TECHNICAL SPECIFICATIONS 259
(Continued)
DO NOT USE E-85 IN NON-FLEX FUEL
V
EHICLES
Non-Flex Fuel Vehicles (FFV) are compatible
with gasoline containing up to 15% ethanol
(E-15). Use of gasoline with higher ethanol
content may void the New Vehicle Limited
Warranty.
If a Non-FFV vehicle is inadvertently fueled with
E-
85 fuel, the engine will have some or all of
these symptoms:
Operate in a lean mode.
OBD II Malfunction Indicator Light on.
Poor engine performance.
Poor cold start and cold driveability.
Increased risk for fuel system component
corrosion.
CNG AND LP FUEL SYSTEM
M
ODIFICATIONS
Modifications that allow the engine to run on
Compressed Natural Gas (CNG) or Liquid
Propane (LP) may result in damage to the
engine, emissions, and fuel system
components. Problems that result from running
CNG or LP are not the responsibility of the
manufacturer and may void or not be covered
under the New Vehicle Limited Warranty.
MMT IN GASOLINE
Methylcyclopentadienyl Manganese Tricarbonyl
(MMT) is a manganese-containing metallic
additive that is blended into some gasoline to
increase octane. Gasoline blended with MMT
provides no performance advantage beyond
gasoline of the same octane number without
MMT. Gasoline blended with MMT reduces
spark plug life and reduces emissions system
performance in some vehicles. The
manufacturer recommends that gasoline
without MMT be used in your vehicle. The MMT content of gasoline may not be indicated on the
gasoline pump; therefore, you should ask your
gasoline retailer whether the gasoline contains
MMT. MMT is prohibited in Federal and
California reformulated gasoline.
FUEL SYSTEM CAUTIONS
CAUTION!
Follow these guidelines to maintain your
vehicle’s performance:
The use of leaded gasoline is prohibited by
Federal law. Using leaded gasoline can
impair engine performance and damage
the emissions control system.
An out-of-tune engine or certain fuel or igni -
tion malfunctions can cause the catalytic
c o
nverter to overheat. If you notice a
pungent burning odor or some light smoke,
your engine may be out of tune or malfunc -
tioning and may require immediate service.
C o
ntact an authorized dealer for service
assistance.
8
Page 263 of 396
TECHNICAL SPECIFICATIONS 261
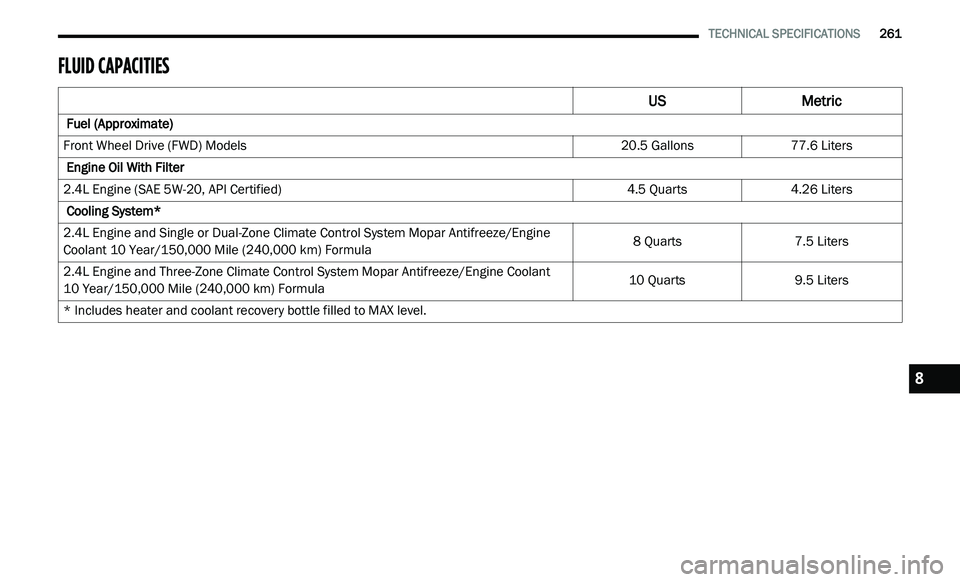
FLUID CAPACITIES
US Metric
Fuel (Approximate)
Front Wheel Drive (FWD) Models 20.5 Gallons77.6 Liters
Engine Oil With Filter
2.4L Engine (SAE 5W-20, API Certified) 4.5 Quarts4.26 Liters
Cooling System*
2.4L Engine and Single or Dual-Zone Climate Control System Mopar Antifreeze/Engine
C o
olant 10 Year/150,000 Mile (240,000 km) Formula 8 Quarts
7.5 Liters
2.4L Engine and Three-Zone Climate Control System Mopar Antifreeze/Engine Coolant
10 Year/150,000 Mile (240,000 km) Formula 10 Quarts
9.5 Liters
* Includes heater and coolant recovery bottle filled to MAX level.
8
Page 289 of 396
MULTIMEDIA 287
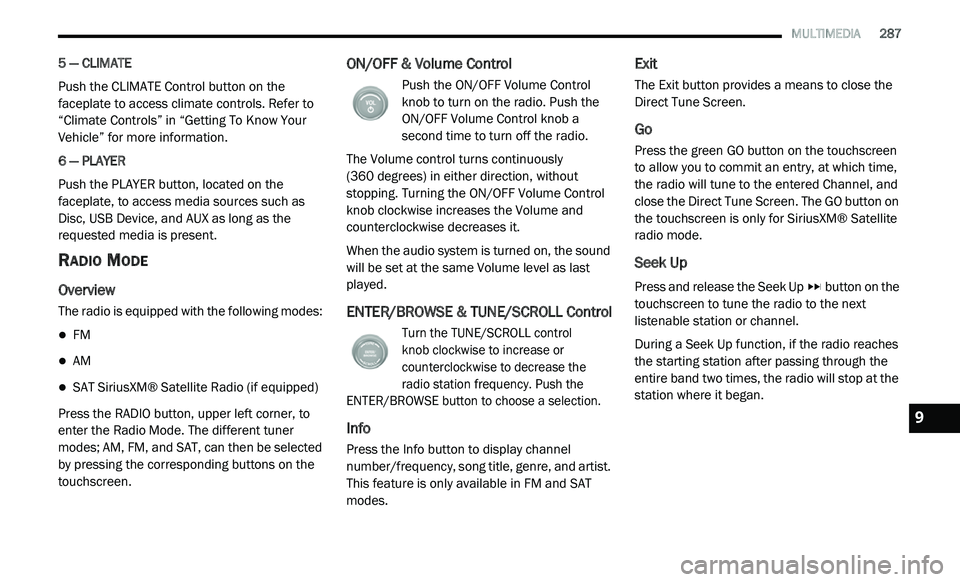
5 — CLIMATE
Push the CLIMATE Control button on the
fa
ceplate to access climate controls. Refer to
“Climate Controls” in “Getting To Know Your
Vehicle” for more information.
6 — PLAYER
Push the PLAYER button, located on the
f a
ceplate, to access media sources such as
Disc, USB Device, and AUX as long as the
requested media is present.
RADIO MODE
Overview
The radio is equipped with the following modes:
FM
AM
SAT SiriusXM® Satellite Radio (if equipped)
Press the RADIO button, upper left corner, to
e n
ter the Radio Mode. The different tuner
modes; AM, FM, and SAT, can then be selected
by pressing the corresponding buttons on the
touchscreen.
ON/OFF & Volume Control
Push the ON/OFF Volume Control
knob to turn on the radio. Push the
O N
/OFF Volume Control knob a
second time to turn off the radio.
The Volume control turns continuously
(360 degrees) in either direction, without
s t
opping. Turning the ON/OFF Volume Control
knob clockwise increases the Volume and
counterclockwise decreases it.
When the audio system is turned on, the sound
w i
ll be set at the same Volume level as last
played.
ENTER/BROWSE & TUNE/SCROLL Control
Turn the TUNE/SCROLL control
knob clockwise to increase or
c o
unterclockwise to decrease the
radio station frequency. Push the
ENTER/BROWSE button to choose a selection.
Info
Press the Info button to display channel
number/frequency, song title, genre, and artist.
This feature is only available in FM and SAT
modes.
Exit
The Exit button provides a means to close the
Direct Tune Screen.
Go
Press the green GO button on the touchscreen
to allow you to commit an entry, at which time,
the radio will tune to the entered Channel, and
close the Direct Tune Screen. The GO button on
the touchscreen is only for SiriusXM® Satellite
radio mode.
Seek Up
Press and release the Seek Up button on the
touchscreen to tune the radio to the next
l i
stenable station or channel.
During a Seek Up function, if the radio reaches
t h
e starting station after passing through the
entire band two times, the radio will stop at the
station where it began.
9
Page 290 of 396
288 MULTIMEDIA
Fast Seek Up
Press and hold the Seek Up button on the
touchscreen to advance the radio through the
a v
ailable stations or channels at a faster rate,
the radio stops at the next available station or
channel when the button on the touchscreen is
released.
Seek Down
Press and release the Seek Down button on
the touchscreen to tune the radio to the next
l i
stenable station or channel.
During a Seek Down function, if the radio
r e
aches the starting station after passing
through the entire band two times, the radio will
stop at the station where it began.
Fast Seek Down
Press and hold the Seek Down button on the
touchscreen to advance the radio through the
a v
ailable stations or channel at a faster rate,
the radio stops at the next available station or
channel when the button is released.
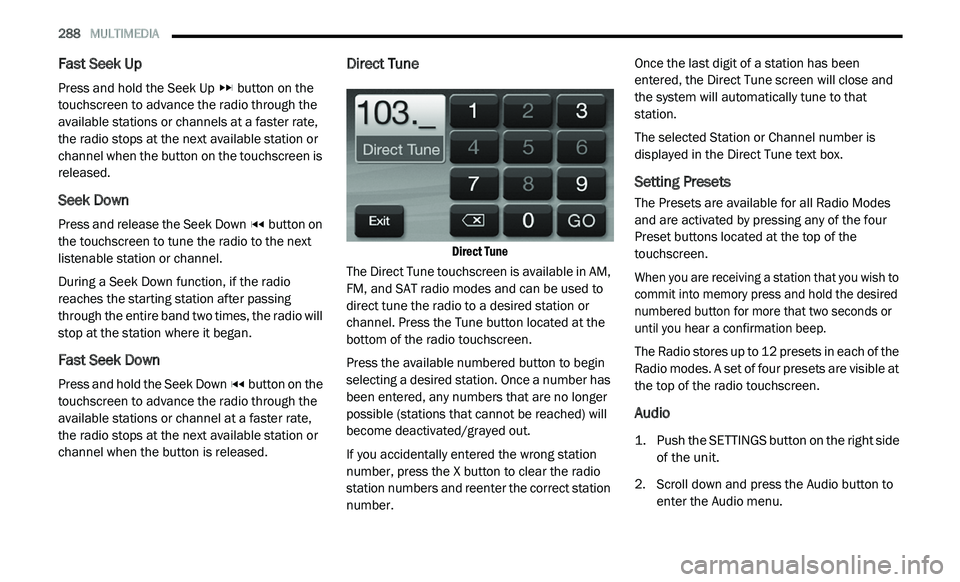
Direct Tune
Direct Tune
The Direct Tune touchscreen is available in AM,
F M
, and SAT radio modes and can be used to
direct tune the radio to a desired station or
channel. Press the Tune button located at the
bottom of the radio touchscreen.
Press the available numbered button to begin
se
lecting a desired station. Once a number has
been entered, any numbers that are no longer
possible (stations that cannot be reached) will
become deactivated/grayed out.
If you accidentally entered the wrong station
nu
mber, press the X button to clear the radio
station numbers and reenter the correct station
number. Once the last digit of a station has been
en
tered, the Direct Tune screen will close and
the system will automatically tune to that
station.
The selected Station or Channel number is
d i
splayed in the Direct Tune text box.
Setting Presets
The Presets are available for all Radio Modes
and are activated by pressing any of the four
Preset buttons located at the top of the
touchscreen.
When you are receiving a station that you wish to
co
mmit into memory press and hold the desired
numbered button for more that two seconds or
until you hear a confirmation beep.
The Radio stores up to 12 presets in each of the
R a
dio modes. A set of four presets are visible at
the top of the radio touchscreen.
Audio
1. Push the SETTINGS button on the right side of the unit.
2. S croll down and press the Audio button to
e
nter the Audio menu.
Page 292 of 396
290 MULTIMEDIA
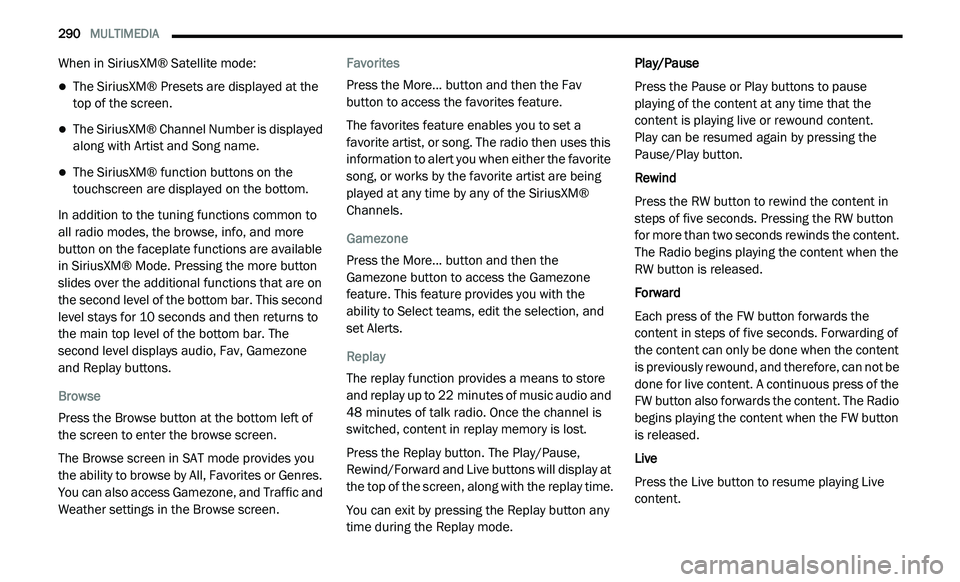
When in SiriusXM® Satellite mode:
The SiriusXM® Presets are displayed at the
top of the screen.
The SiriusXM® Channel Number is displayed
along with Artist and Song name.
The SiriusXM® function buttons on the
touchscreen are displayed on the bottom.
In addition to the tuning functions common to
a l
l radio modes, the browse, info, and more
button on the faceplate functions are available
in SiriusXM® Mode. Pressing the more button
slides over the additional functions that are on
the second level of the bottom bar. This second
level stays for 10 seconds and then returns to
the main top level of the bottom bar. The
second level displays audio, Fav, Gamezone
and Replay buttons.
Browse
Press the Browse button at the bottom left of
t h
e screen to enter the browse screen.
The Browse screen in SAT mode provides you
t h
e ability to browse by All, Favorites or Genres.
You can also access Gamezone, and Traffic and
Weather settings in the Browse screen. Favorites
Press the More... button and then the Fav
b
u
tton to access the favorites feature.
The favorites feature enables you to set a
f a
vorite artist, or song. The radio then uses this
information to alert you when either the favorite
song, or works by the favorite artist are being
played at any time by any of the SiriusXM®
Channels.
Gamezone
Press the More... button and then the
G a
mezone button to access the Gamezone
feature. This feature provides you with the
ability to Select teams, edit the selection, and
set Alerts.
Replay
The replay function provides a means to store
a n
d replay up to 22 minutes of music audio and
4 8
minutes of talk radio. Once the channel is
s w
itched, content in replay memory is lost.
Press the Replay button. The Play/Pause,
R e
wind/Forward and Live buttons will display at
the top of the screen, along with the replay time.
You can exit by pressing the Replay button any
t i
me during the Replay mode. Play/Pause
Press the Pause or Play buttons to pause
p
l
aying of the content at any time that the
content is playing live or rewound content.
Play can be resumed again by pressing the
P a
use/Play button.
Rewind
Press the RW button to rewind the content in
st
eps of five seconds. Pressing the RW button
for more than two seconds rewinds the content.
The Radio begins playing the content when the
RW button is released.
Forward
Each press of the FW button forwards the
c o
ntent in steps of five seconds. Forwarding of
the content can only be done when the content
is previously rewound, and therefore, can not be
done for live content. A continuous press of the
FW button also forwards the content. The Radio
begins playing the content when the FW button
is released.
Live
Press the Live button to resume playing Live
c o
ntent.
Page 293 of 396
MULTIMEDIA 291
MEDIA MODE
Disc Mode
Overview
Disc Mode is entered by either inserting a Disc
or
by pressing the PLAYER button located left of
the display. Once in Player Mode, press the
Source button and select “Disc.”
A “No Disc” message will be displayed on the
s c
reen in the Disc mode when a Disc is not
present in the Radio.
Inserting Compact Disc
Gently insert one Disc into the Disc player
with the Disc label facing up. The CD will
a u
tomatically be pulled into the Disc player and
the Disc icon will illuminate on the radio display.
If a Disc does not go into the slot more than
1 inch (2.5 cm), a disc may already be loaded
a n
d must be ejected before a new disc can be
loaded.
If you insert a disc with the ignition ON and the
r a
dio ON, the unit will switch to Disc mode and
begin to play the disc. The display will show the
track number, and index time in minutes and
seconds. Play will begin at the start of track 1. EJECT Button — Ejecting A Disc
Push the EJECT button to eject the
Disc.
If the Disc is not removed, the radio will reinsert
t h
e Disc but will not play it.
A disc can be ejected with the radio and ignition
O F
F. Seek Up/Down
Press and release the Seek Up
button for the
next selection on the Disc. Press and release
t h
e Seek Down button to return to the
beginning of the current selection, or return to
t h
e beginning of the previous selection if the
Disc is within the first eight seconds of the
current selection.
Fast Seek Up
Press and hold the Seek Up button and the
Disc player will begin to fast forward through the
c u
rrent track until the button is released.
Fast Seek Down
Press and hold the Seek Down button and
the Disc player will begin to rewind through the
c u
rrent track until the button is released.
Browse
Press the Browse button on the touchscreen to
s c
roll through and select a desired track on the
Disc. Press the Exit button on the touchscreen if
you wish to cancel the browse function.
CAUTION!
This CD player will accept 4-3/4 inch
(12 cm) discs only. The use of other sized discs
m a
y damage the CD player mechanism.
Do not use adhesive labels. These labels can
peel away and jam the player mechanism.
Uconnect is a single CD player. Do not
attempt to insert a second CD if one is
already loaded.
Dual-media disc types (one side is a DVD,
the other side is a CD) should not be used,
and they can cause damage to the player.
9