DODGE SPRINTER 2007 2.G Owners Manual
Manufacturer: DODGE, Model Year: 2007, Model line: SPRINTER, Model: DODGE SPRINTER 2007 2.GPages: 393, PDF Size: 7.61 MB
Page 141 of 393
140 Controls in detailAuxiliary heating/ventilation*
3
You can switch the auxiliary heating / ven-
tilation on and off immediately using:
\4the auxiliary heating / heater booster
switch (\2page 140)
\4the auxiliary heating remote control*
(\2page 141)
Before switching on
\1Adjust the heat output to the desired
temperature using the temperature
control (\2page 131).
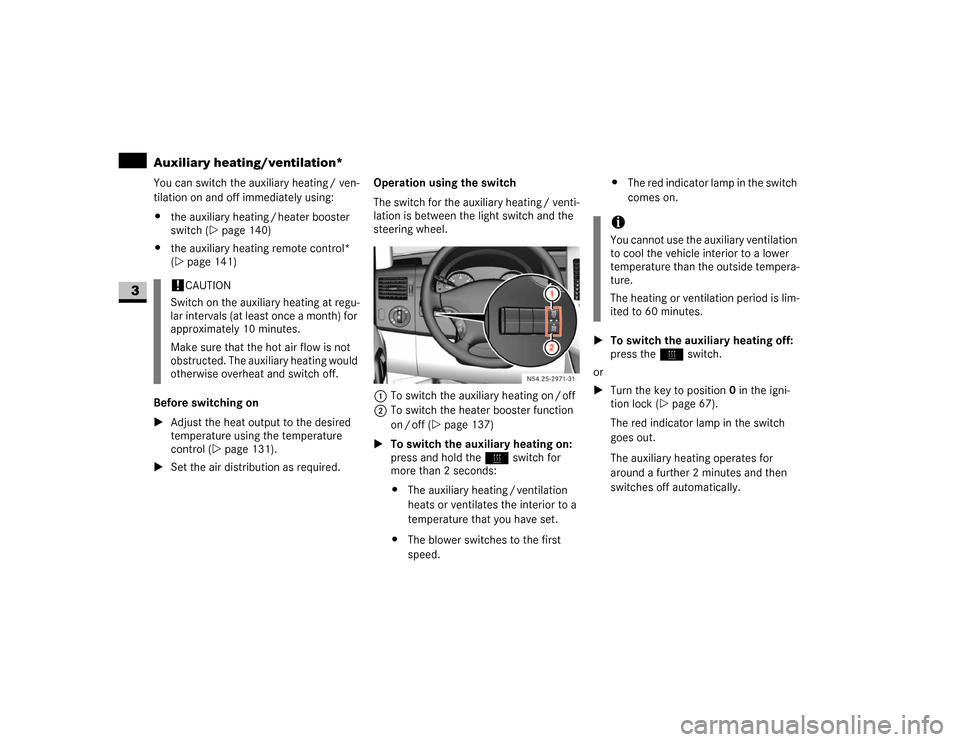
\1Set the air distribution as required.Operation using the switch
The switch for the auxiliary heating / venti-
lation is between the light switch and the
steering wheel.
1To switch the auxiliary heating on / off
2To switch the heater booster function
on / off (\2page 137)
\1To switch the auxiliary heating on:
press and hold theö switch for
more than 2 seconds:
\4The auxiliary heating / ventilation
heats or ventilates the interior to a
temperature that you have set.
\4The blower switches to the first
speed.\4The red indicator lamp in the switch
comes on.
\1To switch the auxiliary heating off:
press theö switch.
or
\1Turn the key to position0 in the igni-
tion lock (\2page 67).
The red indicator lamp in the switch
goes out.
The auxiliary heating operates for
around a further 2 minutes and then
switches off automatically.
!
CAUTION
Switch on the auxiliary heating at regu-
lar intervals (at least once a month) for
approximately 10 minutes.
Make sure that the hot air flow is not
obstructed. The auxiliary heating would
otherwise overheat and switch off.
N54.25-2928-31
iYou cannot use the auxiliary ventilation
to cool the vehicle interior to a lower
temperature than the outside tempera-
ture.
The heating or ventilation period is lim-
ited to 60 minutes.
Page 142 of 393
141 Controls in detail
Auxiliary heating/ventilation*
3
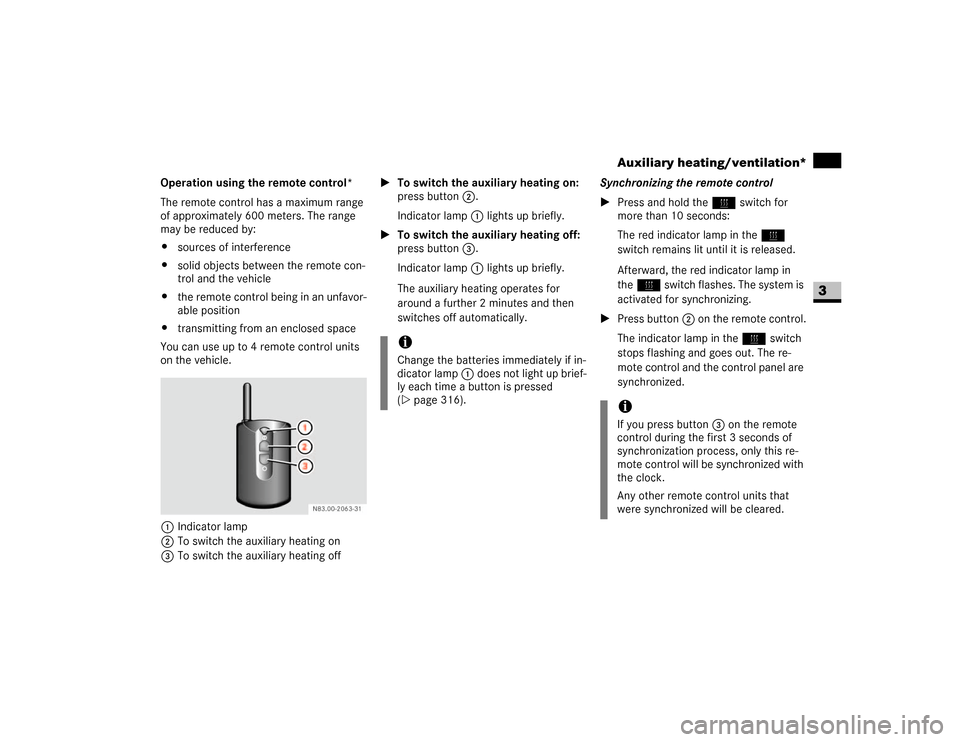
Operation using the remote control*
The remote control has a maximum range
of approximately 600 meters. The range
may be reduced by:
\4sources of interference
\4solid objects between the remote con-
trol and the vehicle
\4the remote control being in an unfavor-
able position
\4transmitting from an enclosed space
You can use up to 4 remote control units
on the vehicle.
1Indicator lamp
2To switch the auxiliary heating on
3To switch the auxiliary heating off\1To switch the auxiliary heating on:
press button2.
Indicator lamp1 lights up briefly.
\1To switch the auxiliary heating off:
press button3.
Indicator lamp1 lights up briefly.
The auxiliary heating operates for
around a further 2 minutes and then
switches off automatically.Synchronizing the remote control
\1Press and hold theö switch for
more than 10 seconds:
The red indicator lamp in theö
switch remains lit until it is released.
Afterward, the red indicator lamp in
theö switch flashes. The system is
activated for synchronizing.
\1Press button2 on the remote control.
The indicator lamp in theö switch
stops flashing and goes out. The re-
mote control and the control panel are
synchronized.
iChange the batteries immediately if in-
dicator lamp 1 does not light up brief-
ly each time a button is pressed
(\2page 316).
iIf you press button3 on the remote
control during the first 3 seconds of
synchronization process, only this re-
mote control will be synchronized with
the clock.
Any other remote control units that
were synchronized will be cleared.
Page 143 of 393
142 Controls in detailAuxiliary heating/ventilation*
3
Selecting a switch-on time
You can use the operating system to define
up to 3 switch-on times, one of which can
be selected to switch on the auxiliary
heating / ventilation.
Operating system without steering
wheel buttons
\1Switch on the ignition (\2page 67).
\1Press theö switch.
Theö symbol in the display flashes.
or
\1Press the menu button on the in-
strument cluster repeatedly until the
ö symbol in the display flashes.
\1Use the or button on the instru-
ment cluster to select desired switch-
on time
1 to
3.
The switch-on time selected is dis-
played.\1Wait 10 seconds for the standard dis-
play to appear.
The switch-on time is selected.
The yellow indicator lamp in theö
switch comes on.
If you have not selected a switch-on time
and
--:--
appears in the display, the auto-
matic switch-on is deactivated. The yellow
indicator lamp in theö switch goes
out.Operating system with steering wheel
buttons*
\1Switch on the ignition (\2page 67).
\1Briefly press theö switch.
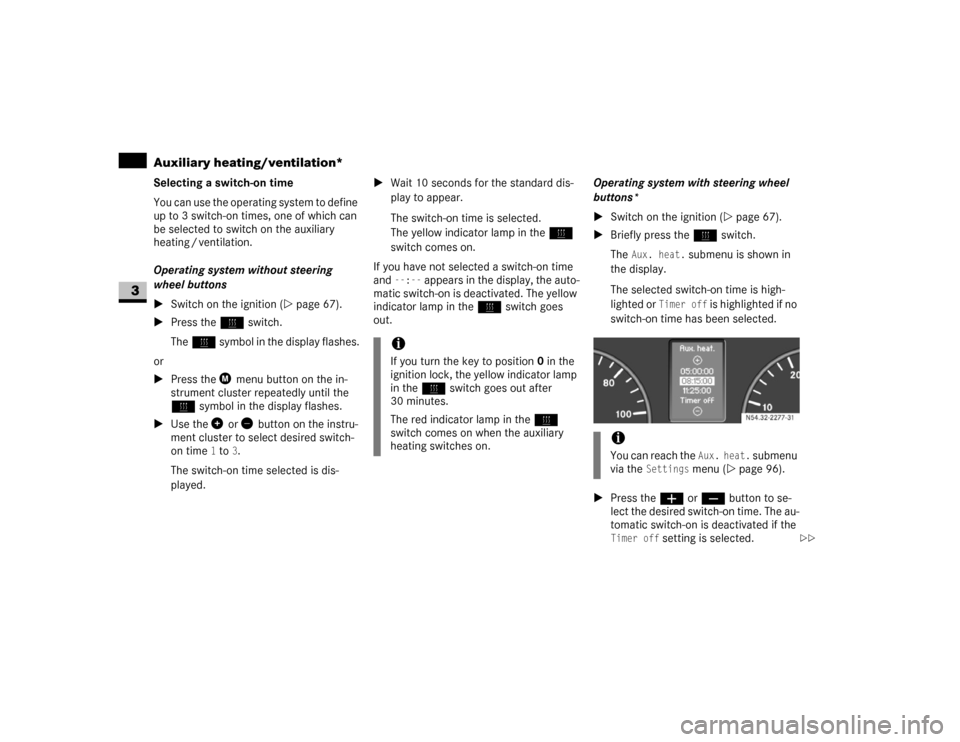
The
Aux. heat.
submenu is shown in
the display.
The selected switch-on time is high-
lighted or
Timer off
is highlighted if no
switch-on time has been selected.
\1Press theæ orç button to se-
lect the desired switch-on time. The au-
tomatic switch-on is deactivated if the
Timer off
setting is selected.
iIf you turn the key to position0 in the
ignition lock, the yellow indicator lamp
in theö switch goes out after
30 minutes.
The red indicator lamp in theö
switch comes on when the auxiliary
heating switches on.
iYou can reach the
Aux. heat.
submenu
via the
Settings
menu (\2page 96).
N54.32-2277-31
\2\2
Page 144 of 393
143 Controls in detail
Auxiliary heating/ventilation*
3
\1Press the è button.
The switch-on time is selected.
The yellow indicator lamp in theö
switch comes on.
Setting the switch-on time
Operating system without steering
wheel buttons
\1Select a switch-on time as described
under “Selecting a switch-on time”
(\2page 142).\1Press the reset button on the instru-
ment cluster to set the selected switch-
on time.
The hours figure flashes and the”
symbol appears in the display.
\1Set the hours using the or am
button on the instrument cluster.
\1Press the reset button.
The minute display flashes.
\1Set the minutes using the or
button.Operating system with steering wheel
buttons
\1Select a switch-on time as described
under “Selecting a switch-on time”
(\2page 142).
\1Press thej button.
The
Hours
menu appears in the display.
\1Set the hours using theæ orç
button.
\1Press thej button.
The
Minutes
menu appears in the dis-
play.
\1Set the minutes using theæ
orç button.
\1Press the è button.
The switch-on time is set and selected.
iIf you turn the key to position0 in the
ignition lock, the yellow indicator lamp
in theö switch goes out after
30 minutes.
The red indicator lamp in theö
switch comes on when the auxiliary
heating switches on.
iIf you keep the button pressed, the val-
ues will change continuously.
To return to the standard display:
\4press and hold the button on
the instrument cluster for more
than 1 second
\4do not press a button for
10 seconds
iTo return to the standard display, press
theè or ÿ button repeatedly
until the standard display appears.
Page 145 of 393
144 Controls in detailOpen air
3
\3 Open airYou can open and close the side windows
electrically.
The switches for all side windows are locat-
ed on the door control panel.
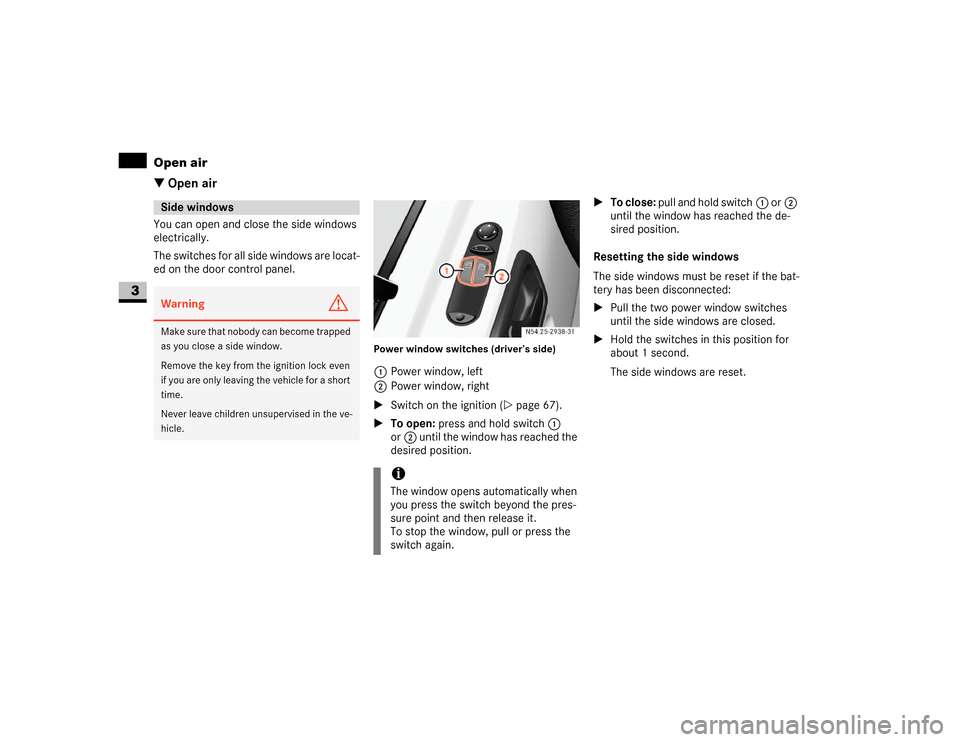
Power window switches (driver’s side)1Power window, left
2Power window, right
\1Switch on the ignition (\2page 67).
\1To open: press and hold switch1
or2 until the window has reached the
desired position.\1To close: pull and hold switch1 or2
until the window has reached the de-
sired position.
Resetting the side windows
The side windows must be reset if the bat-
tery has been disconnected:
\1Pull the two power window switches
until the side windows are closed.
\1Hold the switches in this position for
about 1 second.
The side windows are reset.
Side windowsWarning
G
Make sure that nobody can become trapped
as you close a side window.
Remove the key from the ignition lock even
if you are only leaving the vehicle for a short
time.
Never leave children unsupervised in the ve-
hicle.
iThe window opens automatically when
you press the switch beyond the pres-
sure point and then release it.
To stop the window, pull or press the
switch again.
Page 146 of 393
145 Controls in detail
Open air
3
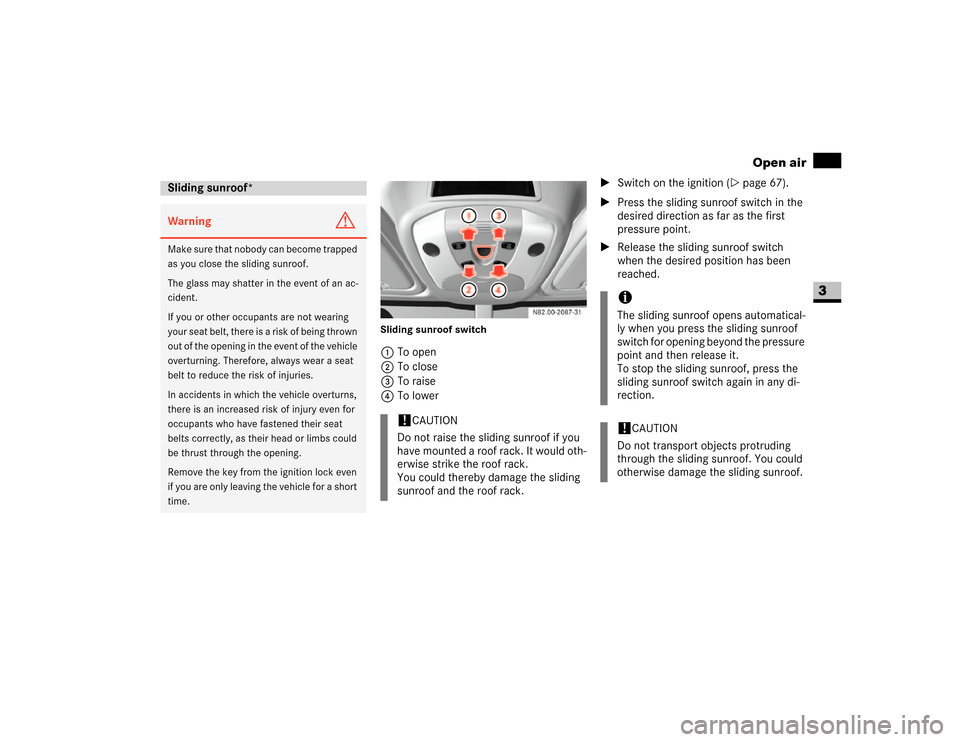
Sliding sunroof switch1To open
2To close
3To raise
4To lower\1Switch on the ignition (\2page 67).
\1Press the sliding sunroof switch in the
desired direction as far as the first
pressure point.
\1Release the sliding sunroof switch
when the desired position has been
reached.
Sliding sunroof*Warning
G
M a k e s u r e t h a t n o b o d y c a n b e c o m e t r a p p e d
as you close the sliding sunroof.
The glass may shatter in the event of an ac-
cident.
If you or other occupants are not wearing
your seat belt, there is a risk of being thrown
out of the opening in the event of the vehicle
overturning. Therefore, always wear a seat
belt to reduce the risk of injuries.
In accidents in which the vehicle overturns,
there is an increased risk of injury even for
occupants who have fastened their seat
belts correctly, as their head or limbs could
be thrust through the opening.
Remove the key from the ignition lock even
if you are only leaving the vehicle for a short
time.
!
CAUTION
Do not raise the sliding sunroof if you
have mounted a roof rack. It would oth-
erwise strike the roof rack.
You could thereby damage the sliding
sunroof and the roof rack.
iThe sliding sunroof opens automatical-
ly when you press the sliding sunroof
switch for opening beyond the pressure
point and then release it.
To stop the sliding sunroof, press the
sliding sunroof switch again in any di-
rection.!
CAUTION
Do not transport objects protruding
through the sliding sunroof. You could
otherwise damage the sliding sunroof.
Page 147 of 393
146 Controls in detailOpen air
3
Resetting the sliding sunroof
The sliding sunroof must be reset after:
\4the sunroof has been closed manually
using the emergency operation key
(\2page 304)
\4the sunroof has opened with a jerk
\4a malfunction
\1Switch on the ignition (\2page 67).
\1Press the sliding sunroof switch in the
direction of arrow2 (\2page 145).
\1Wait until the sliding sunroof is closed
and then keep the sliding sunroof
switch pressed for approximately
3seconds.
The sliding sunroof is reset.The roof ventilator can be used to ventilate
or remove air from the load compartment.
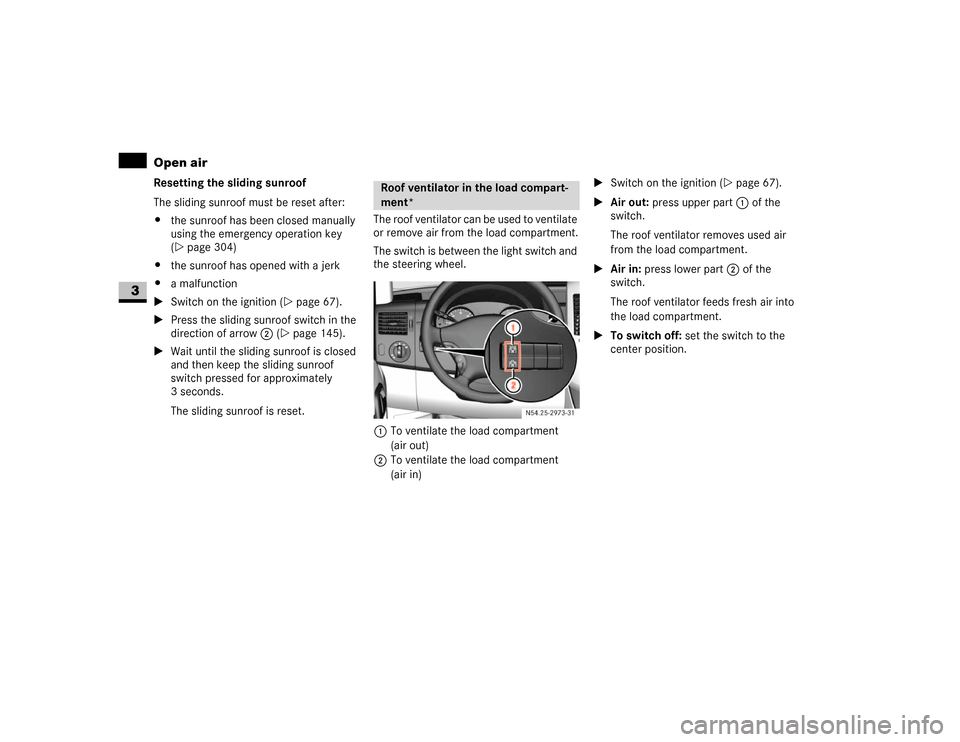
The switch is between the light switch and
the steering wheel.
1To ventilate the load compartment
(air out)
2To ventilate the load compartment
(air in)\1Switch on the ignition (\2page 67).
\1Air out: press upper part 1 of the
switch.
The roof ventilator removes used air
from the load compartment.
\1Air in: press lower part 2 of the
switch.
The roof ventilator feeds fresh air into
the load compartment.
\1To switch off: set the switch to the
center position.
Roof ventilator in the load compart-
ment*
N54.25-2929-31
Page 148 of 393
147 Controls in detail
Driving systems
3
\3 Driving systemsDriving systems which may form part of
your vehicle are described on the following
pages:
\4Cruise control* (\2page 147), which
you can use to control the speed of
your vehicle
\4Parktronic system*, which is an aid for
parking and maneuvering
(\2page 150)
\4Reverse warning feature*, which helps
you ensure the safety of other road us-
ers (\2page 153)
The ABS, BAS, ESP
®, ASR and EBV driving
safety systems are described in the "Safe-
ty and Security" section (\2page 23).Cruise control maintains the speed of the
vehicle for you.
Use cruise control if road and traffic condi-
tions make it appropriate to maintain a
steady speed for a prolonged period. You
can store any road speed above 20 mph
(30 km/h).
Cruise control*iThe increments for setting speed and
the threshold values for switching on or
automatically switching off cruise con-
trol depend on the digital speedometer
setting, mph or km/h (\2page 99).Warning
G
The cruise control function cannot take ac-
count of road and traffic conditions.
Always pay attention to road and traffic
conditions, even when cruise control is acti-
vated.
Cruise control is only an aid designed to as-
sist driving. You are responsible for the vehi-
cle’s speed and for braking in good time.
If there is a change of drivers, advise the
new driver of the cruising speed that is
stored.Warning
G
Do not use cruise control:
\4if road and traffic conditions do not per-
mit a constant driving speed to be main-
tained (e.g. heavy traffic or winding
roads). You could otherwise cause an
accident.
\4on slippery roads. The drive wheels may
lose their grip when braking or acceler-
ating and the vehicle could skid
\4when visibility is poor, e.g. in fog, heavy
rain or snow
Page 149 of 393
148 Controls in detailDriving systems
3
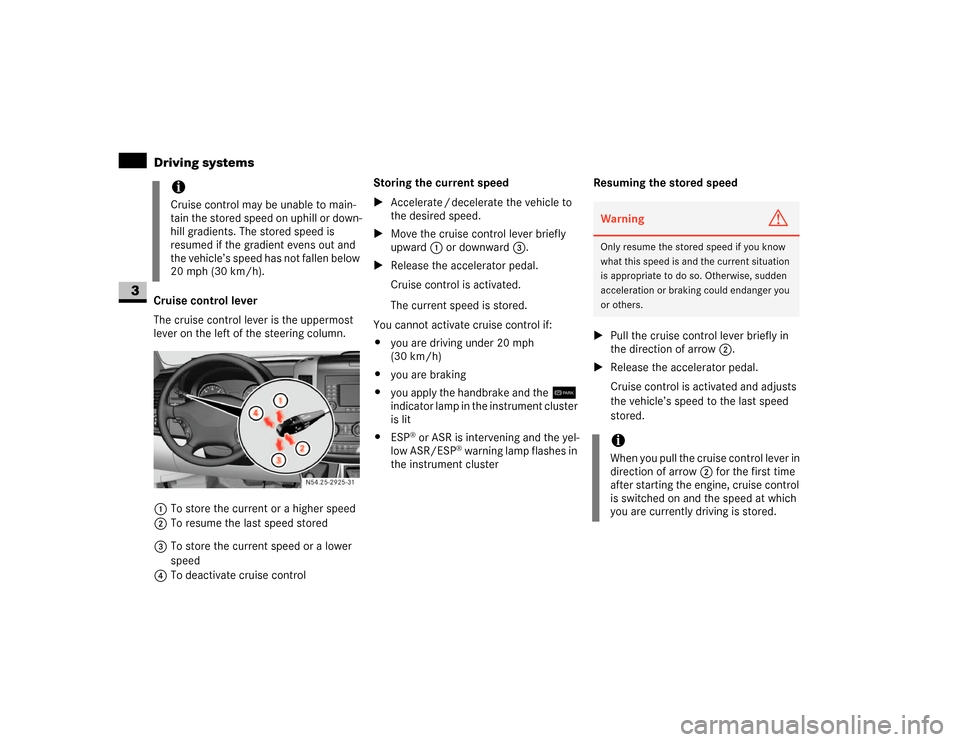
Cruise control lever
The cruise control lever is the uppermost
lever on the left of the steering column.
1To store the current or a higher speed
2To resume the last speed stored
3To store the current speed or a lower
speed
4To deactivate cruise controlStoring the current speed
\1Accelerate / decelerate the vehicle to
the desired speed.
\1Move the cruise control lever briefly
upward 1 or downward 3.
\1Release the accelerator pedal.
Cruise control is activated.
The current speed is stored.
You cannot activate cruise control if:
\4you are driving under 20 mph
(30 km/h)
\4you are braking
\4you apply the handbrake and the7
indicator lamp in the instrument cluster
is lit
\4ESP
® or ASR is intervening and the yel-
low ASR/ESP
® warning lamp flashes in
the instrument clusterResuming the stored speed
\1Pull the cruise control lever briefly in
the direction of arrow2.
\1Release the accelerator pedal.
Cruise control is activated and adjusts
the vehicle’s speed to the last speed
stored.
iCruise control may be unable to main-
tain the stored speed on uphill or down-
hill gradients. The stored speed is
resumed if the gradient evens out and
the vehicle’s speed has not fallen below
20 mph (30 km/h).
N54.25-2925-31
Warning
G
Only resume the stored speed if you know
what this speed is and the current situation
is appropriate to do so. Otherwise, sudden
acceleration or braking could endanger you
or others.iWhen you pull the cruise control lever in
direction of arrow 2 for the first time
after starting the engine, cruise control
is switched on and the speed at which
you are currently driving is stored.
Page 150 of 393
149 Controls in detail
Driving systems
3
Setting the speed
\1Briefly press the cruise control lever
upward1 to increase the speed or
downward3 to reduce the speed.
The last speed stored is increased or
decreased in 1 mph increments
(1 km/h increments).
or
\1Press and hold the cruise control lever
up1 or down3 until the desired
speed has been reached.\1Release the cruise control lever.
The current speed is stored.
Deactivating cruise control
There are various ways of deactivating
cruise control:
\1Briefly press cruise control lever
forward4.
or
\1Apply the brakes.
The last speed set remains stored.Warning
G
The rate at which you increase the speed in
1 mph increments (1 km/h increments) may
be faster than your vehicle is able to accel-
erate. Your vehicle may then continue to ac-
celerate up to the newly set speed even
after you have released the cruise control le-
ver.
Only increase the speed if the current situa-
tion is appropriate to do so. Sudden acceler-
ation could otherwise endanger you and
others.
iCruise control is not deactivated if you
depress the accelerator pedal. If you ac-
celerate briefly to overtake, for exam-
ple, cruise control adjusts the vehicle’s
speed to the last speed stored after you
have finished overtaking.iThe last speed stored is cleared when
you switch off the engine.
iCruise control is automatically deacti-
vated if:
\4you are braking
\4you apply the handbrake and
the7 indicator lamp in the in-
strument cluster is lit
\4you are driving under 20 mph
(30 km/h)
\4ESP
® or ASR is intervening and the
yellow ASR/ESP
® warning lamp
flashes in the instrument cluster
\4you move the selector lever to posi-
tion N while driving
\4ESP
®, ASR or ABS has malfunc-
tioned