DODGE STRATUS COUPE 2005 2.G Owners Manual
STRATUS COUPE 2005 2.G
DODGE
DODGE
https://www.carmanualsonline.info/img/12/5683/w960_5683-0.png
DODGE STRATUS COUPE 2005 2.G Owners Manual
Trending: manual transmission, fuel fill door release, brake, power steering fluid, tow, washer fluid, ECO mode
Page 301 of 396
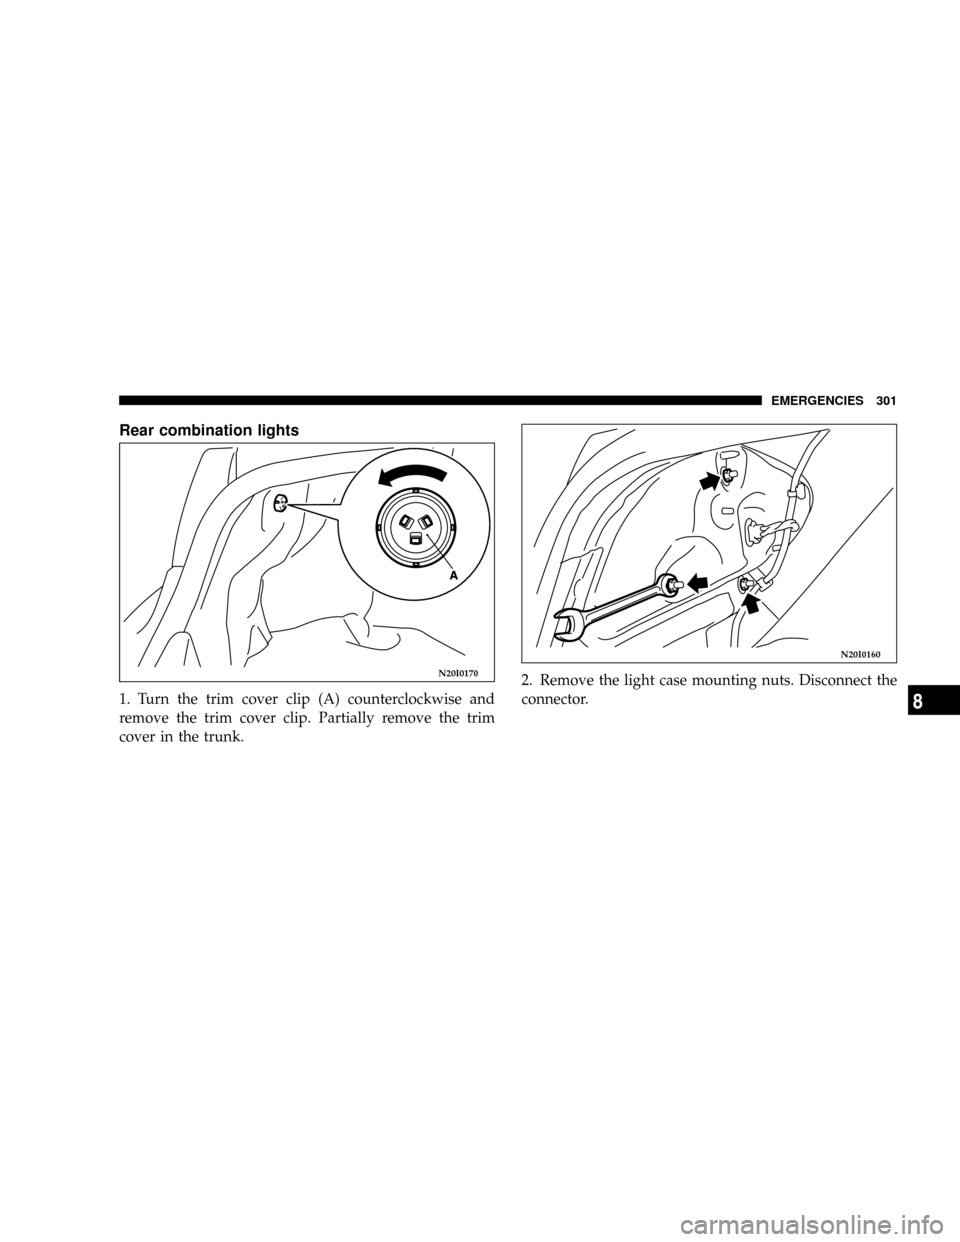
Rear combination lights
1. Turn the trim cover clip (A) counterclockwise and
remove the trim cover clip. Partially remove the trim
cover in the trunk.2. Remove the light case mounting nuts. Disconnect the
connector.
N20I0170
N20I0160
EMERGENCIES 301
8
Page 302 of 396
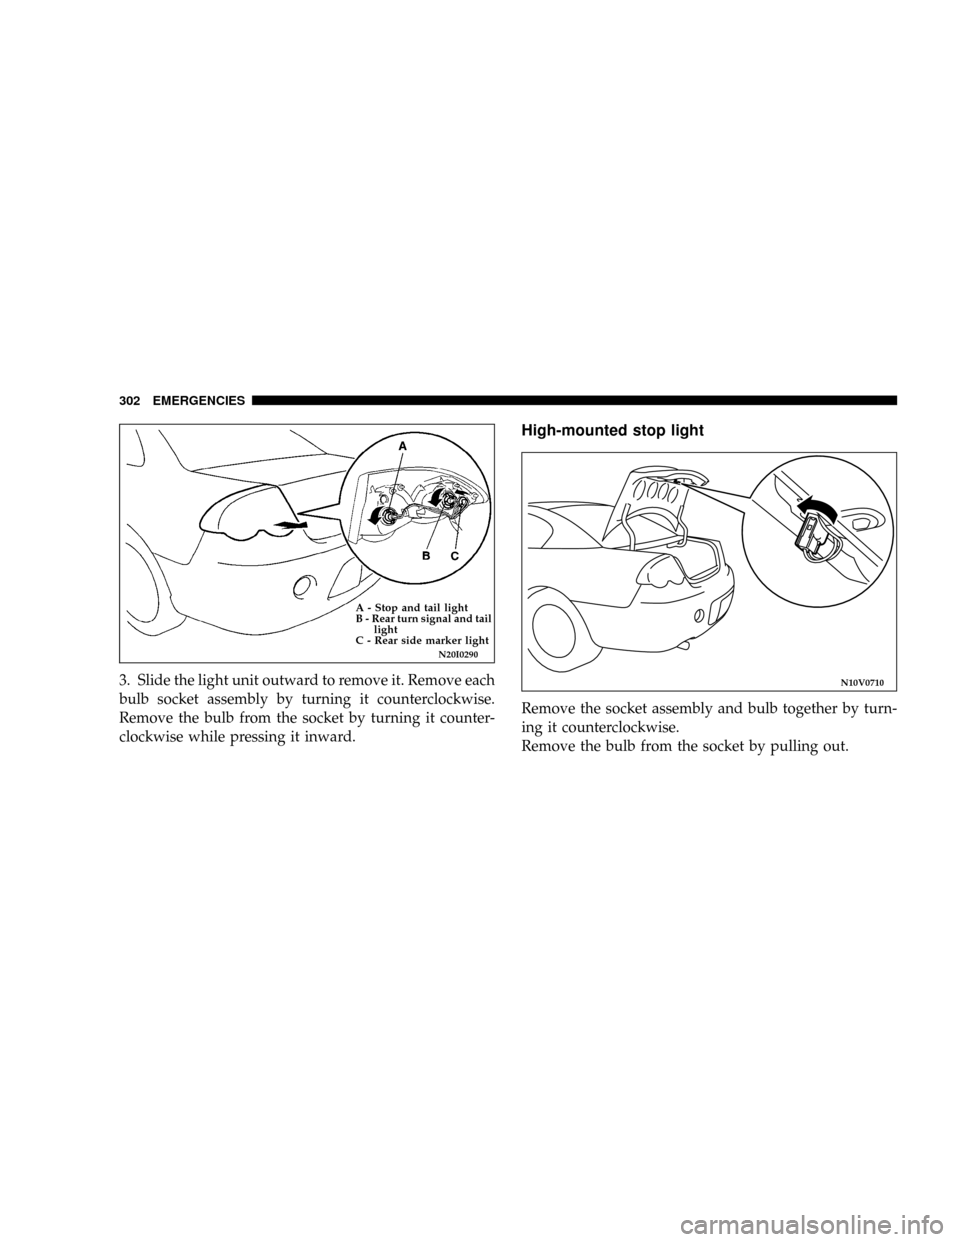
3. Slide the light unit outward to remove it. Remove each
bulb socket assembly by turning it counterclockwise.
Remove the bulb from the socket by turning it counter-
clockwise while pressing it inward.
High-mounted stop light
Remove the socket assembly and bulb together by turn-
ing it counterclockwise.
Remove the bulb from the socket by pulling out.
N20I0290
A - Stop and tail light
B - Rear turn signal and tail
light
C - Rear side marker light
N10V0710
302 EMERGENCIES
Page 303 of 396
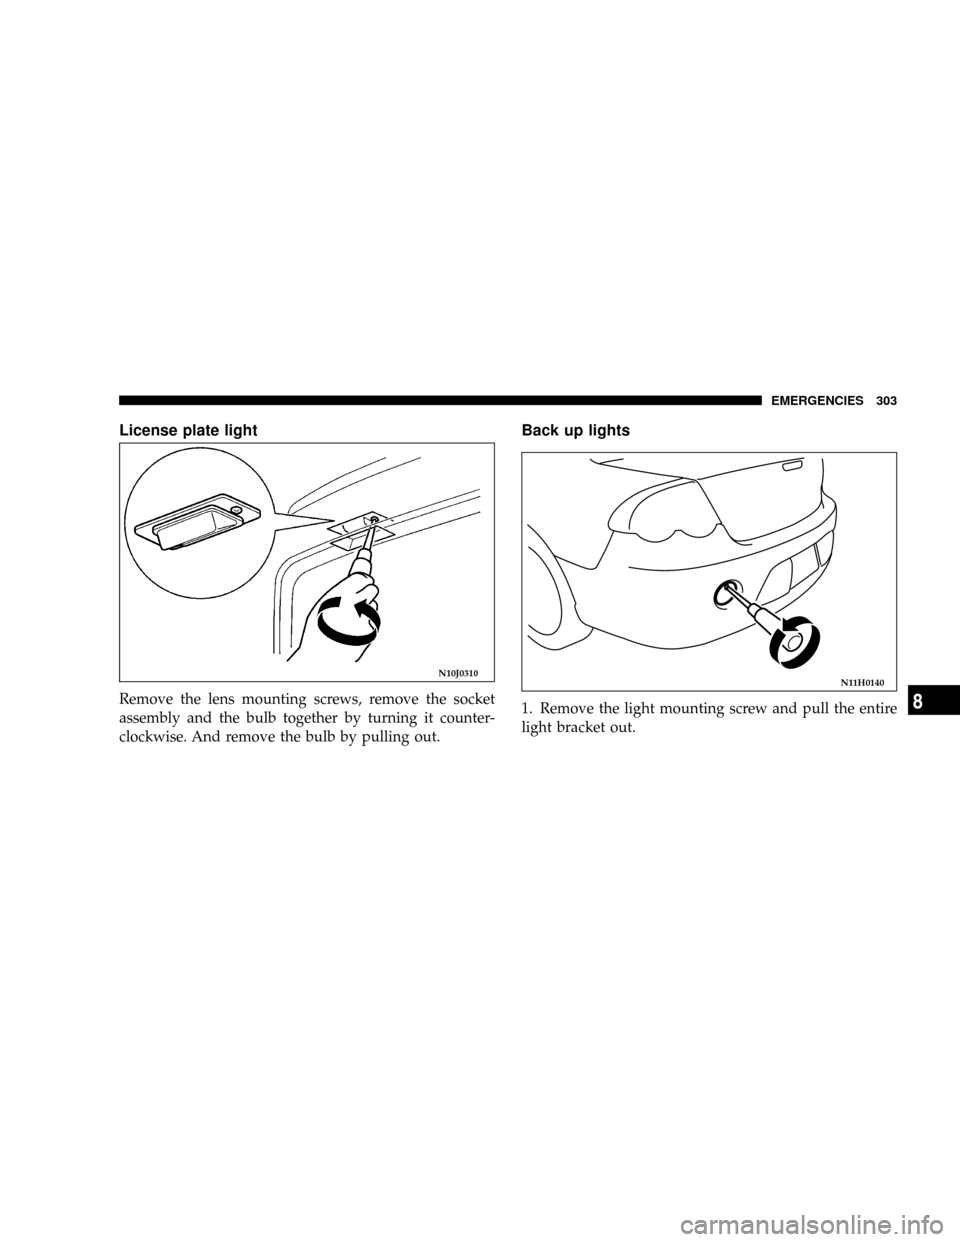
License plate light
Remove the lens mounting screws, remove the socket
assembly and the bulb together by turning it counter-
clockwise. And remove the bulb by pulling out.
Back up lights
1. Remove the light mounting screw and pull the entire
light bracket out.
N10J0310N11H0140
EMERGENCIES 303
8
Page 304 of 396
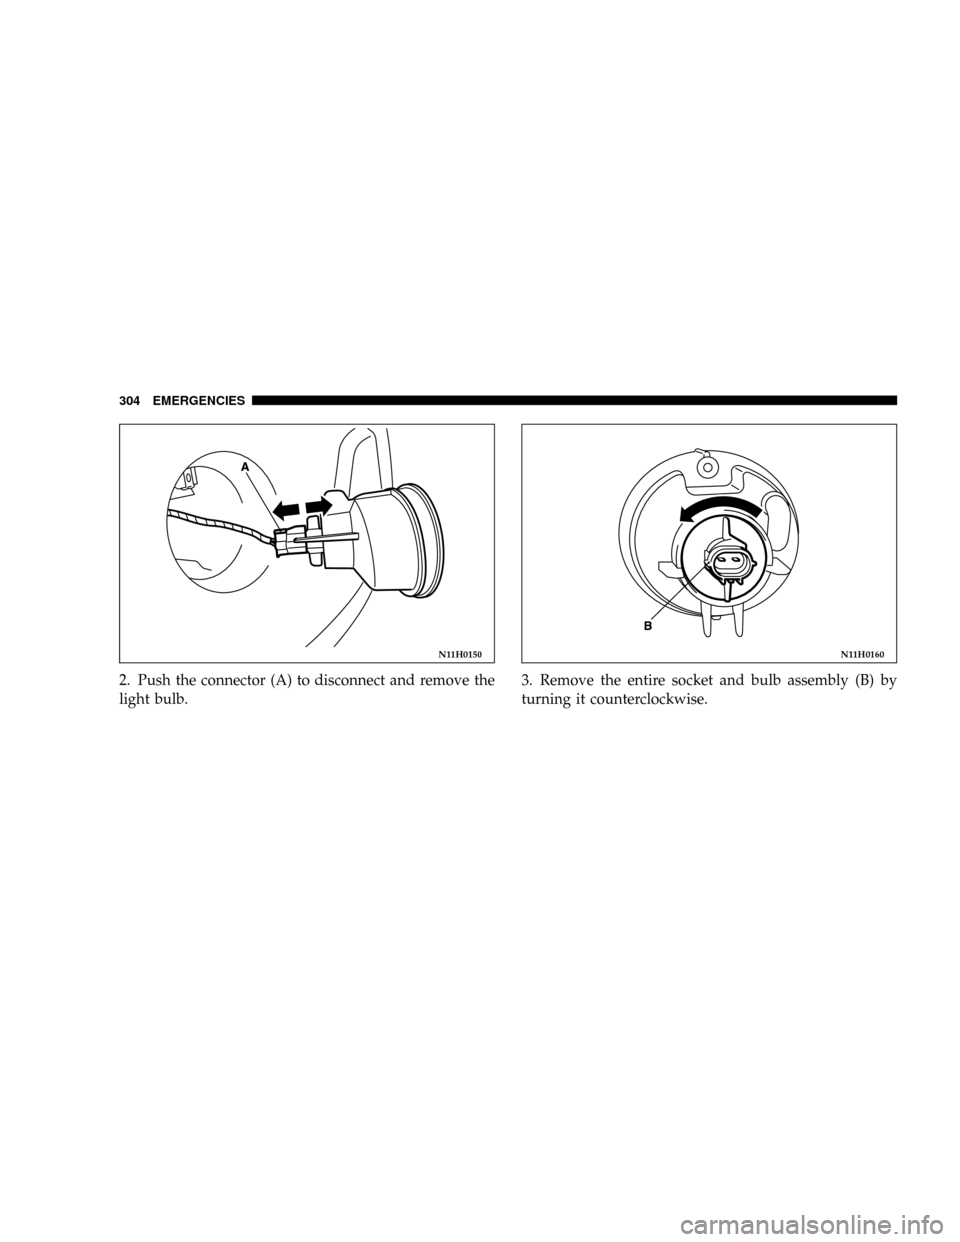
2. Push the connector (A) to disconnect and remove the
light bulb.3. Remove the entire socket and bulb assembly (B) by
turning it counterclockwise.
N11H0150N11H0160
304 EMERGENCIES
Page 305 of 396
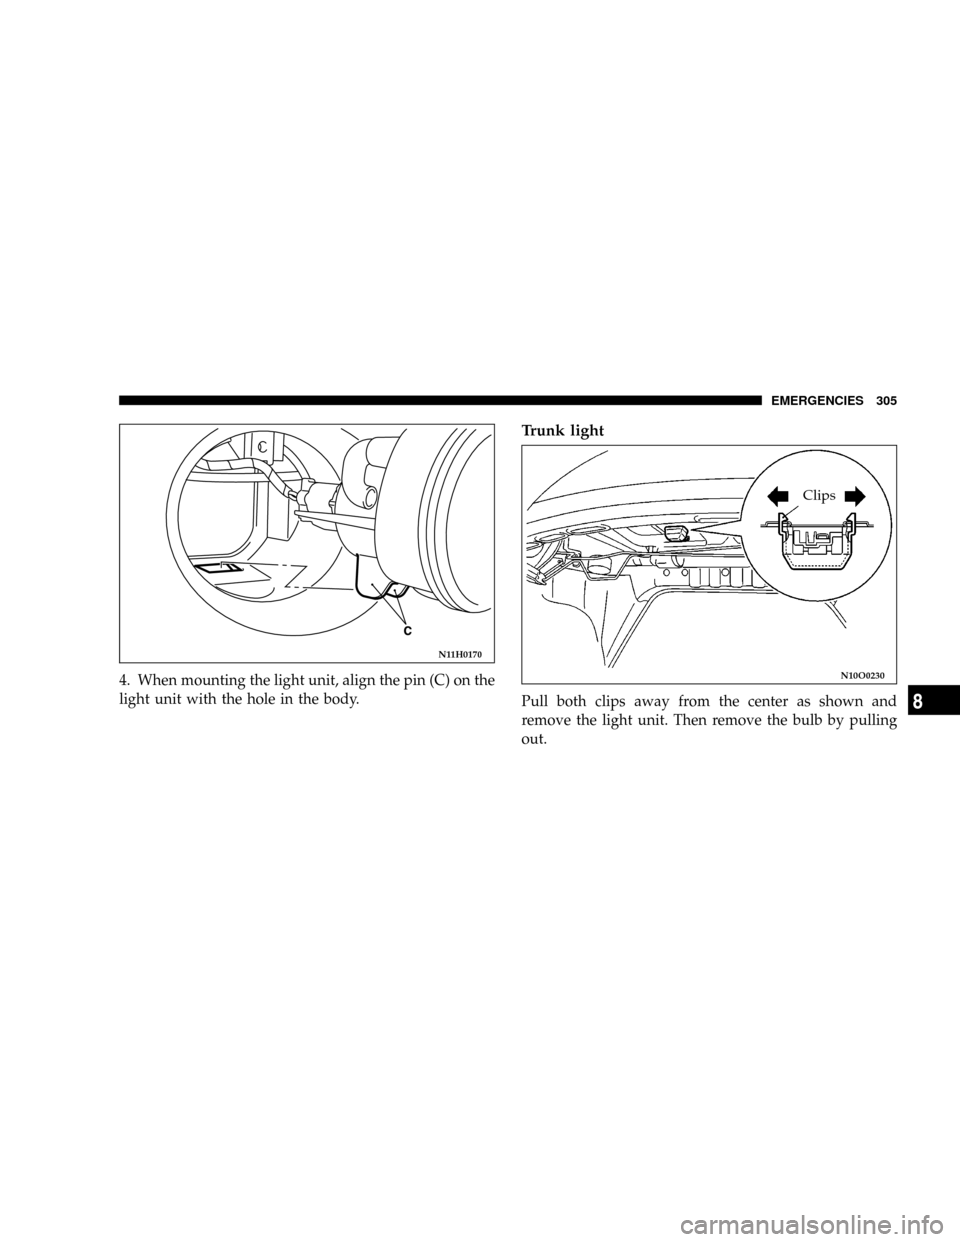
4. When mounting the light unit, align the pin (C) on the
light unit with the hole in the body.
Trunk light
Pull both clips away from the center as shown and
remove the light unit. Then remove the bulb by pulling
out.
N11H0170
N10O0230
Clips
EMERGENCIES 305
8
Page 306 of 396
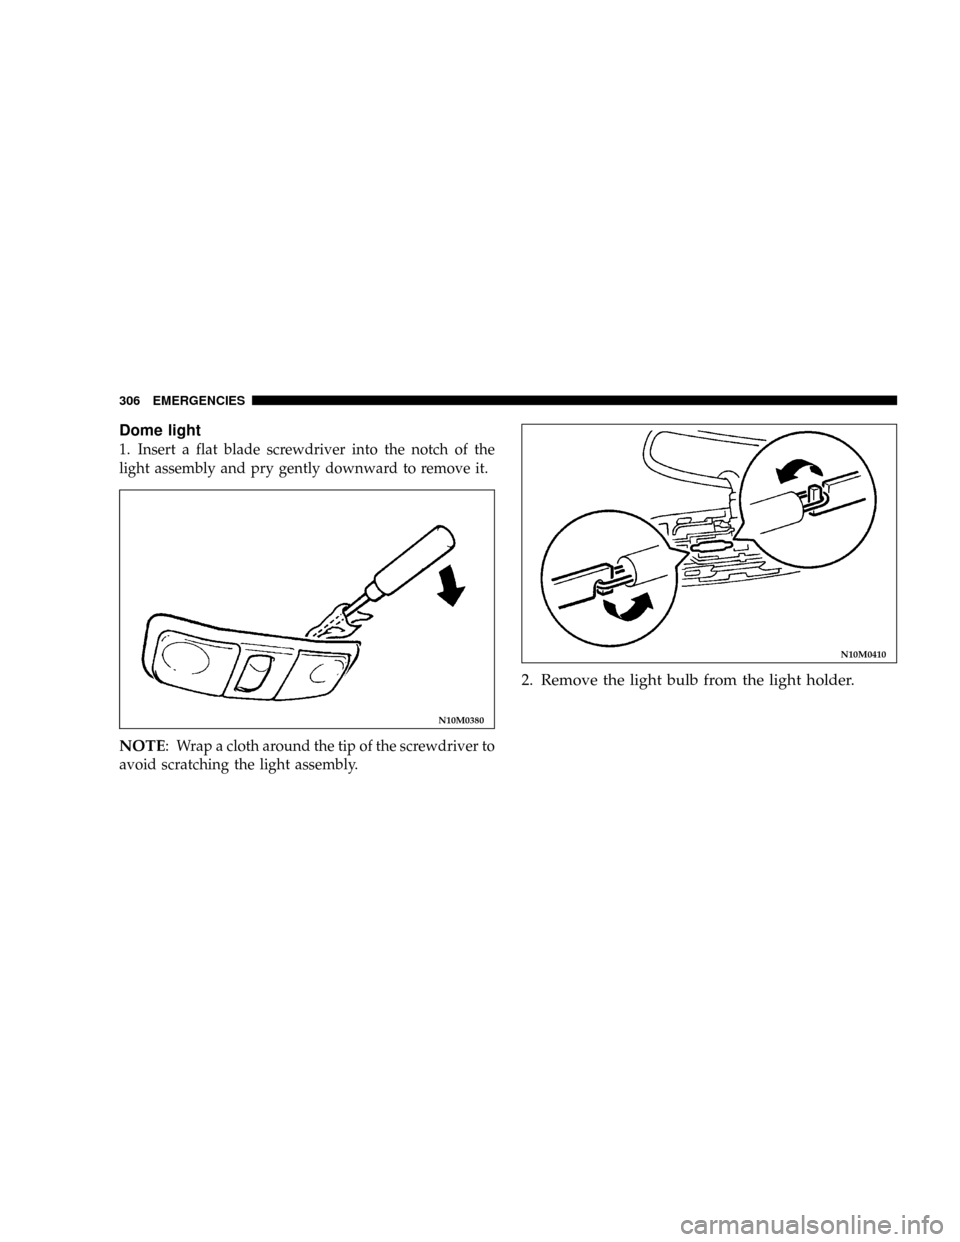
Dome light
1. Insert a flat blade screwdriver into the notch of the
light assembly and pry gently downward to remove it.
NOTE: Wrap a cloth around the tip of the screwdriver to
avoid scratching the light assembly.
2. Remove the light bulb from the light holder.
N10M0380
N10M0410
306 EMERGENCIES
Page 307 of 396
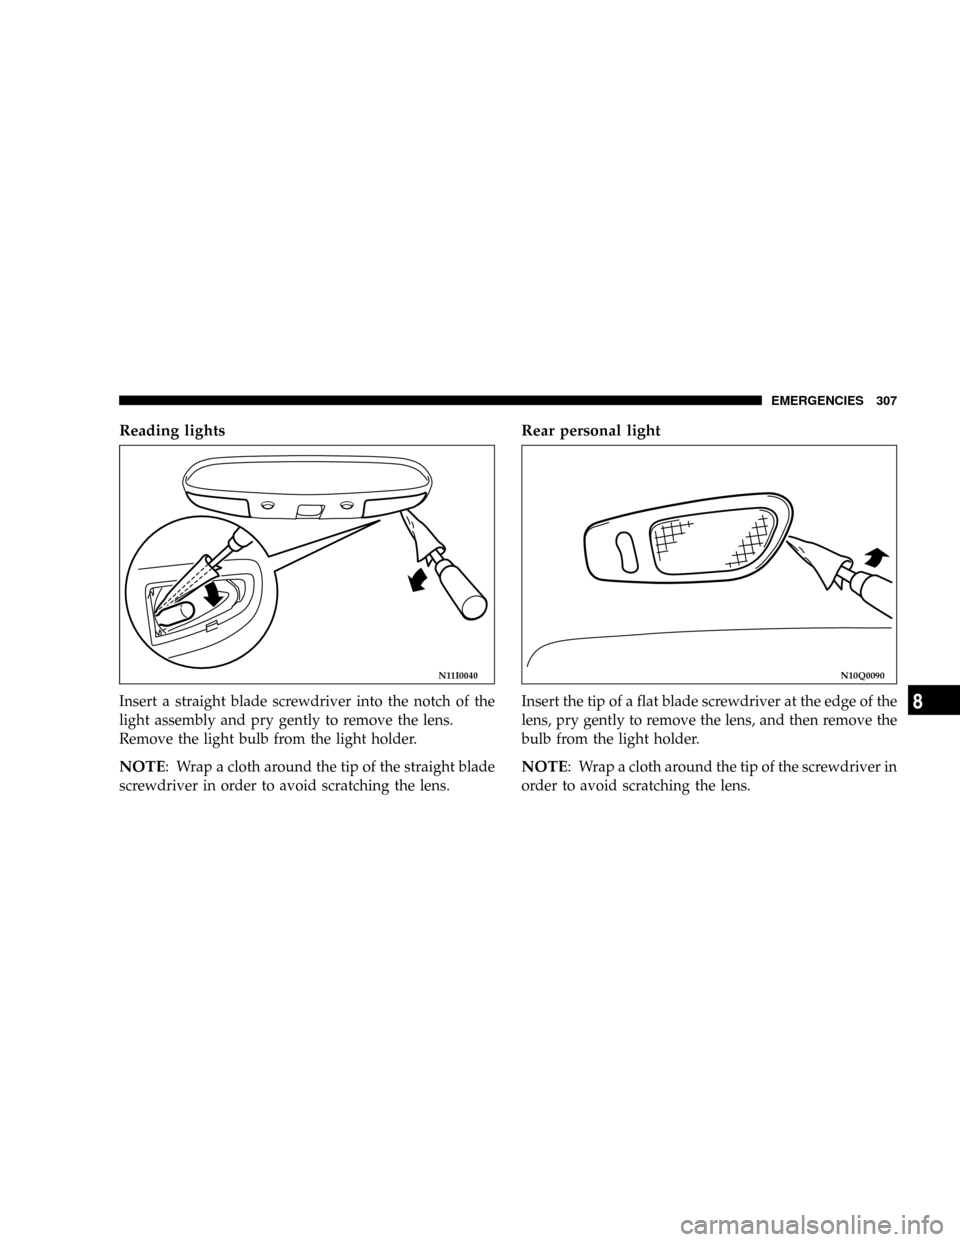
Reading lights
Insert a straight blade screwdriver into the notch of the
light assembly and pry gently to remove the lens.
Remove the light bulb from the light holder.
NOTE: Wrap a cloth around the tip of the straight blade
screwdriver in order to avoid scratching the lens.
Rear personal light
Insert the tip of a flat blade screwdriver at the edge of the
lens, pry gently to remove the lens, and then remove the
bulb from the light holder.
NOTE: Wrap a cloth around the tip of the screwdriver in
order to avoid scratching the lens.
N11I0040N10Q0090
EMERGENCIES 307
8
Page 308 of 396
Page 309 of 396

MAINTENANCE
CONTENTS
mView of engine compartment..............311
mService precautions.....................312
mEmission-control system maintenance.......313
mEmissions Testing......................314
mOnboard Diagnostic System (OBD II)........314
mReplacement Parts......................315
NFuel system (tank, filler tube, connections,
and fuel tank filler cap).................315
NFuel hoses...........................315
NAir cleaner filter......................316
NEvaporative emission control system
(except evaporative emission canister).......316
NSpark plugs..........................317
NIgnition cables........................317NDistributor cap and rotor................317
mGeneral maintenance....................318
NEngine oil and oil filter..................318
mEngine coolant.........................322
NTo check the coolant level................322
NTo add coolant........................322
mBrake fluid...........................323
mClutch fluid (manual transaxle)............324
NTo check the clutch fluid.................324
NTo replace the fluid....................324
mBattery..............................325
NDuring cold weather...................327
9
Page 310 of 396

NDisconnection and connection.............327
mAutomatic transaxle.....................329
NTo check the fluid level..................330
NProcedure for checking the fluid level.......330
mManual transaxle.......................331
mDisc brake pads, rear drum brake linings
and rear wheel cylinders.................331
mBrake hoses...........................331
mBall joint, steering linkage seal and drive
shaft boots...........................331
mSupplemental Restraint System (SRS)........331
mHood lock release mechanism and
safety catch
...........................332
mExhaust system........................332
mWindshield wiper blades.................333
NWindshield washers....................333
mParking brake.........................334
mDrive belt (for generator, water pump, power
steering pump)
........................335
mTiming belt...........................336
mTi re s................................336
NTire inflation pressures..................340
NRadial ply tires.......................341
N
Tire pressure for sustained high-speed driving...342
NReplacing tire and wheels................342
NTire maintenance......................342
NCargo loads..........................346
NTread wear indicators...................346
NTire rotation.........................347
NTire chains...........................348
NSnow tires...........................348
mRegular Maintenance Schedule.............349
mSevere Maintenance Schedule..............357
310 MAINTENANCE
Trending: radiator, ad blue, wiring, oil pressure, fog light, change key battery, brake pads
