display FIAT DUCATO 2011 Owner handbook (in English)
[x] Cancel search | Manufacturer: FIAT, Model Year: 2011, Model line: DUCATO, Model: FIAT DUCATO 2011Pages: 287, PDF Size: 4.42 MB
Page 61 of 287
57
KNOWING
YOUR CAR
SAFETY
STARTING
AND
DRIVING
WARNING
LIGHTS AND
MESSAGES
IN AN
EMERGENCY
MAINTENANCE
AND CARE
TECHNICAL
SPECIFICATIONS
INDEX
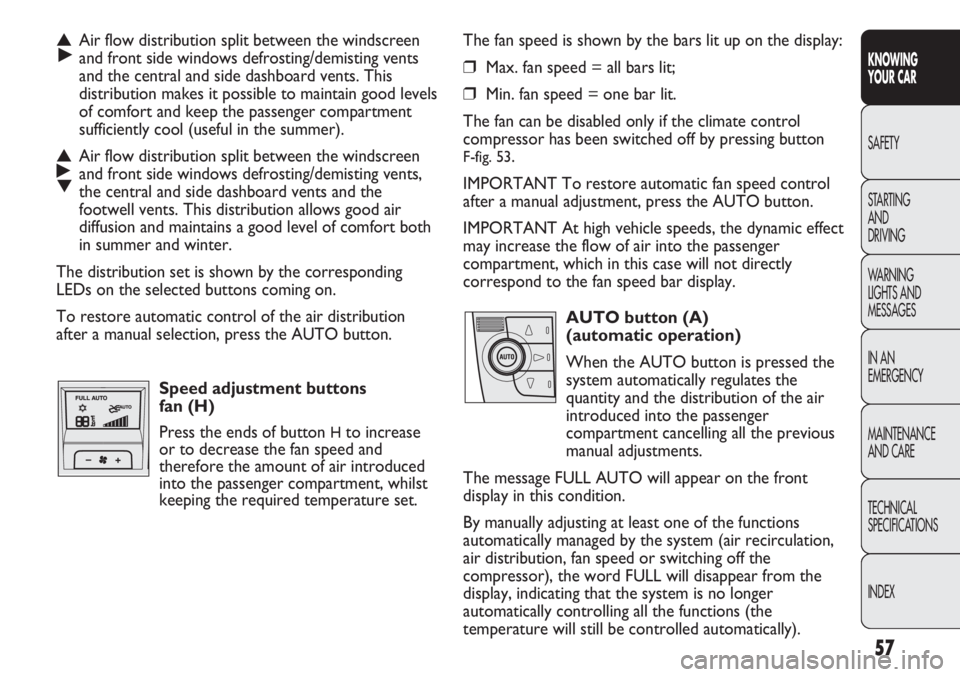
The fan speed is shown by the bars lit up on the display:
❒Max. fan speed = all bars lit;
❒Min. fan speed = one bar lit.
The fan can be disabled only if the climate control
compressor has been switched off by pressing button
F-fig. 53.
IMPORTANT To restore automatic fan speed control
after a manual adjustment, press the AUTO button.
IMPORTANT At high vehicle speeds, the dynamic effect
may increase the flow of air into the passenger
compartment, which in this case will not directly
correspond to the fan speed bar display.
AUTO button (A)
(automatic operation)
When the AUTO button is pressed the
system automatically regulates the
quantity and the distribution of the air
introduced into the passenger
compartment cancelling all the previous
manual adjustments.
The message FULL AUTO will appear on the front
display in this condition.
By manually adjusting at least one of the functions
automatically managed by the system (air recirculation,
air distribution, fan speed or switching off the
compressor), the word FULL will disappear from the
display, indicating that the system is no longer
automatically controlling all the functions (the
temperature will still be controlled automatically).
▲
˙Air flow distribution split between the windscreen
and front side windows defrosting/demisting vents
and the central and side dashboard vents. This
distribution makes it possible to maintain good levels
of comfort and keep the passenger compartment
sufficiently cool (useful in the summer).
▲
˙
▼Air flow distribution split between the windscreen
and front side windows defrosting/demisting vents,
the central and side dashboard vents and the
footwell vents. This distribution allows good air
diffusion and maintains a good level of comfort both
in summer and winter.
The distribution set is shown by the corresponding
LEDs on the selected buttons coming on.
To restore automatic control of the air distribution
after a manual selection, press the AUTO button.
Speed adjustment buttons
fan (H)
Press the ends of button
Hto increase
or to decrease the fan speed and
therefore the amount of air introduced
into the passenger compartment, whilst
keeping the required temperature set.
Page 62 of 287

58
KNOWING
YOUR CAR
SAFETY
STARTING
AND
DRIVING
WARNING
LIGHTS AND
MESSAGES
IN AN
EMERGENCY
MAINTENANCE
AND CARE
TECHNICAL
SPECIFICATIONS
INDEX
It is however not advised to use it on rainy/cold days as
it would considerably increase the possibility of the
windows steaming up, especially if the climate control
compressor is off.
To prevent steaming up, the recirculation is forced off
(i.e. air is introduced from the outside) when the the
outside temperature is cold.
It is advisable not to use the air recirculation function
when the outside temperature is low to prevent the
windows from rapidly misting up.
Climate control compressor on/off
button (F)
Pressing the √button switches the
climate control compressor off, it if was
on previously and the logo in the display
goes out.
Press the button when the LED is off to restore
automatic system control of compressor activation.
The icon will light up on the display.
The system will switch recirculation off when the
compressor is switched off to prevent misting up.
Although the system is capable of maintaining the
required temperature, the word FULL will disappear
from the display. If the system is no longer able to
maintain the temperature, the figures will flash and the
word AUTO will go out. IMPORTANT Should the system (after manual
intervention) no longer be able to guarantee the target
temperature for the passenger compartment, the set
temperature value will start flashing to indicate the
difficulties the system is experiencing and then the word
AUTO will go out.
To restore system automatic control at any time, after
one or more manual adjustments, press the AUTO
button.
Air recirculation on/off button (G)
The Air recirculation works according to
the following operating logics:
❒override on (air recirculation always on), indicated
by the LED on the button
Gcoming on and the
symbol íon the display;
❒override off (air recirculation always off and
introduction of outside air), indicated by the LED
on the button going off and the symbol êappearing
on the display.
These operating conditions are obtained by pressing air
recirculation button G in sequence.
IMPORTANT The engagement of the air recirculation
system makes it possible to reach the required heating
or cooling conditions faster.
Page 63 of 287
59
KNOWING
YOUR CAR
SAFETY
STARTING
AND
DRIVING
WARNING
LIGHTS AND
MESSAGES
IN AN
EMERGENCY
MAINTENANCE
AND CARE
TECHNICAL
SPECIFICATIONS
INDEX
IMPORTANT With the compressor off, it is not
possible to introduce air into the passenger
compartment at a temperature lower than that of the
outside air. In certain weather conditions, the windows
could mist up rapidly due to the non-dehumidified air.
The system remembers that the compressor has been
switched off, even after the engine has stopped.
To restore automatic compressor activation control,
press the √button again (in this case, the system will
work only as a heater) or press the AUTO button.
With the compressor switched off, if the outside
temperature is higher than the one set, the system is
not capable of satisfying this request. This is signalled by
the target temperature flashing, after which the word
AUTO goes out.
With the climate control compressor off, the fan speed
can be set to zero manually (no bar shown).
With the compressor enabled and the engine started,
the fan speed may be reduced to the minimum setting
(only one bar shown).
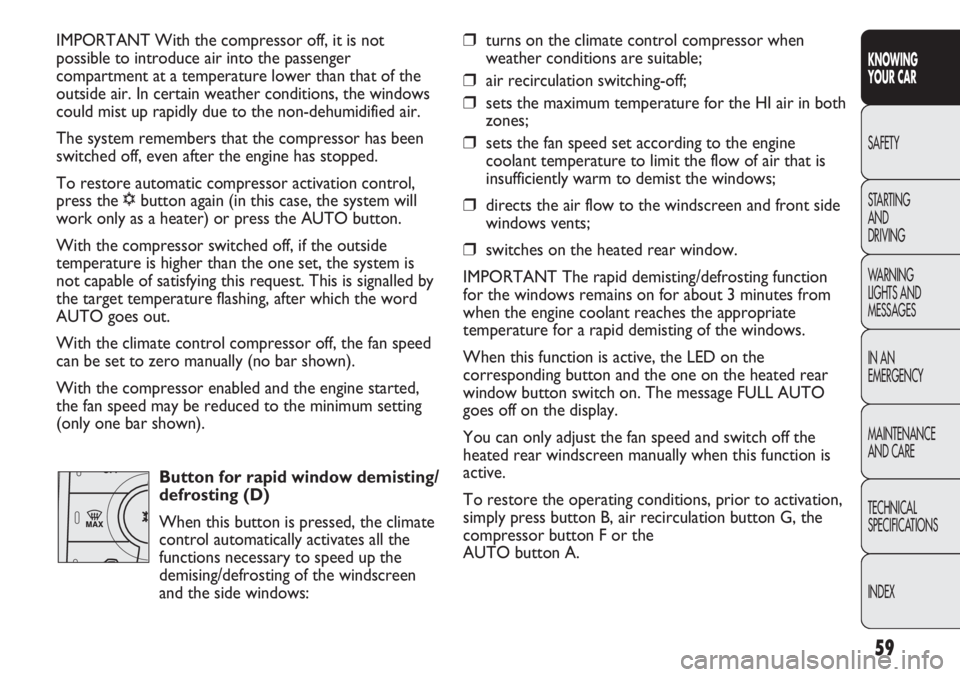
Button for rapid window demisting/
defrosting (D)
When this button is pressed, the climate
control automatically activates all the
functions necessary to speed up the
demising/defrosting of the windscreen
and the side windows:❒turns on the climate control compressor when
weather conditions are suitable;
❒air recirculation switching-off;
❒sets the maximum temperature for the HI air in both
zones;
❒sets the fan speed set according to the engine
coolant temperature to limit the flow of air that is
insufficiently warm to demist the windows;
❒directs the air flow to the windscreen and front side
windows vents;
❒switches on the heated rear window.
IMPORTANT The rapid demisting/defrosting function
for the windows remains on for about 3 minutes from
when the engine coolant reaches the appropriate
temperature for a rapid demisting of the windows.
When this function is active, the LED on the
corresponding button and the one on the heated rear
window button switch on. The message FULL AUTO
goes off on the display.
You can only adjust the fan speed and switch off the
heated rear windscreen manually when this function is
active.
To restore the operating conditions, prior to activation,
simply press button B, air recirculation button G, the
compressor button F or the
AUTO button A.
Page 64 of 287
60
KNOWING
YOUR CAR
SAFETY
STARTING
AND
DRIVING
WARNING
LIGHTS AND
MESSAGES
IN AN
EMERGENCY
MAINTENANCE
AND CARE
TECHNICAL
SPECIFICATIONS
INDEX
IMPORTANT To ensure rapid demisting/defrosting,
if there is an additional heater/air conditioner (under the
front or rear seat on Panorama and Combi versions),
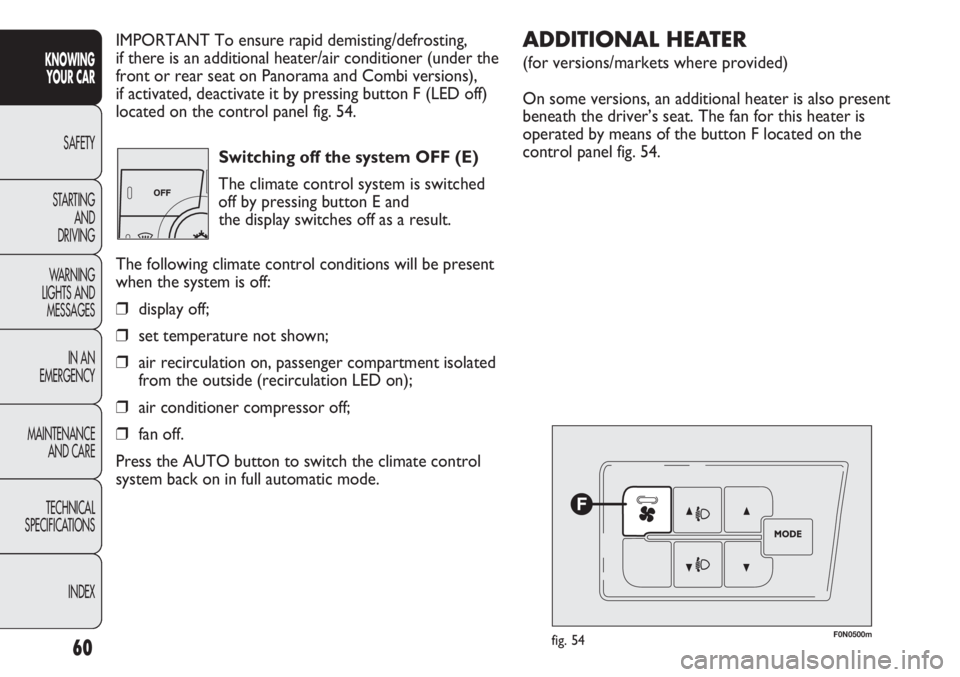
if activated, deactivate it by pressing button F (LED off)
located on the control panel fig. 54.
Switching off the system OFF (E)
The climate control system is switched
off by pressing button E and
the display switches off as a result.
The following climate control conditions will be present
when the system is off:
❒display off;
❒set temperature not shown;
❒air recirculation on, passenger compartment isolated
from the outside (recirculation LED on);
❒air conditioner compressor off;
❒fan off.
Press the AUTO button to switch the climate control
system back on in full automatic mode.
F0N0500mfig. 54
ADDITIONAL HEATER
(for versions/markets where provided)
On some versions, an additional heater is also present
beneath the driver’s seat. The fan for this heater is
operated by means of the button F located on the
control panel fig. 54.
Page 67 of 287
63
KNOWING
YOUR CAR
SAFETY
STARTING
AND
DRIVING
WARNING
LIGHTS AND
MESSAGES
IN AN
EMERGENCY
MAINTENANCE
AND CARE
TECHNICAL
SPECIFICATIONS
INDEX
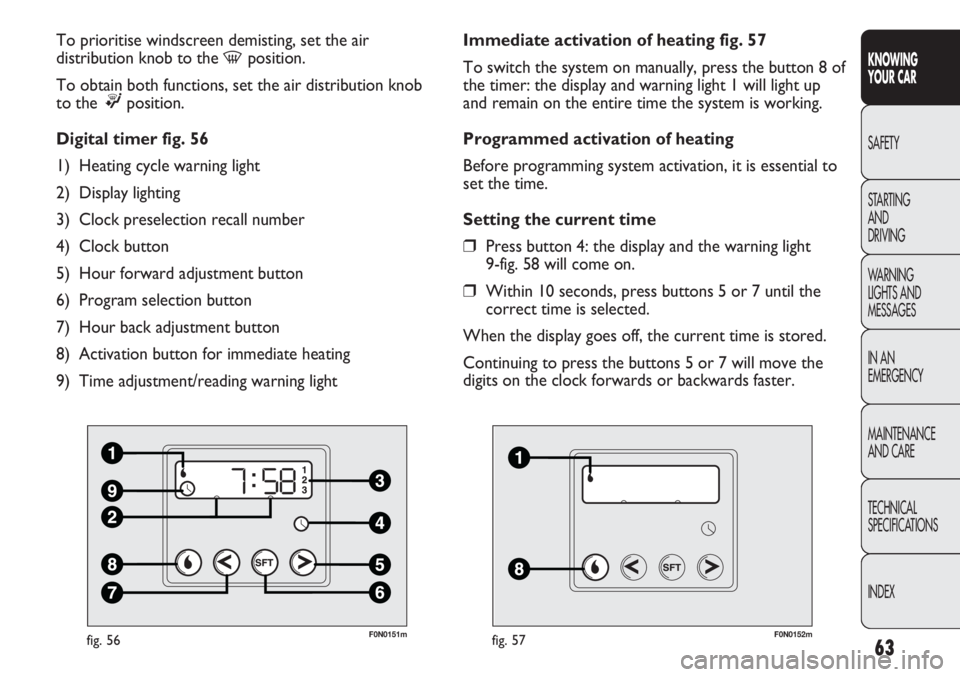
F0N0151mfig. 56
To prioritise windscreen demisting, set the air
distribution knob to the
-position.
To obtain both functions, set the air distribution knob
to the
®position.
Digital timer fig. 56
1) Heating cycle warning light
2) Display lighting
3) Clock preselection recall number
4) Clock button
5) Hour forward adjustment button
6) Program selection button
7) Hour back adjustment button
8) Activation button for immediate heating
9) Time adjustment/reading warning light
F0N0152mfig. 57
Immediate activation of heating fig. 57
To switch the system on manually, press the button 8 of
the timer: the display and warning light 1 will light up
and remain on the entire time the system is working.
Programmed activation of heating
Before programming system activation, it is essential to
set the time.
Setting the current time
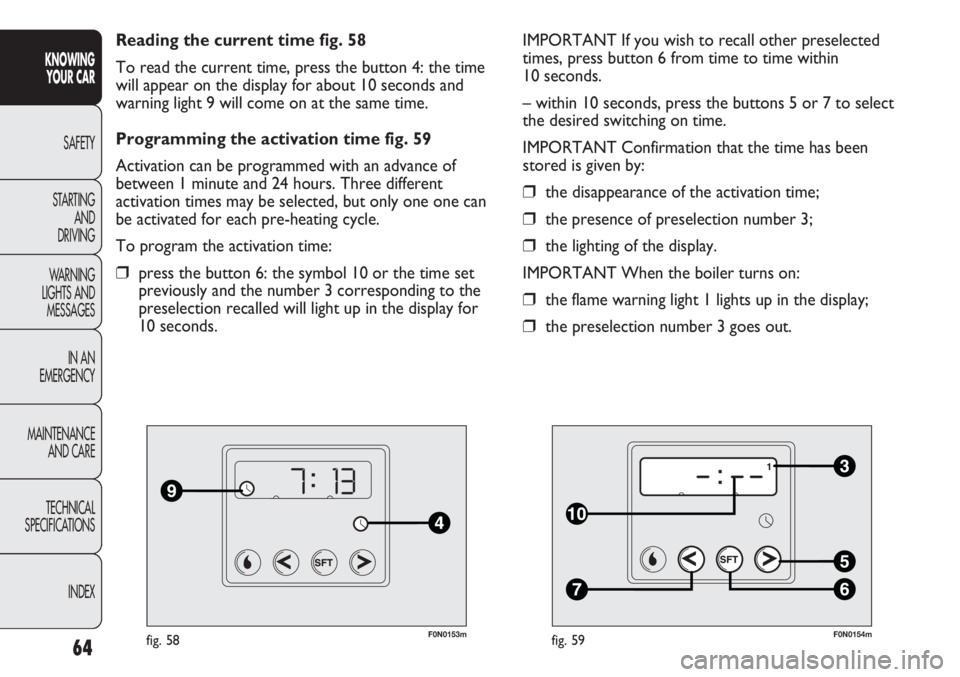
❒Press button 4: the display and the warning light
9-fig. 58 will come on.
❒Within 10 seconds, press buttons 5 or 7 until the
correct time is selected.
When the display goes off, the current time is stored.
Continuing to press the buttons 5 or 7 will move the
digits on the clock forwards or backwards faster.
Page 68 of 287
64
KNOWING
YOUR CAR
SAFETY
STARTING
AND
DRIVING
WARNING
LIGHTS AND
MESSAGES
IN AN
EMERGENCY
MAINTENANCE
AND CARE
TECHNICAL
SPECIFICATIONS
INDEX
F0N0153mfig. 58
Reading the current time fig. 58
To read the current time, press the button 4: the time
will appear on the display for about 10 seconds and
warning light 9 will come on at the same time.
Programming the activation time fig. 59
Activation can be programmed with an advance of
between 1 minute and 24 hours. Three different
activation times may be selected, but only one one can
be activated for each pre-heating cycle.
To program the activation time:
❒press the button 6: the symbol 10 or the time set
previously and the number 3 corresponding to the
preselection recalled will light up in the display for
10 seconds.
F0N0154mfig. 59
IMPORTANT If you wish to recall other preselected
times, press button 6 from time to time within
10 seconds.
– within 10 seconds, press the buttons 5 or 7 to select
the desired switching on time.
IMPORTANT Confirmation that the time has been
stored is given by:
❒the disappearance of the activation time;
❒the presence of preselection number 3;
❒the lighting of the display.
IMPORTANT When the boiler turns on:
❒the flame warning light 1 lights up in the display;
❒the preselection number 3 goes out.
Page 69 of 287
65
KNOWING
YOUR CAR
SAFETY
STARTING
AND
DRIVING
WARNING
LIGHTS AND
MESSAGES
IN AN
EMERGENCY
MAINTENANCE
AND CARE
TECHNICAL
SPECIFICATIONS
INDEX
Deactivation of the programmed activation time
fig. 59
To delete the programmed activation time, press button
6 briefly: the display lighting will go off and the number 3
relating to the preselected time will disappear.
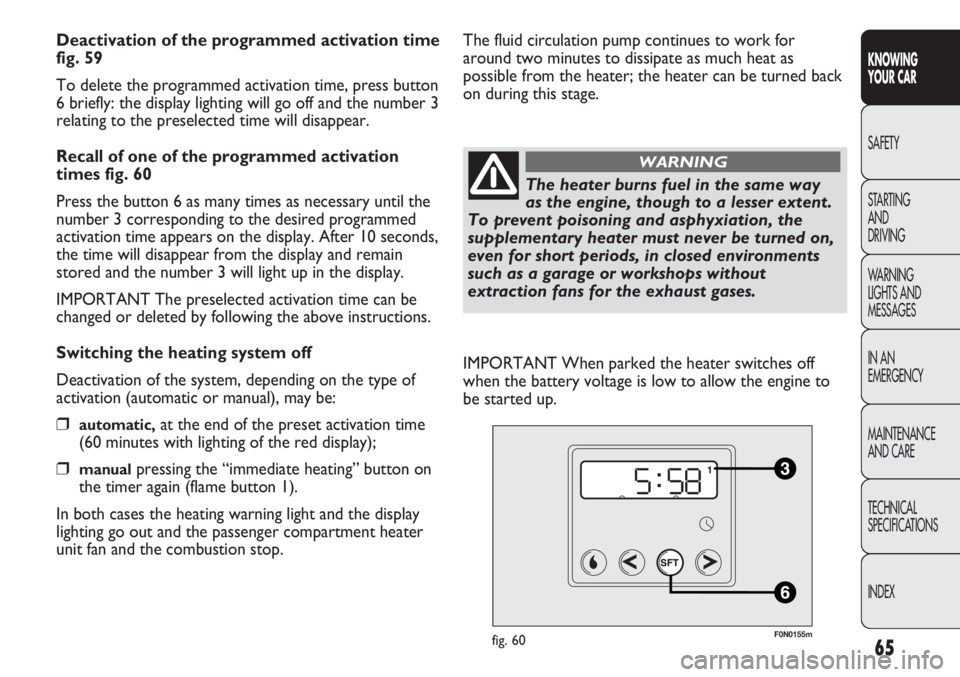
Recall of one of the programmed activation
times fig. 60
Press the button 6 as many times as necessary until the
number 3 corresponding to the desired programmed
activation time appears on the display. After 10 seconds,
the time will disappear from the display and remain
stored and the number 3 will light up in the display.
IMPORTANT The preselected activation time can be
changed or deleted by following the above instructions.
Switching the heating system off
Deactivation of the system, depending on the type of
activation (automatic or manual), may be:
❒automatic,at the end of the preset activation time
(60 minutes with lighting of the red display);
❒manualpressing the “immediate heating” button on
the timer again (flame button 1).
In both cases the heating warning light and the display
lighting go out and the passenger compartment heater
unit fan and the combustion stop.
F0N0155mfig. 60
The fluid circulation pump continues to work for
around two minutes to dissipate as much heat as
possible from the heater; the heater can be turned back
on during this stage.
The heater burns fuel in the same way
as the engine, though to a lesser extent.
To prevent poisoning and asphyxiation, the
supplementary heater must never be turned on,
even for short periods, in closed environments
such as a garage or workshops without
extraction fans for the exhaust gases.
WARNING
IMPORTANT When parked the heater switches off
when the battery voltage is low to allow the engine to
be started up.
Page 72 of 287
68
KNOWING
YOUR CAR
SAFETY
STARTING
AND
DRIVING
WARNING
LIGHTS AND
MESSAGES
IN AN
EMERGENCY
MAINTENANCE
AND CARE
TECHNICAL
SPECIFICATIONS
INDEX
F0N0501mfig. 63F0N0502mfig. 64
EXTERNAL LIGHTS
The left lever includes the controls for the exterior lights.
The exterior lights can only be switched on when the
ignition key is in the ON position.
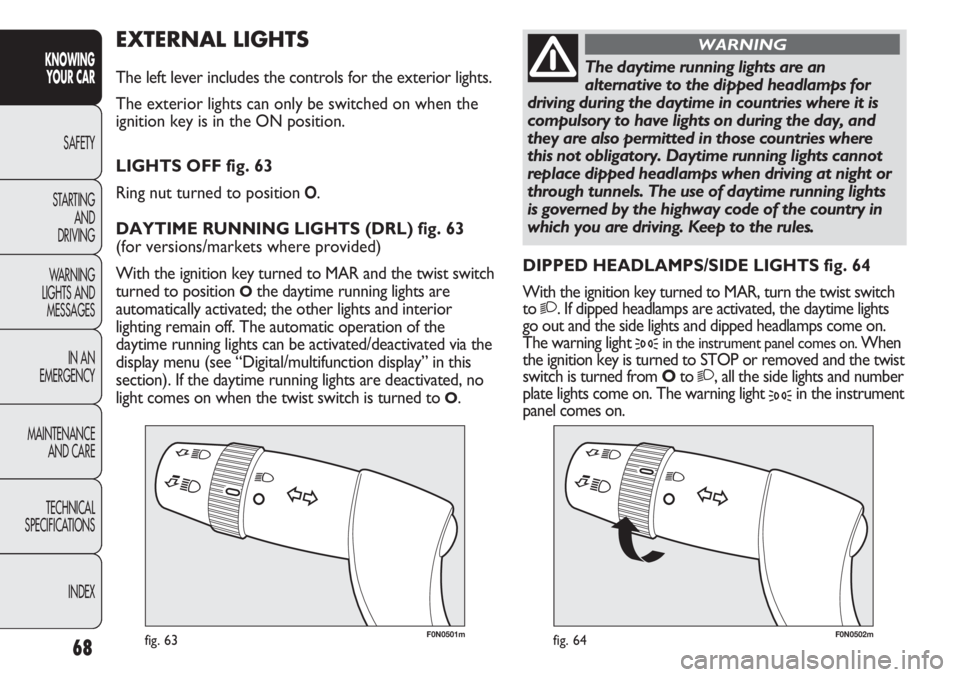
LIGHTS OFF fig. 63
Ring nut turned to position
O.
DAYTIME RUNNING LIGHTS (DRL) fig. 63
(for versions/markets where provided)
With the ignition key turned to MAR and the twist switch
turned to position
Othe daytime running lights are
automatically activated; the other lights and interior
lighting remain off. The automatic operation of the
daytime running lights can be activated/deactivated via the
display menu (see “Digital/multifunction display” in this
section). If the daytime running lights are deactivated, no
light comes on when the twist switch is turned to
O.DIPPED HEADLAMPS/SIDE LIGHTS fig. 64
With the ignition key turned to MAR, turn the twist switch
to
2. If dipped headlamps are activated, the daytime lights
go out and the side lights and dipped headlamps come on.
The warning light
3in the instrument panel comes on. When
the ignition key is turned to STOP or removed and the twist
switch is turned from Oto
2, all the side lights and number
plate lights come on. The warning light
3in the instrument
panel comes on.
The daytime running lights are an
alternative to the dipped headlamps for
driving during the daytime in countries where it is
compulsory to have lights on during the day, and
they are also permitted in those countries where
this not obligatory. Daytime running lights cannot
replace dipped headlamps when driving at night or
through tunnels. The use of daytime running lights
is governed by the highway code of the country in
which you are driving. Keep to the rules.
WARNING
Page 74 of 287
70
KNOWING
YOUR CAR
SAFETY
STARTING
AND
DRIVING
WARNING
LIGHTS AND
MESSAGES
IN AN
EMERGENCY
MAINTENANCE
AND CARE
TECHNICAL
SPECIFICATIONS
INDEX
F0N0506mfig. 68
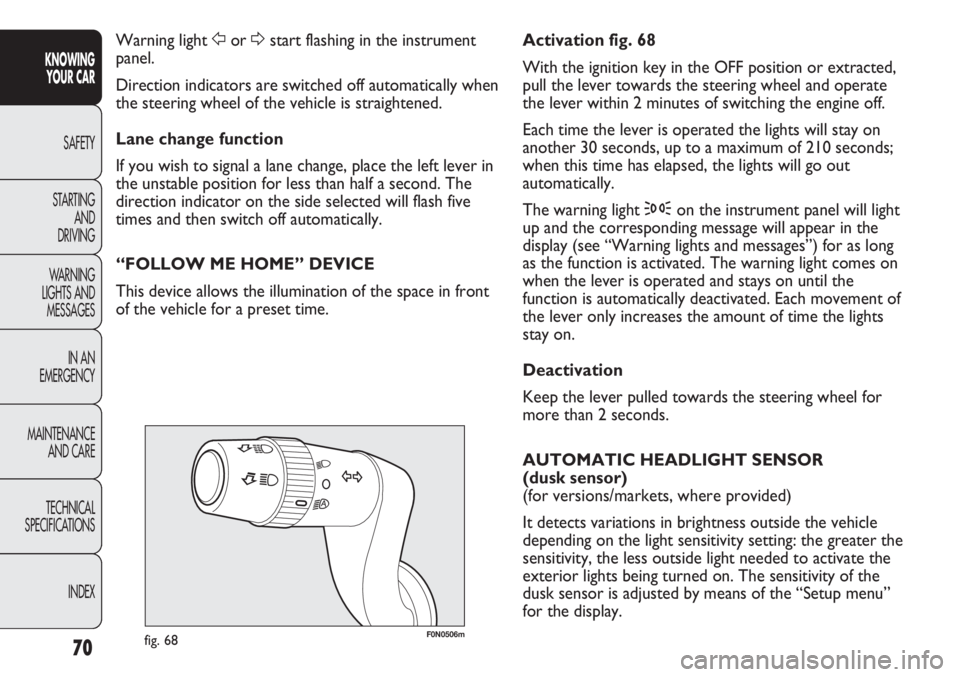
Activation fig. 68
With the ignition key in the OFF position or extracted,
pull the lever towards the steering wheel and operate
the lever within 2 minutes of switching the engine off.
Each time the lever is operated the lights will stay on
another 30 seconds, up to a maximum of 210 seconds;
when this time has elapsed, the lights will go out
automatically.
The warning light 3on the instrument panel will light
up and the corresponding message will appear in the
display (see “Warning lights and messages”) for as long
as the function is activated. The warning light comes on
when the lever is operated and stays on until the
function is automatically deactivated. Each movement of
the lever only increases the amount of time the lights
stay on.
Deactivation
Keep the lever pulled towards the steering wheel for
more than 2 seconds.
AUTOMATIC HEADLIGHT SENSOR
(dusk sensor)
(for versions/markets, where provided)
It detects variations in brightness outside the vehicle
depending on the light sensitivity setting: the greater the
sensitivity, the less outside light needed to activate the
exterior lights being turned on. The sensitivity of the
dusk sensor is adjusted by means of the “Setup menu”
for the display. Warning light For Dstart flashing in the instrument
panel.
Direction indicators are switched off automatically when
the steering wheel of the vehicle is straightened.
Lane change function
If you wish to signal a lane change, place the left lever in
the unstable position for less than half a second. The
direction indicator on the side selected will flash five
times and then switch off automatically.
“FOLLOW ME HOME” DEVICE
This device allows the illumination of the space in front
of the vehicle for a preset time.
Page 86 of 287
82
KNOWING
YOUR CAR
SAFETY
STARTING
AND
DRIVING
WARNING
LIGHTS AND
MESSAGES
IN AN
EMERGENCY
MAINTENANCE
AND CARE
TECHNICAL
SPECIFICATIONS
INDEX
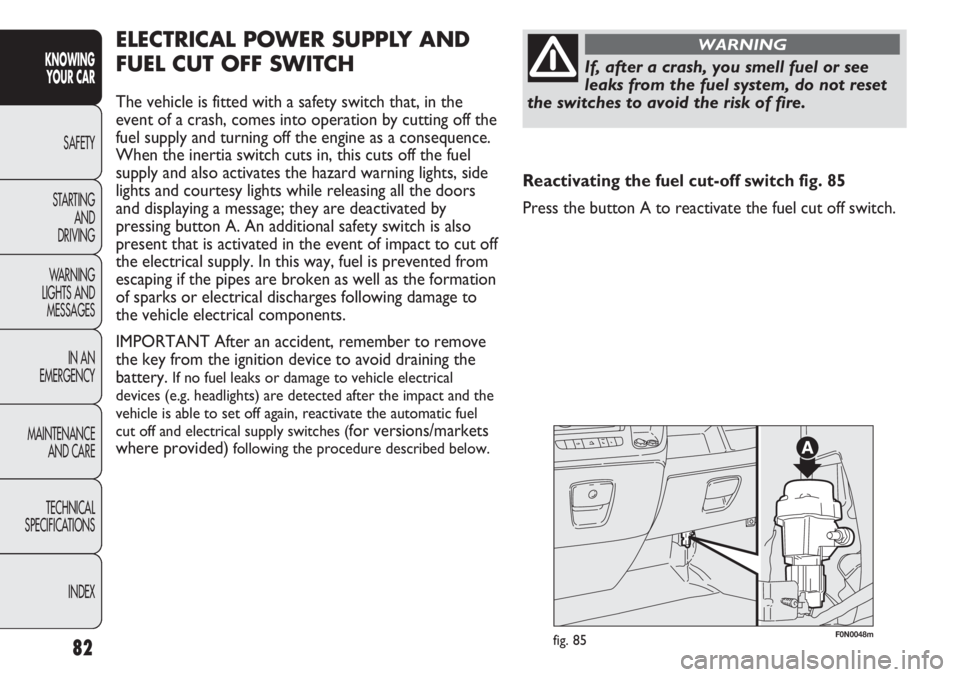
F0N0048mfig. 85
ELECTRICAL POWER SUPPLY AND
FUEL CUT OFF SWITCH
The vehicle is fitted with a safety switch that, in the
event of a crash, comes into operation by cutting off the
fuel supply and turning off the engine as a consequence.
When the inertia switch cuts in, this cuts off the fuel
supply and also activates the hazard warning lights, side
lights and courtesy lights while releasing all the doors
and displaying a message; they are deactivated by
pressing button A. An additional safety switch is also
present that is activated in the event of impact to cut off
the electrical supply. In this way, fuel is prevented from
escaping if the pipes are broken as well as the formation
of sparks or electrical discharges following damage to
the vehicle electrical components.
IMPORTANT After an accident, remember to remove
the key from the ignition device to avoid draining the
battery.
If no fuel leaks or damage to vehicle electrical
devices (e.g. headlights) are detected after the impact and the
vehicle is able to set off again, reactivate the automatic fuel
cut off and electrical supply switches (
for versions/markets
where provided)
following the procedure described below.
If, after a crash, you smell fuel or see
leaks from the fuel system, do not reset
the switches to avoid the risk of fire.
WARNING
Reactivating the fuel cut-off switch fig. 85
Press the button A to reactivate the fuel cut off switch.