display FIAT DUCATO BASE CAMPER 2014 Owner handbook (in English)
[x] Cancel search | Manufacturer: FIAT, Model Year: 2014, Model line: DUCATO BASE CAMPER, Model: FIAT DUCATO BASE CAMPER 2014Pages: 367, PDF Size: 20.39 MB
Page 146 of 367

What it means What to do
FUEL CUT-OFF DEVICE INERTIA SWITCH
TRIPPED
(Versions with reconfigurable multifunction
display)
This symbol on the display switches on when the
fuel cut-off device inertia switch has tripped.For the fuel cut-off inertia switch reactivation
procedure, refer to the "Electrical power supply
and fuel cut-off switch" section in the "Knowing
your vehicle" chapter. If it is still not possible to
restore the fuel supply, contact a Fiat Dealership.PARKING SENSOR FAILURE
(Versions with reconfigurable multifunction
display)
The symbol switches on together with a
dedicated message to indicate a failure of the
parking sensors.DRIVING ADVISOR SYSTEM FAILURE
(Versions with reconfigurable multifunction
display)
The symbol switches on in the display with the
two direction warning lights
and
lighting up,
along with an acoustic signal and a dedicated
message.
TRAFFIC SIGN RECOGNITION FAILURE
The symbol switches on in the display together
with a dedicated message to indicate a failure of
the Traffic Sign Recognition.
LIMITED RANGE
The display shows a dedicated message to warn
the driver that the vehicle's range is less than 50
km.
142
KNOWING THE INSTRUMENT PANEL
Page 147 of 367
What it means What to do
START&STOP SYSTEM ACTIVATION/
DEACTIVATION
(for versions/markets, where provided)
Start&Stop system activation
A message will appear on the display when the
Start&Stop system is activated. In this case the
LED located on the
button is off (see the
“Start&Stop” paragraph in the "Knowing your
vehicle" chapter).
Start&Stop system deactivation
A dedicated message will appear on the display
when the Start&Stop system is deactivated.
The LED on the
button is on when the system
is deactivated.
START&STOP FAILURE
If the Start&Stop system is faulty the
symbol
switches on in the display along with a dedicated
message.
143
Page 151 of 367
97) After the adjustment, always
check that the cursor to which the
ring is fastened is locked in one
of the preset positions. Release
the grip and push downwards
to enable the locking device to
click if the grip has not been
released in one of the possible
positions.
SBR SYSTEM
IN BRIEF
The vehicle is fitted with a Seat Belt
Reminder system (SBR), consisting of
a buzzer and a flashing warning light
on the instrument panel which
warns the driver that the seat belt
must be fastened.
The buzzer can be deactivated (until the
next engine stop) as follows:
❒fasten the driver's seat belt;
❒turn the ignition key to the MAR-ON
position;
❒wait for over 20 seconds and then
release one of the seat belts.
For permanent deactivation, contact a
Fiat Dealership.
With digital display, the SBR system
can only be reactivated at a Fiat
Dealership.
With multifunction display, the SBR
system can also be reactivated through
the set-up menu.
PRETENSIONERSTo increase the protective efficiency of
the front seat belts, the vehicle is fitted
with pretensioners. These devices, in
the event of a head-on crash or side
impact, rewind the seat belts a few
centimetres. In this way, they ensure
that the belts fit tightly to the wearer
before the restraining action begins.
The retractor locks to indicate that the
pretensioner has intervened; the seat
belt cannot be drawn back up even
when guiding it manually.
IMPORTANT To obtain the highest
degree of protection from the action of
the pretensioner, wear the seat belt
tight to the chest and pelvis.
A slight discharge of smoke may be
produced during the activation of the
pretensioner which is not harmful and
does not involve any fire hazard.
The pretensioner does not require any
maintenance or lubrication. Any
changes to its original conditions will
invalidate its efficiency. If, due to
unusual natural events (floods, sea
storms, etc.), the device has been
affected by water and mud, it must
absolutely be replaced.
98)25)
147
Page 165 of 367
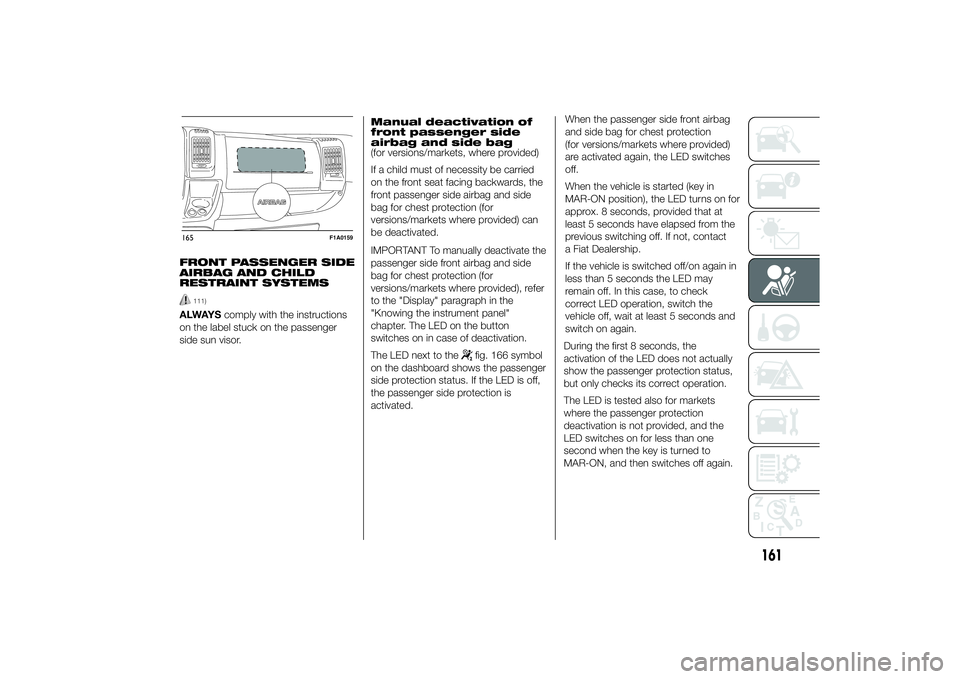
FRONT PASSENGER SIDE
AIRBAG AND CHILD
RESTRAINT SYSTEMS
111)
ALWAYScomply with the instructions
on the label stuck on the passenger
side sun visor.Manual deactivation of
front passenger side
airbag and side bag
(for versions/markets, where provided)
If a child must of necessity be carried
on the front seat facing backwards, the
front passenger side airbag and side
bag for chest protection (for
versions/markets where provided) can
be deactivated.
IMPORTANT To manually deactivate the
passenger side front airbag and side
bag for chest protection (for
versions/markets where provided), refer
to the "Display" paragraph in the
"Knowing the instrument panel"
chapter. The LED on the button
switches on in case of deactivation.
The LED next to the
fig. 166 symbol
on the dashboard shows the passenger
side protection status. If the LED is off,
the passenger side protection is
activated.When the passenger side front airbag
and side bag for chest protection
(for versions/markets where provided)
are activated again, the LED switches
off.
When the vehicle is started (key in
MAR-ON position), the LED turns on for
approx. 8 seconds, provided that at
least 5 seconds have elapsed from the
previous switching off. If not, contact
a Fiat Dealership.
If the vehicle is switched off/on again in
less than 5 seconds the LED may
remain off. In this case, to check
correct LED operation, switch the
vehicle off, wait at least 5 seconds and
switch on again.
During the first 8 seconds, the
activation of the LED does not actually
show the passenger protection status,
but only checks its correct operation.
The LED is tested also for markets
where the passenger protection
deactivation is not provided, and the
LED switches on for less than one
second when the key is turned to
MAR-ON, and then switches off again.
165
F1A0159
161
Page 170 of 367
IMPORTANT The front airbags and/or
side bags may be deployed if the
vehicle is subject to heavy knocks or
accidents involving the underbody area,
such as for example violent shocks,
against steps, kerbs or low obstacles,
vehicle falling into big potholes or
depressions in the road.
IMPORTANT A small amount of dust
will be released when the airbags
are deployed. The dust is not harmful
and does not indicate the beginning of
a fire. Furthermore, the surface of the
deployed bag and the interior of the
vehicle may be covered in a dusty
residue: this may irritate your skin and
eyes. Wash with mild soap and water in
the event of exposure.
IMPORTANT Should an accident occur
in which any of the safety devices are
activated, take the vehicle to a Fiat
Dealership to have the activated
devices replaced and to have the whole
system checked.
Every control, repair and replacement
operation concerning the airbags must
only be carried out at a Fiat Dealership.If you are having the vehicle scrapped,
have the system deactivated at a Fiat
Dealership first. If the vehicle changes
ownership, the new owner must be
informed of how to use the airbags and
the above warnings and also be given
this "Owner Handbook".
IMPORTANT Pretensioners, front
airbags and front side bags are
deployed differently according to the
type of collision. Failure to deploy
of one of the devices does not
necessarily indicate a system
malfunction.
WARNING
112) Never rest your head, arms or
elbows on the doors, on the
windows or in the window bag
area as this could cause injuries
during the inflation phase.
113) Never lean your head, arms and
elbows out of the window.114) If when turning the key to
MAR-ON the warning light
does not turn on or if it stays
on when travelling (together with
the message on the multifunction
display, for versions/markets
where provided), there could be a
fault in the safety systems; in
this event, airbags or
pretensioners may not trigger in
the case of impact or, in a lower
number of cases, they could be
triggered accidentally. Contact a
Fiat Dealership immediately to
have the system checked.
115) Do not cover the backrest of
the front or rear seats with covers
which are not suitable for use
with side bags.
116) Do not travel carrying objects in
your lap, in front of your chest or
between your lips (pipe, pencils,
etc.). They could cause severe
injury if the airbag is deployed.
117) Always drive keeping your
hands on the steering wheel rim
so that the airbag can inflate
freely if necessary. Do not drive
with your body bent forward.
Keep your back straight against
the backrest.
166
SAFETY
Page 182 of 367
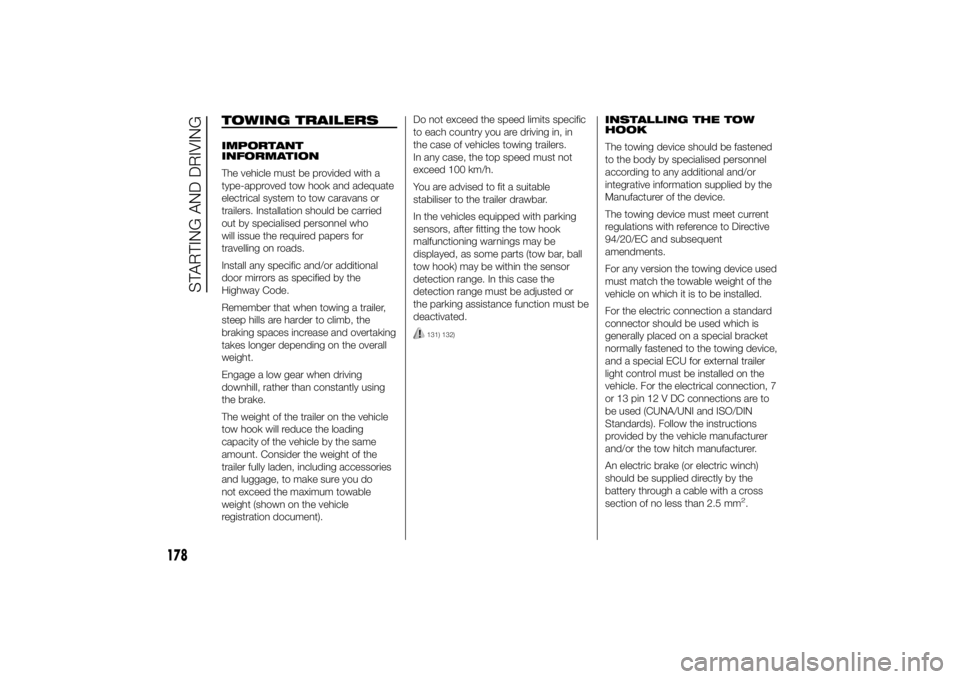
TOWING TRAILERSIMPORTANT
INFORMATION
The vehicle must be provided with a
type-approved tow hook and adequate
electrical system to tow caravans or
trailers. Installation should be carried
out by specialised personnel who
will issue the required papers for
travelling on roads.
Install any specific and/or additional
door mirrors as specified by the
Highway Code.
Remember that when towing a trailer,
steep hills are harder to climb, the
braking spaces increase and overtaking
takes longer depending on the overall
weight.
Engage a low gear when driving
downhill, rather than constantly using
the brake.
The weight of the trailer on the vehicle
tow hook will reduce the loading
capacity of the vehicle by the same
amount. Consider the weight of the
trailer fully laden, including accessories
and luggage, to make sure you do
not exceed the maximum towable
weight (shown on the vehicle
registration document).Do not exceed the speed limits specific
to each country you are driving in, in
the case of vehicles towing trailers.
In any case, the top speed must not
exceed 100 km/h.
You are advised to fit a suitable
stabiliser to the trailer drawbar.
In the vehicles equipped with parking
sensors, after fitting the tow hook
malfunctioning warnings may be
displayed, as some parts (tow bar, ball
tow hook) may be within the sensor
detection range. In this case the
detection range must be adjusted or
the parking assistance function must be
deactivated.
131) 132)
INSTALLING THE TOW
HOOK
The towing device should be fastened
to the body by specialised personnel
according to any additional and/or
integrative information supplied by the
Manufacturer of the device.
The towing device must meet current
regulations with reference to Directive
94/20/EC and subsequent
amendments.
For any version the towing device used
must match the towable weight of the
vehicle on which it is to be installed.
For the electric connection a standard
connector should be used which is
generally placed on a special bracket
normally fastened to the towing device,
and a special ECU for external trailer
light control must be installed on the
vehicle. For the electrical connection, 7
or 13 pin 12 V DC connections are to
be used (CUNA/UNI and ISO/DIN
Standards). Follow the instructions
provided by the vehicle manufacturer
and/or the tow hitch manufacturer.
An electric brake (or electric winch)
should be supplied directly by the
battery through a cable with a cross
section of no less than 2.5 mm
2.
178
STARTING AND DRIVING
Page 363 of 367
INDEX
ABS .............................................. 74
Additional heater ............................ 38
Additional rear climate control
(Panorama/Combi) ....................... 43
Additional rear heating
(Panorama/Combi) ....................... 43
Advice for extending battery life...... 237
Air cleaner ...................................... 236
Air suspension ............................... 64
Arrangement possibilities for
Universal Isofix child restraint
system on seats of vehicle ........... 156
Ashtray .......................................... 60
ASR system ................................... 76
ASR (system) ................................. 76
Automatic climate control
system ......................................... 33
Automatic headlight sensor ............ 47Battery (disconnector) ................... 56
Battery disconnector ...................... 56
Battery
– Replacement ............................. 237
Battery (recharging) ........................ 219
Battery replacement ....................... 237
body paintwork identification
plate............................................. 250
Bodywork
– Advice for preserving the
bodywork .................................. 244– Exterior and underbody
warranty .................................... 243
– Protection from atmospheric
agents ....................................... 243
Bodywork version .......................... 252
Bonnet ........................................... 71
Bottle replacement ......................... 198
Brake fluid ...................................... 234
Brakes
– specifications ............................ 258
Bulbs
– types of bulbs ........................... 202
Bump starting ................................ 191
Cab glove compartment ............... 62
Capucine ....................................... 62
Carrying children safely
– Arrangement possibilities for
child restraint systems ............... 152
– Child restraint systems .............. 150
– Safety regulations ...................... 153
Central locking ............................... 56
Changing a bulb............................. 201
Changing an interior bulb ............... 211
Chassis marking ............................ 250
Checking and restoring pressure .... 198
Checking levels .............................. 229
Cigar lighter.................................... 60
Clutch ............................................ 256
CO2 emissions............................... 332Compartment beneath
passenger side front seat ............. 59
Controls ......................................... 54
Cruise Control ................................ 50
Daytime Running Lights ................ 44
Dead lock ...................................... 67
Demanding vehicle use .................. 228
Desk/Book rest .............................. 61
Diesel particulate filter (DPF) ........... 101
Diffusers ......................................... 28
Dimensions .................................... 264
Dipped headlights .................... 44-207
Direction indicators ................... 46-207
Display
– Standard screen ........................ 109
Door pockets ................................. 59
Doors ............................................. 65
DPF (particulate filter) ..................... 101
Driving Advisor (system) ................. 83
Driving style.................................... 177Electric windows ........................... 70
Electronic alarm ............................. 13
Engine codes ................................. 252
Engine coolant ............................... 232
Engine coolant temperature
indicator ....................................... 108
Engine............................................ 254
Engine marking .............................. 251
Engine oil ....................................... 232
Page 364 of 367
Engine oil level gauge ..................... 108
EOBD system ................................ 92
ESC (system) ................................. 75
External lights................................. 44Fiat CODE system......................... 10
Fix&Go Automatic quick tyre
repair kit ............................... 196-198
Flap on bench ............................ 18-62
Flashing ......................................... 45
Flex Floor rear seat......................... 20
Fluids and lubricants ...................... 318
Fog lights ................................. 55-208
Follow Me Home device ................. 46
Follow me home ............................ 46
Front airbags .................................. 160
– Driver's side front airbag............ 160
– Manually deactivating the
front airbag and side bag........... 161
– Passenger side front airbag ....... 160
Front roof light (changing a bulb) .... 211
Fuel consumption .......................... 321
Fuel cut-off switch ......................... 57
Fuel level gauge ............................. 108
Fuel tank cap ................................. 101
Fuses (replacement) ....................... 212Gearbox ....................................... 173
Gear lever ...................................... 173
Gear Shift Indicator ........................ 110
Glove compartment ....................... 58Glove compartment with lock......... 58
Hazard warning lights ................... 54
HBA (Hydraulic Brake Assist)
system ......................................... 77
HBA (system) ................................. 77
Headlight alignment corrector ........ 73
Headlights
– Headlight alignment corrector.... 73
– Light beam direction.................. 73
Headlight washers .................... 49-242
Head restraints
– Front ......................................... 23
Heated rear window ....................... 55
Heating and ventilation controls...... 28
Heating and ventilation ................... 27
Hill Descent Control System ........... 77
Hill Descent .................................... 77
Hill Holder system .......................... 76
Hill Holder (system) ........................ 76Identification data .......................... 250
Ignition switch ................................ 14
Independent additional heater ........ 39
Inflation pressure ............................ 263
Inflation procedure ......................... 196
Instrument panel ............................ 104
Interior fittings ................................ 58
Interiors .......................................... 246
Isofix child restraint systems
(setup)– Arrangement possibilities for
child restraint system on
seats of vehicle.......................... 156
Jump starting ................................ 190Lectern ......................................... 61
Lifting the vehicle ........................... 220
Light beam direction ...................... 73
Lights off ........................................ 44
Loading advice............................... 175M
ain beam headlights............. 45-206
Maintenance and care - regular
checks ......................................... 228
Maintenance and care -
Scheduled Servicing .................... 224
Maintenance and care -
scheduled servicing plan .............. 225
Manual climate control system ....... 30
Manually deactivating the front
airbag and side bag ..................... 161
Moving footboard ........................... 68
MSR system .................................. 74
MSR (system)................................. 74
Multifunction display
– Control buttons ......................... 110
– Setup menu .............................. 111
Number plate lights....................... 210O
n-board instruments................... 104
Parking ......................................... 172
Parking lights.............................. 46-55
INDEX