display FIAT DUCATO BASE CAMPER 2018 Owner handbook (in English)
[x] Cancel search | Manufacturer: FIAT, Model Year: 2018, Model line: DUCATO BASE CAMPER, Model: FIAT DUCATO BASE CAMPER 2018Pages: 304, PDF Size: 14.93 MB
Page 114 of 304
PASSENGER SIDE FRONT
AIRBAG
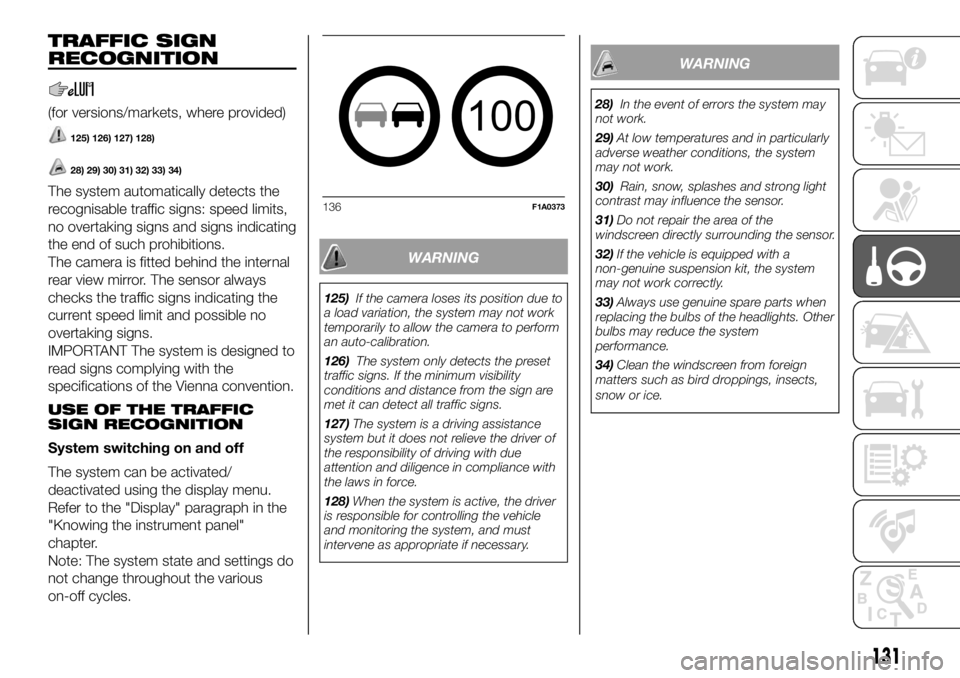
(for versions/markets, where provided)
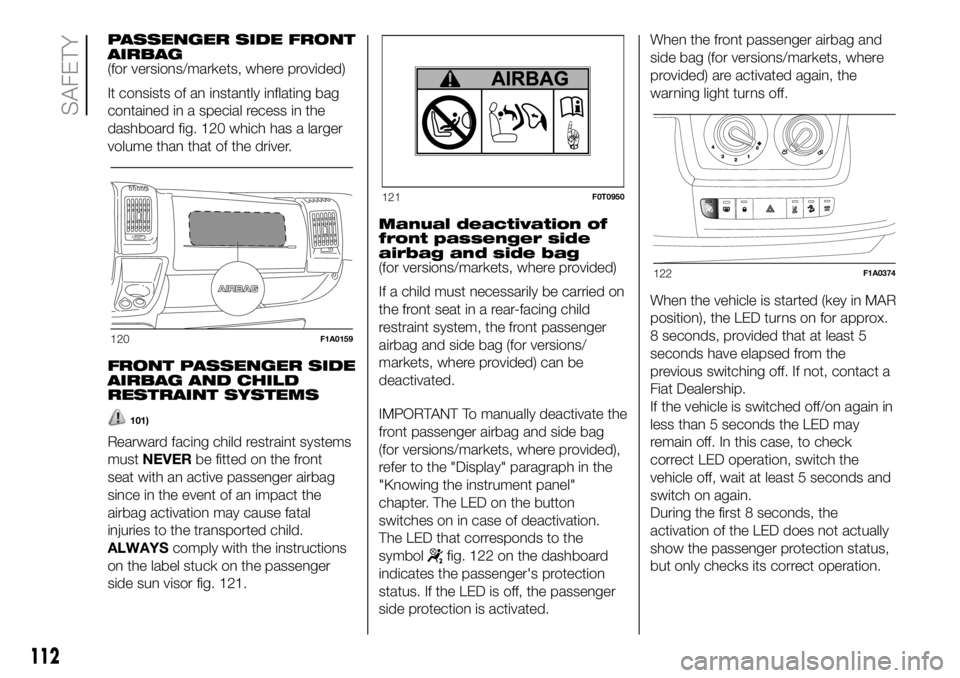
It consists of an instantly inflating bag
contained in a special recess in the
dashboard fig. 120 which has a larger
volume than that of the driver.
FRONT PASSENGER SIDE
AIRBAG AND CHILD
RESTRAINT SYSTEMS
101)
Rearward facing child restraint systems
mustNEVERbe fitted on the front
seat with an active passenger airbag
since in the event of an impact the
airbag activation may cause fatal
injuries to the transported child.
ALWAYScomply with the instructions
on the label stuck on the passenger
side sun visor fig. 121.Manual deactivation of
front passenger side
airbag and side bag
(for versions/markets, where provided)
If a child must necessarily be carried on
the front seat in a rear-facing child
restraint system, the front passenger
airbag and side bag (for versions/
markets, where provided) can be
deactivated.
IMPORTANT To manually deactivate the
front passenger airbag and side bag
(for versions/markets, where provided),
refer to the "Display" paragraph in the
"Knowing the instrument panel"
chapter. The LED on the button
switches on in case of deactivation.
The LED that corresponds to the
symbol
fig. 122 on the dashboard
indicates the passenger's protection
status. If the LED is off, the passenger
side protection is activated.When the front passenger airbag and
side bag (for versions/markets, where
provided) are activated again, the
warning light turns off.
When the vehicle is started (key in MAR
position), the LED turns on for approx.
8 seconds, provided that at least 5
seconds have elapsed from the
previous switching off. If not, contact a
Fiat Dealership.
If the vehicle is switched off/on again in
less than 5 seconds the LED may
remain off. In this case, to check
correct LED operation, switch the
vehicle off, wait at least 5 seconds and
switch on again.
During the first 8 seconds, the
activation of the LED does not actually
show the passenger protection status,
but only checks its correct operation.
120F1A0159
121F0T0950
122F1A0374
112
SAFETY
Page 118 of 304

IMPORTANT A small amount of dust
will be released when the airbags
are deployed. The dust is not harmful
and does not indicate the beginning of
a fire. Furthermore, the surface of the
deployed bag and the interior of the
vehicle may be covered in a dusty
residue: this may irritate your skin and
eyes. Wash with mild soap and water in
the event of exposure.
IMPORTANT Should an accident occur
in which any of the safety devices are
activated, take the vehicle to a Fiat
Dealership to have the activated
devices replaced and to have the whole
system checked.
Every control, repair and replacement
operation concerning the airbags must
be carried out only at Fiat Dealerships.
If you are having the vehicle scrapped,
have the system deactivated at a Fiat
Dealership first. If the vehicle changes
ownership, the new owner must be
informed of how to use the airbags and
the above warnings and also be given
this "Owner Handbook".
IMPORTANT Pretensioners, front
airbags and front side bags are
deployed differently according to the
type of collision. Failure to activate one
or more of the devices does not
indicate a system malfunction.
WARNING
100)Do not apply stickers or other objects
to the steering wheel, the dashboard in
the passenger side airbag area and the
seats. Never put objects (e.g. mobile
phones) on the passenger side of the
dashboard since they could interfere with
correct inflation of the passenger airbag
and also cause serious injury to the
passengers.
101)When there is an active passenger
airbag, DO NOT install rearward facing
child restraint systems on the front seat.
Deployment of the airbag in an accident
could cause fatal injuries to the child
regardless of the severity of the impact.
Therefore, always deactivate the passenger
side airbag when a rearward facing child
restraint system is installed on the front
passenger seat. The front passenger seat
must also be positioned back as far as
possible in order to prevent the child
restraint system from coming into contact
with the dashboard. Immediately reactivate
the passenger airbag as soon as the child
restraint system has been removed.
102)Never rest head, arms and elbows on
the doors, on the windows and in the
side air bag head protection area (Window
Bag) to prevent possible injuries during
inflation phase.
103)Never lean your head, arms or elbows
out of the window.104)If when turning the key to MAR the
warning light
does not turn on or if
it stays on when travelling (together with
the message on the multifunction display,
for versions/markets where provided), there
could be a fault in the safety systems; in
this event, airbags or pretensioners may
not trigger in the case of impact or, in
a lower number of cases, they could be
triggered accidentally. Contact a Fiat
Dealership immediately to have the system
checked.
105)Do not cover the backrest of the front
or rear seats with covers which are not
suitable for use with side bags.
106)Do not travel carrying objects in your
lap, in front of your chest or between
your lips (pipe, pencils, etc.): they could
cause severe injury if the airbag is
deployed.
107)Always drive keeping your hands on
the steering wheel rim so the airbag can
inflate freely if necessary. Do not drive with
your body bent forward. Keep your back
straight against the backrest.
116
SAFETY
Page 122 of 304
PROCEDURE FOR
NATURAL POWER
VERSIONS
(For versions/markets, where provided)
The various engine cranking methods
are described below:
METHANE tank not on reserve –
petrol tank not empty:
the engine is always started in methane
mode;
METHANE tank empty – petrol tank
not empty:
the engine is forced to start on petrol
and it will not switch to methane until
the methane tank has been filled. At the
same time, the reserve warning light
will turn on and the "REFUELLING
REQUIRED" message will be shown on
the instrument panel display;
METHANE tank not on reserve –
petrol tank empty:
the engine is always started in methane
mode.
17) 18) 19) 20) 21)
WARNING
116)It is dangerous to run the engine in
enclosed areas. The engine consumes
oxygen and engine exhaust contains
carbon dioxide, carbon monoxide and
other toxic gasses.
WARNING
14)It is advisable not to demand maximum
performance from your vehicle (e.g.
excessive acceleration, long distances at
high speeds, excessive intense braking,
etc.) during the initial period of use.
15)When the engine is switched off never
leave the key turned to MAR-ON to prevent
useless current absorption from draining
the battery.
16)If the engine fails to start with a gear
engaged, the potentially dangerous
situation due to the fact that the
transmission is automatically placed in
neutral will be signalled by a buzzer.
17)
If the warning light
flashes for 60
seconds after starting or during an
extended towing period, this indicates a
problem in the glow plug preheating
system. Use the vehicle normally if the
engine starts, but contact a Fiat Dealership
as soon as possible. 18)
Remember that the brake servo and
power steering are not operational until the
engine has been started, so you need to
apply much more force than usual to
the brake pedal and steering wheel. 19)
Never bump start the engine by
pushing, towing or coasting downhill. This
could cause fuel to flow into the catalytic
converter and damage it beyond repair. 20)A quick burst on the accelerator before
stopping the engine serves no practical
purpose; it wastes fuel and is especially
damaging to turbocharged engines. 21)
In some cases, when the engine
switches off, the fan could activate for max.
120 seconds.
120
STARTING AND DRIVING
Page 123 of 304
PARKING THE
VEHICLE
117)
22)
Proceed as follows when parking and
leaving the vehicle:
engage the gear (on a slope, engage
first gear if the vehicle is facing uphill
or reverse if it is facing downhill) and
leave the wheels steered;
stop the engine and engage the
handbrake;
always remove the ignition key.
If the vehicle is parked on a steep
slope, it is advisable to block the
wheels with a wedge or stone.
On versions equipped with automatic
transmission (Comfort matic), wait
for the letterPto appear on the display
before releasing the brake pedal.
IMPORTANTNEVERleave the vehicle
with the gearbox in neutral (or, on
versions equipped with automatic
(Comfort matic) transmission, before
putting the shift lever in thePposition).VERSIONS WITH MANUAL
TRANSMISSION
Proceed as follows:
engage a gear (on a slope, engage
first gear if the car is facing uphill or
reverse if it is facing downhill) and leave
the wheels steered.
stop the engine and engage the
handbrake;
If the vehicle is parked on a steep
slope, it is advisable to block the
wheels with a wedge or stone.
Do not leave the key in the ignition as
this drains the battery. Always remove
the key when you leave the car.
VERSIONS WITH COMFORT MATIC
TRANSMISSION
To park safely, it is essential to engage
1st gear or reverse (R), with your foot
on the brake pedal and, if the road
is sloping, to operate the handbrake; it
is also essential to wait for the engaged
gear to disappear from the
reconfigurable multifunction display
before releasing the brake pedal.
IMPORTANT NEVER leave the car with
the gearbox in neutral (N).
IMPORTANT NOTES
With the vehicle stationary and a
gear engaged, always keep the brake
pedal pressed until you decide to
set off, then release the brake and
accelerate gently;
during prolonged stops with the
engine running, it is advisable to keep
the gearbox in neutral (N);
to keep the clutch in good condition,
do not use the accelerator to keep the
car stationary (e.g. when stopped
facing uphill); the clutch could be
damaged by overheating. Use the
brake pedal instead and operate the
accelerator only when you are ready to
set off;
only use second gear when you
need greater control for starting
manoeuvres on surfaces with poor grip;
if, with reverse gear (R) engaged,
you have to engage first gear or vice
versa, only do this when the vehicle is
completely stationary and with the
brake pedal pressed;
although it is strongly inadvisable, if
you are driving downhill and, for
unexpected reasons, you let the vehicle
move forward with the transmission in
neutral (N), when you engage a gear,
the system will automatically engage
the best gear to transmit the correct
drive torque to the wheels depending
on the vehicle's speed;
121
Page 126 of 304
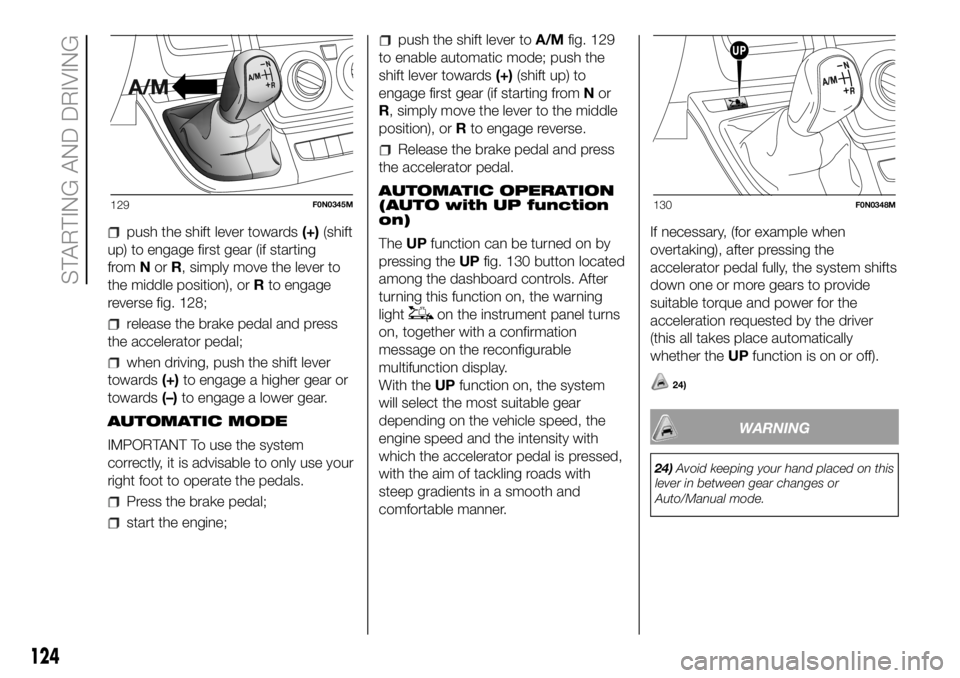
push the shift lever towards(+)(shift
up) to engage first gear (if starting
fromNorR, simply move the lever to
the middle position), orRto engage
reverse fig. 128;
release the brake pedal and press
the accelerator pedal;
when driving, push the shift lever
towards(+)to engage a higher gear or
towards(–)to engage a lower gear.
AUTOMATIC MODE
IMPORTANT To use the system
correctly, it is advisable to only use your
right foot to operate the pedals.
Press the brake pedal;
start the engine;
push the shift lever toA/Mfig. 129
to enable automatic mode; push the
shift lever towards(+)(shift up) to
engage first gear (if starting fromNor
R, simply move the lever to the middle
position), orRto engage reverse.
Release the brake pedal and press
the accelerator pedal.
AUTOMATIC OPERATION
(AUTO with UP function
on)
TheUPfunction can be turned on by
pressing theUPfig. 130 button located
among the dashboard controls. After
turning this function on, the warning
light
on the instrument panel turns
on, together with a confirmation
message on the reconfigurable
multifunction display.
With theUPfunction on, the system
will select the most suitable gear
depending on the vehicle speed, the
engine speed and the intensity with
which the accelerator pedal is pressed,
with the aim of tackling roads with
steep gradients in a smooth and
comfortable manner.If necessary, (for example when
overtaking), after pressing the
accelerator pedal fully, the system shifts
down one or more gears to provide
suitable torque and power for the
acceleration requested by the driver
(this all takes place automatically
whether theUPfunction is on or off).
24)
WARNING
24)Avoid keeping your hand placed on this
lever in between gear changes or
Auto/Manual mode.
129F0N0345M130F0N0348M
124
STARTING AND DRIVING
Page 127 of 304
START&STOP
SYSTEM
IN BRIEF
The Start&Stop device automatically
stops the engineeach time the
vehicle is stationary and all the
conditions for automatic switch-off
have been met, and starts it again
when the driver wants to move off.
This improves the efficiency of the
vehicle by reducing fuel consumption,
the emission of harmful gases and
noise pollution.
OPERATING MODE
Stopping the engine
Versions with manual transmission
With the vehicle stationary, the engine
stops with the gearbox in neutral and
the clutch pedal released.
Versions with Comfort-matic
transmission
With car at a standstill and brake pedal
pressed, the engine switches off if the
gear lever is in a position other thanR.In the event of stops uphill, engine
switching off is disabled to make the
"Hill Holder" function available (works
only with the engine running).
The warning light on the instrument
panel switches on to signal that the
engine has stopped.
Restarting the engine
Versions with manual transmission
Depress the clutch pedal to restart
the engine.
Versions with Comfort-matic
transmission
Releasing the brake pedal the engine
restarts automatically; the icon
switches off on the display.
If the engine is restarted with the “Hill
Holder” function off, move the lever
towards (+), (-)orRand the engine
restarts.
MANUAL ACTIVATION
AND DEACTIVATION OF
THE SYSTEM
To activate/deactivate the system
manually, press the
button on the
dashboard control panel.
25)
SAFETY FUNCTIONS
In engine cut-out conditions through
the Start&Stop system, if the driver
unfastens his/her seat belt and opens
the driver's door or the passenger door,
the engine can be restarted only by
using the key. The driver is notified of
this condition by a buzzer, through the
instrument panel warning light
flashing and, where provided, by a
message in the display.
119) 120)
WARNING
25)If the vehicle is equipped with manual
climate control, if you want to favour
climate comfort, the Start&Stop system
can be deactivated for continuous climate
control system operation.
WARNING
119)The vehicle should always be
evacuated after the key has been removed
or turned to the STOP position. When
refuelling, make sure that the car is
switched off with the key in the STOP
position.
120)If the battery needs to be replaced,
always contact a Fiat Dealership. The
replacement battery should be of the same
type (L6 105Ah/850A) and should have
the same characteristics.
125
Page 129 of 304
by pressing the brake pedal or
operating the handbrake;
by pressing the clutch pedal;
requesting a gear shift with an
automatic transmission in sequential
mode;
with the vehicle speed below the set
limit
by pressing the accelerator pedal; in
this case the system is not actually
turned off but the acceleration request
takes priority; the Cruise Control
remains activated, without the need to
press the CANC/RES button to restore
the previous conditions once the
acceleration is over.
The device is automatically switched off
in the following cases:
if the ABS or ESC systems
intervene;
in the event of system failure.
121) 122)
SPEED LIMITER
This device allows the vehicle speed to
be limited to a value set by the driver.
The maximum speed can be set both
with vehicle stationary and in motion.
The minimum speed that can be set is
30 km/h.When the device is active, the vehicle
speed depends on the accelerator
pedal, until the programmed speed limit
is reached (see "Speed limit
programming" paragraph).
If necessary (in the event of overtaking
for example), the set speed limit can
be exceeded by fully depressing the
accelerator pedal.
By gradually reducing the pressure on
the accelerator pedal, the function
will be reactivated as soon as the
vehicle speed drops below the
programmed speed.
Turning the device on
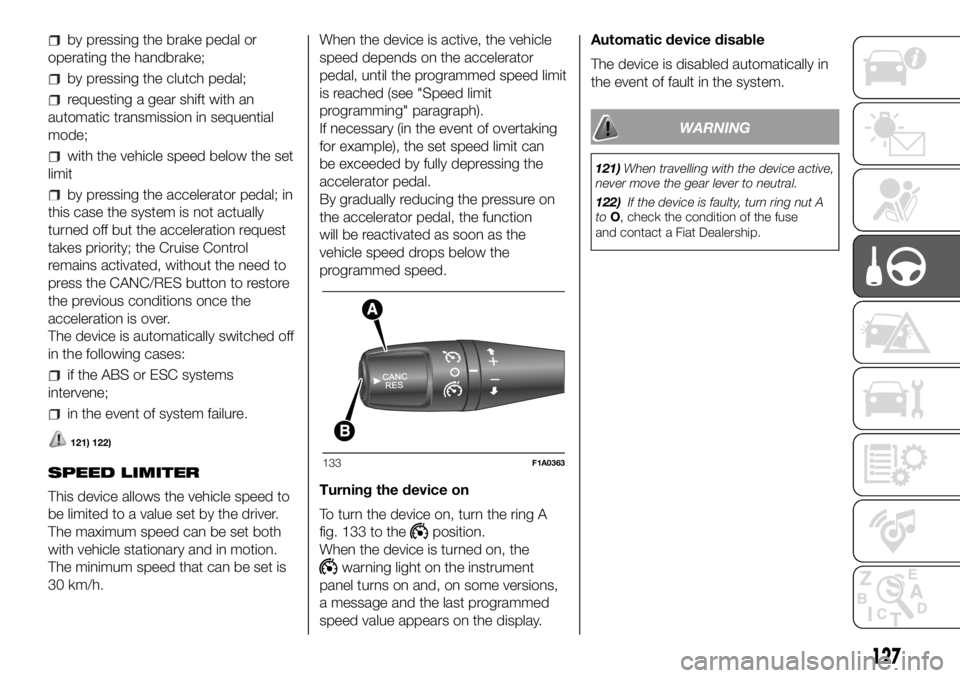
To turn the device on, turn the ring A
fig. 133 to the
position.
When the device is turned on, the
warning light on the instrument
panel turns on and, on some versions,
a message and the last programmed
speed value appears on the display.Automatic device disable
The device is disabled automatically in
the event of fault in the system.
WARNING
121)When travelling with the device active,
never move the gear lever to neutral.
122)If the device is faulty, turn ring nut A
toO, check the condition of the fuse
and contact a Fiat Dealership.
133F1A0363
127
Page 130 of 304
SPEED BLOCK
(for versions/markets, where provided)
The vehicle is equipped with a speed
limitation function that can be set at the
user's request to one of 4 predefined
values: 90, 100, 110, 130 km/h.
To activate/deactivate this function,
contact a Fiat Dealership.
Following the operation, a sticker will be
applied to the windscreen showing the
maximum speed setting.
IMPORTANT The speedometer could
indicate a higher maximum speed than
the effective one, set by the Dealership,
in accordance with the regulations in
force.
PARKING SENSORS
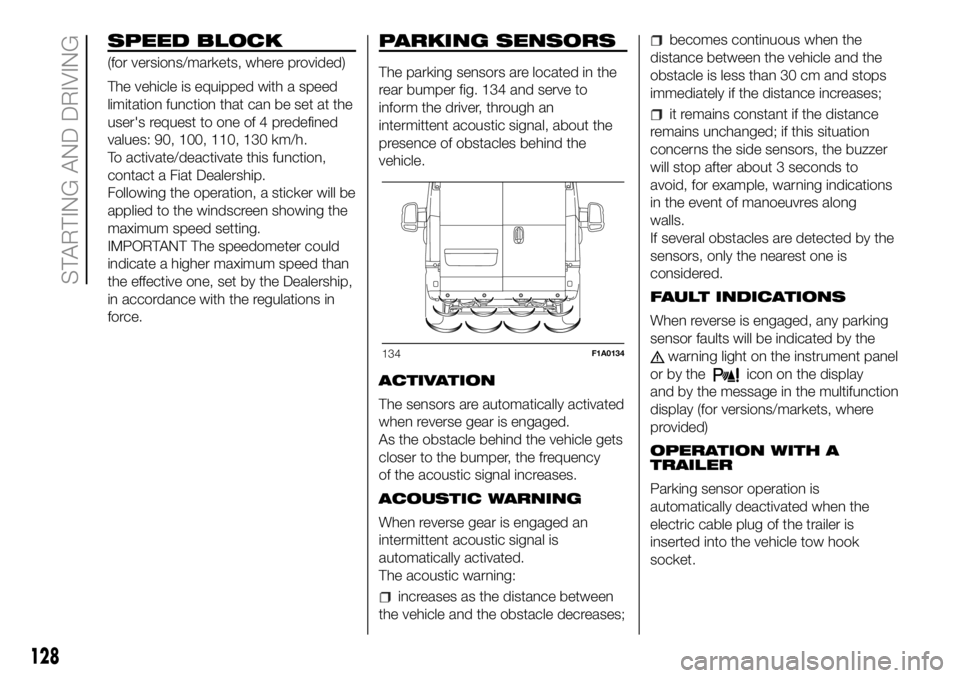
The parking sensors are located in the
rear bumper fig. 134 and serve to
inform the driver, through an
intermittent acoustic signal, about the
presence of obstacles behind the
vehicle.
ACTIVATION
The sensors are automatically activated
when reverse gear is engaged.
As the obstacle behind the vehicle gets
closer to the bumper, the frequency
of the acoustic signal increases.
ACOUSTIC WARNING
When reverse gear is engaged an
intermittent acoustic signal is
automatically activated.
The acoustic warning:
increases as the distance between
the vehicle and the obstacle decreases;
becomes continuous when the
distance between the vehicle and the
obstacle is less than 30 cm and stops
immediately if the distance increases;
it remains constant if the distance
remains unchanged; if this situation
concerns the side sensors, the buzzer
will stop after about 3 seconds to
avoid, for example, warning indications
in the event of manoeuvres along
walls.
If several obstacles are detected by the
sensors, only the nearest one is
considered.
FAULT INDICATIONS
When reverse is engaged, any parking
sensor faults will be indicated by the
warning light on the instrument panel
or by the
icon on the display
and by the message in the multifunction
display (for versions/markets, where
provided)
OPERATION WITH A
TRAILER
Parking sensor operation is
automatically deactivated when the
electric cable plug of the trailer is
inserted into the vehicle tow hook
socket.
134F1A0134
128
STARTING AND DRIVING
Page 132 of 304
REAR CAMERA
(PARKVIEW® REAR
BACK UP CAMERA)
(for versions/markets, where provided)
124)
27)
The vehicle may be equipped with a
ParkView® Rear Back Up Camera,
which allows the driver to see the
surrounding area behind the vehicle on
the display when reverse is engaged
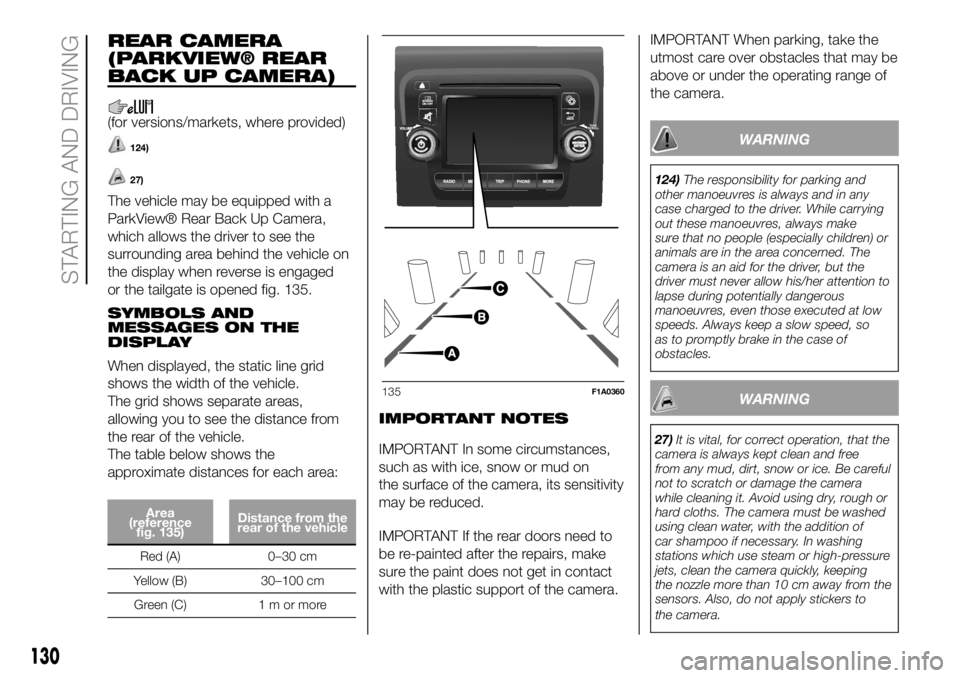
or the tailgate is opened fig. 135.
SYMBOLS AND
MESSAGES ON THE
DISPLAY
When displayed, the static line grid
shows the width of the vehicle.
The grid shows separate areas,
allowing you to see the distance from
the rear of the vehicle.
The table below shows the
approximate distances for each area:
Area
(reference
fig. 135)Distance from the
rear of the vehicle
Red (A) 0–30 cm
Yellow (B) 30–100 cm
Green (C) 1 m or more
IMPORTANT NOTES
IMPORTANT In some circumstances,
such as with ice, snow or mud on
the surface of the camera, its sensitivity
may be reduced.
IMPORTANT If the rear doors need to
be re-painted after the repairs, make
sure the paint does not get in contact
with the plastic support of the camera.IMPORTANT When parking, take the
utmost care over obstacles that may be
above or under the operating range of
the camera.
WARNING
124)The responsibility for parking and
other manoeuvres is always and in any
case charged to the driver. While carrying
out these manoeuvres, always make
sure that no people (especially children) or
animals are in the area concerned. The
camera is an aid for the driver, but the
driver must never allow his/her attention to
lapse during potentially dangerous
manoeuvres, even those executed at low
speeds. Always keep a slow speed, so
as to promptly brake in the case of
obstacles.
WARNING
27)It is vital, for correct operation, that the
camera is always kept clean and free
from any mud, dirt, snow or ice. Be careful
not to scratch or damage the camera
while cleaning it. Avoid using dry, rough or
hard cloths. The camera must be washed
using clean water, with the addition of
car shampoo if necessary. In washing
stations which use steam or high-pressure
jets, clean the camera quickly, keeping
the nozzle more than 10 cm away from the
sensors. Also, do not apply stickers to
the camera.
135F1A0360
130
STARTING AND DRIVING
Page 133 of 304
TRAFFIC SIGN
RECOGNITION
(for versions/markets, where provided)
125) 126) 127) 128)
28) 29) 30) 31) 32) 33) 34)
The system automatically detects the
recognisable traffic signs: speed limits,
no overtaking signs and signs indicating
the end of such prohibitions.
The camera is fitted behind the internal
rear view mirror. The sensor always
checks the traffic signs indicating the
current speed limit and possible no
overtaking signs.
IMPORTANT The system is designed to
read signs complying with the
specifications of the Vienna convention.
USE OF THE TRAFFIC
SIGN RECOGNITION
System switching on and off
The system can be activated/
deactivated using the display menu.
Refer to the "Display" paragraph in the
"Knowing the instrument panel"
chapter.
Note: The system state and settings do
not change throughout the various
on-off cycles.
WARNING
125)If the camera loses its position due to
a load variation, the system may not work
temporarily to allow the camera to perform
an auto-calibration.
126)The system only detects the preset
traffic signs. If the minimum visibility
conditions and distance from the sign are
met it can detect all traffic signs.
127)The system is a driving assistance
system but it does not relieve the driver of
the responsibility of driving with due
attention and diligence in compliance with
the laws in force.
128)When the system is active, the driver
is responsible for controlling the vehicle
and monitoring the system, and must
intervene as appropriate if necessary.
WARNING
28)In the event of errors the system may
not work.
29)At low temperatures and in particularly
adverse weather conditions, the system
may not work.
30)Rain, snow, splashes and strong light
contrast may influence the sensor.
31)Do not repair the area of the
windscreen directly surrounding the sensor.
32)If the vehicle is equipped with a
non-genuine suspension kit, the system
may not work correctly.
33)Always use genuine spare parts when
replacing the bulbs of the headlights. Other
bulbs may reduce the system
performance.
34)Clean the windscreen from foreign
matters such as bird droppings, insects,
snow or ice.
100
136F1A0373
131