start stop button FIAT FIORINO 2007 Owner handbook (in English)
[x] Cancel search | Manufacturer: FIAT, Model Year: 2007, Model line: FIORINO, Model: FIAT FIORINO 2007Pages: 210, PDF Size: 3.22 MB
Page 13 of 210
12
SAFETY
STARTING
AND DRIVING
WARNING
LIGHTS AND
MESSAGES
IN AN
EMERGENCY
MAINTENANCE
AND CARE
TECHNICAL
SPECIFICATIONS
INDEX
DASHBOARD
AND CONTROLS
ALARM
(where provided)
In addition to all the remote control func-
tions described above, an alarm has been
installed, which is controlled by a receiv-
er unit located under the dashboard near
the fuse box.
ALARM TRIPPING
The alarm trips in the following cases:
❒when one of the doors or bonnet is
opened illegitimately (perimeter pro-
tection);
❒when the ignition system is started up
(ignition key rotated to MAR);
❒when the battery cables are cut;
❒when someone is moving inside the
passenger compartment (volumetric
protection);
❒when the vehicle is unusually lifted/tilt-
ed.
Depending on the markets where the ve-
hicle is sold, alarm tripping causes either
a siren or direction indicators to go on
(for approx. 26 seconds). Alarm tripping
and the number of cycles depend on the
sales market.Provision has been made for a maximum
number of acoustic/visual cycles, after
which the system resumes its standard
control function.
Volumetric and anti-lift protections are
disabled by pressing the control button in-
stalled on the front dashboard (see para-
graph “Anti-lift protections).
IMPORTANT The engine stop function is
guaranteed by the Fiat CODE, which is au-
tomatically activated when the ignition key
is extracted from the starter device.
ENABLING THE ALARM
Keep the doors and bonnets closed and
either turn the ignition key to STOPor
remove it. Direct the key with the remote
control towards the vehicle and press but-
ton
Á, then release it.
Excluding some versions for specific mar-
kets, the system produces a sound warn-
ing (beep) and enables door locking.
Before the alarm is enabled, a self-test is
run. If a failure is detected, the system pro-
duces a new acoustic signal and shows a
message on the display (see section
“Warning lights and messages”). If this is the case, disable the alarm by
pressing button Ë, check correct locking
of the doors, bonnet and boot, and enable
the alarm again by pressing button
Á.
If a door or the bonnet is not correctly
closed, it will be excluded from the test-
ing by the alarm system.
If the alarm produces an acoustic signal
even when the doors, bonnet and boot
are correctly closed, a failure has occurred
in system operation. Go to a Fiat Dealer-
ship.
IMPORTANT If the central door locking
system is engaged using the metal insert
of the key, the alarm is not enabled.
IMPORTANT Originally, the alarm is con-
figured in compliance with the regulations
existing in the different countries.
Page 20 of 210
19
SAFETY
STARTING
AND DRIVING
WARNING
LIGHTS AND
MESSAGES
IN AN
EMERGENCY
MAINTENANCE
AND CARE
TECHNICAL
SPECIFICATIONS
INDEX
DASHBOARD
AND CONTROLS
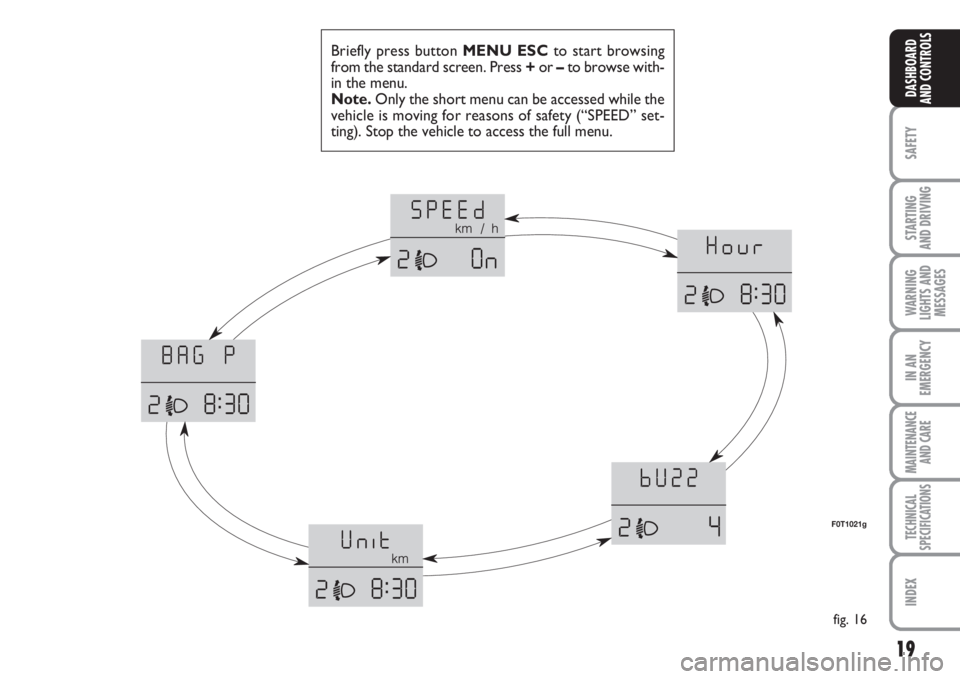
Briefly press button MENU ESCto start browsing
from the standard screen. Press +or –to browse with-
in the menu.
Note.Only the short menu can be accessed while the
vehicle is moving for reasons of safety (“SPEED” set-
ting). Stop the vehicle to access the full menu.
fig. 16
F0T1021g
Page 25 of 210
24
SAFETY
STARTING
AND DRIVING
WARNING
LIGHTS AND
MESSAGES
IN AN
EMERGENCY
MAINTENANCE
AND CARE
TECHNICAL
SPECIFICATIONS
INDEX
DASHBOARD
AND CONTROLS
Day
YearMonth
Deutsch
Português
English
Español
Français
Italiano
Nederland
Turkçe Example:
fig. 19 Example:
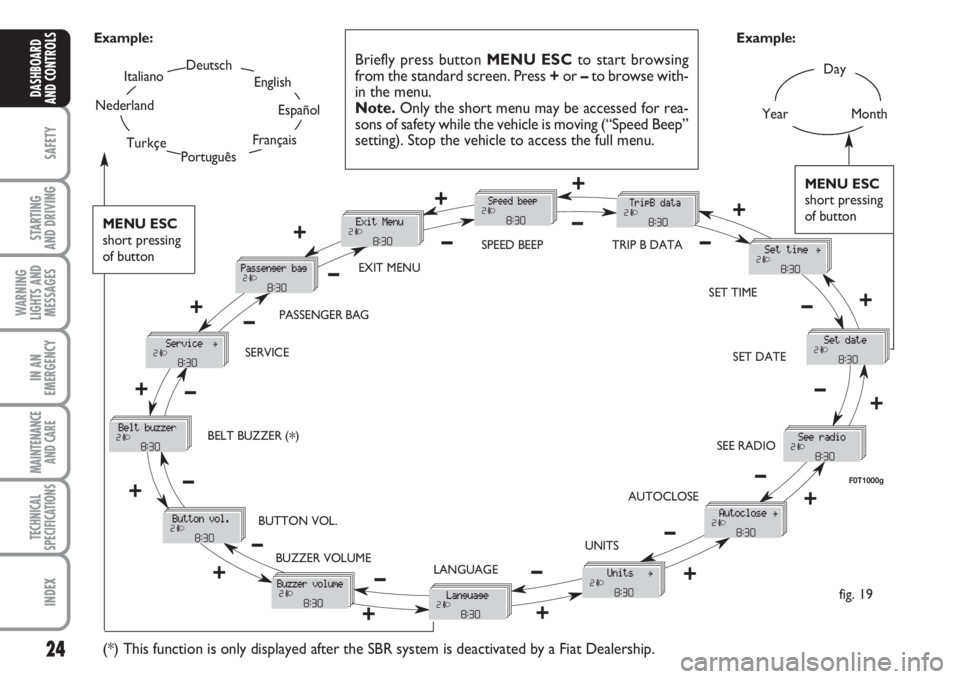
Briefly press button MENU ESCto start browsing
from the standard screen. Press +or –to browse with-
in the menu.
Note.Only the short menu may be accessed for rea-
sons of safety while the vehicle is moving (“Speed Beep”
setting). Stop the vehicle to access the full menu.
F0T1000g
MENU ESC
short pressing
of button
+
– +
–
– +
+
–
+–
–
– +
+++ ––––
++ +
– +
–
EXIT MENUSPEED BEEP
SET TIME
SET DATE
SEE RADIO
AUTOCLOSE
UNITS
LANGUAGE BUZZER VOLUME BUTTON VOL. BELT BUZZER (
*) SERVICEPASSENGER BAG
(*) This function is only displayed after the SBR system is deactivated by a Fiat Dealership.
–+
TRIP B DATA
MENU ESC
short pressing
of button
Page 46 of 210
45
SAFETY
STARTING
AND DRIVING
WARNING
LIGHTS AND
MESSAGES
IN AN
EMERGENCY
MAINTENANCE
AND CARE
TECHNICAL
SPECIFICATIONS
INDEX
DASHBOARD
AND CONTROLS
REGULATING THE
FAN SPEED
To ventilate the passenger compartment
properly proceed as follows:
❒fully open the central air vents and side
outlets;
❒turn knob Ato the blue section;
❒turn cursor Bon
¶;
❒turn knob Cto the required speed;
❒turn knob Don
¥.ACTIVATION OF INTERNAL
AIR RECIRCULATION
Turn cursor Bto position
v.
It is advisable to activate air recirculation
during vehicle stops in queues or tunnels
to prevent the introduction of polluted air
from the outside.
Do not use the function for a long time,
particularly if there are many passengers
on board, to prevent the windows from
misting up.
IMPORTANT The internal air recircula-
tion system makes it possible to reach the
required “heating” or “cooling” condi-
tions faster. Do not use the air recircula-
tion function on rainy/cold days as it would
considerably increase the possibility of the
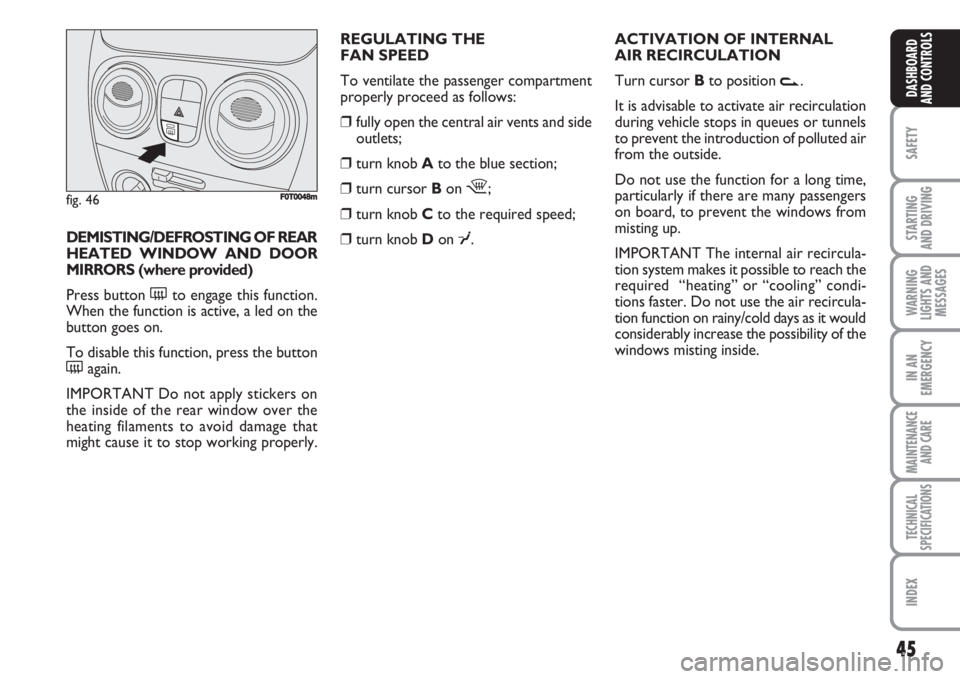
windows misting inside. DEMISTING/DEFROSTING OF REAR
HEATED WINDOW AND DOOR
MIRRORS (where provided)
Press button (to engage this function.
When the function is active, a led on the
button goes on.
To disable this function, press the button
(again.
IMPORTANT Do not apply stickers on
the inside of the rear window over the
heating filaments to avoid damage that
might cause it to stop working properly.
fig. 46F0T0048m
Page 48 of 210
47
SAFETY
STARTING
AND DRIVING
WARNING
LIGHTS AND
MESSAGES
IN AN
EMERGENCY
MAINTENANCE
AND CARE
TECHNICAL
SPECIFICATIONS
INDEX
DASHBOARD
AND CONTROLS
FAST HEATING
Proceed as follows:
❒close all the vents on the dashboard;
❒turn knob Aon
-;
❒turn knob Con 4
-;
❒turn knob Don
ß.
FAST DEMISTING/
DEFROSTING OF WINDSCREEN
AND FRONT SIDE WINDOWS
(MAX-DEF function)
Proceed as follows:
❒turn knob Aon
-;
❒turn knob Con 4
-;
❒turn knob Don
-;
❒turn cursor Bon
¶.
After demisting/defrosting, operate the
standard controls to restore the required
comfort conditions.
IMPORTANT The climate control system
is very useful for faster demisting because
it dries the air. Regulate the controls as
described above and engage the climate
control by pressing knob C.Window demisting
In the event of considerable external mois-
ture and/or rain and/or considerable dif-
ferences in temperature inside and out-
side the passenger compartment, perform
the following preventive demisting proce-
dure:
❒turn cursor Bon
¶;
❒turn knob Aon
-;
❒turn knob Con 2;
❒turn knob Don
-having the possi-
bility to reach position
®if the win-
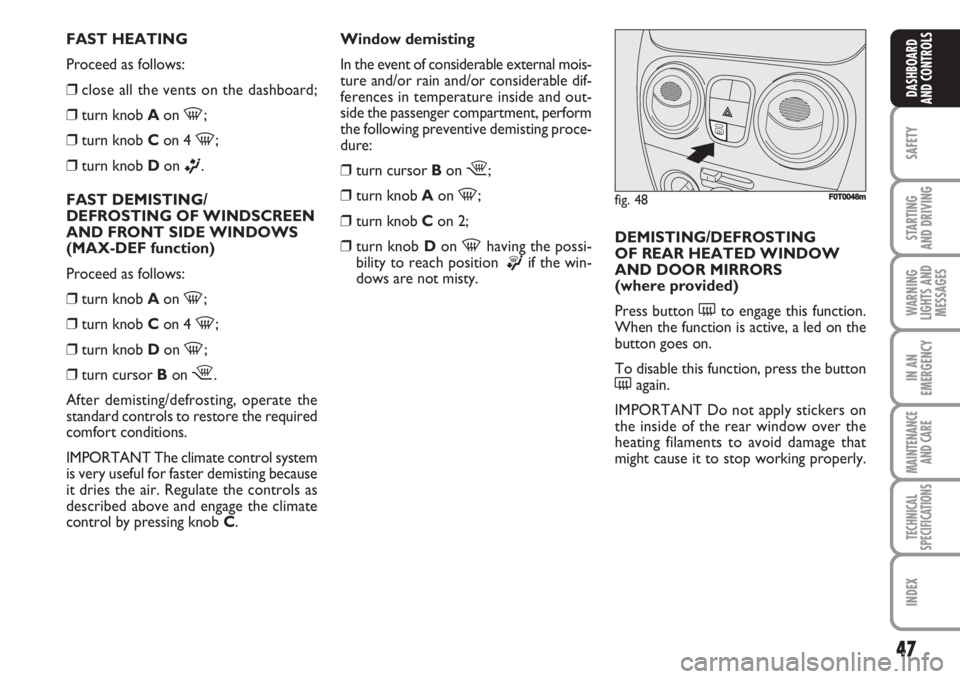
dows are not misty. DEMISTING/DEFROSTING
OF REAR HEATED WINDOW
AND DOOR MIRRORS
(where provided)
Press button (to engage this function.
When the function is active, a led on the
button goes on.
To disable this function, press the button
(again.
IMPORTANT Do not apply stickers on
the inside of the rear window over the
heating filaments to avoid damage that
might cause it to stop working properly.
fig. 48F0T0048m
Page 56 of 210
55
SAFETY
STARTING
AND DRIVING
WARNING
LIGHTS AND
MESSAGES
IN AN
EMERGENCY
MAINTENANCE
AND CARE
TECHNICAL
SPECIFICATIONS
INDEX
DASHBOARD
AND CONTROLS
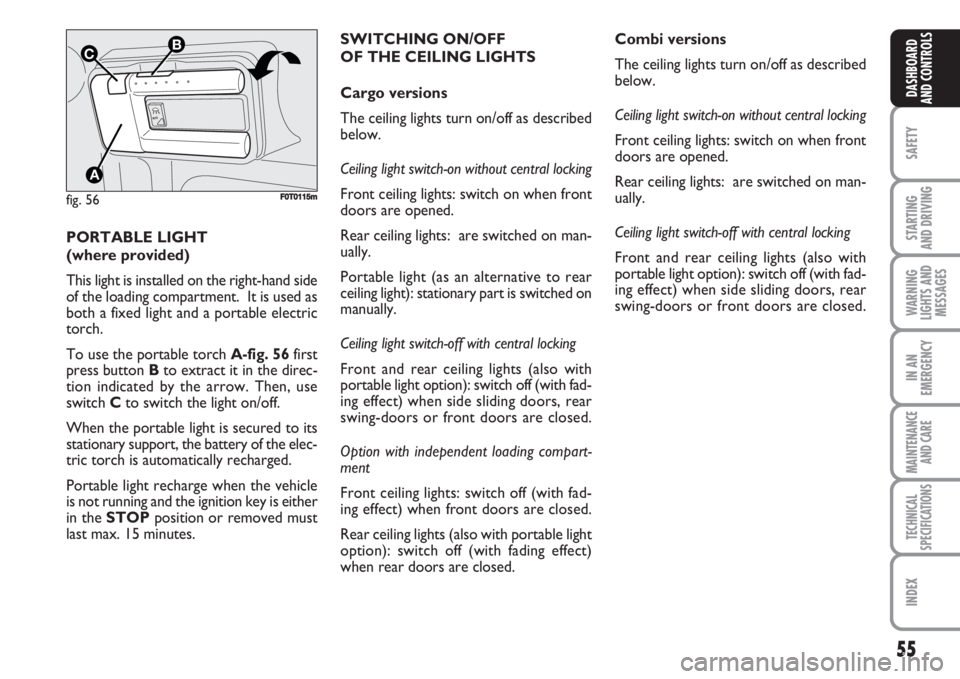
PORTABLE LIGHT
(where provided)
This light is installed on the right-hand side
of the loading compartment. It is used as
both a fixed light and a portable electric
torch.
To use the portable torch A-fig. 56first
press button Bto extract it in the direc-
tion indicated by the arrow. Then, use
switch Cto switch the light on/off.
When the portable light is secured to its
stationary support, the battery of the elec-
tric torch is automatically recharged.
Portable light recharge when the vehicle
is not running and the ignition key is either
in the STOPposition or removed must
last max. 15 minutes.
fig. 56
AUTO
B
A
C
F0T0115m
SWITCHING ON/OFF
OF THE CEILING LIGHTS
Cargo versions
The ceiling lights turn on/off as described
below.
Ceiling light switch-on without central locking
Front ceiling lights: switch on when front
doors are opened.
Rear ceiling lights: are switched on man-
ually.
Portable light (as an alternative to rear
ceiling light): stationary part is switched on
manually.
Ceiling light switch-off with central locking
Front and rear ceiling lights (also with
portable light option): switch off (with fad-
ing effect) when side sliding doors, rear
swing-doors or front doors are closed.
Option with independent loading compart-
ment
Front ceiling lights: switch off (with fad-
ing effect) when front doors are closed.
Rear ceiling lights (also with portable light
option): switch off (with fading effect)
when rear doors are closed.Combi versions
The ceiling lights turn on/off as described
below.
Ceiling light switch-on without central locking
Front ceiling lights: switch on when front
doors are opened.
Rear ceiling lights: are switched on man-
ually.
Ceiling light switch-off with central locking
Front and rear ceiling lights (also with
portable light option): switch off (with fad-
ing effect) when side sliding doors, rear
swing-doors or front doors are closed.
Page 67 of 210
66
SAFETY
STARTING
AND DRIVING
WARNING
LIGHTS AND
MESSAGES
IN AN
EMERGENCY
MAINTENANCE
AND CARE
TECHNICAL
SPECIFICATIONS
INDEX
DASHBOARD
AND CONTROLS
WINDOW WINDERS
FRONT POWER
WINDOWS (where provided)
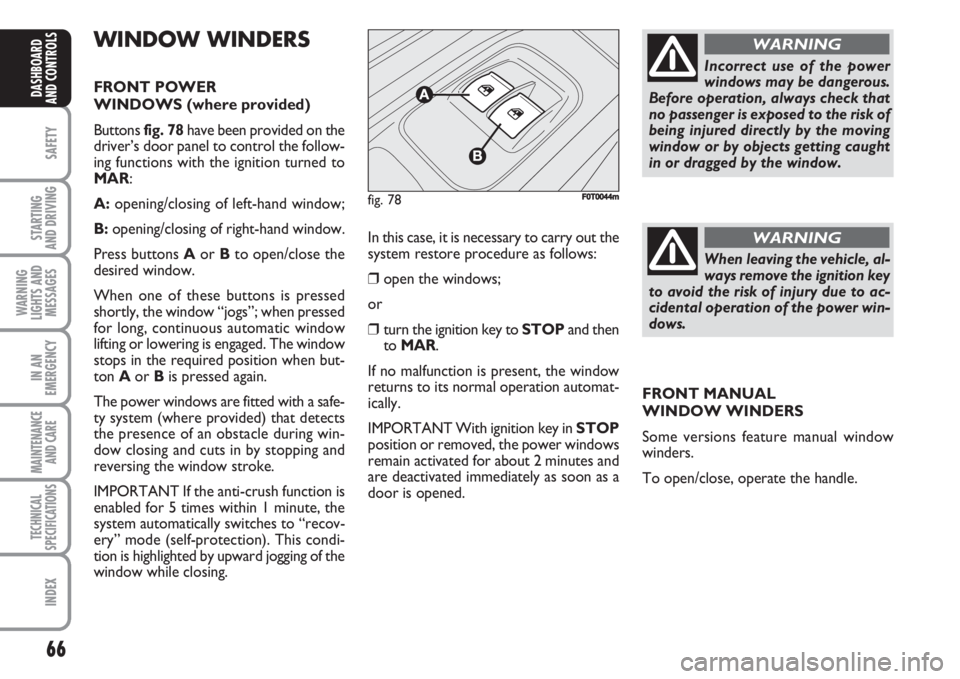
Buttons fig. 78have been provided on the
driver’s door panel to control the follow-
ing functions with the ignition turned to
MAR:
A:opening/closing of left-hand window;
B:opening/closing of right-hand window.
Press buttons Aor Bto open/close the
desired window.
When one of these buttons is pressed
shortly, the window “jogs”; when pressed
for long, continuous automatic window
lifting or lowering is engaged. The window
stops in the required position when but-
ton Aor Bis pressed again.
The power windows are fitted with a safe-
ty system (where provided) that detects
the presence of an obstacle during win-
dow closing and cuts in by stopping and
reversing the window stroke.
IMPORTANT If the anti-crush function is
enabled for 5 times within 1 minute, the
system automatically switches to “recov-
ery” mode (self-protection). This condi-
tion is highlighted by upward jogging of the
window while closing.In this case, it is necessary to carry out the
system restore procedure as follows:
❒open the windows;
or
❒turn the ignition key to STOPand then
to MAR.
If no malfunction is present, the window
returns to its normal operation automat-
ically.
IMPORTANT With ignition key in STOP
position or removed, the power windows
remain activated for about 2 minutes and
are deactivated immediately as soon as a
door is opened.
fig. 78F0T0044m
Incorrect use of the power
windows may be dangerous.
Before operation, always check that
no passenger is exposed to the risk of
being injured directly by the moving
window or by objects getting caught
in or dragged by the window.
WARNING
When leaving the vehicle, al-
ways remove the ignition key
to avoid the risk of injury due to ac-
cidental operation of the power win-
dows.
WARNING
FRONT MANUAL
WINDOW WINDERS
Some versions feature manual window
winders.
To open/close, operate the handle.
Page 105 of 210
104
SAFETY
WARNING
LIGHTS AND
MESSAGES
IN AN
EMERGENCY
MAINTENANCE
AND CARE
TECHNICAL
SPECIFICATIONS
INDEX
DASHBOARDAND CONTROLS
STARTING
AND DRIVING
HANDBRAKE
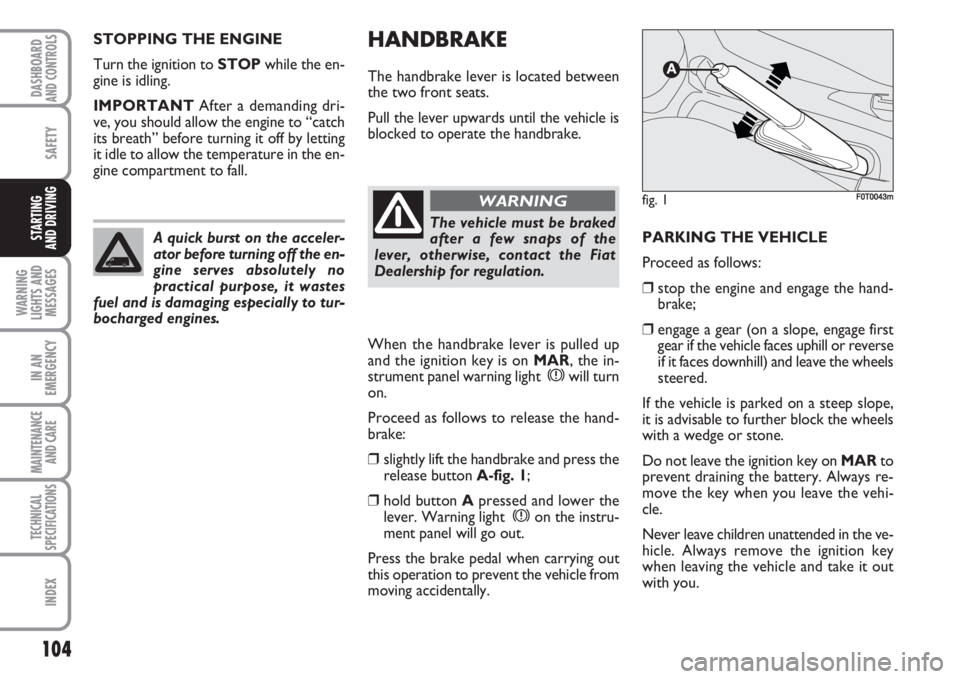
The handbrake lever is located between
the two front seats.
Pull the lever upwards until the vehicle is
blocked to operate the handbrake.
When the handbrake lever is pulled up
and the ignition key is on MAR, the in-
strument panel warning light xwill turn
on.
Proceed as follows to release the hand-
brake:
❒slightly lift the handbrake and press the
release button A-fig. 1;
❒hold button Apressed and lower the
lever. Warning light xon the instru-
ment panel will go out.
Press the brake pedal when carrying out
this operation to prevent the vehicle from
moving accidentally.PARKING THE VEHICLE
Proceed as follows:
❒stop the engine and engage the hand-
brake;
❒engage a gear (on a slope, engage first
gear if the vehicle faces uphill or reverse
if it faces downhill) and leave the wheels
steered.
If the vehicle is parked on a steep slope,
it is advisable to further block the wheels
with a wedge or stone.
Do not leave the ignition key on MARto
prevent draining the battery. Always re-
move the key when you leave the vehi-
cle.
Never leave children unattended in the ve-
hicle. Always remove the ignition key
when leaving the vehicle and take it out
with you. STOPPING THE ENGINE
Turn the ignition to STOPwhile the en-
gine is idling.
IMPORTANTAfter a demanding dri-
ve, you should allow the engine to “catch
its breath” before turning it off by letting
it idle to allow the temperature in the en-
gine compartment to fall.
A quick burst on the acceler-
ator before turning off the en-
gine serves absolutely no
practical purpose, it wastes
fuel and is damaging especially to tur-
bocharged engines.
fig. 1FF0T0043m
The vehicle must be braked
after a few snaps of the
lever, otherwise, contact the Fiat
Dealership for regulation.
WARNING