height FIAT FIORINO 2017 Owner handbook (in English)
[x] Cancel search | Manufacturer: FIAT, Model Year: 2017, Model line: FIORINO, Model: FIAT FIORINO 2017Pages: 272, PDF Size: 5.87 MB
Page 40 of 272
SEATS
FRONT SEATS
WARNING
All adjustments must be made with the
vehicle stationary.
Lengthwise adjustment
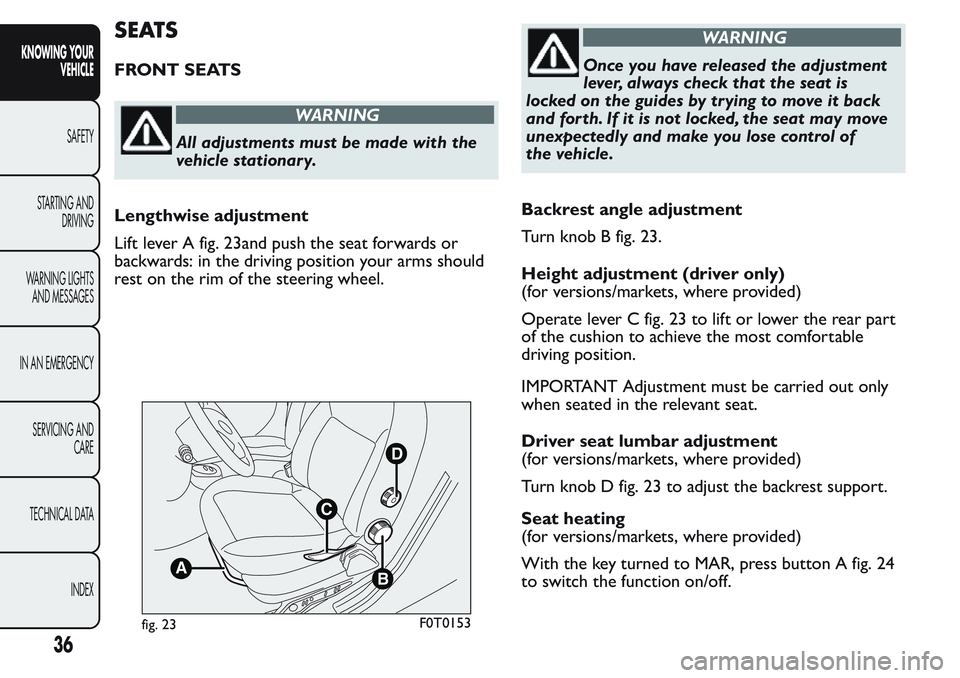
Lift lever A fig. 23and push the seat forwards or
backwards: in the driving position your arms should
rest on the rim of the steering wheel.
WARNING
Once you have released the adjustment
lever, always check that the seat is
locked on the guides by trying to move it back
and forth. If it is not locked, the seat may move
unexpectedly and make you lose control of
the vehicle.
Backrest angle adjustment
Turn knob B fig. 23.
Height adjustment (driver only)
(for versions/markets, where provided)
Operate lever C fig. 23 to lift or lower the rear part
of the cushion to achieve the most comfortable
driving position.
IMPORTANT Adjustment must be carried out only
when seated in the relevant seat.
Driver seat lumbar adjustment
(for versions/markets, where provided)
Turn knob D fig. 23 to adjust the backrest support.
Seat heating
(for versions/markets, where provided)
With the key turned to MAR, press button A fig. 24
to switch the function on/off.
B
D
C
A
fig. 23F0T0153
36
KNOWING YOUR
VEHICLE
SAFETY
STARTING AND
DRIVING
WARNING LIGHTS
AND MESSAGES
IN AN EMERGENCY
SERVICING AND
CARE
TECHNICAL DATA
INDEX
Page 45 of 272
HEADREST
FRONT
These are height-adjustable and lock into place
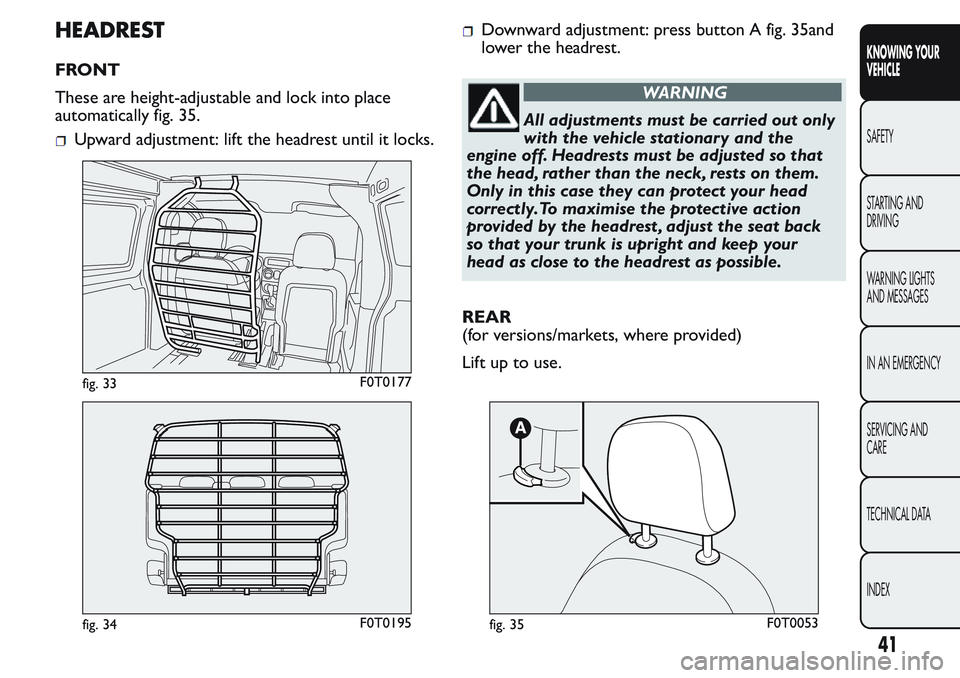
automatically fig. 35.
Upward adjustment: lift the headrest until it locks.
Downward adjustment: press button A fig. 35and
lower the headrest.
WARNING
All adjustments must be carried out only
with the vehicle stationary and the
engine off. Headrests must be adjusted so that
the head, rather than the neck, rests on them.
Only in this case they can protect your head
correctly.To maximise the protective action
provided by the headrest , adjust the seat back
so that your trunk is upright and keep your
head as close to the headrest as possible.
REAR
(for versions/markets, where provided)
Lift up to use.
fig. 33F0T0177
fig. 34F0T0195fig. 35F0T0053
41
KNOWING YOUR
VEHICLE
SAFETY
STARTING AND
DRIVING
WARNING LIGHTS
AND MESSAGES
IN AN EMERGENCY
SERVICING AND
CARE
TECHNICAL DATA
INDEX
Page 47 of 272
STEERING WHEEL
The height and axial position of the steering wheel
can be adjusted on some versions.
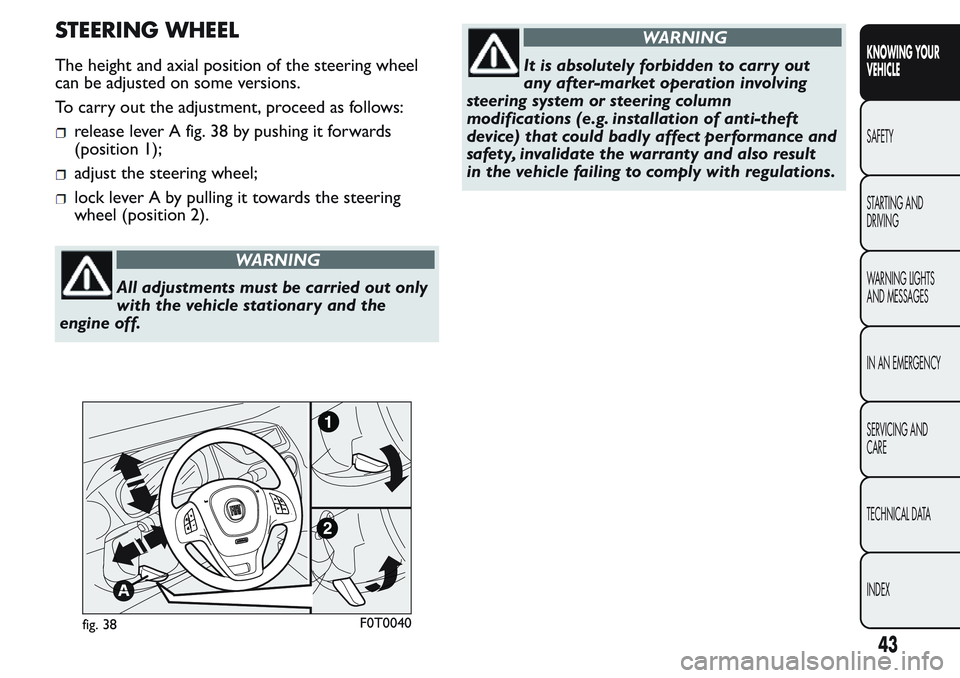
To carry out the adjustment, proceed as follows:
release lever A fig. 38 by pushing it forwards
(position 1);
adjust the steering wheel;
lock lever A by pulling it towards the steering
wheel (position 2).
WARNING
All adjustments must be carried out only
with the vehicle stationary and the
engine off.
WARNING
It is absolutely forbidden to carr y out
any after-market operation involving
steering system or steering column
modifications (e.g. installation of anti-theft
device) that could badly affect performance and
safety, invalidate the warranty and also result
in the vehicle failing to comply with regulations.
fig. 38F0T0040
43
KNOWING YOUR
VEHICLE
SAFETY
STARTING AND
DRIVING
WARNING LIGHTS
AND MESSAGES
IN AN EMERGENCY
SERVICING AND
CARE
TECHNICAL DATA
INDEX
Page 94 of 272
Projecting loads on the roof of the car
may interfere with the correct operation
of the sensor. Before starting make sure
the load is correctly positioned, in order not to
cover the sensor operating range.
If the windscreen must be replaced due to
scratches, chipping or breakage, contact
exclusively a Fiat Dealership. Do not
replace the windscreen on your own, risk of
malfunction! It is advisable to replace the
windscreen if it is damaged in the laser sensor
area.
Do not tamper nor operate on the laser
sensor. Do not close the openings in the
aesthetic cover located under the interior
rear view mirror. In the event of a sensor failure,
contact a Fiat Dealership.
If you are driving on roads close to trees
with protruding branches it is advisable to
deactivate the system to prevent the
branches at the height of the bonnet or the
windscreen from interfering with the system.
Do not cover the operating range of the
sensor with stickers or other objects.
Also pay attention to other objects on the
bonnet (e.g. a layer of snow) and make sure they
do not interfere with the light emitted by the
laser.
If a trailer or a vehicle is towed the system
must be deactivated with the display
Setup Menu.
If the system signals a loss of pressure on
a specific tyre, it is recommended to
check the pressure on all four tyres.
90
KNOWING YOUR
VEHICLE
SAFETY
STARTING AND
DRIVING
WARNING LIGHTS
AND MESSAGES
IN AN EMERGENCY
SERVICING AND
CARE
TECHNICAL DATA
INDEX
Page 117 of 272
always use the seat belt with the strap well
stretched and not twisted; make sure that it
is free to run without obstructions;
check seat belt operation as follows: attach the
seat belt and pull it hard;
replace the belt after an accident of a certain
severity even if it does not appear to be damaged.
Always replace the seat belt if the pretensioners
were deployed;
prevent the retractors from getting wet: their
correct operation is only guaranteed if water does
not get inside;
replace the seat belt when it shows wear or cuts.
CARRYING CHILDREN SAFELY
For optimal protection in the event of an impact, all
occupants must be seated and wearing adequate
restraint systems, including newborn and other
children!
This prescription is compulsory in all EC countries
according to EC Directive 2003/20/EC.
Children below the height of 1.50 metres and up to
12 years must be protected with suitable restraint
systems and be seated on the rear seats. Statistics on
accidents indicate that the rear seats offer greater
safety for children.
Compared with an adult, a child's head is larger and
heavier in proportion to their body and the child's
muscular and bone structures are not fully
developed. Therefore, correct restraint systems
other than adult seat belts are necessary to reduce
as much as possible the risk of injuries in the event
of an accident, braking or a sudden manoeuvre.
Children must be seated safely and comfortably.
Depending on the characteristics of the child
restraint systems used, you are advised to keep
children in rearward facing child restraint systems for
as long as possible (at least until 3-4 years old),
since this is the most protected position in the event
of an impact.
It is recommended to always choose the restraint
system most suitable for the child; for this reason
always refer to the Owner Handbook provided with
the child restraint system, to be sure that it is of
the right type for the children it is intended for.
113
KNOWING YOUR
VEHICLE
SAFETY
STARTING AND
DRIVING
WARNING LIGHTS
AND MESSAGES
IN AN EMERGENCY
SERVICING AND
CARE
TECHNICAL DATA
INDEX
Page 121 of 272
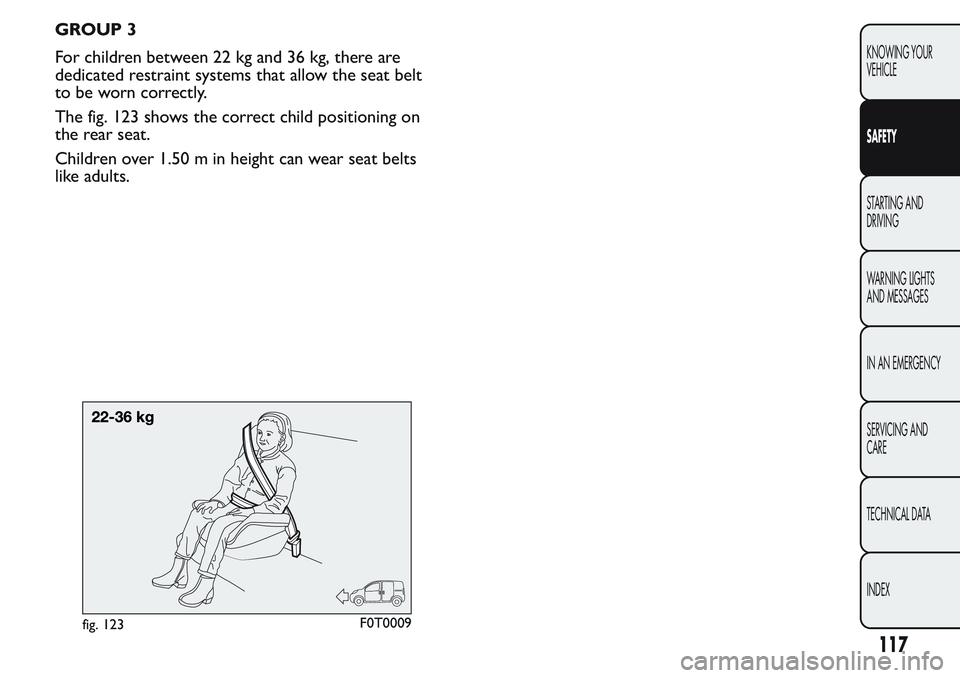
GROUP 3
For children between 22 kg and 36 kg, there are
dedicated restraint systems that allow the seat belt
to be worn correctly.
The fig. 123 shows the correct child positioning on
the rear seat.
Children over 1.50 m in height can wear seat belts
like adults.
fig. 123F0T0009
117
KNOWING YOUR
VEHICLE
SAFETY
STARTING AND
DRIVING
WARNING LIGHTS
AND MESSAGES
IN AN EMERGENCY
SERVICING AND
CARE
TECHNICAL DATA
INDEX
Page 170 of 272
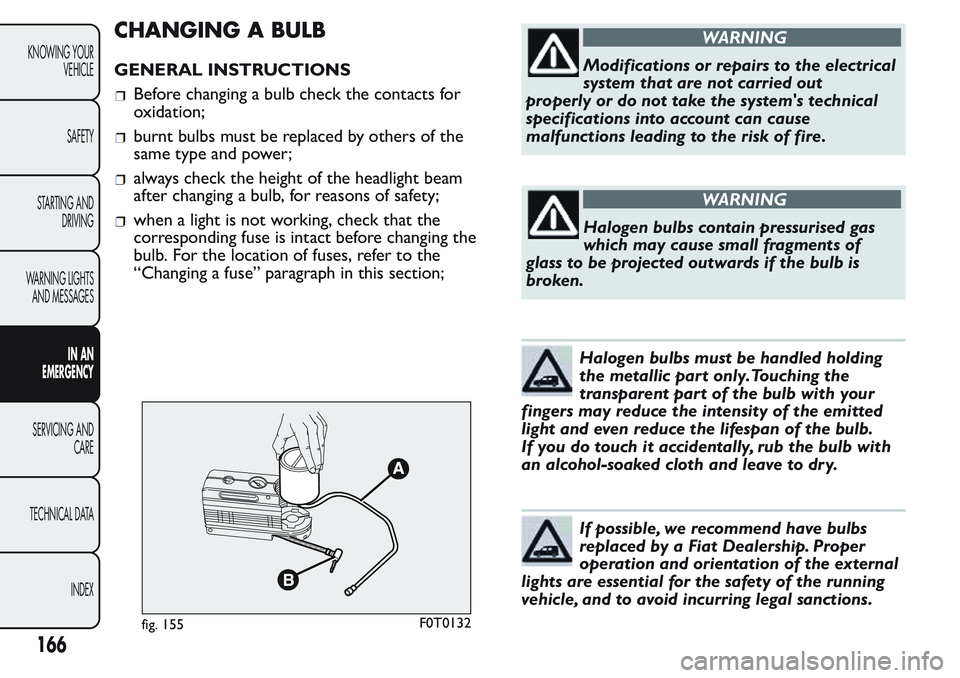
CHANGING A BULB
GENERAL INSTRUCTIONS
Before changing a bulb check the contacts for
oxidation;
burnt bulbs must be replaced by others of the
same type and power;
always check the height of the headlight beam
after changing a bulb, for reasons of safety;
when a light is not working, check that the
corresponding fuse is intact before changing the
bulb. For the location of fuses, refer to the
“Changing a fuse” paragraph in this section;
WARNING
Modifications or repairs to the electrical
system that are not carried out
properly or do not take the system's technical
specifications into account can cause
malfunctions leading to the risk of fire.
WARNING
Halogen bulbs contain pressurised gas
which may cause small fragments of
glass to be projected outwards if the bulb is
broken.
Halogen bulbs must be handled holding
the metallic part only.Touching the
transparent part of the bulb with your
fingers may reduce the intensity of the emitted
light and even reduce the lifespan of the bulb.
If you do touch it accidentally, rub the bulb with
an alcohol-soaked cloth and leave to dry.
If possible, we recommend have bulbs
replaced by a Fiat Dealership. Proper
operation and orientation of the external
lights are essential for the safety of the running
vehicle, and to avoid incurring legal sanctions.
fig. 155F0T0132
166
KNOWING YOUR
VEHICLE
SAFETY
STARTING AND
DRIVING
WARNING LIGHTS
AND MESSAGES
IN AN
EMERGENCY
SERVICING AND
CARE
TECHNICAL DATA
INDEX
Page 228 of 272
WHEELS
RIMS AND TYRES
Pressed steel or alloy rims. Tubeless radial carcass
tyres. The logbook also contains all type-approved
tyres.
IMPORTANT If there are any discrepancies between
the Owner Handbook and the registration
document, take the information from the latter.
Respect the prescribed size to ensure safety of the
vehicle in movement. Fit tyres of the same make and
type on all wheels.
IMPORTANT Do not use air chambers with tubeless
tyres.
SPARE WHEEL
Pressed steel rim. Tubeless tyre.
WHEEL GEOMETRY
Front wheels toe-in measured between rims: -1 ±1
mm.
The values refer to the vehicle in running order.
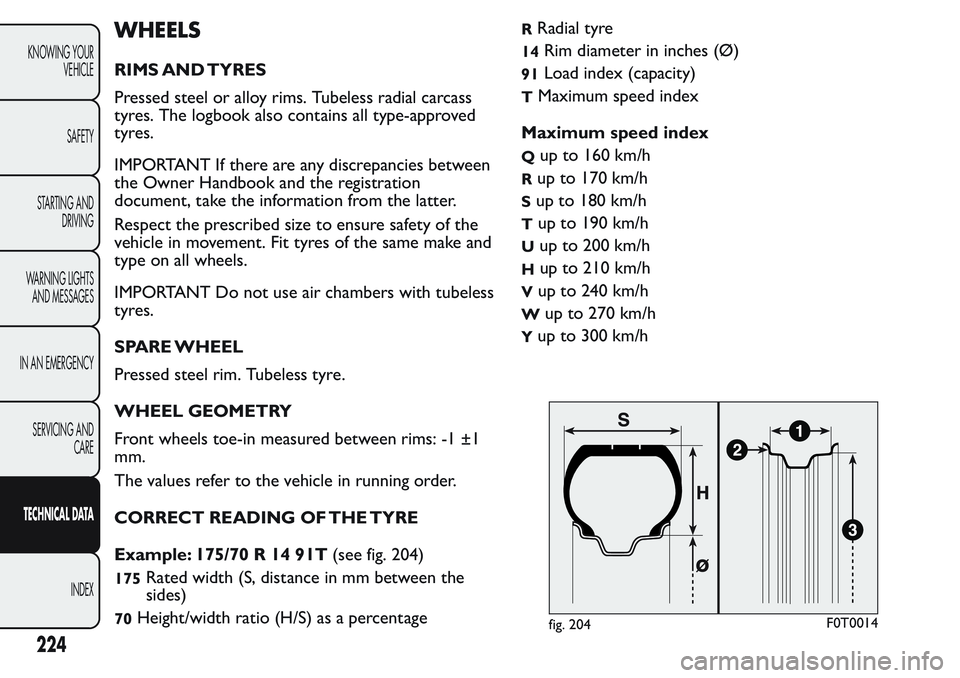
CORRECT READING OF THE TYRE
Example: 175/70 R 14 91T(see fig. 204)
175Rated width (S, distance in mm between the
sides)
70Height/width ratio (H/S) as a percentage
RRadial tyre
14Rim diameter in inches (Ø)
91Load index (capacity)
TMaximum speed index
Maximum speed index
Qup to 160 km/h
Rup to 170 km/h
Sup to 180 km/h
Tup to 190 km/h
Uup to 200 km/h
Hup to 210 km/h
Vup to 240 km/h
Wup to 270 km/h
Yup to 300 km/h
fig. 204F0T0014
224
KNOWING YOUR
VEHICLE
SAFETY
STARTING AND
DRIVING
WARNING LIGHTS
AND MESSAGES
IN AN EMERGENCY
SERVICING AND
CARE
TECHNICAL DATA
INDEX
Page 233 of 272
DIMENSIONS
Dimensions are expressed in mm and refer to the vehicle equipped with its standard-supplied tyres.
Height is measured with vehicle unladen.
ABCDE FGH
Cargo versions 3957 854 2513 5901721/
1782
(*)1469 1716 1465
Cargo Adventure
versions3957 854 2513 5901742/
1803
(*)1464 1716 1465
(*)With roof bars (for versions/markets where provided)
Small variations in size are possible depending on the dimensions of the rims.
Dimensions are expressed in mm and refer to the vehicle equipped with its standard-supplied tyres.
Height is measured with vehicle unladen.
fig. 206
F0T0160
229
KNOWING YOUR
VEHICLE
SAFETY
STARTING AND
DRIVING
WARNING LIGHTS
AND MESSAGES
IN AN EMERGENCY
SERVICING AND
CARE
TECHNICAL DATA
INDEX