engine FIAT IDEA 2008 1.G User Guide
[x] Cancel search | Manufacturer: FIAT, Model Year: 2008, Model line: IDEA, Model: FIAT IDEA 2008 1.GPages: 210, PDF Size: 3.64 MB
Page 35 of 210
34
SAFETY
DEVICES
CORRECT USE
OF THE CAR
WARNING
LIGHTS AND
MESSAGES
IN AN
EMERGENCY
CAR
MAINTENANCE
TECHNICAL
SPECIFICATIONS
INDEX
DASHBOARD
AND CONTROLS
New mission
The new mission begins after:
– “manual” resetting by the user, by press-
ing the relevant button;
– “automatic” resetting, when the “Trip
distance” reaches 9999.9 km or when the
“Travel time” reaches 99.59 (99 hours and
59 minutes);
– disconnection/reconnection of the bat-
tery.
IMPORTANT The reset operations per-
formed after the “General Trip” message
appears are used to also reset the “Trip
B”, which, on its turn, is used to reset the
values of the corresponding function. Travel time
This value shows the time elapsed since
the start of a new mission.
IMPORTANT If information is not avail-
able, the message “----” will appear instead
of the Trip Computer values. Displaying
of the values will be resumed regularly
when normal operation is restored with-
out resetting the values displayed before
the failure nor starting a new mission.
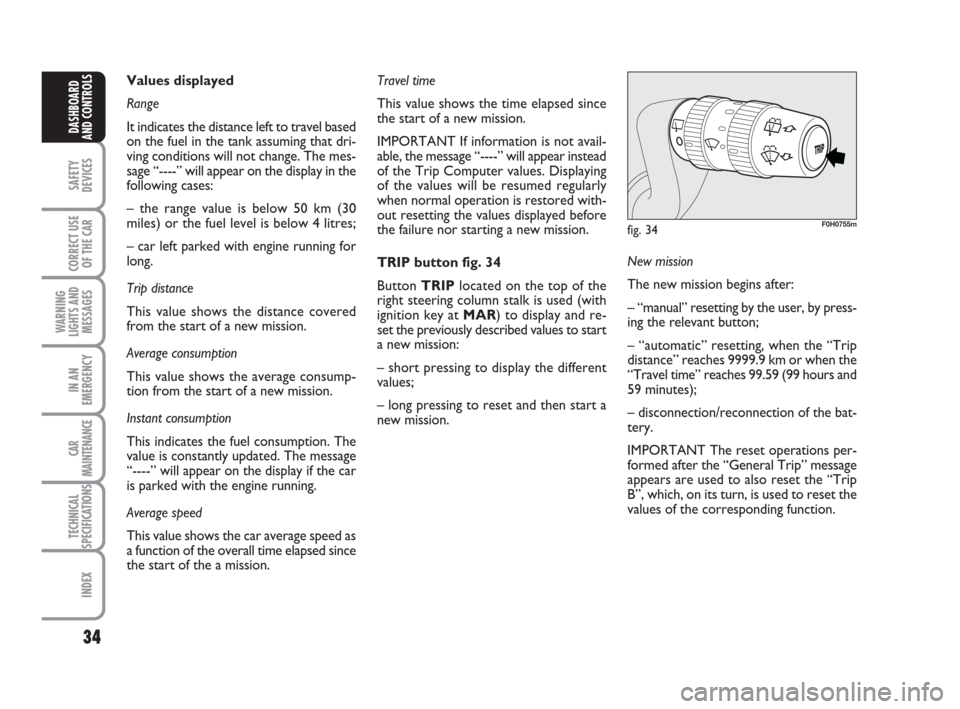
TRIP button fig. 34
Button TRIPlocated on the top of the
right steering column stalk is used (with
ignition key at MAR) to display and re-
set the previously described values to start
a new mission:
– short pressing to display the different
values;
– long pressing to reset and then start a
new mission. Values displayed
Range
It indicates the distance left to travel based
on the fuel in the tank assuming that dri-
ving conditions will not change. The mes-
sage “----” will appear on the display in the
following cases:
– the range value is below 50 km (30
miles) or the fuel level is below 4 litres;
– car left parked with engine running for
long.
Trip distance
This value shows the distance covered
from the start of a new mission.
Average consumption
This value shows the average consump-
tion from the start of a new mission.
Instant consumption
This indicates the fuel consumption. The
value is constantly updated. The message
“----” will appear on the display if the car
is parked with the engine running.
Average speed
This value shows the car average speed as
a function of the overall time elapsed since
the start of the a mission.
fig. 34F0H0755m
001-035 idea GB 1 ed 10-07-2008 8:27 Pagina 34
Page 37 of 210
36
SAFETY
DEVICES
CORRECT USE
OF THE CAR
WARNING
LIGHTS AND
MESSAGES
IN AN
EMERGENCY
CAR
MAINTENANCE
TECHNICAL
SPECIFICATIONS
INDEX
DASHBOARD
AND CONTROLS
fig. 35F0H0737m
STEERING WHEEL
ADJUSTMENT
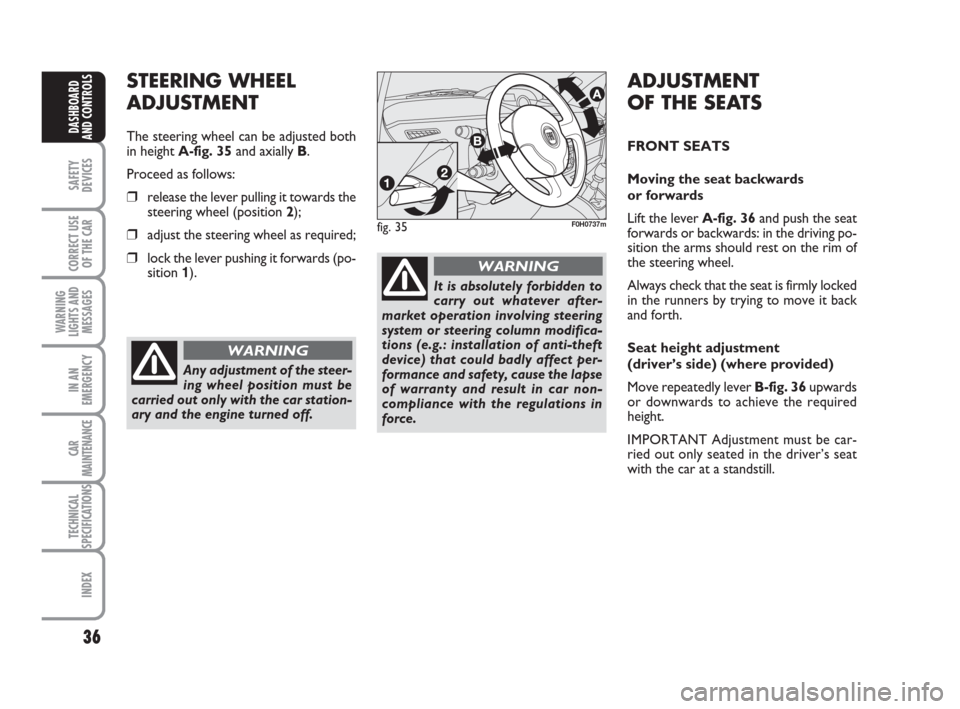
The steering wheel can be adjusted both
in height A-fig. 35and axially B.
Proceed as follows:
âť’release the lever pulling it towards the
steering wheel (position 2);
âť’adjust the steering wheel as required;
âť’lock the lever pushing it forwards (po-
sition 1).
Any adjustment of the steer-
ing wheel position must be
carried out only with the car station-
ary and the engine turned off.
WARNING
It is absolutely forbidden to
carry out whatever after-
market operation involving steering
system or steering column modifica-
tions (e.g.: installation of anti-theft
device) that could badly affect per-
formance and safety, cause the lapse
of warranty and result in car non-
compliance with the regulations in
force.
WARNING
ADJUSTMENT
OF THE SEATS
FRONT SEATS
Moving the seat backwards
or forwards
Lift the lever A-fig. 36and push the seat
forwards or backwards: in the driving po-
sition the arms should rest on the rim of
the steering wheel.
Always check that the seat is firmly locked
in the runners by trying to move it back
and forth.
Seat height adjustment
(driver’s side) (where provided)
Move repeatedly lever B-fig. 36upwards
or downwards to achieve the required
height.
IMPORTANT Adjustment must be car-
ried out only seated in the driver’s seat
with the car at a standstill.
036-092 idea GB 1 ed 10-07-2008 16:12 Pagina 36
Page 58 of 210
57
SAFETY
DEVICES
CORRECT USE
OF THE CAR
WARNING
LIGHTS AND
MESSAGES
IN AN
EMERGENCY
CAR
MAINTENANCE
TECHNICAL
SPECIFICATIONS
INDEX
DASHBOARD
AND CONTROLS
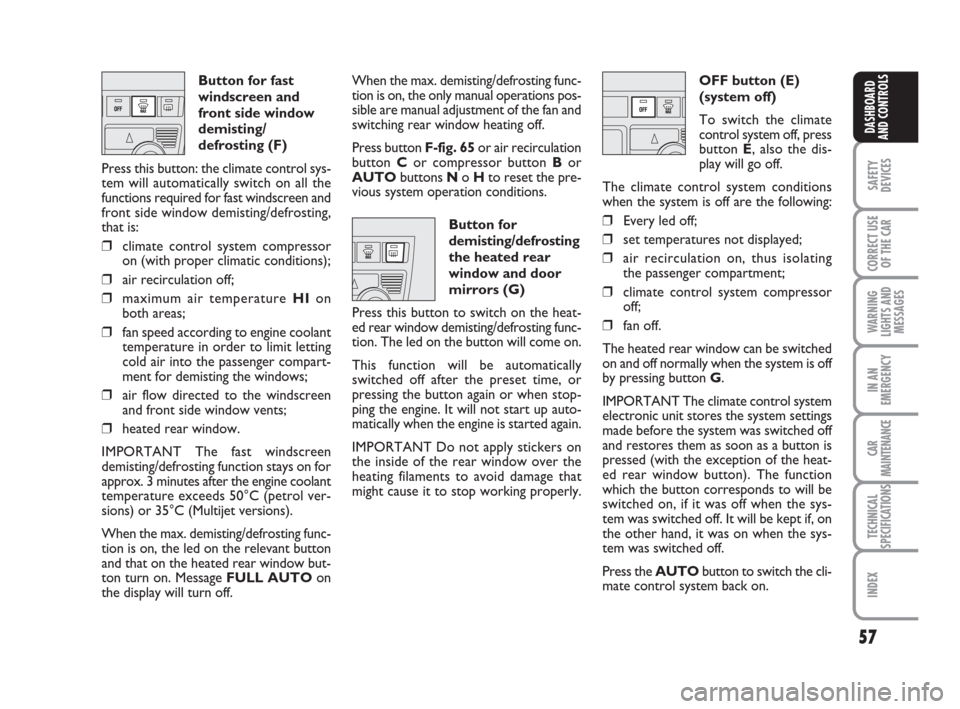
Button for fast
windscreen and
front side window
demisting/
defrosting (F)
Press this button: the climate control sys-
tem will automatically switch on all the
functions required for fast windscreen and
front side window demisting/defrosting,
that is:
âť’climate control system compressor
on (with proper climatic conditions);
âť’air recirculation off;
âť’maximum air temperature HIon
both areas;
âť’fan speed according to engine coolant
temperature in order to limit letting
cold air into the passenger compart-
ment for demisting the windows;
âť’air flow directed to the windscreen
and front side window vents;
âť’heated rear window.
IMPORTANT The fast windscreen
demisting/defrosting function stays on for
approx. 3 minutes after the engine coolant
temperature exceeds 50°C (petrol ver-
sions) or 35°C (Multijet versions).
When the max. demisting/defrosting func-
tion is on, the led on the relevant button
and that on the heated rear window but-
ton turn on. Message FULL AUTOon
the display will turn off.When the max. demisting/defrosting func-
tion is on, the only manual operations pos-
sible are manual adjustment of the fan and
switching rear window heating off.
Press button F-fig. 65or air recirculation
button Cor compressor button Bor
AUTObuttons No Hto reset the pre-
vious system operation conditions.
Button for
demisting/defrosting
the heated rear
window and door
mirrors (G)
Press this button to switch on the heat-
ed rear window demisting/defrosting func-
tion. The led on the button will come on.
This function will be automatically
switched off after the preset time, or
pressing the button again or when stop-
ping the engine. It will not start up auto-
matically when the engine is started again.
IMPORTANT Do not apply stickers on
the inside of the rear window over the
heating filaments to avoid damage that
might cause it to stop working properly.OFF button (E)
(system off)
To switch the climate
control system off, press
button E, also the dis-
play will go off.
The climate control system conditions
when the system is off are the following:
âť’Every led off;
âť’set temperatures not displayed;
âť’air recirculation on, thus isolating
the passenger compartment;
âť’climate control system compressor
off;
âť’fan off.
The heated rear window can be switched
on and off normally when the system is off
by pressing button G.
IMPORTANT The climate control system
electronic unit stores the system settings
made before the system was switched off
and restores them as soon as a button is
pressed (with the exception of the heat-
ed rear window button). The function
which the button corresponds to will be
switched on, if it was off when the sys-
tem was switched off. It will be kept if, on
the other hand, it was on when the sys-
tem was switched off.
Press the AUTObutton to switch the cli-
mate control system back on.
036-092 idea GB 1 ed 10-07-2008 16:12 Pagina 57
Page 60 of 210
59
SAFETY
DEVICES
CORRECT USE
OF THE CAR
WARNING
LIGHTS AND
MESSAGES
IN AN
EMERGENCY
CAR
MAINTENANCE
TECHNICAL
SPECIFICATIONS
INDEX
DASHBOARD
AND CONTROLS
fig. 70F0H0071mfig. 71F0H0070mfig. 72F0H0072m
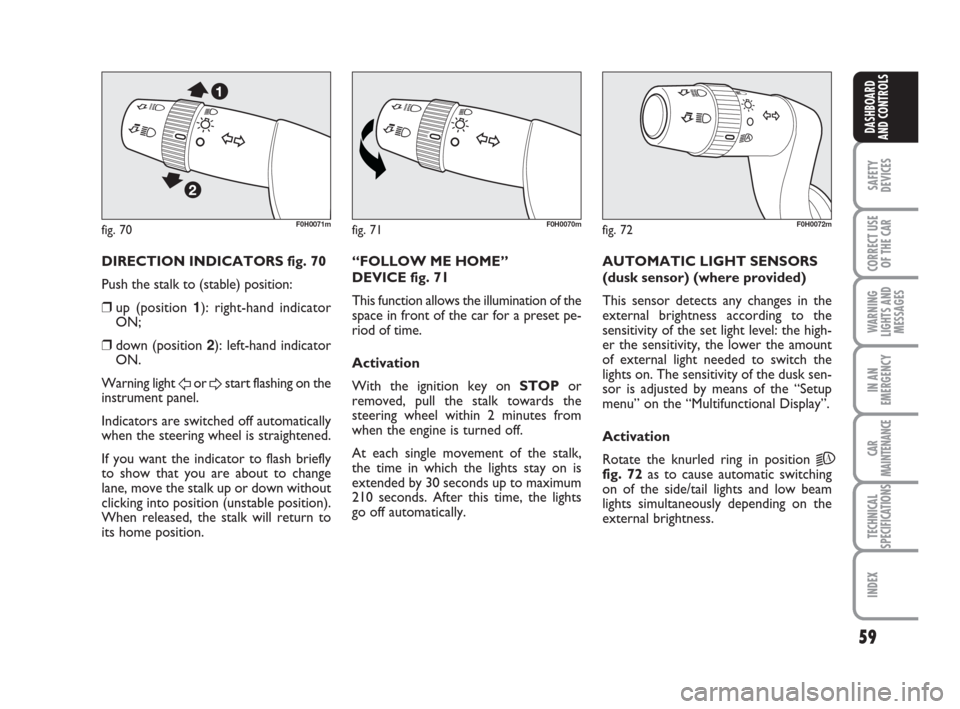
DIRECTION INDICATORS fig. 70
Push the stalk to (stable) position:
âť’up (position 1): right-hand indicator
ON;
âť’down (position 2): left-hand indicator
ON.
Warning light
For Dstart flashing on the
instrument panel.
Indicators are switched off automatically
when the steering wheel is straightened.
If you want the indicator to flash briefly
to show that you are about to change
lane, move the stalk up or down without
clicking into position (unstable position).
When released, the stalk will return to
its home position.“FOLLOW ME HOME”
DEVICE fig. 71
This function allows the illumination of the
space in front of the car for a preset pe-
riod of time.
Activation
With the ignition key on STOPor
removed, pull the stalk towards the
steering wheel within 2 minutes from
when the engine is turned off.
At each single movement of the stalk,
the time in which the lights stay on is
extended by 30 seconds up to maximum
210 seconds. After this time, the lights
go off automatically. AUTOMATIC LIGHT SENSORS
(dusk sensor) (where provided)
This sensor detects any changes in the
external brightness according to the
sensitivity of the set light level: the high-
er the sensitivity, the lower the amount
of external light needed to switch the
lights on. The sensitivity of the dusk sen-
sor is adjusted by means of the “Setup
menu” on the “Multifunctional Display”.
Activation
Rotate the knurled ring in position
2A
fig. 72as to cause automatic switching
on of the side/tail lights and low beam
lights simultaneously depending on the
external brightness.
036-092 idea GB 1 ed 10-07-2008 16:12 Pagina 59
Page 65 of 210
64
SAFETY
DEVICES
CORRECT USE
OF THE CAR
WARNING
LIGHTS AND
MESSAGES
IN AN
EMERGENCY
CAR
MAINTENANCE
TECHNICAL
SPECIFICATIONS
INDEX
DASHBOARD
AND CONTROLS
TO REDUCE MEMORISED
SPEED
The speed memorised can be increased in
two ways:
âť’disengaging the device and then
memorising the new speed;
or
❒moving the stalk downwards (–) until
reaching the new speed which will be
memorised automatically.
Each operation of the stalk will corre-
spond to a slight reduction in speed (about
1 km/h), while keeping the stalk down-
wards continuously will correspond to a
continuous speed reduction.
DEVICE DISENGAGEMENT
Turn the ring A-fig. 78to OFFor the ig-
nition key to STOP. The device is auto-
matically deactivated also in one of the fol-
lowing cases:
âť’pressing the brake or clutch pedal.
In the event of device mal-
function or failure, turn the
knurled ring A to OFF and contact a
Fiat Dealership after checking the
protective fuse integrity.
WARNING
CEILING LIGHTS
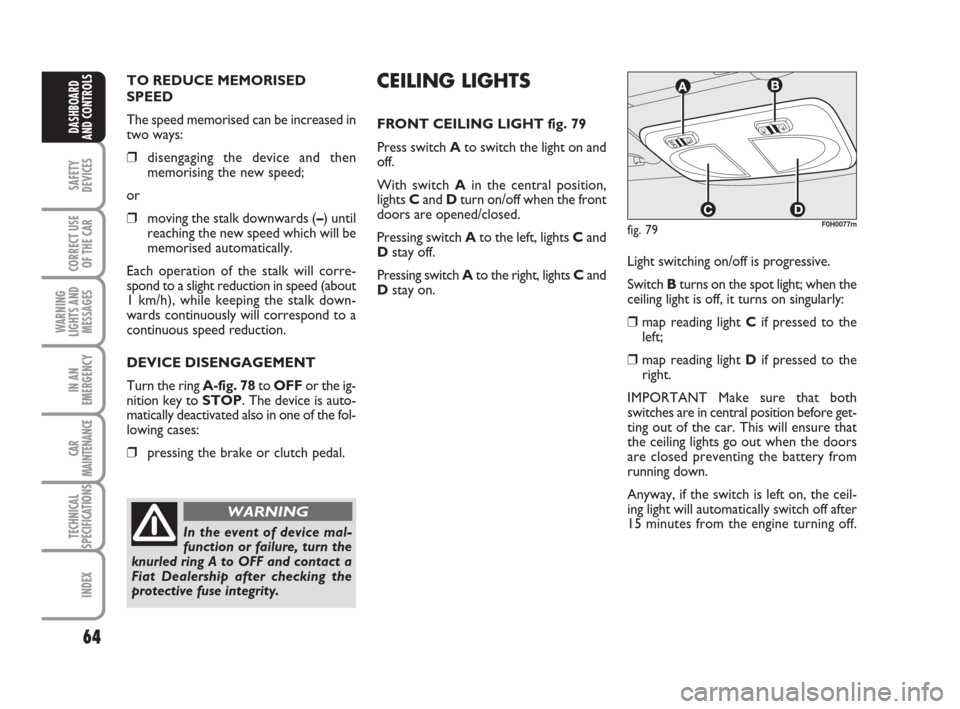
FRONT CEILING LIGHT fig. 79
Press switch Ato switch the light on and
off.
With switch Ain the central position,
lights Cand Dturn on/off when the front
doors are opened/closed.
Pressing switch Ato the left, lights Cand
Dstay off.
Pressing switch Ato the right, lights Cand
Dstay on.
fig. 79F0H0077m
Light switching on/off is progressive.
Switch Bturns on the spot light; when the
ceiling light is off, it turns on singularly:
âť’map reading light Cif pressed to the
left;
âť’map reading light Dif pressed to the
right.
IMPORTANT Make sure that both
switches are in central position before get-
ting out of the car. This will ensure that
the ceiling lights go out when the doors
are closed preventing the battery from
running down.
Anyway, if the switch is left on, the ceil-
ing light will automatically switch off after
15 minutes from the engine turning off.
036-092 idea GB 1 ed 10-07-2008 16:12 Pagina 64
Page 66 of 210
65
SAFETY
DEVICES
CORRECT USE
OF THE CAR
WARNING
LIGHTS AND
MESSAGES
IN AN
EMERGENCY
CAR
MAINTENANCE
TECHNICAL
SPECIFICATIONS
INDEX
DASHBOARD
AND CONTROLS
Ceiling light timing
Two timing strategies are available in or-
der to facilitate getting in and out of the
car, especially at night in dark areas:
T
IMING FOR GETTING INTO THE CAR
The ceiling lights will come on as follows:
âť’for about 10 seconds when a door is
unlocked;
âť’for about 3 minutes when a door is
opened;
âť’for about 10 seconds when a door is
closed (within the 3 minutes).
Timing will be stopped when the ignition
key is turned to MAR.
T
IMING FOR GETTING OUT OF THE CAR
The ceiling lights will come on as follows
when the key is removed from the igni-
tion switch:
âť’for about 10 seconds within 2 min-
utes after stopping the engine;
âť’for about 3 minutes when a door is
opened;
âť’for about 10 seconds when a door is
closed (within the three minutes).
The timeout will automatically end when
the doors are locked.
fig. 80F0H0078mfig. 81F0H0079m
fig. 82F0H0254m
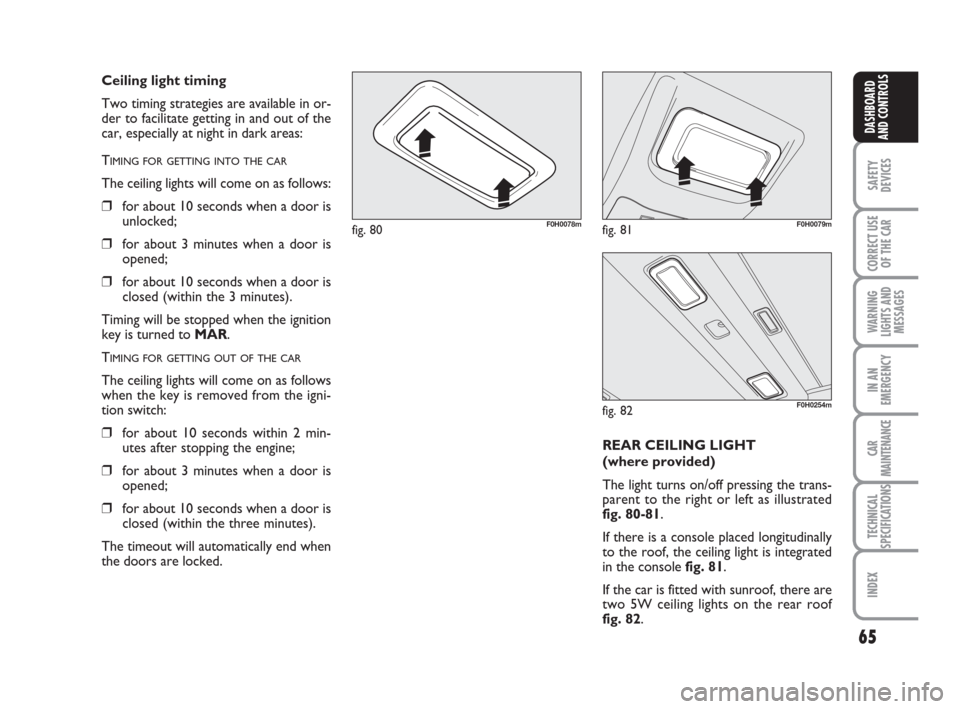
REAR CEILING LIGHT
(where provided)
The light turns on/off pressing the trans-
parent to the right or left as illustrated
fig. 80-81.
If there is a console placed longitudinally
to the roof, the ceiling light is integrated
in the console fig. 81.
If the car is fitted with sunroof, there are
two 5W ceiling lights on the rear roof
fig. 82.
036-092 idea GB 1 ed 10-07-2008 16:12 Pagina 65
Page 68 of 210
67
SAFETY
DEVICES
CORRECT USE
OF THE CAR
WARNING
LIGHTS AND
MESSAGES
IN AN
EMERGENCY
CAR
MAINTENANCE
TECHNICAL
SPECIFICATIONS
INDEX
DASHBOARD
AND CONTROLS
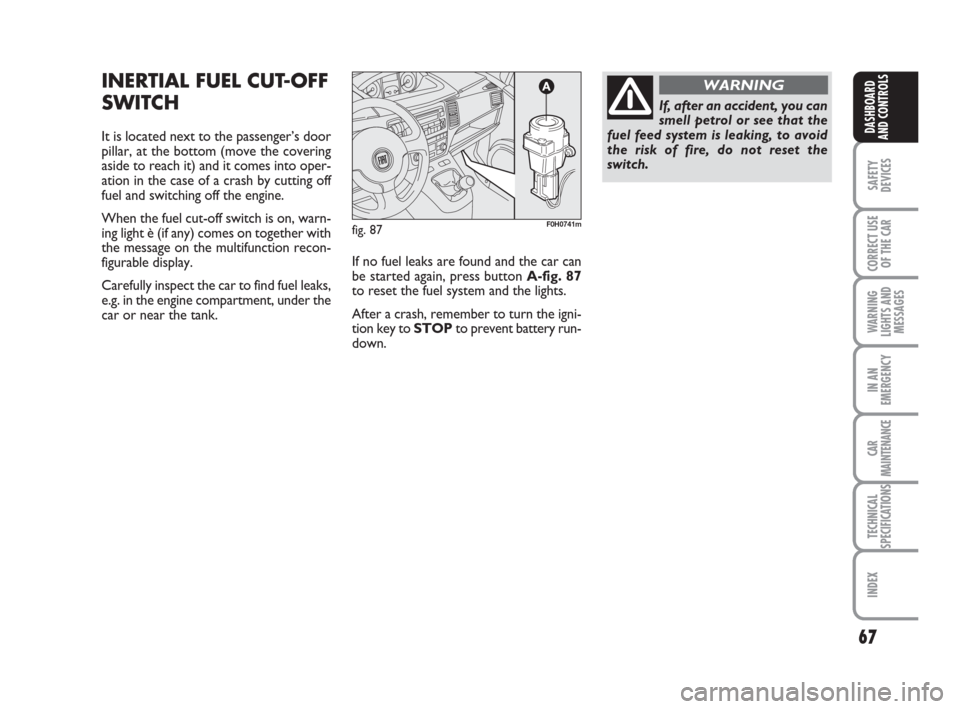
INERTIAL FUEL CUT-OFF
SWITCH
It is located next to the passenger’s door
pillar, at the bottom (move the covering
aside to reach it) and it comes into oper-
ation in the case of a crash by cutting off
fuel and switching off the engine.
When the fuel cut-off switch is on, warn-
ing light è (if any) comes on together with
the message on the multifunction recon-
figurable display.
Carefully inspect the car to find fuel leaks,
e.g. in the engine compartment, under the
car or near the tank.If no fuel leaks are found and the car can
be started again, press button A-fig. 87
to reset the fuel system and the lights.
After a crash, remember to turn the igni-
tion key to STOPto prevent battery run-
down.
fig. 87F0H0741m
If, after an accident, you can
smell petrol or see that the
fuel feed system is leaking, to avoid
the risk of fire, do not reset the
switch.
WARNING
036-092 idea GB 1 ed 10-07-2008 16:12 Pagina 67
Page 81 of 210
80
SAFETY
DEVICES
CORRECT USE
OF THE CAR
WARNING
LIGHTS AND
MESSAGES
IN AN
EMERGENCY
CAR
MAINTENANCE
TECHNICAL
SPECIFICATIONS
INDEX
DASHBOARD
AND CONTROLS
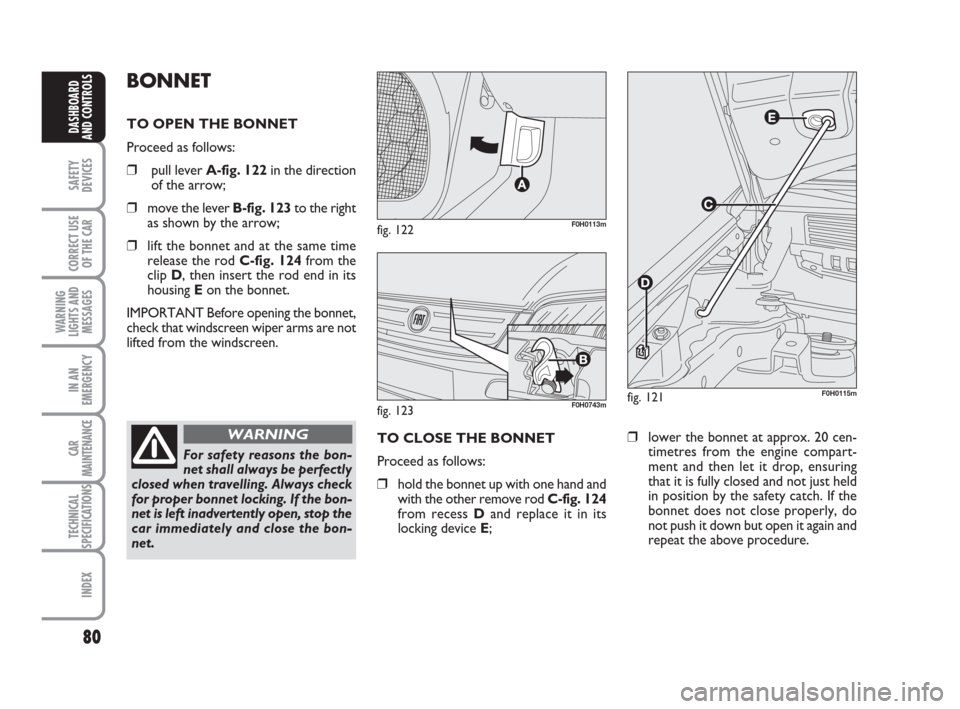
BONNET
TO OPEN THE BONNET
Proceed as follows:
âť’pull lever A-fig. 122in the direction
of the arrow;
âť’move the lever B-fig. 123to the right
as shown by the arrow;
âť’lift the bonnet and at the same time
release the rod C-fig. 124from the
clip D, then insert the rod end in its
housing Eon the bonnet.
IMPORTANT Before opening the bonnet,
check that windscreen wiper arms are not
lifted from the windscreen.
For safety reasons the bon-
net shall always be perfectly
closed when travelling. Always check
for proper bonnet locking. If the bon-
net is left inadvertently open, stop the
car immediately and close the bon-
net.
WARNING
fig. 122F0H0113m
fig. 123F0H0743mfig. 121F0H0115m
TO CLOSE THE BONNET
Proceed as follows:
âť’hold the bonnet up with one hand and
with the other remove rod C-fig. 124
from recess Dand replace it in its
locking device E;âť’lower the bonnet at approx. 20 cen-
timetres from the engine compart-
ment and then let it drop, ensuring
that it is fully closed and not just held
in position by the safety catch. If the
bonnet does not close properly, do
not push it down but open it again and
repeat the above procedure.
036-092 idea GB 1 ed 10-07-2008 16:12 Pagina 80
Page 85 of 210
84
SAFETY
DEVICES
CORRECT USE
OF THE CAR
WARNING
LIGHTS AND
MESSAGES
IN AN
EMERGENCY
CAR
MAINTENANCE
TECHNICAL
SPECIFICATIONS
INDEX
DASHBOARD
AND CONTROLS
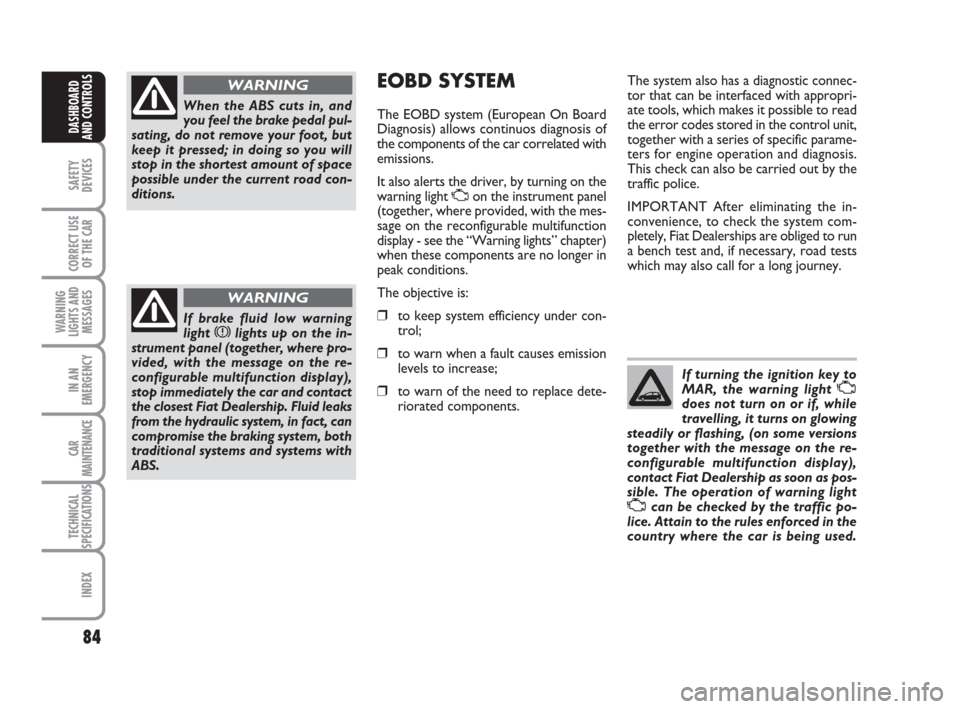
When the ABS cuts in, and
you feel the brake pedal pul-
sating, do not remove your foot, but
keep it pressed; in doing so you will
stop in the shortest amount of space
possible under the current road con-
ditions.
WARNING
If brake fluid low warning
light xlights up on the in-
strument panel (together, where pro-
vided, with the message on the re-
configurable multifunction display),
stop immediately the car and contact
the closest Fiat Dealership. Fluid leaks
from the hydraulic system, in fact, can
compromise the braking system, both
traditional systems and systems with
ABS.
WARNING
EOBD SYSTEM
The EOBD system (European On Board
Diagnosis) allows continuos diagnosis of
the components of the car correlated with
emissions.
It also alerts the driver, by turning on the
warning light Uon the instrument panel
(together, where provided, with the mes-
sage on the reconfigurable multifunction
display - see the “Warning lights” chapter)
when these components are no longer in
peak conditions.
The objective is:
âť’to keep system efficiency under con-
trol;
âť’to warn when a fault causes emission
levels to increase;
âť’to warn of the need to replace dete-
riorated components.The system also has a diagnostic connec-
tor that can be interfaced with appropri-
ate tools, which makes it possible to read
the error codes stored in the control unit,
together with a series of specific parame-
ters for engine operation and diagnosis.
This check can also be carried out by the
traffic police.
IMPORTANT After eliminating the in-
convenience, to check the system com-
pletely, Fiat Dealerships are obliged to run
a bench test and, if necessary, road tests
which may also call for a long journey.
If turning the ignition key to
MAR, the warning light
Udoes not turn on or if, while
travelling, it turns on glowing
steadily or flashing, (on some versions
together with the message on the re-
configurable multifunction display),
contact Fiat Dealership as soon as pos-
sible. The operation of warning light
Ucan be checked by the traffic po-
lice. Attain to the rules enforced in the
country where the car is being used.
036-092 idea GB 1 ed 10-07-2008 16:12 Pagina 84
Page 88 of 210
87
SAFETY
DEVICES
CORRECT USE
OF THE CAR
WARNING
LIGHTS AND
MESSAGES
IN AN
EMERGENCY
CAR
MAINTENANCE
TECHNICAL
SPECIFICATIONS
INDEX
DASHBOARD
AND CONTROLS
“DUALDRIVE” ELECTRIC
POWER STEERING
SYSTEM
The car is fitted with an electrically con-
trolled power steering called “Dualdrive”.
It only works when the ignition key is at
MARand the engine is running and it can
be customised by the driver according to
the driving conditions.
ACTIVATION/DEACTIVATION
(CITY function)
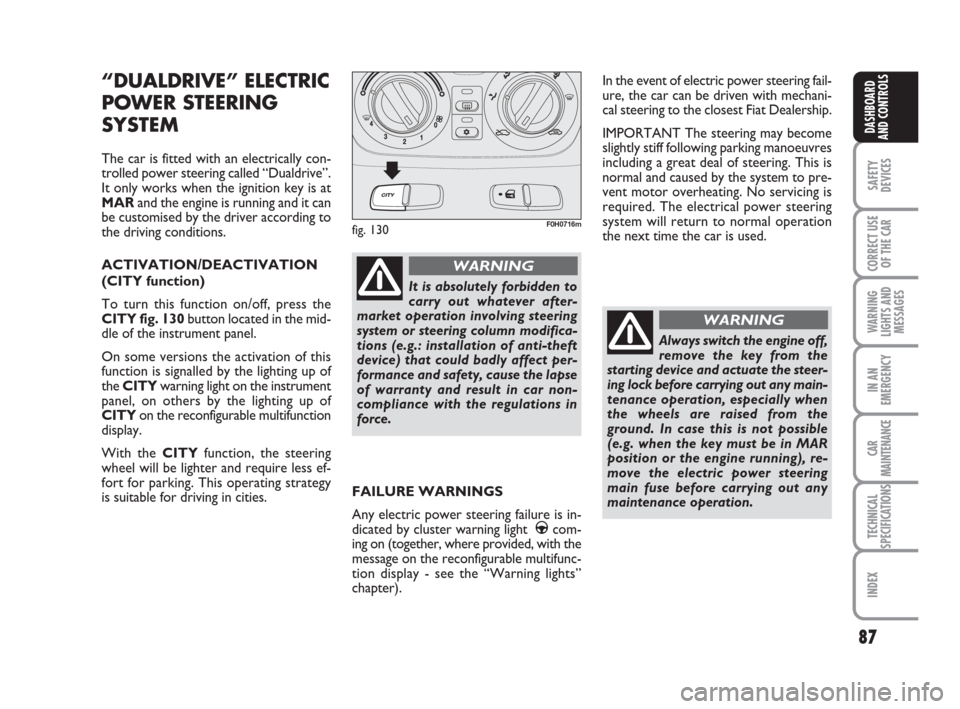
To turn this function on/off, press the
CITY fig. 130button located in the mid-
dle of the instrument panel.
On some versions the activation of this
function is signalled by the lighting up of
the CITYwarning light on the instrument
panel, on others by the lighting up of
CITYon the reconfigurable multifunction
display.
With the CITYfunction, the steering
wheel will be lighter and require less ef-
fort for parking. This operating strategy
is suitable for driving in cities.
fig. 130F0H0716m
It is absolutely forbidden to
carry out whatever after-
market operation involving steering
system or steering column modifica-
tions (e.g.: installation of anti-theft
device) that could badly affect per-
formance and safety, cause the lapse
of warranty and result in car non-
compliance with the regulations in
force.
WARNING
In the event of electric power steering fail-
ure, the car can be driven with mechani-
cal steering to the closest Fiat Dealership.
IMPORTANT The steering may become
slightly stiff following parking manoeuvres
including a great deal of steering. This is
normal and caused by the system to pre-
vent motor overheating. No servicing is
required. The electrical power steering
system will return to normal operation
the next time the car is used.
Always switch the engine off,
remove the key from the
starting device and actuate the steer-
ing lock before carrying out any main-
tenance operation, especially when
the wheels are raised from the
ground. In case this is not possible
(e.g. when the key must be in MAR
position or the engine running), re-
move the electric power steering
main fuse before carrying out any
maintenance operation.
WARNING
FAILURE WARNINGS
Any electric power steering failure is in-
dicated by cluster warning light
gcom-
ing on (together, where provided, with the
message on the reconfigurable multifunc-
tion display - see the “Warning lights”
chapter).
036-092 idea GB 1 ed 10-07-2008 16:12 Pagina 87