FIAT MULTIPLA 2004 1.G Connect NavPlus Manual
Manufacturer: FIAT, Model Year: 2004, Model line: MULTIPLA, Model: FIAT MULTIPLA 2004 1.GPages: 202, PDF Size: 2.22 MB
Page 51 of 202
50
CONNECT NAV
NAVIGATOR
TOURIST GUIDE
INFORMATION
(where fitted)
You can access tourist information
during navigation.
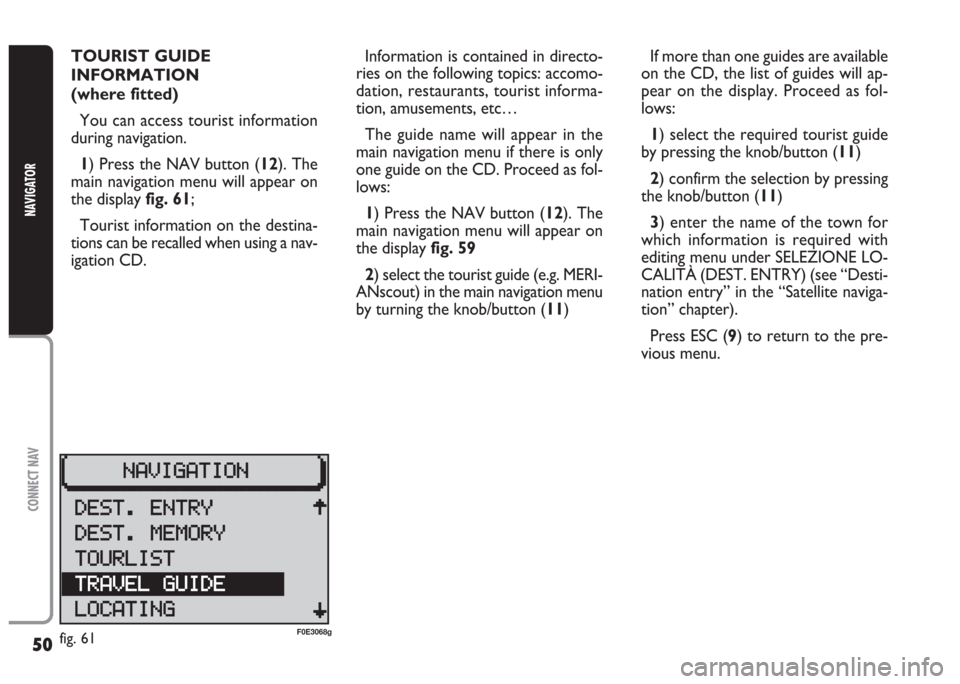
1) Press the NAV button (12). The
main navigation menu will appear on
the displayfig. 61;
Tourist information on the destina-
tions can be recalled when using a nav-
igation CD.Information is contained in directo-
ries on the following topics: accomo-
dation, restaurants, tourist informa-
tion, amusements, etc…
The guide name will appear in the
main navigation menu if there is only
one guide on the CD. Proceed as fol-
lows:
1) Press the NAV button (12). The
main navigation menu will appear on
the display fig. 59
2) select the tourist guide (e.g. MERI-
ANscout) in the main navigation menu
by turning the knob/button (11)If more than one guides are available
on the CD, the list of guides will ap-
pear on the display. Proceed as fol-
lows:
1) select the required tourist guide
by pressing the knob/button (11)
2) confirm the selection by pressing
the knob/button (11)
3) enter the name of the town for
which information is required with
editing menu under SELEZIONE LO-
CALITÀ (DEST. ENTRY) (see “Desti-
nation entry” in the “Satellite naviga-
tion” chapter).
Press ESC (9) to return to the pre-
vious menu.
fig. 61F0E3068g
Page 52 of 202
51
CONNECT NAV
NAVIGATOR
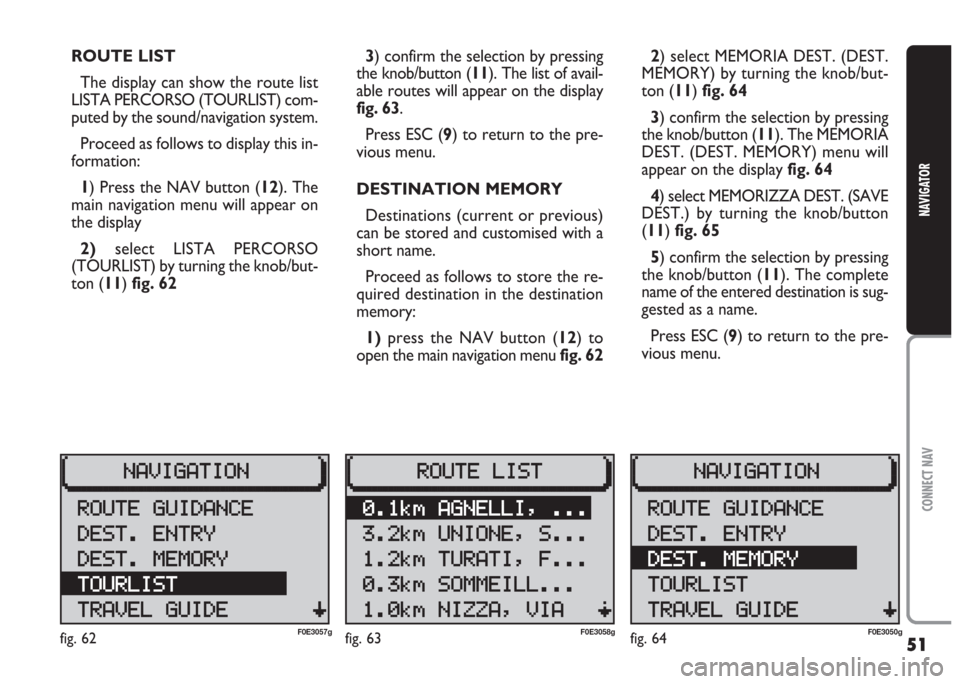
2) select MEMORIA DEST. (DEST.
MEMORY) by turning the knob/but-
ton (11) fig. 64
3) confirm the selection by pressing
the knob/button (11). The MEMORIA
DEST. (DEST. MEMORY) menu will
appear on the display fig. 64
4) select MEMORIZZA DEST. (SAVE
DEST.) by turning the knob/button
(11) fig. 65
5) confirm the selection by pressing
the knob/button (11). The complete
name of the entered destination is sug-
gested as a name.
Press ESC (9) to return to the pre-
vious menu. ROUTE LIST
The display can show the route list
LISTA PERCORSO (TOURLIST) com-
puted by the sound/navigation system.
Proceed as follows to display this in-
formation:
1) Press the NAV button (12). The
main navigation menu will appear on
the display
2)select LISTA PERCORSO
(TOURLIST) by turning the knob/but-
ton (11) fig. 623) confirm the selection by pressing
the knob/button (11). The list of avail-
able routes will appear on the display
fig. 63.
Press ESC (9) to return to the pre-
vious menu.
DESTINATION MEMORY
Destinations (current or previous)
can be stored and customised with a
short name.
Proceed as follows to store the re-
quired destination in the destination
memory:
1)press the NAV button (12) to
open the main navigation menu fig. 62
fig. 62F0E3057gfig. 63F0E3058gfig. 64F0E3050g
Page 53 of 202
52
CONNECT NAV
NAVIGATOR
Entering and editing
destination names
Proceed as follows to edit or enter
a name in the destination memory:
1) press the NAV button (12) to
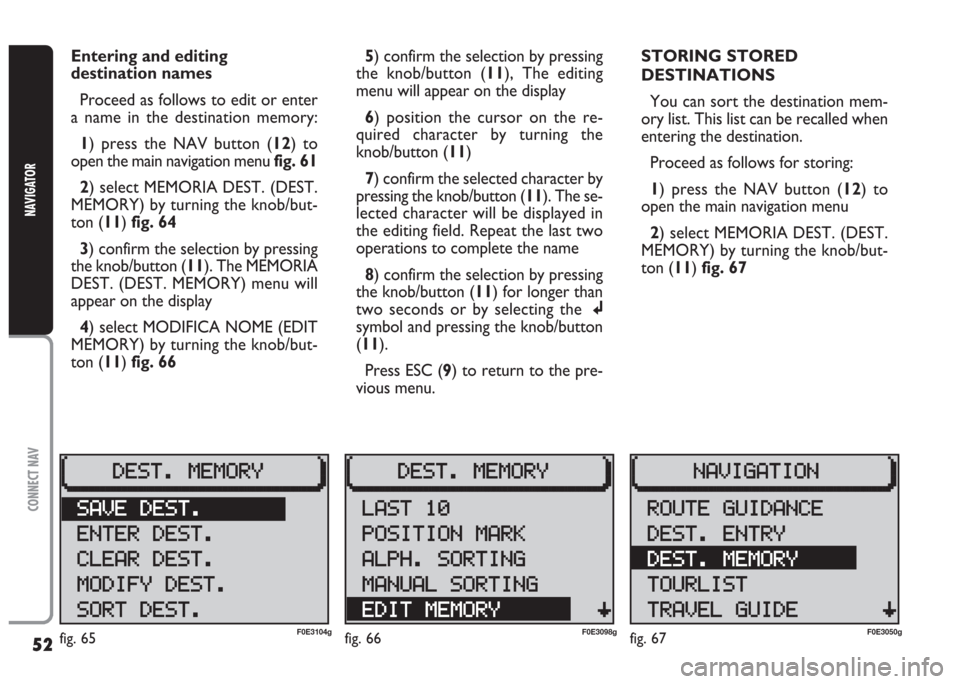
open the main navigation menu fig. 61
2) select MEMORIA DEST. (DEST.
MEMORY) by turning the knob/but-
ton (11) fig. 64
3) confirm the selection by pressing
the knob/button (11). The MEMORIA
DEST. (DEST. MEMORY) menu will
appear on the display
4) select MODIFICA NOME (EDIT
MEMORY) by turning the knob/but-
ton (11) fig. 665) confirm the selection by pressing
the knob/button (11), The editing
menu will appear on the display
6) position the cursor on the re-
quired character by turning the
knob/button (11)
7) confirm the selected character by
pressing the knob/button (11). The se-
lected character will be displayed in
the editing field. Repeat the last two
operations to complete the name
8) confirm the selection by pressing
the knob/button (11) for longer than
two seconds or by selecting thej
symbol and pressing the knob/button
(11).
Press ESC (9) to return to the pre-
vious menu.STORING STORED
DESTINATIONS
You can sort the destination mem-
ory list. This list can be recalled when
entering the destination.
Proceed as follows for storing:
1) press the NAV button (12) to
open the main navigation menu
2) select MEMORIA DEST. (DEST.
MEMORY) by turning the knob/but-
ton (11) fig. 67
fig. 65F0E3104gfig. 66F0E3098gfig. 67F0E3050g
Page 54 of 202
53
CONNECT NAV
NAVIGATOR
3) confirm the selection by pressing
the knob/button (11). The MEMORIA
DEST. (DEST. MEMORY) will appear
on the display
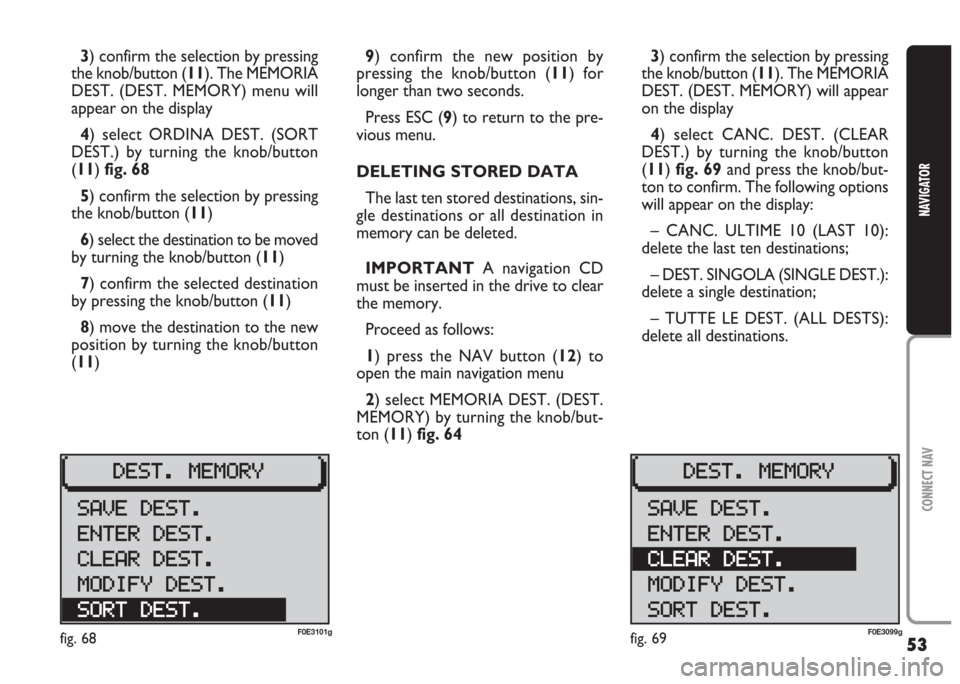
4) select CANC. DEST. (CLEAR
DEST.) by turning the knob/button
(11) fig. 69and press the knob/but-
ton to confirm. The following options
will appear on the display:
– CANC. ULTIME 10 (LAST 10):
delete the last ten destinations;
– DEST. SINGOLA (SINGLE DEST.):
delete a single destination;
– TUTTE LE DEST. (ALL DESTS):
delete all destinations. 3) confirm the selection by pressing
the knob/button (11). The MEMORIA
DEST. (DEST. MEMORY) menu will
appear on the display
4) select ORDINA DEST. (SORT
DEST.) by turning the knob/button
(11) fig. 68
5) confirm the selection by pressing
the knob/button (11)
6) select the destination to be moved
by turning the knob/button (11)
7) confirm the selected destination
by pressing the knob/button (11)
8) move the destination to the new
position by turning the knob/button
(11)9) confirm the new position by
pressing the knob/button (11) for
longer than two seconds.
Press ESC (9) to return to the pre-
vious menu.
DELETING STORED DATA
The last ten stored destinations, sin-
gle destinations or all destination in
memory can be deleted.
IMPORTANT A navigation CD
must be inserted in the drive to clear
the memory.
Proceed as follows:
1) press the NAV button (12) to
open the main navigation menu
2) select MEMORIA DEST. (DEST.
MEMORY) by turning the knob/but-
ton (11) fig. 64
fig. 68F0E3101gfig. 69F0E3099g
Page 55 of 202
54
CONNECT NAV
NAVIGATOR
5) select the required option (LAST
10, SINGLE DEST., ALL DESTS) and
confirm by pressing the knob/button
(11). The memory will be automati-
cally cleared for the first two options.
Continue as follows for the third op-
tion:
6) select the destination to be delet-
ed by turning the knob/button (11)
7) confirm the selection by pressing
the knob/button (11)
8) select CANCELLA (CLEAR) (to
delete) or ANNULLA (NO) (not to
delete) with the knob/button (11).
Press ESC (9) to return to the pre-
vious menu.ENTERING AND EDITING
DESTINATION SHORT
NAMES
Proceed as follows to edit or enter
a short name in the destination mem-
ory:
1) press the NAV button (12) to
open the main navigation menu
2) select MEMORIA DEST.
(DEST.MEMORY) by turning the
knob/button (11)
3) confirm the selection by pressing
the knob/button (11). The MEMORIA
DEST. (DEST. MEMORY) menu will
appear on the display
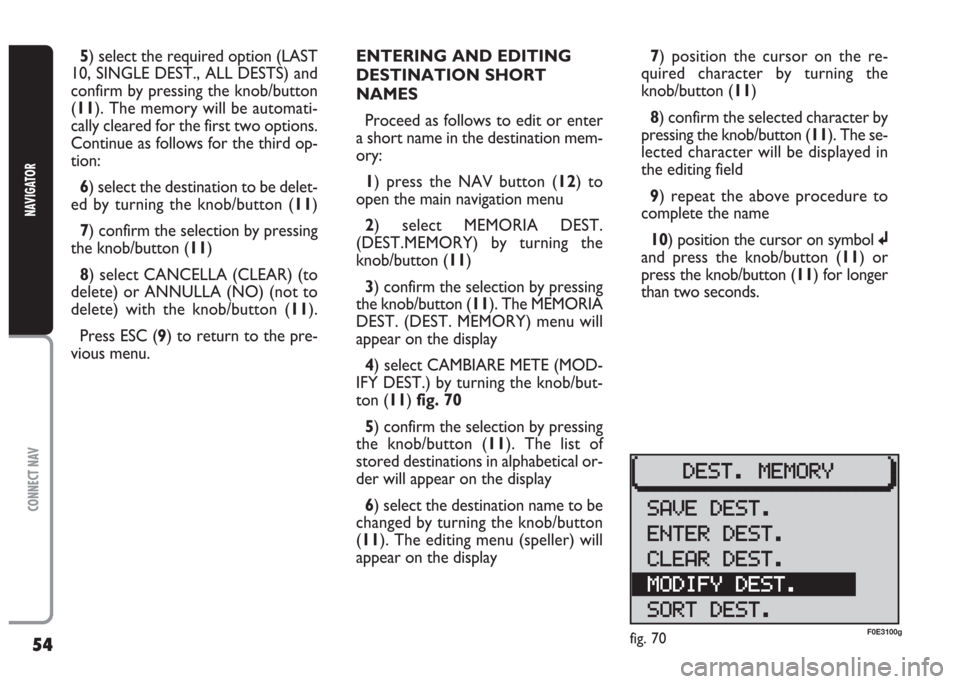
4) select CAMBIARE METE (MOD-
IFY DEST.) by turning the knob/but-
ton (11) fig. 70
5) confirm the selection by pressing
the knob/button (11). The list of
stored destinations in alphabetical or-
der will appear on the display
6) select the destination name to be
changed by turning the knob/button
(11). The editing menu (speller) will
appear on the display7) position the cursor on the re-
quired character by turning the
knob/button (11)
8) confirm the selected character by
pressing the knob/button (11). The se-
lected character will be displayed in
the editing field
9) repeat the above procedure to
complete the name
10) position the cursor on symbol j
and press the knob/button (11) or
press the knob/button (11) for longer
than two seconds.
fig. 70F0E3100g
Page 56 of 202
55
CONNECT NAV
NAVIGATOR
GPS STATUS AND POSITION
INFORMATION
Proceed as follows to display infor-
mation concerning the number of GPS
satellites which can be received and
the car position:
1) press the NAV button (12). The
main navigation menu will be displayed
2) select INFO GPS (GPS STATUS)
by turning the knob/button (11)
3) confirm the selection by pressing
the knob/button (11).
Press ESC (9) to return to the pre-
vious menu.AVOIDING TAILBACKS
DURING NAVIGATION
The sound/navigation system can de-
tour tailbacks or road interruptions
during navigation.
IMPORTANT Only the options
for which data is available on the nav-
igation CD are offered. A lock symbol
Swill appear next to the unavailable
options.
Proceed as follows:
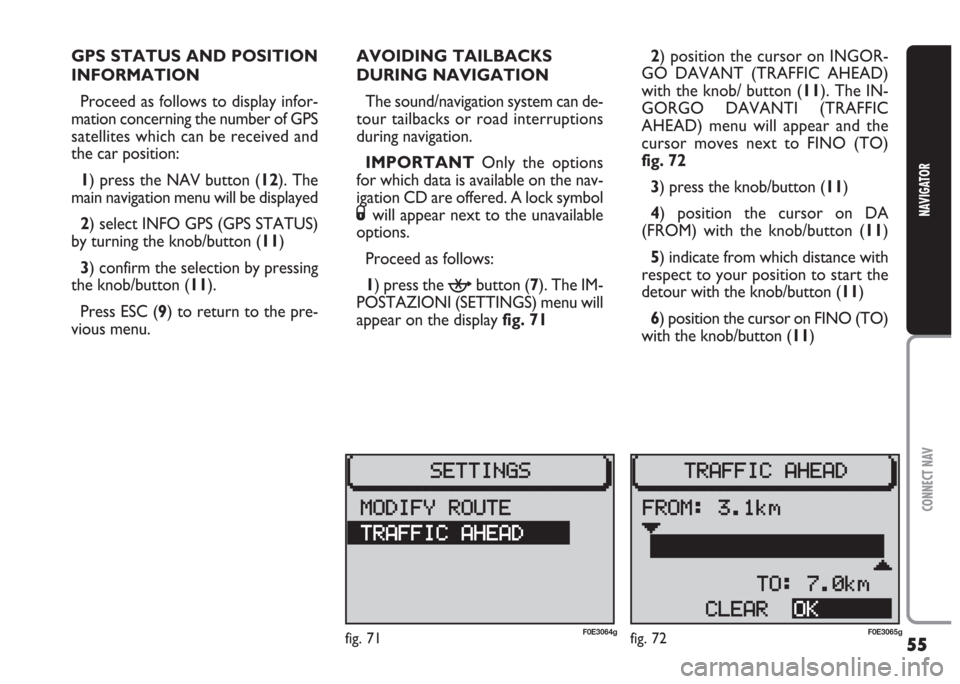
1) press the
kbutton (7). The IM-
POSTAZIONI (SETTINGS) menu will
appear on the displayfig. 712) position the cursor on INGOR-
GO DAVANT (TRAFFIC AHEAD)
with the knob/ button (11). The IN-
GORGO DAVANTI (TRAFFIC
AHEAD) menu will appear and the
cursor moves next to FINO (TO)
fig. 72
3) press the knob/button (11)
4) position the cursor on DA
(FROM) with the knob/button (11)
5) indicate from which distance with
respect to your position to start the
detour with the knob/button (11)
6) position the cursor on FINO (TO)
with the knob/button (11)
fig. 71F0E3064gfig. 72F0E3065g
Page 57 of 202
56
CONNECT NAV
NAVIGATOR
LOCKING A ROUTE
SECTION WITHIN A
ROUTE LIST
You can lock single road sections
along the calculated route. This func-
tion is very useful when you receive
information on heavy traffic, works in
progress, etc. along your calculated
route.
Proceed as follows:
1) press the
kbutton (7). The IM-
POSTAZIONI (SETTINGS) menu will
appear on the display fig. 71 7) indicate at which distance with re-
spect to your position to end the de-
tour with the knob/button (11)
8) select OK with the knob/button
(11). Press the knob/button (11) to
confirm. The route guidance menu will
appear on the display and the new
route is recalculated. The message
NEW CALC. will appear on the display
Proceed as follows to switch the
function off:
1) press the kbutton (7). The IM-
POSTAZIONI (SETTINGS) menu will
appear on the displayfig. 71
2) position the cursor on INGORGO
DAVANT (TRAFFIC AHEAD) with
the knob/ button (11). The INGOR-
GO DAVANTI (TRAFFIC AHEAD)
menu will appear and the cursor
moves next to FINO (TO)
3) press the knob/button
4) select ELIMINA (CLEAR) by the
knob/button (11)
5) confirm the selection by pressing
the knob/button (11). The route will
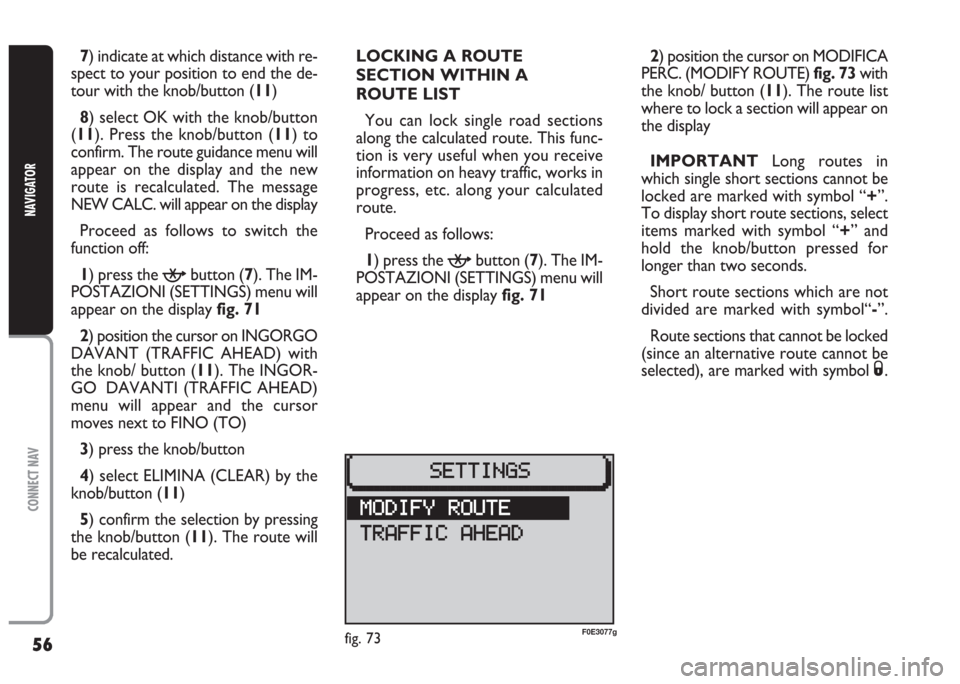
be recalculated.2) position the cursor on MODIFICA
PERC. (MODIFY ROUTE)fig. 73 with
the knob/ button (11). The route list
where to lock a section will appear on
the display
IMPORTANT Long routes in
which single short sections cannot be
locked are marked with symbol “+”.
To display short route sections, select
items marked with symbol “+” and
hold the knob/button pressed for
longer than two seconds.
Short route sections which are not
divided are marked with symbol“-”.
Route sections that cannot be locked
(since an alternative route cannot be
selected), are marked with symbol
S.
fig. 73F0E3077g
Page 58 of 202
57
CONNECT NAV
NAVIGATOR
3) select the first route section you
want to delete from the list (it is bet-
ter to select a long route) with the
knob/button (11)
4) press the knob/button (11): a ring
will be displayed in front of the se-
lected route
5) turn the knob/button (11) until se-
lecting the last route to delete from
the list (it is better to select a long
route)
6) press the knob/button (11). The
main navigation menu will appear on
the display and a new route is calcu-
lated. The message NEW CALC will
appear on the display.Proceed as follows to delete/edit the
route section:
1) press the
kbutton (7). The IM-
POSTAZIONI (SETTINGS) menu will
appear on the display fig. 71
2) position the cursor on MODIFI-
CA PERC. (MODIFY ROUTE) with
the knob/ button (11) fig. 73: the dis-
play will show the clear or change op-
tions:
– select ELIMINA (CLEAR) to delete
a route section. The main navigation
menu will appear on the display and a
new route is calculated. The message
NEW CALC will appear on the dis-
play.
– select CAMBIA (CHANGE) to
modify a route section and repeat the
operations specified above in points
3), 4), 5) and 6)CUSTOMISING THE ROUTE
Routes can be customised at any mo-
ment, even during navigation by en-
tering the following parameters:
– PERCORSO (ROUTE): you can
choose between the fastest or short-
est route or select the “Dynamic trav-
el guide” DINAMIC (DYN.) with TMC
(see “Dynamic travel guide” in this
chapter). When this function is on, all
the other options (AUTOSTR. (MO-
TORWAY), TRAGHETTI (FERRY)
and PEDAGGIO (TOOL)) are not dis-
played. The satellite sound/navigation
system tunes automatically to a TMC
station and computes the fastest/
shortest route on the basis of the traf-
fic messages;
– AUTOSTR. (MOTORWAY): dur-
ing navigation, you can choose
whether to use motorways;
– TRAGHETTI (FERRY): you can
choose whether to use ferries;
– PEDAGGIO (TOOL): you can ex-
clude toll roads from the route.
Page 59 of 202
58
CONNECT NAV
NAVIGATOR
Proceed as follows to select the
route options:
1) press the MEN button (10) in the
main navigation menu or in the route
guidance menu to open the navigation
setup menu
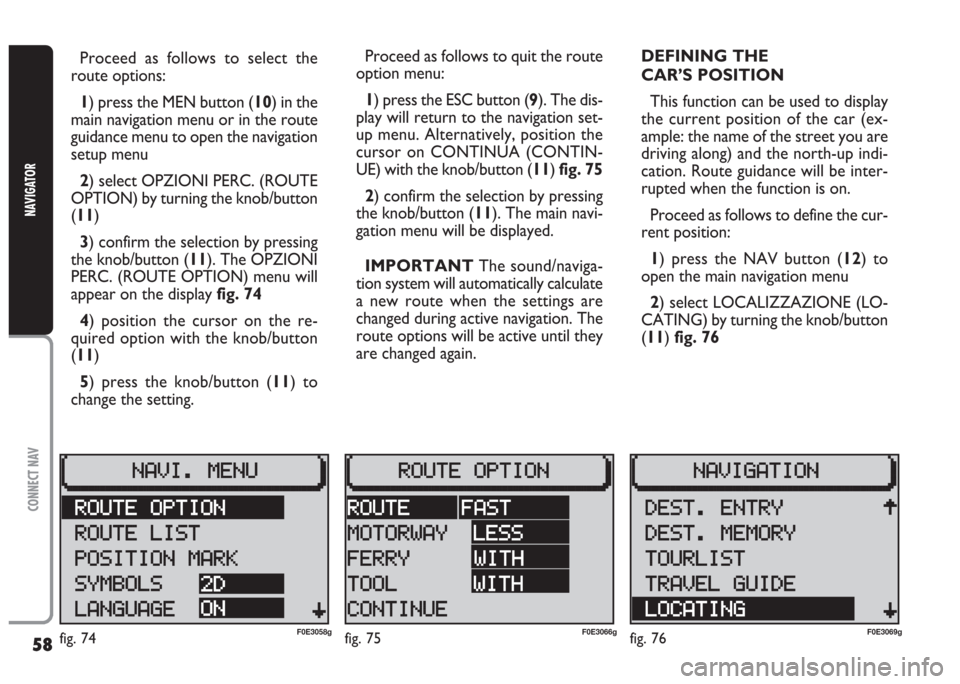
2) select OPZIONI PERC. (ROUTE
OPTION) by turning the knob/button
(11)
3) confirm the selection by pressing
the knob/button (11). The OPZIONI
PERC. (ROUTE OPTION) menu will
appear on the display fig. 74
4) position the cursor on the re-
quired option with the knob/button
(11)
5) press the knob/button (11) to
change the setting.Proceed as follows to quit the route
option menu:
1) press the ESC button (9). The dis-
play will return to the navigation set-
up menu. Alternatively, position the
cursor on CONTINUA (CONTIN-
UE) with the knob/button (11) fig. 75
2) confirm the selection by pressing
the knob/button (11). The main navi-
gation menu will be displayed.
IMPORTANT The sound/naviga-
tion system will automatically calculate
a new route when the settings are
changed during active navigation. The
route options will be active until they
are changed again.DEFINING THE
CAR’S POSITION
This function can be used to display
the current position of the car (ex-
ample: the name of the street you are
driving along) and the north-up indi-
cation. Route guidance will be inter-
rupted when the function is on.
Proceed as follows to define the cur-
rent position:
1) press the NAV button (12) to
open the main navigation menu
2) select LOCALIZZAZIONE (LO-
CATING) by turning the knob/button
(11) fig. 76
fig. 74F0E3058gfig. 75F0E3066gfig. 76F0E3069g
Page 60 of 202
59
CONNECT NAV
NAVIGATOR
3) confirm the selection by pressing
the knob/button (11).
Press ESC (9) to end the function
and return to the main navigation
menu.
Storing the position
Proceed as follows to store the cur-
rent position:
1) press the MEN button (10) to
open the navigation setup menu
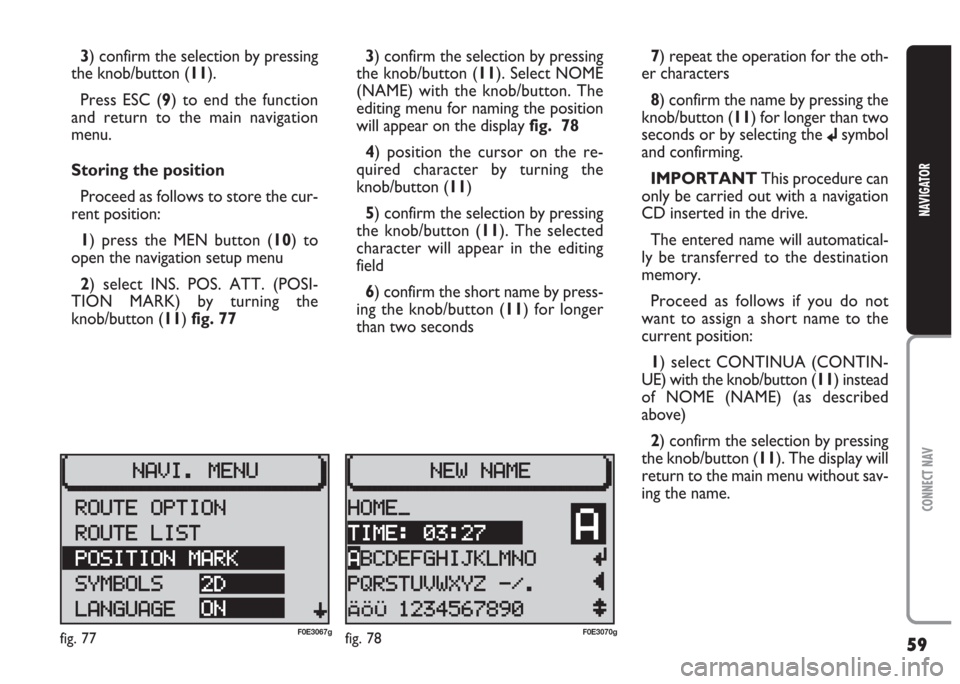
2) select INS. POS. ATT. (POSI-
TION MARK) by turning the
knob/button (11) fig. 773) confirm the selection by pressing
the knob/button (11). Select NOME
(NAME) with the knob/button. The
editing menu for naming the position
will appear on the display fig. 78
4) position the cursor on the re-
quired character by turning the
knob/button (11)
5) confirm the selection by pressing
the knob/button (11). The selected
character will appear in the editing
field
6) confirm the short name by press-
ing the knob/button (11) for longer
than two seconds7) repeat the operation for the oth-
er characters
8) confirm the name by pressing the
knob/button (11) for longer than two
seconds or by selecting the
jsymbol
and confirming.
IMPORTANT This procedure can
only be carried out with a navigation
CD inserted in the drive.
The entered name will automatical-
ly be transferred to the destination
memory.
Proceed as follows if you do not
want to assign a short name to the
current position:
1) select CONTINUA (CONTIN-
UE) with the knob/button (11) instead
of NOME (NAME) (as described
above)
2) confirm the selection by pressing
the knob/button (11). The display will
return to the main menu without sav-
ing the name.
fig. 77F0E3067gfig. 78F0E3070g