lock FIAT MULTIPLA 2004 1.G Connect NavPlus Manual
[x] Cancel search | Manufacturer: FIAT, Model Year: 2004, Model line: MULTIPLA, Model: FIAT MULTIPLA 2004 1.GPages: 202, PDF Size: 2.22 MB
Page 4 of 202
3
CONNECT NAV
NAVIGATOR
BASIC SETTINGS (SETUP).................................. 63
OPENING THE SETUP MENU ................................ 63
ADJUSTING THE DISPLAY ...................................... 63
ADJUSTING POWER-ON, TA
ANNOUNCEMENT, MESSAGE ................................ 65
SETTING THE CLOCK .............................................. 67
SELECTING THE LANGUAGE ................................ 69
GPS STATUS .................................................................. 70
SECURITY ...................................................................... 71
RESETTING DEFAULT SETTINGS .......................... 72 DYNAMIC TRAVEL GUIDE ...................................... 49
TOURIST GUIDE INFORMATION ........................ 50
ROUTE LIST .................................................................. 51
DESTINATION MEMORY ........................................ 51
STORING STORED DESTINATIONS .................... 52
DELETING STORED DATA ...................................... 53
ENTERING AND EDITING
DESTINATION SHORT NAMES ............................ 54
GPS STATUS AND POSITION
INFORMATION ............................................................ 55
AVOIDING TAILBACKS DURING
NAVIGATION .............................................................. 55
LOCKING A ROUTE SECTION
WITHIN A ROUTE LIST ............................................ 56
CUSTOMISING THE ROUTE .................................. 57
DEFINING THE CAR’S POSITION ........................ 58
RECEIVING TRAFFIC ANNOUNCEMENTS
DURING NAVIGATION ............................................ 60
SWITCHING VOICE MESSAGES
ON AND OFF .............................................................. 60
SWITCHING THE LAST 10
DESTINATIONS MEMORY ON AND OFF .......... 60
SWITCHING ROUTE TIME
INFORMATION ON AND OFF .............................. 61
MANUAL POSITION INDICATION ...................... 61
NAVIGATION SIMULATION .................................. 62
Page 8 of 202
7
CONNECT NAV
NAVIGATOR
3) continue with the other three dig-
its to complete the security code.
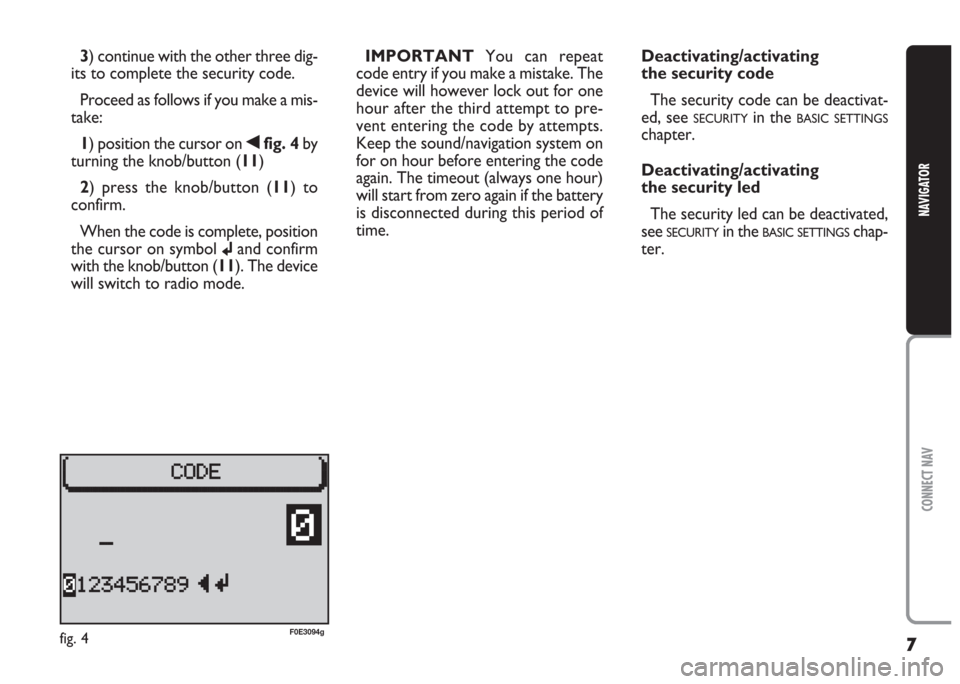
Proceed as follows if you make a mis-
take:
1) position the cursor on
¯fig. 4 by
turning the knob/button (11)
2) press the knob/button (11) to
confirm.
When the code is complete, position
the cursor on symbol
jand confirm
with the knob/button (11). The device
will switch to radio mode.IMPORTANTYou can repeat
code entry if you make a mistake. The
device will however lock out for one
hour after the third attempt to pre-
vent entering the code by attempts.
Keep the sound/navigation system on
for on hour before entering the code
again. The timeout (always one hour)
will start from zero again if the battery
is disconnected during this period of
time.
fig. 4F0E3094g
Deactivating/activating
the security code
The security code can be deactivat-
ed, see
SECURITYin the BASIC SETTINGS
chapter.
Deactivating/activating
the security led
The security led can be deactivated,
see
SECURITYin the BASIC SETTINGSchap-
ter.
Page 9 of 202
8
CONNECT NAV
NAVIGATOR
The sound/navigation system has a
power output max of 4 x 18W. The
functions and specifications are illus-
trated in the following paragraphs.
RADIO SECTION
– PLL tuning (Phase Locked Loop) in
the FM/MW wavebands.
– RDS (Radio Data System) with TA
(Traffic Announcement), EON (En-
hanced Other Network), Radiotext
(information on the type of pro-
gramme or broadcast piece name dis-
play), REG (Regional Programmes)
functions.
– (Radio Data System) alternative
frequency tuning.
– Automatic/manual station tuning.
– Manual storage of 24 stations: 18
in FM waveband (6 in FM1, 6 in FM2
and 6 in FMT) and 6 in MW waveband.
– Preselection scanning.– PTY function: for displaying radio
station programme type (if broadcast),
e.g. POP, ROCK etc.
– SHARX function: for reducing FM
interference.
– SCAN function: for scanning all sta-
tions which can be received in the se-
lected frequency waveband.
– TIM function (Traffic Information
Memory): automatic vocal storage of
14 traffic messages having max. over-
all length equal to or lower than 4 min-
utes
– TMC function (Traffic Message
Channel): for listening to traffic mes-
sage channels
– AUTOSTORE function: automat-
ic storage of 6 stations in the devot-
ed FM band.
– Automatic Stereo/Mono selection.CD SECTION AND
CD
CHANGER(where fitted)
– Select track (forwards/backwards).
– Fast play (forwards/backwards).
– MIX function: random track play-
back.
– SCAN function: for playing ten sec-
onds of each track on the CD.
– REPEAT function: for repeating the
track.
– Programmable track sequence.
T T
E E
C C
H H
N N
I I
C C
A A
L L
S S
P P
E E
C C
I I
F F
I I
C C
A A
T T
I I
O O
N N
S S
For installation and re-
spective connections,
contact Fiat Dealership
exclusively.
Page 14 of 202
13
CONNECT NAV
NAVIGATOR
ADJUSTING THE VOLUME
To turn the volume up: turn the
knob/button (16) clockwise.
To turn the volume down: turn the
knob/button (16) anticlockwise.
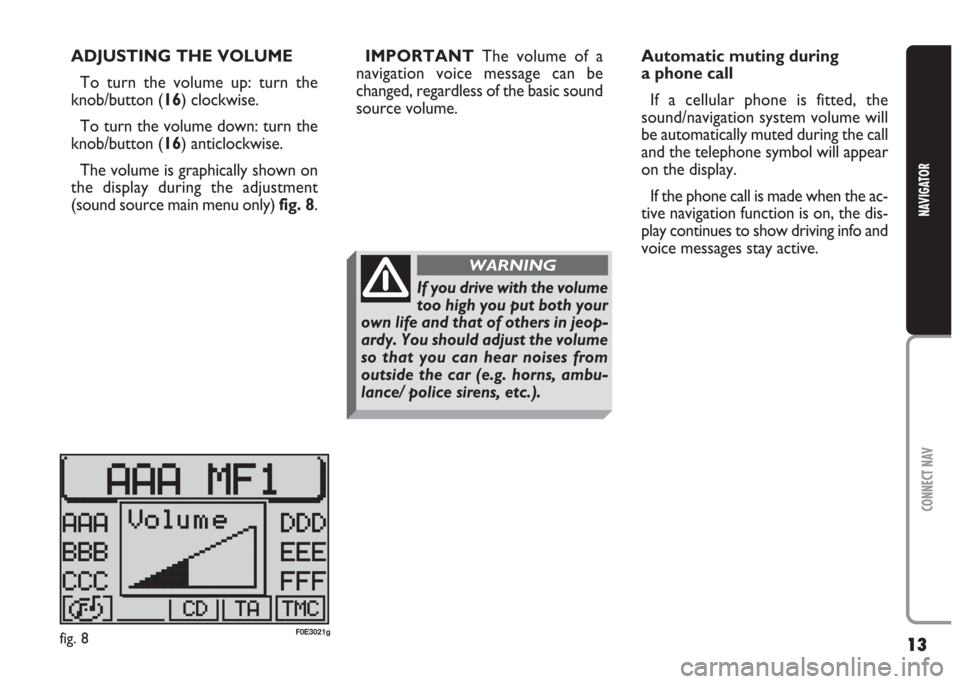
The volume is graphically shown on
the display during the adjustment
(sound source main menu only) fig. 8.IMPORTANTThe volume of a
navigation voice message can be
changed, regardless of the basic sound
source volume.Automatic muting during
a phone call
If a cellular phone is fitted, the
sound/navigation system volume will
be automatically muted during the call
and the telephone symbol will appear
on the display.
If the phone call is made when the ac-
tive navigation function is on, the dis-
play continues to show driving info and
voice messages stay active.
fig. 8F0E3021g
If you drive with the volume
too high you put both your
own life and that of others in jeop-
ardy. You should adjust the volume
so that you can hear noises from
outside the car (e.g. horns, ambu-
lance/ police sirens, etc.).
WARNING
Page 29 of 202
28
CONNECT NAV
NAVIGATOR
PLAYING A CD
(INTERNAL PLAYER)
Playback will start automatically as
soon as a CD is inserted.
If you are using another source and
a CD is inserted in the internal player,
press the CD-C button (15). The main
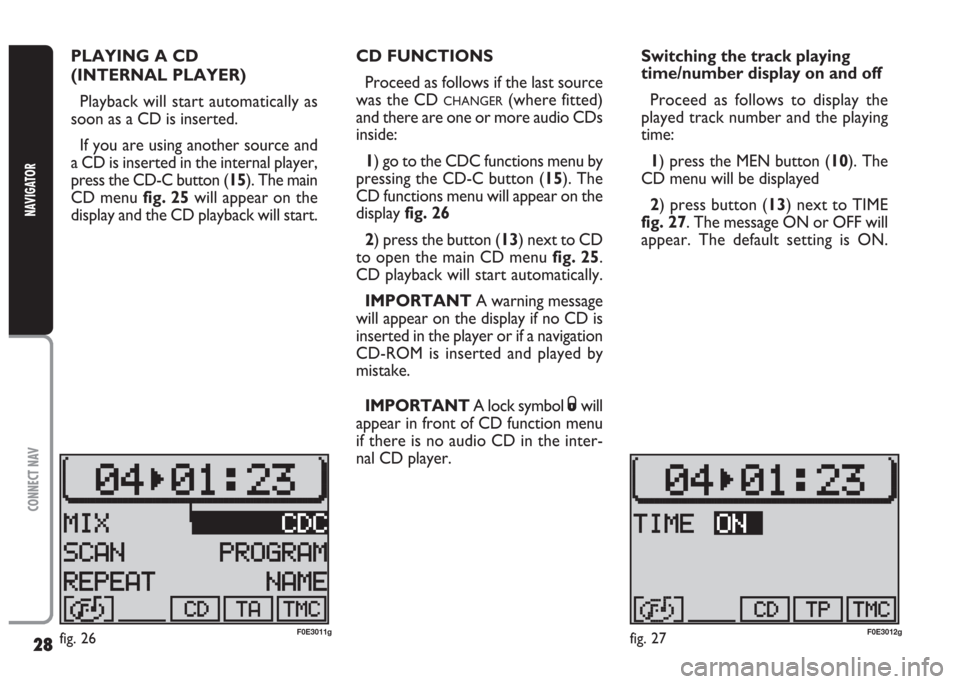
CD menu fig. 25will appear on the
display and the CD playback will start.CD FUNCTIONS
Proceed as follows if the last source
was the CD
CHANGER(where fitted)
and there are one or more audio CDs
inside:
1) go to the CDC functions menu by
pressing the CD-C button (15). The
CD functions menu will appear on the
display fig. 26
2) press the button (13) next to CD
to open the main CD menu fig. 25.
CD playback will start automatically.
IMPORTANT A warning message
will appear on the display if no CD is
inserted in the player or if a navigation
CD-ROM is inserted and played by
mistake.
IMPORTANT A lock symbol
Swill
appear in front of CD function menu
if there is no audio CD in the inter-
nal CD player.Switching the track playing
time/number display on and off
Proceed as follows to display the
played track number and the playing
time:
1) press the MEN button (10). The
CD menu will be displayed
2) press button (13) next to TIME
fig. 27. The message ON or OFF will
appear. The default setting is ON.
fig. 26F0E3011gfig. 27F0E3012g
Page 38 of 202
37
CONNECT NAV
NAVIGATOR
6) confirm the selected character by
pressing the knob/button (11). The se-
lected character is displayed in the
editing field 3-fig. 36
7) repeat the procedure for the oth-
er letters in the name
8) when entering the name, the list
of destinations matching the entered
letters will appear in the editing list 2-
fig. 36
9) position the cursor on the symbol
jand press the knob/button (11) or
hold the knob/button (11) pressed for
longer than two seconds. The alpha-
betical list of destinations will appear
10) turn the knob/button (11) to
seek the required town destination
name in the editing list11) confirm the destination by press-
ing the knob/button (11).
Press ESC (9) to not confirm the
destination and return to the editing
menu (Speller) fig. 36.
After selecting the destination, the
sound/navigation system offers the fol-
lowing options: VIA (STREET), CEN-
TRO (CENTRE), DINTORNI DEST.
(DEST. SURROUND)
IMPORTANT Only the options
for which data is available on the nav-
igation CD are offered. A lock symbol
Swill appear next to the unavailable
options.
“VIA” (STREET) The destination
street can be entered. This option de-
pends on the size of the town and da-
ta stored on the navigation CD.Confirm the street. The entering
procedure will continue with the fol-
lowing options:
– CONTINUA (CONTINUE): select
this item to continue;
– INCROCIO (INTERSECTION):
select this item to define an intersec-
tion with the previously selected
street as a destination. In this case, an
alphabetical list where to select the re-
quired intersection will be displayed;
– NUMERO CIVICO (HOUSE
NUMBER): select this item to define a
house number on the previously se-
lected street as a destination.
“CENTRO” (CENTRE) The town
centre or district (for larger cities) can
be entered as a destination.
Page 40 of 202
39
CONNECT NAV
NAVIGATOR
9) position the cursor on the symbol
jand press the knob/button (11) or
hold the knob/button (11) pressed for
longer than two seconds. The alpha-
betical list of destinations will appear
on the display
10) turn the knob/button (11) to
seek the required street name in the
editing list
11) confirm the destination by press-
ing the knob/button (11).IMPORTANT Only the options
for which data is available on the nav-
igation CD are offered. A lock symbol
S will appear next to the unavailable
options.
Press ESC (9) to return to the pre-
vious menu.
“NUMERO CIVICO” (HOUSE
NUMBER) destination entry
Proceed as follows to reach a house
number:
1) enter the street number as de-
scribed previously 2) select NUMERO CIVICO
(HOUSE NUMBER) with the
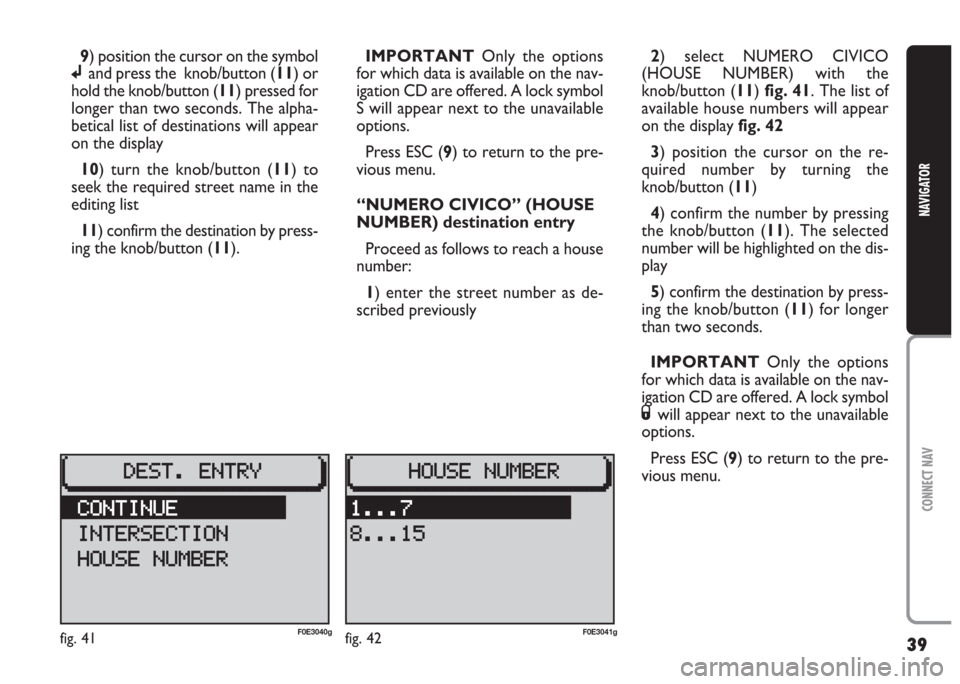
knob/button (11) fig. 41. The list of
available house numbers will appear
on the display fig. 42
3) position the cursor on the re-
quired number by turning the
knob/button (11)
4) confirm the number by pressing
the knob/button (11). The selected
number will be highlighted on the dis-
play
5) confirm the destination by press-
ing the knob/button (11) for longer
than two seconds.
IMPORTANT Only the options
for which data is available on the nav-
igation CD are offered. A lock symbol
Swill appear next to the unavailable
options.
Press ESC (9) to return to the pre-
vious menu.
fig. 41F0E3040gfig. 42F0E3041g
Page 41 of 202
40
CONNECT NAV
NAVIGATOR
“INCROCIO”
(INTERSECTION)
destination entry
Proceed as follows to reach an in-
tersection:
1) enter the street name as de-
scribed above
2) select INCROCIO (INTERSEC-
TION) with the knob/button (11)
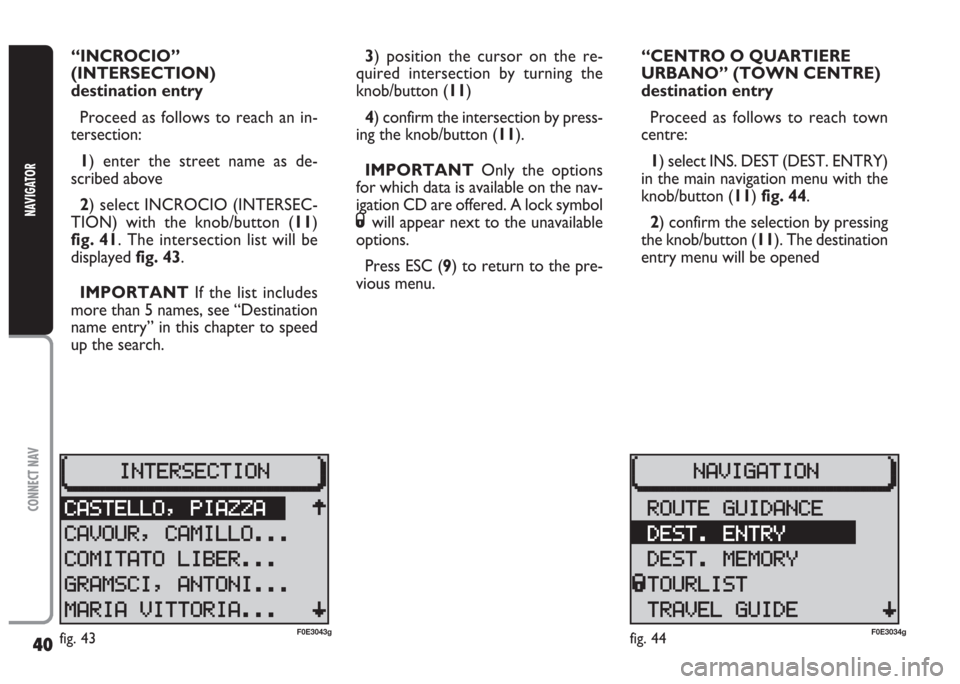
fig. 41. The intersection list will be
displayed fig. 43.
IMPORTANT If the list includes
more than 5 names, see “Destination
name entry” in this chapter to speed
up the search.3) position the cursor on the re-
quired intersection by turning the
knob/button (11)
4) confirm the intersection by press-
ing the knob/button (11).
IMPORTANT Only the options
for which data is available on the nav-
igation CD are offered. A lock symbol
Swill appear next to the unavailable
options.
Press ESC (9) to return to the pre-
vious menu.“CENTRO O QUARTIERE
URBANO” (TOWN CENTRE)
destination entry
Proceed as follows to reach town
centre:
1) select INS. DEST (DEST. ENTRY)
in the main navigation menu with the
knob/button (11) fig. 44.
2) confirm the selection by pressing
the knob/button (11). The destination
entry menu will be opened
fig. 43F0E3043gfig. 44F0E3034g
Page 42 of 202
41
CONNECT NAV
NAVIGATOR
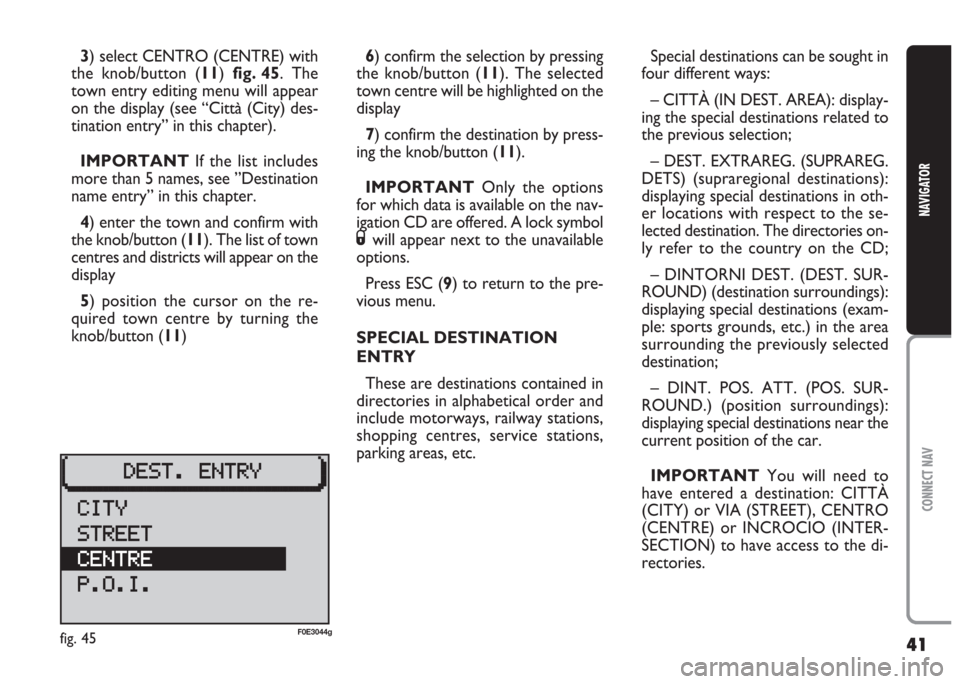
3) select CENTRO (CENTRE) with
the knob/button (11) fig. 45. The
town entry editing menu will appear
on the display (see “Città (City) des-
tination entry” in this chapter).
IMPORTANT If the list includes
more than 5 names, see ”Destination
name entry” in this chapter.
4) enter the town and confirm with
the knob/button (11). The list of town
centres and districts will appear on the
display
5) position the cursor on the re-
quired town centre by turning the
knob/button (11)6) confirm the selection by pressing
the knob/button (11). The selected
town centre will be highlighted on the
display
7) confirm the destination by press-
ing the knob/button (11).
IMPORTANT Only the options
for which data is available on the nav-
igation CD are offered. A lock symbol
Swill appear next to the unavailable
options.
Press ESC (9) to return to the pre-
vious menu.
SPECIAL DESTINATION
ENTRY
These are destinations contained in
directories in alphabetical order and
include motorways, railway stations,
shopping centres, service stations,
parking areas, etc.Special destinations can be sought in
four different ways:
– CITTÀ (IN DEST. AREA): display-
ing the special destinations related to
the previous selection;
– DEST. EXTRAREG. (SUPRAREG.
DETS) (supraregional destinations):
displaying special destinations in oth-
er locations with respect to the se-
lected destination. The directories on-
ly refer to the country on the CD;
– DINTORNI DEST. (DEST. SUR-
ROUND) (destination surroundings):
displaying special destinations (exam-
ple: sports grounds, etc.) in the area
surrounding the previously selected
destination;
– DINT. POS. ATT. (POS. SUR-
ROUND.) (position surroundings):
displaying special destinations near the
current position of the car.
IMPORTANT You will need to
have entered a destination: CITTÀ
(CITY) or VIA (STREET), CENTRO
(CENTRE) or INCROCIO (INTER-
SECTION) to have access to the di-
rectories.
fig. 45F0E3044g
Page 56 of 202
55
CONNECT NAV
NAVIGATOR
GPS STATUS AND POSITION
INFORMATION
Proceed as follows to display infor-
mation concerning the number of GPS
satellites which can be received and
the car position:
1) press the NAV button (12). The
main navigation menu will be displayed
2) select INFO GPS (GPS STATUS)
by turning the knob/button (11)
3) confirm the selection by pressing
the knob/button (11).
Press ESC (9) to return to the pre-
vious menu.AVOIDING TAILBACKS
DURING NAVIGATION
The sound/navigation system can de-
tour tailbacks or road interruptions
during navigation.
IMPORTANT Only the options
for which data is available on the nav-
igation CD are offered. A lock symbol
Swill appear next to the unavailable
options.
Proceed as follows:
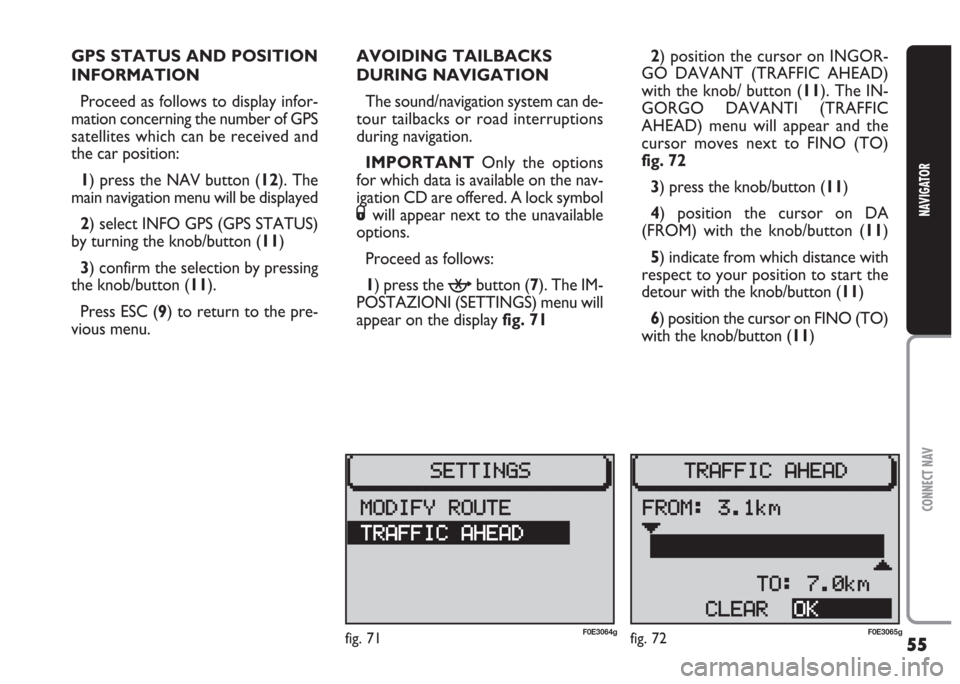
1) press the
kbutton (7). The IM-
POSTAZIONI (SETTINGS) menu will
appear on the displayfig. 712) position the cursor on INGOR-
GO DAVANT (TRAFFIC AHEAD)
with the knob/ button (11). The IN-
GORGO DAVANTI (TRAFFIC
AHEAD) menu will appear and the
cursor moves next to FINO (TO)
fig. 72
3) press the knob/button (11)
4) position the cursor on DA
(FROM) with the knob/button (11)
5) indicate from which distance with
respect to your position to start the
detour with the knob/button (11)
6) position the cursor on FINO (TO)
with the knob/button (11)
fig. 71F0E3064gfig. 72F0E3065g