FIAT SEICENTO 2007 1.G Service Manual
Manufacturer: FIAT, Model Year: 2007, Model line: SEICENTO, Model: FIAT SEICENTO 2007 1.GPages: 154, PDF Size: 3.68 MB
Page 41 of 154
40GETTING TO KNOW YOUR CAR
The use of the hazard
lights is governed by the
traffic regulations of the
country the car is driven in.
These laws should be complied
with.
SWITCHES AND CONTROL
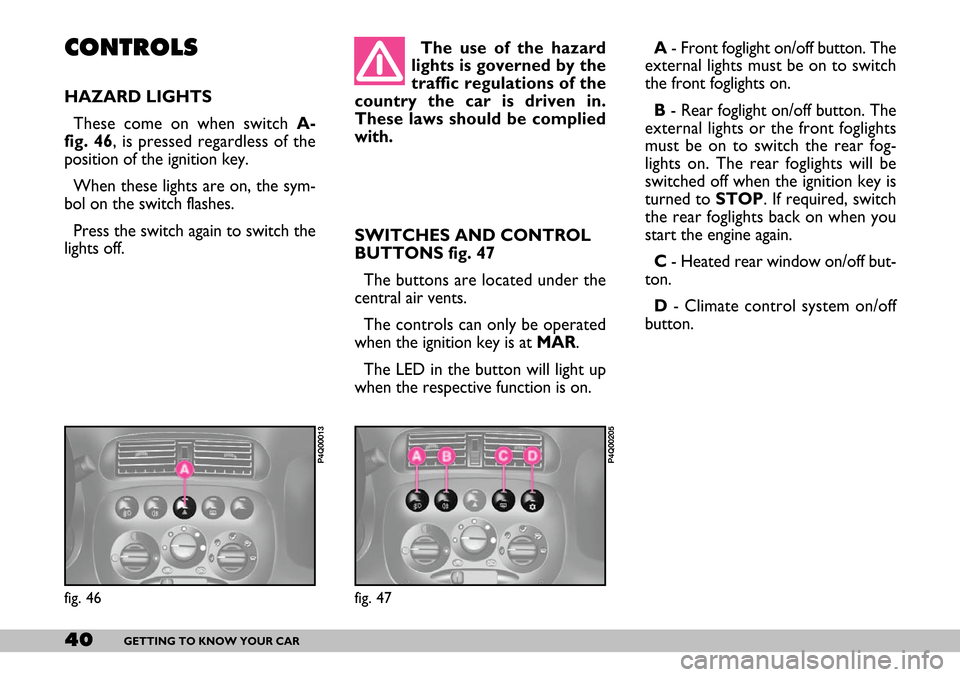
BUTTONS fig. 47
The buttons are located under the
central air vents.
The controls can only be operated
when the ignition key is at MAR.
The LED in the button will light up
when the respective function is on.CONTROLS
HAZARD LIGHTS
These come on when switch A-
fig. 46, is pressed regardless of the
position of the ignition key.
When these lights are on, the sym-
bol on the switch flashes.
Press the switch again to switch the
lights off.
fig. 46
P4Q00013
A - Front foglight on/off button. The
external lights must be on to switch
the front foglights on.
B- Rear foglight on/off button. The
external lights or the front foglights
must be on to switch the rear fog-
lights on. The rear foglights will be
switched off when the ignition key is
turned to STOP. If required, switch
the rear foglights back on when you
start the engine again.
C- Heated rear window on/off but-
ton.
D- Climate control system on/off
button.
fig. 47
P4Q00205
Page 42 of 154
41GETTING TO KNOW YOUR CAR
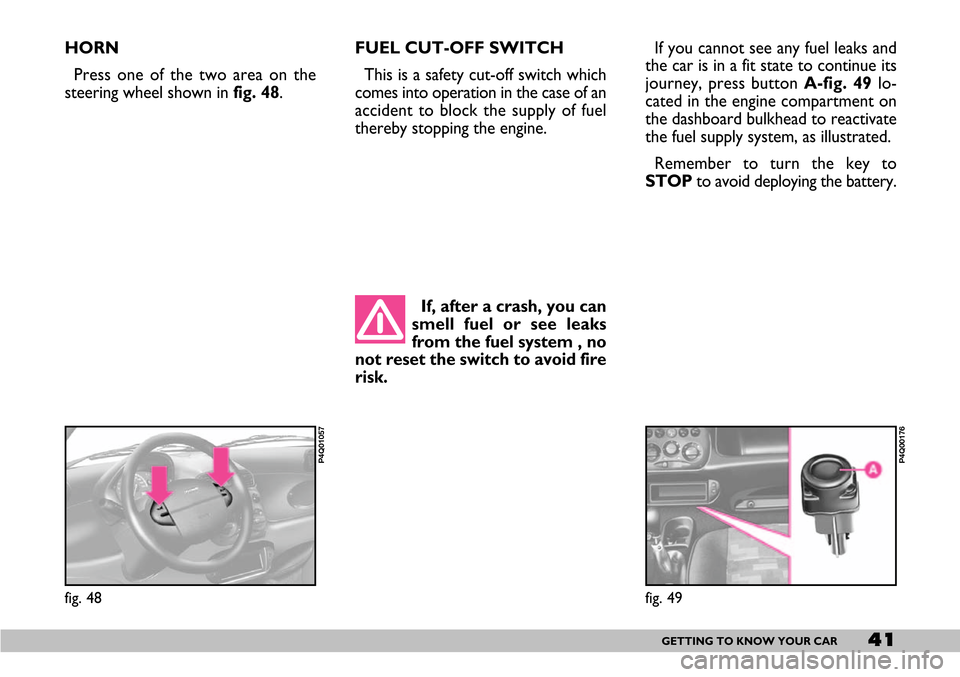
HORN
Press one of the two area on the
steering wheel shown in fig. 48.FUEL CUT-OFF SWITCH
This is a safety cut-off switch which
comes into operation in the case of an
accident to block the supply of fuel
thereby stopping the engine.
If, after a crash, you can
smell fuel or see leaks
from the fuel system , no
not reset the switch to avoid fire
risk.
fig. 48
P4Q01057
If you cannot see any fuel leaks and
the car is in a fit state to continue its
journey, press button A-fig. 49lo-
cated in the engine compartment on
the dashboard bulkhead to reactivate
the fuel supply system, as illustrated.
Remember to turn the key to
STOPto avoid deploying the battery.
fig. 49
P4Q00176
Page 43 of 154
42GETTING TO KNOW YOUR CAR
INTERIOR
EQUIPMENT
ASHTRAY AND CIGAR
LIGHTER
Use:
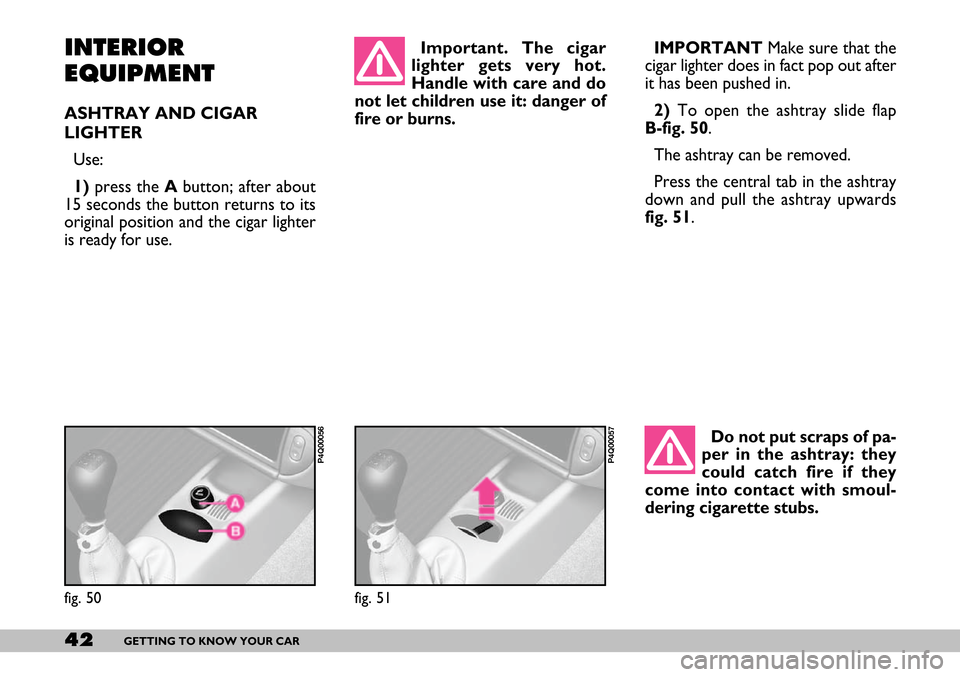
1)press the Abutton; after about
15 seconds the button returns to its
original position and the cigar lighter
is ready for use.IMPORTANTMake sure that the
cigar lighter does in fact pop out after
it has been pushed in.
2) To open the ashtray slide flap
B-fig. 50.
The ashtray can be removed.
Press the central tab in the ashtray
down and pull the ashtray upwards
fig. 51.
fig. 50
P4Q00056
Important. The cigar
lighter gets very hot.
Handle with care and do
not let children use it: danger of
fire or burns.
fig. 51
P4Q00057
Do not put scraps of pa-
per in the ashtray: they
could catch fire if they
come into contact with smoul-
dering cigarette stubs.
Page 44 of 154
43GETTING TO KNOW YOUR CAR
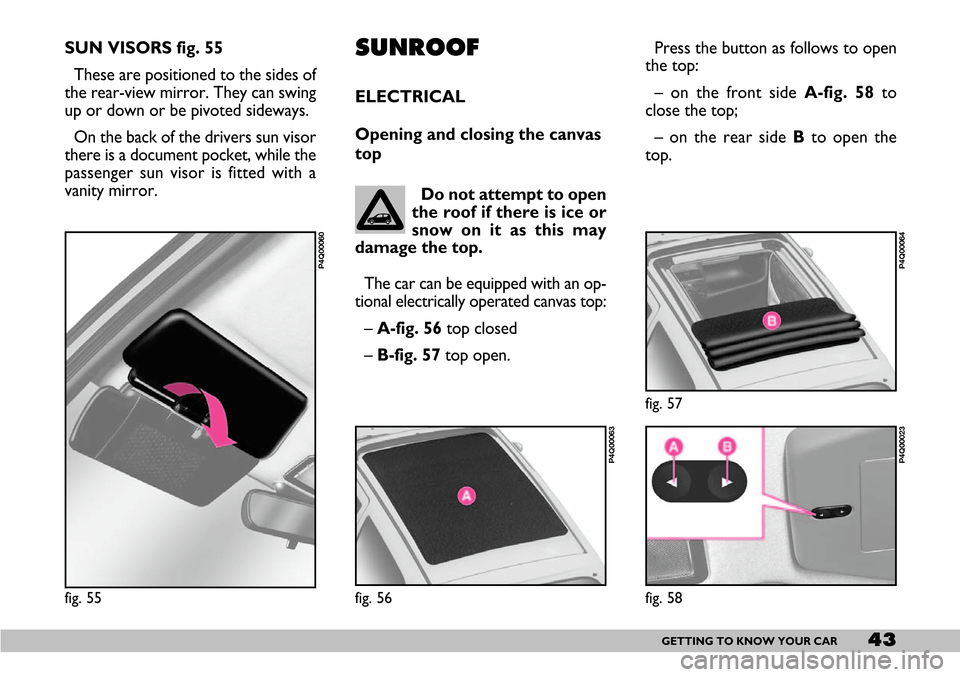
SUN VISORS fig. 55
These are positioned to the sides of
the rear-view mirror. They can swing
up or down or be pivoted sideways.
On the back of the drivers sun visor
there is a document pocket, while the
passenger sun visor is fitted with a
vanity mirror.
fig. 55
P4Q00060
SUNROOF
ELECTRICAL
Opening and closing the canvas
top
Do not attempt to open
the roof if there is ice or
snow on it as this may
damage the top.
The car can be equipped with an op-
tional electrically operated canvas top:
– A-fig. 56 top closed
– B-fig. 57 top open.Press the button as follows to open
the top:
– on the front side A-fig. 58to
close the top;
– on the rear side Bto open the
top.
fig. 56
P4Q00063
fig. 57
P4Q00064
fig. 58
P4Q00023
Page 45 of 154
44GETTING TO KNOW YOUR CAR
The top will stop as soon as the but-
ton is released. Consequently, hold
button Apressed to open or close
the top completely.
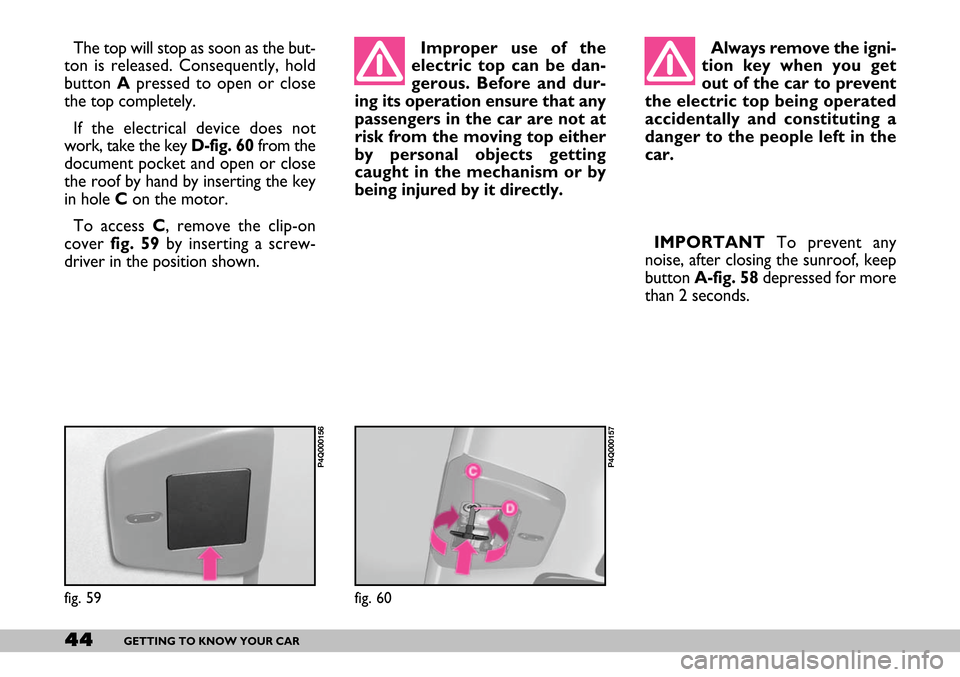
If the electrical device does not
work, take the key D-fig. 60 from the
document pocket and open or close
the roof by hand by inserting the key
in hole C on the motor.
To access C, remove the clip-on
cover fig. 59by inserting a screw-
driver in the position shown.Improper use of the
electric top can be dan-
gerous. Before and dur-
ing its operation ensure that any
passengers in the car are not at
risk from the moving top either
by personal objects getting
caught in the mechanism or by
being injured by it directly.
fig. 59
P4Q000156
Always remove the igni-
tion key when you get
out of the car to prevent
the electric top being operated
accidentally and constituting a
danger to the people left in the
car.
fig. 60
P4Q000157
IMPORTANTTo prevent any
noise, after closing the sunroof, keep
button A-fig. 58depressed for more
than 2 seconds.
Page 46 of 154
45GETTING TO KNOW YOUR CAR
DOORS
LOCKING - UNLOCKING
Before opening a door,
make sure this can be
done in safety.
From the outside
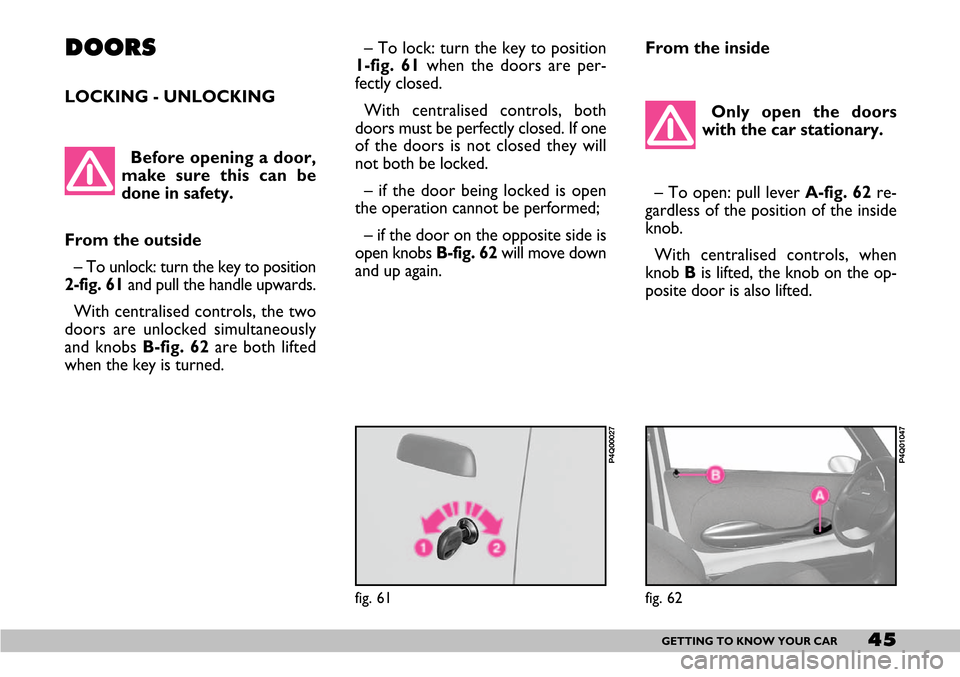
– To unlock: turn the key to position
2-fig. 61and pull the handle upwards.
With centralised controls, the two
doors are unlocked simultaneously
and knobs B-fig. 62 are both lifted
when the key is turned.
– To lock: turn the key to position
1-fig. 61when the doors are per-
fectly closed.
With centralised controls, both
doors must be perfectly closed. If one
of the doors is not closed they will
not both be locked.
– if the door being locked is open
the operation cannot be performed;
– if the door on the opposite side is
open knobs B-fig. 62 will move down
and up again.From the inside
Only open the doors
with the car stationary.
– To open: pull lever A-fig. 62re-
gardless of the position of the inside
knob.
With centralised controls, when
knob B is lifted, the knob on the op-
posite door is also lifted.
fig. 61
P4Q00027
fig. 62
P4Q01047
Page 47 of 154
46GETTING TO KNOW YOUR CAR
ELECTRIC WINDOWS
The electric window device will
work normally when the ignition key
is turned to MAR.
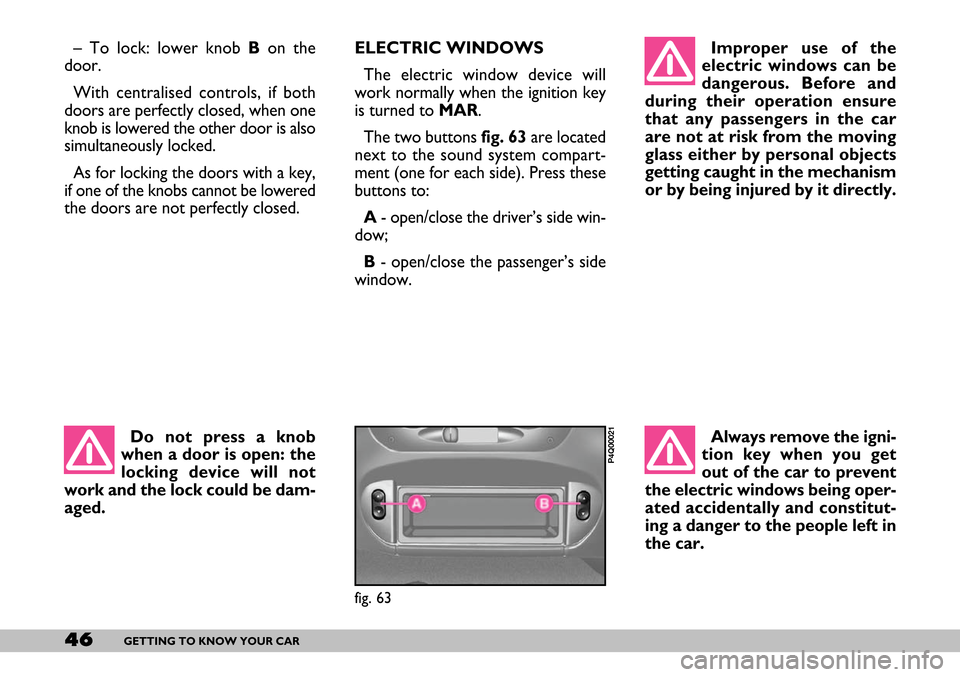
The two buttons fig. 63 are located
next to the sound system compart-
ment (one for each side). Press these
buttons to:
A - open/close the driver’s side win-
dow;
B - open/close the passenger’s side
window.Improper use of the
electric windows can be
dangerous. Before and
during their operation ensure
that any passengers in the car
are not at risk from the moving
glass either by personal objects
getting caught in the mechanism
or by being injured by it directly.
fig. 63
P4Q00021
Always remove the igni-
tion key when you get
out of the car to prevent
the electric windows being oper-
ated accidentally and constitut-
ing a danger to the people left in
the car.
– To lock: lower knob B on the
door.
With centralised controls, if both
doors are perfectly closed, when one
knob is lowered the other door is also
simultaneously locked.
As for locking the doors with a key,
if one of the knobs cannot be lowered
the doors are not perfectly closed.
Do not press a knob
when a door is open: the
locking device will not
work and the lock could be dam-
aged.
Page 48 of 154
47GETTING TO KNOW YOUR CAR
BOOT
OPENING/CLOSING
THE TAILGATE
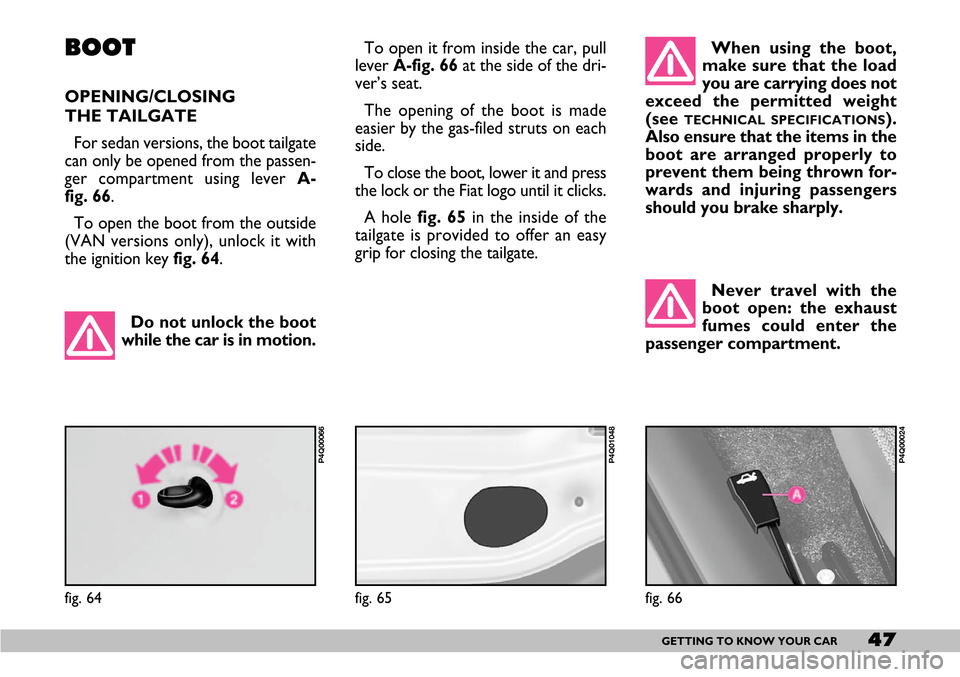
For sedan versions, the boot tailgate
can only be opened from the passen-
ger compartment using lever A-
fig. 66.
To open the boot from the outside
(VAN versions only), unlock it with
the ignition key fig. 64.
fig. 64
P4Q00066
Do not unlock the boot
while the car is in motion.
To open it from inside the car, pull
lever A-fig. 66at the side of the dri-
ver’s seat.
The opening of the boot is made
easier by the gas-filed struts on each
side.
To close the boot, lower it and press
the lock or the Fiat logo until it clicks.
A hole fig. 65in the inside of the
tailgate is provided to offer an easy
grip for closing the tailgate. When using the boot,
make sure that the load
you are carrying does not
exceed the permitted weight
(see
TECHNICAL SPECIFICATIONS).
Also ensure that the items in the
boot are arranged properly to
prevent them being thrown for-
wards and injuring passengers
should you brake sharply.
Never travel with the
boot open: the exhaust
fumes could enter the
passenger compartment.
fig. 65
P4Q01048
fig. 66
P4Q00024
Page 49 of 154
48GETTING TO KNOW YOUR CAR
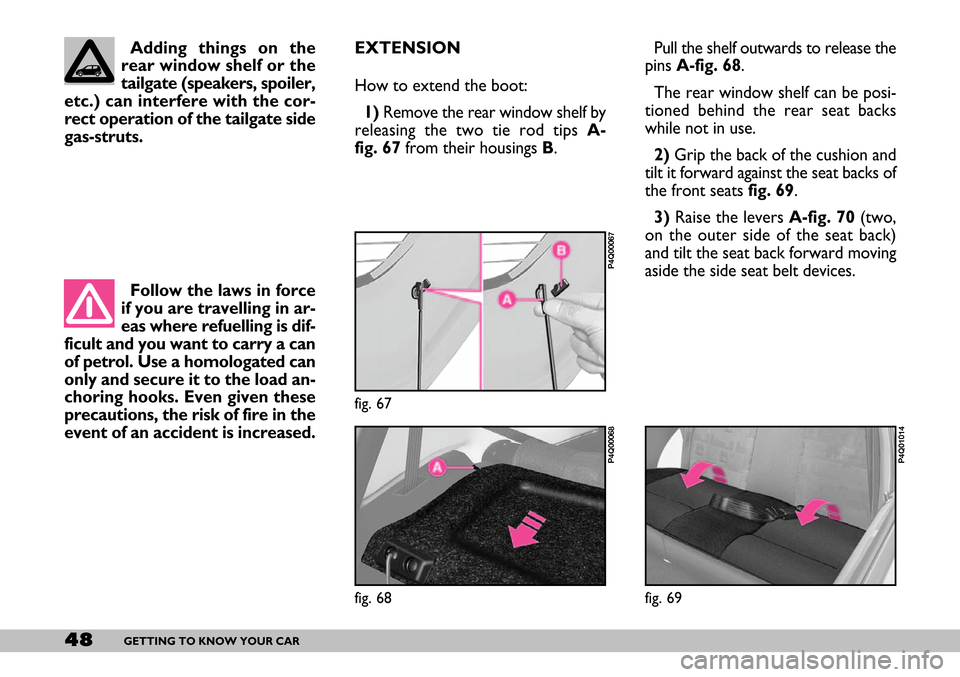
EXTENSION
How to extend the boot:
1)Remove the rear window shelf by
releasing the two tie rod tips A-
fig. 67 from their housings B. Pull the shelf outwards to release the
pins A-fig. 68.
The rear window shelf can be posi-
tioned behind the rear seat backs
while not in use.
2)Grip the back of the cushion and
tilt it forward against the seat backs of
the front seats fig. 69.
3)Raise the levers A-fig. 70(two,
on the outer side of the seat back)
and tilt the seat back forward moving
aside the side seat belt devices.
fig. 68
P4Q00068
fig. 67
P4Q00067
fig. 69
P4Q01014
Adding things on the
rear window shelf or the
tailgate (speakers, spoiler,
etc.) can interfere with the cor-
rect operation of the tailgate side
gas-struts.
Follow the laws in force
if you are travelling in ar-
eas where refuelling is dif-
ficult and you want to carry a can
of petrol. Use a homologated can
only and secure it to the load an-
choring hooks. Even given these
precautions, the risk of fire in the
event of an accident is increased.
Page 50 of 154
49GETTING TO KNOW YOUR CAR
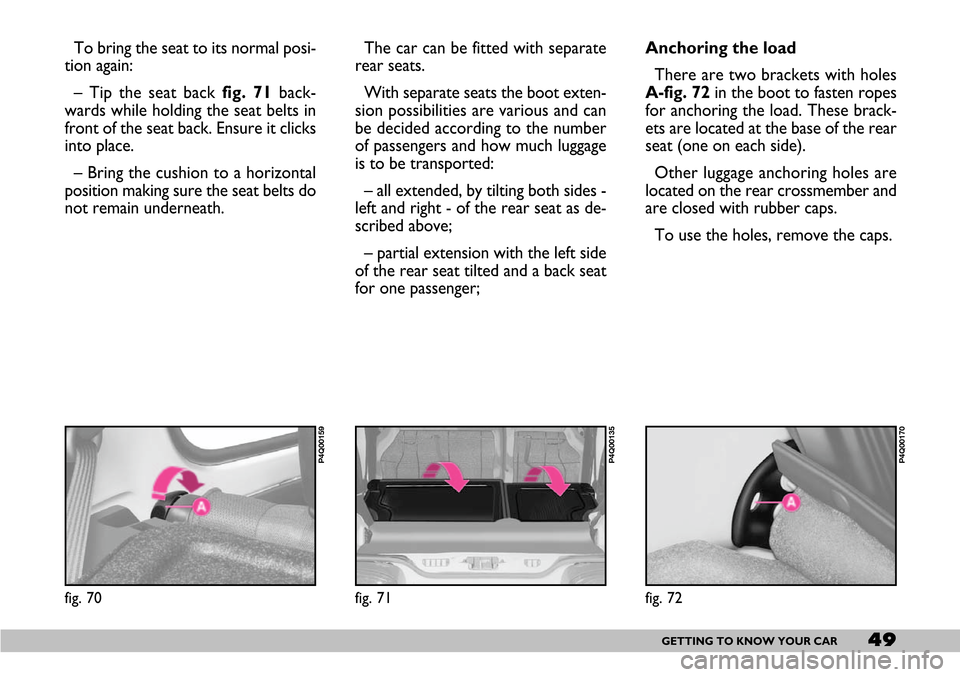
To bring the seat to its normal posi-
tion again:
– Tip the seat back fig. 71back-
wards while holding the seat belts in
front of the seat back. Ensure it clicks
into place.
– Bring the cushion to a horizontal
position making sure the seat belts do
not remain underneath.
fig. 70
P4Q00159
The car can be fitted with separate
rear seats.
With separate seats the boot exten-
sion possibilities are various and can
be decided according to the number
of passengers and how much luggage
is to be transported:
– all extended, by tilting both sides -
left and right - of the rear seat as de-
scribed above;
– partial extension with the left side
of the rear seat tilted and a back seat
for one passenger;Anchoring the load
There are two brackets with holes
A-fig. 72 in the boot to fasten ropes
for anchoring the load. These brack-
ets are located at the base of the rear
seat (one on each side).
Other luggage anchoring holes are
located on the rear crossmember and
are closed with rubber caps.
To use the holes, remove the caps.
fig. 71
P4Q00135
fig. 72
P4Q00170