ignition FIAT UNO 1983 Service Repair Manual
[x] Cancel search | Manufacturer: FIAT, Model Year: 1983, Model line: UNO, Model: FIAT UNO 1983Pages: 303, PDF Size: 10.36 MB
Page 3 of 303
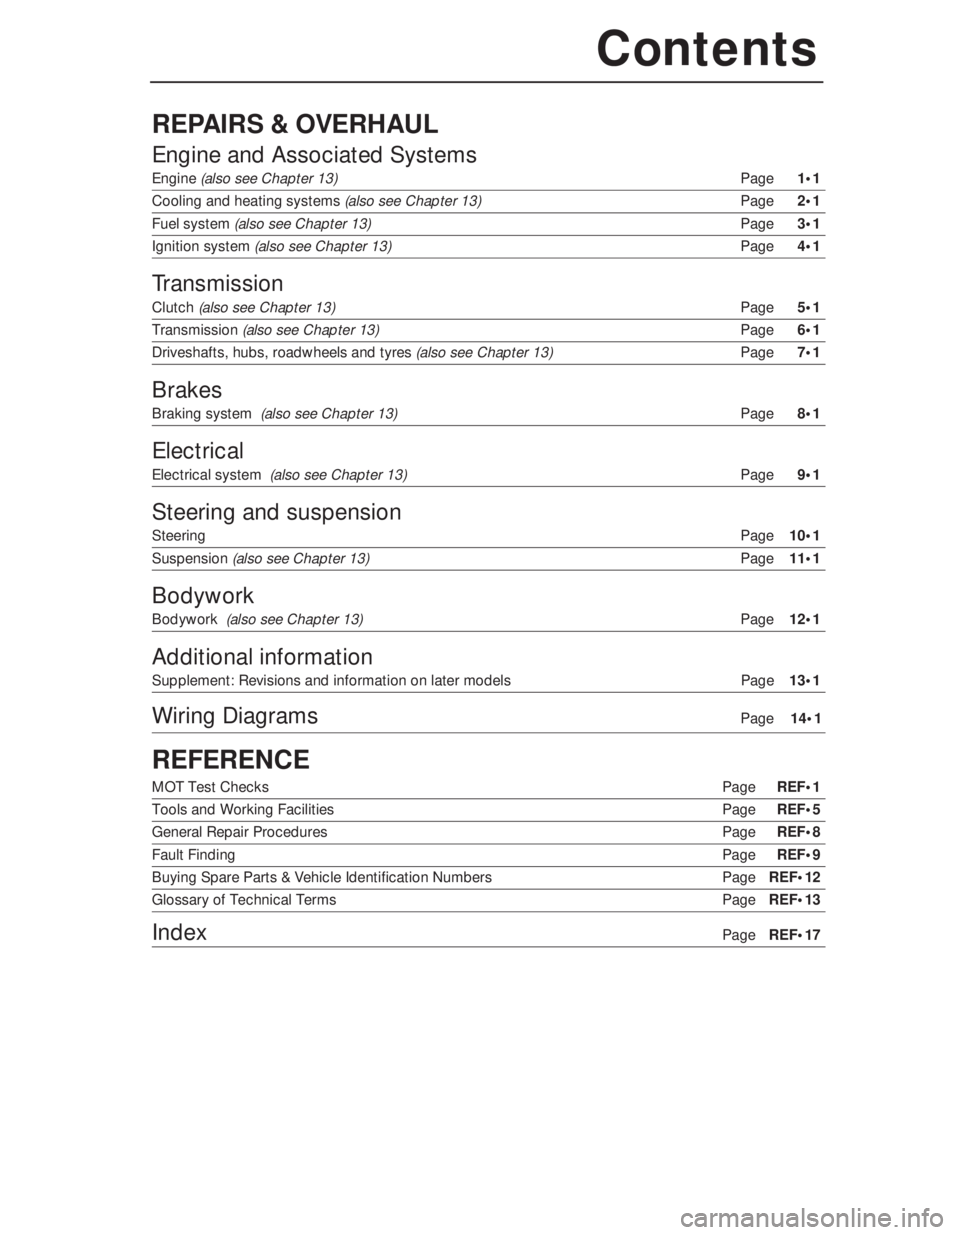
REPAIRS & OVERHAUL
Engine and Associated Systems
Engine (also see Chapter 13)Page 1•1
Cooling and heating systems (also see Chapter 13)Page2•1
Fuel system (also see Chapter 13)Page 3•1
Ignition system (also see Chapter 13)Page4•1
Transmission
Clutch (also see Chapter 13)Page5•1
Transmission (also see Chapter 13)Page6•1
Driveshafts, hubs, roadwheels and tyres (also see Chapter 13)Page7•1
Brakes
Braking system(also see Chapter 13)Page 8•1
Electrical
Electrical system(also see Chapter 13)Page 9•1
Steering and suspension
SteeringPage 10•1
Suspension (also see Chapter 13)Page 11•1
Bodywork
Bodywork (also see Chapter 13)Page 12•1
Additional information
Supplement: Revisions and information on later models Page 13•1
Wiring DiagramsPage 14•1
REFERENCE
MOT Test Checks PageREF•1
Tools and Working Facilities Page REF•5
General Repair Procedures Page REF•8
Fault FindingPage REF•9
Buying Spare Parts & Vehicle Identification Numbers PageREF•12
Glossary of Technical Terms PageREF•13
IndexPage REF•17
Contents
Page 5 of 303
Safety First!0•5
Working on your car can be dangerous.
This page shows just some of the potential
risks and hazards, with the aim of creating a
safety-conscious attitude.
General hazards
Scalding
• Don’t remove the radiator or expansion
tank cap while the engine is hot.
• Engine oil, automatic transmission fluid or
power steering fluid may also be dangerously
hot if the engine has recently been running.
Burning
• Beware of burns from the exhaust system
and from any part of the engine. Brake discs
and drums can also be extremely hot
immediately after use.
Crushing
• When working under or near
a raised vehicle,
always
supplement the
jack with axle
stands, or use
drive-on
ramps.
Never
venture
under a car which
is only supported by a jack.
• Take care if loosening or tightening high-
torque nuts when the vehicle is on stands.
Initial loosening and final tightening should
be done with the wheels on the ground.
Fire
• Fuel is highly flammable; fuel vapour is
explosive.
• Don’t let fuel spill onto a hot engine.
• Do not smoke or allow naked lights
(including pilot lights) anywhere near a
vehicle being worked on. Also beware of
creating sparks
(electrically or by use of tools).
• Fuel vapour is heavier than air, so don’t
work on the fuel system with the vehicle over
an inspection pit.
• Another cause of fire is an electrical
overload or short-circuit. Take care when
repairing or modifying the vehicle wiring.
• Keep a fire extinguisher handy, of a type
suitable for use on fuel and electrical fires.
Electric shock
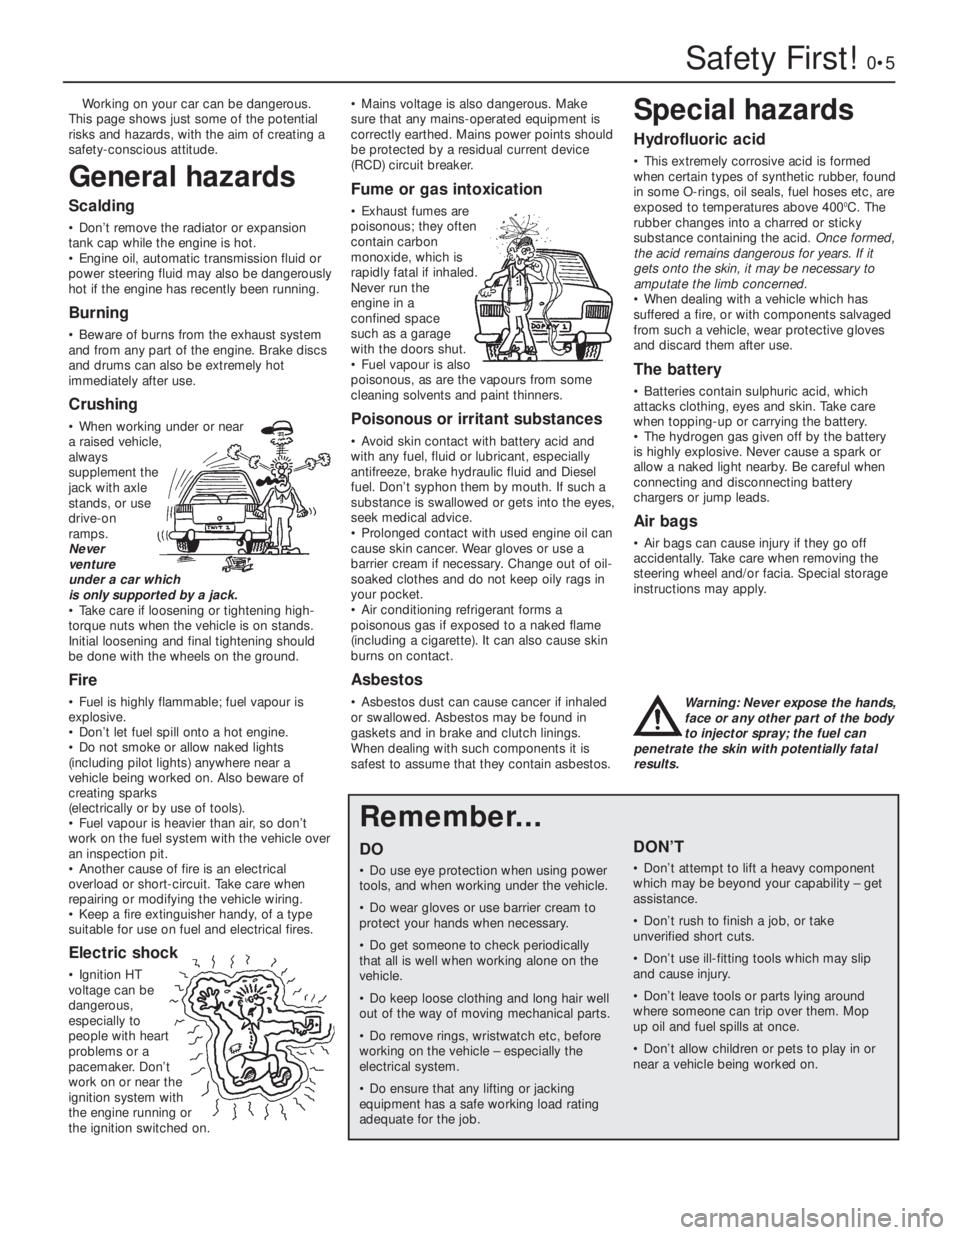
• Ignition HT
voltage can be
dangerous,
especially to
people with heart
problems or a
pacemaker. Don’t
work on or near the
ignition system with
the engine running or
the ignition switched on.• Mains voltage is also dangerous. Make
sure that any mains-operated equipment is
correctly earthed. Mains power points should
be protected by a residual current device
(RCD) circuit breaker.
Fume or gas intoxication
• Exhaust fumes are
poisonous; they often
contain carbon
monoxide, which is
rapidly fatal if inhaled.
Never run the
engine in a
confined space
such as a garage
with the doors shut.
• Fuel vapour is also
poisonous, as are the vapours from some
cleaning solvents and paint thinners.
Poisonous or irritant substances
• Avoid skin contact with battery acid and
with any fuel, fluid or lubricant, especially
antifreeze, brake hydraulic fluid and Diesel
fuel. Don’t syphon them by mouth. If such a
substance is swallowed or gets into the eyes,
seek medical advice.
• Prolonged contact with used engine oil can
cause skin cancer. Wear gloves or use a
barrier cream if necessary. Change out of oil-
soaked clothes and do not keep oily rags in
your pocket.
• Air conditioning refrigerant forms a
poisonous gas if exposed to a naked flame
(including a cigarette). It can also cause skin
burns on contact.
Asbestos
• Asbestos dust can cause cancer if inhaled
or swallowed. Asbestos may be found in
gaskets and in brake and clutch linings.
When dealing with such components it is
safest to assume that they contain asbestos.
Special hazards
Hydrofluoric acid
• This extremely corrosive acid is formed
when certain types of synthetic rubber, found
in some O-rings, oil seals, fuel hoses etc, are
exposed to temperatures above 400
0C. The
rubber changes into a charred or sticky
substance containing the acid. Once formed,
the acid remains dangerous for years. If it
gets onto the skin, it may be necessary to
amputate the limb concerned.
• When dealing with a vehicle which has
suffered a fire, or with components salvaged
from such a vehicle, wear protective gloves
and discard them after use.
The battery
• Batteries contain sulphuric acid, which
attacks clothing, eyes and skin. Take care
when topping-up or carrying the battery.
• The hydrogen gas given off by the battery
is highly explosive. Never cause a spark or
allow a naked light nearby. Be careful when
connecting and disconnecting battery
chargers or jump leads.
Air bags
• Air bags can cause injury if they go off
accidentally. Take care when removing the
steering wheel and/or facia. Special storage
instructions may apply.
Diesel injection equipment
• Diesel injection pumps supply fuel at very
high pressure. Take care when working on
the fuel injectors and fuel pipes.
Warning: Never expose the hands,
face or any other part of the body
to injector spray; the fuel can
penetrate the skin with potentially fatal
results.
Remember...
DO
• Do use eye protection when using power
tools, and when working under the vehicle.
• Do wear gloves or use barrier cream to
protect your hands when necessary.
• Do get someone to check periodically
that all is well when working alone on the
vehicle.
• Do keep loose clothing and long hair well
out of the way of moving mechanical parts.
• Do remove rings, wristwatch etc, before
working on the vehicle – especially the
electrical system.
• Do ensure that any lifting or jacking
equipment has a safe working load rating
adequate for the job.
A few tips
DON’T
• Don’t attempt to lift a heavy component
which may be beyond your capability – get
assistance.
• Don’t rush to finish a job, or take
unverified short cuts.
• Don’t use ill-fitting tools which may slip
and cause injury.
• Don’t leave tools or parts lying around
where someone can trip over them. Mop
up oil and fuel spills at once.
• Don’t allow children or pets to play in or
near a vehicle being worked on.
Page 7 of 303
Roadside Repairs0•7
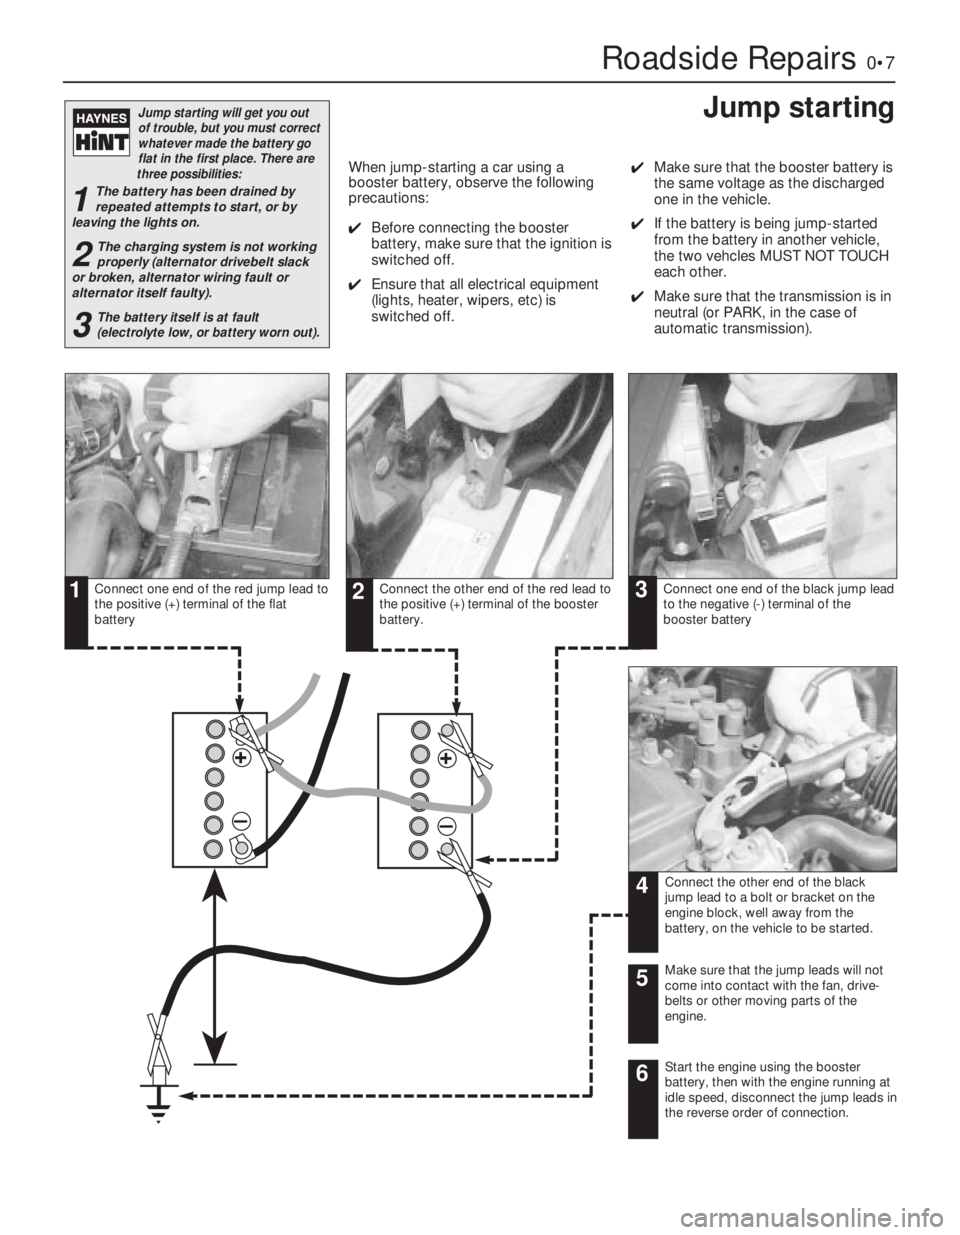
Connect one end of the red jump lead to
the positive (+) terminal of the flat
batteryConnect the other end of the red lead to
the positive (+) terminal of the booster
battery.Connect one end of the black jump lead
to the negative (-) terminal of the
booster battery
Connect the other end of the black
jump lead to a bolt or bracket on the
engine block, well away from the
battery, on the vehicle to be started.
–
+
+
–
123
4
Make sure that the jump leads will not
come into contact with the fan, drive-
belts or other moving parts of the
engine.5
Start the engine using the booster
battery, then with the engine running at
idle speed, disconnect the jump leads in
the reverse order of connection.6
Jump starting will get you out
of trouble, but you must correct
whatever made the battery go
flat in the first place. There are
three possibilities:
1The battery has been drained by
repeated attempts to start, or by
leaving the lights on.
2The charging system is not working
properly (alternator drivebelt slack
or broken, alternator wiring fault or
alternator itself faulty).
3The battery itself is at fault
(electrolyte low, or battery worn out).
Booster battery (jump) starting
When jump-starting a car using a
booster battery, observe the following
precautions:
4Before connecting the booster
battery, make sure that the ignition is
switched off.
4Ensure that all electrical equipment
(lights, heater, wipers, etc) is
switched off.4Make sure that the booster battery is
the same voltage as the discharged
one in the vehicle.
4If the battery is being jump-started
from the battery in another vehicle,
the two vehcles MUST NOT TOUCH
each other.
4Make sure that the transmission is in
neutral (or PARK, in the case of
automatic transmission).
Jump starting
Page 8 of 303
0•8Roadside Repairs
To avoid repetition, the procedure for
raising the vehicle, in order to carry out work
under it, is not included before each relevant
operation described in this Manual.
It is to be preferred, and it is certainly
recommended, that the vehicle is positioned
over an inspection pit or raised on a lift. Where
these facilities are not available, use ramps or
jack up the vehicle strictly in accordance with
the following guide. Once the vehicle is raised,
supplement the jack with axle stands.
Jacking
The jack supplied with the car should only
be used to change a wheel. Do not use this
jack when overhaul or repair work is being
carried out; employ a hydraulic or screw jack
and supplement it with axle stands.
Jacking points are located under the sills
for use with the jack supplied.To raise the front end with a garage jack,
locate the jack under the transmission lower
mounting, just below and slightly to the rear of
the transmission oil drain plug. Protect the
mounting by placing a block of wood between
the jack head and the mounting.
To raise the rear of the car, the jack should
be placed under the spare wheel housing as
far to the rear as possible. Place a wooden
bearer between the jack head and the
housing.
Towing
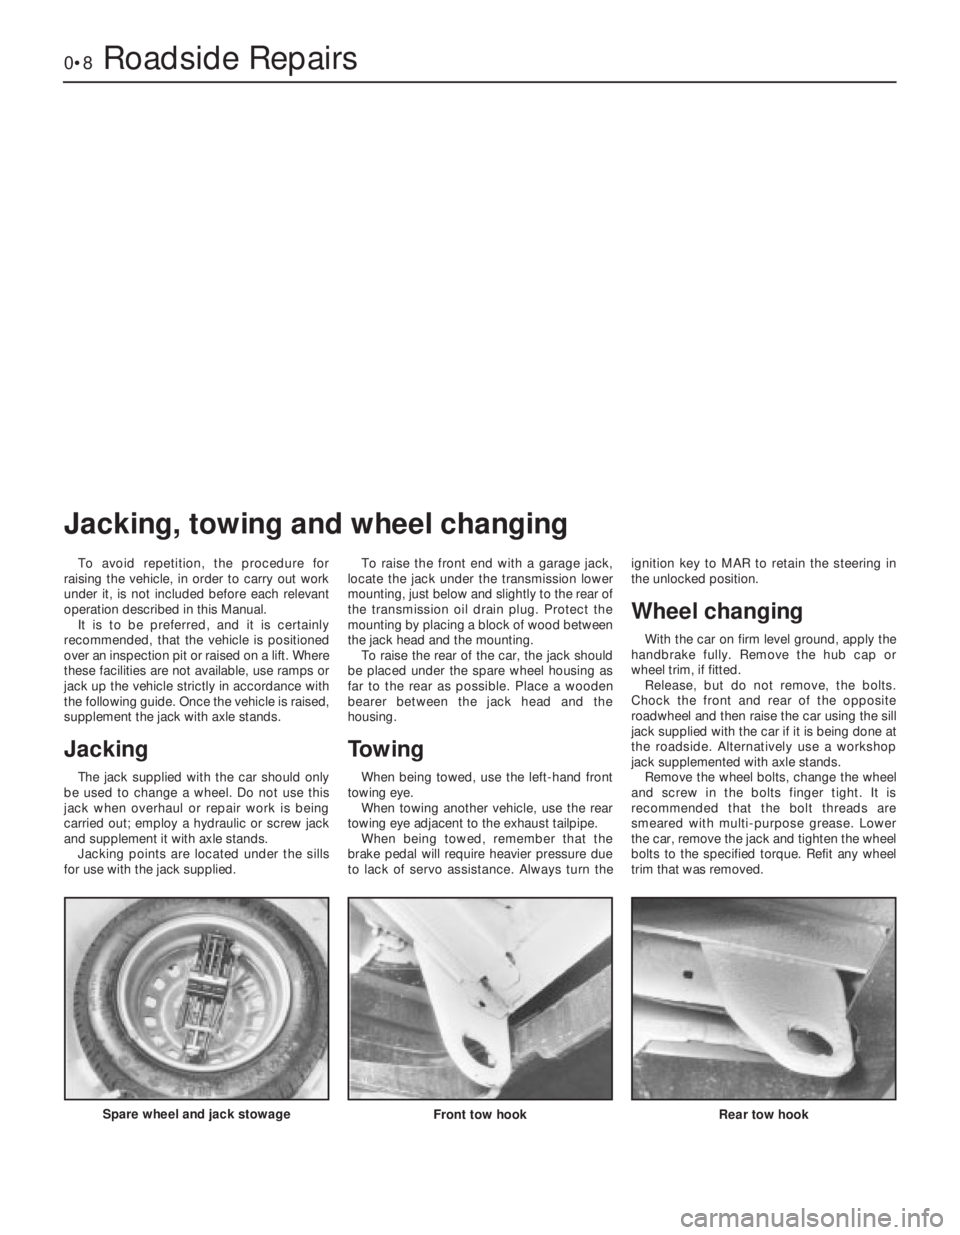
When being towed, use the left-hand front
towing eye.
When towing another vehicle, use the rear
towing eye adjacent to the exhaust tailpipe.
When being towed, remember that the
brake pedal will require heavier pressure due
to lack of servo assistance. Always turn theignition key to MAR to retain the steering in
the unlocked position.
Wheel changing
With the car on firm level ground, apply the
handbrake fully. Remove the hub cap or
wheel trim, if fitted.
Release, but do not remove, the bolts.
Chock the front and rear of the opposite
roadwheel and then raise the car using the sill
jack supplied with the car if it is being done at
the roadside. Alternatively use a workshop
jack supplemented with axle stands.
Remove the wheel bolts, change the wheel
and screw in the bolts finger tight. It is
recommended that the bolt threads are
smeared with multi-purpose grease. Lower
the car, remove the jack and tighten the wheel
bolts to the specified torque. Refit any wheel
trim that was removed.
Spare wheel and jack stowage
Front tow hook Rear tow hook
Jacking, towing and wheel changing
Page 10 of 303
0•10Routine maintenance
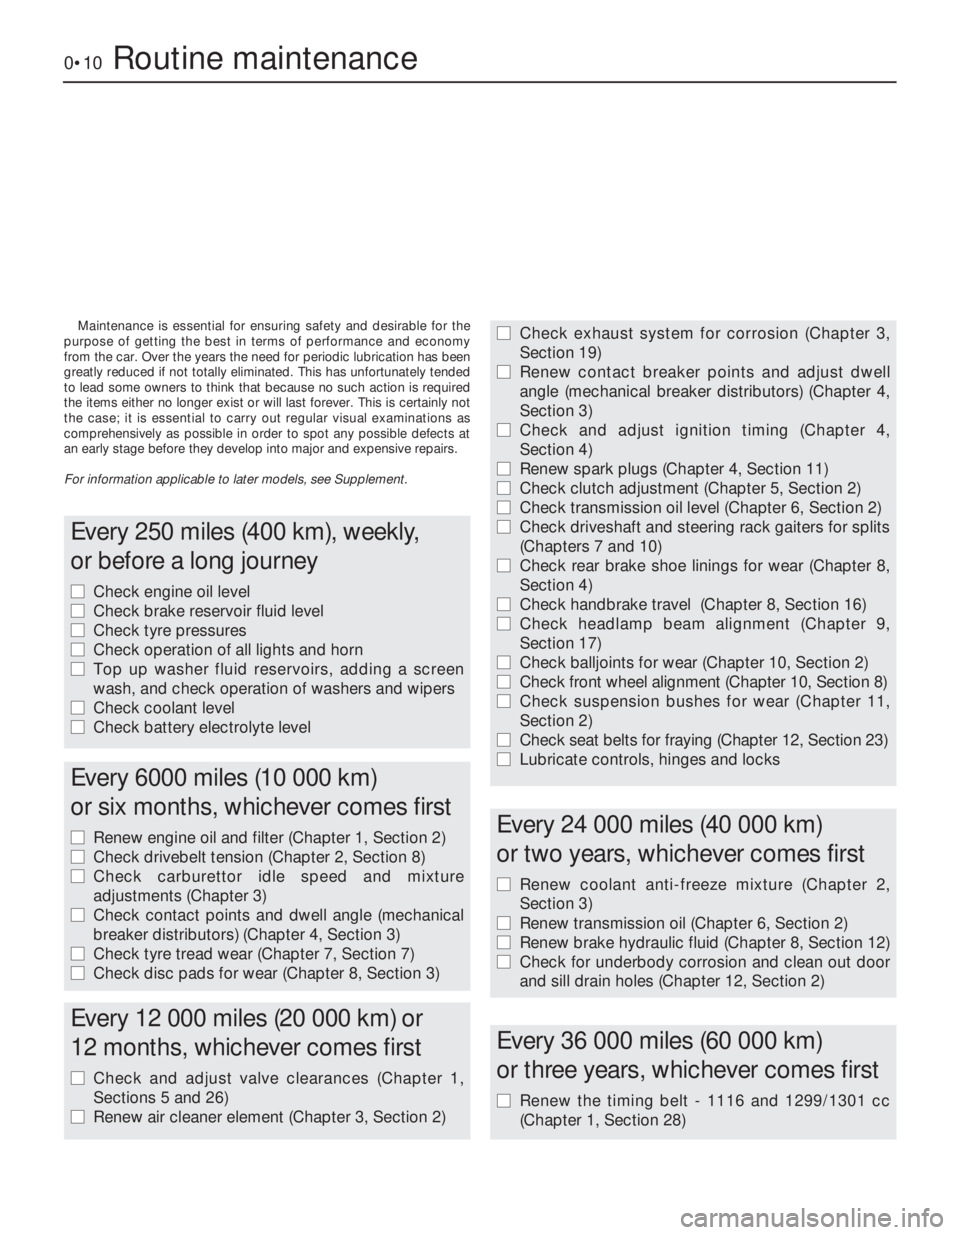
Maintenance is essential for ensuring safety and desirable for the
purpose of getting the best in terms of performance and economy
from the car. Over the years the need for periodic lubrication has been
greatly reduced if not totally eliminated. This has unfortunately tended
to lead some owners to think that because no such action is required
the items either no longer exist or will last forever. This is certainly not
the case; it is essential to carry out regular visual examinations as
comprehensively as possible in order to spot any possible defects at
an early stage before they develop into major and expensive repairs.
For information applicable to later models, see Supplement.
Every 250 miles (400 km), weekly,
or before a long journey
m mCheck engine oil level
m mCheck brake reservoir fluid level
m mCheck tyre pressures
m mCheck operation of all lights and horn
m mTop up washer fluid reservoirs, adding a screen
wash, and check operation of washers and wipers
m mCheck coolant level
m mCheck battery electrolyte level
Every 6000 miles (10 000 km)
or six months, whichever comes first
m mRenew engine oil and filter (Chapter 1, Section 2)
m mCheck drivebelt tension (Chapter 2, Section 8)
m mCheck carburettor idle speed and mixture
adjustments (Chapter 3)
m mCheck contact points and dwell angle (mechanical
breaker distributors) (Chapter 4, Section 3)
m mCheck tyre tread wear (Chapter 7, Section 7)
m mCheck disc pads for wear (Chapter 8, Section 3)
Every 36 000 miles (60 000 km)
or three years, whichever comes first
m mRenew the timing belt - 1116 and 1299/1301 cc
(Chapter 1, Section 28)
m mCheck exhaust system for corrosion (Chapter 3,
Section 19)
m mRenew contact breaker points and adjust dwell
angle (mechanical breaker distributors) (Chapter 4,
Section 3)
m mCheck and adjust ignition timing (Chapter 4,
Section 4)
m mRenew spark plugs (Chapter 4, Section 11)
m mCheck clutch adjustment (Chapter 5, Section 2)
m mCheck transmission oil level (Chapter 6, Section 2)
m mCheck driveshaft and steering rack gaiters for splits
(Chapters 7 and 10)
m mCheck rear brake shoe linings for wear (Chapter 8,
Section 4)
m mCheck handbrake travel (Chapter 8, Section 16)
m mCheck headlamp beam alignment (Chapter 9,
Section 17)
m mCheck balljoints for wear (Chapter 10, Section 2)
m mCheck front wheel alignment (Chapter 10, Section 8)
m mCheck suspension bushes for wear (Chapter 11,
Section 2)
m mCheck seat belts for fraying (Chapter 12, Section 23)
m mLubricate controls, hinges and locks
Every 24 000 miles (40 000 km)
or two years, whichever comes first
m mRenew coolant anti-freeze mixture (Chapter 2,
Section 3)
m mRenew transmission oil (Chapter 6, Section 2)
m mRenew brake hydraulic fluid (Chapter 8, Section 12)
m mCheck for underbody corrosion and clean out door
and sill drain holes (Chapter 12, Section 2)
Every 12 000 miles (20 000 km) or
12 months, whichever comes first
m mCheck and adjust valve clearances (Chapter 1,
Sections 5 and 26)
m mRenew air cleaner element (Chapter 3, Section 2)
Page 11 of 303
Routine maintenance0•11
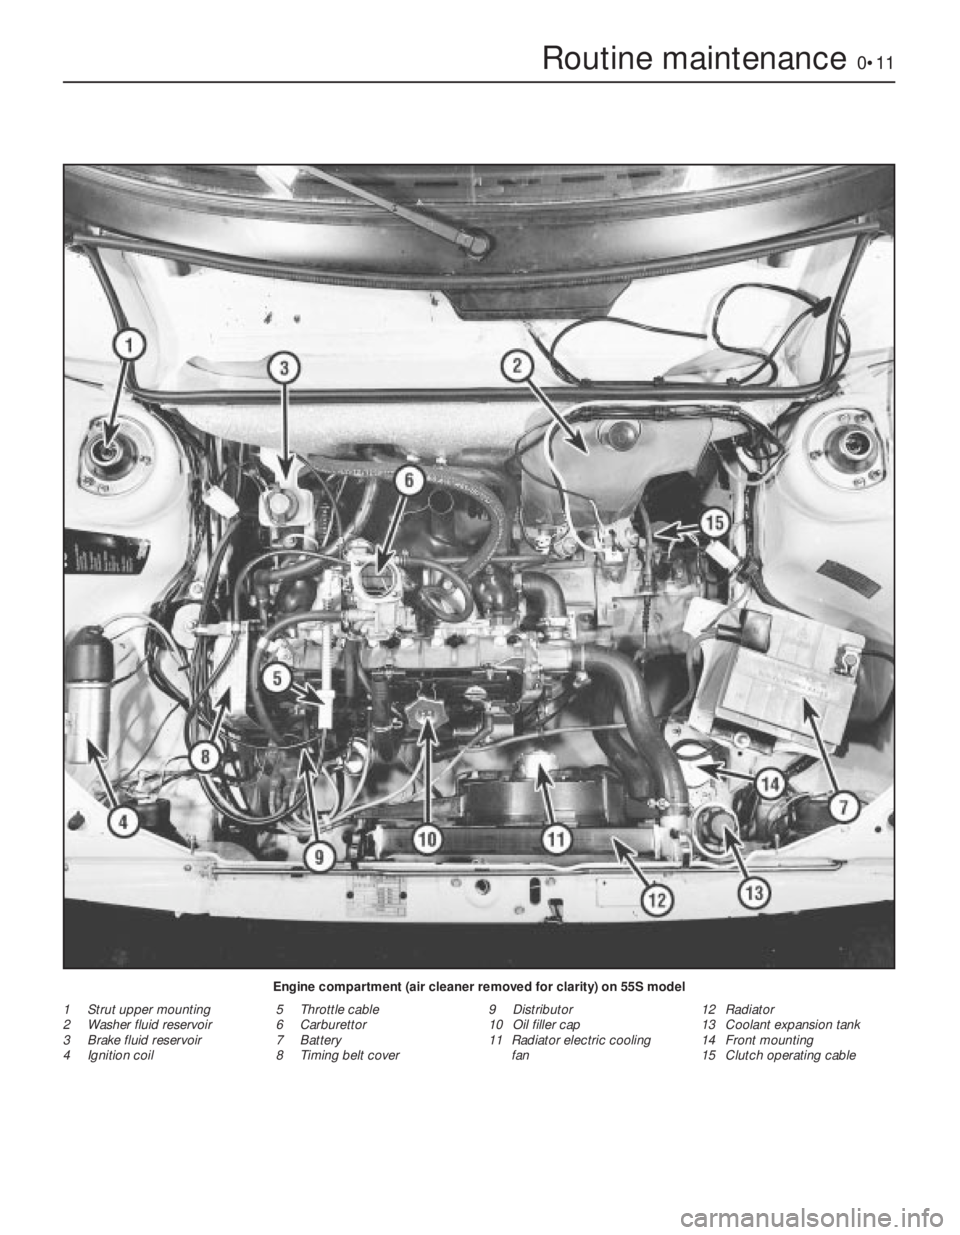
Engine compartment (air cleaner removed for clarity) on 55S model
1 Strut upper mounting
2 Washer fluid reservoir
3 Brake fluid reservoir
4 Ignition coil5 Throttle cable
6 Carburettor
7 Battery
8 Timing belt cover9 Distributor
10 Oil filler cap
11 Radiator electric cooling
fan12 Radiator
13 Coolant expansion tank
14 Front mounting
15 Clutch operating cable
Page 27 of 303
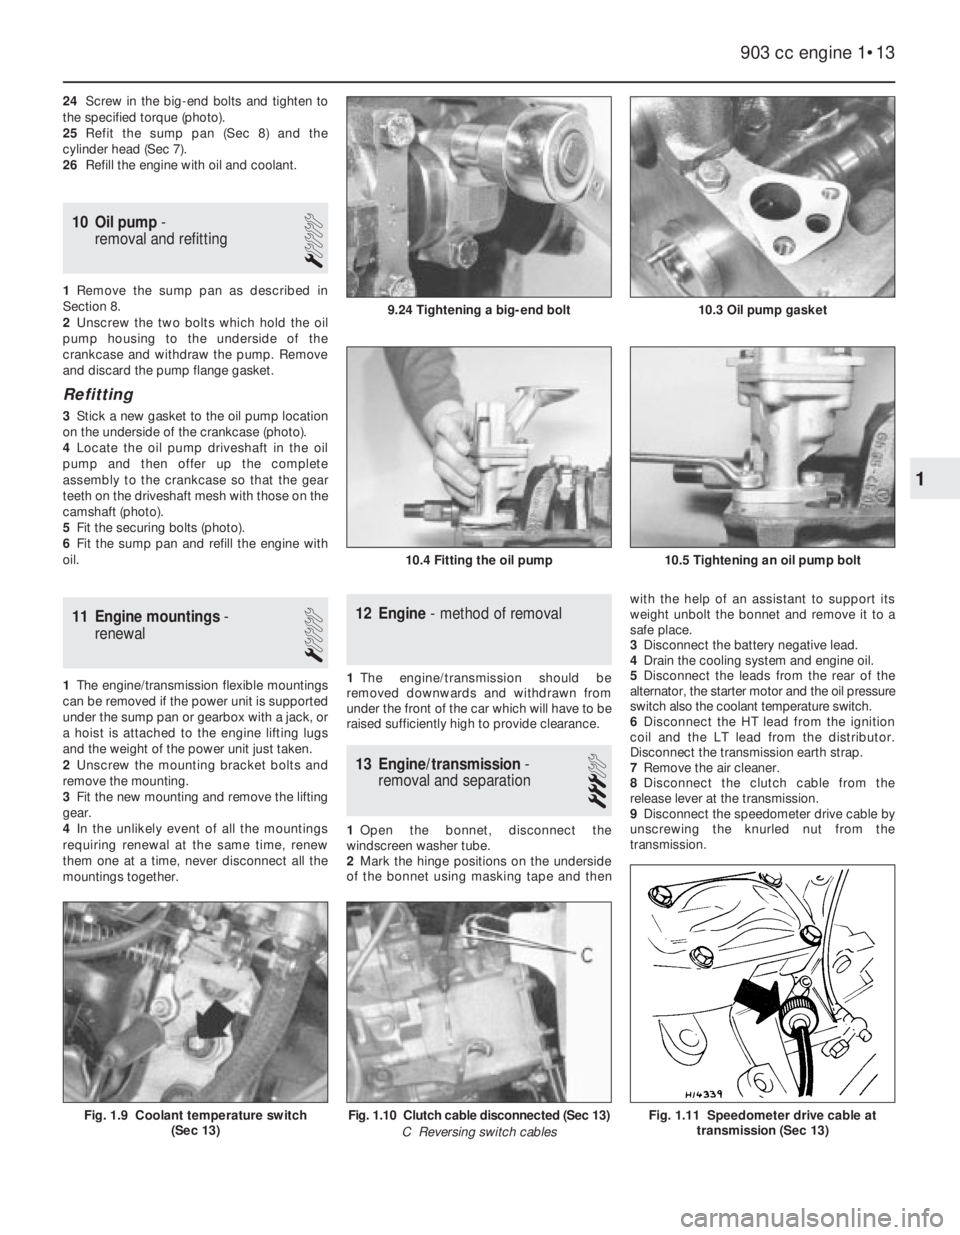
24Screw in the big-end bolts and tighten to
the specified torque (photo).
25Refit the sump pan (Sec 8) and the
cylinder head (Sec 7).
26Refill the engine with oil and coolant.
10 Oil pump-
removal and refitting
1
1Remove the sump pan as described in
Section 8.
2Unscrew the two bolts which hold the oil
pump housing to the underside of the
crankcase and withdraw the pump. Remove
and discard the pump flange gasket.
Refitting
3Stick a new gasket to the oil pump location
on the underside of the crankcase (photo).
4Locate the oil pump driveshaft in the oil
pump and then offer up the complete
assembly to the crankcase so that the gear
teeth on the driveshaft mesh with those on the
camshaft (photo).
5Fit the securing bolts (photo).
6Fit the sump pan and refill the engine with
oil.
11 Engine mountings-
renewal
1
1The engine/transmission flexible mountings
can be removed if the power unit is supported
under the sump pan or gearbox with a jack, or
a hoist is attached to the engine lifting lugs
and the weight of the power unit just taken.
2Unscrew the mounting bracket bolts and
remove the mounting.
3Fit the new mounting and remove the lifting
gear.
4In the unlikely event of all the mountings
requiring renewal at the same time, renew
them one at a time, never disconnect all the
mountings together.
12 Engine- method of removal
1The engine/transmission should be
removed downwards and withdrawn from
under the front of the car which will have to be
raised sufficiently high to provide clearance.
13 Engine/transmission-
removal and separation
3
1Open the bonnet, disconnect the
windscreen washer tube.
2Mark the hinge positions on the underside
of the bonnet using masking tape and thenwith the help of an assistant to support its
weight unbolt the bonnet and remove it to a
safe place.
3Disconnect the battery negative lead.
4Drain the cooling system and engine oil.
5Disconnect the leads from the rear of the
alternator, the starter motor and the oil pressure
switch also the coolant temperature switch.
6Disconnect the HT lead from the ignition
coil and the LT lead from the distributor.
Disconnect the transmission earth strap.
7Remove the air cleaner.
8Disconnect the clutch cable from the
release lever at the transmission.
9Disconnect the speedometer drive cable by
unscrewing the knurled nut from the
transmission.
903 cc engine 1•13
10.3 Oil pump gasket
10.4 Fitting the oil pump10.5 Tightening an oil pump bolt
9.24 Tightening a big-end bolt
Fig. 1.11 Speedometer drive cable at
transmission (Sec 13)Fig. 1.10 Clutch cable disconnected (Sec 13)
C Reversing switch cablesFig. 1.9 Coolant temperature switch
(Sec 13)
1
Page 41 of 303
2The big-end bearing shells can be renewed
without having to remove the cylinder head if
the caps are unbolted and the
piston/connecting rod pushed gently about
one inch up the bore (the crankpin being at its
lowest point). If these shells are worn,
however, the main bearing shells will almost
certainly be worn as well. In this case, the
engine should be removed for complete
overhaul including crankshaft removal.
3To remove the piston/connecting rods,
remove the cylinder head as described in
Section 29.
4Grip the oil pick-up pipe and twist or rock it
from its hole in the crankcase. It is an
interference fit in the hole.
5Unscrew the nuts from the big-end caps,
then remove the caps with their bearing
shells. The caps and their connecting rods are
numbered 1, 2, 3 and 4 from the timing cover
end of the engine. The numbers are adjacent
at the big-end cap joint and on the side of the
crankcase furthest from the auxiliary shaft.
6If the bearing shells are to be used again,
tape them to their respective big-end caps.
7Push each connecting rod/piston assembly
up the bore and out of the cylinder block.
There is one reservation; if a wear ridge has
developed at the top of the bores, remove this
by careful scraping before trying to remove
the piston/rod assemblies. The ridge will
otherwise prevent removal or break the piston
rings during the attempt.
8If the connecting rod bearing shells are to
be used again, tape the shells to their
respective rods.
9Dismantling the piston/connecting rod is
described in Section 18.
Refitting
10Fit the new shells into the connecting rod
and caps, ensuring the surfaces on which the
shells seat, are clean and dry.
11Check that the piston ring gaps are evenly
spaced at 120º intervals. Liberally oil the rings
and the cylinder bores.
12Fit a piston ring clamp to compress the
rings.
13Insert the piston/connecting rod into the
cylinder bore, checking that the rod assembly
is correct for that particular bore. The cap and
rod matching numbers must be furthest away
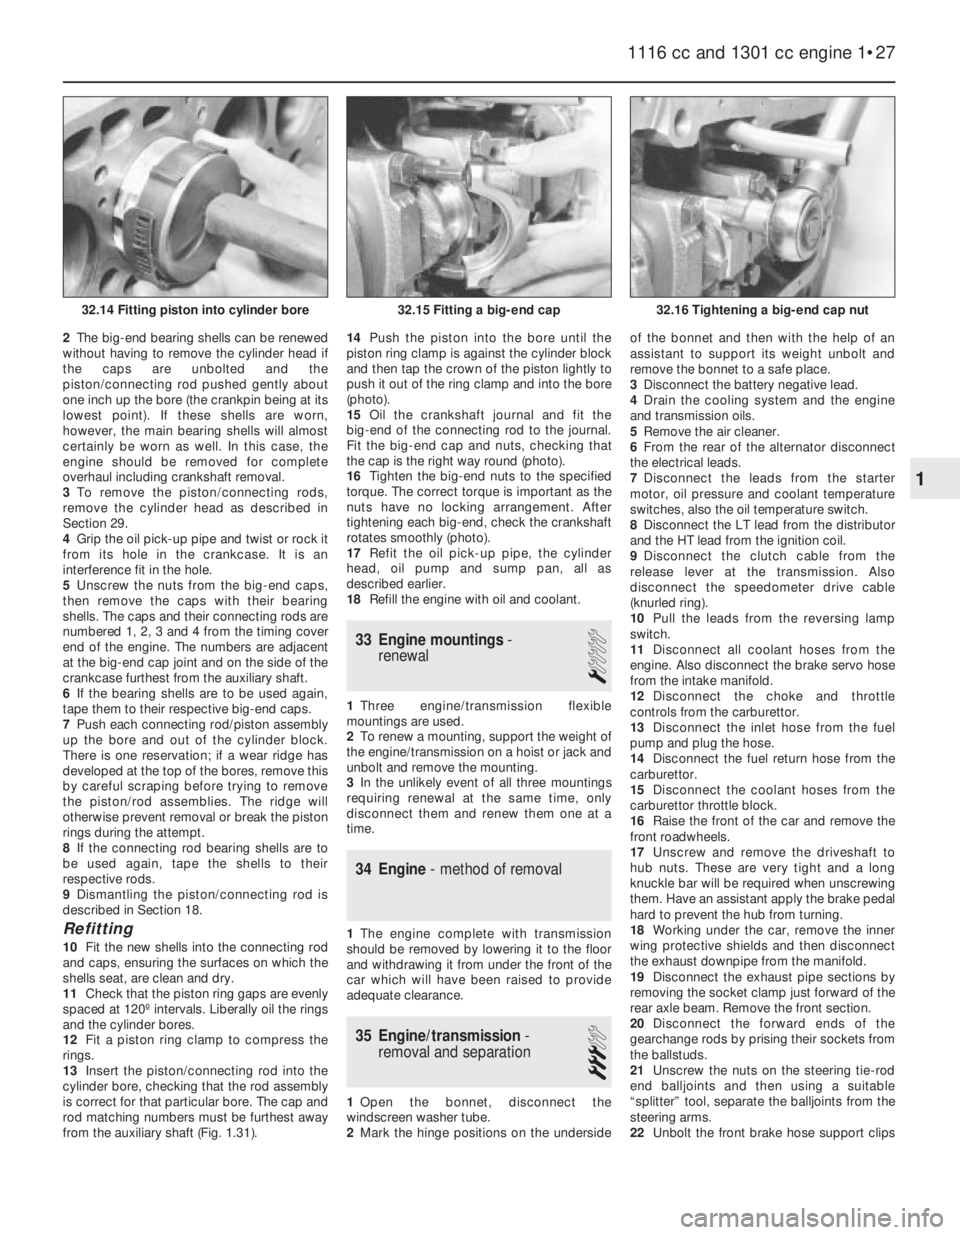
from the auxiliary shaft (Fig. 1.31).14Push the piston into the bore until the
piston ring clamp is against the cylinder block
and then tap the crown of the piston lightly to
push it out of the ring clamp and into the bore
(photo).
15Oil the crankshaft journal and fit the
big-end of the connecting rod to the journal.
Fit the big-end cap and nuts, checking that
the cap is the right way round (photo).
16Tighten the big-end nuts to the specified
torque. The correct torque is important as the
nuts have no locking arrangement. After
tightening each big-end, check the crankshaft
rotates smoothly (photo).
17Refit the oil pick-up pipe, the cylinder
head, oil pump and sump pan, all as
described earlier.
18Refill the engine with oil and coolant.
33 Engine mountings-
renewal
1
1Three engine/transmission flexible
mountings are used.
2To renew a mounting, support the weight of
the engine/transmission on a hoist or jack and
unbolt and remove the mounting.
3In the unlikely event of all three mountings
requiring renewal at the same time, only
disconnect them and renew them one at a
time.
34 Engine- method of removal
1The engine complete with transmission
should be removed by lowering it to the floor
and withdrawing it from under the front of the
car which will have been raised to provide
adequate clearance.
35 Engine/transmission-
removal and separation
3
1Open the bonnet, disconnect the
windscreen washer tube.
2Mark the hinge positions on the undersideof the bonnet and then with the help of an
assistant to support its weight unbolt and
remove the bonnet to a safe place.
3Disconnect the battery negative lead.
4Drain the cooling system and the engine
and transmission oils.
5Remove the air cleaner.
6From the rear of the alternator disconnect
the electrical leads.
7Disconnect the leads from the starter
motor, oil pressure and coolant temperature
switches, also the oil temperature switch.
8Disconnect the LT lead from the distributor
and the HT lead from the ignition coil.
9Disconnect the clutch cable from the
release lever at the transmission. Also
disconnect the speedometer drive cable
(knurled ring).
10Pull the leads from the reversing lamp
switch.
11Disconnect all coolant hoses from the
engine. Also disconnect the brake servo hose
from the intake manifold.
12Disconnect the choke and throttle
controls from the carburettor.
13Disconnect the inlet hose from the fuel
pump and plug the hose.
14Disconnect the fuel return hose from the
carburettor.
15Disconnect the coolant hoses from the
carburettor throttle block.
16Raise the front of the car and remove the
front roadwheels.
17Unscrew and remove the driveshaft to
hub nuts. These are very tight and a long
knuckle bar will be required when unscrewing
them. Have an assistant apply the brake pedal
hard to prevent the hub from turning.
18Working under the car, remove the inner
wing protective shields and then disconnect
the exhaust downpipe from the manifold.
19Disconnect the exhaust pipe sections by
removing the socket clamp just forward of the
rear axle beam. Remove the front section.
20Disconnect the forward ends of the
gearchange rods by prising their sockets from
the ballstuds.
21Unscrew the nuts on the steering tie-rod
end balljoints and then using a suitable
“splitter” tool, separate the balljoints from the
steering arms.
22Unbolt the front brake hose support clips
1116 cc and 1301 cc engine 1•27
32.16 Tightening a big-end cap nut32.15 Fitting a big-end cap32.14 Fitting piston into cylinder bore
1
Page 48 of 303
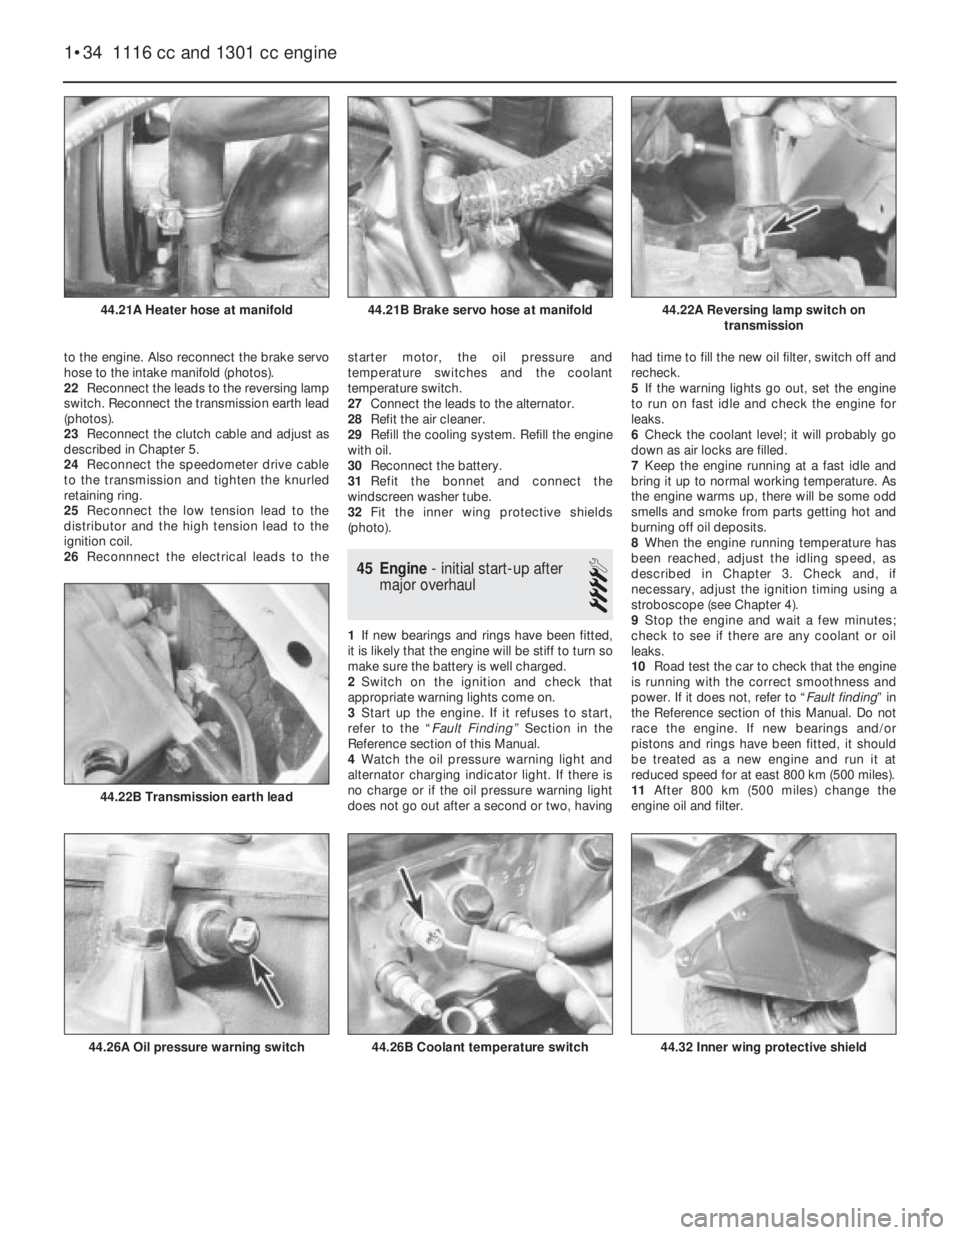
to the engine. Also reconnect the brake servo
hose to the intake manifold (photos).
22Reconnect the leads to the reversing lamp
switch. Reconnect the transmission earth lead
(photos).
23Reconnect the clutch cable and adjust as
described in Chapter 5.
24Reconnect the speedometer drive cable
to the transmission and tighten the knurled
retaining ring.
25Reconnect the low tension lead to the
distributor and the high tension lead to the
ignition coil.
26Reconnnect the electrical leads to thestarter motor, the oil pressure and
temperature switches and the coolant
temperature switch.
27Connect the leads to the alternator.
28Refit the air cleaner.
29Refill the cooling system. Refill the engine
with oil.
30Reconnect the battery.
31Refit the bonnet and connect the
windscreen washer tube.
32Fit the inner wing protective shields
(photo).
45 Engine- initial start-up after
major overhaul
4
1If new bearings and rings have been fitted,
it is likely that the engine will be stiff to turn so
make sure the battery is well charged.
2Switch on the ignition and check that
appropriate warning lights come on.
3Start up the engine. If it refuses to start,
refer to the “Fault Finding” Section in the
Reference section of this Manual.
4Watch the oil pressure warning light and
alternator charging indicator light. If there is
no charge or if the oil pressure warning light
does not go out after a second or two, havinghad time to fill the new oil filter, switch off and
recheck.
5If the warning lights go out, set the engine
to run on fast idle and check the engine for
leaks.
6Check the coolant level; it will probably go
down as air locks are filled.
7Keep the engine running at a fast idle and
bring it up to normal working temperature. As
the engine warms up, there will be some odd
smells and smoke from parts getting hot and
burning off oil deposits.
8When the engine running temperature has
been reached, adjust the idling speed, as
described in Chapter 3. Check and, if
necessary, adjust the ignition timing using a
stroboscope (see Chapter 4).
9Stop the engine and wait a few minutes;
check to see if there are any coolant or oil
leaks.
10Road test the car to check that the engine
is running with the correct smoothness and
power. If it does not, refer to “Fault finding” in
the Reference section of this Manual. Do not
race the engine. If new bearings and/or
pistons and rings have been fitted, it should
be treated as a new engine and run it at
reduced speed for at east 800 km (500 miles).
11After 800 km (500 miles) change the
engine oil and filter.
1•34 1116 cc and 1301 cc engine
44.32 Inner wing protective shield44.26B Coolant temperature switch44.26A Oil pressure warning switch
44.22B Transmission earth lead
44.22A Reversing lamp switch on
transmission44.21B Brake servo hose at manifold44.21A Heater hose at manifold
Page 49 of 303
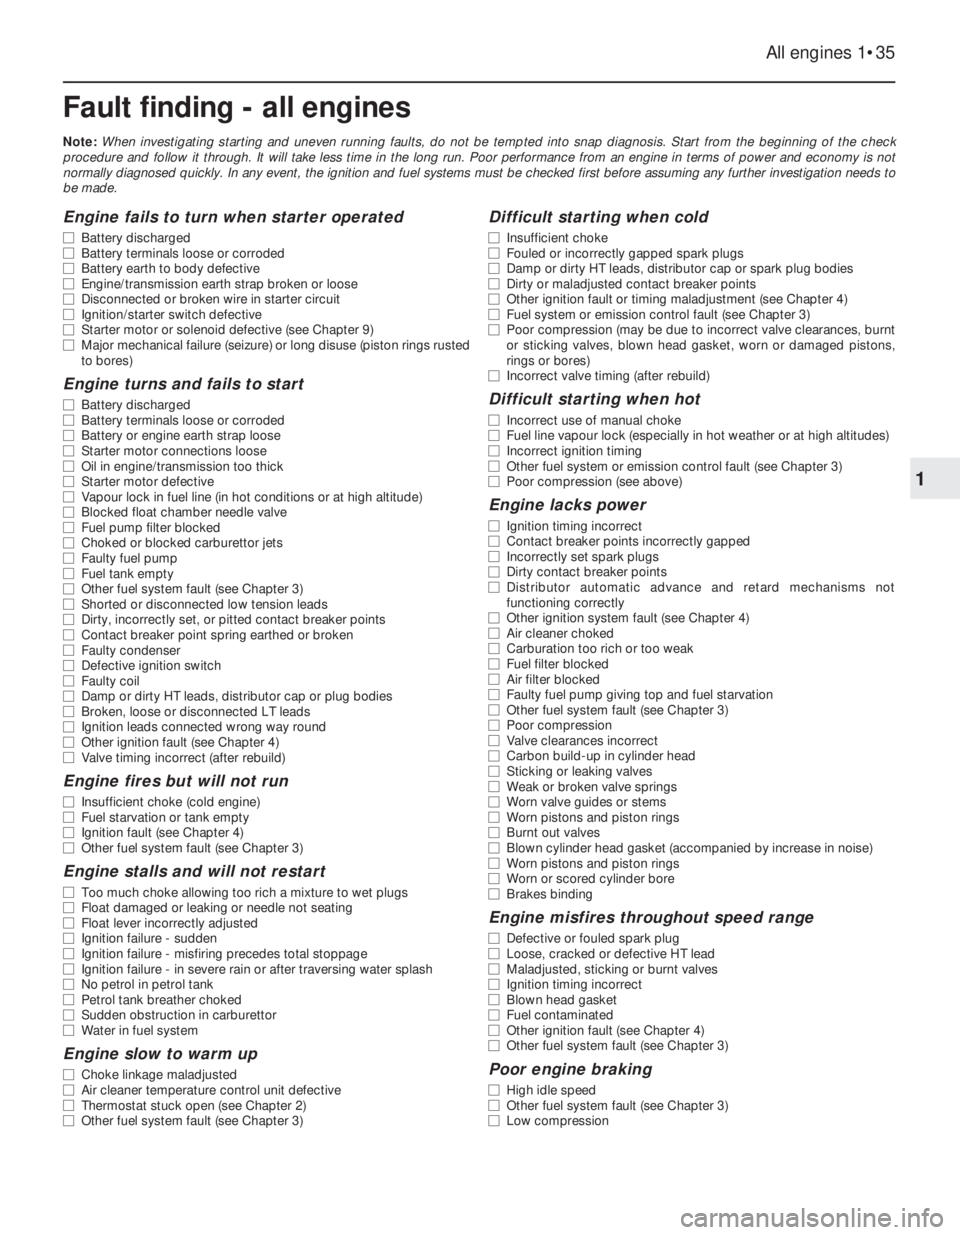
Fault finding - all engines
Note: When investigating starting and uneven running faults, do not be tempted into snap diagnosis. Start from the beginning of the check
procedure and follow it through. It will take less time in the long run. Poor performance from an engine in terms of power and economy is not
normally diagnosed quickly. In any event, the ignition and fuel systems must be checked first before assuming any further investigation needs to
be made.
All engines 1•35
1
Engine fails to turn when starter operated
m mBattery discharged
m mBattery terminals loose or corroded
m mBattery earth to body defective
m mEngine/transmission earth strap broken or loose
m mDisconnected or broken wire in starter circuit
m mIgnition/starter switch defective
m mStarter motor or solenoid defective (see Chapter 9)
m mMajor mechanical failure (seizure) or long disuse (piston rings rusted
to bores)
Engine turns and fails to start
m mBattery discharged
m mBattery terminals loose or corroded
m mBattery or engine earth strap loose
m mStarter motor connections loose
m mOil in engine/transmission too thick
m mStarter motor defective
m mVapour lock in fuel line (in hot conditions or at high altitude)
m mBlocked float chamber needle valve
m mFuel pump filter blocked
m mChoked or blocked carburettor jets
m mFaulty fuel pump
m mFuel tank empty
m mOther fuel system fault (see Chapter 3)
m mShorted or disconnected low tension leads
m mDirty, incorrectly set, or pitted contact breaker points
m mContact breaker point spring earthed or broken
m mFaulty condenser
m mDefective ignition switch
m mFaulty coil
m mDamp or dirty HT leads, distributor cap or plug bodies
m mBroken, loose or disconnected LT leads
m mIgnition leads connected wrong way round
m mOther ignition fault (see Chapter 4)
m mValve timing incorrect (after rebuild)
Engine fires but will not run
m
mInsufficient choke (cold engine)
m mFuel starvation or tank empty
m mIgnition fault (see Chapter 4)
m mOther fuel system fault (see Chapter 3)
Engine stalls and will not restart
m
mToo much choke allowing too rich a mixture to wet plugs
m mFloat damaged or leaking or needle not seating
m mFloat lever incorrectly adjusted
m mIgnition failure - sudden
m mIgnition failure - misfiring precedes total stoppage
m mIgnition failure - in severe rain or after traversing water splash
m mNo petrol in petrol tank
m mPetrol tank breather choked
m mSudden obstruction in carburettor
m mWater in fuel system
Engine slow to warm up
m
mChoke linkage maladjusted
m mAir cleaner temperature control unit defective
m mThermostat stuck open (see Chapter 2)
m mOther fuel system fault (see Chapter 3)
Difficult starting when cold
m
mInsufficient choke
m mFouled or incorrectly gapped spark plugs
m mDamp or dirty HT leads, distributor cap or spark plug bodies
m mDirty or maladjusted contact breaker points
m mOther ignition fault or timing maladjustment (see Chapter 4)
m mFuel system or emission control fault (see Chapter 3)
m mPoor compression (may be due to incorrect valve clearances, burnt
or sticking valves, blown head gasket, worn or damaged pistons,
rings or bores)
m mIncorrect valve timing (after rebuild)
Difficult starting when hot
m
mIncorrect use of manual choke
m mFuel line vapour lock (especially in hot weather or at high altitudes)
m mIncorrect ignition timing
m mOther fuel system or emission control fault (see Chapter 3)
m mPoor compression (see above)
Engine lacks power
m
mIgnition timing incorrect
m mContact breaker points incorrectly gapped
m mIncorrectly set spark plugs
m mDirty contact breaker points
m mDistributor automatic advance and retard mechanisms not
functioning correctly
m mOther ignition system fault (see Chapter 4)
m mAir cleaner choked
m mCarburation too rich or too weak
m mFuel filter blocked
m mAir filter blocked
m mFaulty fuel pump giving top and fuel starvation
m mOther fuel system fault (see Chapter 3)
m mPoor compression
m mValve clearances incorrect
m mCarbon build-up in cylinder head
m mSticking or leaking valves
m mWeak or broken valve springs
m mWorn valve guides or stems
m mWorn pistons and piston rings
m mBurnt out valves
m mBlown cylinder head gasket (accompanied by increase in noise)
m mWorn pistons and piston rings
m mWorn or scored cylinder bore
m mBrakes binding
Engine misfires throughout speed range
m
mDefective or fouled spark plug
m mLoose, cracked or defective HT lead
m mMaladjusted, sticking or burnt valves
m mIgnition timing incorrect
m mBlown head gasket
m mFuel contaminated
m mOther ignition fault (see Chapter 4)
m mOther fuel system fault (see Chapter 3)
Poor engine braking
m
mHigh idle speed
m mOther fuel system fault (see Chapter 3)
m mLow compression