FORD CONTOUR 1999 2.G Owners Manual
Manufacturer: FORD, Model Year: 1999, Model line: CONTOUR, Model: FORD CONTOUR 1999 2.GPages: 244, PDF Size: 2.26 MB
Page 131 of 244
Driving
131
Follow these guidelines to ensure
safe towing procedure:
¥ Stay within your vehicleÕs load
limits.
¥ Thoroughly prepare your vehicle
for towing. Refer to Preparing to
towin this chapter.
¥ Use extra caution when driving
while trailer towing. Refer to
Driving while towing a trailerin
this chapter.
¥ Service your vehicle more
frequently if you tow a trailer.
Refer to the severe duty schedule
in the maintenance guide and or
service guide.
¥ Do not tow a trailer until your
vehicle has been driven at least
800 km (500 miles).
¥ Refer to the instructions
included with towing accessories
for the proper installation and
adjustment specifications.
22CDren 3/25/99 3:32 PM Page 131
Page 132 of 244
Driving
132
Preparing to tow
Use the proper equipment for
towing a trailer and make sure that
it is properly attached to your
vehicle. See your dealer or a
reliable trailer retailer if you
require assistance.
Auxiliary coolers are recommended
for the power steering system and
automatic transaxle system if you
are planning on:
¥ Traveling farther than 80 km
(50 miles).
¥ Towing in hilly terrain.
¥ Towing frequently.
Towing trailers beyond the
maximum recommended
gross trailer weight exceeds the
limit of the vehicle and could
result in engine damage, transaxle
damage, structural damage, loss of
control, and personal injury.
Do not exceed the maximum loads
listed on the Safety Compliance
Certification Label. For load
specification terms found on the
label, refer to Loading your
vehiclein this chapter. Remember
to figure in the tongue load of your
loaded vehicle when figuring the
total weight.
22CDren 3/25/99 3:32 PM Page 132
Page 133 of 244
Driving
133
Using a hitch
Do not use hitches that:
¥ Clamp onto the vehicle bumper.
¥ Attach to the axle.
Distribute the load so that only 10
to 15% of the total weight of the
trailer is on the tongue. Tie down
the load so that it does not shift
and change weight on the hitch.
Follow the instructions of a
reputable rental agency.
Using trailer lamps
See your local trailer retailer or
rental agency for proper
instructions and equipment for
hooking up trailer lamps.
Do not hook the trailer lamps
directly into the vehicleÕs wiring
system. If the trailer lamps are not
working properly, the warning
lights in the instrument cluster may
not work properly.
22CDren 3/25/99 3:32 PM Page 133
Page 134 of 244
Driving
134
Using trailer brakes
Use electric brakes or manual,
automatic or surge type hydraulic
brakes that meet federal and local
regulations. Install and adjust
brakes according to the
manufacturerÕs instructions.
Using safety chains
Always connect the trailerÕs safety
chains to the vehicle. To connect
the chains, cross the chains under
the trailer tongue and attach to the
vehicle frame or hook retainers
(not the bumper). Make sure there
is enough slack to allow the vehicle
to turn corners.
Do not connect a trailerÕs
hydraulic brake system
directly to your vehicleÕs brake
system. Your vehicle may not have
enough braking power and your
chances of having a collision
greatly increase.
22CDren 3/25/99 3:32 PM Page 134
Page 135 of 244

Driving
135
Driving while towing a trailer
Do not drive faster than 72 km/h
(45 mph) while towing a 454 kg
(1 000 lb) trailer. Do not drive
faster than 72 km/h (45 mph) with
any weight trailer while towing in
hilly terrain or on hot days.
Speed control (if equipped) may
not work properly while towing on
long, steep grades.
If driving with an automatic
transaxle:
¥ Use D (Drive) or a low gear
rather than D (Overdrive) by
depressing the TCS button on the
side of the gearshift lever, while
towing up or down steep inclines.
¥ Anticipate stops and brake
gradually.
If driving with a manual transaxle:
¥ Select a gear that avoids jerking
or excessive engine speed.
¥ Avoid driving excessively in first
or second gear. If you need to drive
excessively in first or second gear,
the trailer may be too big or too
heavily loaded for the vehicle
drivetrain.
¥ Shift to a lower gear while
towing up or down steep hills.
¥ Anticipate stops and brake
gradually.
22CDren 3/25/99 3:32 PM Page 135
Page 136 of 244
Driving
136
FUEL CONSUMPTION
Fuel economy can be improved by
avoiding:
¥ lack of regular, scheduled
maintenance,
¥ excessive speed,
¥ rapid acceleration,
¥ driving with the brake pedal
depressed,
¥ sudden stops,
¥ extended engine idling,
¥ use of speed control in hilly
terrain,
¥ extended use of the air
conditioner, defroster, rear window
defroster and other accessories,
¥ underinflated tires,
¥ heavy loads,
¥ aftermarket add-ons such as
bike, ski or luggage racks, bug
deflectors, etc.
22CDren 3/25/99 3:32 PM Page 136
Page 137 of 244
Roadside emergencies
137
HAZARD FLASHER CONTROL
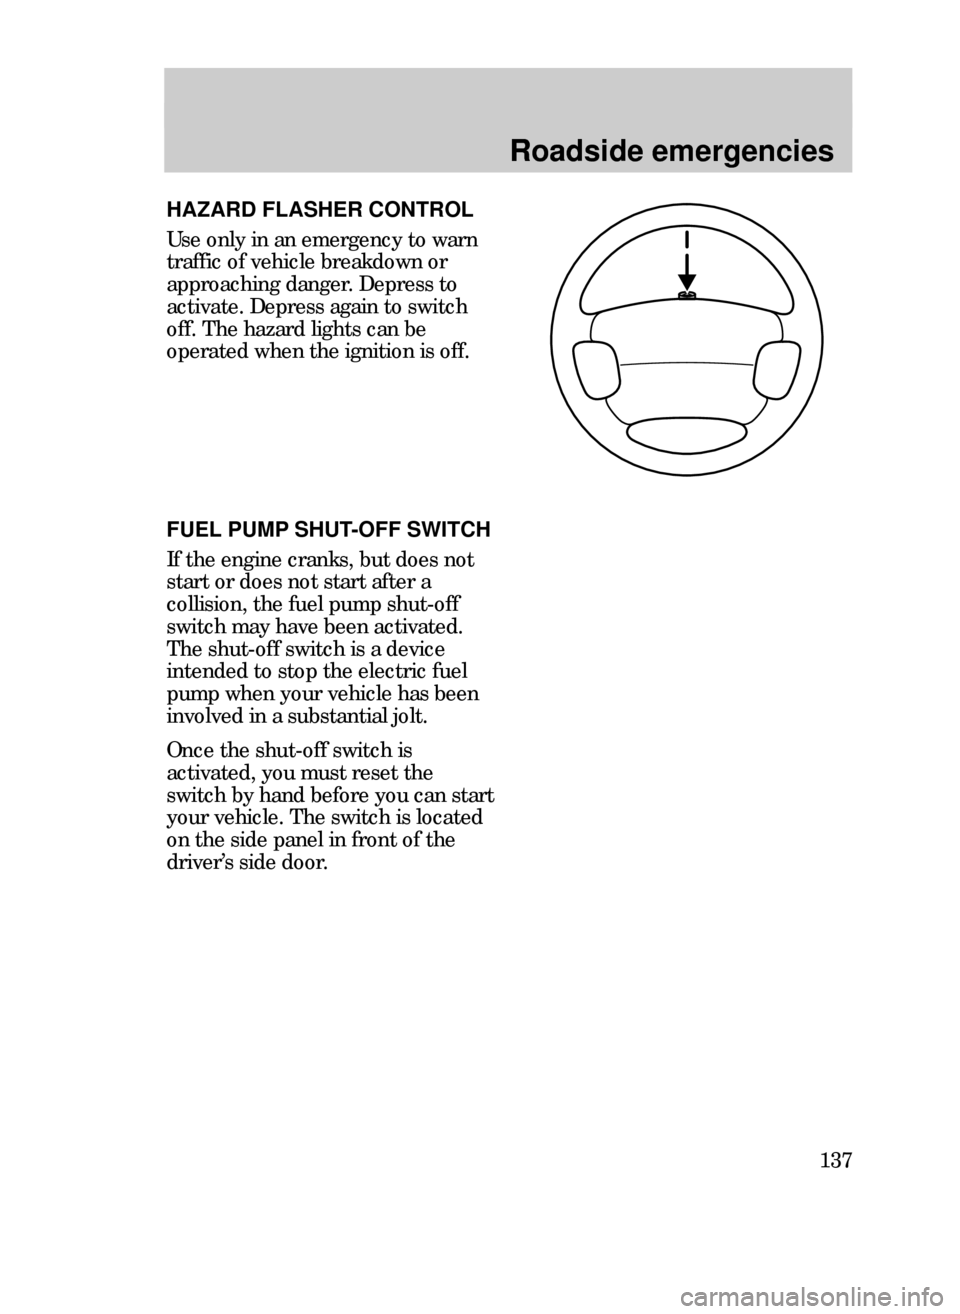
Use only in an emergency to warn
traffic of vehicle breakdown or
approaching danger. Depress to
activate. Depress again to switch
off. The hazard lights can be
operated when the ignition is off.
FUEL PUMP SHUT-OFF SWITCH
If the engine cranks, but does not
start or does not start after a
collision, the fuel pump shut-off
switch may have been activated.
The shut-off switch is a device
intended to stop the electric fuel
pump when your vehicle has been
involved in a substantial jolt.
Once the shut-off switch is
activated, you must reset the
switch by hand before you can start
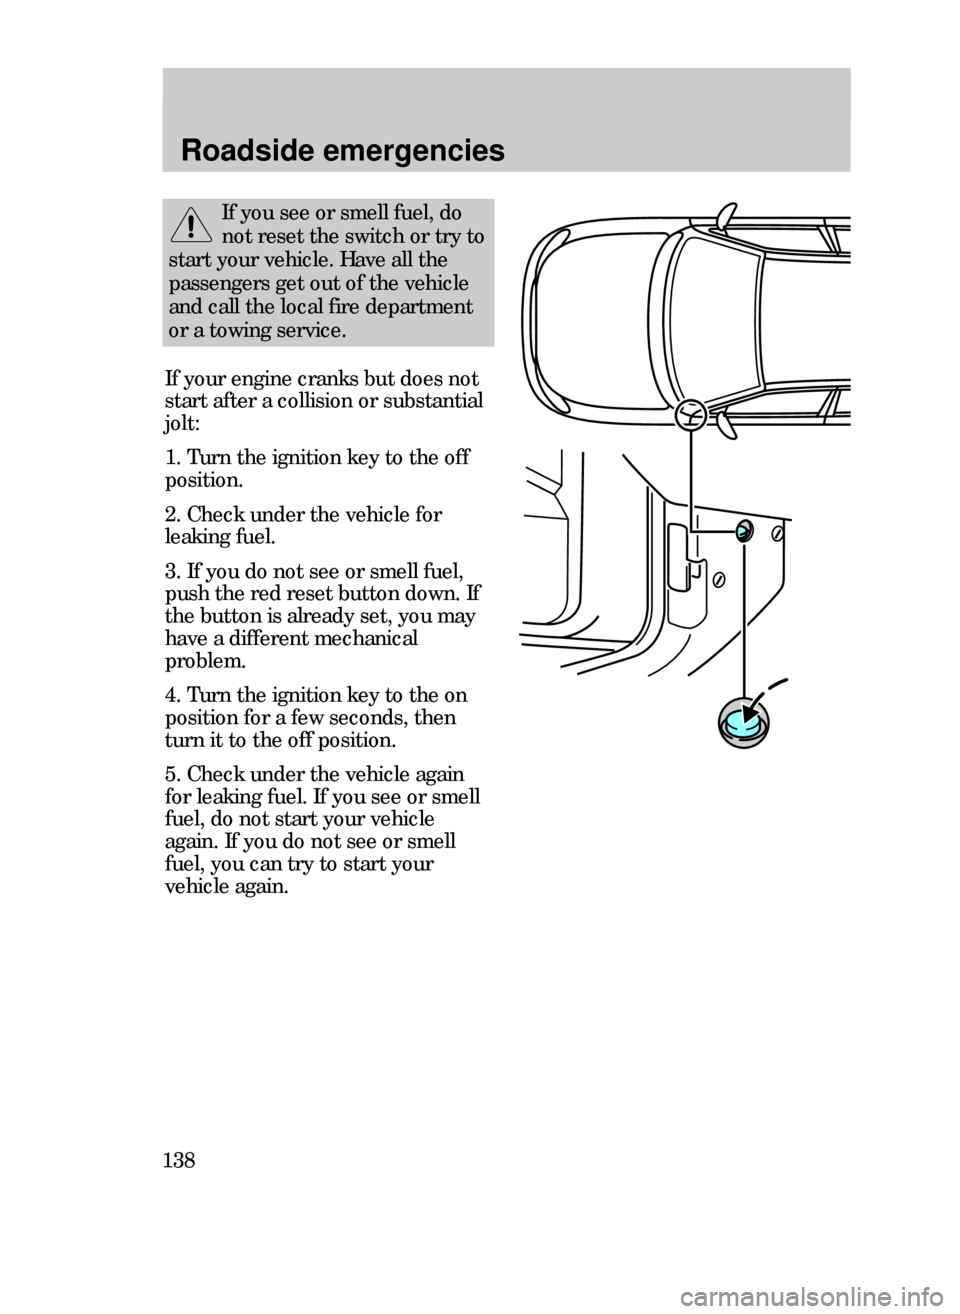
your vehicle. The switch is located
on the side panel in front of the
driverÕs side door.
22CDren 3/25/99 3:32 PM Page 137
Page 138 of 244
138
Roadside emergencies
If your engine cranks but does not
start after a collision or substantial
jolt:
1. Turn the ignition key to the off
position.
2. Check under the vehicle for
leaking fuel.
3. If you do not see or smell fuel,
push the red reset button down. If
the button is already set, you may
have a different mechanical
problem.
4. Turn the ignition key to the on
position for a few seconds, then
turn it to the off position.
5. Check under the vehicle again
for leaking fuel. If you see or smell
fuel, do not start your vehicle
again. If you do not see or smell
fuel, you can try to start your
vehicle again.
If you see or smell fuel, do
not reset the switch or try to
start your vehicle. Have all the
passengers get out of the vehicle
and call the local fire department
or a towing service.
23CREen 3/25/99 3:35 PM Page 138
Page 139 of 244
Roadside emergencies
139
Even after a fuse is replaced, it will
continue to blow if the cause of the
overload is not identified and
corrected. If the fuse continues to
blow, have the vehicleÕs electrical
system checked by your dealer or a
qualified service technician.
To reset a circuit breaker, press the
reset button.
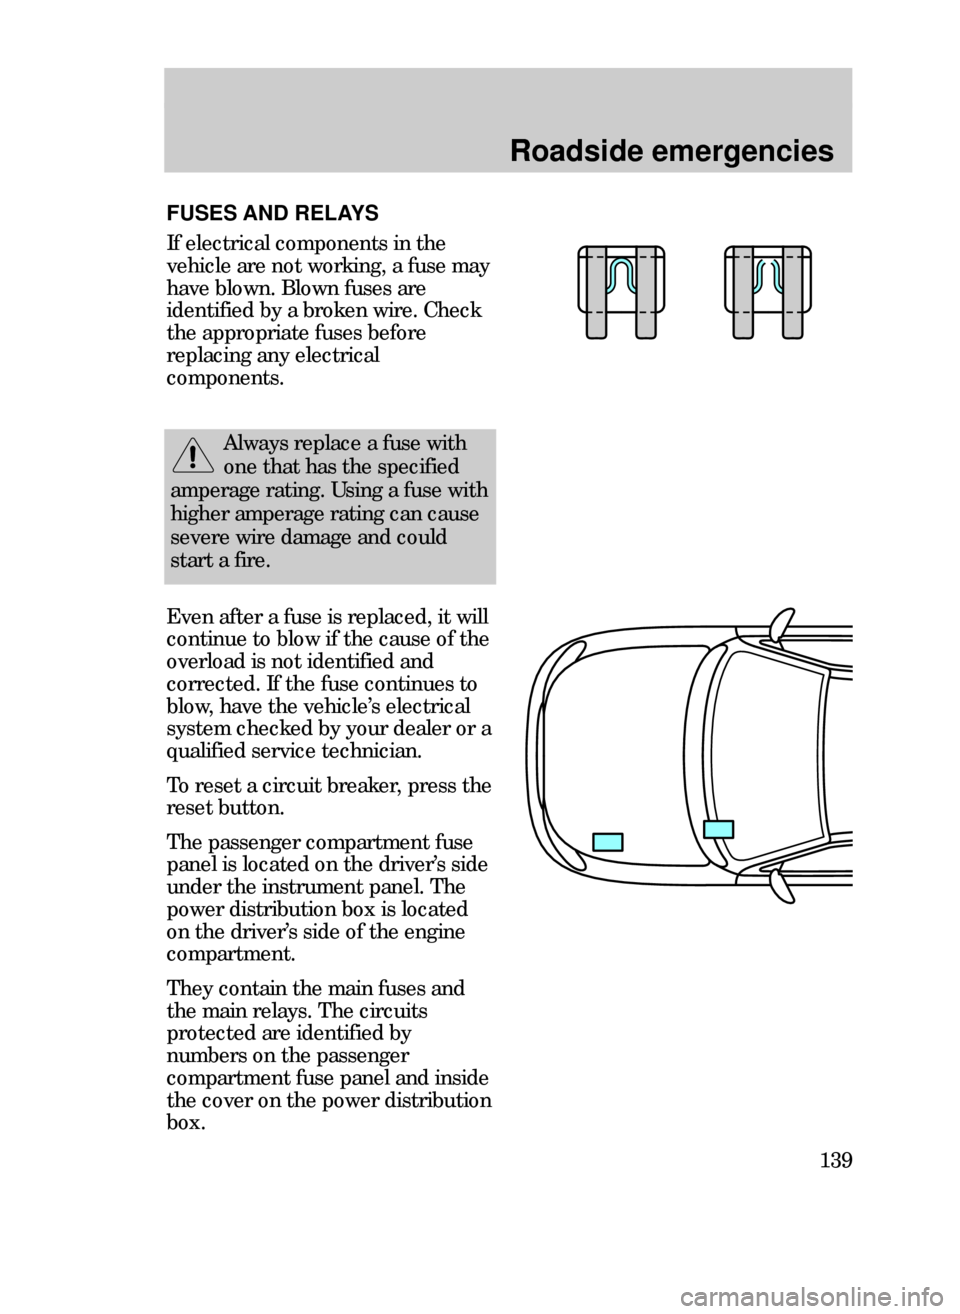
The passenger compartment fuse
panel is located on the driverÕs side
under the instrument panel. The
power distribution box is located
on the driverÕs side of the engine
compartment.
They contain the main fuses and
the main relays. The circuits
protected are identified by
numbers on the passenger
compartment fuse panel and inside
the cover on the power distribution
box.
FUSES AND RELAYS
If electrical components in the
vehicle are not working, a fuse may
have blown. Blown fuses are
identified by a broken wire. Check
the appropriate fuses before
replacing any electrical
components.
Always replace a fuse with
one that has the specified
amperage rating. Using a fuse with
higher amperage rating can cause
severe wire damage and could
start a fire.
23CREen 3/25/99 3:35 PM Page 139
Page 140 of 244
Roadside emergencies
140
1
111213141516
R6R5R4R3R2
10
123456789
R1R7R8
R9R10
R11 D1
D2
17
18
4647
4849 5051 52
394041
424344
45
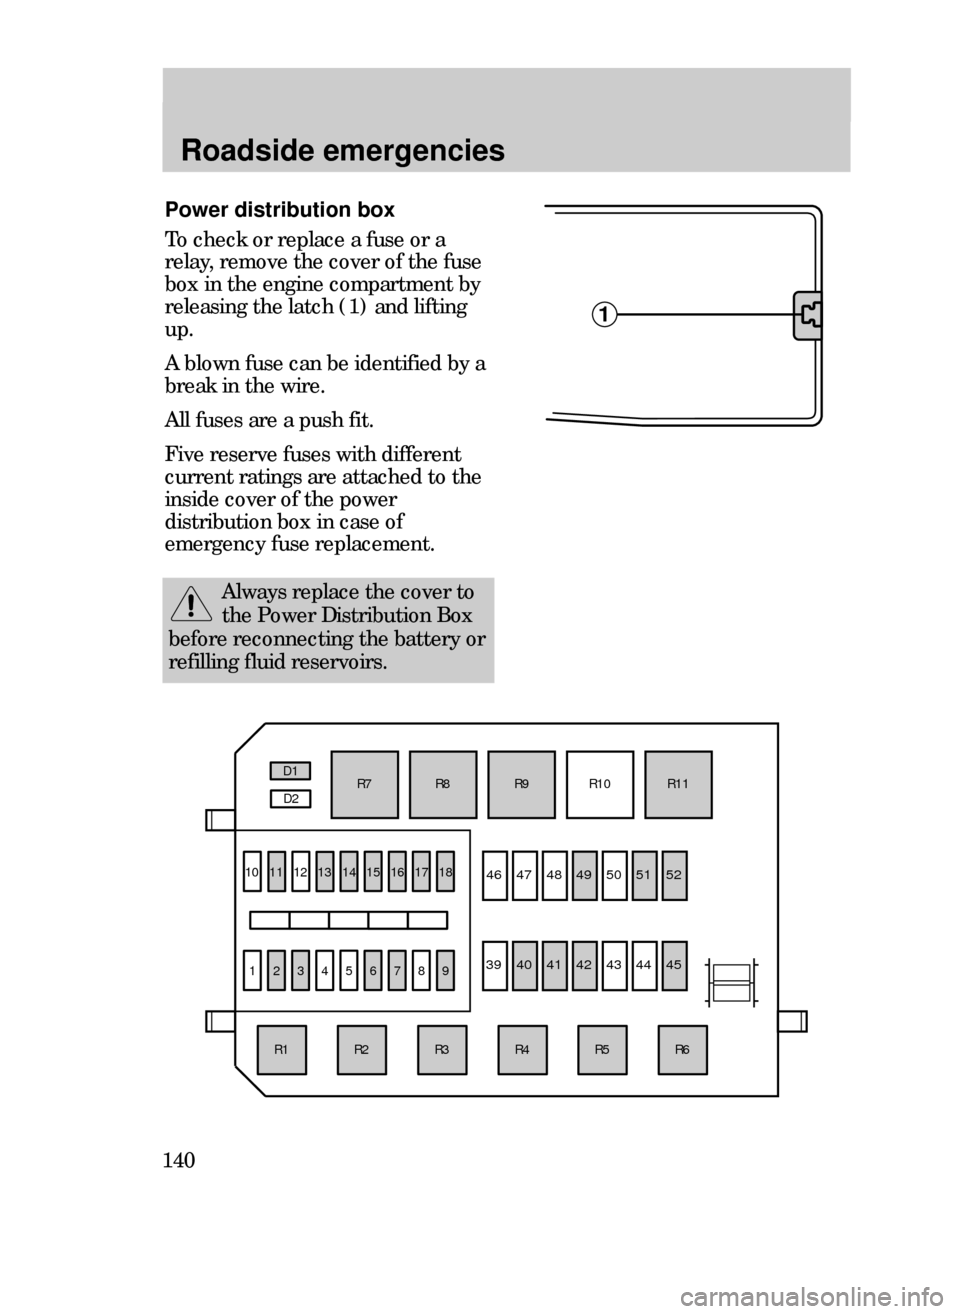
Power distribution box
To check or replace a fuse or a
relay, remove the cover of the fuse
box in the engine compartment by
releasing the latch (1) and lifting
up.
A blown fuse can be identified by a
break in the wire.
All fuses are a push fit.
Five reserve fuses with different
current ratings are attached to the
inside cover of the power
distribution box in case of
emergency fuse replacement.
Always replace the cover to
the Power Distribution Box
before reconnecting the battery or
refilling fluid reservoirs.
23CREen 3/25/99 3:35 PM Page 140