Ev button FORD ESCAPE 2022 Owners Manual
[x] Cancel search | Manufacturer: FORD, Model Year: 2022, Model line: ESCAPE, Model: FORD ESCAPE 2022Pages: 585, PDF Size: 6.15 MB
Page 451 of 585
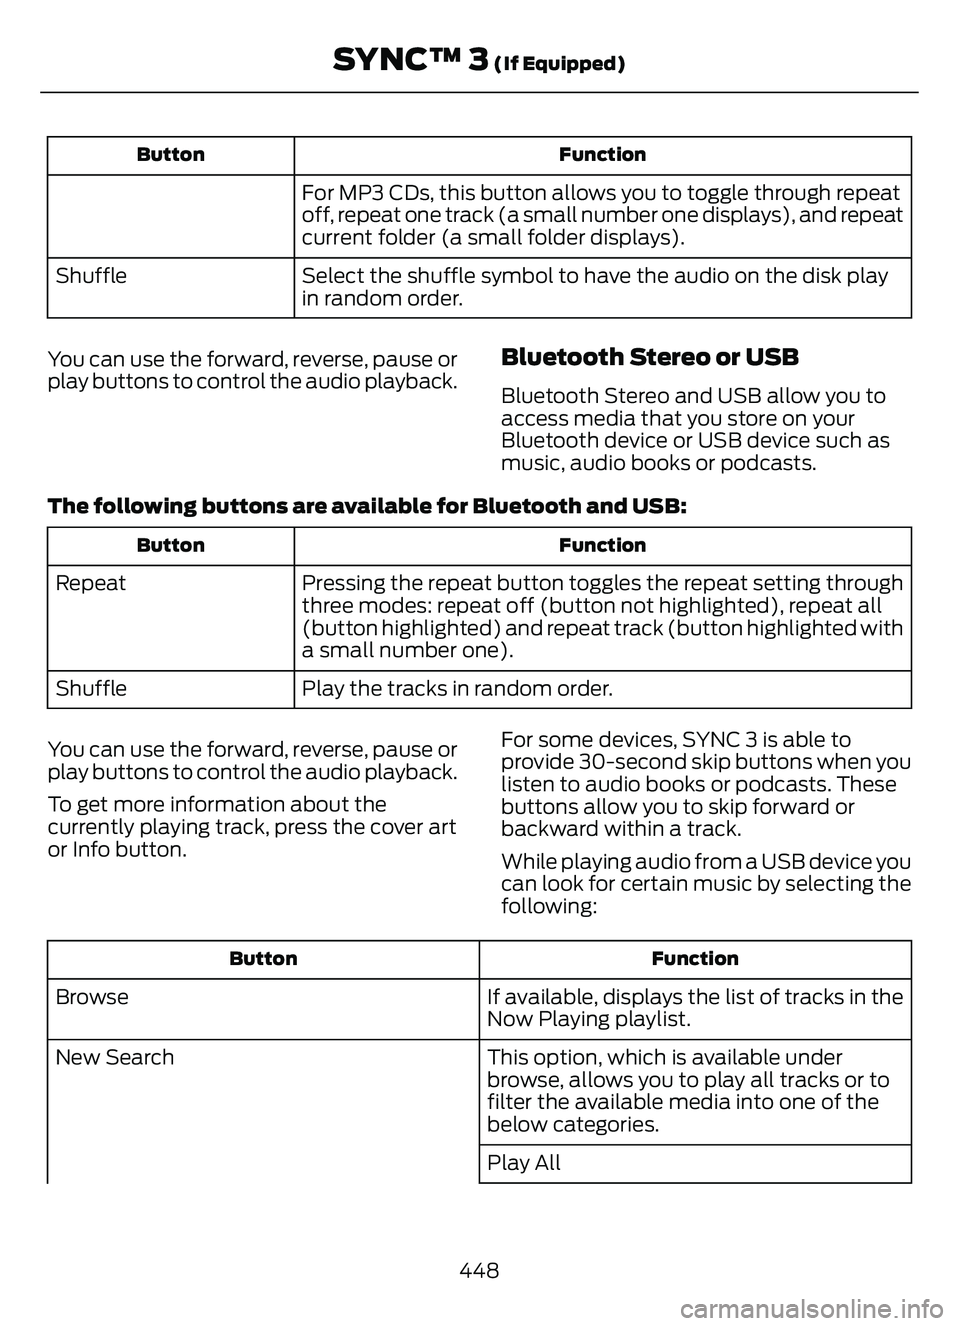
Function
Button
For MP3 CDs, this button allows you to toggle through repeat
off, repeat one track (a small number one displays), and repeat
current folder (a small folder displays).
Select the shuffle symbol to have the audio on the disk play
in random order.
Shuffle
You can use the forward, reverse, pause or
play buttons to control the audio playback.
Bluetooth Stereo or USB
Bluetooth Stereo and USB allow you to
access media that you store on your
Bluetooth device or USB device such as
music, audio books or podcasts.
The following buttons are available for Bluetooth and USB:
Function
Button
Pressing the repeat button toggles the repeat setting through
three modes: repeat off (button not highlighted), repeat all
(button highlighted) and repeat track (button highlighted with
a small number one).
Repeat
Play the tracks in random order.
Shuffle
You can use the forward, reverse, pause or
play buttons to control the audio playback.
To get more information about the
currently playing track, press the cover art
or Info button. For some devices, SYNC 3 is able to
provide 30-second skip buttons when you
listen to audio books or podcasts. These
buttons allow you to skip forward or
backward within a track.
While playing audio from a USB device you
can look for certain music by selecting the
following:
Function
Button
If available, displays the list of tracks in the
Now Playing playlist.
Browse
This option, which is available under
browse, allows you to play all tracks or to
filter the available media into one of the
below categories.
New Search
Play All
448
SYNC™ 3 (If Equipped)
Page 452 of 585
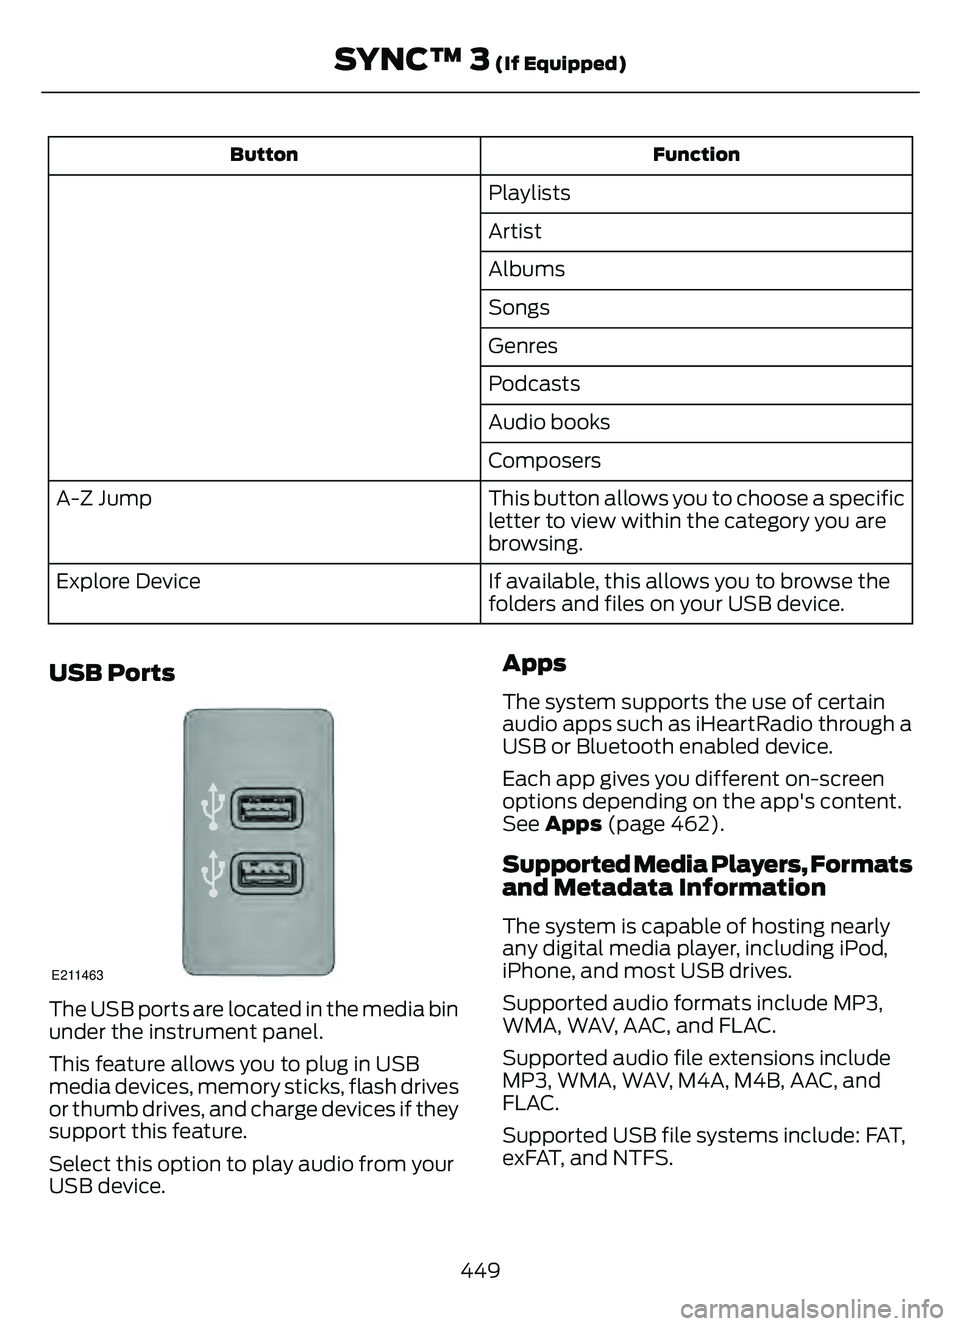
Function
Button
Playlists
Artist
Albums
Songs
Genres
Podcasts
Audio books
Composers
This button allows you to choose a specific
letter to view within the category you are
browsing.
A-Z Jump
If available, this allows you to browse the
folders and files on your USB device.
Explore Device
USB Ports
E211463
The USB ports are located in the media bin
under the instrument panel.
This feature allows you to plug in USB
media devices, memory sticks, flash drives
or thumb drives, and charge devices if they
support this feature.
Select this option to play audio from your
USB device.
Apps
The system supports the use of certain
audio apps such as iHeartRadio through a
USB or Bluetooth enabled device.
Each app gives you different on-screen
options depending on the app's content.
See
Apps (page 462).
Supported Media Players, Formats
and Metadata Information
The system is capable of hosting nearly
any digital media player, including iPod,
iPhone, and most USB drives.
Supported audio formats include MP3,
WMA, WAV, AAC, and FLAC.
Supported audio file extensions include
MP3, WMA, WAV, M4A, M4B, AAC, and
FLAC.
Supported USB file systems include: FAT,
exFAT, and NTFS.
449
SYNC™ 3 (If Equipped)
Page 453 of 585
SYNC 3 is also able to organize the media
from your USB device by metadata tags.
Metadata tags, which are descriptive
software identifiers embedded in the
media files, provide information about the
file.
If your indexed media files contain no
information embedded in these metadata
tags, SYNC 3 may classify the empty
metadata tags as unknown.
SYNC 3 is capable of indexing up to
50,000 songs per USB device, for up to 10
devices.
PHONE
WARNING: Driving while distracted
can result in loss of vehicle control, crash
and injury. We strongly recommend that
you use extreme caution when using any
device that may take your focus off the
road. Your primary responsibility is the
safe operation of your vehicle. We
recommend against the use of any
hand-held device while driving and
encourage the use of voice-operated
systems when possible. Make sure you
are aware of all applicable local laws
that may affect the use of electronic
devices while driving.
Check the compatibility of your device on
the regional website.
Pairing Your Cell Phone for the
First Time
Go to the settings menu on your cell phone
and switch Bluetooth on.
Select the phone option on the
feature bar.
1. Select Add Phone. Note:
A prompt alerts you to search for your
vehicle on your cell phone.
2. Select your vehicle on your cell phone.
Note: A number appears on your cell phone
and on the touchscreen.
3. Confirm that the number on your cell phone matches the number on the
touchscreen.
Note: The touchscreen indicates that you
have successfully paired your cell phone.
4. Download the phonebook from your cell phone when you are prompted.
Note: If you pair more than one cell phone,
use the phone settings to specify the
primary phone. You can change this setting
at any time.
Using Your Cell Phone
Recent Call List
Display and select an entry from a list of
previous calls.
Contacts
Display a smart search form to look up your
contacts. Use the List button to
alphabetically sort your contacts.
Favorites
Display and select an entry from the list of
favorite contacts that are set up on your
phone.
Messaging
Displays the list of text messages to read,
listen to, or respond to.
Email
Displays the list of emails to read, listen to,
or respond to.
450
SYNC™ 3 (If Equipped)
Page 456 of 585
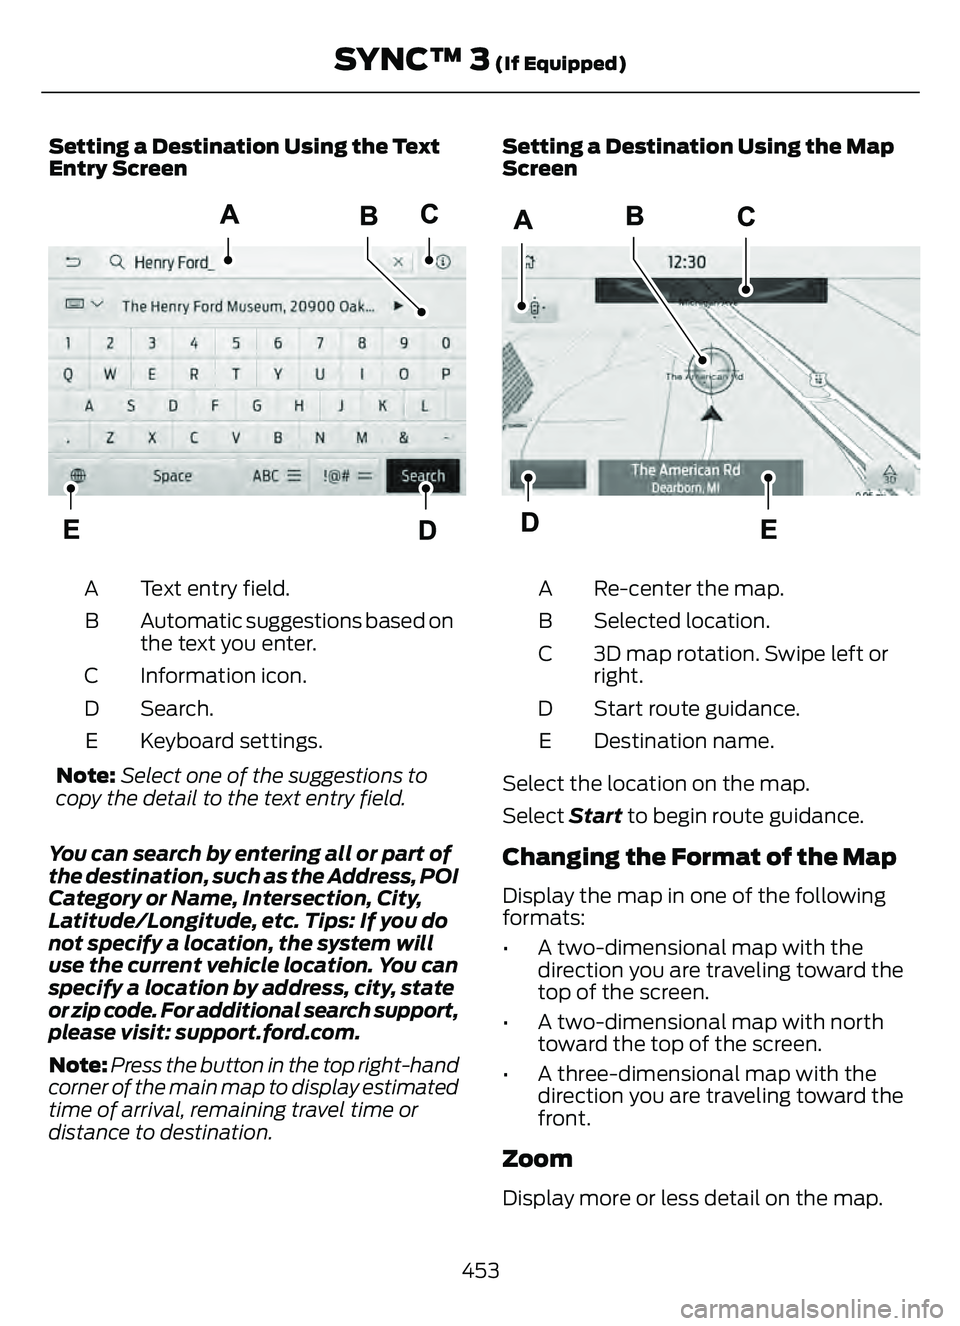
Setting a Destination Using the Text
Entry Screen
E297558E297558
Text entry field.
A
Automatic suggestions based on
the text you enter.
B
Information icon.
C
Search.
D
Keyboard settings.
E
Note: Select one of the suggestions to
copy the detail to the text entry field.
You can search by entering all or part of
the destination, such as the Address, POI
Category or Name, Intersection, City,
Latitude/Longitude, etc. Tips: If you do
not specify a location, the system will
use the current vehicle location. You can
specify a location by address, city, state
or zip code. For additional search support,
please visit: support.for d.com.
Note: Press the button in the top right-hand
corner of the main map to display estimated
time of arrival, remaining travel time or
distance to destination. Setting a Destination Using the Map
Screen
E297559E297559
Re-center the map.
A
Selected location.
B
3D map rotation. Swipe left or
right.
C
Start route guidance.
D
Destination name.
E
Select the location on the map.
Select Start to begin route guidance.
Changing the Format of the Map
Display the map in one of the following
formats:
• A two-dimensional map with the
direction you are traveling toward the
top of the screen.
• A two-dimensional map with north toward the top of the screen.
• A three-dimensional map with the direction you are traveling toward the
front.
Zoom
Display more or less detail on the map.
453
SYNC™ 3 (If Equipped)
Page 457 of 585
Note:You can use pinch gestures to zoom
in and out. Place two fingers on the screen
and move them apart to zoom in. Place two
fingers on the screen and bring them
together to zoom out.
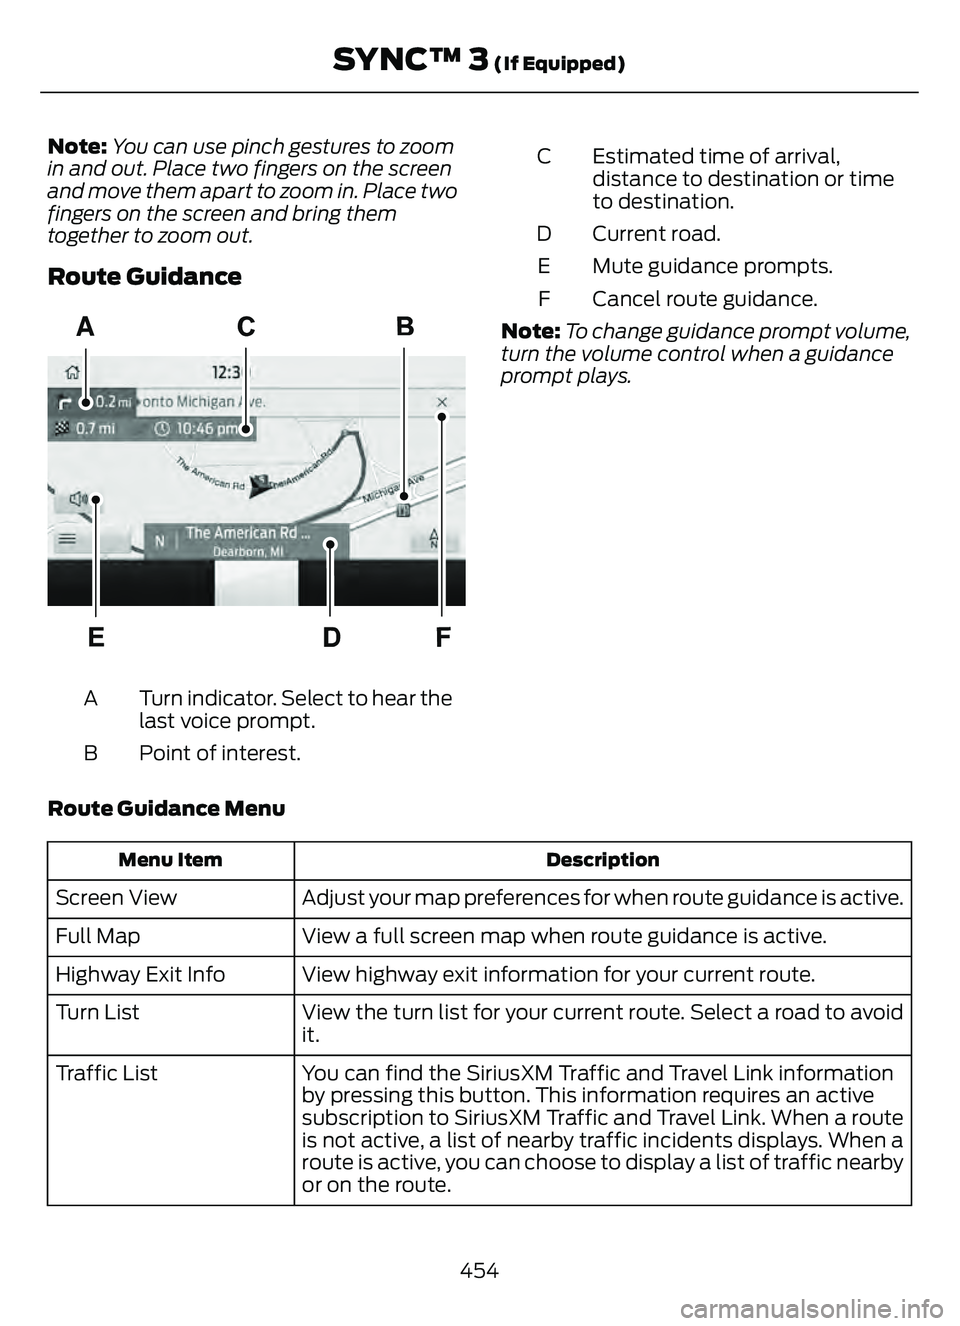
Route Guidance
9 560E297560F
A
Turn indicator. Select to hear the
last voice prompt.
A
Point of interest.
B Estimated time of arrival,
distance to destination or time
to destination.
C
Current road.
D
Mute guidance prompts.
E
Cancel route guidance.
F
Note: To change guidance prompt volume,
turn the volume control when a guidance
prompt plays.
Route Guidance Menu
Description
Menu Item
Adjust your map preferences for when route guidance is active.
Screen View
View a full screen map when route guidance is active.
Full Map
View highway exit information for your current route.
Highway Exit Info
View the turn list for your current route. Select a road to avoid
it.
Turn List
You can find the SiriusXM Traffic and Travel Link information
by pressing this button. This information requires an active
subscription to SiriusXM Traffic and Travel Link. When a route
is not active, a list of nearby traffic incidents displays. When a
route is active, you can choose to display a list of traffic nearby
or on the route.
Traffic List
454
SYNC™ 3 (If Equipped)
Page 458 of 585

Description
Menu Item
Adjust navigation settings. See Settings (page 464).
Navigation Settings
View information about your current location.
Where Am I?
Cancel route guidance.
Cancel Route
View the entire current route on the map.
View Route
View an alternative route compared to your current one.
Detour
Change the order or remove waypoints.
Edit Waypoints
The system determines the order of waypoints for you.
Optimize Order
Go to the next screen and start the new route.
Go
Adjusting the Guidance Prompt
Volume
Turn the volume control when a guidance
prompt plays to adjust the volume.
Note: If you have inadvertently adjusted
the volume to zero, press the turn indicator
button to play the last voice prompt and
then adjust the volume to the desired level.
Muting Guidance Prompts
Select the mute option on the
screen to mute guidance
prompts.
Note: The system mutes the next and all
future guidance prompts.
Adding Waypoints
You can add a waypoint to a navigation
route as a destination along your route.
You can add up to five waypoints.
1. Select the search option on the map.
2. Set a destination.
3. Select Add Waypoint.
4. Select Go. Canceling Route Guidance
Select the route guidance menu
option on the active guidance
screen.
Select Cancel Route.
E294817E294817
Note:The route guidance menu option is
always in the bottom right-hand corner of
the main map.
cityseeker (If Equipped)
Note: cityseeker point of interest (POI)
information is limited to approximately 1,110
cities (1,049 in the United States, 36 in
Canada and 15 in Mexico).
455
SYNC™ 3 (If Equipped)
Page 459 of 585
E225487
cityseeker, when available, is a service that
provides more information about certain
points of interest such as restaurants,
hotels and attractions.
When you have selected a point of interest,
the location and information appear, such
as address, phone number and a star
rating.
Press More Information to see a photo,
a review, a list of services and facilities, the
average room or meal price and the web
address. This screen displays the point of
interest icons.
For restaurants, cityseeker can provide
information such as star rating, average
cost, review, handicap access, hours of
operation, and website address.
For hotels, cityseeker can provide
information such as star rating, price
category, review, check-in and checkout
times, hotel service icons and website
address. Hotel service icons include:
• Restaurant
• Business center
• Handicap facilities
• Laundry
• Refrigerator
• 24 hour room service
• Fitness center
• Internet access
• Pool
• Wi-Fi Attractions include nearby landmarks,
amusement parks, historic buildings and
more. cityseeker can provide information
such as star rating, reviews, hour of
operation and admission price.
SiriusXM Traffic and T
ravel Link (If
Equipped)
SiriusXM Traffic and Travel Link is available
on vehicles equipped with navigation and
only in select markets. You must activate
and subscribe to receive SiriusXM Traffic
and Travel Link information. It helps you
locate the best gas prices, find movie
listings, get current traffic alerts, view the
weather map, get accurate ski conditions
and see current sports scores.
The system calculates a reasonable
efficient route based on available speed
limits, traffic, and road conditions. You may
know a local short cut that is more efficient
at a given time than the route provided by
SYNC 3, but you should expect a slight
difference in minutes or miles with the
SYNC 3 route.
Michelin Travel Guide (If Equipped)
The Michelin travel guide is a service which
provides additional information about
certain places of interest, for example
restaurants, hotels and tourist sites. Points
of interest that have Michelin travel guide
information display a button to show you
more information. Push the button to see
the additional information. If you have
paired your phone with the system, you
can press the phone button to directly
establish a call with the selected point of
interest.
456
SYNC™ 3 (If Equipped)
Page 463 of 585
Description and Action
Charging Status
A charging coupler is plugged into the
vehicle but there is no connection with a charging power source.
Charge station not detected.
Your vehicle is plugged in but cannot
communicate with the charging station. Contact the station provider.
Incompatible charge station.
Your vehicle is plugged in and charging ispaused at the charge station.
Charge station paused.
Charging Time Information
Displays estimates of how long your
vehicle will take to fully charge when
plugged into a high or low power charger.
• High power estimate: The minimum time to a 100% charge using a high
power charger.
• Low power estimate: The longest time to a 100% charge using a low power
charger.
When charging, the start and estimated
end time are displayed. When your vehicle
is not plugged in and at a location with
Charge Times enabled, the start and end
times display based on known charging
power.
Note: Charging durations and end times are
only estimates. Certain conditions may
result in longer charging times. See Vehicle
Charging Status (page 128).
High Voltage Battery State of Charge
Displays the remaining charge percentage
with 100% representing the total amount
of energy you can get from an external
charge.
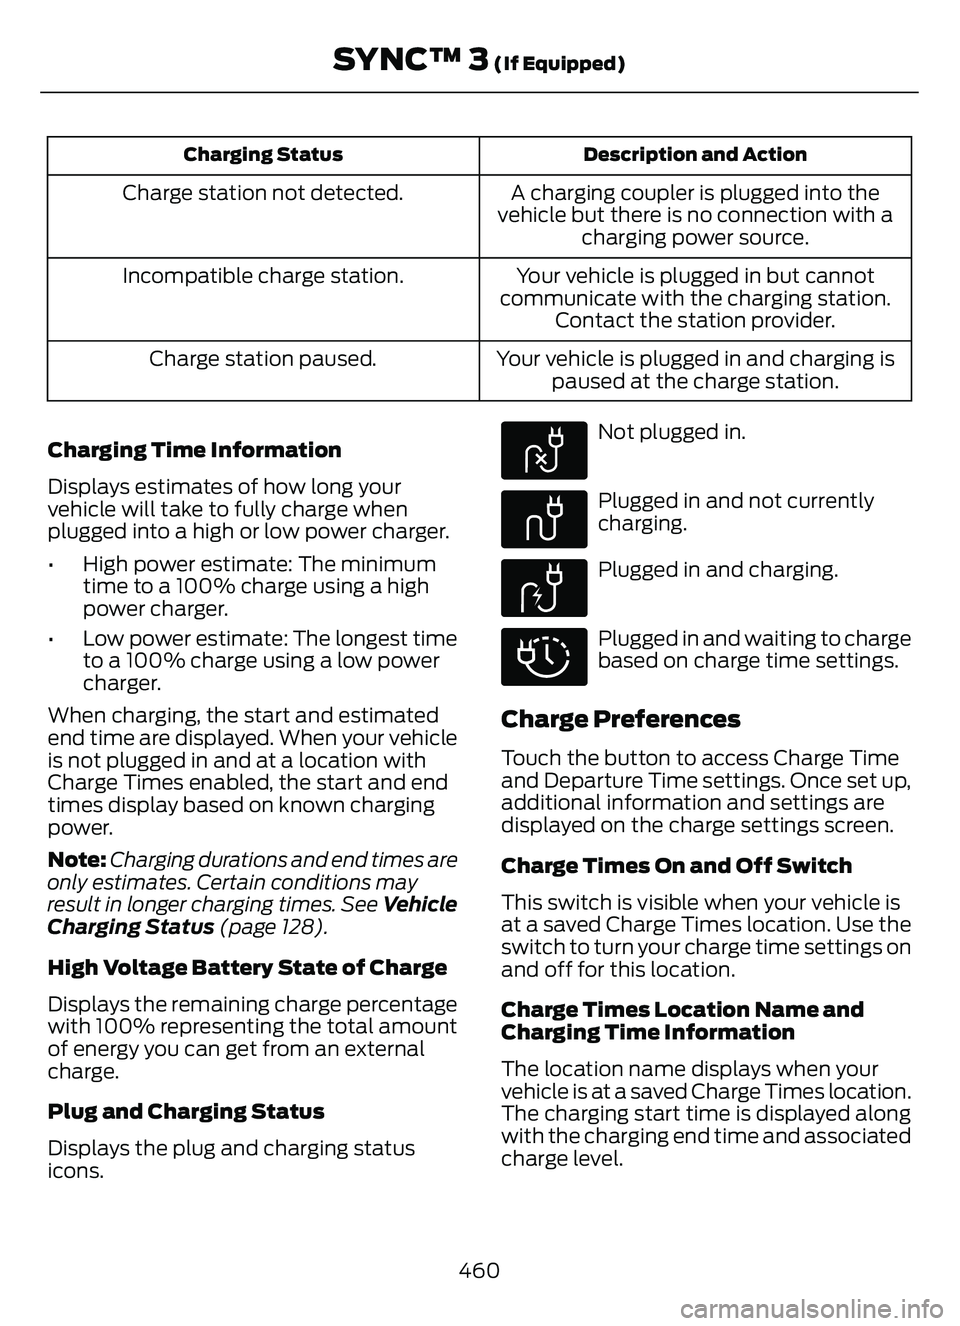
Plug and Charging Status
Displays the plug and charging status
icons.
E304458
Not plugged in.
E304459
Plugged in and not currently
charging.
E304460
Plugged in and charging.
E304461
Plugged in and waiting to charge
based on charge time settings.
Charge Preferences
Touch the button to access Charge Time
and Departure Time settings. Once set up,
additional information and settings are
displayed on the charge settings screen.
Charge Times On and Off Switch
This switch is visible when your vehicle is
at a saved Charge Times location. Use the
switch to turn your charge time settings on
and off for this location.
Charge Times Location Name and
Charging Time Information
The location name displays when your
vehicle is at a saved Charge Times location.
The charging start time is displayed along
with the charging end time and associated
charge level.
460
SYNC™ 3 (If Equipped)
Page 464 of 585
Departure Times On and Off Switch
This switch is visible when you have at
least one departure time set. Use this
switch to turn all departure times on and
off. Switching departure times off does not
delete your settings.
Next Departure Times and Cabin
Temperature
Displays the next departure time and
associated cabin temperature setting.
Charge Time Settings
Follow these steps to set a preferred
charge time for a charging location.
1. Select Charge Preferences on theCharge Settings screen.
2. Select Charge Time Setup on the Edit Charge Preferences screen.
3. Select Add New Location on the Charge Times screen. You can also edit
settings for previously saved locations
from this screen.
4. Select an address from the Recent Charge Locations screen.
5. On the Confirm Location for Charge Times screen, you can edit the location
name and set a max charge level as
desired. Once you have your desired
location name and max charge level,
select Continue to Schedule.
Note: Charging will stop when your vehicle
reaches the max charge level.
6. Select WEEKDAY or WEEKEND on the Preferred Charge Times screen.
7. On the Select preferred WEEKDAY or WEEKEND Charge Times screen, use
the circular 24 hour clock to select your
charging time windows. You can select
up to two time windows by pressing
and dragging across the hour buttons. When you have selected your preferred
times then press Next to return to the
Preferred Charge Times screen. Repeat
for WEEKEND or WEEKDAY as desired.
Once you are done setting preferred
charge times, press Save.
Note: Selecting all or none of the 24 hours
results in any time of day given equal priority
for charging.
8. Your saved location now shows on the Charge Times screen. Select Done to
return to the main charge settings
screen. Whenever your vehicle is at a
saved charging location the charge
settings screen displays the location
name, and the charging times are
based on your Charge Time settings for
that location plus the next Departure
Time.
Note: Reaching your max charge level by
your next Departure Time is always the
priority. When Charge Times are set,
charging outside your preferred charging
time windows could be necessary in order
to finish by your next Departure Time.
Departure Time Settings
1. Select Charge Preferences on the Charge Settings screen.
2. Select Departure Time Setup on the Edit Charge Preferences screen.
3. Two time settings show for each day of the week on the Departure Times
schedule screen. Select any one.
4. On the Departure Time settings screen, set your desired departure time, cabin
temperature and days of the week to
repeat. Press Save.
5. Your settings are now shown on the Departure Times schedule screen.
Press Back two times to return to the
main charge settings screen. The next
departure time and cabin temperature
setting display.
461
SYNC™ 3 (If Equipped)
Page 465 of 585

Note:Cabin conditioning can perform
differently depending on if you plug in with
the included convenience cord or a higher
power charging station. The power available
for conditioning is limited to the charging
station power available.
Note: Your vehicle may not always reach
the set cabin temperature due to charging
and ambient temperature conditions. This
is normal operation.
APPS
The system allows you interact with select
mobile apps while keeping your eyes on
the road. Voice commands, your steering
wheel buttons, or a quick tap on your
touchscreen give you advanced control of
compatible mobile apps. You can also
stream your favorite music or podcasts,
share your time of arrival with friends, and
keep connected safely.
When you start an app through the system
for the first time, you could be asked to
grant certain permissions. You can review
and change the permissions that you have
granted at any time when your vehicle is
not moving. We recommend that you
check your data plan before using your
apps through the system. Using them
could result in additional charges. We also
recommend that you check the app
provider's terms and conditions and
privacy policy before using their app. Make
sure that you have an active account for
apps that you want to use through the
system. Some apps will work with no
setup. Others require you to configure
some personal settings before you can use
them.
Note: For more information about available
apps, visit catalog.ford.com.
Using Apps on an iOS Device
Select the apps option on the
feature bar.
1. If your device is connected via USB, switch Apple CarPlay off. See Phone
(page 450).
2. Connect your device to a USB port or pair and connect using Bluetooth.
3. If prompted to enable CarPlay, select Disable.
4. Start the apps on your device that you want to use through SYNC.
Note: If you close the apps on your device,
you will not be able to use them through the
system.
5. Select the app that you want to use on the touchscreen.
Note: Connect your device to a USB port if
you want to use a navigation app. When
using a navigation app, keep your device
unlocked and the app open.
Using Apps on an Android Device
Select the apps option on the
feature bar.
1. If your device is connected via USB, switch Android Auto off. See Phone
(page 450).
2. Pair your device. See Phone (page 450).
3. Start the apps on your device that you want to use through SYNC.
Note: If you close the apps on your device,
you will not be able to use them through the
system.
4. Select Find Mobile Apps.
Note: The system searches and connects
to compatible apps that are running on your
device.
5. Select the app that you want to use on the touchscreen.
462
SYNC™ 3 (If Equipped)