Ev button FORD ESCAPE 2022 Owners Manual
[x] Cancel search | Manufacturer: FORD, Model Year: 2022, Model line: ESCAPE, Model: FORD ESCAPE 2022Pages: 585, PDF Size: 6.15 MB
Page 337 of 585
3. Add engine oil that meets ourspecifications. See Capacities and
Specifications (page 387).
4. Reinstall the engine oil filler cap. Turn it clockwise until you feel a strong
resistance.
Note: Do not add oil further than the
maximum mark. Oil levels above the
maximum mark may cause engine damage.
Note: Immediately soak up any oil spillage
with an absorbent cloth.
RESETTING THE ENGINE OIL
CHANGE REMINDER
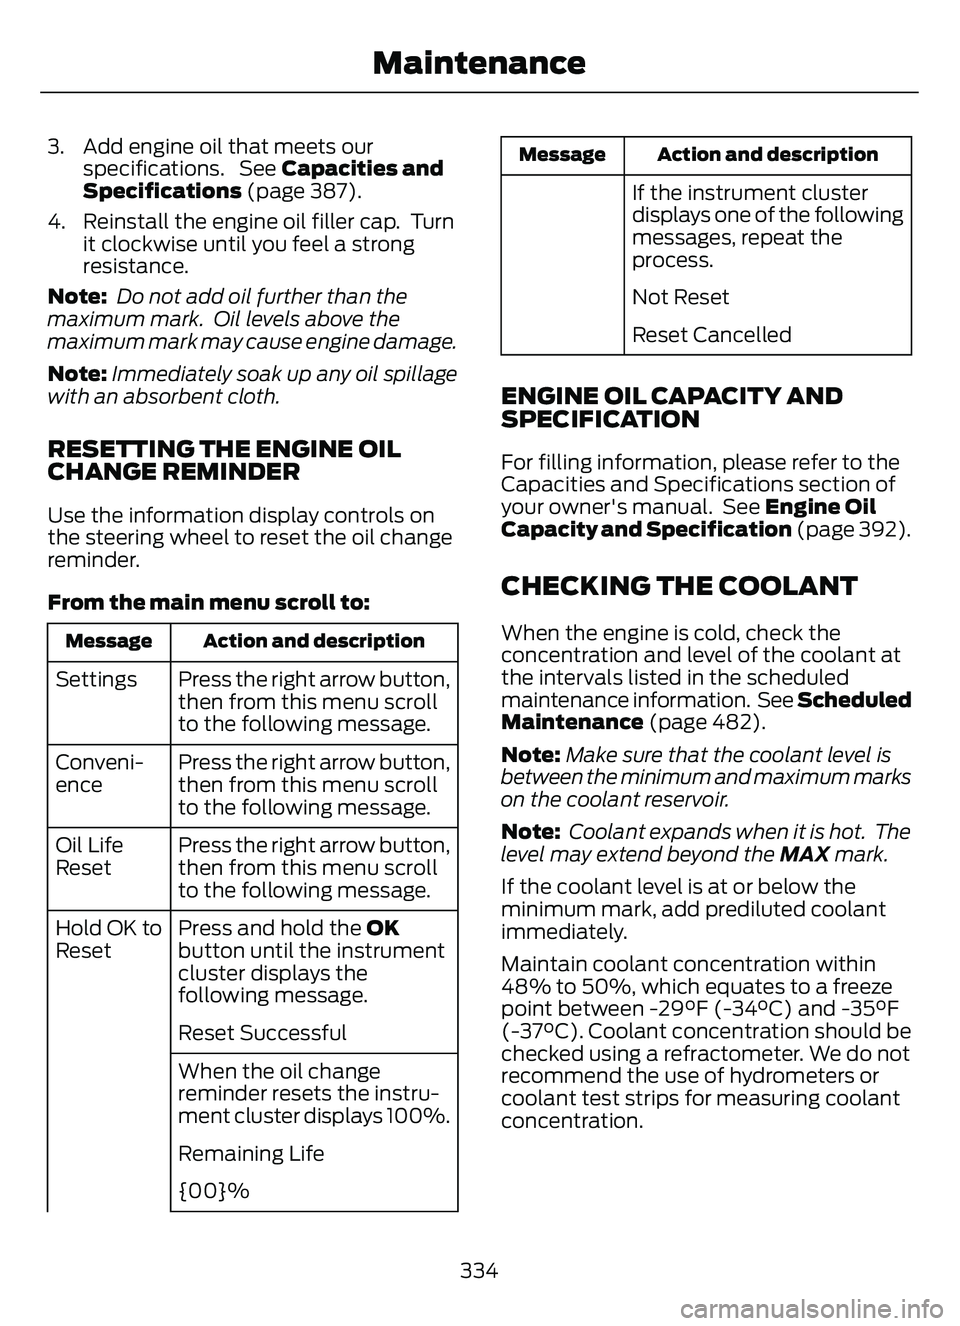
Use the information display controls on
the steering wheel to reset the oil change
reminder.
From the main menu scroll to:
Action and description
Message
Press the right arrow button,
then from this menu scroll
to the following message.
Settings
Press the right arrow button,
then from this menu scroll
to the following message.
Conveni-
ence
Press the right arrow button,
then from this menu scroll
to the following message.
Oil Life
Reset
Press and hold the OK
button until the instrument
cluster displays the
following message.
Hold OK to
Reset
Reset Successful
When the oil change
reminder resets the instru-
ment cluster displays 100%.
Remaining Life
{00}%
Action and description
Message
If the instrument cluster
displays one of the following
messages, repeat the
process.
Not Reset
Reset Cancelled
ENGINE OIL CAPACITY AND
SPECIFICATION
For filling information, please refer to the
Capacities and Specifications section of
your owner's manual. See Engine Oil
Capacity and Specification (page 392).
CHECKING THE COOLANT
When the engine is cold, check the
concentration and level of the coolant at
the intervals listed in the scheduled
maintenance information. See Scheduled
Maintenance (page 482).
Note:Make sure that the coolant level is
between the minimum and maximum marks
on the coolant reservoir.
Note: Coolant expands when it is hot. The
level may extend beyond the MAX mark.
If the coolant level is at or below the
minimum mark, add prediluted coolant
immediately.
Maintain coolant concentration within
48% to 50%, which equates to a freeze
point between -29°F (-34°C) and -35°F
(-37°C). Coolant concentration should be
checked using a refractometer. We do not
recommend the use of hydrometers or
coolant test strips for measuring coolant
concentration.
334
Maintenance
Page 375 of 585
WHAT IS THE TIRE SEALANT
AND INFLATOR KIT
The kit consists of an air compressor to
re-inflate the tire and a canister of sealing
compound that effectively seals most
punctures. This kit provides a temporary
tire repair allowing you to drive your vehicle
up to 120 mi (200 km) at a maximum
speed of 50 mph (80 km/h) to reach a tire
service location.
TIRE SEALANT AND INFLATOR
KIT PRECAUTIONS
WARNING: Failure to follow these
guidelines could result in an increased
risk of loss of vehicle control, injury or
death.
WARNING: Do not run the engine
when operating the air compressor
unless the vehicle is outdoors or in a
well-ventilated area.
Note: Do not use the kit if a tire has become
severely damaged. Only punctures located
within the tire tread can be sealed with the
kit.
Do not attempt to repair punctures larger
than 0.24 in (6 mm) or damage to the tire's
sidewall. The tire may not completely seal.
• Drive carefully and avoid abrupt steering maneuvers.
• Periodically monitor tire inflation pressure in the affected tire; if the tire
is losing pressure, have the vehicle
towed.
• Read the information in the Tips for Use of the Kit section to make sure safe
operation of the kit and your vehicle.
LOCATING THE TIRE SEALANT
AND INFLATOR KIT
The kit is located under the load floor in
the rear of the vehicle.
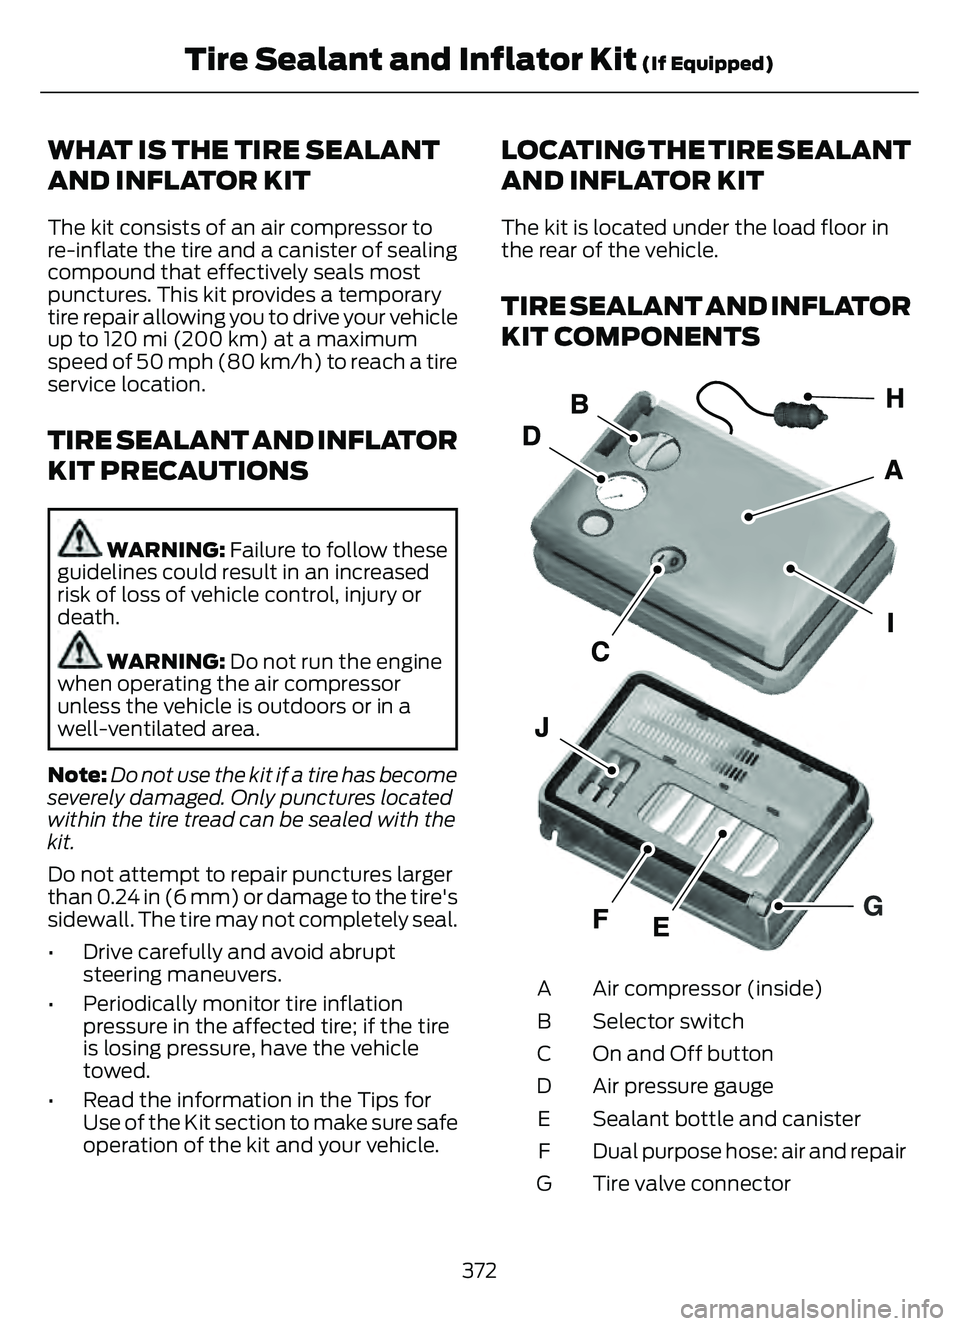
TIRE SEALANT AND INFLATOR
KIT COMPONENTS
E1755977E1755977
Air compressor (inside)
A
Selector switch
B
On and Off button
C
Air pressure gauge
D
Sealant bottle and canister
E
Dual purpose hose: air and repair
F
Tire valve connector
G
372
Tire Sealant and Inflator Kit (If Equipped)
Page 377 of 585
E175979E175979
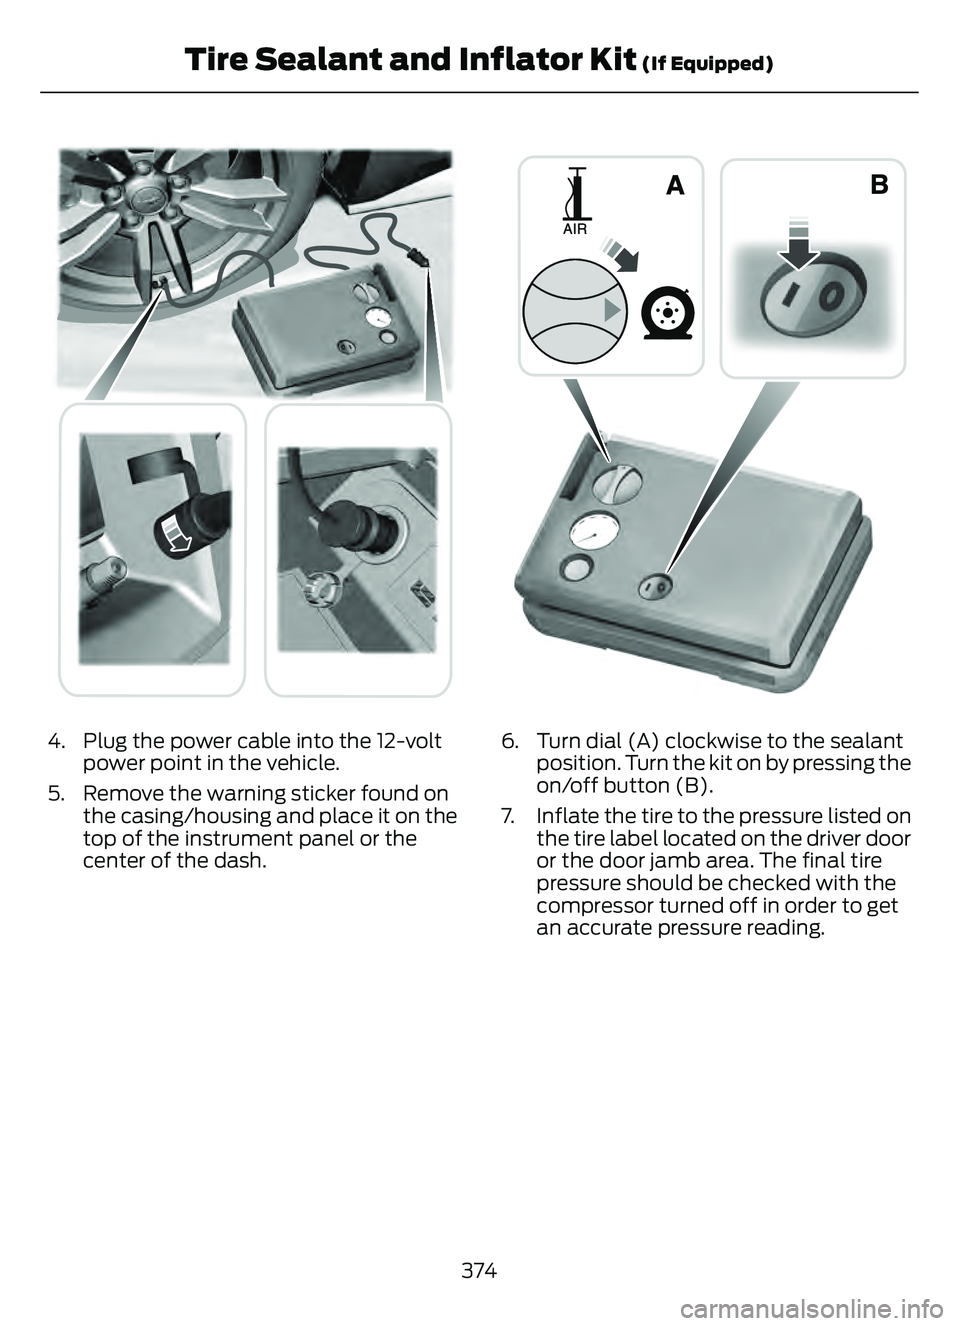
4. Plug the power cable into the 12-voltpower point in the vehicle.
5. Remove the warning sticker found on the casing/housing and place it on the
top of the instrument panel or the
center of the dash.
E175981E175EE981
6. Turn dial (A) clockwise to the sealantposition. Turn the kit on by pressing the
on/off button (B).
7. Inflate the tire to the pressure listed on the tire label located on the driver door
or the door jamb area. The final tire
pressure should be checked with the
compressor turned off in order to get
an accurate pressure reading.
374
Tire Sealant and Inflator Kit (If Equipped)
Page 412 of 585
CREATING A VEHICLE WI-FI
HOTSPOT
You can create a Wi-Fi hotspot in your
vehicle and allow devices to connect to it
for access to the Internet.
Press the button to enter the
settings menu.
1. Select Connectivity Features.
2. Select Vehicle Hotspot.
Note: The vehicle hotspot default setting
is on.
3. Select Settings .
4. Make sure that you have Wi-Fi visibility switched on.
Note: The Wi-Fi Visibility default setting is
on.
Finding the Wi-Fi Hotspot Name
and Password
Press the button to enter the
settings menu.
1. Select Connectivity Features.
2. Select Vehicle Hotspot.
3. Select Settings .
Note: The SSID is the hotspot name.
4. Scroll to Hide password .
5. Uncheck the box.
Connecting a Device to the Wi-Fi
Hotspot
1. On your device, switch on Wi-Fi and select the hotspot from the list of
available Wi-Fi networks.
2. When prompted, enter the password.
Purchasing a Data Plan
1. Connect a device to the hotspot. Note:
The vehicle network carrier’s portal
opens on your device.
2. If the portal does not open on your device, open a website and it redirects
to the vehicle network carrier’s portal.
Note: Secure websites do not redirect.
Note: If you have an active plan, the system
does not redirect to the vehicle network
carrier’s portal when you connect a device.
Visit the vehicle network carrier’s website
to purchase more data.
Note: If data usage information is available
in the vehicle hotspot menu, it is
approximate.
Note: If you carry out a master reset, the
system does not remove your vehicle from
your vehicle network carrier’s account. To
remove your vehicle from the account,
contact your vehicle network carrier.
Note: The vehicle network carrier provides
Vehicle Hotspot services, subject to your
vehicle network carrier agreement, coverage
and availability.
CHANGING THE VEHICLE WI-
FI HOTSPOT NAME OR
PASSWORD
Press the button to enter the
settings menu.
1. Select Connectivity Features.
2. Select Vehicle Hotspot.
3. Select Settings .
4. Select SSID: ___.
5. Enter your required SSID.
6. Select Done.
7. S e l e c t Password: ___ .
8. Enter your required password.
9. Select Done.
409
Vehicle Wi-Fi Hotspot
Page 413 of 585
AUDIO SYSTEM
PRECAUTIONS
WARNING: Driving while distracted
can result in loss of vehicle control, crash
and injury. We strongly recommend that
you use extreme caution when using any
device that may take your focus off the
road. Your primary responsibility is the
safe operation of your vehicle. We
recommend against the use of any
hand-held device while driving and
encourage the use of voice-operated
systems when possible. Make sure you
are aware of all applicable local laws
that may affect the use of electronic
devices while driving.
Listening to loud audio for long periods of
time could damage your hearing.
SWITCHING THE AUDIO UNIT
ON AND OFF
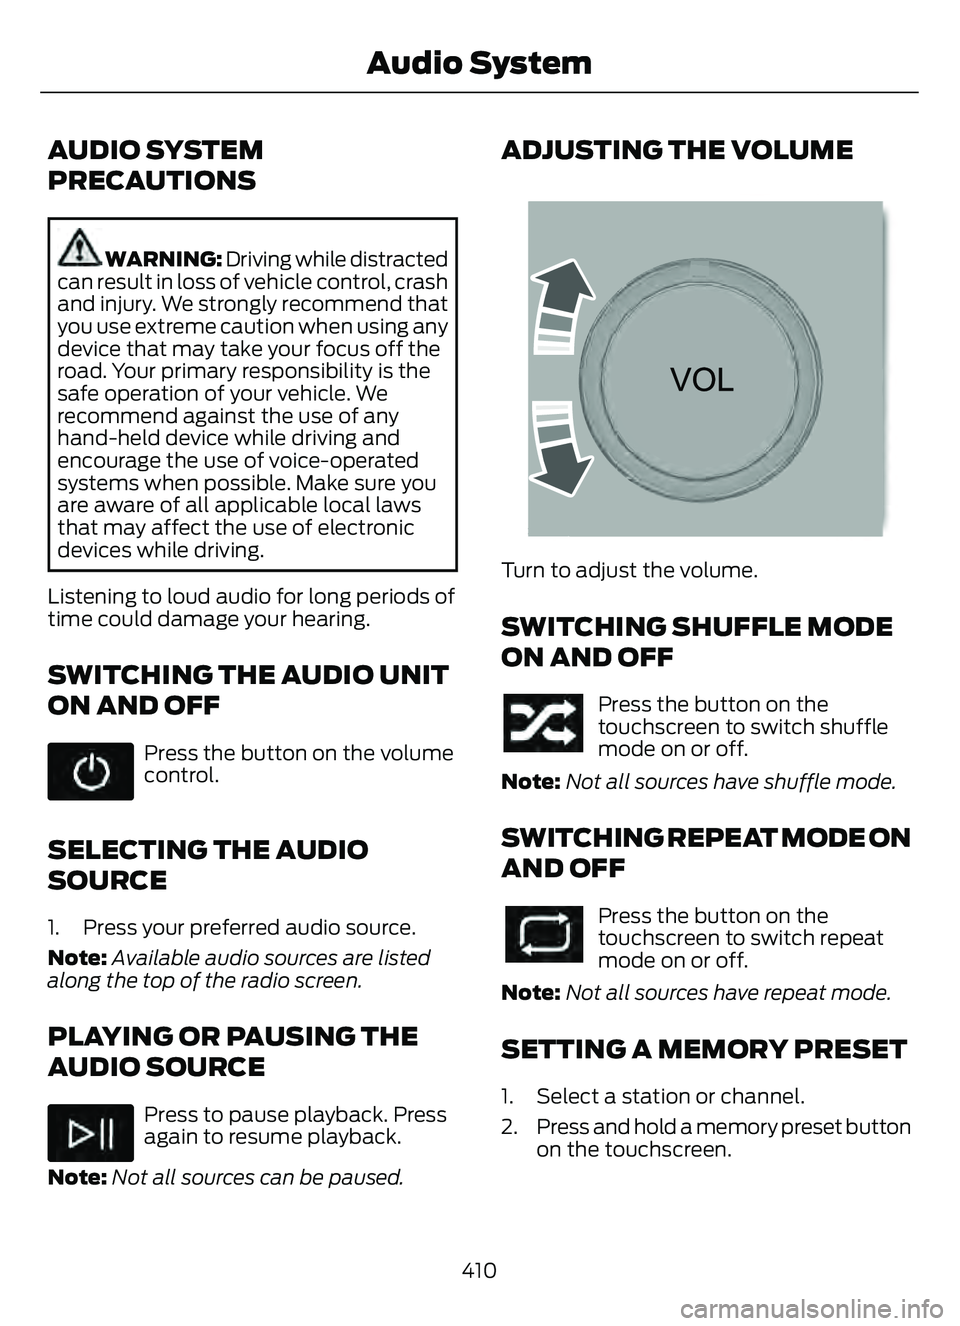
Press the button on the volume
control.
SELECTING THE AUDIO
SOURCE
1. Press your preferred audio source.
Note: Available audio sources are listed
along the top of the radio screen.
PLAYING OR PAUSING THE
AUDIO SOURCE
Press to pause playback. Press
again to resume playback.
Note: Not all sources can be paused.
ADJUSTING THE VOLUME
E2265373E2265373265373
Turn to adjust the volume.
SWITCHING SHUFFLE MODE
ON AND OFF
Press the button on the
touchscreen to switch shuffle
mode on or off.
Note: Not all sources have shuffle mode.
SWITCHING REPEAT MODE ON
AND OFF
Press the button on the
touchscreen to switch repeat
mode on or off.
Note: Not all sources have repeat mode.
SETTING A MEMORY PRESET
1. Select a station or channel.
2. Press and hold a memory preset button
on the touchscreen.
410
Audio System
Page 414 of 585
Note:The audio mutes briefly while the
system saves the preset and returns once it
is stored.
Note: You can save presets from multiple
sources to the memory preset bar.
MUTING THE AUDIO
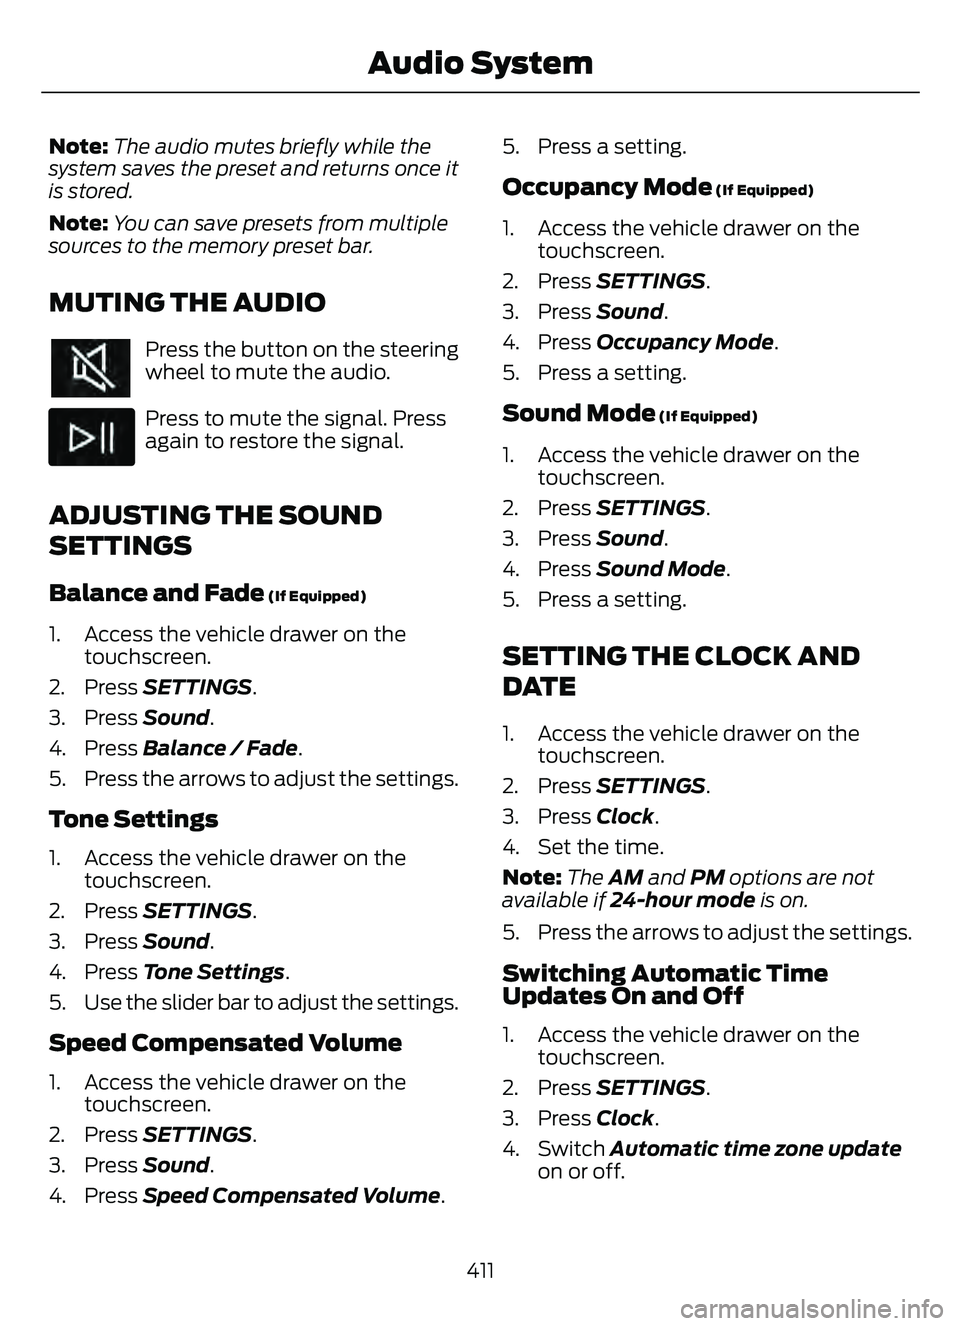
Press the button on the steering
wheel to mute the audio.
Press to mute the signal. Press
again to restore the signal.
ADJUSTING THE SOUND
SETTINGS
Balance and Fade (If Equipped)
1. Access the vehicle drawer on the touchscreen.
2. Press SETTINGS.
3. Press Sound.
4. Press Balance / Fade.
5. Press the arrows to adjust the settings.
Tone Settings
1. Access the vehicle drawer on the touchscreen.
2. Press SETTINGS.
3. Press Sound.
4. Press Tone Settings .
5. Use the slider bar to adjust the settings.
Speed Compensated Volume
1. Access the vehicle drawer on the touchscreen.
2. Press SETTINGS.
3. Press Sound.
4. Press Speed Compensated Volume .5. Press a setting.
Occupancy Mode (If Equipped)
1. Access the vehicle drawer on the
touchscreen.
2. Press SETTINGS.
3. Press Sound.
4. Press Occupancy Mode .
5. Press a setting.
Sound Mode (If Equipped)
1. Access the vehicle drawer on the touchscreen.
2. Press SETTINGS.
3. Press Sound.
4. Press Sound Mode .
5. Press a setting.
SETTING THE CLOCK AND
DATE
1. Access the vehicle drawer on the touchscreen.
2. Press SETTINGS.
3. Press Clock.
4. Set the time.
Note: The AM and PM options are not
available if 24-hour mode is on.
5. Press the arrows to adjust the settings.
Switching Automatic Time
Updates On and Off
1. Access the vehicle drawer on the touchscreen.
2. Press SETTINGS.
3. Press Clock.
4. Switch Automatic time zone update on or off.
411
Audio System
Page 415 of 585
AM/FM RADIO
AM/FM RADIO LIMITATIONS
The further you travel from an AM or FM
station, the weaker the signal and the
weaker the reception.
Hills, mountains, tall buildings, bridges,
tunnels, freeway overpasses, parking
garages, dense tree foliage and
thunderstorms can interfere with the
reception.
When you pass a ground-based broadcast
repeating tower, a stronger signal may
overtake a weaker one and result in the
audio system muting.
SELECTING A RADIO STATION
Manually Selecting a Radio
Station
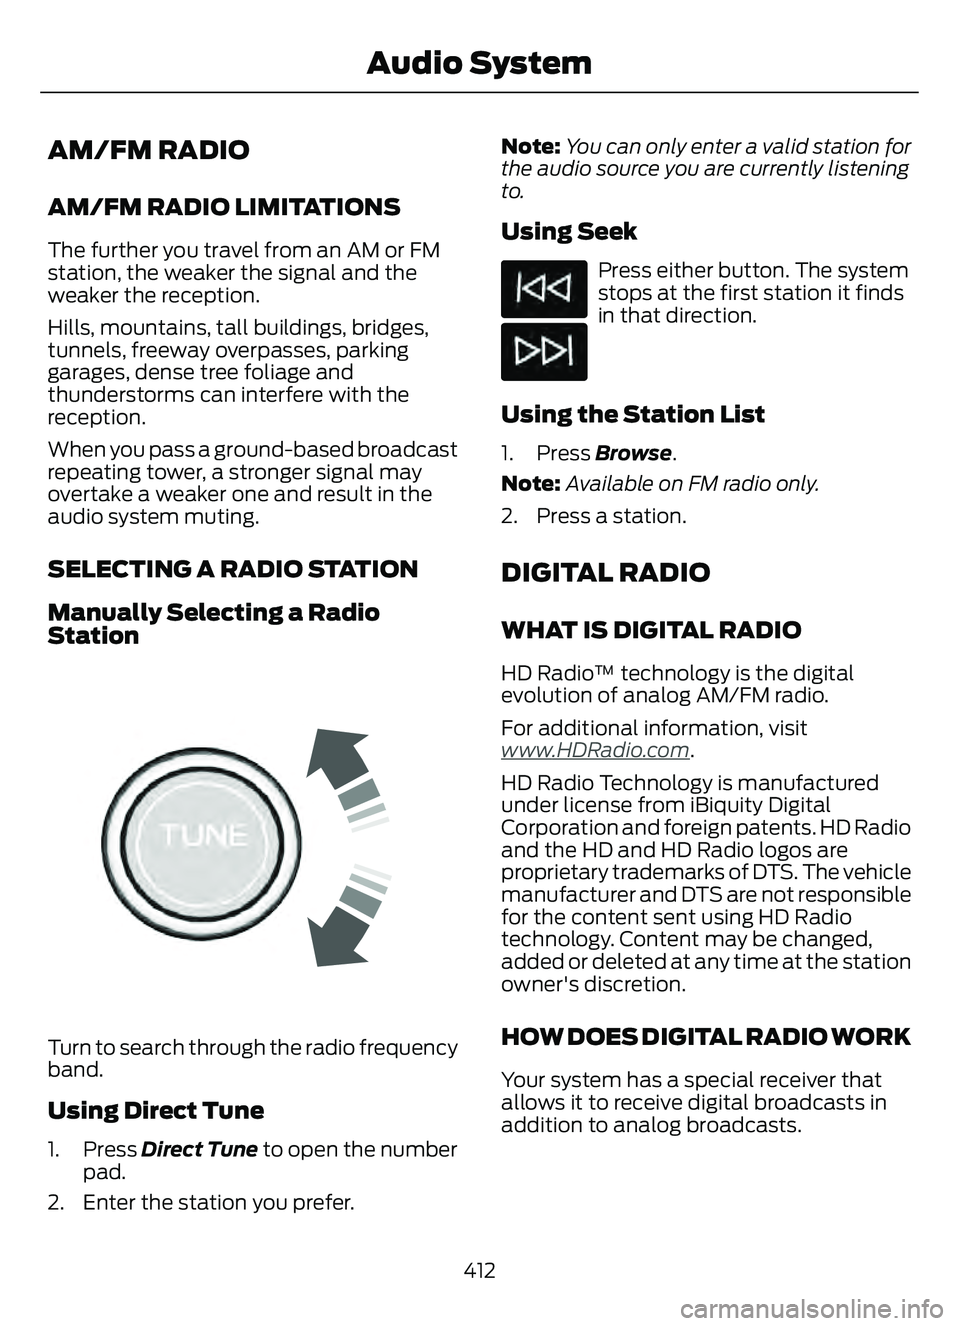
E270235E270235
Turn to search through the radio frequency
band.
Using Direct Tune
1. Press Direct Tune to open the number
pad.
2. Enter the station you prefer. Note:
You can only enter a valid station for
the audio source you are currently listening
to.
Using Seek
Press either button. The system
stops at the first station it finds
in that direction.
Using the Station List
1. Press Browse .
Note: Available on FM radio only.
2. Press a station.
DIGITAL RADIO
WHAT IS DIGITAL RADIO
HD Radio™ technology is the digital
evolution of analog AM/FM radio.
For additional information, visit
www
.HDRadio.com.
HD Radio Technology is manufactured
under license from iBiquity Digital
Corporation and foreign patents. HD Radio
and the HD and HD Radio logos are
proprietary trademarks of DTS. The vehicle
manufacturer and DTS are not responsible
for the content sent using HD Radio
technology. Content may be changed,
added or deleted at any time at the station
owner's discretion.
HOW DOES DIGITAL RADIO WORK
Your system has a special receiver that
allows it to receive digital broadcasts in
addition to analog broadcasts.
412
Audio System
Page 416 of 585
HD1 signifies the main programming status
and is available in both analog and digital
broadcasts. Other multicast stations are
only available digitally and could contain
new or different content.
Note:When the system first receives an
HD1 station, it plays the station in the analog
version until it verifies the station is an HD
Radio station. Then it shifts to the digital
version.
Note: There is an audio mute delay when
switching to an HD2 or HD3 station because
the system has to reacquire and decode the
digital signal.
DIGITAL RADIO LIMITATIONS
If you are outside the reception area, the
system could not work.
If you are on the fringe of the reception
area, the station could mute due to weak
signal strength.
Note: If you are listening to HD1, the system
changes back to the analog broadcast until
the digital broadcast is available again. If
you are listening to any other multicast
channels, the station mutes and stays
muted unless it is able to connect to the
digital signal again.
Depending on the station quality, you could
hear a slight sound change when the
station changes between analog and
digital audio.
You cannot access a saved HD station if
your vehicle is outside the station’s
reception area.
SWITCHING DIGITAL RADIO
RECEPTION ON AND OFF
1. Access the vehicle drawer on the touchscreen.
2. Press SETTINGS.
3. Press Radio. 4. Switch HD Radio on or off.
DIGITAL RADIO INDICATORS
HD Radio Indicator
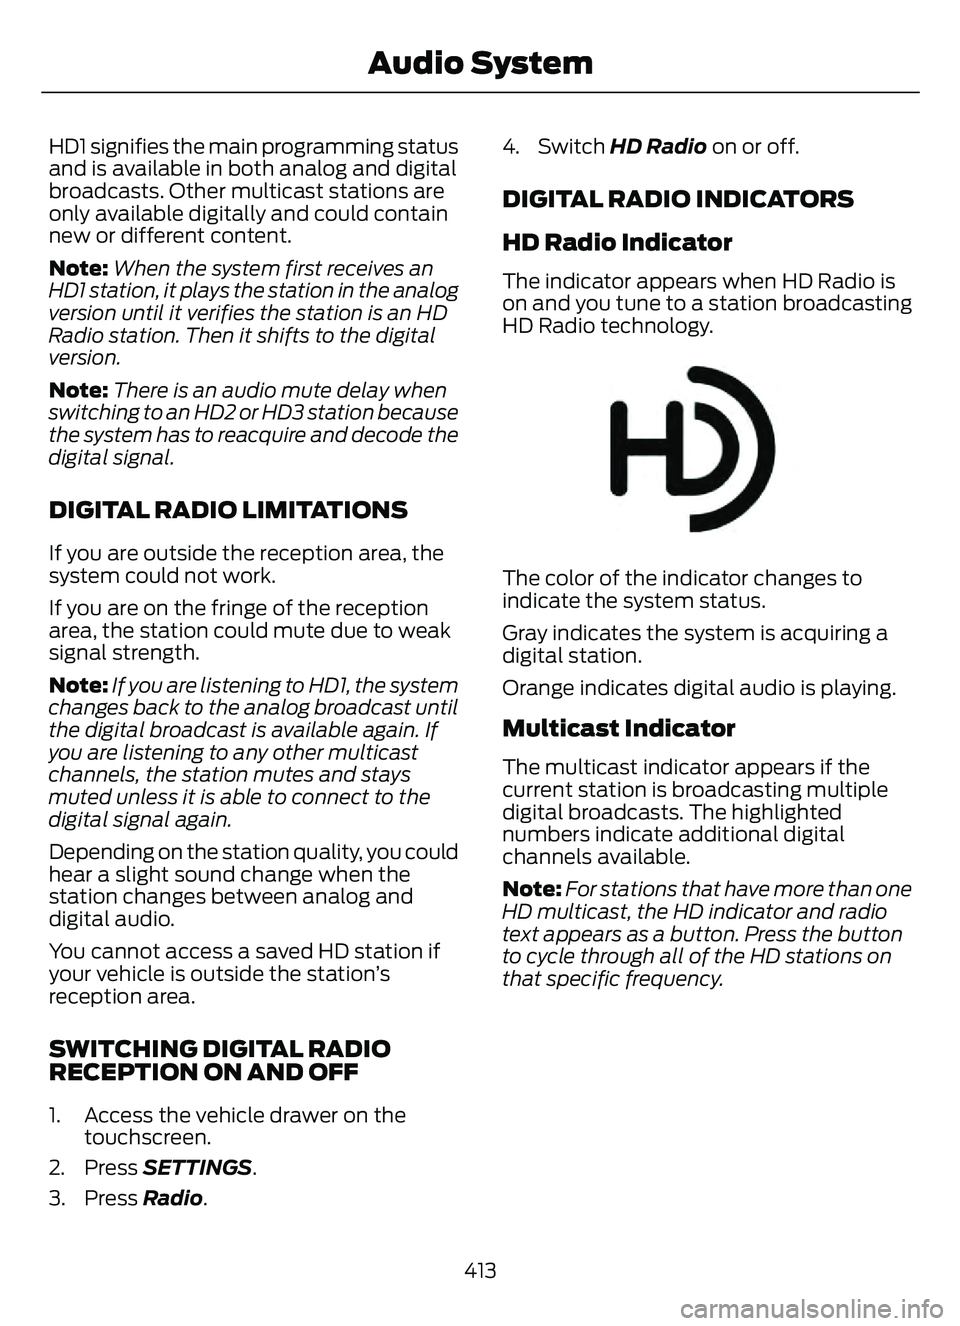
The indicator appears when HD Radio is
on and you tune to a station broadcasting
HD Radio technology.
E142616
The color of the indicator changes to
indicate the system status.
Gray indicates the system is acquiring a
digital station.
Orange indicates digital audio is playing.
Multicast Indicator
The multicast indicator appears if the
current station is broadcasting multiple
digital broadcasts. The highlighted
numbers indicate additional digital
channels available.
Note:
For stations that have more than one
HD multicast, the HD indicator and radio
text appears as a button. Press the button
to cycle through all of the HD stations on
that specific frequency.
413
Audio System
Page 419 of 585
(read and unread), and call history,
including history of calls when your cellular
phone was not connected to the system.
In addition, if you connect a media device,
the system creates and retains an index of
supported media content. The system also
records a short development log of
approximately 10 minutes of all recent
system activity. The log profile and other
system data may be used to improve the
system and help diagnose any problems
that may occur.
The cellular profile, media device index,
and development log will remain in the
vehicle unless you delete them and are
generally accessible only in the vehicle
when you connect the cellular phone or
media player. If you no longer plan to use
the system or the vehicle, we recommend
you perform a Master Reset to erase all
stored information.
No one can access system data without
special equipment and access to the
vehicle's SYNC module. Ford Motor
Company and Ford of Canada will not
access the system data for any purpose
other than as described absent consent, acourt order, or where required by law
enforcement, other government
authorities, or other third parties acting
with lawful authority. Other parties may
seek to access the information
independently of Ford Motor Company and
Ford of Canada. For further privacy
information, see the section on 911 Assist.
See
SYNC™ Applications and Services
(page 419).
USING VOICE RECOGNITION
This system helps you control many
features using voice commands. This
allows you to keep your hands on the
wheel and focus on what is around you.
Initiating a Voice Session
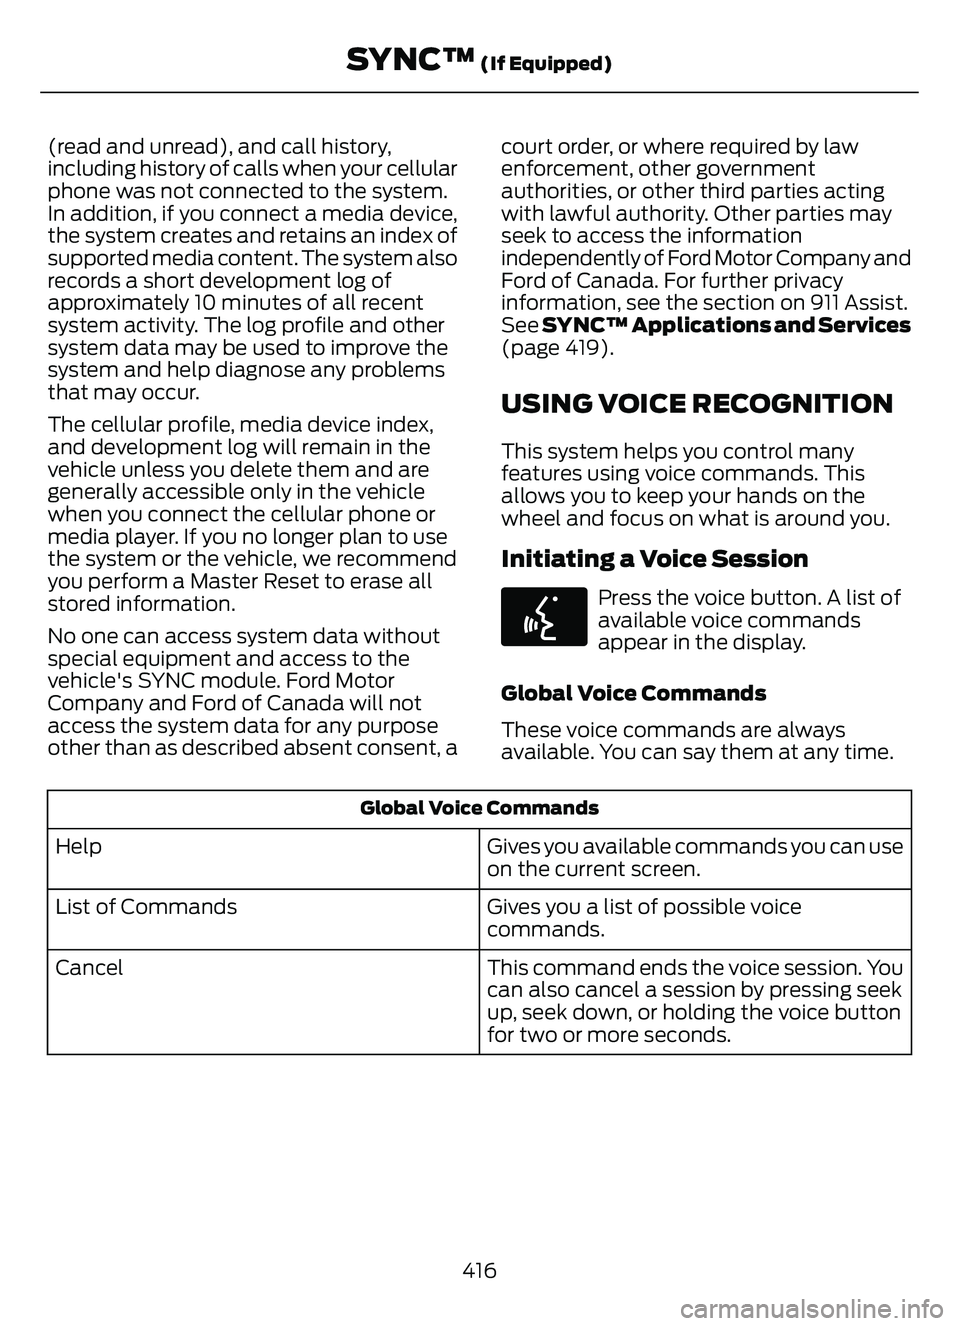
E142599
Press the voice button. A list of
available voice commands
appear in the display.
Global Voice Commands
These voice commands are always
available. You can say them at any time.
Global Voice Commands
Gives you available commands you can use
on the current screen.
Help
Gives you a list of possible voice
commands.
List of Commands
This command ends the voice session. You
can also cancel a session by pressing seek
up, seek down, or holding the voice button
for two or more seconds.
Cancel
416
SYNC™ (If Equipped)
Page 420 of 585
Helpful Hints
• Make sure the interior of your vehicle isas quiet as possible. Wind noise from
open windows and road vibrations may
prevent the system from correctly
recognizing spoken commands.
• Before giving a voice command, wait for the system announcement to finish,
followed by a single tone. Any
command spoken before this does not
register with the system.
• Speak naturally, without long pauses between words.
• You can interrupt the system at any time while it is speaking by pressing the
voice button. You can cancel a voice
session by pressing and holding the
voice button.System Interaction and Feedback
The system provides feedback through
audible tones, prompts, questions and
spoken confirmations depending on the
situation and the chosen level of
interaction. You can customize the voice
recognition system to provide more or less
instruction and feedback.
The default setting is to a higher level of
interaction in order to help you learn to use
the system. You can change these settings
at any time.
Adjusting the Interaction Level
E142599
Press the voice button. When
prompted, say:
Action and Description
Voice Command
Provides more detailed interaction and
guidance. (Recommended for first time
users.)
Interaction Mode Standard
Provides less audible interaction and guid-
ance.
Interaction Mode Advanced
Phone Confirmation
Using phone confirmations; the system
asks you to verify before placing any calls.
To adjust this setting press the voice button, when prompted say:
Action and Description
Voice Command
When enabled, this feature prompts you to
confirm any voice initiated call command
prior to placing the call.
Phone Confirmation Off
The system makes a best guess; occasion-
ally, the system asks you to confirm
settings.
Phone Confirmation On
417
SYNC™ (If Equipped)