flat tire FORD ESCAPE 2022 Owners Manual
[x] Cancel search | Manufacturer: FORD, Model Year: 2022, Model line: ESCAPE, Model: FORD ESCAPE 2022Pages: 585, PDF Size: 6.15 MB
Page 14 of 585
Towing Your Vehicle
Towing Your Vehicle Precautions ..........316
Recreationally Towing Your Vehicle -Gasoline, AWD ..........................................316
Recreationally Towing Your Vehicle - Gasoline, FWD ..........................................316
Recreationally Towing Your Vehicle - Hybrid Electric Vehicle (HEV)/Plug-In
Hybrid Electric Vehicle (PHEV) ..........316
Emergency Towing - Hybrid Electric Vehicle (HEV)/Plug-In Hybrid Electric
Vehicle (PHEV) .........................................317
Emergency Towing - 8-Speed Automatic Transmission – 8F24 ..............................317
Emergency Towing - 8-Speed Automatic Transmission – 8F35 .............................318
Towing Your Vehicle – Troubleshooting ........................................................................\
.318
Fuses
Fuse Precautions .........................................319
Under Hood Fuse Box ................................319
Body Control Module Fuse Box .............325
Identifying Fuse Types ..............................327
Fuses – Troubleshooting ..........................327
Maintenance
Maintenance Precautions .......................328
Opening and Closing the Hood .............328
Under Hood Overview - 1.5L EcoBoost™........................................................................\
330
Under Hood Overview - 2.0L EcoBoost™ ........................................................................\
.3 3 1
Under Hood Overview - Hybrid Electric Vehicle (HEV) ...........................................332
Engine Oil .......................................................333
Checking the Coolant ...............................334
Changing the Engine Air Filter - 1.5L EcoBoost™/2.0L EcoBoost™ ..........338
Changing the Engine Air Filter - 2.5L, Hybrid Electric Vehicle (HEV)/Plug-In
Hybrid Electric Vehicle (PHEV) .........339 Changing the Fuel Filter - Gasoline,
Hybrid Electric Vehicle (HEV) ...........340
Drive Belt Routing Overview - 1.5L EcoBoost™ ..............................................340
Drive Belt Routing Overview - 2.0L EcoBoost™ ................................................341
12V Battery .....................................................341
Changing the 12V Battery ........................343
Adjusting the Headlamps .......................344
Exterior Bulbs ...............................................345
Interior Bulbs ................................................348
Vehicle Care
Cleaning Products ......................................349
Cleaning the Exterior .................................349
Cleaning the Interior ...................................351
Repairing Minor Paint Damage ..............353
Waxing Your Vehicle ..................................353
Body Styling Kits
Body Styling Kit Precautions ..................354
Storing Your Vehicle
Preparing Your Vehicle for Storage ......355
Removing Your Vehicle From Storage ........................................................................\
356
Wheel and Tire Information
Locating the Tire label ..............................357
Department of Transportation UniformTire Quality Grades ................................357
Information on the Tire Sidewall ..........358
Glossary of Tire Terminology .................363
Tire Replacement Requirements .........364
Using Snow Chains ....................................366
Tire Care
Checking the Tire Pressures ...................368
Inflating the Tires .......................................368
Inspecting the Tire for Wear ...................369
11
Table of Contents
Page 15 of 585
Inspecting the Tire for Damage ............369
Inspecting the Wheel Valve Stems ......370
Tire Rotation .................................................370
Tire Sealant and Inflator Kit
What Is the Tire Sealant and Inflator Kit........................................................................\
.372
Tire Sealant and Inflator Kit Precautions ........................................................................\
.372
Locating the Tire Sealant and Inflator Kit ........................................................................\
.372
Tire Sealant and Inflator Kit Components ........................................................................\
.372
Using the Tire Sealant and Inflator Kit ........................................................................\
3 7 3
Tire Pressure MonitoringSystem
What Is the Tire Pressure MonitoringSystem ........................................................378
Tire Pressure Monitoring System Overview ....................................................378
Tire Pressure Monitoring System Precautions ...............................................379
Tire Pressure Monitoring System Limitations ................................................379
Viewing the Tire Pressures .....................380
Tire Pressure Monitoring System – Troubleshooting .....................................380
Changing a Road Wheel
Changing a Flat Tire ...................................382
Wheel Nuts ...................................................386
Capacities and Specifications
Engine Specifications - 1.5L EcoBoost™........................................................................\
387
Engine Specifications - 2.0L EcoBoost™ .......................................................................3\
8 8
Engine Specifications - 2.5L, Hybrid Electric Vehicle (HEV)/Plug-In Hybrid
Electric Vehicle (PHEV) .......................389 Motorcraft Parts - 1.5L EcoBoost™ .....390
Motorcraft Parts - 2.0L EcoBoost™ ....390
Motorcraft Parts - 2.5L, Hybrid Electric
Vehicle (HEV)/Plug-In Hybrid Electric
Vehicle (PHEV) ........................................391
Engine Oil Capacity and Specification - 1.5L EcoBoost™ ......................................392
Engine Oil Capacity and Specification - 2.0L EcoBoost™ .....................................393
Engine Oil Capacity and Specification - 2.5L, Hybrid Electric Vehicle (HEV)/
Plug-In Hybrid Electric Vehicle (PHEV)
........................................................................\
395
Cooling System Capacity and Specification - 1.5L EcoBoost™ .......396
Cooling System Capacity and Specification - 2.0L EcoBoost™ .......397
Cooling System Capacity and Specification - 2.5L, Hybrid Electric
Vehicle (HEV)/Plug-In Hybrid Electric
Vehicle (PHEV) ........................................397
Fuel Tank Capacity - Excluding: Hybrid Electric Vehicle (HEV)/Plug-In Hybrid
Electric Vehicle (PHEV) .......................398
Fuel Tank Capacity - Hybrid Electric Vehicle (HEV)/Plug-In Hybrid Electric
Vehicle (PHEV) .......................................399
Air Conditioning System Capacity and Specification - 1.5L EcoBoost™ .......400
Air Conditioning System Capacity and Specification - 2.0L EcoBoost™ .......401
Air Conditioning System Capacity and Specification - 2.5L, Hybrid Electric
Vehicle (HEV)/Plug-In Hybrid Electric
Vehicle (PHEV) .......................................402
Washer Fluid Specification .....................402
Brake Fluid Specification ........................403Vehicle Identification
Vehicle Identification Number ..............404
Connected Vehicle
Connected Vehicle Requirements .......405
Connected Vehicle Limitations .............405
12
Table of Contents
Page 244 of 585
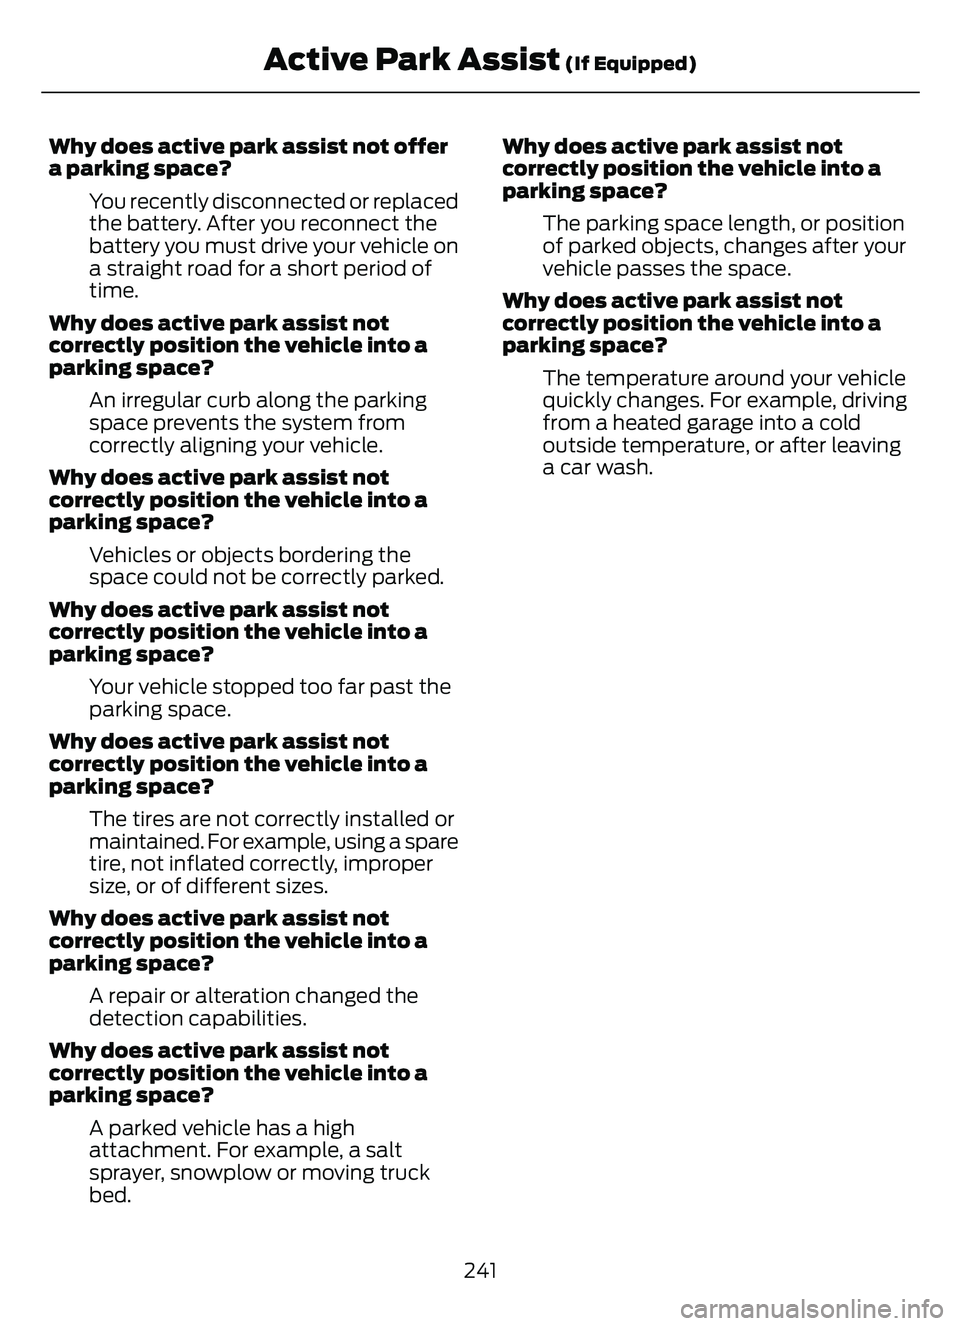
Why does active park assist not offer
a parking space?You recently disconnected or replaced
the battery. After you reconnect the
battery you must drive your vehicle on
a straight road for a short period of
time.
Why does active park assist not
correctly position the vehicle into a
parking space? An irregular curb along the parking
space prevents the system from
correctly aligning your vehicle.
Why does active park assist not
correctly position the vehicle into a
parking space? Vehicles or objects bordering the
space could not be correctly parked.
Why does active park assist not
correctly position the vehicle into a
parking space? Your vehicle stopped too far past the
parking space.
Why does active park assist not
correctly position the vehicle into a
parking space? The tires are not correctly installed or
maintained. For example, using a spare
tire, not inflated correctly, improper
size, or of different sizes.
Why does active park assist not
correctly position the vehicle into a
parking space? A repair or alteration changed the
detection capabilities.
Why does active park assist not
correctly position the vehicle into a
parking space? A parked vehicle has a high
attachment. For example, a salt
sprayer, snowplow or moving truck
bed. Why does active park assist not
correctly position the vehicle into a
parking space?
The parking space length, or position
of parked objects, changes after your
vehicle passes the space.
Why does active park assist not
correctly position the vehicle into a
parking space? The temperature around your vehicle
quickly changes. For example, driving
from a heated garage into a cold
outside temperature, or after leaving
a car wash.
241
Active Park Assist (If Equipped)
Page 270 of 585
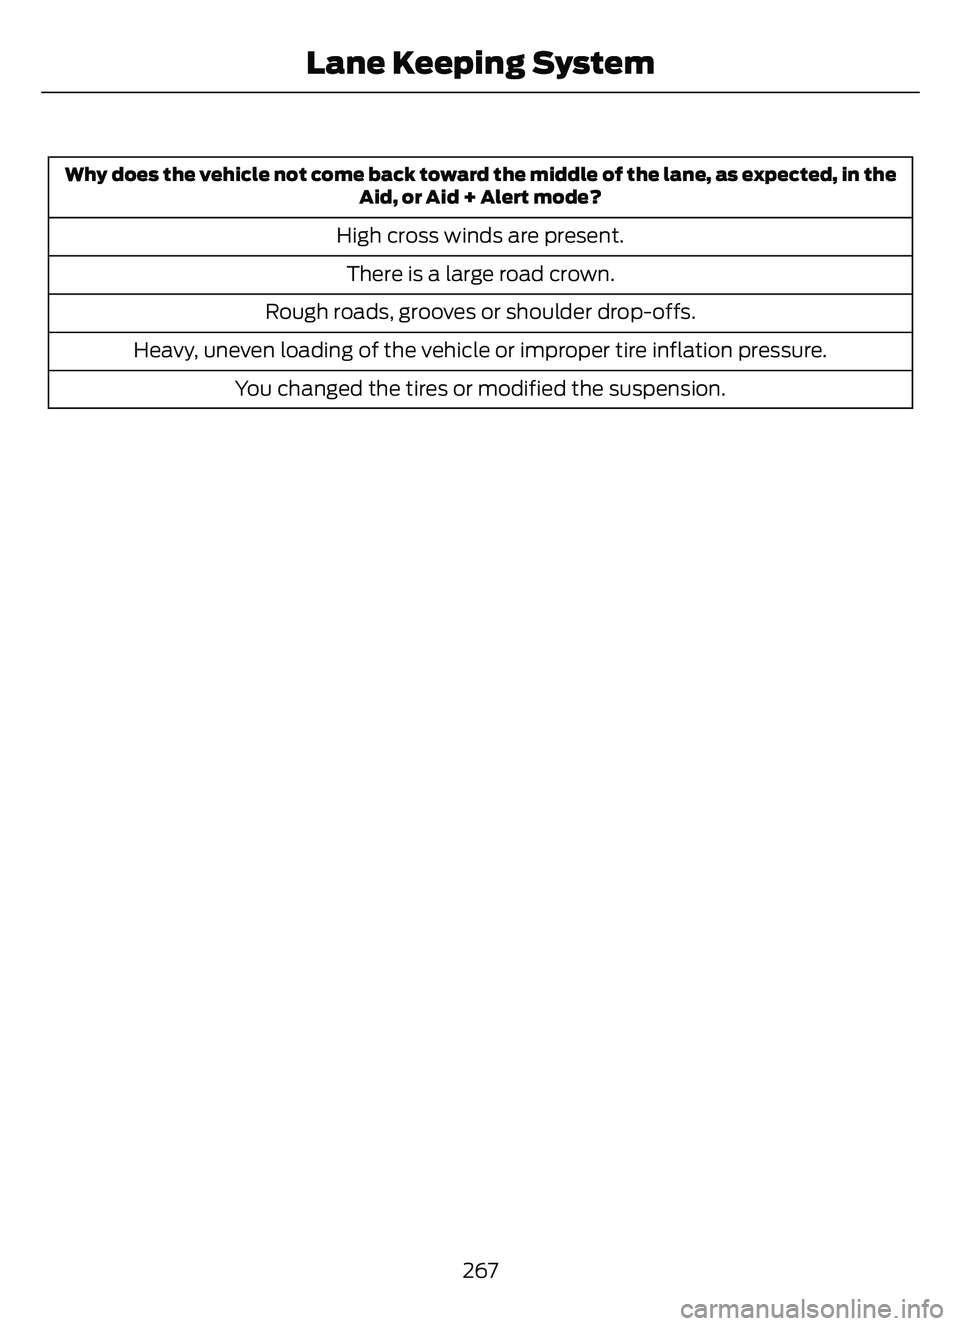
Why does the vehicle not come back toward the middle of the lane, as expected, in theAid, or Aid + Alert mode?
High cross winds are present.
There is a large road crown.
Rough roads, grooves or shoulder drop-offs.
Heavy, uneven loading of the vehicle or improper tire inflation pressure. You changed the tires or modified the suspension.
267
Lane Keeping System
Page 307 of 585
COLD WEATHER
PRECAUTIONS
The functional operation of some
components and systems can be affected
at temperatures below approximately
-13°F (-25°C).
BREAKING-IN
You need to break in new tires for
approximately 300 mi (480 km). During
this time, your vehicle may exhibit some
unusual driving characteristics.
DRIVING ECONOMICALLY
The following helps to improve fuel
consumption:
• Drive smoothly, accelerate gently andanticipate the road ahead to avoid
heavy braking.
• Regularly check your tire pressures and make sure that they are inflated to the
correct pressure.
• Follow the recommended maintenance schedule and carry out the
recommended checks.
• Plan your journey and check the traffic before you set off. It is more efficient
to combine errands into a single trip
whenever possible.
• Avoid idling the engine in cold weather or for extended periods. Start the
engine only when you are ready to set
off.
• Do not carry unnecessary weight in your vehicle as extra weight wastes fuel.
• Do not add unnecessary accessories to the exterior of your vehicle, for
example running boards. If you use a
roof rack, remember to fold it down or
remove it when not in use. • Do not shift into neutral when you are
braking or when your vehicle is slowing
down.
• Shut all windows when driving at high speeds.
• Switch off all electric systems when not in use, for example air conditioning.
Make sure that you unplug any
accessories from the auxiliary power
points when not in use.
DRIVING IN SPECIAL
CONDITIONS
EMERGENCY MANEUVERS
In an unavoidable emergency where you
must make a sudden sharp maneuver, turn
the steering wheel only as rapidly and as
far as required to avoid the emergency.
Apply smooth pressure to the accelerator
pedal or brake pedal as needed. Avoid
abrupt steering, acceleration and braking
changes. Abrupt changes could increase
the risk of vehicle roll over, loss of vehicle
control and personal injury. If possible, use
any available road surfaces to bring your
vehicle under control.
DRIVING THROUGH MUD AND
WATER
Mud
Be cautious of sudden changes in vehicle
speed or direction when you are driving in
mud. Even all-wheel drive and four-wheel
drive vehicles can lose traction in mud. If
your vehicle slides, steer in the direction of
the slide until you regain control of your
vehicle. After driving through mud, clean
off residue stuck to rotating driveshafts
and tires. Excess residue can cause an
imbalance that could damage drive
components.
304
Driving Hints
Page 311 of 585
ROADSIDE ASSISTANCE
Vehicles Sold in the United States:
Getting Roadside Assistance
To fully assist you should you have a
vehicle concern, Ford Motor Company
offers a complimentary roadside
assistance program. This program is
separate from the New Vehicle Limited
Warranty.
The service is available:
• 24 hours a day, seven days a week.
• For the coverage period supplied withyour vehicle.
Roadside Assistance covers:
• A flat tire change with a good spare (except vehicles supplied with a tire
inflation kit).
• Battery jump start.
• Lock-out assistance (key replacement cost is the customer's responsibility).
• Fuel delivery — independent service contractors, if not prohibited by state,
local or municipal law, shall deliver up
to 2 gal (8 L) of gasoline or 5 gal (20 L)
of diesel fuel to a disabled vehicle.
Roadside assistance limits fuel delivery
service to two no-charge occurrences
within a 12-month period.
• Winch out — available within 100 ft (30 m) of a paved or county
maintained road, no recoveries. • Towing — independent service
contractors, if not prohibited by state,
local or municipal law, shall tow Ford
eligible vehicles to an authorized dealer
within 35 mi (56 km) of the
disablement location or to the nearest
authorized dealer. If a member
requests a tow to an authorized dealer
that is more than 35 mi (56 km) from
the disablement location, the member
shall be responsible for any mileage
costs in excess of 35 mi (56 km).
• Roadside Assistance includes up to $200 for a towed trailer if the disabled
eligible vehicle requires service at the
nearest authorized dealer. If the towing
vehicle is operational but the trailer is
not, then the trailer does not qualify for
any roadside services.
Vehicles Sold in the United States:
Using Roadside Assistance
Complete the roadside assistance
identification card and place it in your
wallet for quick reference. This card is in
the Owner's Manual kit.
United States vehicle customers who
require Roadside Assistance, call
1-800-241-3673.
If you need to arrange roadside assistance
for yourself, Ford Motor Company
reimburses a reasonable amount for
towing to the nearest dealership within
35 mi (56 km). To obtain reimbursement
information, United States vehicle
customers call 1-800-241-3673.
Customers need to submit their original
receipts.
308
Crash and Breakdown Information
Page 359 of 585
Note:If you intend on parking your vehicle
for an extended period after cleaning the
wheels with a wheel cleaner, drive your
vehicle for a few minutes before doing so to
reduce the risk of increased corrosion of the
brake discs, brake pads and linings.
Tires
• Maintain recommended air pressure.
Note: If you intend on parking your vehicle
for an extended period after cleaning the
wheels with a wheel cleaner, drive your
vehicle for a few minutes before doing so.
This reduces the risk of corrosion of the
brake discs, brake pads and linings.
REMOVING YOUR VEHICLE
FROM STORAGE
When your vehicle is ready to come out of
storage, do the following:
• We recommend that you change the engine oil before you use your vehicle
again.
• Wash your vehicle to remove any dirt or grease film build-up on window
surfaces.
• Check windshield wipers for any deterioration.
• Check under the hood for any foreign material that may have collected
during storage such as mice or squirrel
nests.
• Check the exhaust for any foreign material that may have collected
during storage.
• Check tire pressures and set tire inflation per the Tire Label.
• Check brake pedal operation. Drive your vehicle 15 ft (4.5 m) back and
forth to remove rust build-up. • Check fluid levels (including coolant,
oil and gas) to make sure there are no
leaks, and fluids are at recommended
levels.
• If you remove the battery, clean the battery cable ends and check for
damage.
Contact an authorized dealer if you have
any concerns or issues.
356
Storing Your Vehicle
Page 360 of 585
LOCATING THE TIRE LABEL
The tire label or safety
certification label is on the driver
side B-pillar or the edge of the
driver door. It contains information
on the recommended front and
rear tire inflation pressures. See
Locating the Safety
Compliance Certification
Labels (page 288).
DEPARTMENT OF
TRANSPORTATION UNIFORM
TIRE QUALITY GRADES
E142542
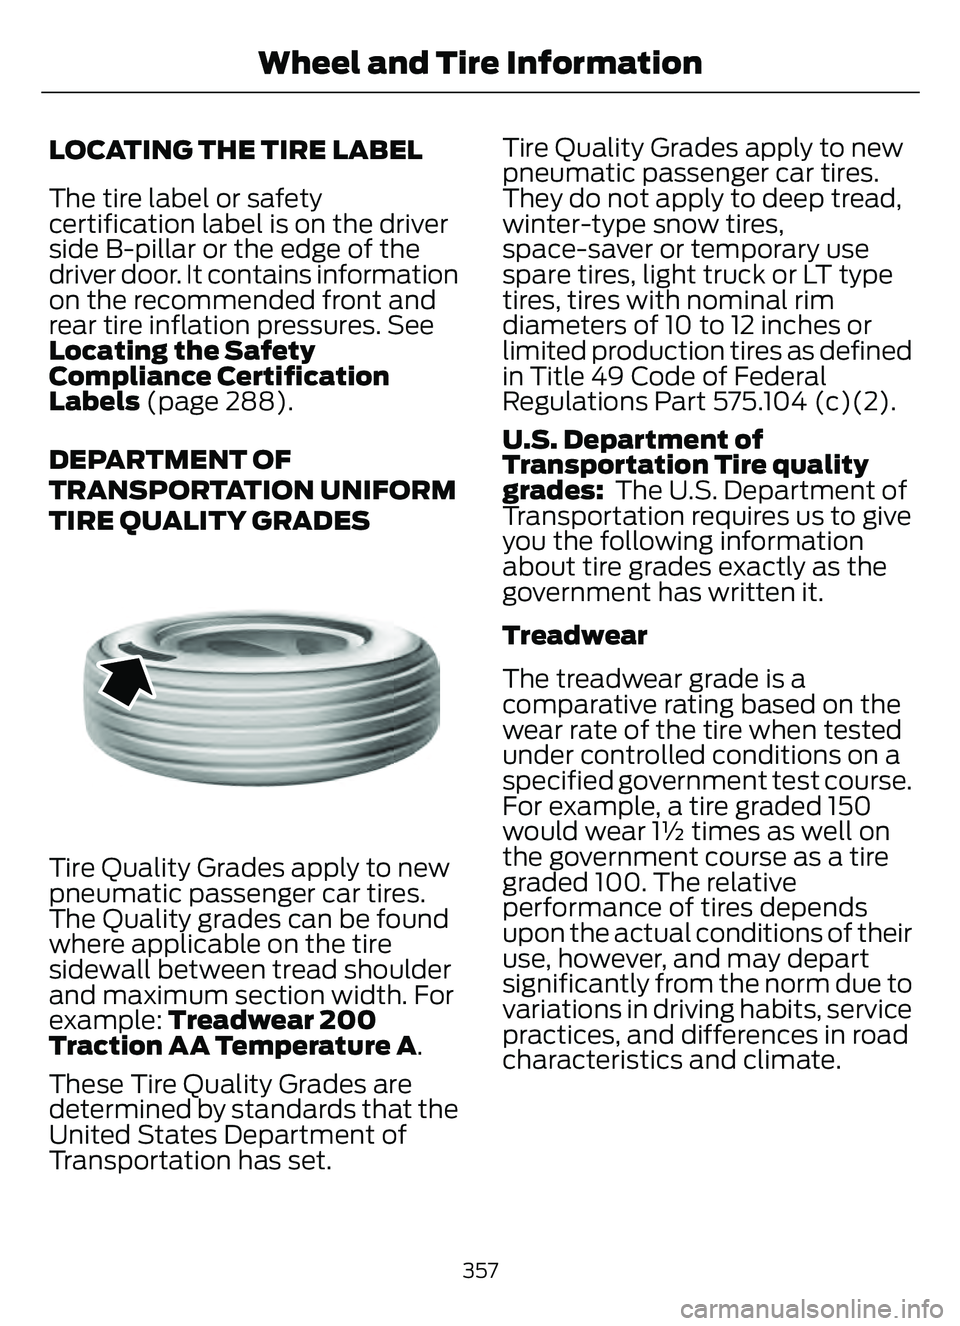
Tire Quality Grades apply to new
pneumatic passenger car tires.
The Quality grades can be found
where applicable on the tire
sidewall between tread shoulder
and maximum section width. For
example: Treadwear 200
Traction AA Temperature A .
These Tire Quality Grades are
determined by standards that the
United States Department of
Transportation has set. Tire Quality Grades apply to new
pneumatic passenger car tires.
They do not apply to deep tread,
winter-type snow tires,
space-saver or temporary use
spare tires, light truck or LT type
tires, tires with nominal rim
diameters of 10 to 12 inches or
limited production tires as defined
in Title 49 Code of Federal
Regulations Part 575.104 (c)(2).
U.S. Department of
Transportation Tire quality
grades:
The U.S. Department of
Transportation requires us to give
you the following information
about tire grades exactly as the
government has written it.
Treadwear
The treadwear grade is a
comparative rating based on the
wear rate of the tire when tested
under controlled conditions on a
specified government test course.
For example, a tire graded 150
would wear 1½ times as well on
the government course as a tire
graded 100. The relative
performance of tires depends
upon the actual conditions of their
use, however, and may depart
significantly from the norm due to
variations in driving habits, service
practices, and differences in road
characteristics and climate.
357
Wheel and Tire Information
Page 361 of 585
Traction AA A B C
WARNING: The traction
grade assigned to this tire is
based on straight-ahead braking
traction tests, and does not
include acceleration, cornering,
hydroplaning or peak traction
characteristics.
The traction grades, from highest
to lowest are AA, A, B, and C. The
grades represent the tire’s ability
to stop on wet pavement as
measured under controlled
conditions on specified
government test surfaces of
asphalt and concrete. A tire
marked C may have poor traction
performance.
Temperature A B C
WARNING: The
temperature grade for this tire is
established for a tire that is
properly inflated and not
overloaded. Excessive speed,
underinflation, or excessive
loading, either separately or in
combination, can cause heat
buildup and possible tire failure.
The temperature grades are A
(the highest), B and C,
representing the tire’s resistance
to the generation of heat and its
ability to dissipate heat when
tested under controlled conditions
on a specified indoor laboratory test wheel. Sustained high
temperature can cause the
material of the tire to degenerate
and reduce tire life, and excessive
temperature can lead to sudden
tire failure. The grade C
corresponds to a level of
performance which all passenger
car tires must meet under the
Federal Motor Vehicle Safety
Standard No. 139. Grades B and A
represent higher levels of
performance on the laboratory
test wheel than the minimum
required by law.
INFORMATION ON THE TIRE
SIDEWALL
Both United States and Canada
Federal regulations require tire
manufacturers to place
standardized information on the
sidewall of all tires. This
information identifies and
describes the fundamental
characteristics of the tire and also
provides a U.S. DOT Tire
Identification Number for safety
standard certification and in case
of a recall.
358
Wheel and Tire Information
Page 362 of 585
Information on P Type Tires
H
I
J
KL
M
A
B
CDEFG
E142543
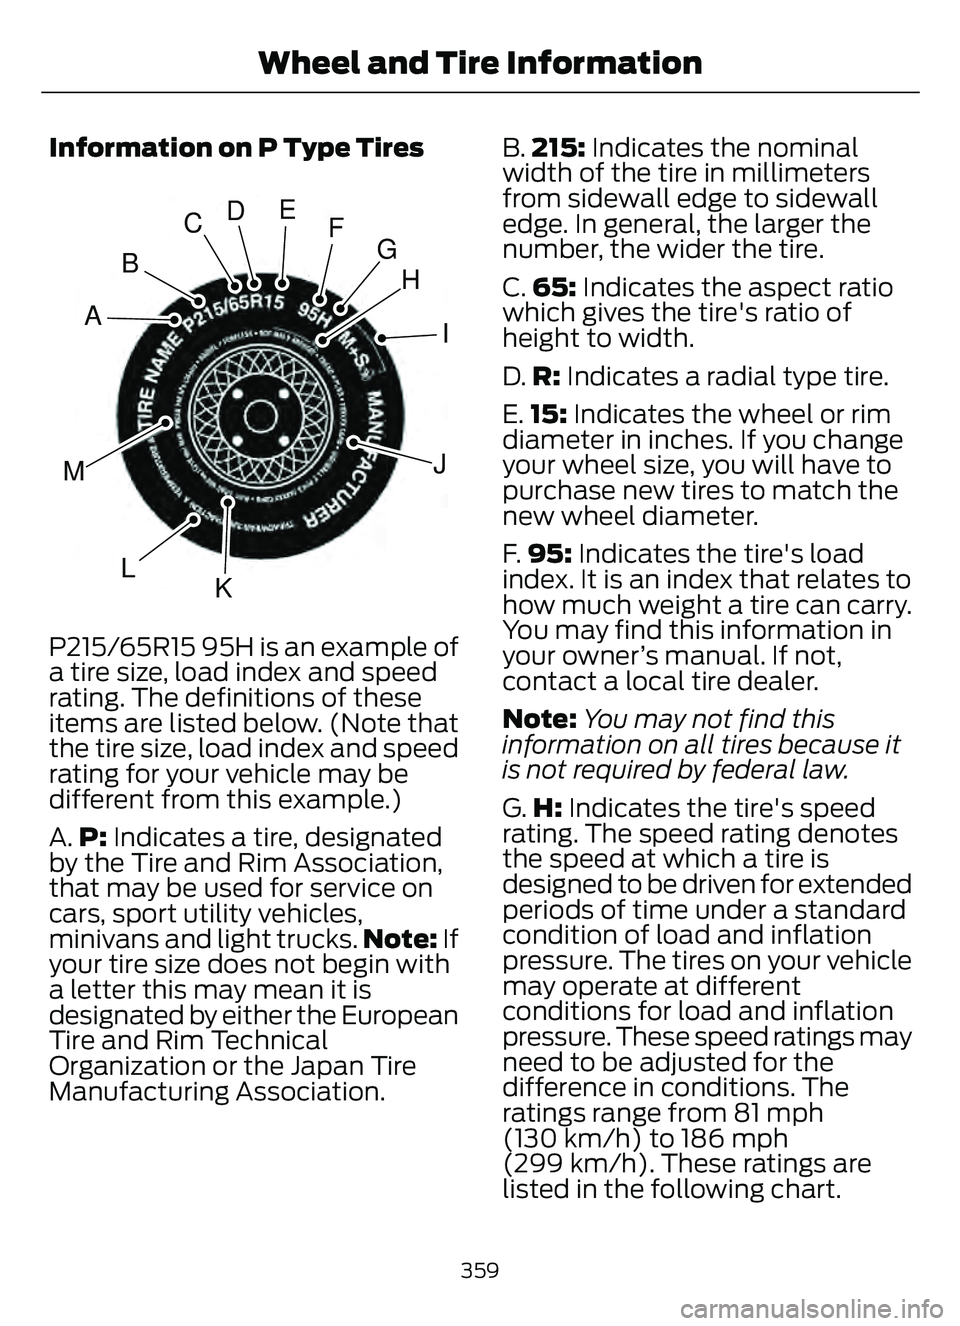
P215/65R15 95H is an example of
a tire size, load index and speed
rating. The definitions of these
items are listed below. (Note that
the tire size, load index and speed
rating for your vehicle may be
different from this example.)
A.P: Indicates a tire, designated
by the Tire and Rim Association,
that may be used for service on
cars, sport utility vehicles,
minivans and light trucks. Note: If
your tire size does not begin with
a letter this may mean it is
designated by either the European
Tire and Rim Technical
Organization or the Japan Tire
Manufacturing Association. B.
215: Indicates the nominal
width of the tire in millimeters
from sidewall edge to sidewall
edge. In general, the larger the
number, the wider the tire.
C. 65: Indicates the aspect ratio
which gives the tire's ratio of
height to width.
D. R: Indicates a radial type tire.
E. 15: Indicates the wheel or rim
diameter in inches. If you change
your wheel size, you will have to
purchase new tires to match the
new wheel diameter.
F. 95: Indicates the tire's load
index. It is an index that relates to
how much weight a tire can carry.
You may find this information in
your owner’s manual. If not,
contact a local tire dealer.
Note: You may not find this
information on all tires because it
is not required by federal law.
G. H: Indicates the tire's speed
rating. The speed rating denotes
the speed at which a tire is
designed to be driven for extended
periods of time under a standard
condition of load and inflation
pressure. The tires on your vehicle
may operate at different
conditions for load and inflation
pressure. These speed ratings may
need to be adjusted for the
difference in conditions. The
ratings range from 81 mph
(130 km/h) to 186 mph
(299 km/h). These ratings are
listed in the following chart.
359
Wheel and Tire Information