buttons FORD EXPEDITION 2015 3.G Owners Manual
[x] Cancel search | Manufacturer: FORD, Model Year: 2015, Model line: EXPEDITION, Model: FORD EXPEDITION 2015 3.GPages: 564, PDF Size: 6.71 MB
Page 25 of 564
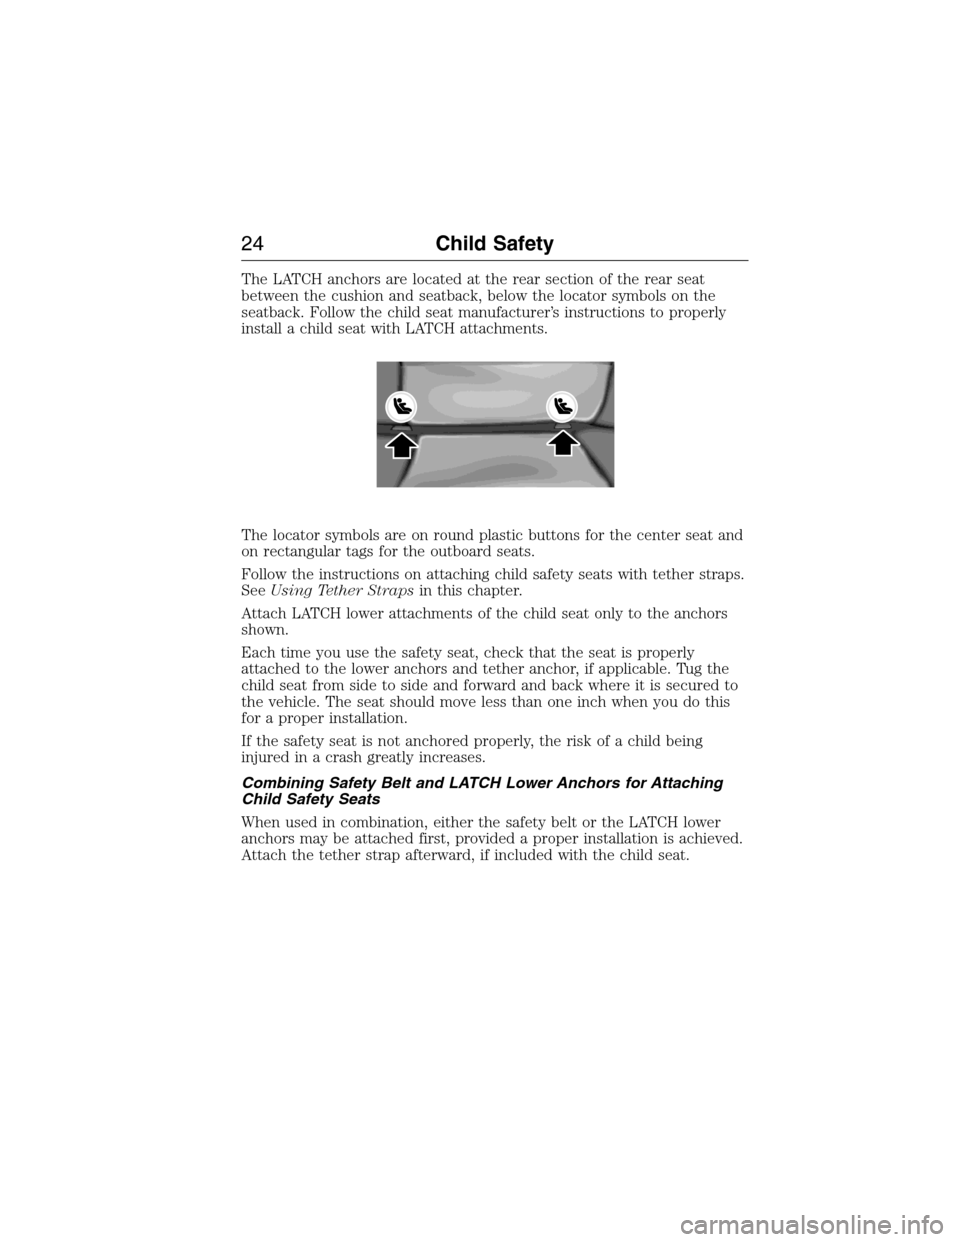
The LATCH anchors are located at the rear section of the rear seat
between the cushion and seatback, below the locator symbols on the
seatback. Follow the child seat manufacturer’s instructions to properly
install a child seat with LATCH attachments.
The locator symbols are on round plastic buttons for the center seat and
on rectangular tags for the outboard seats.
Follow the instructions on attaching child safety seats with tether straps.
SeeUsing Tether Strapsin this chapter.
Attach LATCH lower attachments of the child seat only to the anchors
shown.
Each time you use the safety seat, check that the seat is properly
attached to the lower anchors and tether anchor, if applicable. Tug the
child seat from side to side and forward and back where it is secured to
the vehicle. The seat should move less than one inch when you do this
for a proper installation.
If the safety seat is not anchored properly, the risk of a child being
injured in a crash greatly increases.
Combining Safety Belt and LATCH Lower Anchors for Attaching
Child Safety Seats
When used in combination, either the safety belt or the LATCH lower
anchors may be attached first, provided a proper installation is achieved.
Attach the tether strap afterward, if included with the child seat.
24Child Safety
2015 Expedition(exd)
Owners Guide gf, 1st Printing, July 2014
USA(fus)
Page 41 of 564
SAFETY BELT HEIGHT ADJUSTMENT
WARNING:Position the safety belt height adjusters so that the
belt rests across the middle of your shoulder. Failure to adjust
the safety belt properly could reduce the effectiveness of the seat belt
and increase the risk of injury in a crash.
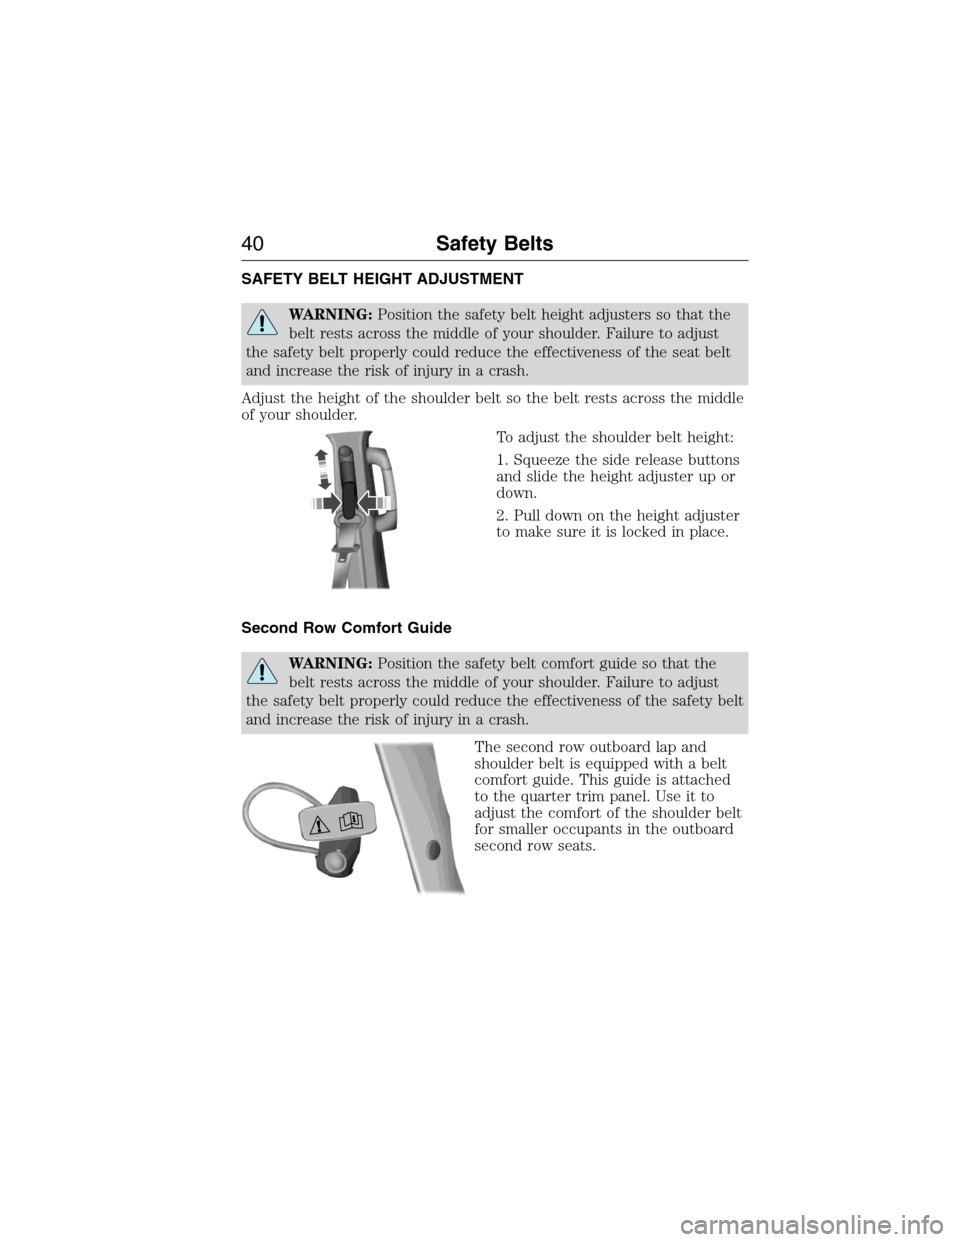
Adjust the height of the shoulder belt so the belt rests across the middle
of your shoulder.
To adjust the shoulder belt height:
1. Squeeze the side release buttons
and slide the height adjuster up or
down.
2. Pull down on the height adjuster
to make sure it is locked in place.
Second Row Comfort Guide
WARNING:Position the safety belt comfort guide so that the
belt rests across the middle of your shoulder. Failure to adjust
the safety belt properly could reduce the effectiveness of the safety belt
and increase the risk of injury in a crash.
The second row outboard lap and
shoulder belt is equipped with a belt
comfort guide. This guide is attached
to the quarter trim panel. Use it to
adjust the comfort of the shoulder belt
for smaller occupants in the outboard
second row seats.
40Safety Belts
2015 Expedition(exd)
Owners Guide gf, 1st Printing, July 2014
USA(fus)
Page 64 of 564
•Audio system maximum volume of 45% for some audio systems. A
message will be shown in the display when you attempt to exceed the
limited volume. Also, the speed-sensitive or compensated automatic
volume control will be disabled.
•Always on setting. When this is selected, you will not be able to turn
off certain features.
CREATING A MYKEY
Use the information display to create a MyKey.
1. Insert the key you want to program into the ignition.
2. Switch the ignition on.
3. Access the main menu on the information display. PressSETUP
using the information display buttons untilPRESS RESET TO
CREATE MYKEYis displayed.
4. Press and release theRESETbutton.HOLD RESET TO
CONFIRM MYKEYwill be displayed.
5. Press and hold theRESETbutton for two seconds untilMARK
THIS AS RESTRICTEDis displayed Wait untilKEY
RESTRICTED AT NEXT STARTis displayed.
MyKey is successfully created. Make sure you label it so you can
distinguish it from the admin keys.
You can also program configurable settings for the key(s). Refer to
Programming/Changing Configurable Settings.
Programming/Changing Configurable Settings
Use the Information display to access your configurable MyKey settings:
1.
Switch the ignition on with an admin key. If your vehicle has keyless
start, place the intelligent access transmitter into the backup slot. The
location of your backup slot is in another chapter. SeeStarting and
Stopping the Engine.
2. Access the main menu on the information display controls and press
SETUPuntil you seeRESET FOR MYKEY SETTINGSin the display.
3. Press and release theRESETbutton to display the MyKey setup menus.
4. Press theSETUPbutton to display the next menu and scroll through
your choices.
5. Within any of the menus, pressRESETto highlight your choice. Use the
arrow buttons to make a selection.
6. PressSETUPto enter your choice. The next configurable setting will
display.
7. Repeat Steps 4 and 5 until you are done changing the configurable
settings.
MyKey63
2015 Expedition(exd)
Owners Guide gf, 1st Printing, July 2014
USA(fus)
Page 70 of 564
LOCKING AND UNLOCKING
You can use the power door lock control or the remote control to lock
and unlock your vehicle.
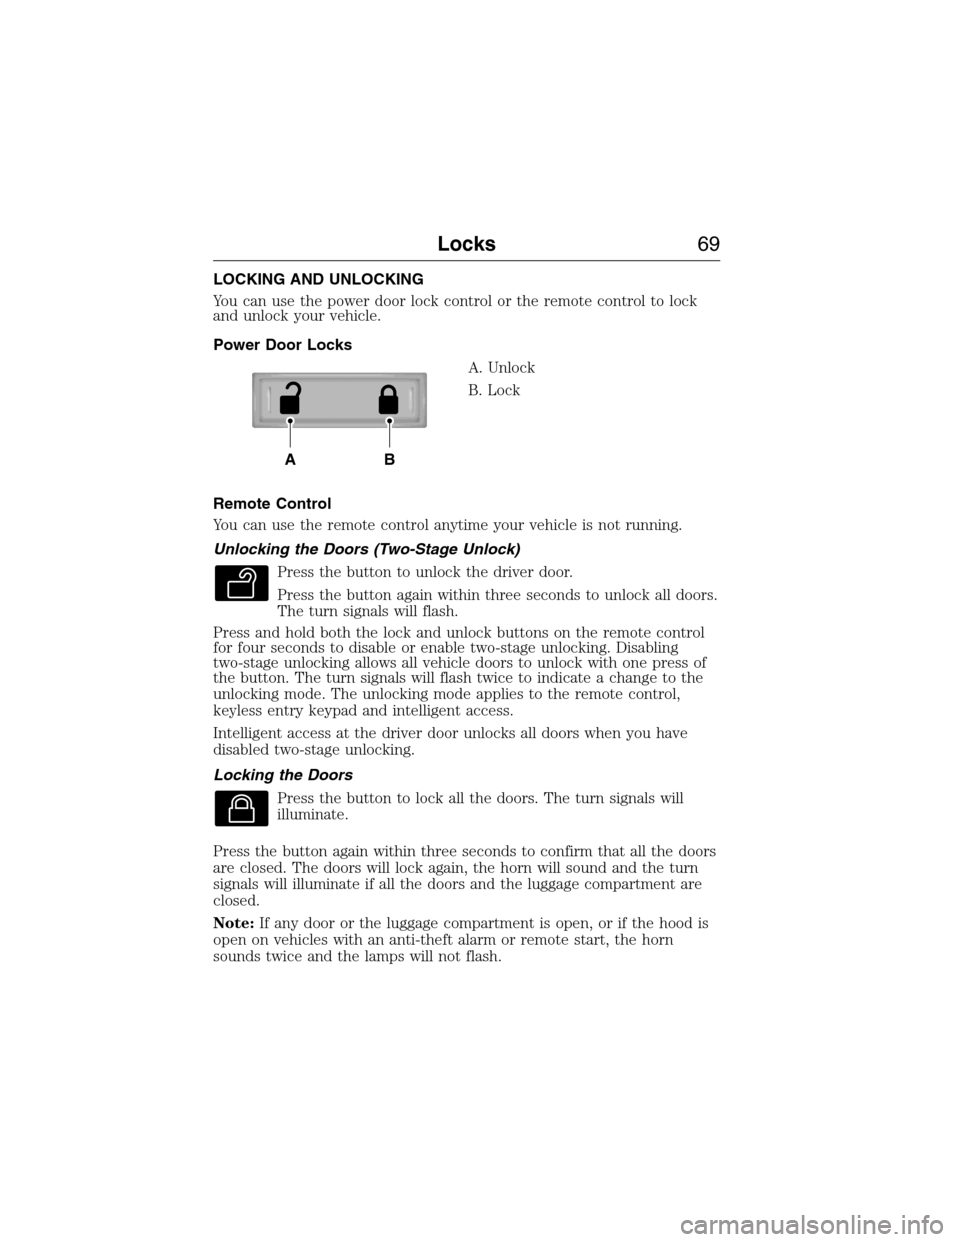
Power Door Locks
A. Unlock
B. Lock
Remote Control
You can use the remote control anytime your vehicle is not running.
Unlocking the Doors (Two-Stage Unlock)
Press the button to unlock the driver door.
Press the button again within three seconds to unlock all doors.
The turn signals will flash.
Press and hold both the lock and unlock buttons on the remote control
for four seconds to disable or enable two-stage unlocking. Disabling
two-stage unlocking allows all vehicle doors to unlock with one press of
the button. The turn signals will flash twice to indicate a change to the
unlocking mode. The unlocking mode applies to the remote control,
keyless entry keypad and intelligent access.
Intelligent access at the driver door unlocks all doors when you have
disabled two-stage unlocking.
Locking the Doors
Press the button to lock all the doors. The turn signals will
illuminate.
Press the button again within three seconds to confirm that all the doors
are closed. The doors will lock again, the horn will sound and the turn
signals will illuminate if all the doors and the luggage compartment are
closed.
Note:If any door or the luggage compartment is open, or if the hood is
open on vehicles with an anti-theft alarm or remote start, the horn
sounds twice and the lamps will not flash.
AB
Locks69
2015 Expedition(exd)
Owners Guide gf, 1st Printing, July 2014
USA(fus)
Page 78 of 564
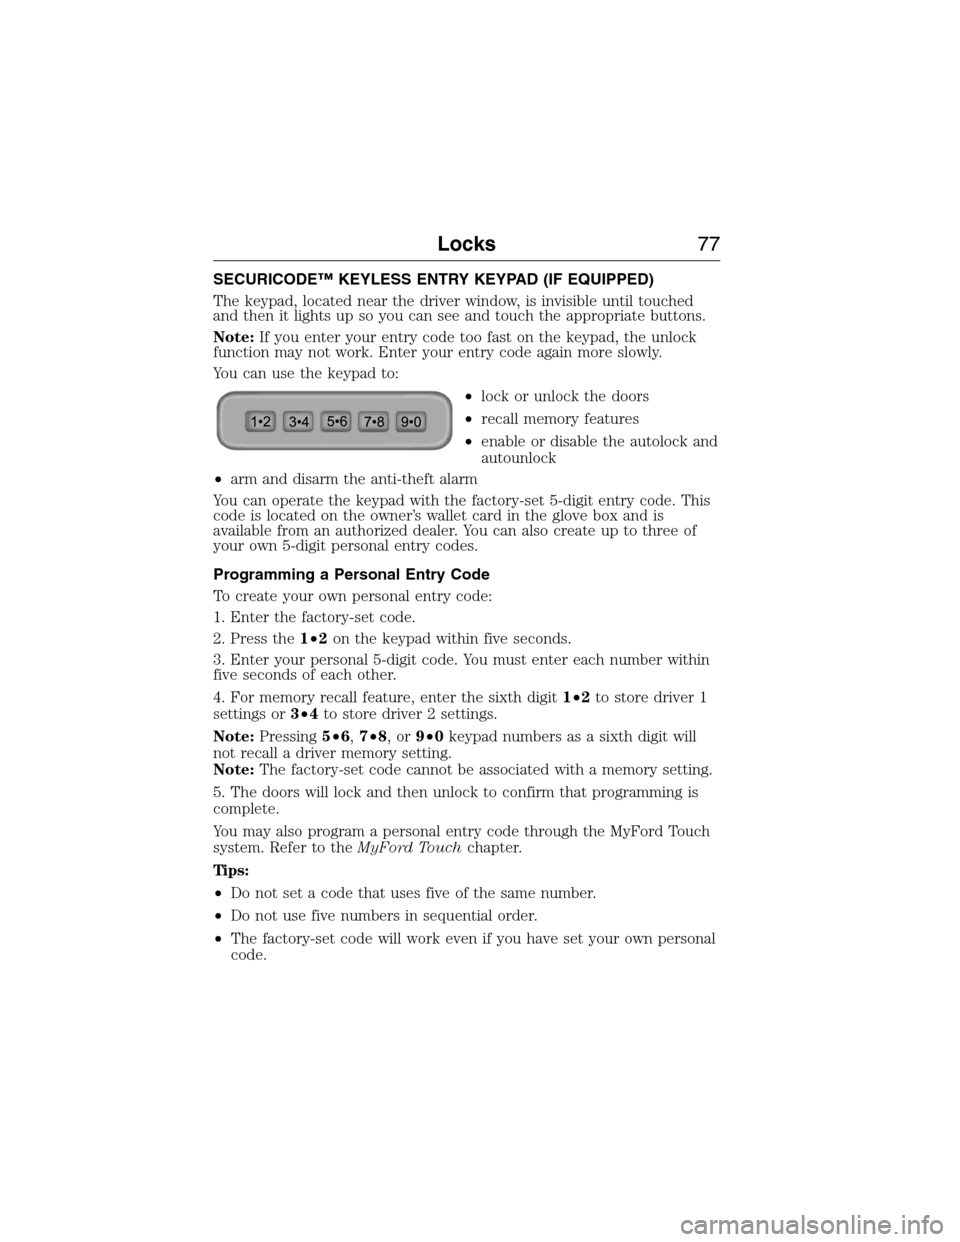
SECURICODE™ KEYLESS ENTRY KEYPAD (IF EQUIPPED)
The keypad, located near the driver window, is invisible until touched
and then it lights up so you can see and touch the appropriate buttons.
Note:If you enter your entry code too fast on the keypad, the unlock
function may not work. Enter your entry code again more slowly.
You can use the keypad to:
•lock or unlock the doors
•recall memory features
•enable or disable the autolock and
autounlock
•arm and disarm the anti-theft alarm
You can operate the keypad with the factory-set 5-digit entry code. This
code is located on the owner’s wallet card in the glove box and is
available from an authorized dealer. You can also create up to three of
your own 5-digit personal entry codes.
Programming a Personal Entry Code
To create your own personal entry code:
1. Enter the factory-set code.
2. Press the1•2on the keypad within five seconds.
3. Enter your personal 5-digit code. You must enter each number within
five seconds of each other.
4. For memory recall feature, enter the sixth digit1•2to store driver 1
settings or3•4to store driver 2 settings.
Note:Pressing5•6,7•8,or9•0keypad numbers as a sixth digit will
not recall a driver memory setting.
Note:The factory-set code cannot be associated with a memory setting.
5. The doors will lock and then unlock to confirm that programming is
complete.
You may also program a personal entry code through the MyFord Touch
system. Refer to theMyFord Touchchapter.
Tips:
•Do not set a code that uses five of the same number.
•Do not use five numbers in sequential order.
•The factory-set code will work even if you have set your own personal
code.
Locks77
2015 Expedition(exd)
Owners Guide gf, 1st Printing, July 2014
USA(fus)
Page 113 of 564
GENERAL INFORMATION
WARNING:Driving while distracted can result in loss of vehicle
control, crash and injury. We strongly recommend that you use
extreme caution when using any device that may take your focus off
the road. Your primary responsibility is the safe operation of your
vehicle. We recommend against the use of any handheld device while
driving and encourage the use of voice-operated systems when possible.
Make sure you are aware of all applicable local laws that may affect the
use of electronic devices while driving.
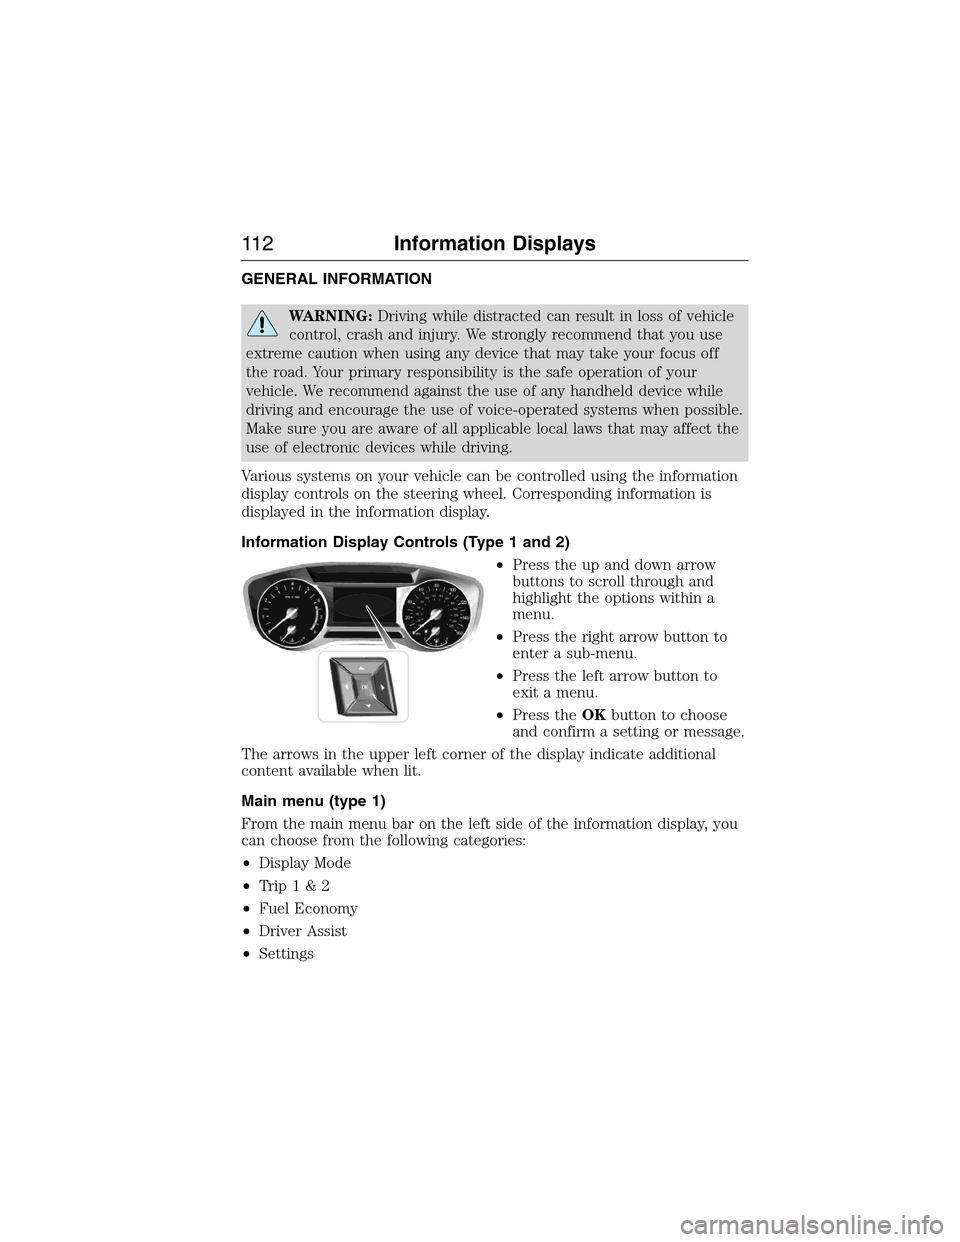
Various systems on your vehicle can be controlled using the information
display controls on the steering wheel. Corresponding information is
displayed in the information display.
Information Display Controls (Type 1 and 2)
•Press the up and down arrow
buttons to scroll through and
highlight the options within a
menu.
•Press the right arrow button to
enter a sub-menu.
•Press the left arrow button to
exit a menu.
•Press theOKbutton to choose
and confirm a setting or message.
The arrows in the upper left corner of the display indicate additional
content available when lit.
Main menu (type 1)
From the main menu bar on the left side of the information display, you
can choose from the following categories:
•Display Mode
•Trip1&2
•Fuel Economy
•Driver Assist
•Settings
11 2Information Displays
2015 Expedition(exd)
Owners Guide gf, 1st Printing, July 2014
USA(fus)
Page 114 of 564
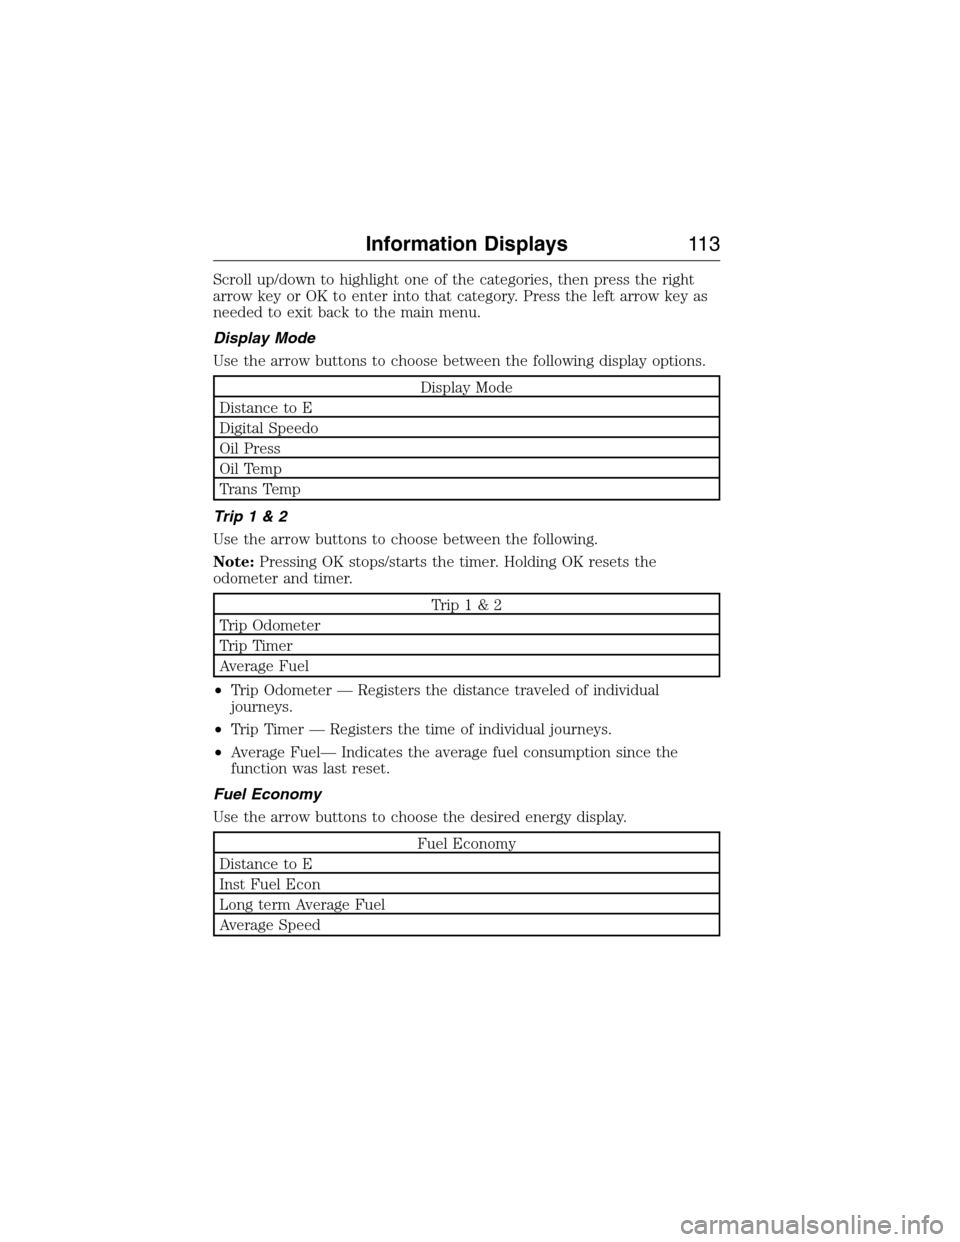
Scroll up/down to highlight one of the categories, then press the right
arrow key or OK to enter into that category. Press the left arrow key as
needed to exit back to the main menu.
Display Mode
Use the arrow buttons to choose between the following display options.
Display Mode
Distance to E
Digital Speedo
Oil Press
Oil Temp
Trans Temp
Trip1&2
Use the arrow buttons to choose between the following.
Note:Pressing OK stops/starts the timer. Holding OK resets the
odometer and timer.
Trip1&2
Trip Odometer
Trip Timer
Average Fuel
•Trip Odometer — Registers the distance traveled of individual
journeys.
•Trip Timer — Registers the time of individual journeys.
•Average Fuel— Indicates the average fuel consumption since the
function was last reset.
Fuel Economy
Use the arrow buttons to choose the desired energy display.
Fuel Economy
Distance to E
Inst Fuel Econ
Long term Average Fuel
Average Speed
Information Displays11 3
2015 Expedition(exd)
Owners Guide gf, 1st Printing, July 2014
USA(fus)
Page 117 of 564
Display Mode
Use the arrow buttons to choose between the following display options.
Display Mode
Distance to Empty
Digital Speedometer — PressOKto change units
Gauge Detail (Oil pressure, Oil temperature and Transmission
temperature)
Engine Information (Oil life, Engine hours and Engine idle hours)
Trip/Fuel
Use the arrow buttons to choose between the following trip and fuel
options.
Note:Press and holdOKto reset the currently displayed information.
Trip/Fuel
Trip1orTrip2
Fuel Economy
Fuel History
•Trip 1 or Trip 2 - Shows your trip time, fuel used, odometer and
average mpg.
•Fuel Economy - Shows your instantaneous fuel usage as a bar graph,
average mpg and distance to empty.
•Fuel History - Shows your fuel usage based on time. The graph is
updated each minute with the fuel economy that you achieved during
30 minutes of driving. Also, shows your distance to empty.
11 6Information Displays
2015 Expedition(exd)
Owners Guide gf, 1st Printing, July 2014
USA(fus)
Page 118 of 564
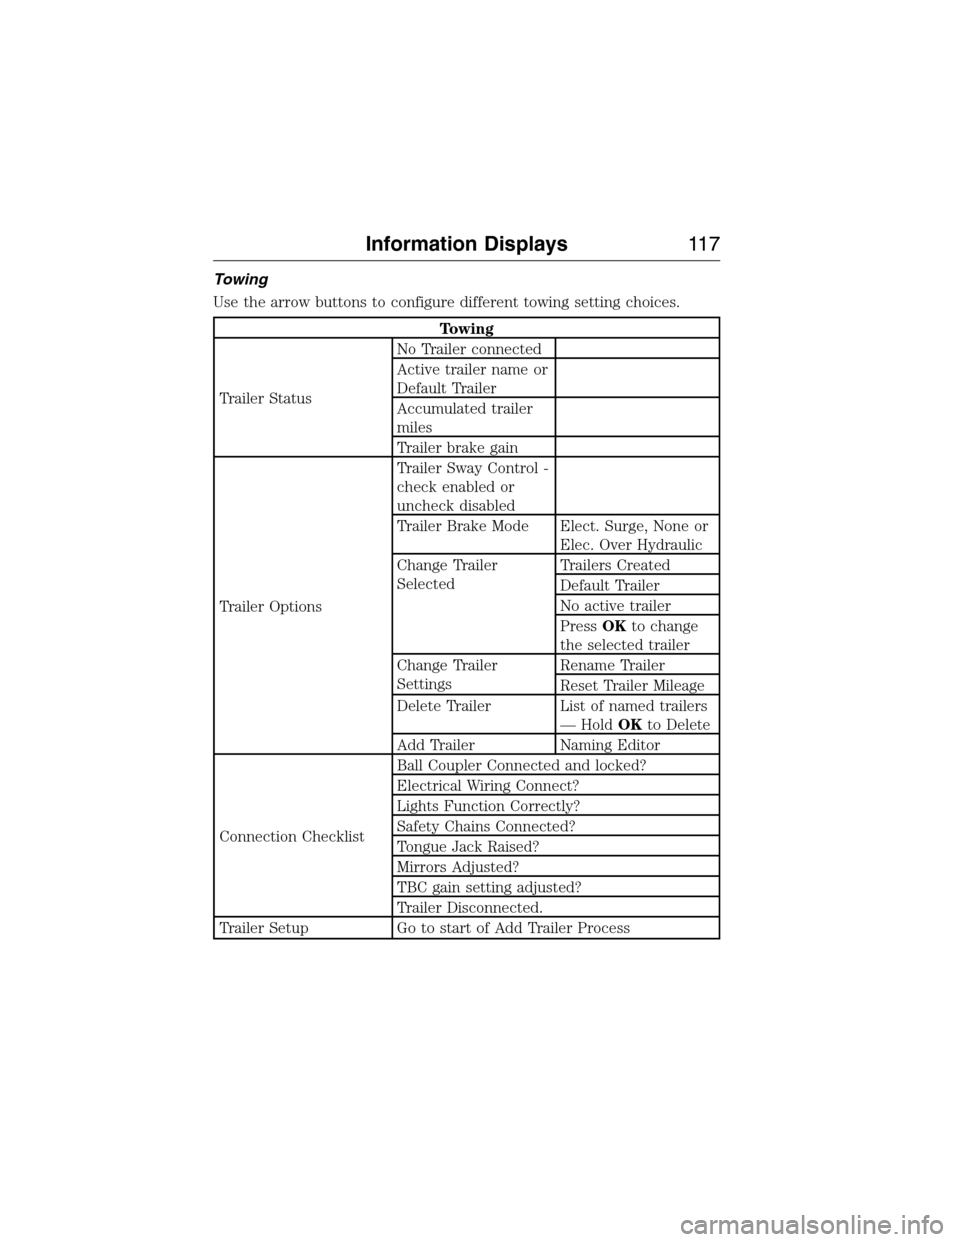
Towing
Use the arrow buttons to configure different towing setting choices.
Towing
Trailer StatusNo Trailer connected
Active trailer name or
Default Trailer
Accumulated trailer
miles
Trailer brake gain
Trailer OptionsTrailer Sway Control -
check enabled or
uncheck disabled
Trailer Brake Mode Elect. Surge, None or
Elec. Over Hydraulic
Change Trailer
SelectedTrailers Created
Default Trailer
No active trailer
PressOKto change
the selected trailer
Change Trailer
SettingsRename Trailer
Reset Trailer Mileage
Delete Trailer List of named trailers
— HoldOKto Delete
Add Trailer Naming Editor
Connection ChecklistBall Coupler Connected and locked?
Electrical Wiring Connect?
Lights Function Correctly?
Safety Chains Connected?
Tongue Jack Raised?
Mirrors Adjusted?
TBC gain setting adjusted?
Trailer Disconnected.
Trailer Setup Go to start of Add Trailer Process
Information Displays11 7
2015 Expedition(exd)
Owners Guide gf, 1st Printing, July 2014
USA(fus)
Page 121 of 564
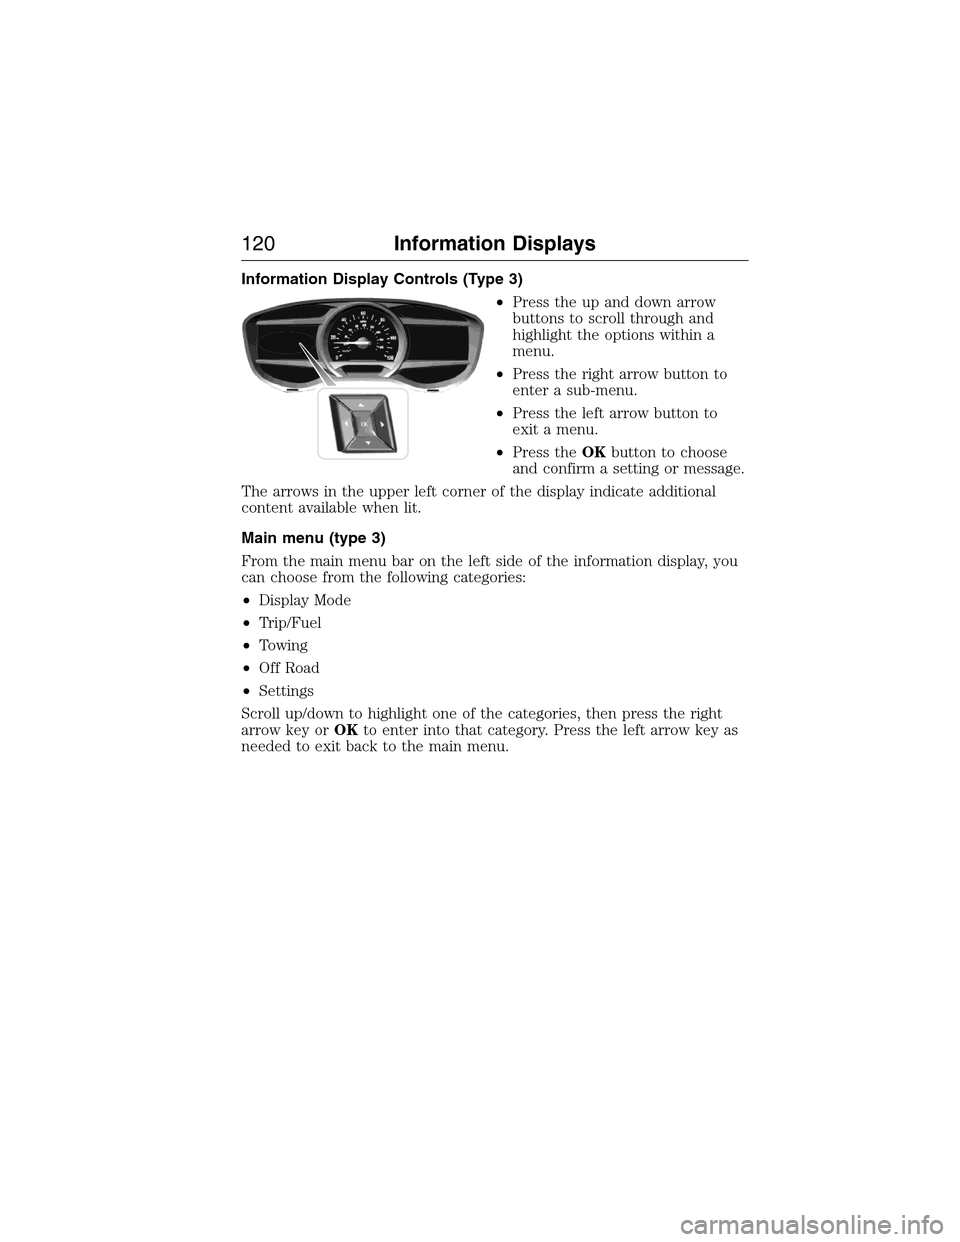
Information Display Controls (Type 3)
•Press the up and down arrow
buttons to scroll through and
highlight the options within a
menu.
•Press the right arrow button to
enter a sub-menu.
•Press the left arrow button to
exit a menu.
•Press theOKbutton to choose
and confirm a setting or message.
The arrows in the upper left corner of the display indicate additional
content available when lit.
Main menu (type 3)
From the main menu bar on the left side of the information display, you
can choose from the following categories:
•Display Mode
•Trip/Fuel
•Towing
•Off Road
•Settings
Scroll up/down to highlight one of the categories, then press the right
arrow key orOKto enter into that category. Press the left arrow key as
needed to exit back to the main menu.
120Information Displays
2015 Expedition(exd)
Owners Guide gf, 1st Printing, July 2014
USA(fus)