turn signal FORD EXPEDITION 2015 3.G Owners Manual
[x] Cancel search | Manufacturer: FORD, Model Year: 2015, Model line: EXPEDITION, Model: FORD EXPEDITION 2015 3.GPages: 564, PDF Size: 6.71 MB
Page 60 of 564
Car Finder
Press the button twice within three seconds. The horn will sound
and the turn signals will flash. We recommend you use this
method to locate your vehicle, rather than using the panic alarm.
Sounding a Panic Alarm
Press the button to activate the alarm. Press the button again
or switch the ignition on to deactivate.
Note:The panic alarm will only operate when the ignition is off.
Remote Start (If Equipped)
WARNING:To avoid exhaust fumes, do not use remote start if
your vehicle is parked indoors or areas that are not well
ventilated.
Note:Do not use remote start if your vehicle is low on fuel.
The remote start button is on the transmitter.
This feature allows you to start your vehicle from outside your vehicle.
The transmitter has an extended operating range.
Vehicles with automatic climate control can be configured to operate
when the vehicle is remote started. See theClimate Controlchapter for
more information. A manual climate control system will run at the setting
it was set to when your vehicle was last turned off.
Many states and provinces have restrictions for the use of remote start.
Check your local and state or provincial laws for specific requirements
regarding remote start systems.
The remote start system will not work if:
•the ignition is on
•the alarm system is triggered
•you disable the feature
•the hood is open
•the transmission is not inP
•the vehicle battery voltage is too low
•the service engine soon light is on.
Keys and Remote Control59
2015 Expedition(exd)
Owners Guide gf, 1st Printing, July 2014
USA(fus)
Page 70 of 564
LOCKING AND UNLOCKING
You can use the power door lock control or the remote control to lock
and unlock your vehicle.
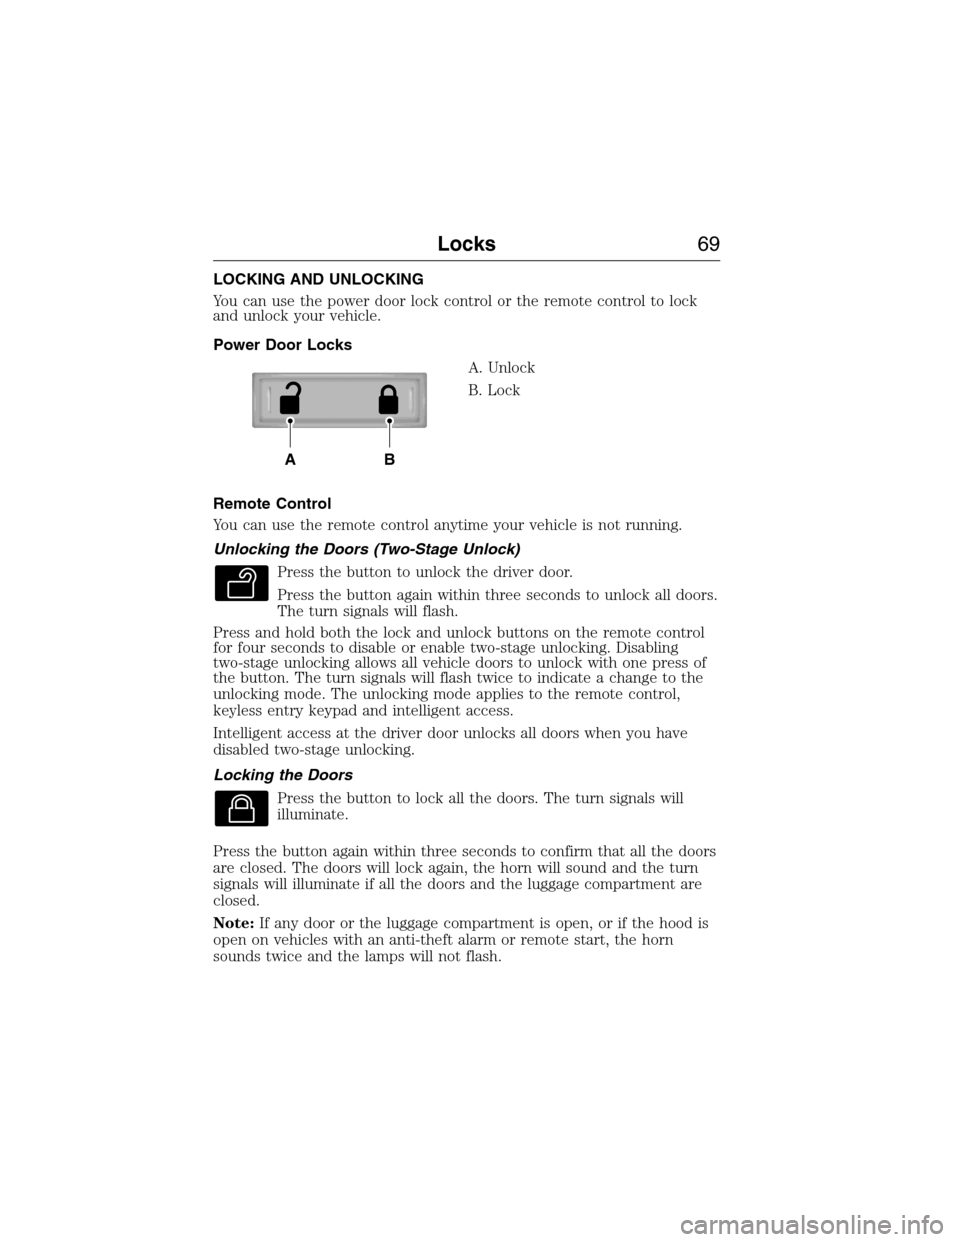
Power Door Locks
A. Unlock
B. Lock
Remote Control
You can use the remote control anytime your vehicle is not running.
Unlocking the Doors (Two-Stage Unlock)
Press the button to unlock the driver door.
Press the button again within three seconds to unlock all doors.
The turn signals will flash.
Press and hold both the lock and unlock buttons on the remote control
for four seconds to disable or enable two-stage unlocking. Disabling
two-stage unlocking allows all vehicle doors to unlock with one press of
the button. The turn signals will flash twice to indicate a change to the
unlocking mode. The unlocking mode applies to the remote control,
keyless entry keypad and intelligent access.
Intelligent access at the driver door unlocks all doors when you have
disabled two-stage unlocking.
Locking the Doors
Press the button to lock all the doors. The turn signals will
illuminate.
Press the button again within three seconds to confirm that all the doors
are closed. The doors will lock again, the horn will sound and the turn
signals will illuminate if all the doors and the luggage compartment are
closed.
Note:If any door or the luggage compartment is open, or if the hood is
open on vehicles with an anti-theft alarm or remote start, the horn
sounds twice and the lamps will not flash.
AB
Locks69
2015 Expedition(exd)
Owners Guide gf, 1st Printing, July 2014
USA(fus)
Page 83 of 564
ANTI-THEFT ALARM
The system will warn you of unauthorized entry to your vehicle.
The turn signal lamps will flash and the horn will sound when:
•any door or the hood is opened without using the key or the remote
control
•the ignition is turned on with an invalid key.
Take all keys and remote controls to your authorized dealer if there is
any potential alarm problem with your vehicle.
Arming the Alarm
The system is ready to arm whenever the ignition is off. Lock the vehicle
to arm the alarm.
The turn signal lamps will flash once after locking the vehicle to indicate
the alarm is in the pre-armed mode and will become fully armed in
20 seconds.
Disarming the Alarm
To disarm the alarm, do any of the following:
•Press the power door unlock button within the 20-second pre-armed
mode.
•Press the unlock button on the remote control.
•Unlock the doors with the keyless entry pad.
•Turn the ignition on with a valid key.
•Press the panic button on the remote control. The alarm system will
still be armed, but this shuts off the horn and turn lamps when the
alarm is sounding.
Note:If the driver’s door is unlocked with a key, a chime will sound
when you open the door. You will have 12 seconds to disarm the alarm
using any of the actions above, otherwise the alarm will trigger.
82Security
2015 Expedition(exd)
Owners Guide gf, 1st Printing, July 2014
USA(fus)
Page 96 of 564
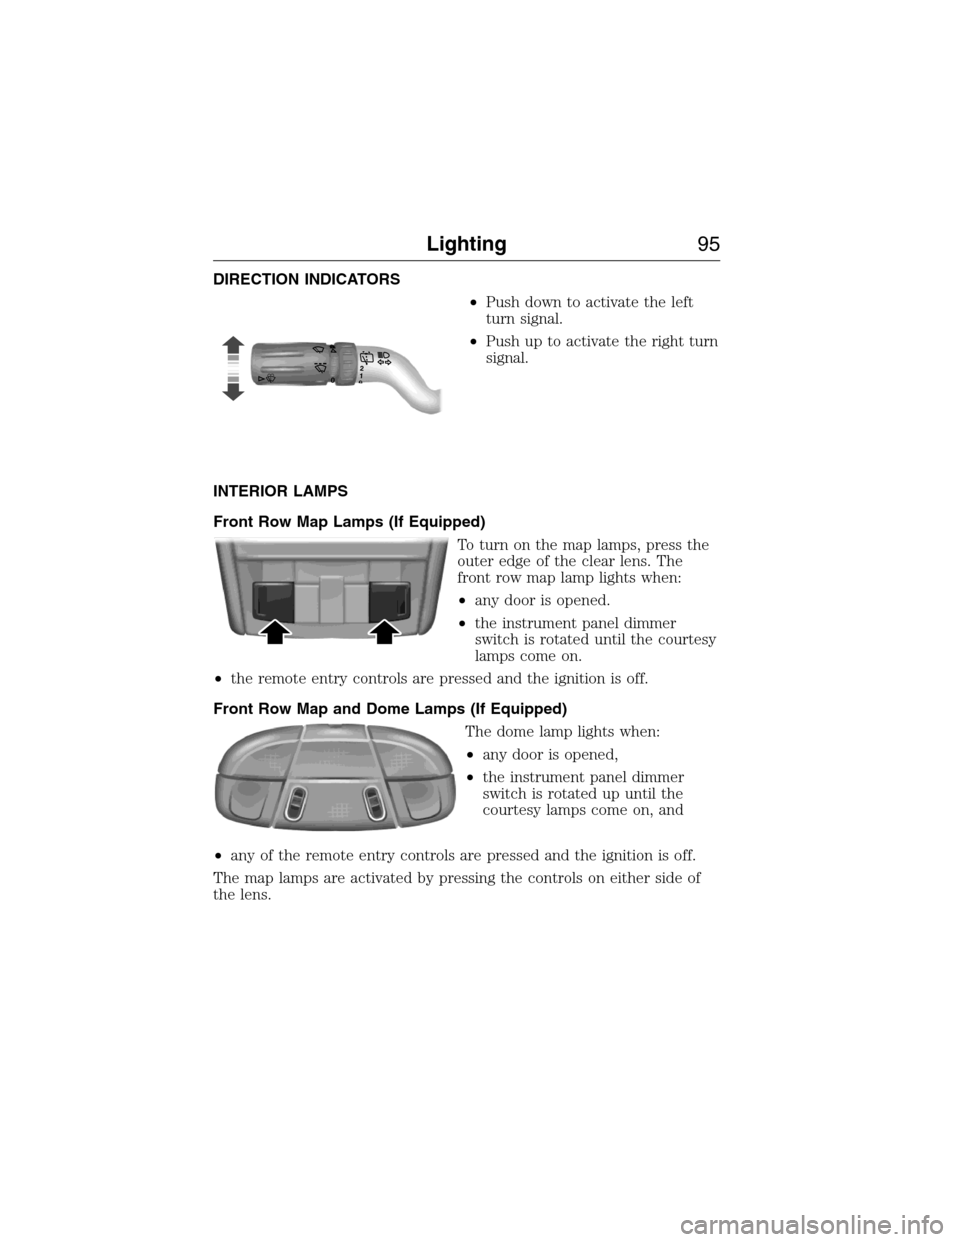
DIRECTION INDICATORS
•Push down to activate the left
turn signal.
•Push up to activate the right turn
signal.
INTERIOR LAMPS
Front Row Map Lamps (If Equipped)
To turn on the map lamps, press the
outer edge of the clear lens. The
front row map lamp lights when:
•any door is opened.
•the instrument panel dimmer
switch is rotated until the courtesy
lamps come on.
•the remote entry controls are pressed and the ignition is off.
Front Row Map and Dome Lamps (If Equipped)
The dome lamp lights when:
•any door is opened,
•the instrument panel dimmer
switch is rotated up until the
courtesy lamps come on, and
•any of the remote entry controls are pressed and the ignition is off.
The map lamps are activated by pressing the controls on either side of
the lens.
120
Lighting95
2015 Expedition(exd)
Owners Guide gf, 1st Printing, July 2014
USA(fus)
Page 101 of 564
Auto-Dimming Feature (If Equipped)
The driver’s side exterior mirror will automatically dim when the interior
auto-dimming mirror is activated.
Signal Indicator Mirrors (If Equipped)
The rear-facing portion of the appropriate mirror housing will blink when
the turn signal is activated.
Blind Spot Information System (BLIS®) with Cross Traffic Alert
(CTA) (If Equipped)
Refer toBlind Spot Information System (BLIS®) with Cross Traffic
Alert (CTA)in theDriving Aidschapter.
INTERIOR MIRROR
WARNING:Do not adjust the mirror when your vehicle is
moving.
Note:Do not clean the housing or glass of any mirror with harsh
abrasives, fuel or other petroleum or ammonia based cleaning products.
You can adjust the interior mirror to your preference. Some mirrors also
have a second pivot point. This lets you move the mirror head up or
down and from side to side.
Auto-Dimming Mirror
Note:Do not block the sensors on the front and back of the mirror.
Mirror performance may be affected. A rear center passenger or raised
rear center head restraint may also block light from reaching the sensor.
The mirror will dim automatically to reduce glare when bright lights are
detected from behind your vehicle. It will automatically return to normal
reflection when you select reverse gear to make sure you have a clear
view when backing up.
100Windows and Mirrors
2015 Expedition(exd)
Owners Guide gf, 1st Printing, July 2014
USA(fus)
Page 109 of 564
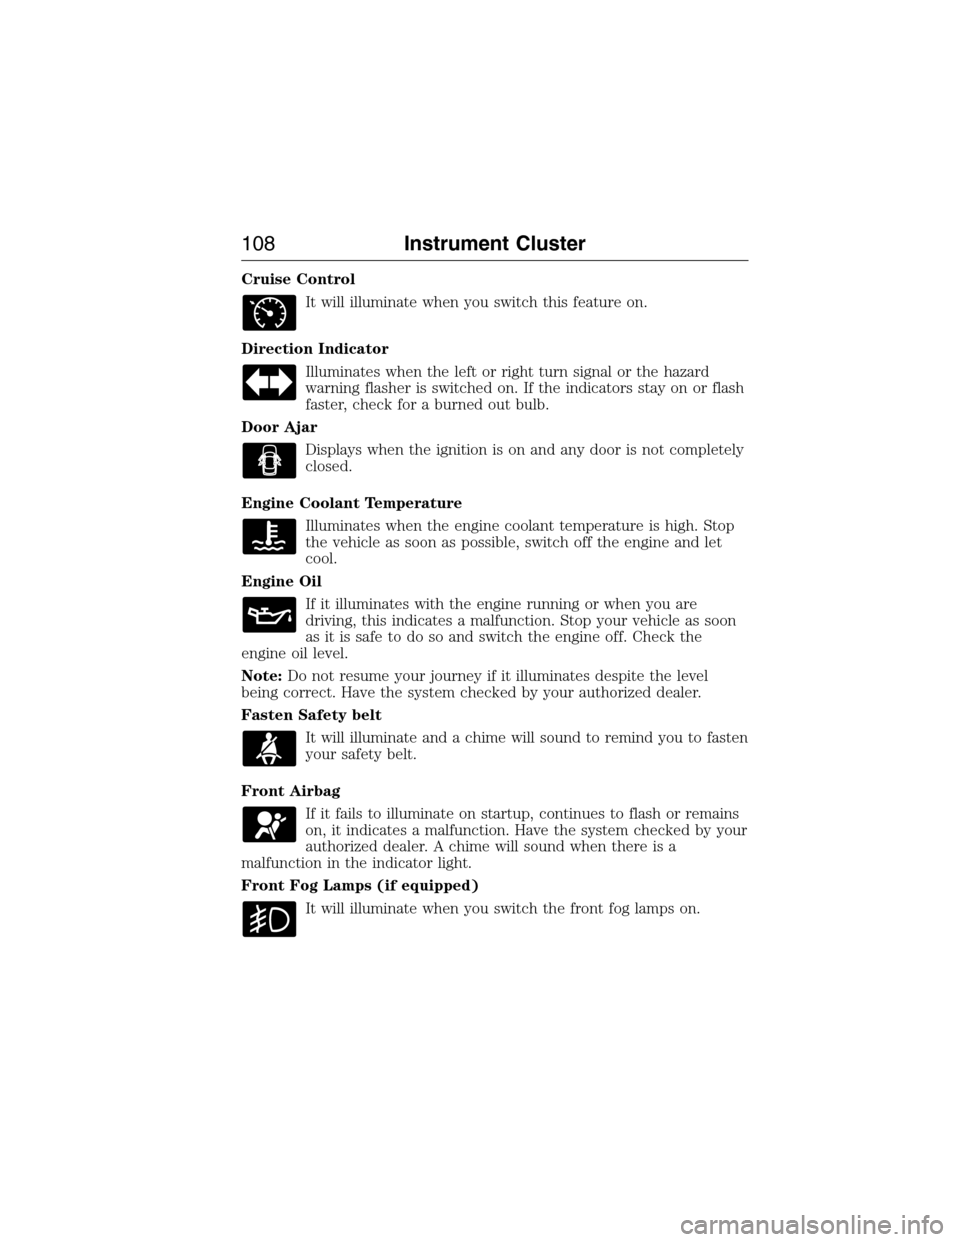
Cruise Control
It will illuminate when you switch this feature on.
Direction Indicator
Illuminates when the left or right turn signal or the hazard
warning flasher is switched on. If the indicators stay on or flash
faster, check for a burned out bulb.
Door Ajar
Displays when the ignition is on and any door is not completely
closed.
Engine Coolant Temperature
Illuminates when the engine coolant temperature is high. Stop
the vehicle as soon as possible, switch off the engine and let
cool.
Engine Oil
If it illuminates with the engine running or when you are
driving, this indicates a malfunction. Stop your vehicle as soon
as it is safe to do so and switch the engine off. Check the
engine oil level.
Note:Do not resume your journey if it illuminates despite the level
being correct. Have the system checked by your authorized dealer.
Fasten Safety belt
It will illuminate and a chime will sound to remind you to fasten
your safety belt.
Front Airbag
If it fails to illuminate on startup, continues to flash or remains
on, it indicates a malfunction. Have the system checked by your
authorized dealer. A chime will sound when there is a
malfunction in the indicator light.
Front Fog Lamps (if equipped)
It will illuminate when you switch the front fog lamps on.
108Instrument Cluster
2015 Expedition(exd)
Owners Guide gf, 1st Printing, July 2014
USA(fus)
Page 112 of 564
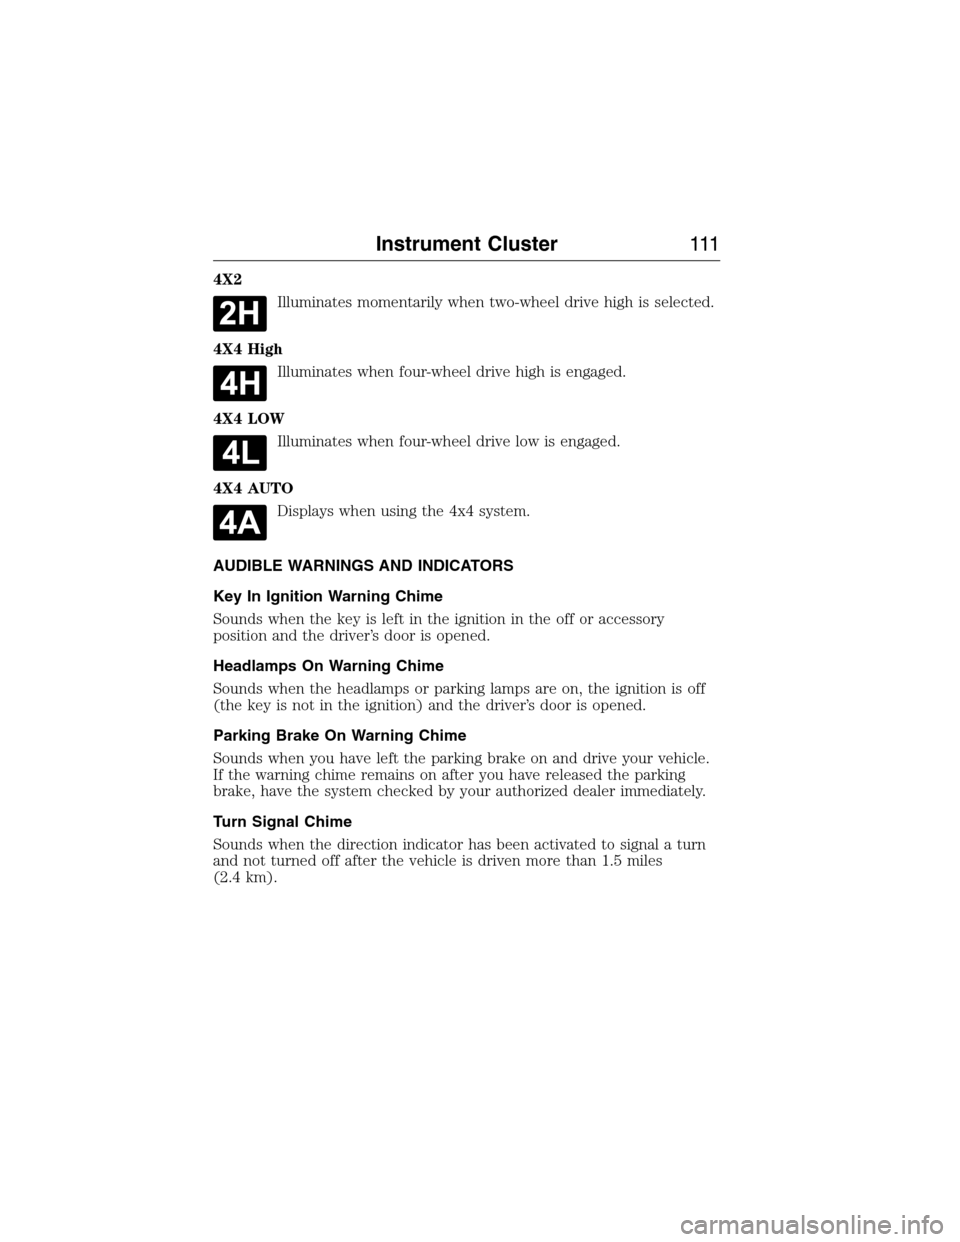
4X2
Illuminates momentarily when two-wheel drive high is selected.
4X4 High
Illuminates when four-wheel drive high is engaged.
4X4 LOW
Illuminates when four-wheel drive low is engaged.
4X4 AUTO
Displays when using the 4x4 system.
AUDIBLE WARNINGS AND INDICATORS
Key In Ignition Warning Chime
Sounds when the key is left in the ignition in the off or accessory
position and the driver’s door is opened.
Headlamps On Warning Chime
Sounds when the headlamps or parking lamps are on, the ignition is off
(the key is not in the ignition) and the driver’s door is opened.
Parking Brake On Warning Chime
Sounds when you have left the parking brake on and drive your vehicle.
If the warning chime remains on after you have released the parking
brake, have the system checked by your authorized dealer immediately.
Turn Signal Chime
Sounds when the direction indicator has been activated to signal a turn
and not turned off after the vehicle is driven more than 1.5 miles
(2.4 km).
Instrument Cluster111
2015 Expedition(exd)
Owners Guide gf, 1st Printing, July 2014
USA(fus)
Page 170 of 564
Programming
Note:Put a new battery in the hand-held transmitter. This will ensure
quicker training and accurate transmission of the radio-frequency signal.
1. With your vehicle parked outside of the garage and your key in the
ignition, turn the key so that the ignition is in the on position.
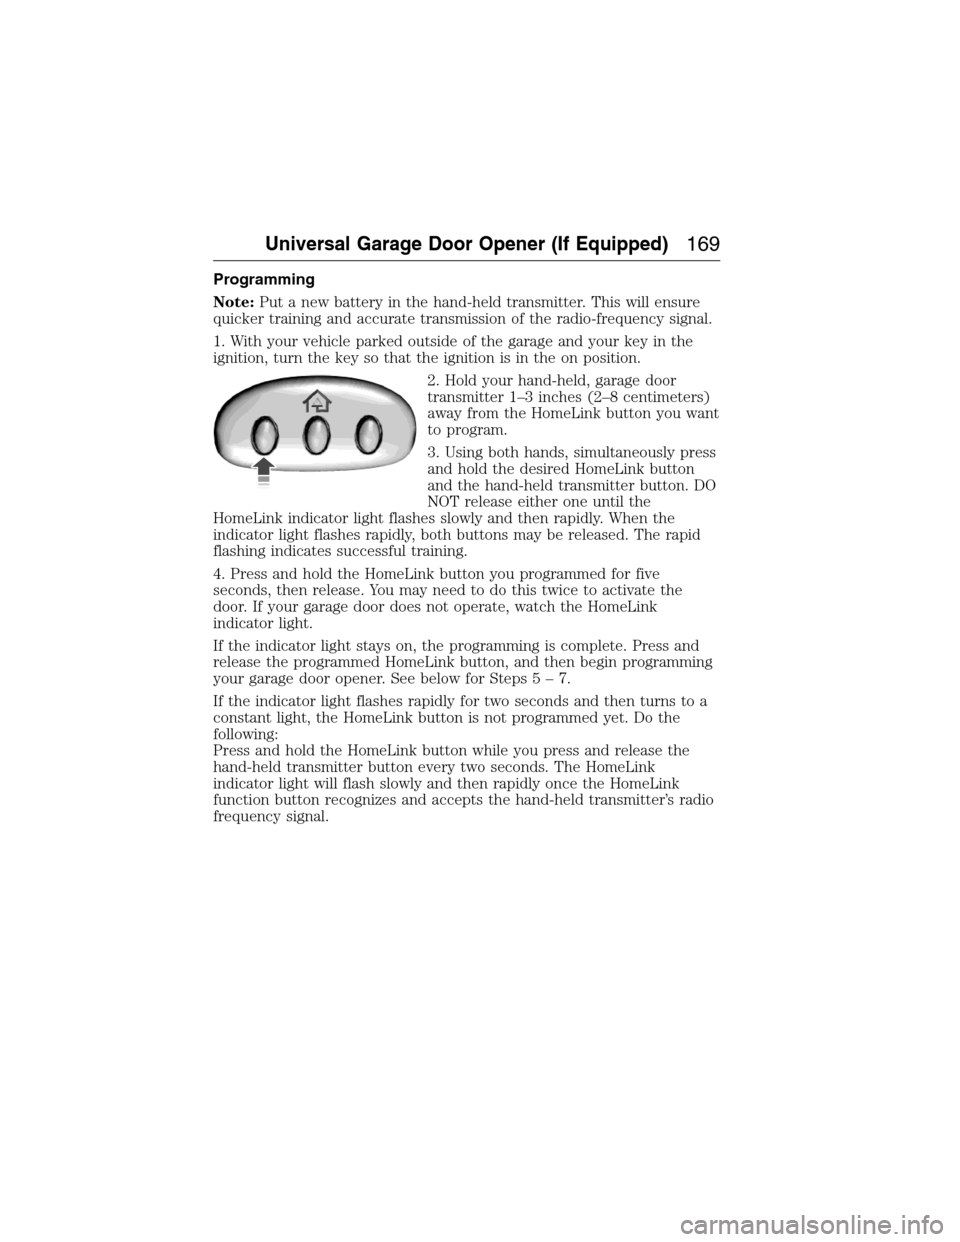
2. Hold your hand-held, garage door
transmitter 1–3 inches (2–8 centimeters)
away from the HomeLink button you want
to program.
3. Using both hands, simultaneously press
and hold the desired HomeLink button
and the hand-held transmitter button. DO
NOT release either one until the
HomeLink indicator light flashes slowly and then rapidly. When the
indicator light flashes rapidly, both buttons may be released. The rapid
flashing indicates successful training.
4. Press and hold the HomeLink button you programmed for five
seconds, then release. You may need to do this twice to activate the
door. If your garage door does not operate, watch the HomeLink
indicator light.
If the indicator light stays on, the programming is complete. Press and
release the programmed HomeLink button, and then begin programming
your garage door opener. See below for Steps5–7.
If the indicator light flashes rapidly for two seconds and then turns to a
constant light, the HomeLink button is not programmed yet. Do the
following:
Press and hold the HomeLink button while you press and release the
hand-held transmitter button every two seconds. The HomeLink
indicator light will flash slowly and then rapidly once the HomeLink
function button recognizes and accepts the hand-held transmitter’s radio
frequency signal.
Universal Garage Door Opener (If Equipped)169
2015 Expedition(exd)
Owners Guide gf, 1st Printing, July 2014
USA(fus)
Page 232 of 564
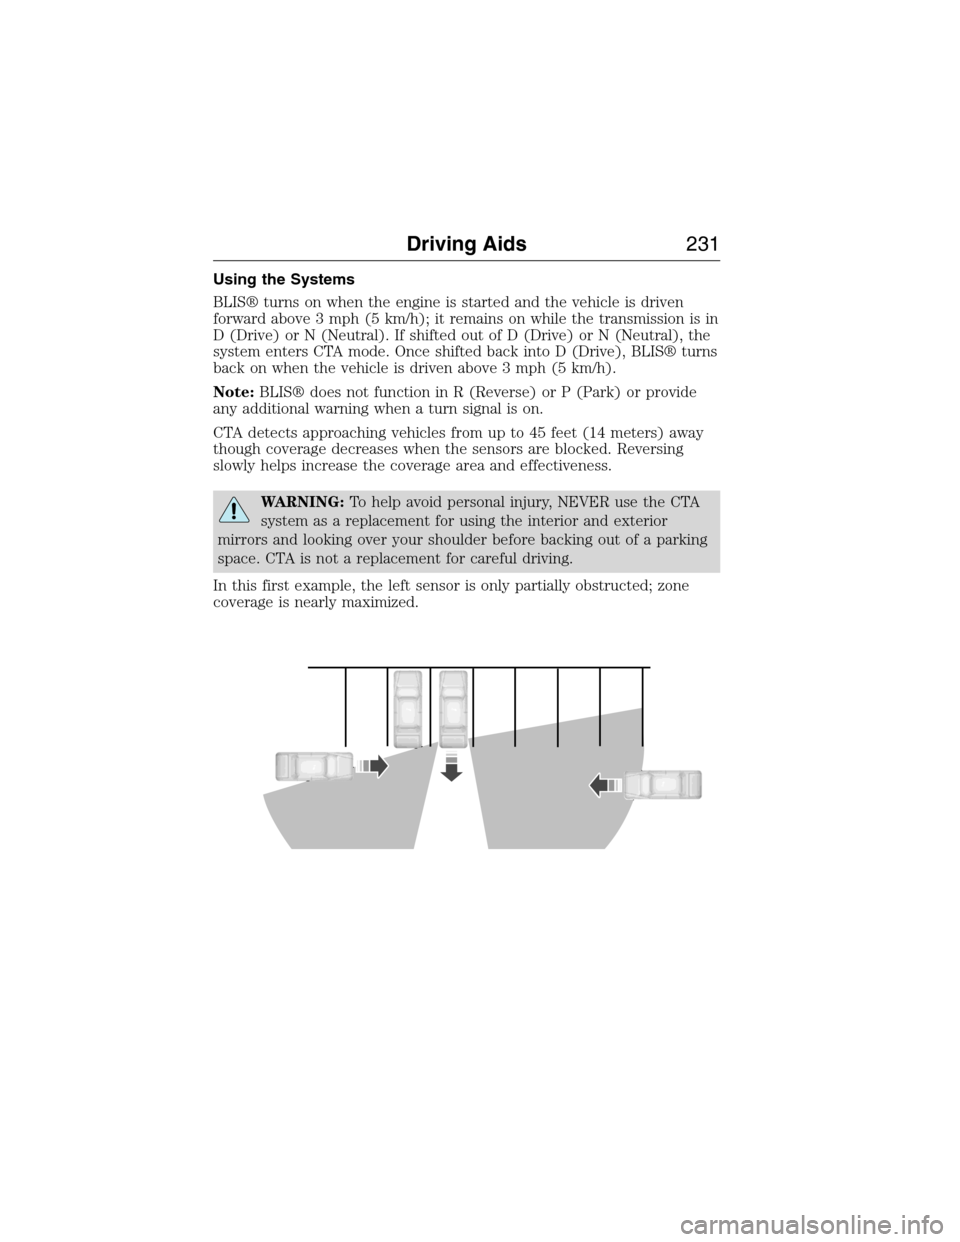
Using the Systems
BLIS® turns on when the engine is started and the vehicle is driven
forward above 3 mph (5 km/h); it remains on while the transmission is in
D (Drive) or N (Neutral). If shifted out of D (Drive) or N (Neutral), the
system enters CTA mode. Once shifted back into D (Drive), BLIS® turns
back on when the vehicle is driven above 3 mph (5 km/h).
Note:BLIS® does not function in R (Reverse) or P (Park) or provide
any additional warning when a turn signal is on.
CTA detects approaching vehicles from up to 45 feet (14 meters) away
though coverage decreases when the sensors are blocked. Reversing
slowly helps increase the coverage area and effectiveness.
WARNING:To help avoid personal injury, NEVER use the CTA
system as a replacement for using the interior and exterior
mirrors and looking over your shoulder before backing out of a parking
space. CTA is not a replacement for careful driving.
In this first example, the left sensor is only partially obstructed; zone
coverage is nearly maximized.
Driving Aids231
2015 Expedition(exd)
Owners Guide gf, 1st Printing, July 2014
USA(fus)
Page 235 of 564
Reasons for messages being displayed
Heavy rainfall/snowfall
interferes with the
radar signalsNo action required. The system automatically
resets to an unblocked state once the
rainfall/snowfall rate decreases or stops. Do
not use BLIS® and/or CTA in these conditions.
System Limitations
The BLIS® and CTA systems do have their limitations; situations such as
severe weather conditions or debris build-up on the sensor area may
limit vehicle detection.
The following are other situations that may limit the BLIS®:
•Certain maneuvering of vehicles entering and exiting the blind zone.
•Vehicles passing through the blind zone at very fast rates.
•When several vehicles forming a convoy pass through the blind zone.
The following are other situations that may limit the CTA system:
•Adjacently parked vehicles or objects obstructing the sensors.
•Approaching vehicles passing at speeds greater than 15 mph
(24 km/h).
•Driving in reverse faster than 3 mph (5 km/h).
•Backing out of an angled parking spot.
False Alerts
Note:If you connected a trailer to your vehicle the BLIS® system may
detect the trailer causing a false alert. To avoid false alerts you may want
to turn the BLIS off manually.
There may be certain instances when either the BLIS® or CTA systems
illuminate the alert indicator with no vehicle in the coverage zone; this is
known as a false alert. Some amount of false alerts are normal; they are
temporary and self-correct.
System Errors
If either system senses a problem with the left or right sensor, the
BLIS® indicator in the information display will illuminate and remain on.
Also,BLIND SPOT SYSTEM FAULTorCROSS TRAFFIC SYSTEM
FAULTmessage will appear. When problems that may cause the left or
right indicator not to illuminate, only the information display message
faults appear.
234Driving Aids
2015 Expedition(exd)
Owners Guide gf, 1st Printing, July 2014
USA(fus)