cooling FORD EXPLORER 2011 5.G Owners Manual
[x] Cancel search | Manufacturer: FORD, Model Year: 2011, Model line: EXPLORER, Model: FORD EXPLORER 2011 5.GPages: 449, PDF Size: 4.03 MB
Page 34 of 449
HILL DESCENT CONTROL ACTIVE (if equipped)— Displayed
when hill descent control mode becomes active.
HILL DESCENT CONTROL FAULT (if equipped)— Displayed when
a hill descent system fault is present.
HILL DESCENT CONTROL OFF (if equipped)— Displayed when hill
descent control mode becomes inactive.
HILL DESCENT CONTROL OFF SYSTEM COOLING (if equipped)
— Displayed when hill descent control mode is disabled to cool the
brake system.
HILL DESCENT CONTROL READY (if equipped)— Displayed
when hill descent control mode is ready.
MODE CHANGE NOT ACCEPTED, RETRY (if equipped)—
Displayed when hill descent control mode cannot be changed at time of
driver request.
OFF ROAD MODE ENABLED (if equipped)— Displayed when off
road mode becomes active.
TERRAIN MANAGEMENT MUD, RUT MODE (if equipped)—
Displays driver selected terrain management mode.
TERRAIN MANAGEMENT NORMAL MODE (if equipped)—
Displays driver selected terrain management mode.
TERRAIN MANAGEMENT SAND MODE (if equipped)— Displays
driver selected terrain management mode.
TERRAIN MANAGEMENT SNOW MODE (if equipped)— Displays
driver selected terrain management mode.
TERRAIN MANAGEMENT SYSTEM FAULT (if equipped)—
Displays when the terrain management system detects an error.
TO STOP ALARM START VEHICLE— Displayed when the perimeter
alarm system is armed and the vehicle is entered using the key on the
driver’s side door. In order to prevent the perimeter alarm system from
triggering, the ignition must be turned to start or on before the
12 second chime expires. SeePerimeter alarm systemin theLocks and
securitychapter.
TRAILER SWAY REDUCE SPEED (if equipped)— Displayed when
the trailer sway control has detected trailer sway. For more information,
refer to theDrivingchapter for more information.
TRANSPORT MODE CONTACT DEALER— Contact your authorized
dealer as soon as possible.
Instrument Cluster
33
2011 Explorer(exp)
Owners Guide, 1st Printing
USA(fus)
Page 47 of 449
AWD OFF (if equipped)— Displayed when the 4WD system has been
automatically disabled to protect itself. This is caused by operating the
vehicle with the compact spare tire installed or if the system is
overheating. The 4WD system will resume normal function and clear this
message after driving a short distance with the road tire re-installed or
after the system is allowed to cool.
CHECK AWD (if equipped)— Displayed in conjunction with the
throttle control/transmission/4WD
light when the 4WD system is
not operating properly. If the warning stays on or continues to come on,
contact your authorized dealer as soon as possible.
EXITING OFF ROAD MODE (if equipped)— Displayed when off
road mode becomes inactive.
FOR HILL DESCENT REDUCE SPEED 20 MPH OR LESS (if
equipped)— Displayed when hill descent speed exceeds 20 MPH.
FOR HILL DESCENT REDUCE SPEED 32 KM/H OR LESS (if
equipped)— Displayed when hill descent speed exceeds 32 KM/H.
FOR HILL DESCENT SELECT GEAR (if equipped)— Displayed
when hill descent control mode requires driver shift transmission into
gear.
FOR OFF ROAD SLOW TO 5 MPH (if equipped)— Displayed when
the vehicle speed requirement for off road mode entry has not been met.
DRIVER RESUME CONTROL (if equipped)— Displayed when the
hill control and off road mode require the driver to resume control.
HILL DESCENT CONTROL ACTIVE (if equipped)— Displayed
when hill descent control mode becomes active.
HILL DESCENT CONTROL FAULT (if equipped)— Displayed when
a hill descent system fault is present.
HILL DESCENT CONTROL OFF (if equipped)— Displayed when hill
descent control mode becomes inactive.
HILL DESCENT CONTROL OFF SYSTEM COOLING (if equipped)
— Displayed when hill descent control mode is disabled to cool the
brake system.
HILL DESCENT CONTROL READY (if equipped)— Displayed
when hill descent control mode is ready.
Instrument Cluster
46
2011 Explorer(exp)
Owners Guide, 1st Printing
USA(fus)
Page 65 of 449
5.(Multifunction control):Press repeatedly to toggle through the
settings and manually choose one of the following air distribution modes:
•
:Distributes air through the windshield defroster vents, de-mister
vents, floor vents and rear seat floor vents. The system will
automatically provide outside air to reduce window fogging.
•
:Distributes air through the instrument panel vents.
•
:Distributes air through the instrument panel vents, demister
vents, floor vents and rear seat floor vents.
•
:Distributes air through the demister vents, floor vents and rear
seat floor vents.
6.A/C:Press to activate/deactivate air conditioning. Use with
recirculated air to improve cooling performance and efficiency. A/C
engages automatically in MAX A/C,
(defrost)
and
(floor/defrost).
7.(Recirculated air):Press to activate/deactivate air recirculation in
the vehicle. Recirculated air may reduce the amount of time needed to cool
down the interior of the vehicle and may also help reduce undesired odors
from reaching the interior of the vehicle. Recirculated air engages
automatically when MAX A/C is selected or can be engaged manually in
any airflow mode except
(defrost). Recirculated air may turn off
automatically in all airflow modes except MAX A/C to reduce fog potential.
8.MAX A/C (if equipped):Distributes recirculated air through the
instrument panel vents to cool the vehicle. This re-cooling of the interior
air is more economical and efficient than normal A/C mode. Recirculated
air may also help reduce undesirable odors from entering the vehicle.
Press the MAX A/C button again for normal A/C operation.
9.Temperature control:Controls the temperature of the airflow in the
vehicle.
Rear climate controls
10.
(Fan speed adjustment):Press to increase (+) or decrease (-)
the fan speed in the rear of the vehicle.
11.TEMP:Press to increase (+) or decrease (-) the temperature in the
rear of the vehicle.
12.REAR CTRL:Press to turn the rear controls on/off. When the rear
controls are on, the rear seat passengers will have control over the settings.
13.(Power):Press to turn the rear climate system on/off.
Climate Controls
64
2011 Explorer(exp)
Owners Guide, 1st Printing
USA(fus)
Page 66 of 449
Operating tips
•To reduce fog build-up on the windshield during humid weather,
select
(defrost) or(floor/defrost).
•To reduce humidity build-up inside the vehicle, do not drive with the
system off or with
(recirculated air) engaged and A/C off.
•Do not put objects under the front seats that will interfere with the
airflow to the back seats.
•Remove any snow, ice or leaves from the air intake area at the base of
the windshield.
•To improve the time to reach comfort in hot weather, drive with the
windows slightly open for 2-3 minutes after start-up or until the
vehicle has been “aired out.”
•A small amount of air may be felt from the floor vent regardless of the
air distribution setting that is selected.
For maximum cooling performance in MAX A/C mode:
1. Select MAX A/C.
2. Move temperature control selector to the coolest setting.
3. Set the fan to the highest speed initially. As the interior starts to cool
down, adjust the fan speed to maintain comfort.
To aid in side window defogging/demisting in cold weather:
1. Select
(panel/floor).
2. Select A/C.
3. Adjust the temperature control to maintain comfort.
4. Set the fan speed to the highest setting.
5. Direct the outer instrument panel vents toward the side windows.
To increase airflow to the outer instrument panel vents, close the vents
located in the middle of the instrument panel.
Climate Controls
65
2011 Explorer(exp)
Owners Guide, 1st Printing
USA(fus)
Page 67 of 449
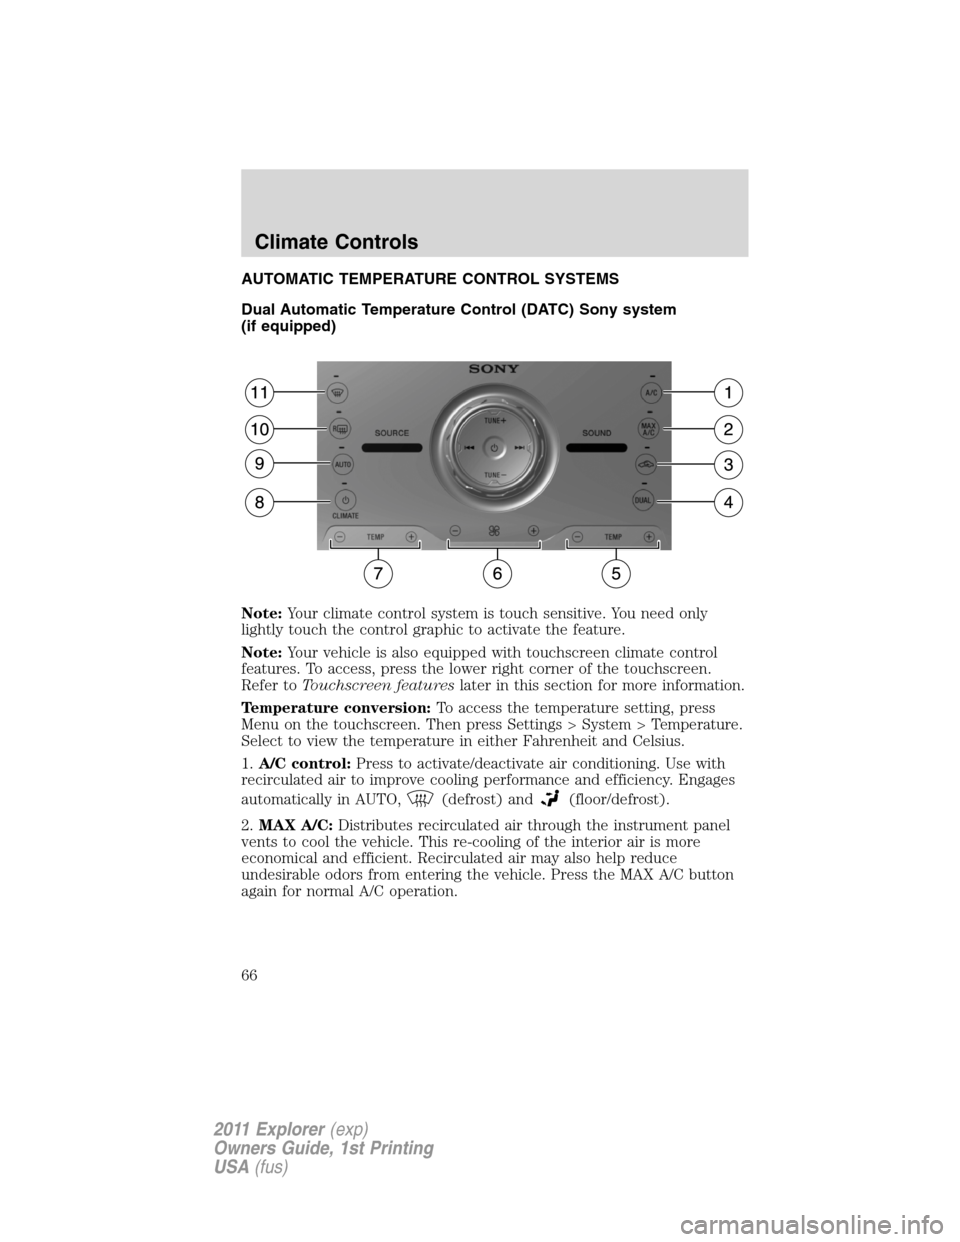
AUTOMATIC TEMPERATURE CONTROL SYSTEMS
Dual Automatic Temperature Control (DATC) Sony system
(if equipped)
Note:Your climate control system is touch sensitive. You need only
lightly touch the control graphic to activate the feature.
Note:Your vehicle is also equipped with touchscreen climate control
features. To access, press the lower right corner of the touchscreen.
Refer toTouchscreen featureslater in this section for more information.
Temperature conversion:To access the temperature setting, press
Menu on the touchscreen. Then press Settings > System > Temperature.
Select to view the temperature in either Fahrenheit and Celsius.
1.A/C control:Press to activate/deactivate air conditioning. Use with
recirculated air to improve cooling performance and efficiency. Engages
automatically in AUTO,
(defrost) and(floor/defrost).
2.MAX A/C:Distributes recirculated air through the instrument panel
vents to cool the vehicle. This re-cooling of the interior air is more
economical and efficient. Recirculated air may also help reduce
undesirable odors from entering the vehicle. Press the MAX A/C button
again for normal A/C operation.
Climate Controls
66
2011 Explorer(exp)
Owners Guide, 1st Printing
USA(fus)
Page 70 of 449
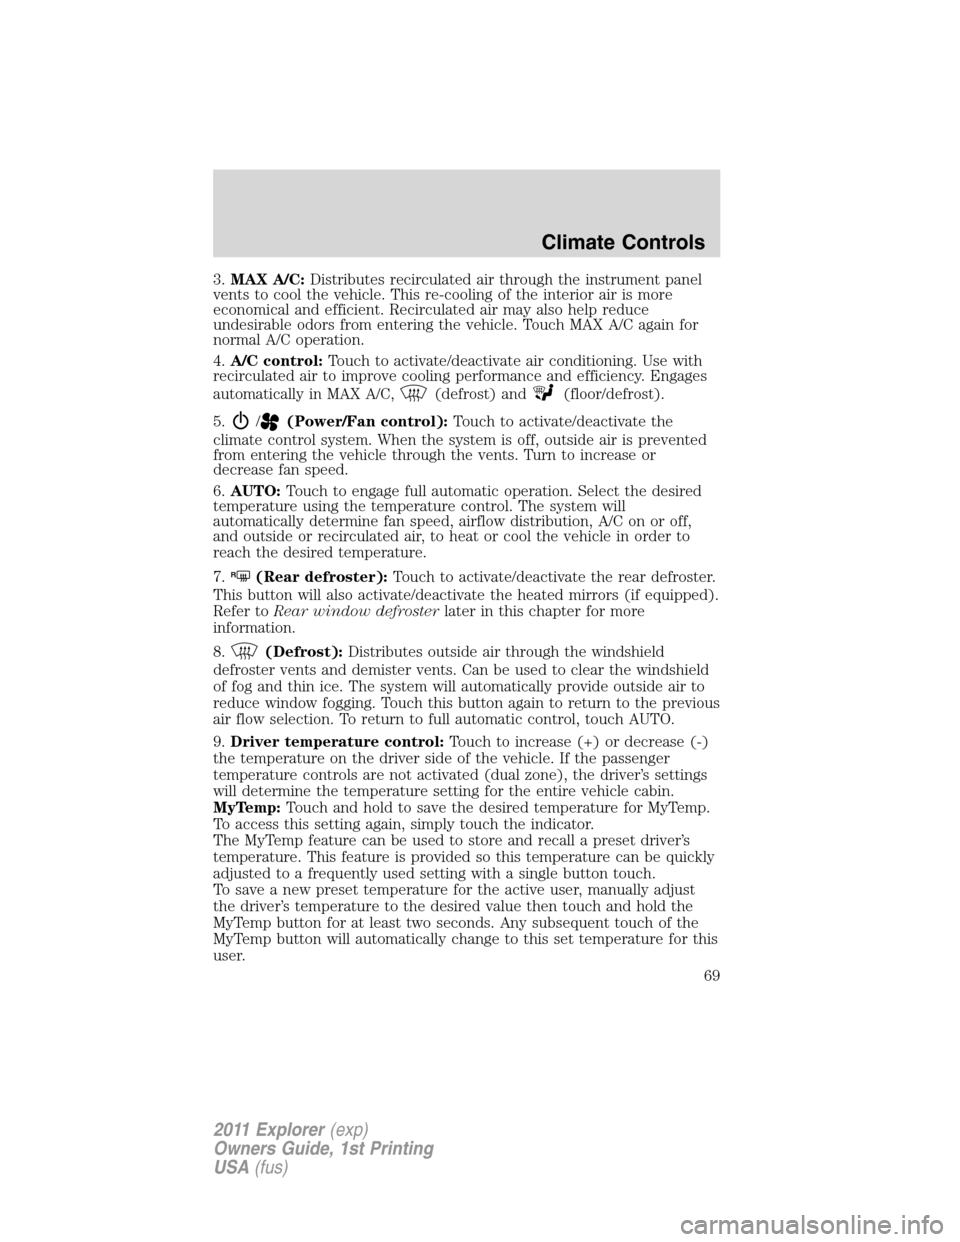
3.MAX A/C:Distributes recirculated air through the instrument panel
vents to cool the vehicle. This re-cooling of the interior air is more
economical and efficient. Recirculated air may also help reduce
undesirable odors from entering the vehicle. Touch MAX A/C again for
normal A/C operation.
4.A/C control:Touch to activate/deactivate air conditioning. Use with
recirculated air to improve cooling performance and efficiency. Engages
automatically in MAX A/C,
(defrost) and(floor/defrost).
5.
/(Power/Fan control):Touch to activate/deactivate the
climate control system. When the system is off, outside air is prevented
from entering the vehicle through the vents. Turn to increase or
decrease fan speed.
6.AUTO:Touch to engage full automatic operation. Select the desired
temperature using the temperature control. The system will
automatically determine fan speed, airflow distribution, A/C on or off,
and outside or recirculated air, to heat or cool the vehicle in order to
reach the desired temperature.
7.
R(Rear defroster):Touch to activate/deactivate the rear defroster.
This button will also activate/deactivate the heated mirrors (if equipped).
Refer toRear window defrosterlater in this chapter for more
information.
8.
(Defrost):Distributes outside air through the windshield
defroster vents and demister vents. Can be used to clear the windshield
of fog and thin ice. The system will automatically provide outside air to
reduce window fogging. Touch this button again to return to the previous
air flow selection. To return to full automatic control, touch AUTO.
9.Driver temperature control:Touch to increase (+) or decrease (-)
the temperature on the driver side of the vehicle. If the passenger
temperature controls are not activated (dual zone), the driver’s settings
will determine the temperature setting for the entire vehicle cabin.
MyTemp:Touch and hold to save the desired temperature for MyTemp.
To access this setting again, simply touch the indicator.
The MyTemp feature can be used to store and recall a preset driver’s
temperature. This feature is provided so this temperature can be quickly
adjusted to a frequently used setting with a single button touch.
To save a new preset temperature for the active user, manually adjust
the driver’s temperature to the desired value then touch and hold the
MyTemp button for at least two seconds. Any subsequent touch of the
MyTemp button will automatically change to this set temperature for this
user.
Climate Controls
69
2011 Explorer(exp)
Owners Guide, 1st Printing
USA(fus)
Page 71 of 449
Operating tips
•To reduce fog build-up on the windshield during humid weather,
select
(defrost) or(floor/defrost).
•To reduce humidity build-up inside the vehicle, do not drive with the
system off or with
(recirculated air) engaged and A/C off.
•Do not put objects under the front seats that will interfere with the
airflow to the back seats.
•Remove any snow, ice or leaves from the air intake area at the base of
the windshield.
•To improve the A/C cool down, drive with the windows slightly open
for 2-3 minutes after start-up or until the vehicle has been “aired out.”
•A small amount of air may be felt from the floor vent regardless of the
air distribution setting that is selected.
For maximum cooling performance:
•Automatic operation:
1. Press AUTO for full automatic operation.
2. Do not override A/C or
(recirculated air).
3. Set the temperature to 60°F (16°C).
•Manual operation:
1. Select MAX A/C.
2. Select
(panel) or(panel/floor).
3. Select
(recirculated air) to provide colder airflow.
4. Set the temperature to 60°F (16°C).
5. Set highest fan setting initially, then adjust to maintain comfort.
To aid in side window defogging/demisting in cold weather:
1. Select
(panel/floor).
2. Select A/C.
3. Adjust the temperature control to maintain comfort.
4. Set the fan speed to the highest setting.
5. Direct the outer instrument panel vents towards the side windows.
To increase airflow to the outer instrument panel vents, close the vents
located in the middle of the instrument panel.
Climate Controls
70
2011 Explorer(exp)
Owners Guide, 1st Printing
USA(fus)
Page 73 of 449
5.MAX A/C:Press to distribute recirculated air through the instrument
panel vents to cool the vehicle. This is more economical and efficient
than normal A/C mode. Recirculated air may also help reduce
undesirable odors from entering the vehicle. Press again for normal A/C
operation.
6.A/C:Press to activate/deactivate air conditioning. Use with
recirculated air to improve cooling performance and efficiency. Engages
automatically in MAX A/C,
(defrost) and(floor/defrost).
7.AUTO:Press to engage full automatic operation. Select the desired
temperature using the temperature control. The system will
automatically determine fan speed, airflow distribution, A/C on or off,
and outside or recirculated air, to heat or cool the vehicle in order to
reach the desired temperature.
8.
R(Rear defroster):Press to activate/deactivate the rear window
defroster. This button will also activate/deactivate the heated mirror (if
equipped). Refer toRear window defrosterlater in this chapter for
more information.
9.
(Defrost):Press to distribute outside air through the windshield
defroster vents and demister vents. Can be used to clear the windshield
of fog and thin ice. The system will automatically provide outside air to
reduce window fogging. Press this button again to return to the previous
air flow selection. To return to full automatic control, press AUTO.
10.Manual controls:Select any of the following to determine where
airflow is directed:
•
:Distributes air through the windshield defroster vents, demister
vents, floor vents and rear seat floor vents. The system will
automatically provide outside air to reduce window fogging. To return
to full automatic control, press AUTO.
•
:Distributes air through the instrument panel vents. To return to
full automatic control, press AUTO.
•
:Distributes air through the instrument panel vents, demister
vents, floor vents, rear seat floor vents. To return to full automatic
control, press AUTO.
•
:Distributes air through the demister vents, floor vents and rear
seat floor vents. To return to full automatic control, press AUTO.
Climate Controls
72
2011 Explorer(exp)
Owners Guide, 1st Printing
USA(fus)
Page 167 of 449
Three-position heated and cooled seats (if equipped)
Heated seats
The heated seats will only function when the engine is running.
WARNING:Persons who are unable to feel pain to the skin
because of advanced age, chronic illness, diabetes, spinal cord
injury, medication, alcohol use, exhaustion, or other physical
conditions, must exercise care when using the seat heater. The seat
heater may cause burns even at low temperatures, especially if used
for long periods of time. Do not place anything on the seat that
insulates against heat, such as a blanket or cushion, because this may
cause the seat heater to overheat. Do not puncture the seat with pins,
needles, or other pointed objects because this may damage the heating
element which may cause the seat heater to overheat. An overheated
seat may cause serious personal injury.
Note:Do not do the following:
•Place heavy objects on the seat
•Operate the seat heater if water or any other liquid is spilled on the
seat. Allow the seat to dry thoroughly.
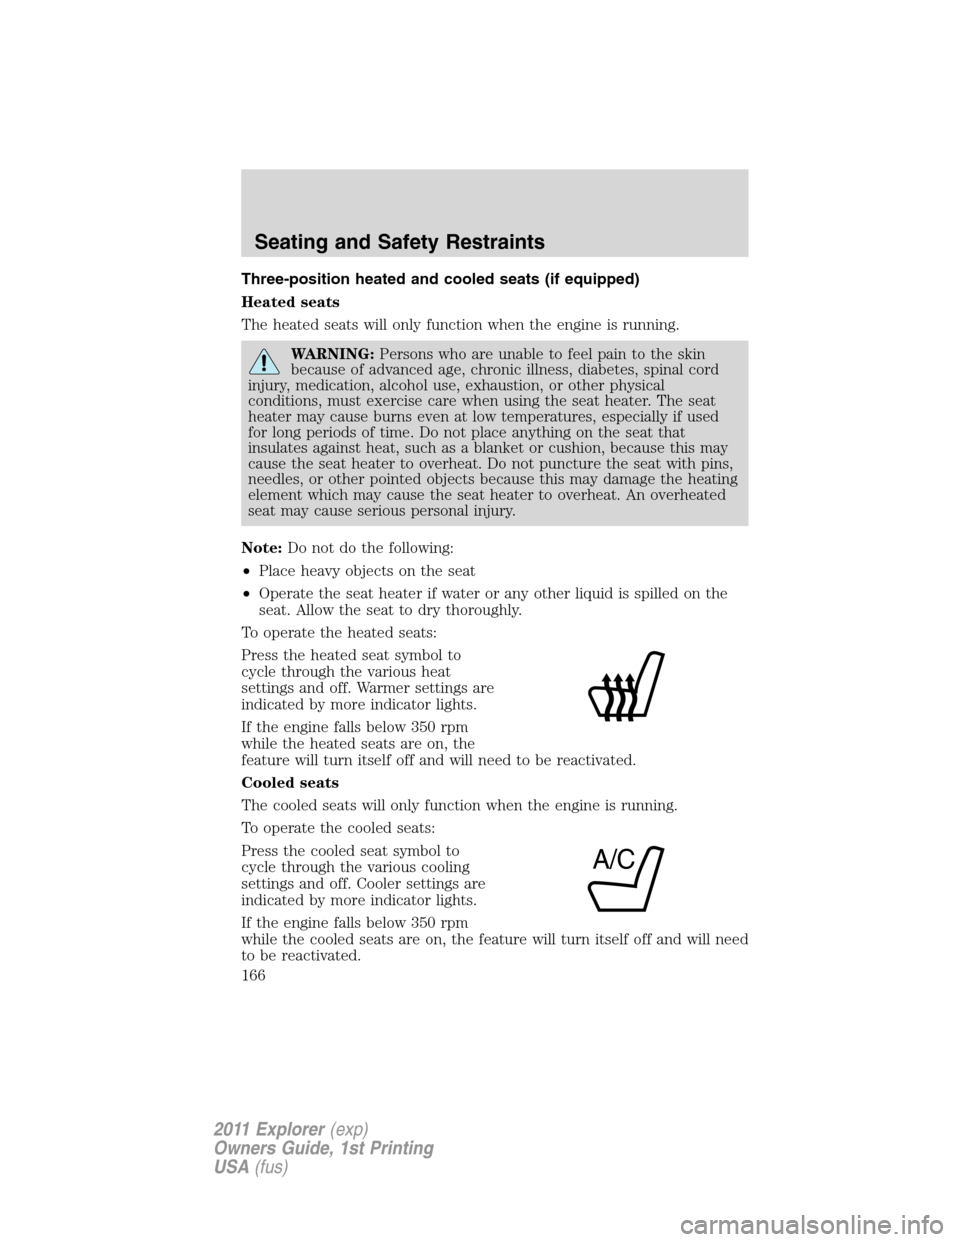
To operate the heated seats:
Press the heated seat symbol to
cycle through the various heat
settings and off. Warmer settings are
indicated by more indicator lights.
If the engine falls below 350 rpm
while the heated seats are on, the
feature will turn itself off and will need to be reactivated.
Cooled seats
The cooled seats will only function when the engine is running.
To operate the cooled seats:
Press the cooled seat symbol to
cycle through the various cooling
settings and off. Cooler settings are
indicated by more indicator lights.
If the engine falls below 350 rpm
while the cooled seats are on, the feature will turn itself off and will need
to be reactivated.
A/C
Seating and Safety Restraints
166
2011 Explorer(exp)
Owners Guide, 1st Printing
USA(fus)
Page 265 of 449
Trailer brakes
Electric brakes and manual, automatic or surge-type trailer brakes are
safe if installed properly and adjusted to the manufacturer’s
specifications. The trailer brakes must meet local and Federal
regulations.
WARNING:Do not connect a trailer’s hydraulic brake system
directly to your vehicle’s brake system. Your vehicle may not
have enough braking power and your chances of having a collision
greatly increase.
The braking system of the tow vehicle is rated for operation at the
GVWR not GCWR.
Trailer lamps
Trailer lamps are required on most towed vehicles. Make sure all running
lights, brake lights, turn signals and hazard lights are working. Contact
your authorized dealer or trailer rental agency for proper instructions
and equipment for hooking-up trailer lamps.
WARNING:Never connect any trailer lighting to the vehicle’s
tail lamp circuits, because it may damage the electrical system
resulting in fire. Contact your authorized dealer as soon as possible for
assistance in proper trailer tow wiring installation. Additional electrical
equipment may be required.
Driving while you tow
When towing a trailer:
•Do not drive faster than 70 mph (113 km/h) during the first 500 miles
(800 km) of trailer towing and don’t make full-throttle starts.
•Turn off the speed control. The speed control may shut off
automatically when you are towing on long, steep grades.
•Activate the tow/haul feature or the grade assist feature on your
transmission to eliminate excessive transmission shifting and assist in
transmission cooling. For additional information, refer toAutomatic
transmission operationin theDrivingchapter.
•Allow more distance for stopping with a trailer attached; anticipate
stops and brake gradually.
Tires, Wheels and Loading
264
2011 Explorer(exp)
Owners Guide, 1st Printing
USA(fus)