brake FORD F650 2015 13.G User Guide
[x] Cancel search | Manufacturer: FORD, Model Year: 2015, Model line: F650, Model: FORD F650 2015 13.GPages: 384, PDF Size: 4.95 MB
Page 20 of 384
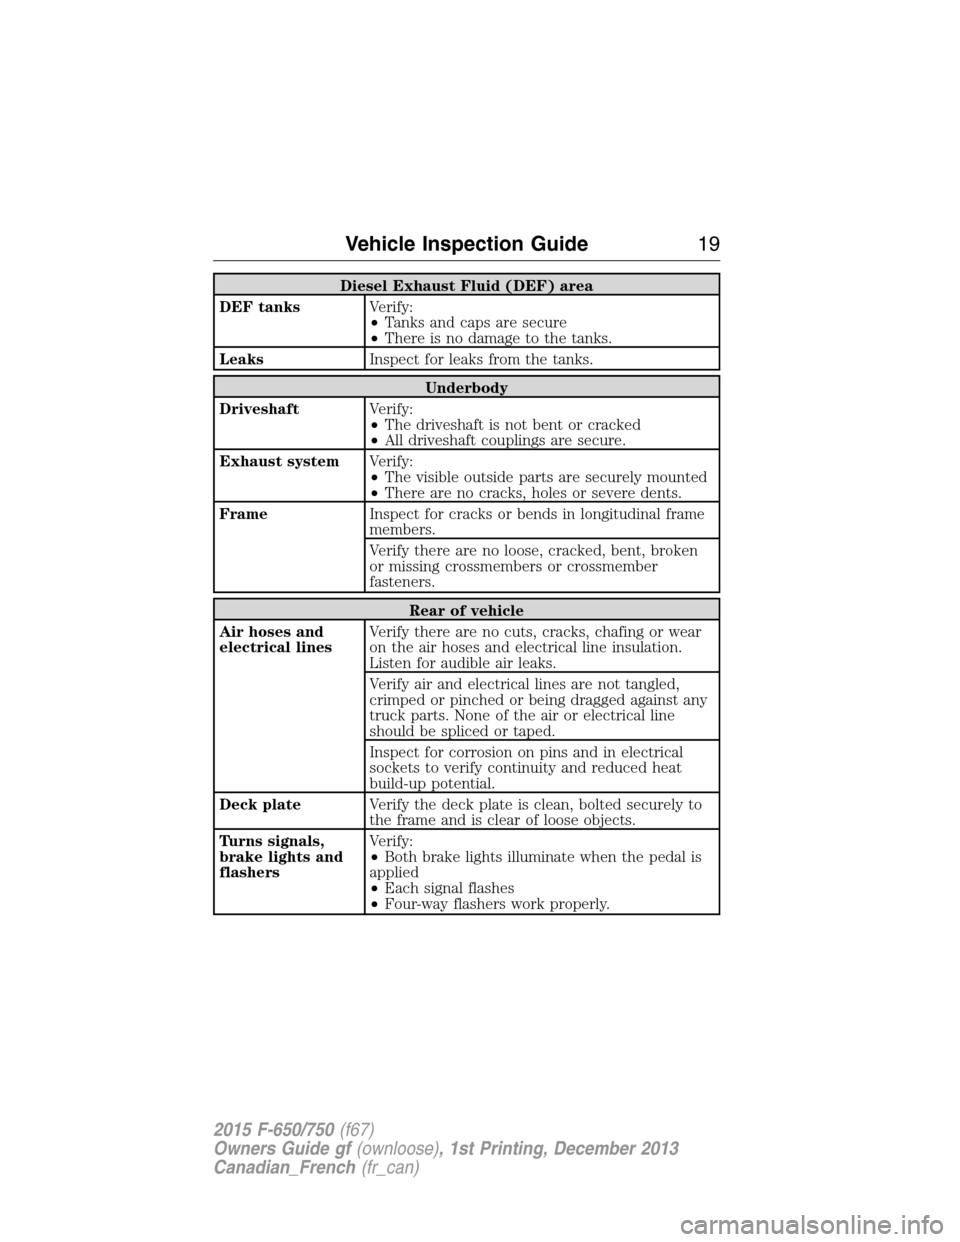
Diesel Exhaust Fluid (DEF) area
DEF tanksVerify:
•Tanks and caps are secure
•There is no damage to the tanks.
LeaksInspect for leaks from the tanks.
Underbody
DriveshaftVerify:
•The driveshaft is not bent or cracked
•All driveshaft couplings are secure.
Exhaust systemVerify:
•The visible outside parts are securely mounted
•There are no cracks, holes or severe dents.
FrameInspect for cracks or bends in longitudinal frame
members.
Verify there are no loose, cracked, bent, broken
or missing crossmembers or crossmember
fasteners.
Rear of vehicle
Air hoses and
electrical linesVerify there are no cuts, cracks, chafing or wear
on the air hoses and electrical line insulation.
Listen for audible air leaks.
Verify air and electrical lines are not tangled,
crimped or pinched or being dragged against any
truck parts. None of the air or electrical line
should be spliced or taped.
Inspect for corrosion on pins and in electrical
sockets to verify continuity and reduced heat
build-up potential.
Deck plateVerify the deck plate is clean, bolted securely to
the frame and is clear of loose objects.
Turns signals,
brake lights and
flashersVerify:
•Both brake lights illuminate when the pedal is
applied
•Each signal flashes
•Four-way flashers work properly.
Vehicle Inspection Guide19
2015 F-650/750(f67)
Owners Guide gf(ownloose), 1st Printing, December 2013
Canadian_French(fr_can)
Page 21 of 384
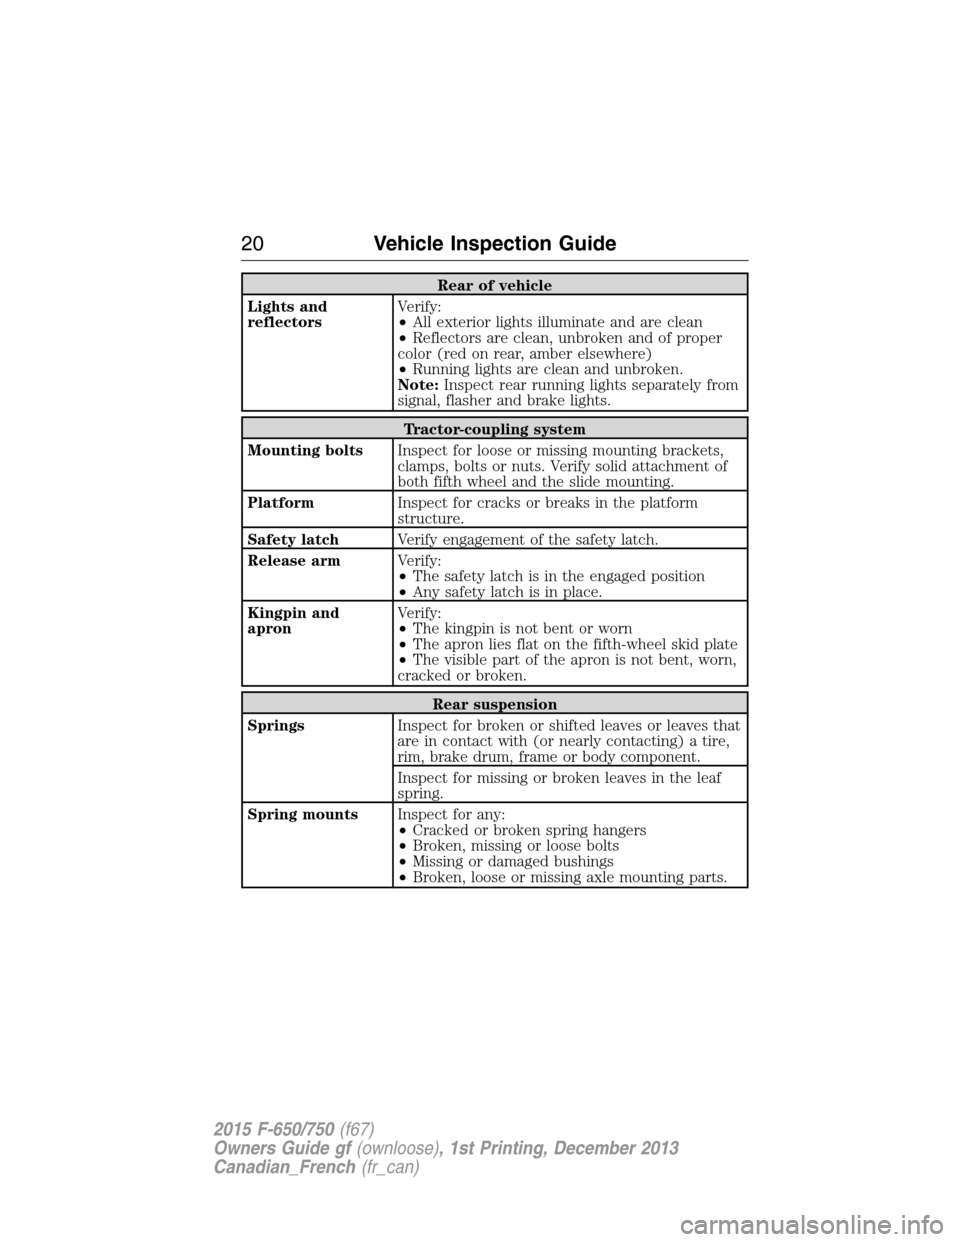
Rear of vehicle
Lights and
reflectorsVerify:
•All exterior lights illuminate and are clean
•Reflectors are clean, unbroken and of proper
color (red on rear, amber elsewhere)
•Running lights are clean and unbroken.
Note:Inspect rear running lights separately from
signal, flasher and brake lights.
Tractor-coupling system
Mounting boltsInspect for loose or missing mounting brackets,
clamps, bolts or nuts. Verify solid attachment of
both fifth wheel and the slide mounting.
PlatformInspect for cracks or breaks in the platform
structure.
Safety latchVerify engagement of the safety latch.
Release armVerify:
•The safety latch is in the engaged position
•Any safety latch is in place.
Kingpin and
apronVerify:
•The kingpin is not bent or worn
•The apron lies flat on the fifth-wheel skid plate
•The visible part of the apron is not bent, worn,
cracked or broken.
Rear suspension
SpringsInspect for broken or shifted leaves or leaves that
are in contact with (or nearly contacting) a tire,
rim, brake drum, frame or body component.
Inspect for missing or broken leaves in the leaf
spring.
Spring mountsInspect for any:
•Cracked or broken spring hangers
•Broken, missing or loose bolts
•Missing or damaged bushings
•Broken, loose or missing axle mounting parts.
20Vehicle Inspection Guide
2015 F-650/750(f67)
Owners Guide gf(ownloose), 1st Printing, December 2013
Canadian_French(fr_can)
Page 22 of 384
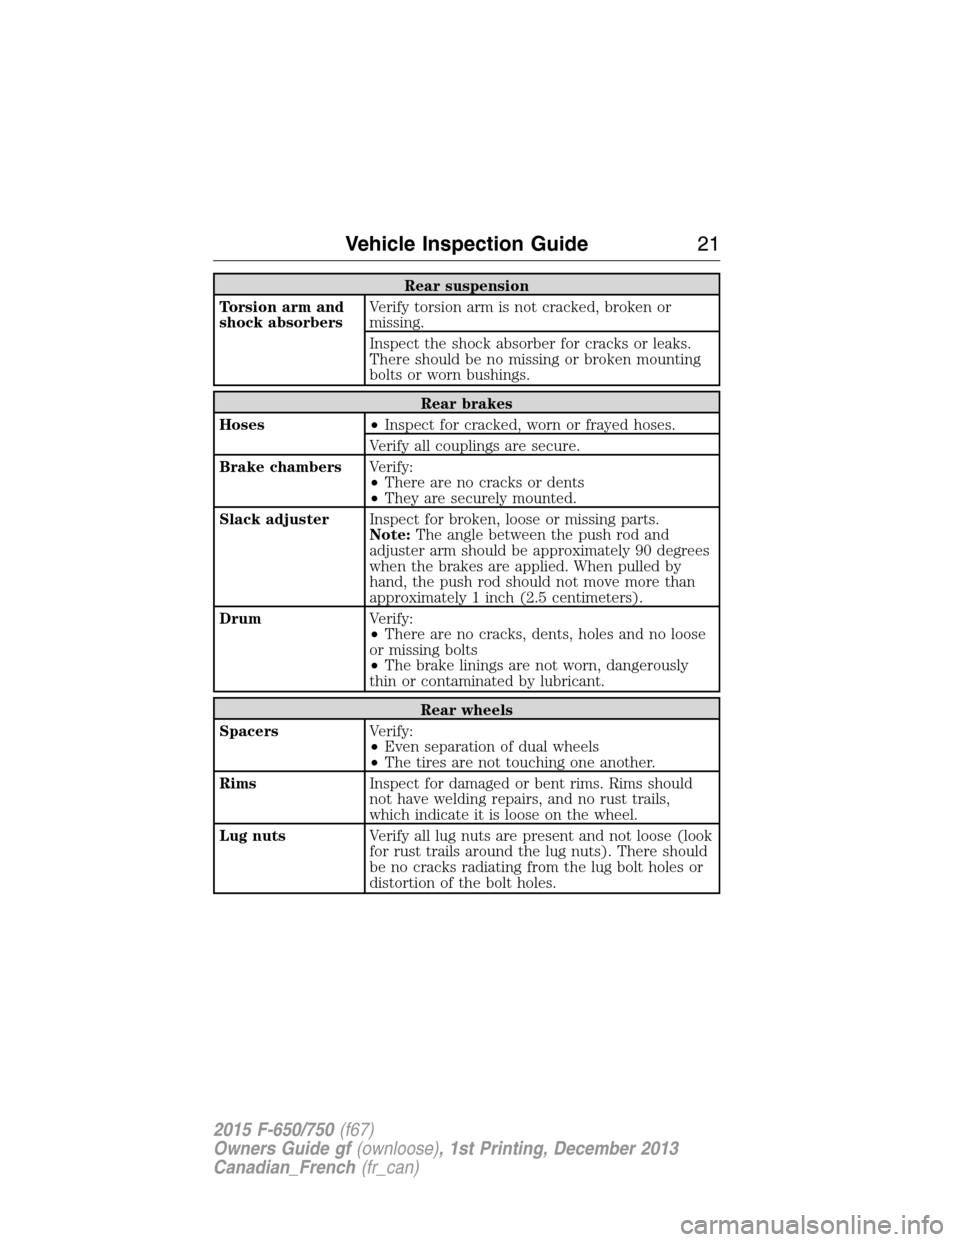
Rear suspension
Torsion arm and
shock absorbersVerify torsion arm is not cracked, broken or
missing.
Inspect the shock absorber for cracks or leaks.
There should be no missing or broken mounting
bolts or worn bushings.
Rear brakes
Hoses•Inspect for cracked, worn or frayed hoses.
Verify all couplings are secure.
Brake chambersVerify:
•There are no cracks or dents
•They are securely mounted.
Slack adjusterInspect for broken, loose or missing parts.
Note:The angle between the push rod and
adjuster arm should be approximately 90 degrees
when the brakes are applied. When pulled by
hand, the push rod should not move more than
approximately 1 inch (2.5 centimeters).
DrumVerify:
•There are no cracks, dents, holes and no loose
or missing bolts
•The brake linings are not worn, dangerously
thin or contaminated by lubricant.
Rear wheels
SpacersVerify:
•Even separation of dual wheels
•The tires are not touching one another.
RimsInspect for damaged or bent rims. Rims should
not have welding repairs, and no rust trails,
which indicate it is loose on the wheel.
Lug nutsVerify all lug nuts are present and not loose (look
for rust trails around the lug nuts). There should
be no cracks radiating from the lug bolt holes or
distortion of the bolt holes.
Vehicle Inspection Guide21
2015 F-650/750(f67)
Owners Guide gf(ownloose), 1st Printing, December 2013
Canadian_French(fr_can)
Page 23 of 384
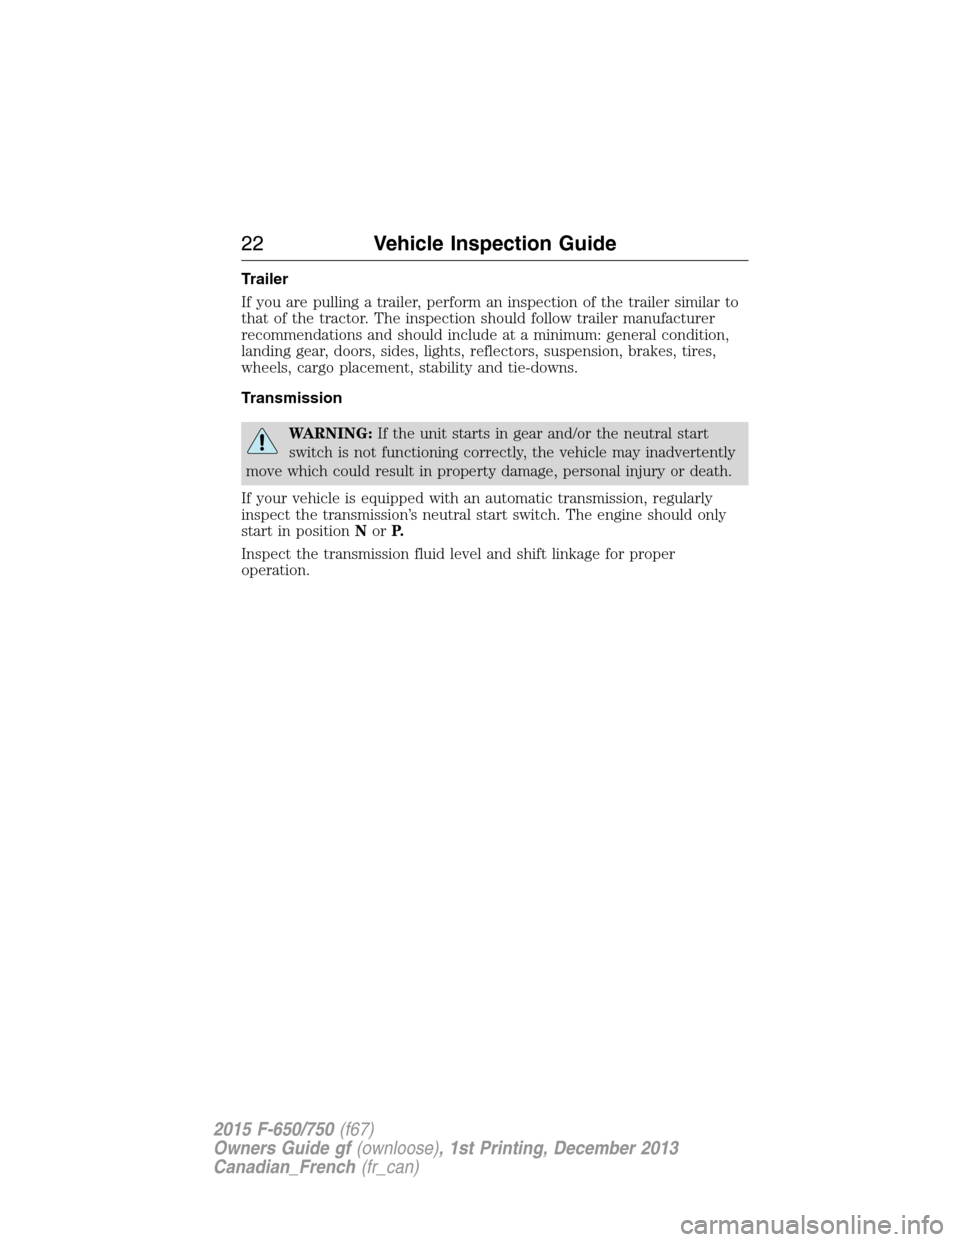
Trailer
If you are pulling a trailer, perform an inspection of the trailer similar to
that of the tractor. The inspection should follow trailer manufacturer
recommendations and should include at a minimum: general condition,
landing gear, doors, sides, lights, reflectors, suspension, brakes, tires,
wheels, cargo placement, stability and tie-downs.
Transmission
WARNING:If the unit starts in gear and/or the neutral start
switch is not functioning correctly, the vehicle may inadvertently
move which could result in property damage, personal injury or death.
If your vehicle is equipped with an automatic transmission, regularly
inspect the transmission’s neutral start switch. The engine should only
start in positionNorP.
Inspect the transmission fluid level and shift linkage for proper
operation.
22Vehicle Inspection Guide
2015 F-650/750(f67)
Owners Guide gf(ownloose), 1st Printing, December 2013
Canadian_French(fr_can)
Page 44 of 384
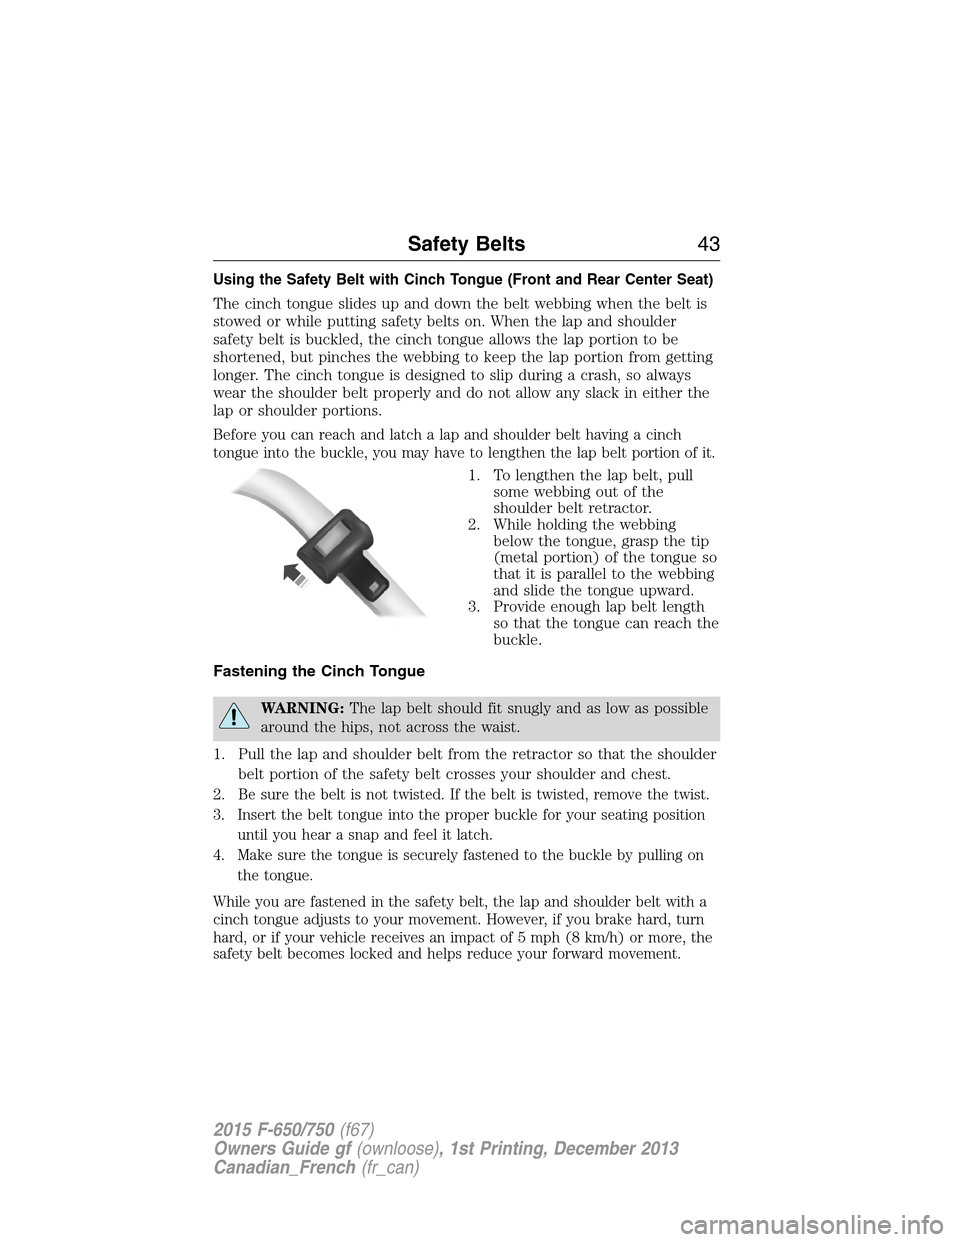
Using the Safety Belt with Cinch Tongue (Front and Rear Center Seat)
The cinch tongue slides up and down the belt webbing when the belt is
stowed or while putting safety belts on. When the lap and shoulder
safety belt is buckled, the cinch tongue allows the lap portion to be
shortened, but pinches the webbing to keep the lap portion from getting
longer. The cinch tongue is designed to slip during a crash, so always
wear the shoulder belt properly and do not allow any slack in either the
lap or shoulder portions.
Before you can reach and latch a lap and shoulder belt having a cinch
tongue into the buckle, you may have to lengthen the lap belt portion of it.
1. To lengthen the lap belt, pull
some webbing out of the
shoulder belt retractor.
2. While holding the webbing
below the tongue, grasp the tip
(metal portion) of the tongue so
that it is parallel to the webbing
and slide the tongue upward.
3. Provide enough lap belt length
so that the tongue can reach the
buckle.
Fastening the Cinch Tongue
WARNING:The lap belt should fit snugly and as low as possible
around the hips, not across the waist.
1. Pull the lap and shoulder belt from the retractor so that the shoulder
belt portion of the safety belt crosses your shoulder and chest.
2.
Be sure the belt is not twisted. If the belt is twisted, remove the twist.
3. Insert the belt tongue into the proper buckle for your seating position
until you hear a snap and feel it latch.
4. Make sure the tongue is securely fastened to the buckle by pulling on
the tongue.
While you are fastened in the safety belt, the lap and shoulder belt with a
cinch tongue adjusts to your movement. However, if you brake hard, turn
hard, or if your vehicle receives an impact of 5 mph (8 km/h) or more, the
safety belt becomes locked and helps reduce your forward movement.
Safety Belts43
2015 F-650/750(f67)
Owners Guide gf(ownloose), 1st Printing, December 2013
Canadian_French(fr_can)
Page 45 of 384
Using Safety Belts During Pregnancy
WARNING:Always ride and drive with your seatback upright
and the safety belt properly fastened. The lap portion of the
safety belt should fit snug and be positioned low across the hips. The
shoulder portion of the safety belt should be positioned across the
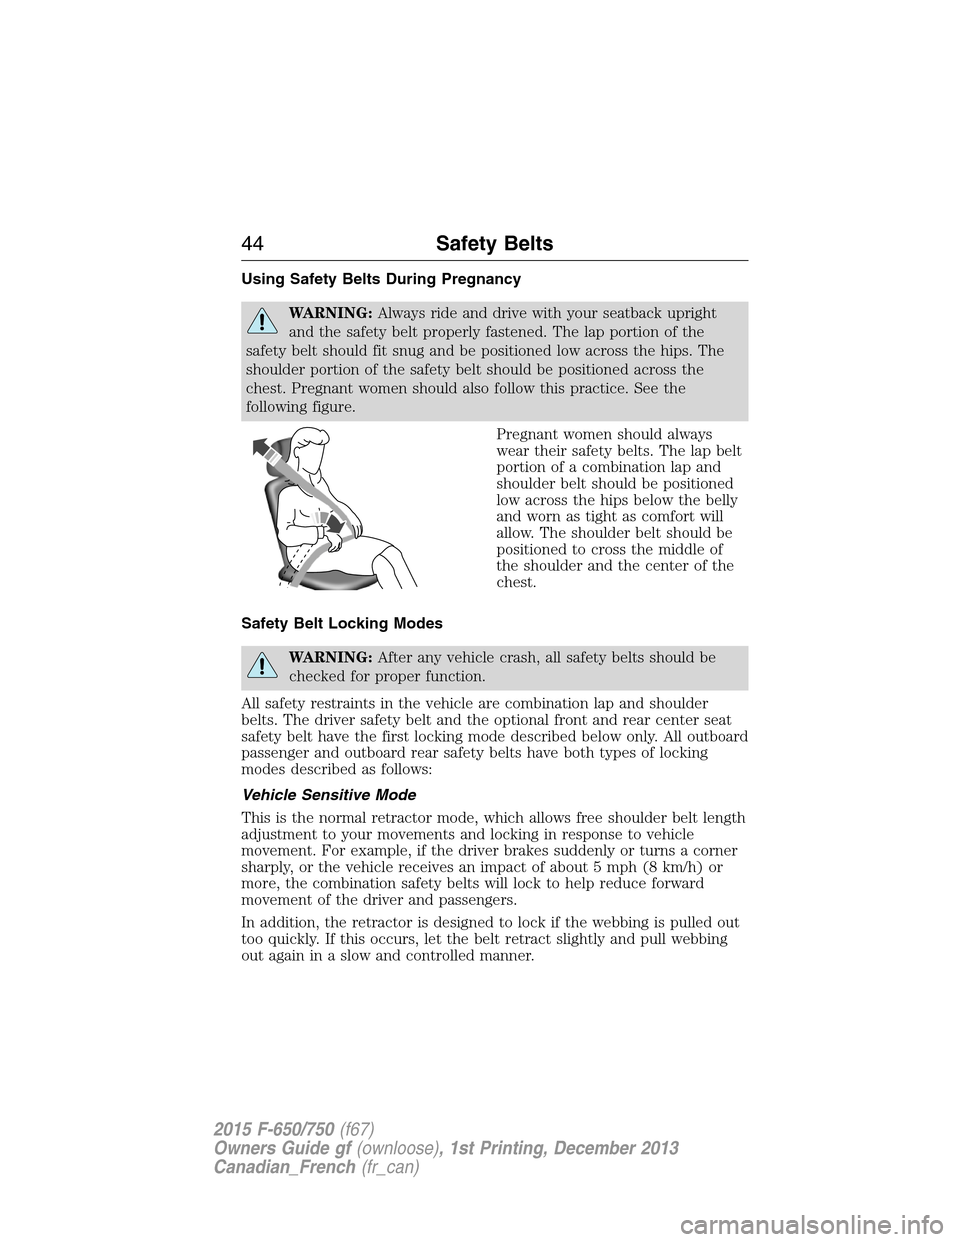
chest. Pregnant women should also follow this practice. See the
following figure.
Pregnant women should always
wear their safety belts. The lap belt
portion of a combination lap and
shoulder belt should be positioned
low across the hips below the belly
and worn as tight as comfort will
allow. The shoulder belt should be
positioned to cross the middle of
the shoulder and the center of the
chest.
Safety Belt Locking Modes
WARNING:After any vehicle crash, all safety belts should be
checked for proper function.
All safety restraints in the vehicle are combination lap and shoulder
belts. The driver safety belt and the optional front and rear center seat
safety belt have the first locking mode described below only. All outboard
passenger and outboard rear safety belts have both types of locking
modes described as follows:
Vehicle Sensitive Mode
This is the normal retractor mode, which allows free shoulder belt length
adjustment to your movements and locking in response to vehicle
movement. For example, if the driver brakes suddenly or turns a corner
sharply, or the vehicle receives an impact of about 5 mph (8 km/h) or
more, the combination safety belts will lock to help reduce forward
movement of the driver and passengers.
In addition, the retractor is designed to lock if the webbing is pulled out
too quickly. If this occurs, let the belt retract slightly and pull webbing
out again in a slow and controlled manner.
44Safety Belts
2015 F-650/750(f67)
Owners Guide gf(ownloose), 1st Printing, December 2013
Canadian_French(fr_can)
Page 50 of 384
Deactivating and Activating the Belt-Minder® Feature
WARNING:While the design allows you to deactivate your
Belt-Minder®, this system is designed to improve your chances of
being safely belted and surviving an accident. We recommend you leave
the Belt-Minder® system activated for yourself and others who may use
the vehicle. To reduce the risk of injury, do not deactivate or activate
the Belt-Minder® feature while driving the vehicle.
Read Steps 1-4 thoroughly before proceeding with the deactivation or
activation programming procedure.
The system can be deactivated and activated by performing the following
procedure:
Before following the procedure, make sure that:
•the parking brake is set
•the gearshift is in positionP(if equipped) orNfor an automatic
transmission or neutral for a manual transmission
•the ignition is off
•all vehicle doors are closed
•the driver’s safety belt is unbuckled
•the parklamps and headlamps are off.
1. Turn the ignition on. (DO NOT START THE ENGINE.)
2. Wait until the safety belt warning light turns off (approximately one
or two minutes).
•Steps 3–5 must be completed within 60 seconds after the safety
belt warning light turns off, or the procedure has to be repeated.
3. Buckle then unbuckle the safety belt three times at a moderate
speed, ending with the safety belt in the unbuckled state.
4. Turn on the parklamps and headlamps, then turn them off.
5. Buckle then unbuckle the safety belt three times at a moderate
speed, ending with the safety belt in the unbuckled state.
•After Step 5, the safety belt warning light turns on for three
seconds.
6. Within seven seconds of the light turning on, buckle then unbuckle
the safety belt.
•This disables the Belt-Minder® feature if it is currently enabled.
•This enables the Belt-Minder® feature if it is currently disabled.
Confirmation of disabling Belt-Minder® is provided by the safety belt
warning light flashing four times per second for three seconds.
Safety Belts49
2015 F-650/750(f67)
Owners Guide gf(ownloose), 1st Printing, December 2013
Canadian_French(fr_can)
Page 68 of 384
Gauge Package (If Equipped)
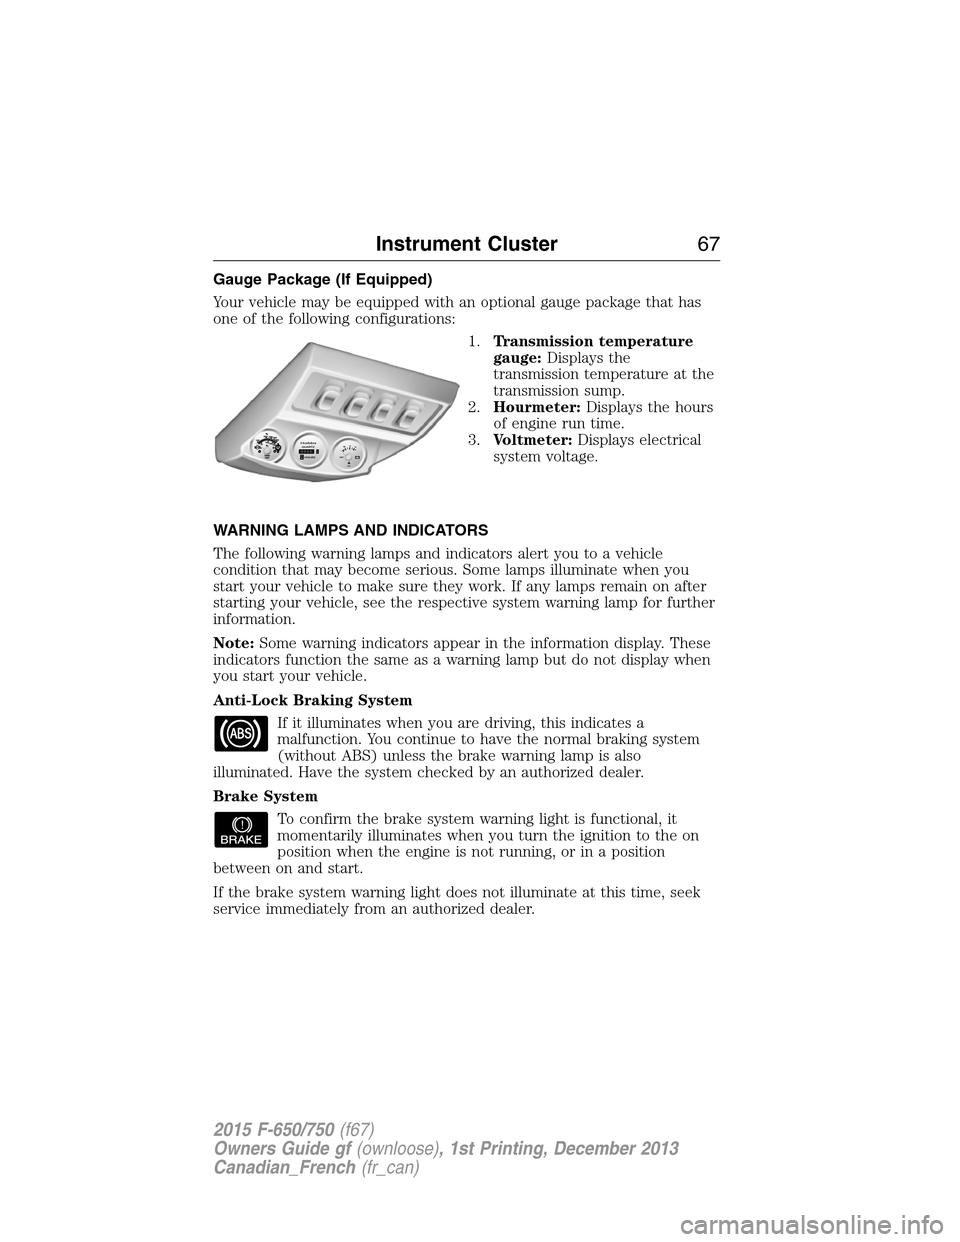
Your vehicle may be equipped with an optional gauge package that has
one of the following configurations:
1.Transmission temperature
gauge:Displays the
transmission temperature at the
transmission sump.
2.Hourmeter:Displays the hours
of engine run time.
3.Voltmeter:Displays electrical
system voltage.
WARNING LAMPS AND INDICATORS
The following warning lamps and indicators alert you to a vehicle
condition that may become serious. Some lamps illuminate when you
start your vehicle to make sure they work. If any lamps remain on after
starting your vehicle, see the respective system warning lamp for further
information.
Note:Some warning indicators appear in the information display. These
indicators function the same as a warning lamp but do not display when
you start your vehicle.
Anti-Lock Braking System
If it illuminates when you are driving, this indicates a
malfunction. You continue to have the normal braking system
(without ABS) unless the brake warning lamp is also
illuminated. Have the system checked by an authorized dealer.
Brake System
To confirm the brake system warning light is functional, it
momentarily illuminates when you turn the ignition to the on
position when the engine is not running, or in a position
between on and start.
If the brake system warning light does not illuminate at this time, seek
service immediately from an authorized dealer.
Instrument Cluster67
2015 F-650/750(f67)
Owners Guide gf(ownloose), 1st Printing, December 2013
Canadian_French(fr_can)
Page 69 of 384
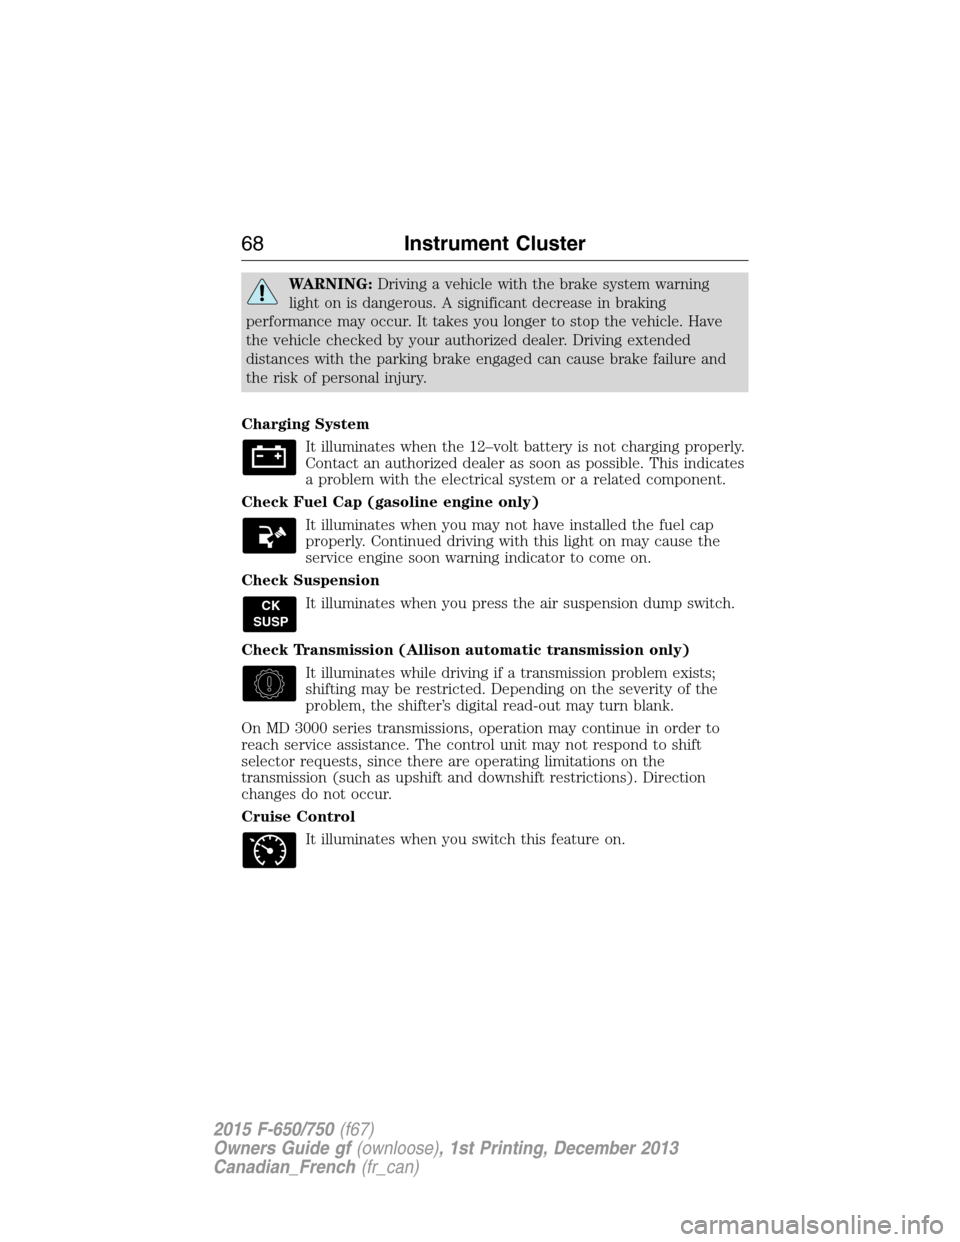
WARNING:Driving a vehicle with the brake system warning
light on is dangerous. A significant decrease in braking
performance may occur. It takes you longer to stop the vehicle. Have
the vehicle checked by your authorized dealer. Driving extended
distances with the parking brake engaged can cause brake failure and
the risk of personal injury.
Charging System
It illuminates when the 12–volt battery is not charging properly.
Contact an authorized dealer as soon as possible. This indicates
a problem with the electrical system or a related component.
Check Fuel Cap (gasoline engine only)
It illuminates when you may not have installed the fuel cap
properly. Continued driving with this light on may cause the
service engine soon warning indicator to come on.
Check Suspension
It illuminates when you press the air suspension dump switch.
Check Transmission (Allison automatic transmission only)
It illuminates while driving if a transmission problem exists;
shifting may be restricted. Depending on the severity of the
problem, the shifter’s digital read-out may turn blank.
On MD 3000 series transmissions, operation may continue in order to
reach service assistance. The control unit may not respond to shift
selector requests, since there are operating limitations on the
transmission (such as upshift and downshift restrictions). Direction
changes do not occur.
Cruise Control
It illuminates when you switch this feature on.
CK
SUSP
68Instrument Cluster
2015 F-650/750(f67)
Owners Guide gf(ownloose), 1st Printing, December 2013
Canadian_French(fr_can)
Page 71 of 384
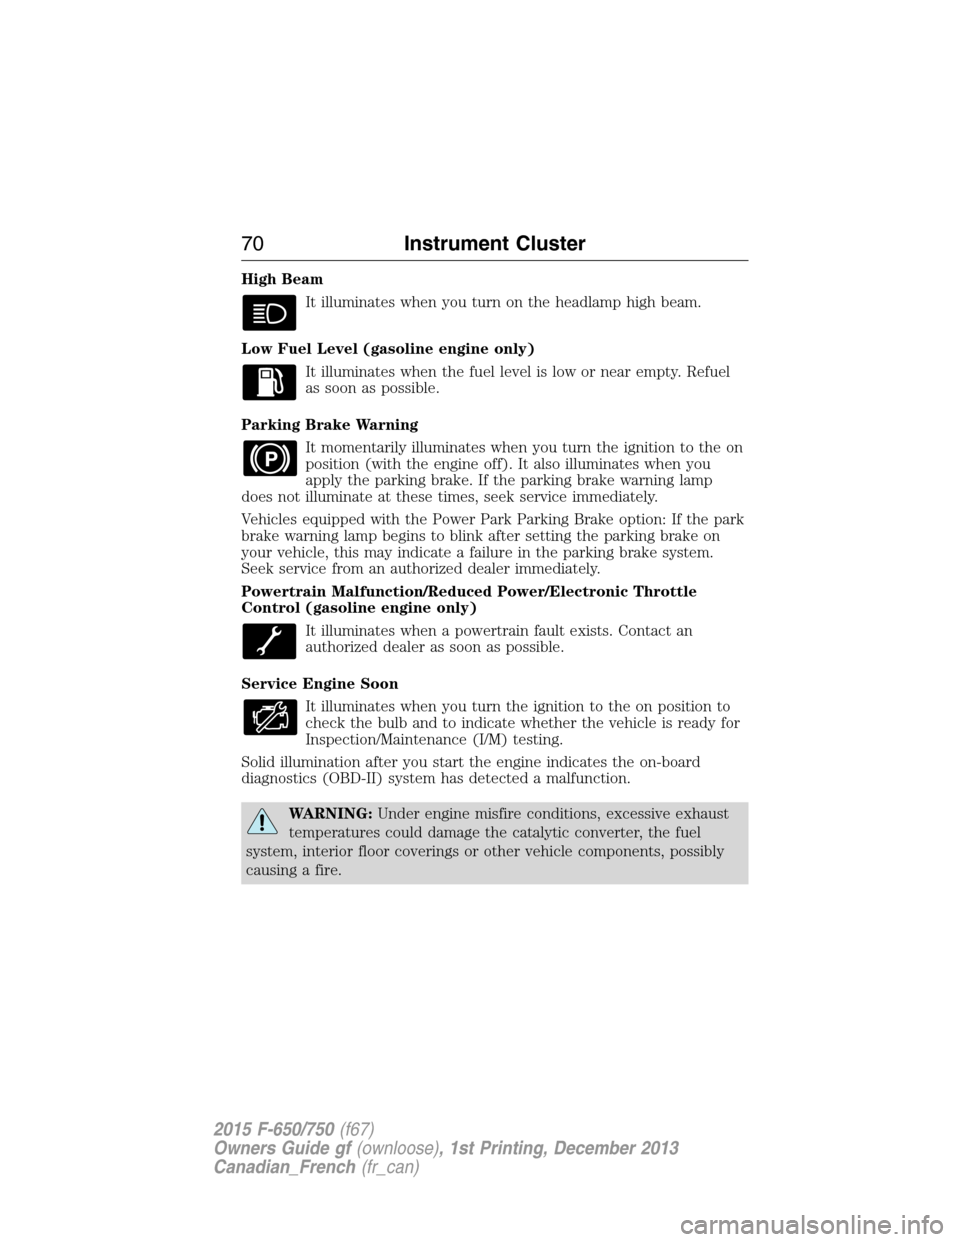
High Beam
It illuminates when you turn on the headlamp high beam.
Low Fuel Level (gasoline engine only)
It illuminates when the fuel level is low or near empty. Refuel
as soon as possible.
Parking Brake Warning
It momentarily illuminates when you turn the ignition to the on
position (with the engine off). It also illuminates when you
apply the parking brake. If the parking brake warning lamp
does not illuminate at these times, seek service immediately.
Vehicles equipped with the Power Park Parking Brake option: If the park
brake warning lamp begins to blink after setting the parking brake on
your vehicle, this may indicate a failure in the parking brake system.
Seek service from an authorized dealer immediately.
Powertrain Malfunction/Reduced Power/Electronic Throttle
Control (gasoline engine only)
It illuminates when a powertrain fault exists. Contact an
authorized dealer as soon as possible.
Service Engine Soon
It illuminates when you turn the ignition to the on position to
check the bulb and to indicate whether the vehicle is ready for
Inspection/Maintenance (I/M) testing.
Solid illumination after you start the engine indicates the on-board
diagnostics (OBD-II) system has detected a malfunction.
WARNING:Under engine misfire conditions, excessive exhaust
temperatures could damage the catalytic converter, the fuel
system, interior floor coverings or other vehicle components, possibly
causing a fire.
P
70Instrument Cluster
2015 F-650/750(f67)
Owners Guide gf(ownloose), 1st Printing, December 2013
Canadian_French(fr_can)