change wheel FORD MUSTANG 2015 6.G Owners Manual
[x] Cancel search | Manufacturer: FORD, Model Year: 2015, Model line: MUSTANG, Model: FORD MUSTANG 2015 6.GPages: 441, PDF Size: 6.98 MB
Page 54 of 441
CREATING A MYKEY
Use the information display to create a
MyKey:
1. Insert the key you want to program into
the ignition. If your vehicle is equipped with
a push-button start, place the intelligent
access key fob into the backup slot. The
location of your backup slot is in another
chapter. See Starting and Stopping the
Engine (page 121).
2. Switch the ignition on.
3. Access the main menu on the
information display controls, and select
Settings
then MyKey by pressing OK or
the > button.
4. Press
OK or the > button to select
Create MyKey.
5. When prompted, hold the
OK button
until you see a message informing you to
label this key as a MyKey. The key will be
restricted at the next start.
MyKey is successfully created. Make sure
you label it so you can distinguish it from
the admin keys.
You can also program configurable
settings for the key(s). See
Programming/Changing Configurable
Settings
. Programming/Changing
Configurable Settings
Use the information display to access your
configurable MyKey settings.
1. Switch the ignition on using an admin
key or fob.
2. Access the main menu on the information display controls, and select
Settings
, then MyKey by pressing OK
or > button.
3. Use the arrow buttons to get to a feature.
4. Press
OK or > to make a selection.
Note: You can clear or change your MyKey
settings at any time during the same key
cycle as you created the MyKey. Once you
have switched the vehicle off, however, you
will need an admin key to change or clear
your MyKey settings.
CLEARING ALL MYKEYS
You can clear or change your MyKey
settings using the information display
control on the steering wheel. See
Information Displays
(page 83).
Switch the ignition on using an admin key
or fob.
To clear all MyKeys of all MyKey settings, press the left arrow button to access
the main menu and scroll to: Action and Description
Message
Press the
OK button.
Settings
Press the
OK button.
MyKey
Press and hold the
OK button until the following message
displays.
Clear MyKey
51
Mustang (), enUSA, First Printing MyKey
™
Page 139 of 441
AUTOMATIC TRANSMISSION
(If Equipped)
WARNINGS
Always set the parking brake fully
and make sure the gearshift is
latched in park (P). Turn the ignition
to the off position and remove the key
whenever you leave your vehicle. Do not apply the brake pedal and
accelerator pedal simultaneously.
Applying both pedals simultaneously
for more than three seconds will limit
engine rpm, which may result in difficulty
maintaining speed in traffic and could lead
to serious injury. Understanding the Positions of
Your Automatic Transmission
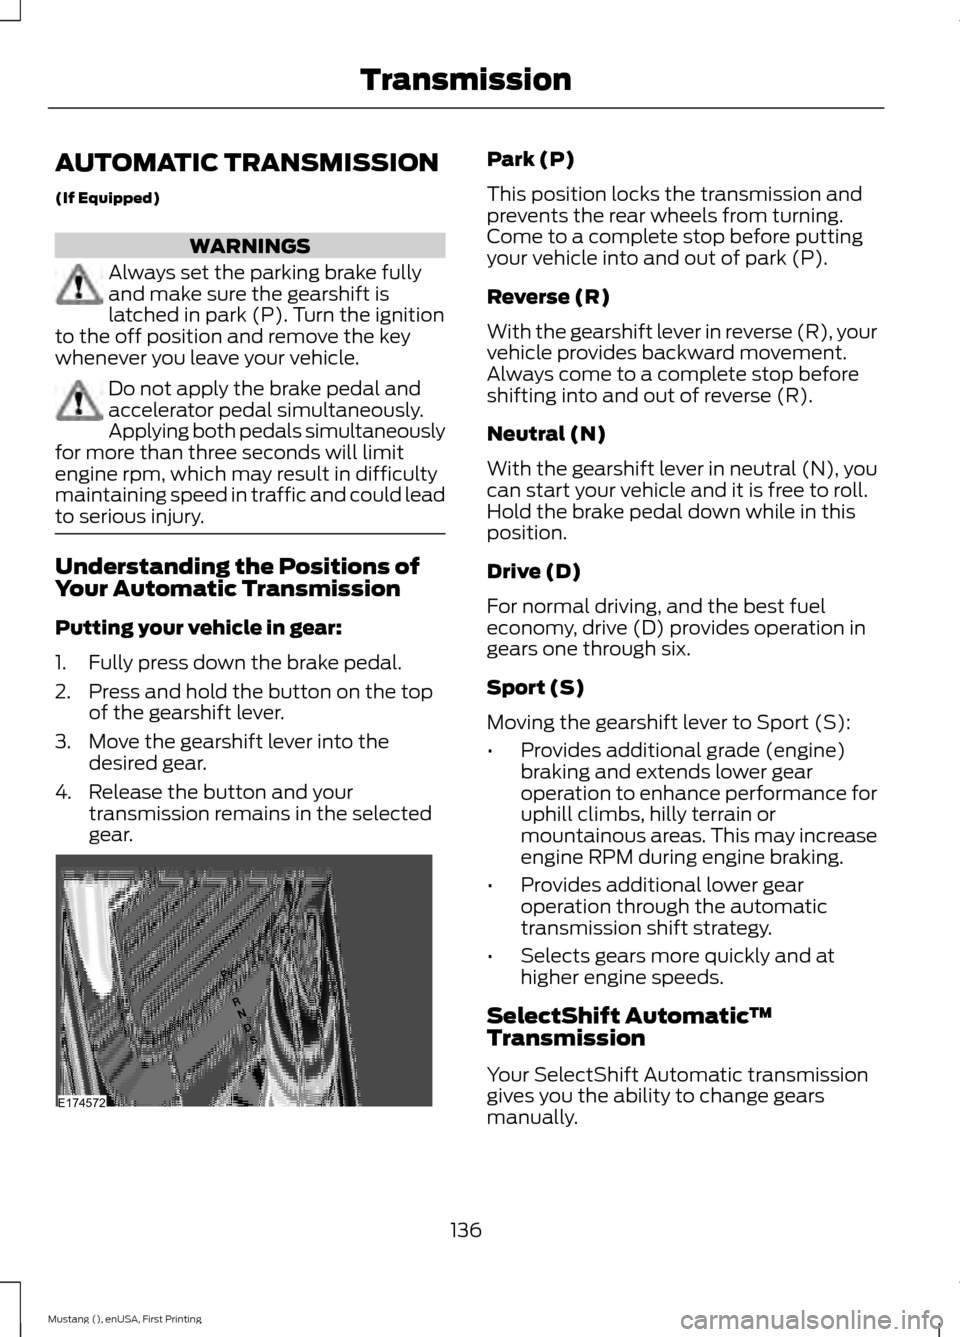
Putting your vehicle in gear:
1. Fully press down the brake pedal.
2. Press and hold the button on the top
of the gearshift lever.
3. Move the gearshift lever into the desired gear.
4. Release the button and your transmission remains in the selected
gear. Park (P)
This position locks the transmission and
prevents the rear wheels from turning.
Come to a complete stop before putting
your vehicle into and out of park (P).
Reverse (R)
With the gearshift lever in reverse (R), your
vehicle provides backward movement.
Always come to a complete stop before
shifting into and out of reverse (R).
Neutral (N)
With the gearshift lever in neutral (N), you
can start your vehicle and it is free to roll.
Hold the brake pedal down while in this
position.
Drive (D)
For normal driving, and the best fuel
economy, drive (D) provides operation in
gears one through six.
Sport (S)
Moving the gearshift lever to Sport (S):
•
Provides additional grade (engine)
braking and extends lower gear
operation to enhance performance for
uphill climbs, hilly terrain or
mountainous areas. This may increase
engine RPM during engine braking.
• Provides additional lower gear
operation through the automatic
transmission shift strategy.
• Selects gears more quickly and at
higher engine speeds.
SelectShift Automatic ™
Transmission
Your SelectShift Automatic transmission
gives you the ability to change gears
manually.
136
Mustang (), enUSA, First Printing TransmissionE174572
Page 146 of 441
PRINCIPLE OF OPERATION
WARNINGS
Vehicle modifications involving
braking system, aftermarket roof
racks, suspension, steering system,
tire construction and wheel and tire size
may change the handling characteristics
of the vehicle and may adversely affect
the performance of the AdvanceTrac
system. In addition, installing any stereo
loudspeakers may interfere with and
adversely affect the AdvanceTrac system.
Install any aftermarket stereo loudspeaker
as far as possible from the front center
console, the tunnel, and the front seats in
order to minimize the risk of interfering with
the AdvanceTrac sensors. Reducing the
effectiveness of the AdvanceTrac system
could lead to an increased risk of loss of
vehicle control, vehicle rollover, personal
injury and death. Remember that even advanced
technology cannot defy the laws of
physics. It’
s always possible to lose
control of a vehicle due to inappropriate
driver input for the conditions. Aggressive
driving on any road condition can cause
you to lose control of your vehicle
increasing the risk of personal injury or
property damage. Activation of the
AdvanceTrac system is an indication that
at least some of the tires have exceeded
their ability to grip the road; this could
reduce the operator ’s ability to control the
vehicle potentially resulting in a loss of
vehicle control, vehicle rollover, personal
injury and death. If your AdvanceTrac
system activates, SLOW DOWN. If a failure has been detected within
the traction control system, the
stability control light will illuminate
steadily. Verify that the traction control
system was not manually disabled using
the stability control button. If the stability
control light still illuminates steadily, have WARNINGS
the system serviced by an authorized
dealer immediately. Operating your vehicle
with traction control disabled could lead
to an increased risk of loss of vehicle
control, vehicle rollover, personal injury and
death. The stability control light
temporarily illuminates on
engine start-up and flashes
when a driving condition activates the
stability system. The stability control off light
temporarily illuminates on
engine start-up, and stays on
when you turn the traction control system
off or select alternative stability control
modes.
The AdvanceTrac Control system helps
you keep control of your vehicle when on
a slippery surface. The electronic stability
control portion of the system helps avoid
skids and lateral slides. The traction
control system helps avoid drive wheel
spin and loss of traction. See Using
Traction Control (page 142).
143
Mustang (), enUSA, First Printing Stability ControlE138639
Page 153 of 441
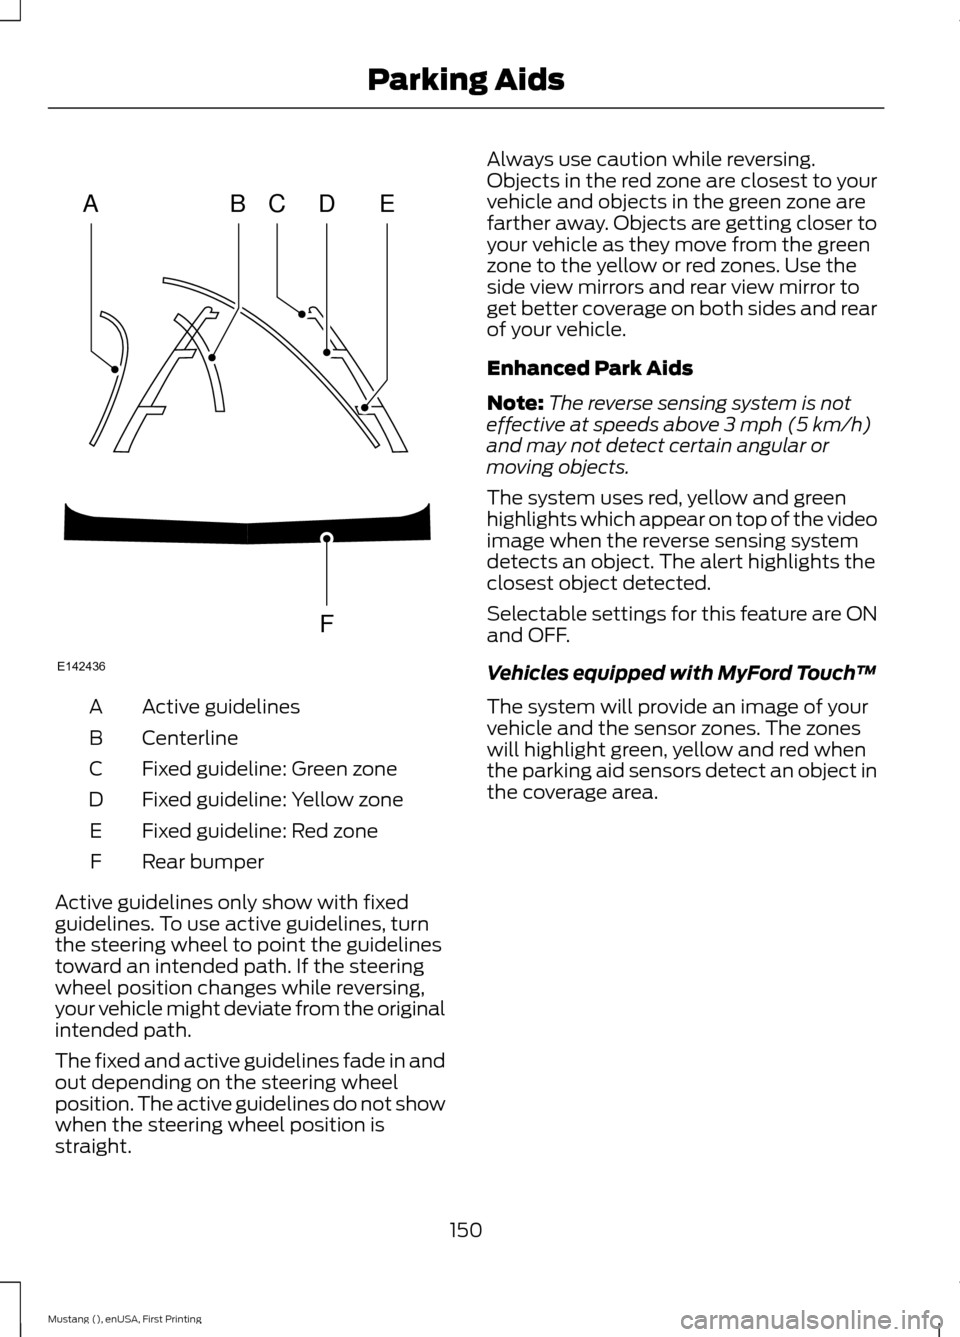
Active guidelines
A
Centerline
B
Fixed guideline: Green zone
C
Fixed guideline: Yellow zone
D
Fixed guideline: Red zone
E
Rear bumper
F
Active guidelines only show with fixed
guidelines. To use active guidelines, turn
the steering wheel to point the guidelines
toward an intended path. If the steering
wheel position changes while reversing,
your vehicle might deviate from the original
intended path.
The fixed and active guidelines fade in and
out depending on the steering wheel
position. The active guidelines do not show
when the steering wheel position is
straight. Always use caution while reversing.
Objects in the red zone are closest to your
vehicle and objects in the green zone are
farther away. Objects are getting closer to
your vehicle as they move from the green
zone to the yellow or red zones. Use the
side view mirrors and rear view mirror to
get better coverage on both sides and rear
of your vehicle.
Enhanced Park Aids
Note:
The reverse sensing system is not
effective at speeds above 3 mph (5 km/h)
and may not detect certain angular or
moving objects.
The system uses red, yellow and green
highlights which appear on top of the video
image when the reverse sensing system
detects an object. The alert highlights the
closest object detected.
Selectable settings for this feature are ON
and OFF.
Vehicles equipped with MyFord Touch ™
The system will provide an image of your
vehicle and the sensor zones. The zones
will highlight green, yellow and red when
the parking aid sensors detect an object in
the coverage area.
150
Mustang (), enUSA, First Printing Parking AidsABCD
F
E
E142436
Page 155 of 441
PRINCIPLE OF OPERATION
Cruise control lets you maintain a set
speed without keeping your foot on the
accelerator pedal. You can use cruise
control when your vehicle speed is greater
than 20 mph (30 km/h).
USING CRUISE CONTROL WARNINGS
Do not use cruise control in heavy
traffic, on winding roads or when the
road surface is slippery. This could
result in loss of vehicle control, serious
injury or death. When you are going downhill, your
vehicle speed may increase above
the set speed. The system will not
apply the brakes. Change down a gear to
assist the system in maintaining the set
speed. Failure to do so could result in loss
of vehicle control, serious injury or death. Note:
Cruise control will disengage if your
vehicle speed decreases more than 10 mph
(16 km/h) below your set speed while
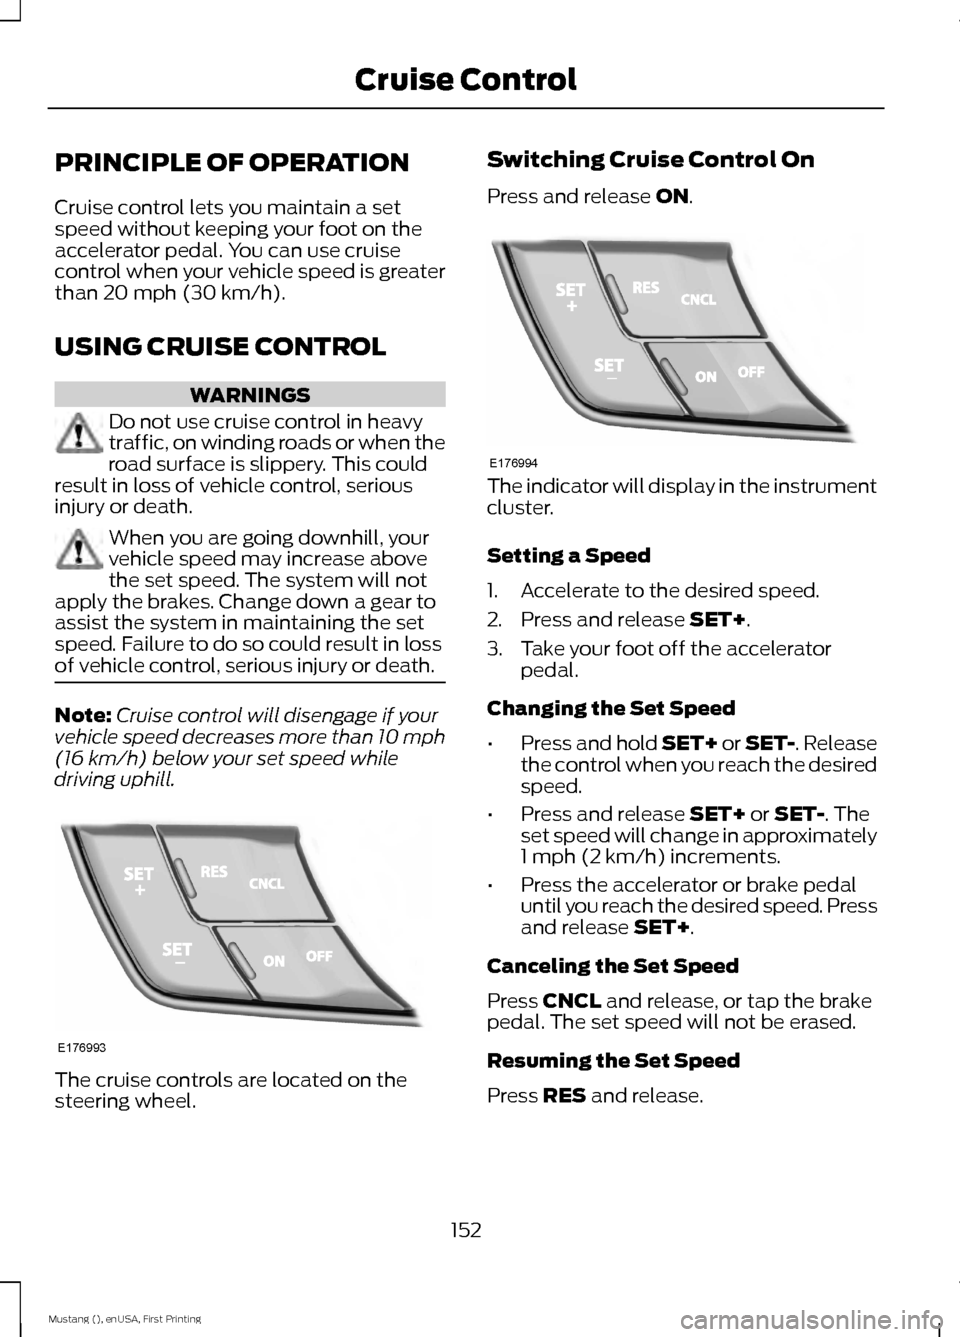
driving uphill. The cruise controls are located on the
steering wheel. Switching Cruise Control On
Press and release
ON.
The indicator will display in the instrument
cluster.
Setting a Speed
1. Accelerate to the desired speed.
2. Press and release
SET+.
3. Take your foot off the accelerator pedal.
Changing the Set Speed
• Press and hold SET+ or SET-. Release
the control when you reach the desired
speed.
• Press and release
SET+ or SET-. The
set speed will change in approximately
1 mph (2 km/h) increments.
• Press the accelerator or brake pedal
until you reach the desired speed. Press
and release
SET+.
Canceling the Set Speed
Press
CNCL and release, or tap the brake
pedal. The set speed will not be erased.
Resuming the Set Speed
Press
RES and release.
152
Mustang (), enUSA, First Printing Cruise ControlE176993 E176994
Page 169 of 441
System Limitations
WARNING
The collision warning system
’s brake
support can only help reduce the
speed at which a collision occurs if
the driver applies the vehicle ’s brakes. The
brake pedal must be pressed just like any
typical braking situation. Due to the nature of radar technology,
there may be certain instances where
vehicles do not provide a collision warning.
These include:
•
Stationary vehicles or vehicles moving
below 6 mph (10 km/h).
• Pedestrians or objects in the roadway.
• Oncoming vehicles in the same lane.
• Severe weather conditions (see
blocked sensor section).
• Debris build-up on the grille near the
headlamps (see blocked sensor
section).
• Small distance to vehicle ahead.
• Steering wheel and pedal movements
are large (very active driving style).
If the front end of the vehicle is hit or
damaged, the radar sensing zone may be
altered causing missed or false collision
warnings. See your authorized dealer to
have your collision warning radar checked
for proper coverage and operation.
DRIVE CONTROL
Selectable Drive Modes
Selectable drive modes delivers a driving
experience through a suite of sophisticated
electronic vehicle systems. These systems
optimize steering, handling and powertrain
response. This provides a single location
to control multiple systems performance
settings. Selectable drive modes consists of the
following systems:
•
Electronically power-assisted steering
adjusts steering effort and feel based
on your selected mode. See Steering
(page 163).
• Electronic stability control and traction
control maintain your vehicle control
in adverse conditions or high
performance driving. See
Stability
Control (page 143).
• Electronic throttle control enhances
the powertrain response to your inputs.
Using Selectable Drive Modes
Selectable drive modes automatically
tailors your vehicle configuration for each
mode selected. To change the drive mode
setting, toggle the mode
button/switch on the instrument
panel under the display. The first press of
the mode button/switch illuminates the
selected mode, subsequent presses will
change the selected mode.
Note: Mode changes are not available when
the vehicle ignition is off or reverse (R) gear
is selected. In gear position drive (D), the
available modes are Normal, Sport+, Track
and Snow/Wet. In gear position sport (S)
Snow/Wet and Normal mode are
unavailable.
Modes:
• Normal – Delivers a balanced
combination of comfort and handling.
This mode provides an engaging drive
experience and a direct connection to
the road without sacrificing any of the
composure demanded from your
vehicle.
• Sport+ – Provides a sportier steering
feel and throttle response. Sport+
mode is ideal for use during more
spirited driving.
166
Mustang (), enUSA, First Printing Driving AidsE174706
Page 170 of 441
•
Track – Provides a performance driving
experience. The engine responds
directly to your inputs and takes on a
more powerful tone. Track mode is for
use when pure performance is desired.
A performance oriented AdvanceTrac
mode is automatically utilized when
Track drive mode is selected. In this
mode, AdvanceTrac intervention is
reduced and tuned specifically for track
usage only and is not intended for
public roads. See Using Stability
Control (page 144).
• Snow/Wet - Provides a confident
handling driving experience during poor
weather. This mode provides an
confident drive experience and a direct
connection to the road without
sacrificing any of the composure
demanded from your vehicle.
Note: Selectable driving modes has
diagnostic checks that continuously monitor
the system to ensure proper operation.
Certain selectable drive modes will not be
available based on gear shifter position (for
example, Snow/Wet is not available while
in sport (S) position). If a selected mode is
unavailable due to a system fault or change
in gear shifter position, the selected mode
will default to Normal.
Selectable Steering
Note: The steering setting defaults to
Normal if the battery is disconnected or
removed. To change the steering feel,
toggle the switch on the
instrument panel. The first press
illuminates the selected mode, subsequent
presses will change the selected mode. Modes:
•
Normal - Default factory setting.
• Sport - Slightly higher effort required
for steering with more road force felt
through the steering wheel.
• Comfort - Slightly less effort required
for steering with less road force felt
through the steering wheel.
After selecting the desired setting, you may
feel a soft feedback bump in the steering
wheel when the changeover occurs.
Note: If your vehicle is equipped with the
selectable drive modes feature, the steering
feel will change when you select a new drive
mode. You can override this automatic
selection by pressing the steering
button/switch.
167
Mustang (), enUSA, First Printing Driving AidsE174705
Page 191 of 441
BREAKING-IN
You need to break in new tires for
approximately 300 miles (480
kilometers). During this time, your vehicle
may exhibit some unusual driving
characteristics.
Avoid driving too fast during the first 1000
miles (1600 kilometers). Vary your speed
frequently and change up through the
gears early. Do not labor the engine.
Do not tow during the first 1000 miles
(1600 kilometers).
ECONOMICAL DRIVING
Fuel economy is affected by several things
such as how you drive, the conditions you
drive under and how you maintain your
vehicle.
There are some things to keep in mind that
may improve your fuel economy:
•
Accelerate and slow down in a smooth,
moderate fashion.
• Drive at steady speeds.
• Anticipate stops; slowing down may
eliminate the need to stop.
• Combine errands and minimize
stop-and-go driving.
•When running errands, go to the
furthest destination first and then
work your way back home.
• Close the windows for high-speed
driving.
• Drive at reasonable speeds. (Traveling
at 65 mph/105 kph uses about 15%
less fuel than traveling at 75 mph/121
kph).
• Keep the tires properly inflated and use
only the recommended size. •
Use the recommended engine oil.
• Perform all regularly scheduled
maintenance.
There are also some things you may want
to avoid doing because they reduce your
fuel economy:
• Avoid sudden or hard accelerations.
• Avoid revving the engine before turning
off the car.
• Avoid long idle periods.
• Do not warm up your vehicle on cold
mornings.
• Reduce the use of air conditioning and
heat.
• Avoid using speed control in hilly
terrain.
• Do not rest your foot on the brake
pedal while driving.
• Avoid carrying unnecessary weight
(approximately 1 mpg [0.4
kilometers/liter] is lost for every 400
lbs [180 kilograms] of weight carried).
• Avoid adding particular accessories to
your vehicle (e.g. bug deflectors,
rollbars/light bars, running boards, ski
racks).
• Avoid driving with the wheels out of
alignment.
DRIVING THROUGH WATER WARNING
Do not drive through flowing or deep
water as you may lose control of your
vehicle.
Note:
Driving through standing water can
cause vehicle damage.
Note: Engine damage can occur if water
enters the air filter.
188
Mustang (), enUSA, First Printing Driving Hints
Page 227 of 441
5. Locate the vertical adjuster on each
headlamp. Use a Phillips #2
screwdriver to turn the adjuster either
clockwise or counterclockwise to
adjust the vertical aim of the
headlamp. The horizontal edge of the
brighter light should touch the
horizontal reference line.
6. Repeat Steps 3 through 7 to adjust the
other headlamp.
7. Close the hood and turn off the lamps.
Horizontal Aim Adjustment
Horizontal aim is not required for this
vehicle and is not adjustable.
CHANGING A BULB
Lamp Assembly Condensation
Exterior lamps have vents to
accommodate normal changes in pressure.
Condensation can be a natural occurrence
of this design. When moist air enters the
lamp assembly through the vents, there is
a possibility that condensation can occur
in cold temperatures. When normal
condensation occurs, a thin film of mist
can form on the interior of the lens. The
mist eventually clears and exits through
the vents during normal operation. Clearing
time may take as long as 48 hours under
dry weather conditions.
Examples of acceptable condensation are:
• Thin mist without streaks, drip marks
or droplets.
• Fine mist that covers less than 50% of
the lens.
Examples of unacceptable moisture are:
• Water puddle inside the lamp.
• Large water droplets, drip marks or
streaks on the interior of the lens. If any of the above conditions of
unacceptable moisture are present,
contact an authorized.
Replacing HID Headlamp Bulbs
Your vehicle has high intensity discharge
lamps. These lamps operate at a high
voltage. Contact an authorized dealer.
Accessing the Direction Indicator
and Fog Lamp Bulbs
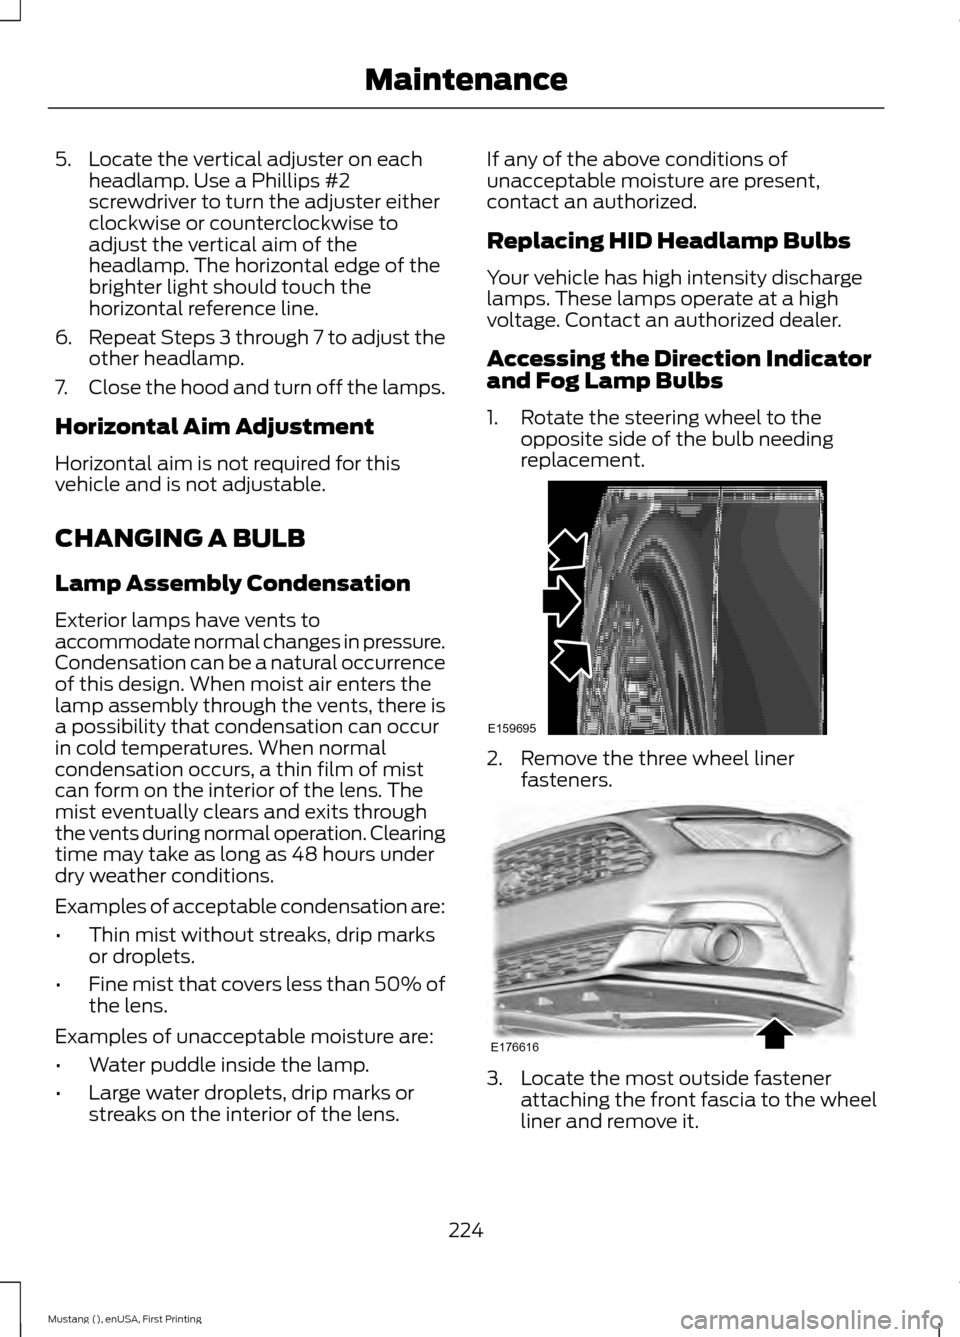
1. Rotate the steering wheel to the
opposite side of the bulb needing
replacement. 2. Remove the three wheel liner
fasteners. 3. Locate the most outside fastener
attaching the front fascia to the wheel
liner and remove it.
224
Mustang (), enUSA, First Printing MaintenanceE159695 E176616
Page 236 of 441
We engineer and test all motor vehicles
and their components for reliable, regular
driving. Under various conditions,
long-term storage may lead to degraded
engine performance or failure unless you
use specific precautions to preserve engine
components.
General
•
Store all vehicles in a dry, ventilated
place.
• Protect from sunlight, if possible.
• If vehicles are stored outside, they
require regular maintenance to protect
against rust and damage.
Body
• Wash your vehicle thoroughly to
remove dirt, grease, oil, tar or mud from
exterior surfaces, rear-wheel housing
and the underside of front fenders.
• Periodically wash your vehicle if it is
stored in exposed locations.
• Touch-up exposed or primed metal to
prevent rust.
• Cover chrome and stainless steel parts
with a thick coat of auto wax to prevent
discoloration. Re-wax as necessary
when you wash your vehicle.
• Lubricate all hood, door and trunk lid
hinges, and latches with a light grade
oil.
• Cover interior trim to prevent fading.
• Keep all rubber parts free from oil and
solvents. Engine
•
The engine oil and filter should be
changed prior to storage because used
engine oil contains contaminates that
may cause engine damage.
• Start the engine every 15 days for a
minimum of 15 minutes. Run at fast idle
with the climate controls set to defrost
until the engine reaches normal
operating temperature.
• With your foot on the brake, shift
through all the gears while the engine
is running.
• We recommend that you change the
engine oil before you use your vehicle
again.
Fuel system
• Fill the fuel tank with high-quality fuel
until the first automatic shutoff of the
fuel pump nozzle.
Cooling system
• Protect against freezing temperatures.
• When removing your vehicle from
storage, check coolant fluid level.
Confirm that there are no cooling
system leaks and that fluid is at the
recommended level.
Battery
• Check and recharge as necessary. Keep
connections clean.
• If storing your vehicle for more than 30
days without recharging the battery,
we recommend that you disconnect
the battery cables to maintain battery
charge for quick starting.
Note: It is necessary to reset memory
features if battery cables are disconnected.
233
Mustang (), enUSA, First Printing Vehicle Care