FORD THUNDERBIRD 2002 11.G Owners Manual
Manufacturer: FORD, Model Year: 2002, Model line: THUNDERBIRD, Model: FORD THUNDERBIRD 2002 11.GPages: 248, PDF Size: 2.1 MB
Page 191 of 248
CLEANING THE INSTRUMENT PANEL
Clean the instrument panel with a damp cloth, then dry with a dry cloth.
Avoid cleaners or polish that increase the gloss of the upper portion of
the instrument panel. The dull finish in this area helps protect the driver
from undesirable windshield reflection.
Do not use chemical solvents or strong detergents when cleaning
the steering wheel or instrument panel to avoid contamination of
the air bag system.
Cleaning the instrument cluster lens
Wipe the cluster area with a soft, damp cotton towel and Ultra Clear
Spray Glass Cleaner (E4AZ-19C507±AA). Dry the area with a clean, dry
towel.
CLEANING SEATS EQUIPPED WITH SIDE AIR BAGS
Remove dust and loose dirt with a vacuum cleaner. In order to remove
stains and soil, clean with Extra Strength Upholstery Cleaner
(E8AZ-19523±AA).
Never saturate the seat covers with any cleaning solution.
Do not use chemical solvents or strong detergents when cleaning
the seat where the side air bag is mounted. Such products could
contaminate the side air bag system and affect performance of the side
air bag in a collision. The air bag may not function correctly and not
provide injury reduction benefits.
CLEANING THE INTERIOR FABRIC, CARPETS AND CLOTH SEATS
Remove dust and loose dirt with a vacuum cleaner. Remove light stains
and soil with Extra Strength Upholstery Cleaner (E8AZ-19523±AA).
Never saturate the seat covers with cleaning solution.
Do not use household cleaning products or glass cleaners, which
can stain and discolor the fabric and affect the flame retardent
abilities of the seat materials.
If grease or tar is present on the material, spot-clean the area first with
Spot and Stain Remover (F3AZ-19521±WA). Follow up by recleaning the
area with Extra Strength Upholstery Cleaner (E8AZ-19523±AA).
Cleaning
191
Page 192 of 248

CLEANING LEATHER SEATS (IF EQUIPPED)
All Ford, Lincoln and Mercury vehicles with leather seating surfaces have
a clear, protective coating over the leather.
To clean the leather seats, simply use a soft cloth with Deluxe Leather
and Vinyl Cleaner (F2AZ-19521±WA). Dry the area with a soft cloth.
It is recommended that you use the Deluxe Leather Care Kit
(F8AZ-19G253±AA), available from your authorized Ford, Lincoln or
Mercury dealer. The mild cleaner and special pad available in the kit
cleans the leather and maintains its natural beauty. For best results,
follow the instructions printed on the cleaner label. Regular cleaning of
your leather upholstery helps maintain its resiliency and color.
Do not use household cleaning products, alcohol solutions,
solvents or cleaners intended for rubber, vinyl and plastics, or
oil/petroleum-based leather conditioners. These products may
cause premature wearing of the clear, protective coating.
CLEANING THE INSIDE WINDOWS
Use Ultra Clear Spray Glass Cleaner (E4AZ-19C507±AA) for the inside
windows if they become fogged.
To clean, use two lint-free, soft towels, folded into a pad-shape. Mist the
glass completely with cleaner, and use one of the towels to evenly agitate
the surface. Use the other towel to remove the residue.
CLEANING AND MAINTAINING THE SAFETY BELTS
Clean the safety belts with Extra Strength Upholstery Cleaner
(E8AZ-19523±AA), available from your authorized Ford, Lincoln or
Mercury dealer.
Do not use bleach, dye or any other solvent to clean the belts, as
these actions may weaken the belt webbing.
UNDERBODY
Flush the complete underside of your vehicle frequently. Keep body and
door drain holes free from packed dirt.
Cleaning
192
Page 193 of 248

FORD CAR CARE PRODUCTS FOR YOUR VEHICLE
Ford has many quality products available from your dealer to clean your
vehicle and protect its finishes. For best results, use the following or
products of equivalent quality:
Ford Custom Clearcoat Polish*
Ford Custom Silicone Gloss Polish
Ford Custom Vinyl Protectant*
Ford Deluxe Leather and Vinyl Cleaner
Ford Extra Strength Tar and Road Oil Remover*
Ford Extra Strength Upholstery Cleaner
Ford Metal Surface Cleaner
Ford Multi-Purpose Cleaner*
Motorcraft Car Wash Concentrate
Motorcraft Carlite Glass Cleaner
Ford Spot and Stain Remover*
Ford Super Premium Tire and Trim Dressing
Ford Triple Clean
Ford Ultra-Clear Spray Glass Cleaner
* May be sold with the Motorcraft name
Cleaning
193
Page 194 of 248

FORD ACCESSORIES FOR YOUR VEHICLE
A wide selection of genuine Ford accessories are available for your
vehicle through your local authorized Lincoln Mercury dealer. These
quality accessories have been specifically engineered to fulfill your
automotive needs; they are custom designed to complement the style
and aerodynamic appearance of your vehicle. In addition, each accessory
is made from high quality materials and meets or exceeds Ford's rigorous
engineering and safety specifications. Ford Motor Company will repair or
replace any properly dealer-installed Ford accessory found to be
defective in factory-supplied materials or workmanship during the
warranty period, as well as any component damaged by the defective
accessory. The accessory will be warranted for whichever provides you
the greatest benefit:
²12 months or 20 000 km (12 000 miles) (whichever occurs first), or
²The remainder of your new vehicle limited warranty.
This means that genuine Ford accessories purchased along with your
new vehicle and installed by the dealer are covered for the full length of
your New Vehicle's Limited Warranty Ð 3 years or 60 000 km
(36 000 miles) (whichever occurs first). Contact your dealer for details
and a copy of the warranty.
Not all accessories are available for all models.
Cleaning
194
Page 195 of 248

SERVICE RECOMMENDATIONS
To help you service your vehicle:
²We highlight do-it-yourself items in the engine compartment for easy
location.
²We provide a scheduled maintenance guide which makes tracking
routine service easy.
If your vehicle requires professional service, your dealership can provide
the necessary parts and service. Check yourWarranty Guideto find out
which parts and services are covered.
Use only recommended fuels, lubricants, fluids and service parts
conforming to specifications. Motorcraft parts are designed and built to
provide the best performance in your vehicle.
PRECAUTIONS WHEN SERVICING YOUR VEHICLE
Be especially careful when inspecting or servicing your vehicle.
²Do not work on a hot engine.
²When the engine is running, keep loose clothing, jewelry or long hair
away from moving parts.
²Do not work on a vehicle with the engine running in an enclosed
space, unless you are sure you have enough ventilation.
²Keep all lit cigarettes, open flames and other lit material away from
the battery and all fuel related parts.
If you disconnect the battery, the engine must ªrelearnº its idle
conditions before your vehicle will drive properly, as explained in the
Batterysection in this chapter.
Working with the engine off
1. Set the parking brake and ensure the gearshift is securely latched in P
(Park).
2. Turn off the engine and remove the key.
3. Block the wheels to prevent the vehicle from moving unexpectedly.
Working with the engine on
1. Set the parking brake and ensure the gearshift is securely latched in P
(Park).
2. Block the wheels to prevent the vehicle from moving unexpectedly.
Note:Do not start your engine with the air cleaner removed and do not
remove it while the engine is running.
Maintenance and specifications
195
Page 196 of 248
OPENING THE HOOD
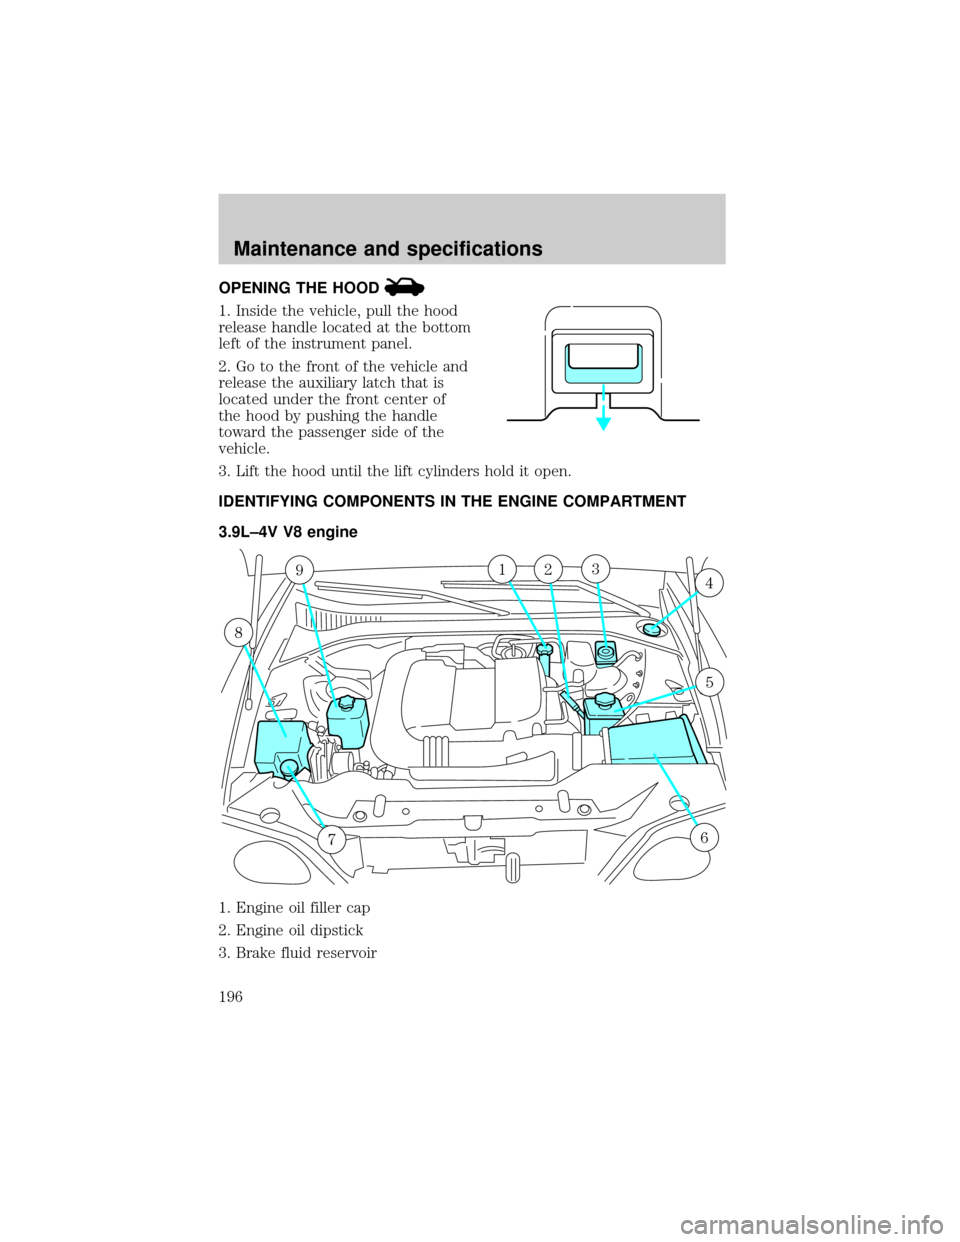
1. Inside the vehicle, pull the hood
release handle located at the bottom
left of the instrument panel.
2. Go to the front of the vehicle and
release the auxiliary latch that is
located under the front center of
the hood by pushing the handle
toward the passenger side of the
vehicle.
3. Lift the hood until the lift cylinders hold it open.
IDENTIFYING COMPONENTS IN THE ENGINE COMPARTMENT
3.9L±4V V8 engine
1. Engine oil filler cap
2. Engine oil dipstick
3. Brake fluid reservoir
9
8
76
4123
5
Maintenance and specifications
196
Page 197 of 248
4. Engine coolant reservoir
5. Power steering fluid reservoir
6. Air filter assembly
7. Windshield washer fluid reservoir
8. Power distribution box
9. Engine cooling fan fluid reservoir
WASHER FLUID
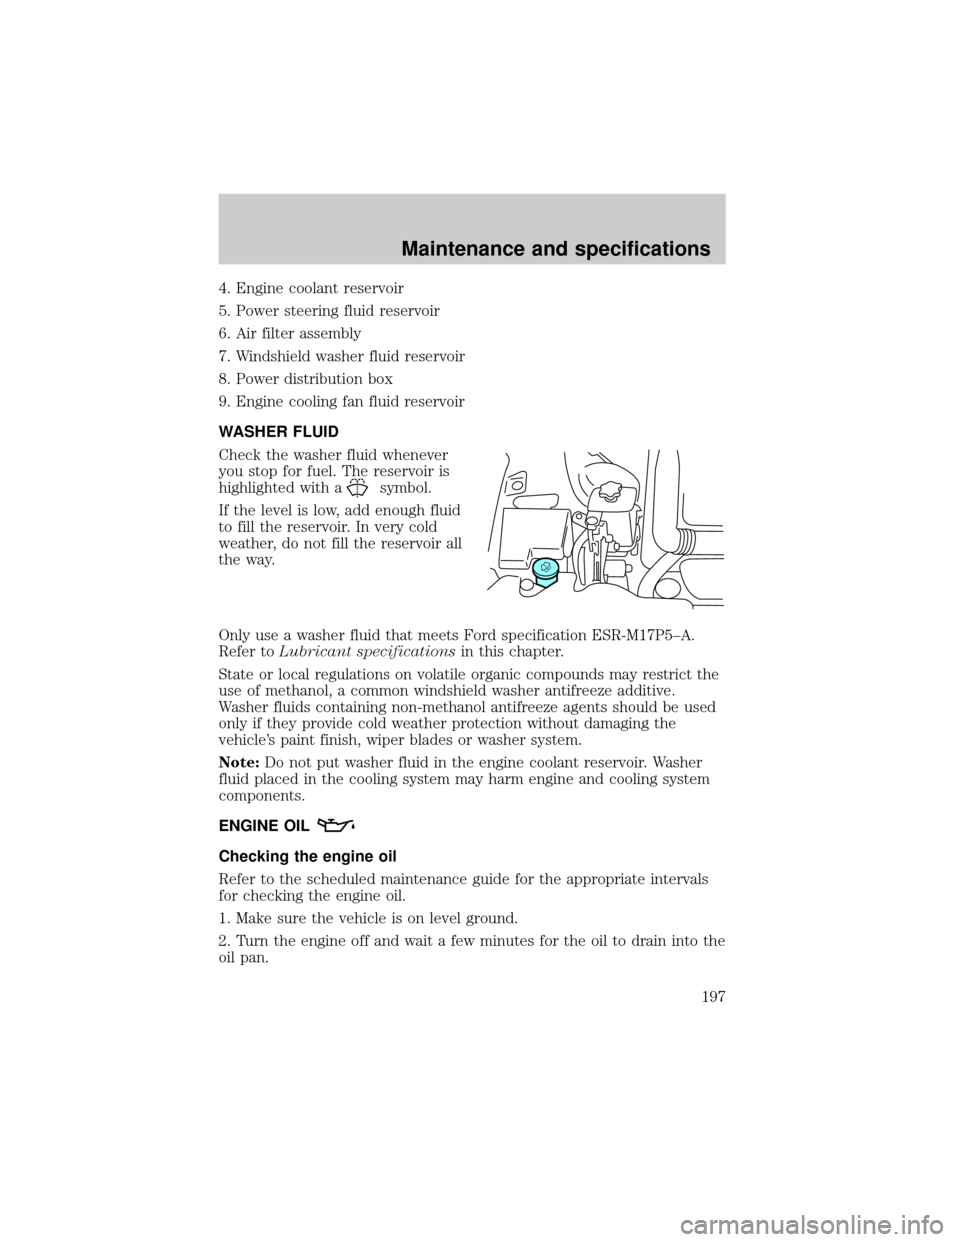
Check the washer fluid whenever
you stop for fuel. The reservoir is
highlighted with a
symbol.
If the level is low, add enough fluid
to fill the reservoir. In very cold
weather, do not fill the reservoir all
the way.
Only use a washer fluid that meets Ford specification ESR-M17P5±A.
Refer toLubricant specificationsin this chapter.
State or local regulations on volatile organic compounds may restrict the
use of methanol, a common windshield washer antifreeze additive.
Washer fluids containing non-methanol antifreeze agents should be used
only if they provide cold weather protection without damaging the
vehicle's paint finish, wiper blades or washer system.
Note:Do not put washer fluid in the engine coolant reservoir. Washer
fluid placed in the cooling system may harm engine and cooling system
components.
ENGINE OIL
Checking the engine oil
Refer to the scheduled maintenance guide for the appropriate intervals
for checking the engine oil.
1. Make sure the vehicle is on level ground.
2. Turn the engine off and wait a few minutes for the oil to drain into the
oil pan.
Maintenance and specifications
197
Page 198 of 248
3. Set the parking brake and ensure the gearshift is securely latched in P
(Park).
4. Open the hood. Protect yourself from engine heat.
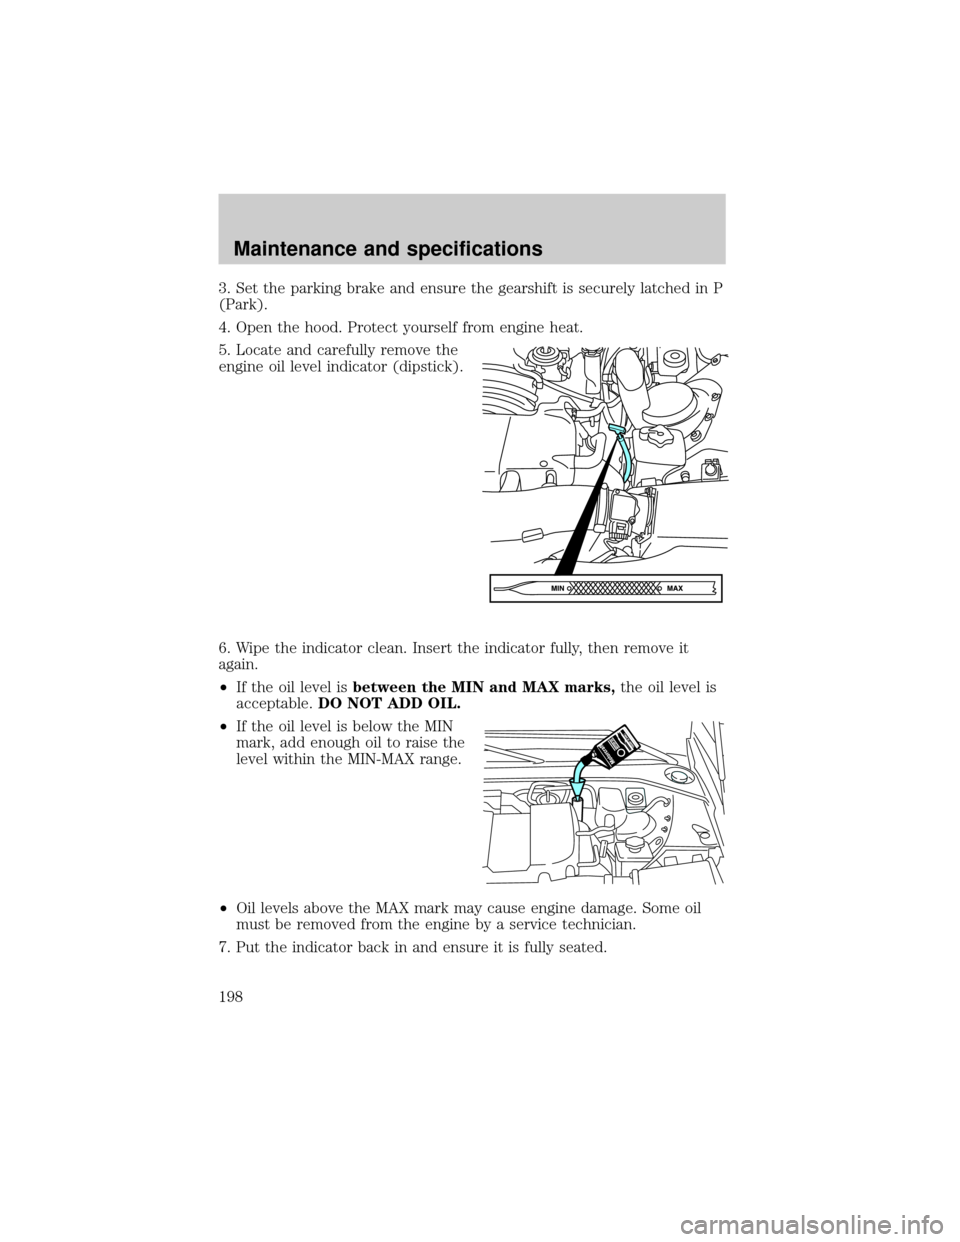
5. Locate and carefully remove the
engine oil level indicator (dipstick).
6. Wipe the indicator clean. Insert the indicator fully, then remove it
again.
²If the oil level isbetween the MIN and MAX marks,the oil level is
acceptable.DO NOT ADD OIL.
²If the oil level is below the MIN
mark, add enough oil to raise the
level within the MIN-MAX range.
²Oil levels above the MAX mark may cause engine damage. Some oil
must be removed from the engine by a service technician.
7. Put the indicator back in and ensure it is fully seated.
Maintenance and specifications
198
Page 199 of 248
Adding engine oil
1. Check the engine oil. For instructions, refer toChecking the engine
oilin this chapter.
2. If the engine oil level is not within the normal range, add only certified
engine oil of the recommended viscosity. Remove the engine oil filler cap
and use a funnel to pour the engine oil into the opening.
3. Recheck the engine oil level. Make sure the oil level is not above the
MAX mark on the engine oil level indicator (dipstick).
4. Install the indicator and ensure it is fully seated.
5. Fully install the engine oil filler cap by turning the filler cap clockwise
tightly until clicks are heard, or until it is snug.
To avoid possible oil loss, DO NOT operate the vehicle with the
engine oil level indicator and/or the engine oil filler cap removed.
Engine oil and filter recommendations
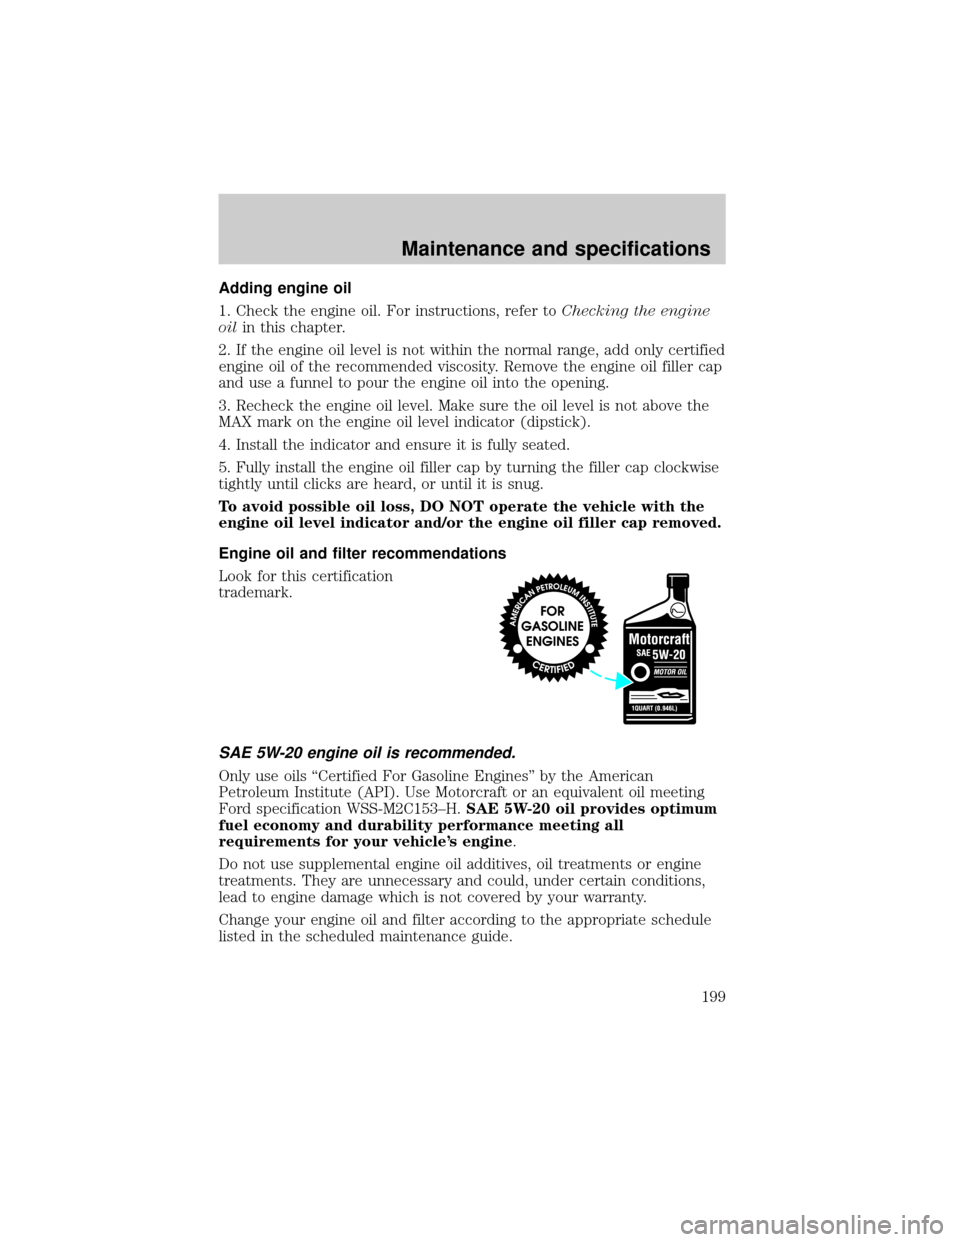
Look for this certification
trademark.
SAE 5W-20 engine oil is recommended.
Only use oils ªCertified For Gasoline Enginesº by the American
Petroleum Institute (API). Use Motorcraft or an equivalent oil meeting
Ford specification WSS-M2C153±H.SAE 5W-20 oil provides optimum
fuel economy and durability performance meeting all
requirements for your vehicle's engine.
Do not use supplemental engine oil additives, oil treatments or engine
treatments. They are unnecessary and could, under certain conditions,
lead to engine damage which is not covered by your warranty.
Change your engine oil and filter according to the appropriate schedule
listed in the scheduled maintenance guide.
Maintenance and specifications
199
Page 200 of 248
Ford production and aftermarket (Motorcraft) oil filters are designed for
added engine protection and long life. If a replacement oil filter is used
that does not meet Ford material and design specifications, start-up
engine noises or knock may be experienced.
It is recommended you use the appropriate Motorcraft oil filter (or
another brand meeting Ford specifications) for your engine application.
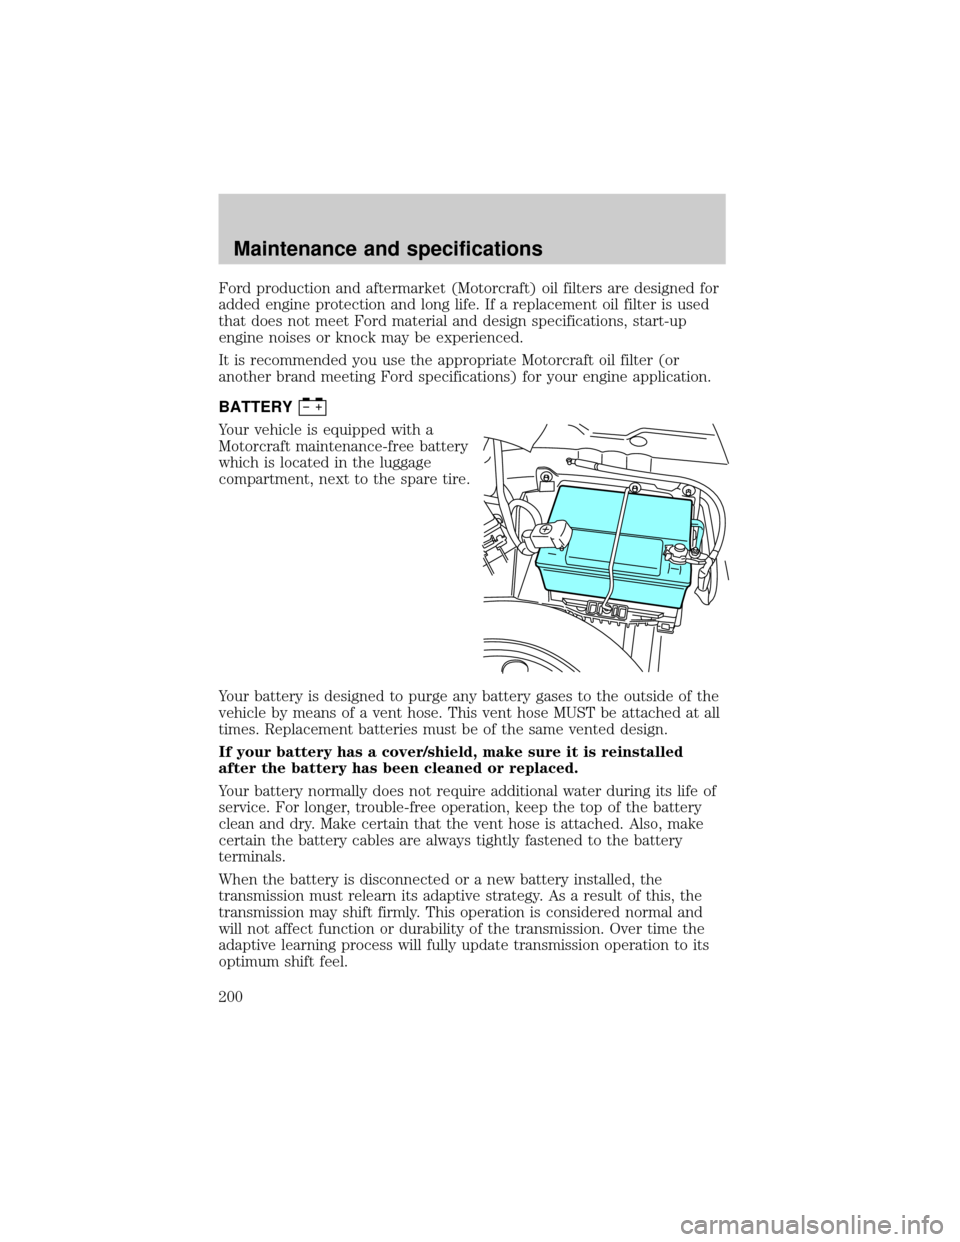
BATTERY
Your vehicle is equipped with a
Motorcraft maintenance-free battery
which is located in the luggage
compartment, next to the spare tire.
Your battery is designed to purge any battery gases to the outside of the
vehicle by means of a vent hose. This vent hose MUST be attached at all
times. Replacement batteries must be of the same vented design.
If your battery has a cover/shield, make sure it is reinstalled
after the battery has been cleaned or replaced.
Your battery normally does not require additional water during its life of
service. For longer, trouble-free operation, keep the top of the battery
clean and dry. Make certain that the vent hose is attached. Also, make
certain the battery cables are always tightly fastened to the battery
terminals.
When the battery is disconnected or a new battery installed, the
transmission must relearn its adaptive strategy. As a result of this, the
transmission may shift firmly. This operation is considered normal and
will not affect function or durability of the transmission. Over time the
adaptive learning process will fully update transmission operation to its
optimum shift feel.
Maintenance and specifications
200