sensor FORD TRANSIT 2016 5.G Owner's Manual
[x] Cancel search | Manufacturer: FORD, Model Year: 2016, Model line: TRANSIT, Model: FORD TRANSIT 2016 5.GPages: 411, PDF Size: 5.65 MB
Page 159 of 411
System Warnings
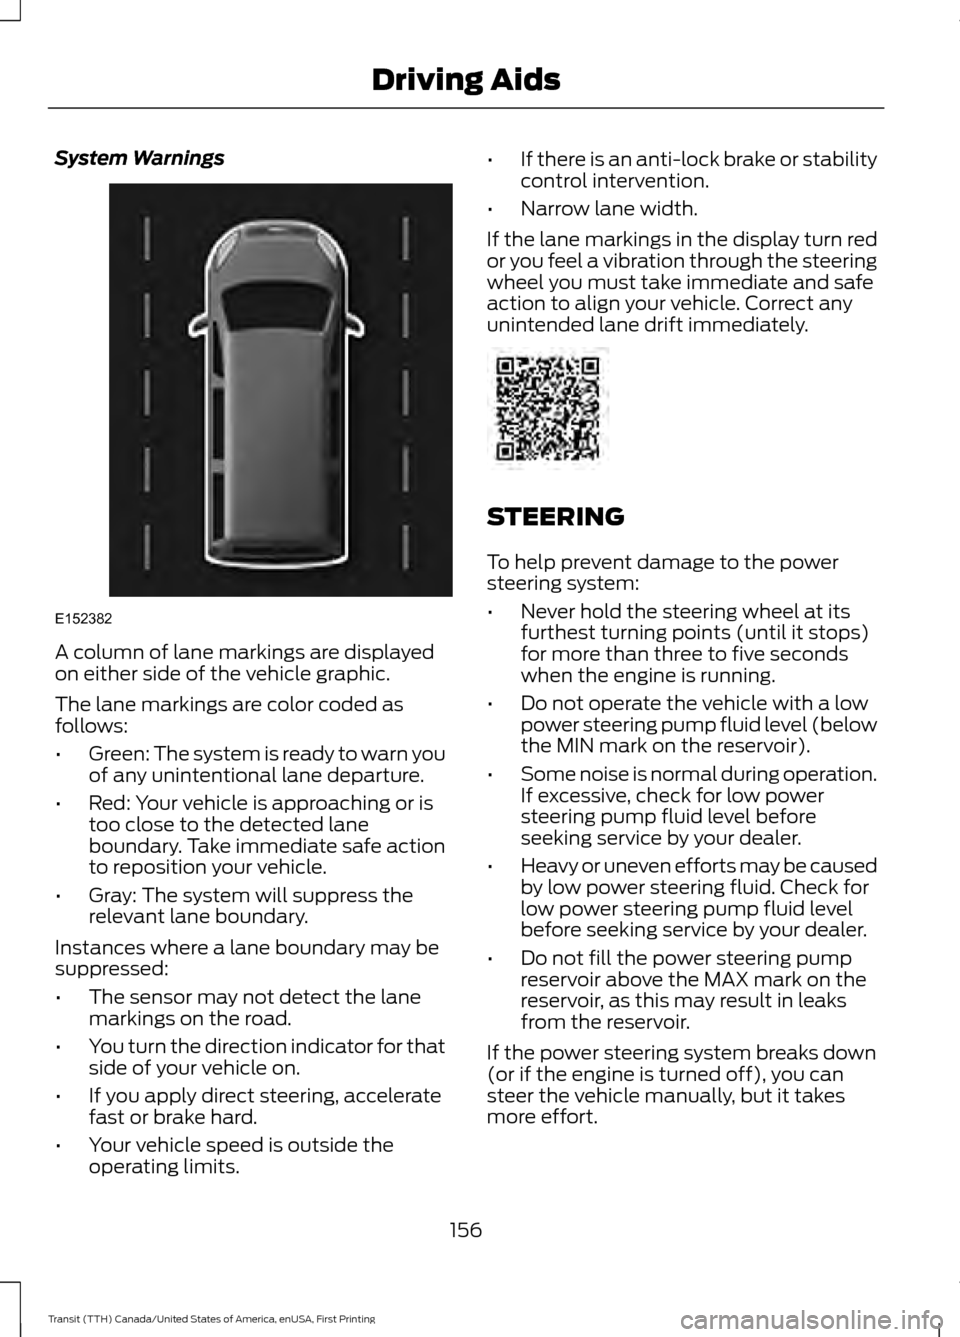
A column of lane markings are displayed
on either side of the vehicle graphic.
The lane markings are color coded as
follows:
•
Green: The system is ready to warn you
of any unintentional lane departure.
• Red: Your vehicle is approaching or is
too close to the detected lane
boundary. Take immediate safe action
to reposition your vehicle.
• Gray: The system will suppress the
relevant lane boundary.
Instances where a lane boundary may be
suppressed:
• The sensor may not detect the lane
markings on the road.
• You turn the direction indicator for that
side of your vehicle on.
• If you apply direct steering, accelerate
fast or brake hard.
• Your vehicle speed is outside the
operating limits. •
If there is an anti-lock brake or stability
control intervention.
• Narrow lane width.
If the lane markings in the display turn red
or you feel a vibration through the steering
wheel you must take immediate and safe
action to align your vehicle. Correct any
unintended lane drift immediately. STEERING
To help prevent damage to the power
steering system:
•
Never hold the steering wheel at its
furthest turning points (until it stops)
for more than three to five seconds
when the engine is running.
• Do not operate the vehicle with a low
power steering pump fluid level (below
the MIN mark on the reservoir).
• Some noise is normal during operation.
If excessive, check for low power
steering pump fluid level before
seeking service by your dealer.
• Heavy or uneven efforts may be caused
by low power steering fluid. Check for
low power steering pump fluid level
before seeking service by your dealer.
• Do not fill the power steering pump
reservoir above the MAX mark on the
reservoir, as this may result in leaks
from the reservoir.
If the power steering system breaks down
(or if the engine is turned off), you can
steer the vehicle manually, but it takes
more effort.
156
Transit (TTH) Canada/United States of America, enUSA, First Printing Driving AidsE152382
Page 199 of 411
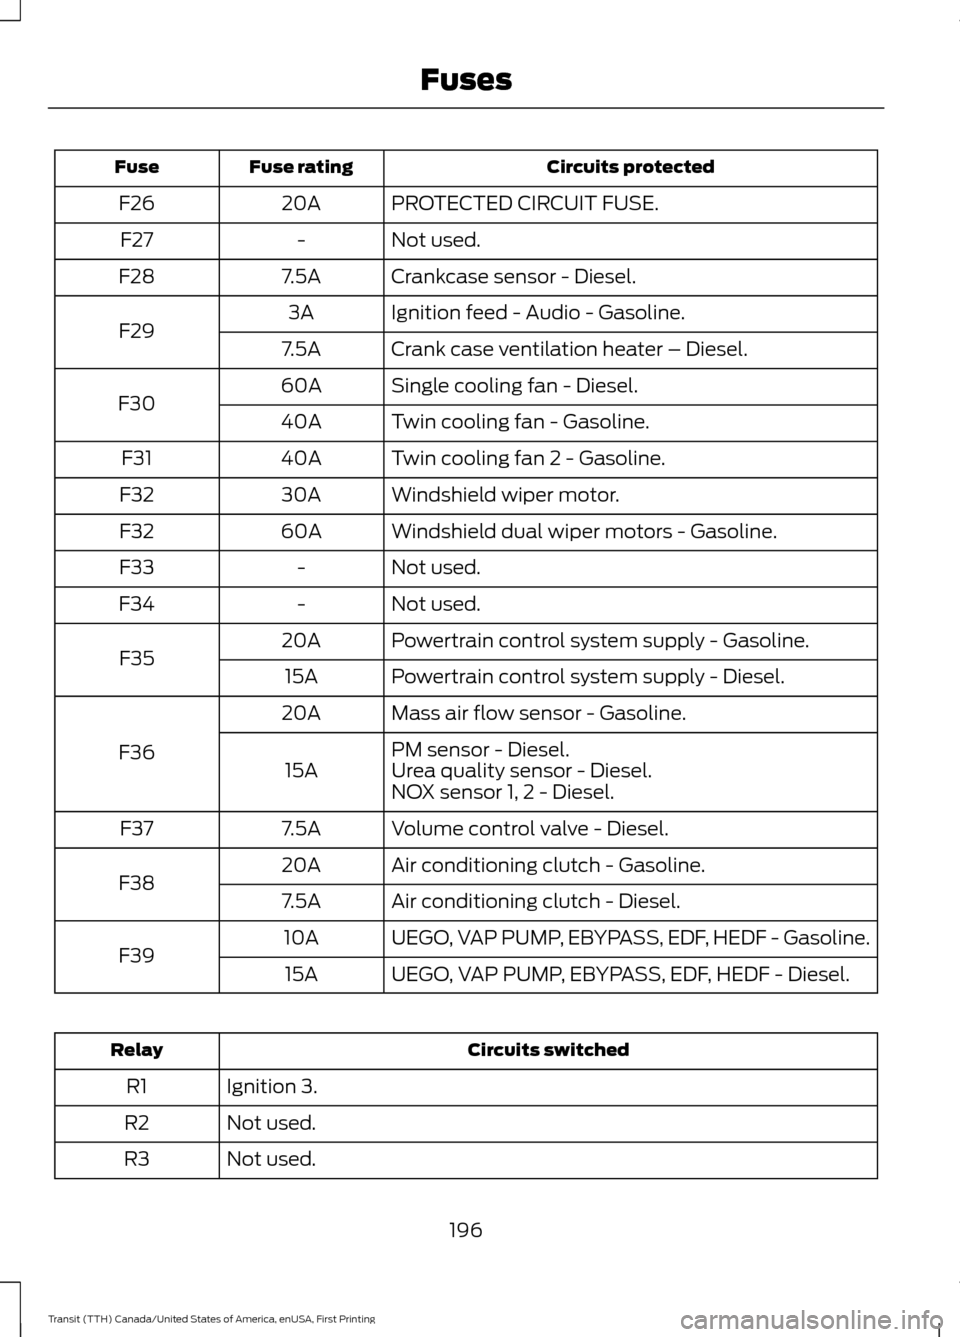
Circuits protected
Fuse rating
Fuse
PROTECTED CIRCUIT FUSE.
20A
F26
Not used.
-
F27
Crankcase sensor - Diesel.
7.5A
F28
Ignition feed - Audio - Gasoline.
3A
F29 Crank case ventilation heater – Diesel.
7.5A
Single cooling fan - Diesel.
60A
F30 Twin cooling fan - Gasoline.
40A
Twin cooling fan 2 - Gasoline.
40A
F31
Windshield wiper motor.
30A
F32
Windshield dual wiper motors - Gasoline.
60A
F32
Not used.
-
F33
Not used.
-
F34
Powertrain control system supply - Gasoline.
20A
F35 Powertrain control system supply - Diesel.
15A
Mass air flow sensor - Gasoline.
20A
F36 PM sensor - Diesel.
15A Urea quality sensor - Diesel. NOX sensor 1, 2 - Diesel.
Volume control valve - Diesel.
7.5A
F37
Air conditioning clutch - Gasoline.
20A
F38 Air conditioning clutch - Diesel.
7.5A
UEGO, VAP PUMP, EBYPASS, EDF, HEDF - Gasoline.
10A
F39
UEGO, VAP PUMP, EBYPASS, EDF, HEDF - Diesel.
15A Circuits switched
Relay
Ignition 3.
R1
Not used.
R2
Not used.
R3
196
Transit (TTH) Canada/United States of America, enUSA, First Printing Fuses
Page 208 of 411
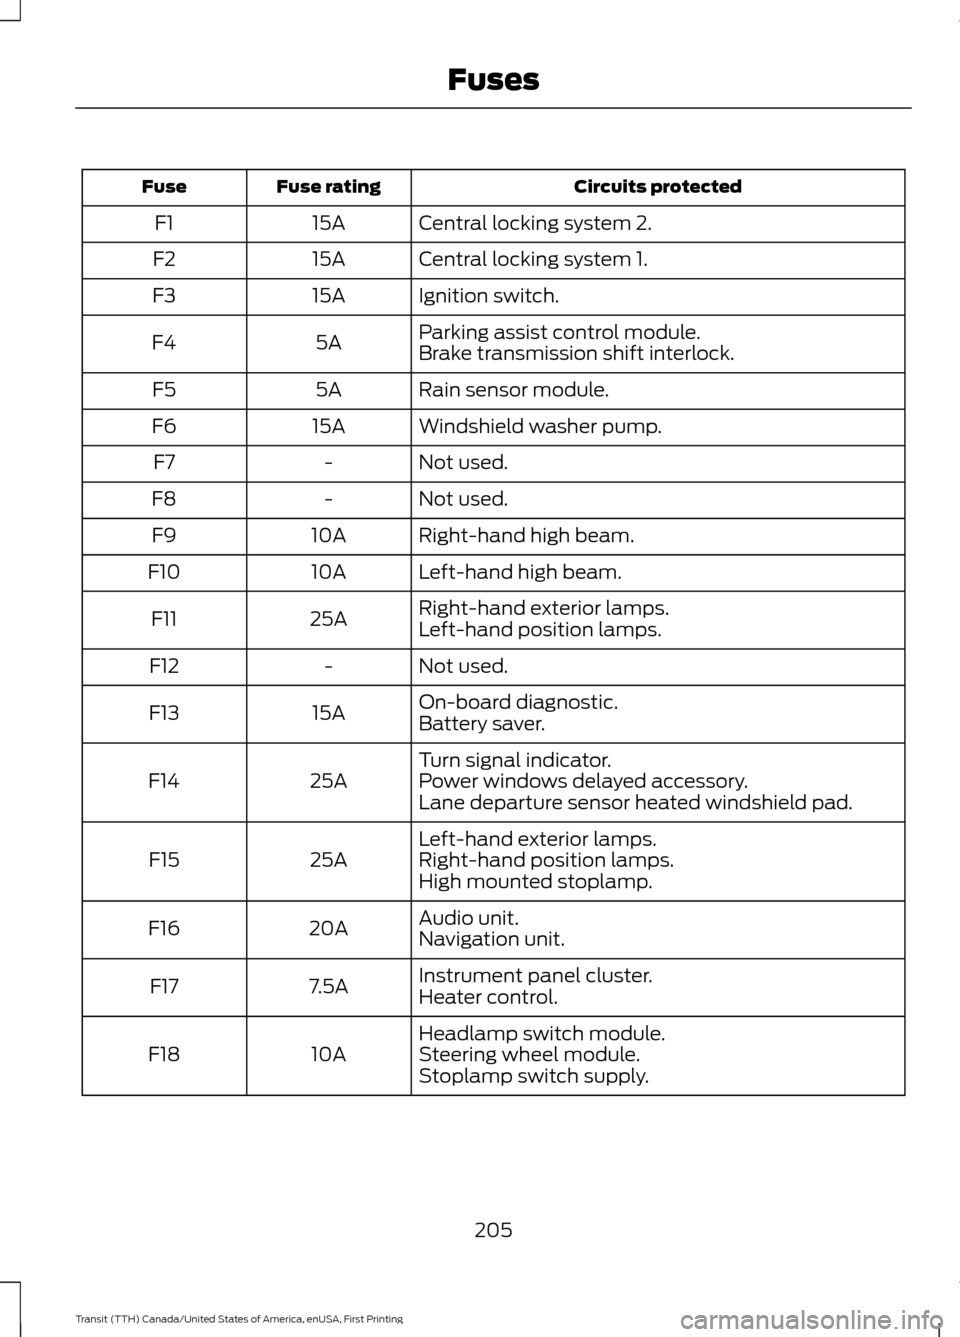
Circuits protected
Fuse rating
Fuse
Central locking system 2.
15A
F1
Central locking system 1.
15A
F2
Ignition switch.
15A
F3
Parking assist control module.
5A
F4
Brake transmission shift interlock.
Rain sensor module.
5A
F5
Windshield washer pump.
15A
F6
Not used.
-
F7
Not used.
-
F8
Right-hand high beam.
10A
F9
Left-hand high beam.
10A
F10
Right-hand exterior lamps.
25A
F11
Left-hand position lamps.
Not used.
-
F12
On-board diagnostic.
15A
F13
Battery saver.
Turn signal indicator.
25A
F14 Power windows delayed accessory.
Lane departure sensor heated windshield pad.
Left-hand exterior lamps.
25A
F15 Right-hand position lamps.
High mounted stoplamp.
Audio unit.
20A
F16
Navigation unit.
Instrument panel cluster.
7.5A
F17
Heater control.
Headlamp switch module.
10A
F18 Steering wheel module.
Stoplamp switch supply.
205
Transit (TTH) Canada/United States of America, enUSA, First Printing Fuses
Page 226 of 411
Note:
Single batteries are mounted the
opposite way around in the battery tray. The
negative terminal is toward the rear of the
vehicle.
Installing the Battery WARNING
Make sure that you securely fasten
the seat runner bolts before installing
the covers.
Install in the reverse order.
CHECKING THE WIPER
BLADES
Run the tip of your fingers over the edge of
the blade to check for roughness.
Clean the wiper blades with washer fluid
or water applied with a soft sponge or
cloth.
CHANGING THE WIPER
BLADES
Changing the Windshield Wiper
Blades
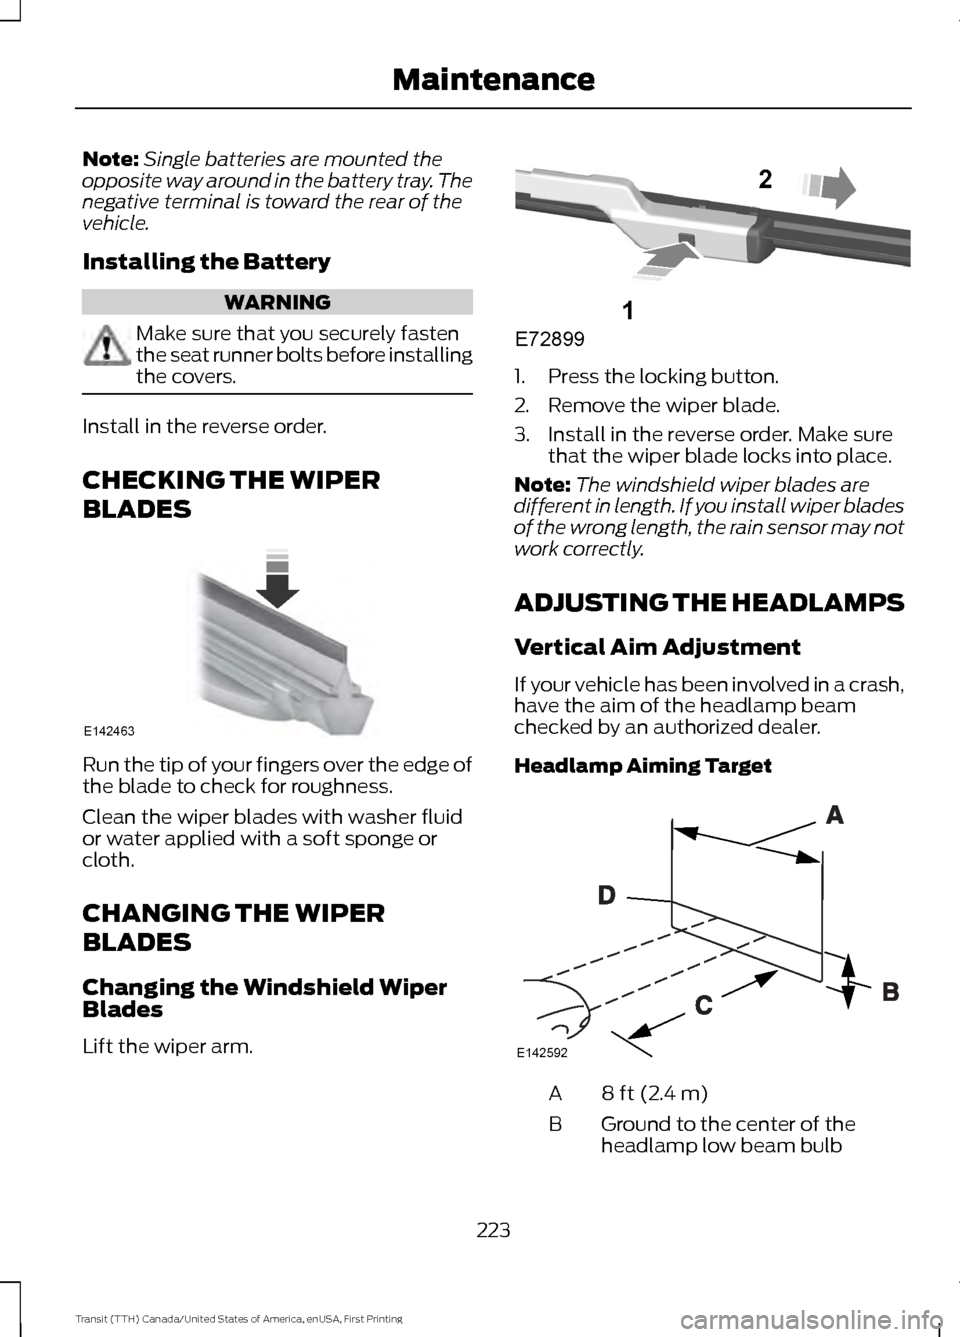
Lift the wiper arm. 1. Press the locking button.
2. Remove the wiper blade.
3. Install in the reverse order. Make sure
that the wiper blade locks into place.
Note: The windshield wiper blades are
different in length. If you install wiper blades
of the wrong length, the rain sensor may not
work correctly.
ADJUSTING THE HEADLAMPS
Vertical Aim Adjustment
If your vehicle has been involved in a crash,
have the aim of the headlamp beam
checked by an authorized dealer.
Headlamp Aiming Target 8 ft (2.4 m)
A
Ground to the center of the
headlamp low beam bulb
B
223
Transit (TTH) Canada/United States of America, enUSA, First Printing MaintenanceE142463 E72899
1
2 E142592
Page 232 of 411
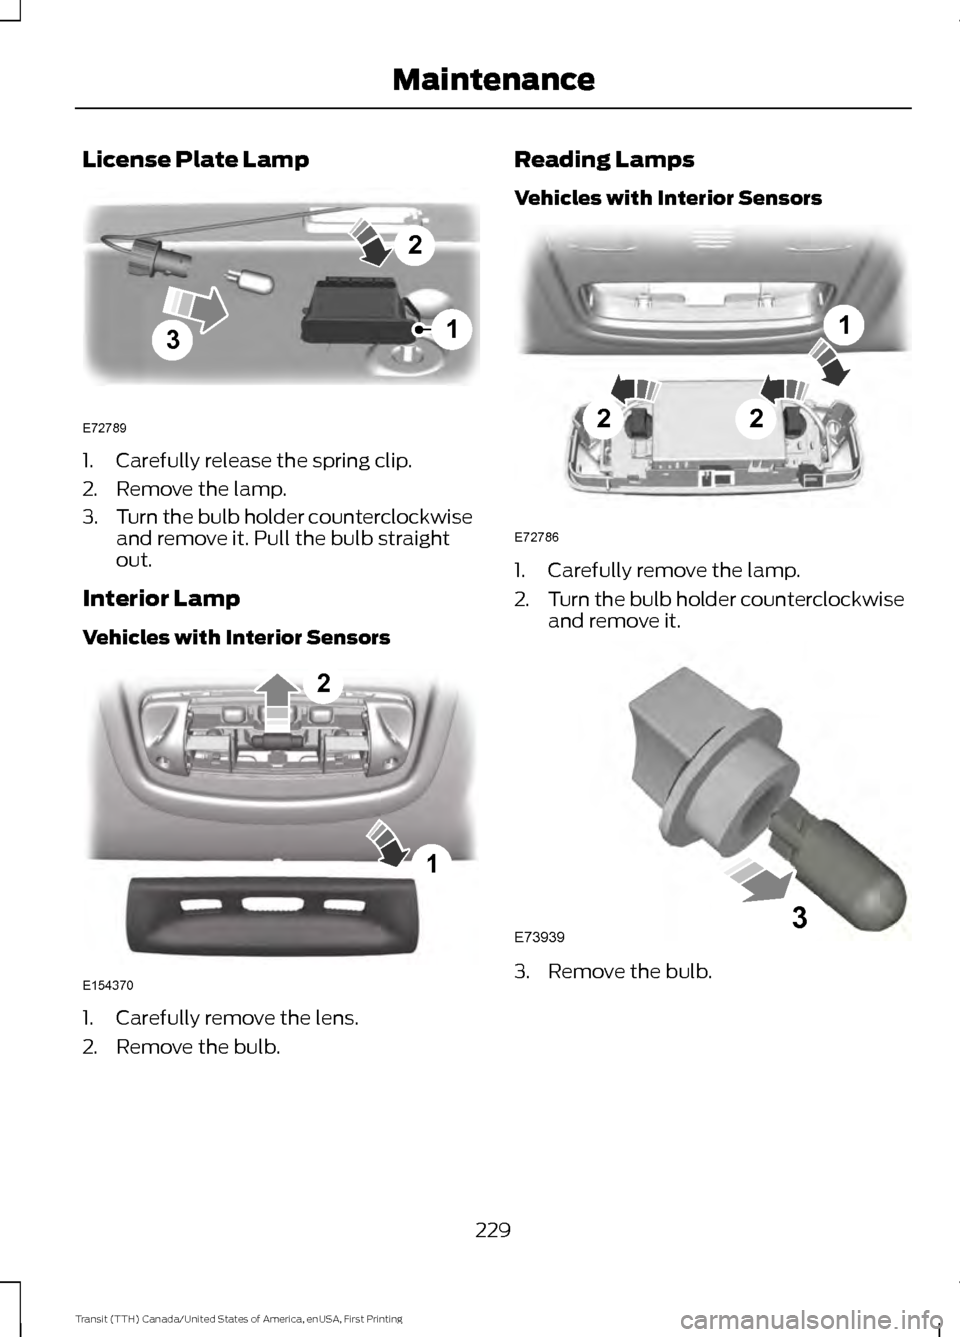
License Plate Lamp
1. Carefully release the spring clip.
2. Remove the lamp.
3.
Turn the bulb holder counterclockwise
and remove it. Pull the bulb straight
out.
Interior Lamp
Vehicles with Interior Sensors 1. Carefully remove the lens.
2. Remove the bulb. Reading Lamps
Vehicles with Interior Sensors
1. Carefully remove the lamp.
2.
Turn the bulb holder counterclockwise
and remove it. 3. Remove the bulb.
229
Transit (TTH) Canada/United States of America, enUSA, First Printing Maintenance3
2
1
E72789 1
2
E154370 22
1
E72786 E739393
Page 233 of 411
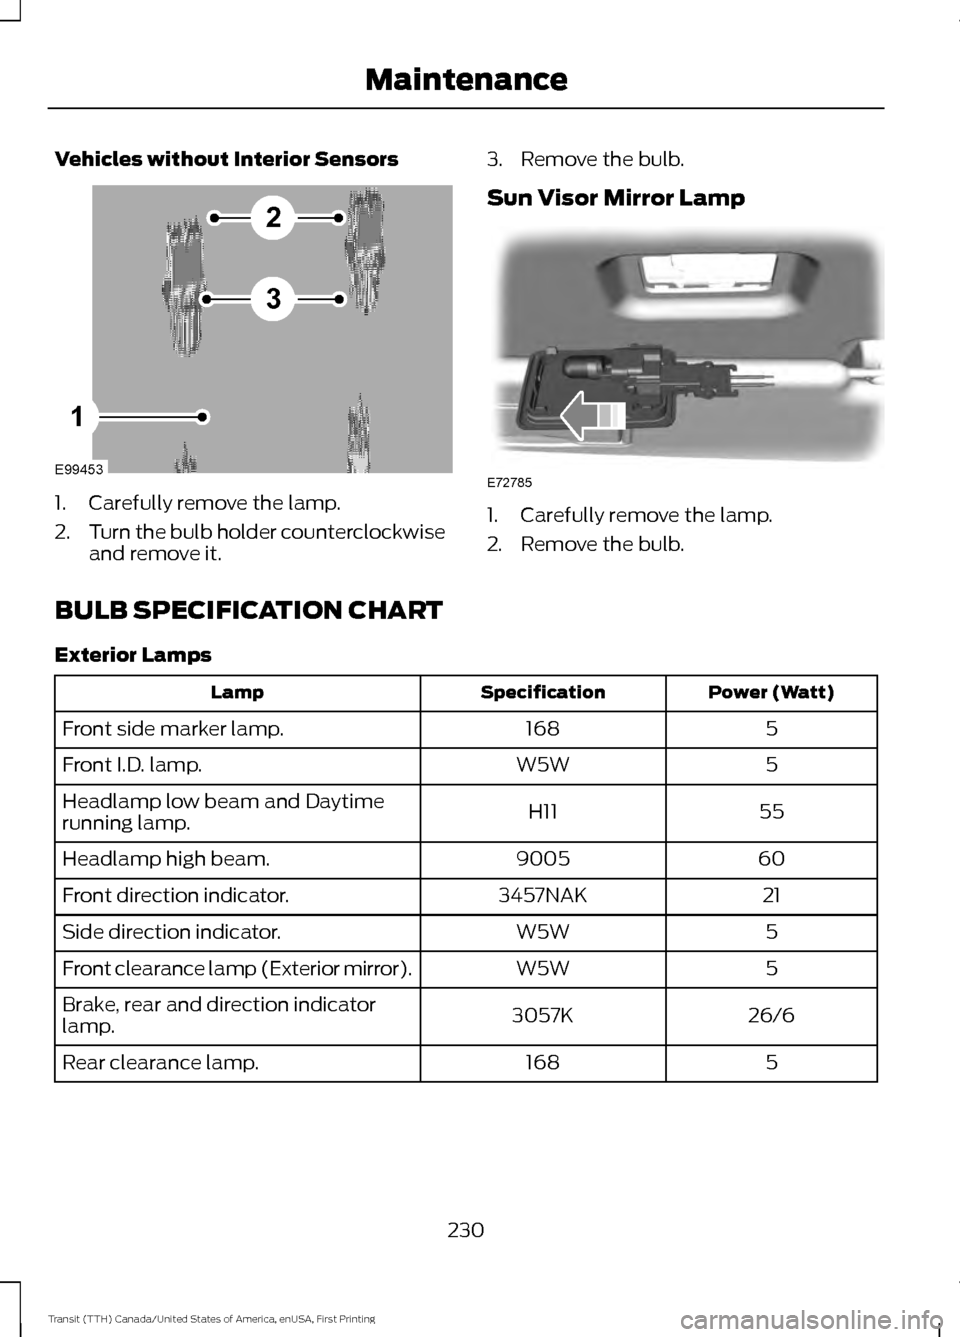
Vehicles without Interior Sensors
1. Carefully remove the lamp.
2.
Turn the bulb holder counterclockwise
and remove it. 3. Remove the bulb.
Sun Visor Mirror Lamp 1. Carefully remove the lamp.
2. Remove the bulb.
BULB SPECIFICATION CHART
Exterior Lamps Power (Watt)
Specification
Lamp
5
168
Front side marker lamp.
5
W5W
Front I.D. lamp.
55
H11
Headlamp low beam and Daytime
running lamp.
60
9005
Headlamp high beam.
21
3457NAK
Front direction indicator.
5
W5W
Side direction indicator.
5
W5W
Front clearance lamp (Exterior mirror).
26/6
3057K
Brake, rear and direction indicator
lamp.
5
168
Rear clearance lamp.
230
Transit (TTH) Canada/United States of America, enUSA, First Printing MaintenanceE99453
2
3
1 E72785
Page 235 of 411
CHANGING THE ENGINE AIR
FILTER
WARNING
To reduce the risk of vehicle damage
and personal burn injuries, do not
start your engine with the air cleaner
removed and do not remove it while the
engine is running. Only use the specified replacement air
filter. See Capacities and Specifications
(page 274).
Note: Failure to use the correct air filter
element may result in severe engine
damage. Resulting component damage
may not be covered by the vehicle Warranty.
Change the air filter element at the correct
interval. See
Scheduled Maintenance
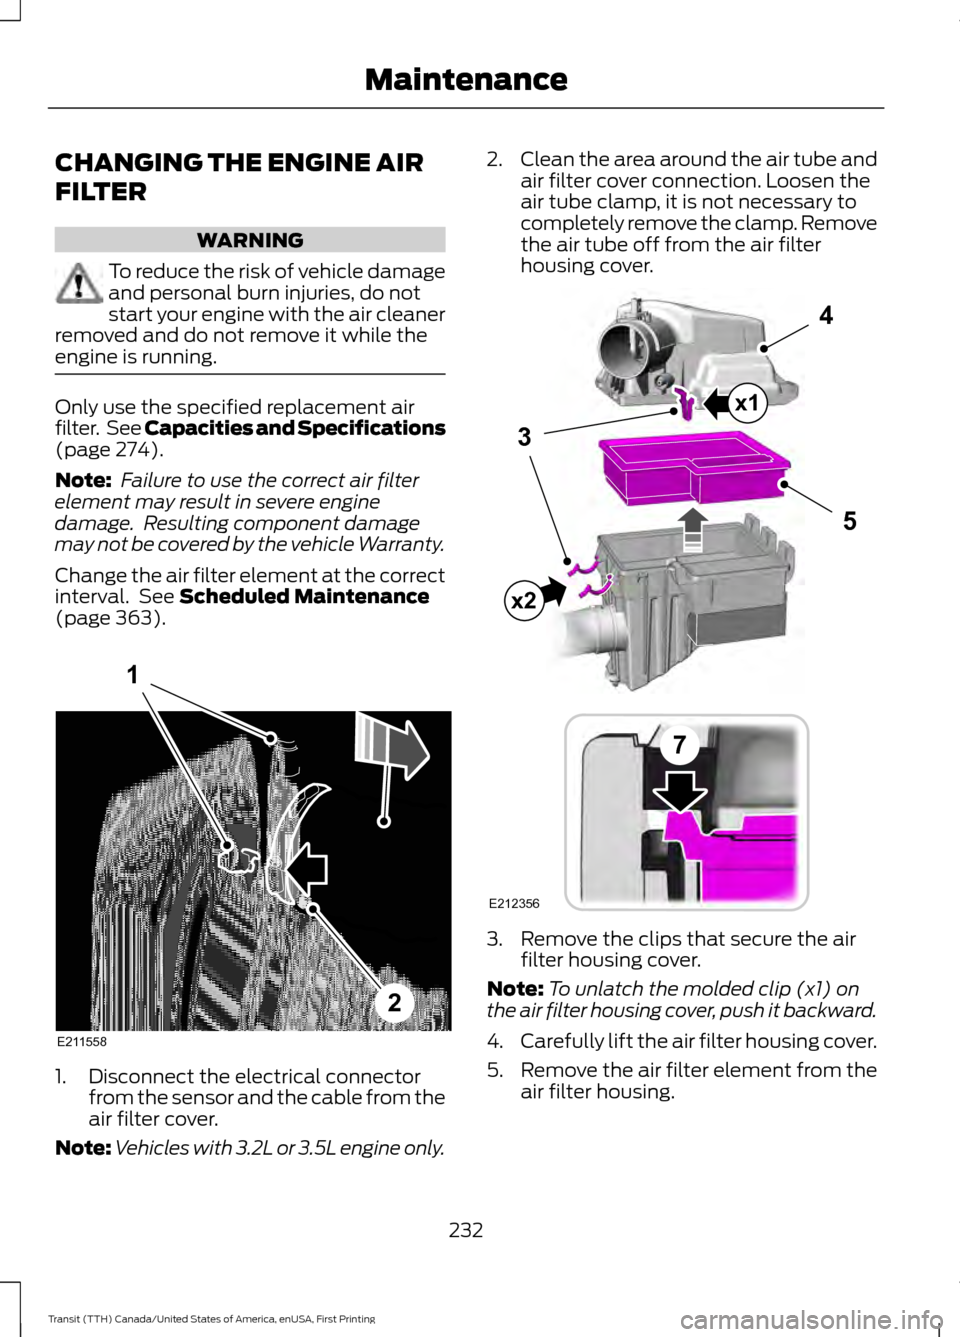
(page 363). 1. Disconnect the electrical connector
from the sensor and the cable from the
air filter cover.
Note: Vehicles with 3.2L or 3.5L engine only. 2.
Clean the area around the air tube and
air filter cover connection. Loosen the
air tube clamp, it is not necessary to
completely remove the clamp. Remove
the air tube off from the air filter
housing cover. 3. Remove the clips that secure the air
filter housing cover.
Note: To unlatch the molded clip (x1) on
the air filter housing cover, push it backward.
4. Carefully lift the air filter housing cover.
5. Remove the air filter element from the
air filter housing.
232
Transit (TTH) Canada/United States of America, enUSA, First Printing MaintenanceE211558
1
2 E212356
5
4
7
3
x1
x2
Page 236 of 411
6.
Wipe any dirt or debris from the air filter
housing and cover to make sure no dirt
gets in the engine and that you have a
good seal.
7. Install a new air filter element. Be careful not to crimp the filter element
edges between the air filter housing
and cover.
8. Install the air filter housing cover.
Note: Make sure the front clips are fully
engaged and the molded clip on the air filter
housing cover is fully pushed down and
securely clicks into place.
9. Install the air tube onto the air filter cover. Tighten the air tube clamp until
you feel a strong resistance.
10. Reconnect the electrical connector to the sensor and the cable to the air
filter cover.
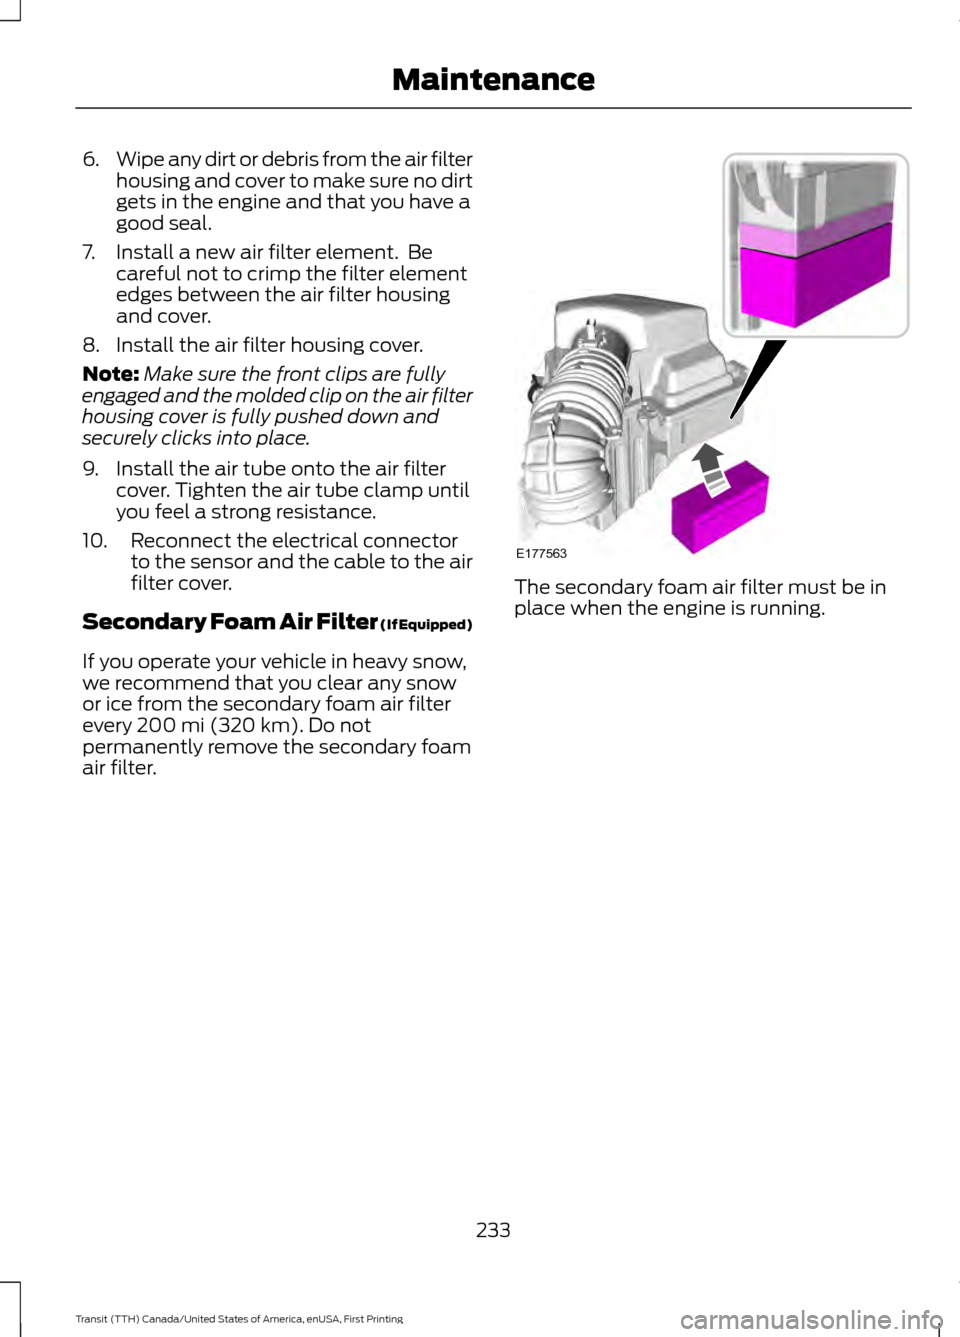
Secondary Foam Air Filter (If Equipped)
If you operate your vehicle in heavy snow,
we recommend that you clear any snow
or ice from the secondary foam air filter
every
200 mi (320 km). Do not
permanently remove the secondary foam
air filter. The secondary foam air filter must be in
place when the engine is running.
233
Transit (TTH) Canada/United States of America, enUSA, First Printing MaintenanceE177563
Page 259 of 411
Note:
The wheel valve stems must
also be replaced when the road
tires are replaced on your vehicle.
Fitting Replacement Tires WARNINGS
When mounting replacement
tires and wheels, you should
not exceed the maximum pressure
indicated on the sidewall of the
tire to set the beads without
additional precautions listed
below. If the beads do not seat at
the maximum pressure indicated,
re-lubricate and try again. For mounting pressures
above 20 psi (1.38 bar)
greater than the maximum
pressure on the tire sidewall, the
tire should be replaced by a tire
professional. For mounting pressures up to 1.38
bar greater than the maximum
pressure on the tire sidewall, the
following precautions must be
taken:
•
Make sure that you have the
correct tire and wheel size.
• Lubricate the tire bead and
wheel bead seat area.
• Stand at a minimum of
12.1 ft
(3.7 m) away from the wheel
and tire assembly.
• Use eye and ear protection. Tire Pressure Monitoring
System
(If Equipped)
The use of wheels or tires not
recommended by Ford Motor
Company may affect the
operation of the tire pressure
monitoring system. If the tire
pressure monitoring system
indicator is flashing, the tire
pressure monitoring system is
malfunctioning. The replacement
tire might be incompatible with
the tire pressure monitoring
system, or a component of the tire
pressure monitoring system may
be damaged. See
Tire Pressure
Monitoring System (page 260).
The tire pressure sensors mounted
in the wheels (originally installed
on your vehicle) are not designed
to be used in aftermarket wheels.
Tire Safety Practices WARNINGS
If your vehicle is stuck in
snow, mud, sand, etc., do not
rapidly spin the tires. Spinning the
tires can tear the tire and cause
an explosion. A tire can explode in
as little as three to five seconds.
256
Transit (TTH) Canada/United States of America, enUSA, First Printing Wheels and Tires
Page 261 of 411
Tire Rotation
WARNING
If the tire label shows
different tire pressures for the
front and rear tires and the vehicle
is fitted with a tire pressure
monitoring system, the settings
for the system sensors need to be
reset. Always carry out the system
reset procedure after tire rotation.
If the system is not reset, it may
not provide a low tire pressure
warning when necessary. See Tire
Pressure Monitoring System
(page 260). Rotating the tires at the
recommended interval detailed in
the Scheduled Maintenance
chapter will help the tires wear
more evenly, providing better tire
performance and longer tire life.
Sometimes irregular tire wear can
be corrected by rotating the tires.
Note:
After rotating the tires the
inflation pressure must be checked
and adjusted to the vehicle
requirements.
Note: If the tires show uneven
wear ask an authorized dealer to
check for and correct any wheel
misalignment, tire imbalance or
mechanical problem involved
before tire rotation. Note:
Your vehicle may have a
dissimilar spare wheel and tire
assembly. A dissimilar spare wheel
and tire assembly is defined as a
spare wheel and tire assembly that
is different in brand, size or
appearance from the road tires and
wheels. If you have a dissimilar
spare wheel and tire assembly it is
intended for temporary use only
and should not be used in a tire
rotation.
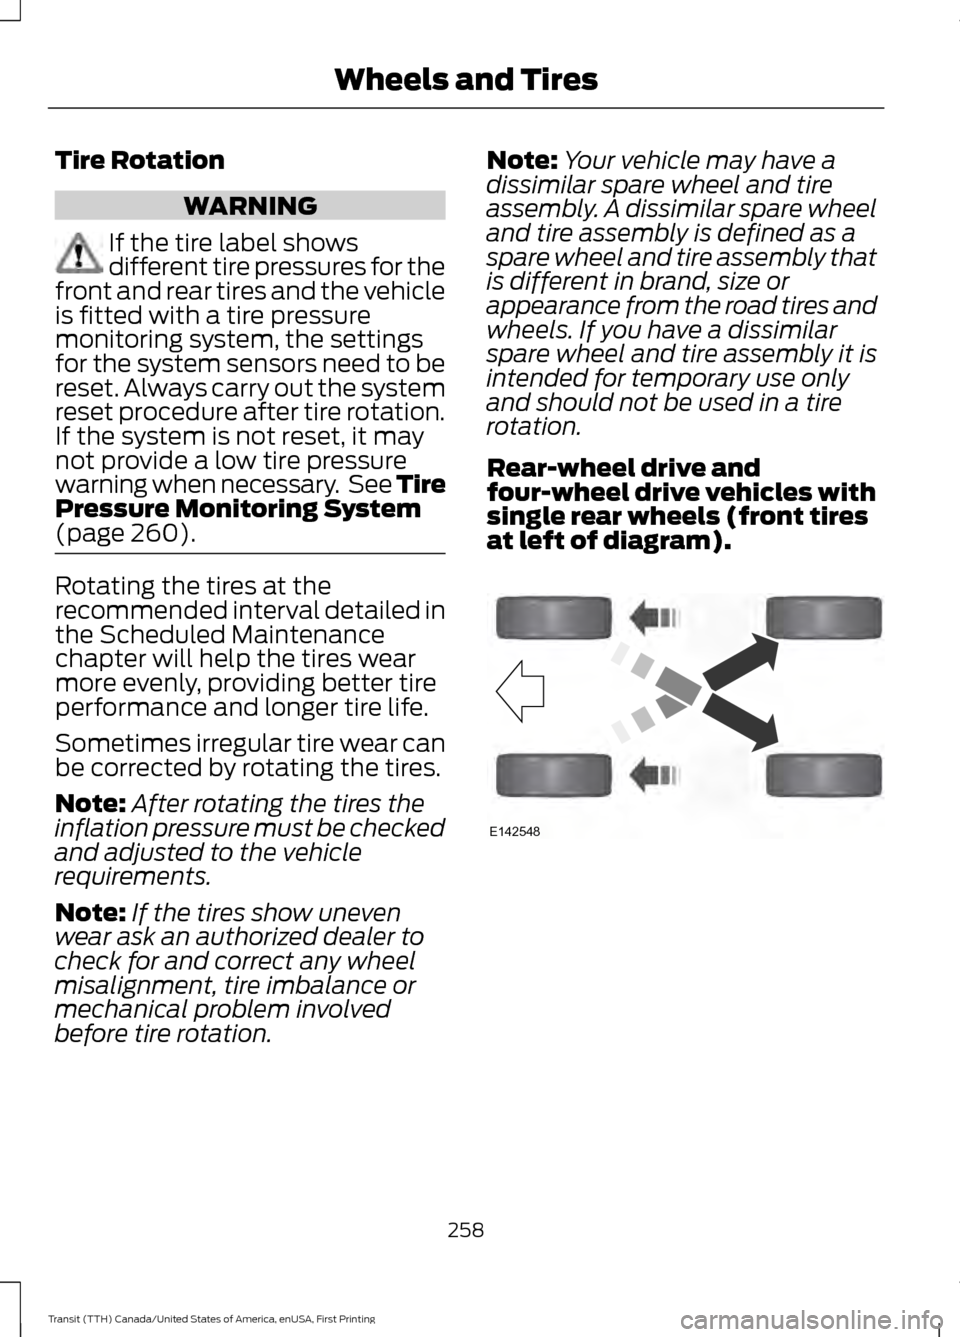
Rear-wheel drive and
four-wheel drive vehicles with
single rear wheels (front tires
at left of diagram). 258
Transit (TTH) Canada/United States of America, enUSA, First Printing Wheels and TiresE142548