FORD TRANSIT 2016 5.G Manual PDF
Manufacturer: FORD, Model Year: 2016, Model line: TRANSIT, Model: FORD TRANSIT 2016 5.GPages: 411, PDF Size: 5.65 MB
Page 71 of 411
A wipe will occur a few seconds after
washing to clear any remaining washer
fluid. This feature can be switched on or
off in the information display. See General
Information (page 82).
68
Transit (TTH) Canada/United States of America, enUSA, First Printing Wipers and Washers
Page 72 of 411

GENERAL INFORMATION
Condensation in Lamp Assemblies
Exterior lamps have vents to
accommodate normal changes in air
pressure.
Condensation can be a natural by-product
of this design. When moist air enters the
lamp assembly through the vents, there is
a possibility that condensation can occur
when the temperature is cold. When
normal condensation occurs, a fine mist
can form on the interior of the lens. The
fine mist eventually clears and exits
through the vents during normal operation.
Clearing time may take as long as 48 hours
under dry weather conditions.
Examples of acceptable condensation are:
•
The presence of a fine mist (no streaks,
drip marks or large droplets).
• A fine mist covers less than 50% of the
lens.
Examples of unacceptable condensation
are:
• A water puddle inside the lamp.
• Streaks, drip marks or large droplets
present on the interior of the lens.
If you see any unacceptable condensation,
have your vehicle checked by an authorized
dealer. LIGHTING CONTROL
Lighting Control Positions Off.A
Position lamps, instrument panel
lamps, license plate lamps.
B
Headlamps.
C
Autolamps.
D
High Beams Push the lever away from you to switch
the high beam on.
Push the lever forward again or pull the
lever toward you to switch the high beams
off.
69
Transit (TTH) Canada/United States of America, enUSA, First Printing LightingE175211
ABCD E163718
Page 73 of 411
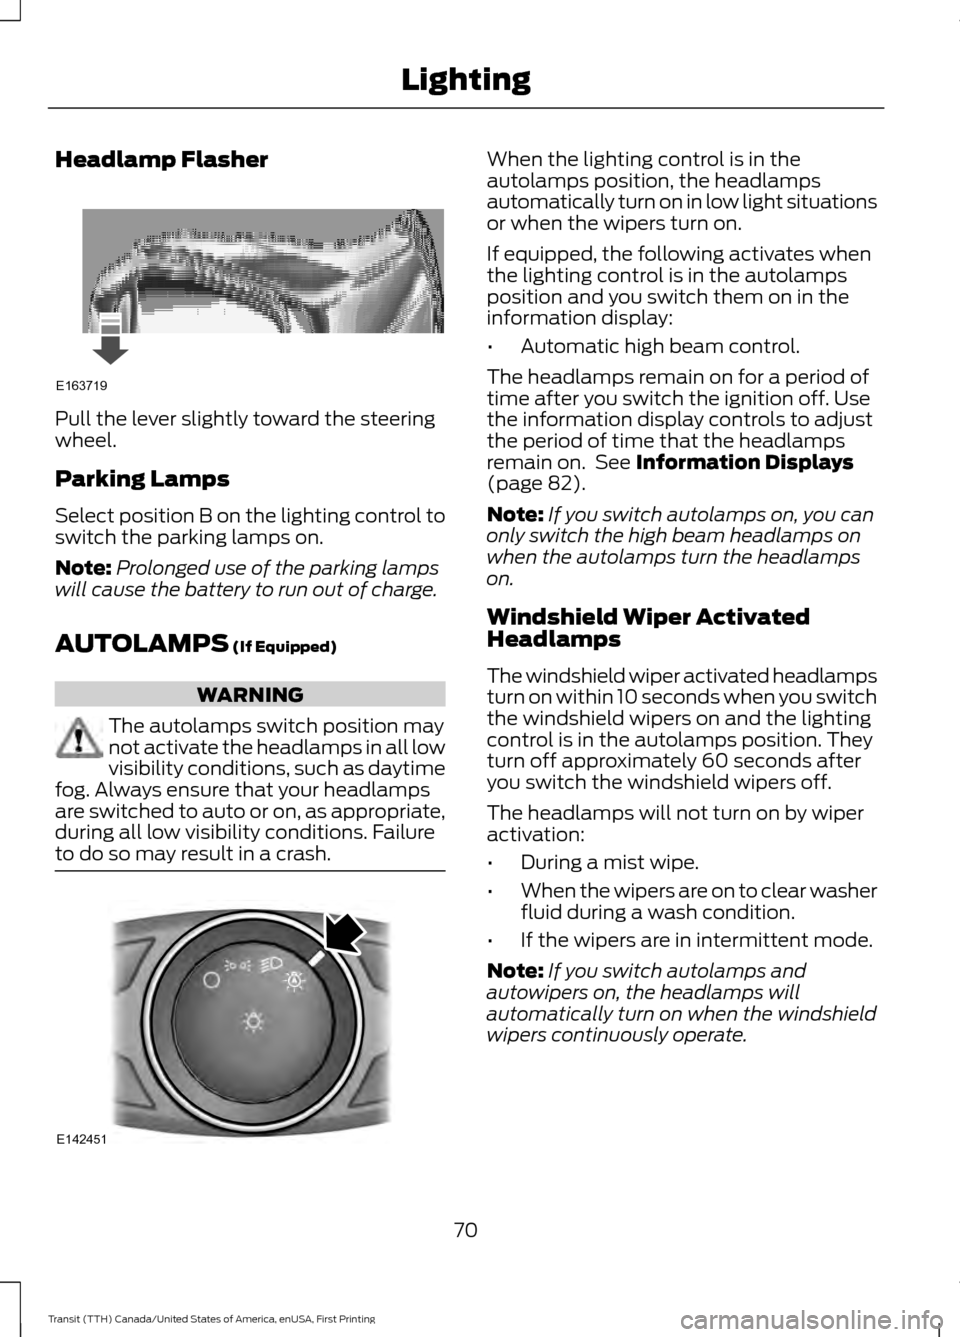
Headlamp Flasher
Pull the lever slightly toward the steering
wheel.
Parking Lamps
Select position B on the lighting control to
switch the parking lamps on.
Note:
Prolonged use of the parking lamps
will cause the battery to run out of charge.
AUTOLAMPS (If Equipped) WARNING
The autolamps switch position may
not activate the headlamps in all low
visibility conditions, such as daytime
fog. Always ensure that your headlamps
are switched to auto or on, as appropriate,
during all low visibility conditions. Failure
to do so may result in a crash. When the lighting control is in the
autolamps position, the headlamps
automatically turn on in low light situations
or when the wipers turn on.
If equipped, the following activates when
the lighting control is in the autolamps
position and you switch them on in the
information display:
•
Automatic high beam control.
The headlamps remain on for a period of
time after you switch the ignition off. Use
the information display controls to adjust
the period of time that the headlamps
remain on. See
Information Displays
(page 82).
Note: If you switch autolamps on, you can
only switch the high beam headlamps on
when the autolamps turn the headlamps
on.
Windshield Wiper Activated
Headlamps
The windshield wiper activated headlamps
turn on within 10 seconds when you switch
the windshield wipers on and the lighting
control is in the autolamps position. They
turn off approximately 60 seconds after
you switch the windshield wipers off.
The headlamps will not turn on by wiper
activation:
• During a mist wipe.
• When the wipers are on to clear washer
fluid during a wash condition.
• If the wipers are in intermittent mode.
Note: If you switch autolamps and
autowipers on, the headlamps will
automatically turn on when the windshield
wipers continuously operate.
70
Transit (TTH) Canada/United States of America, enUSA, First Printing LightingE163719 E142451
Page 74 of 411
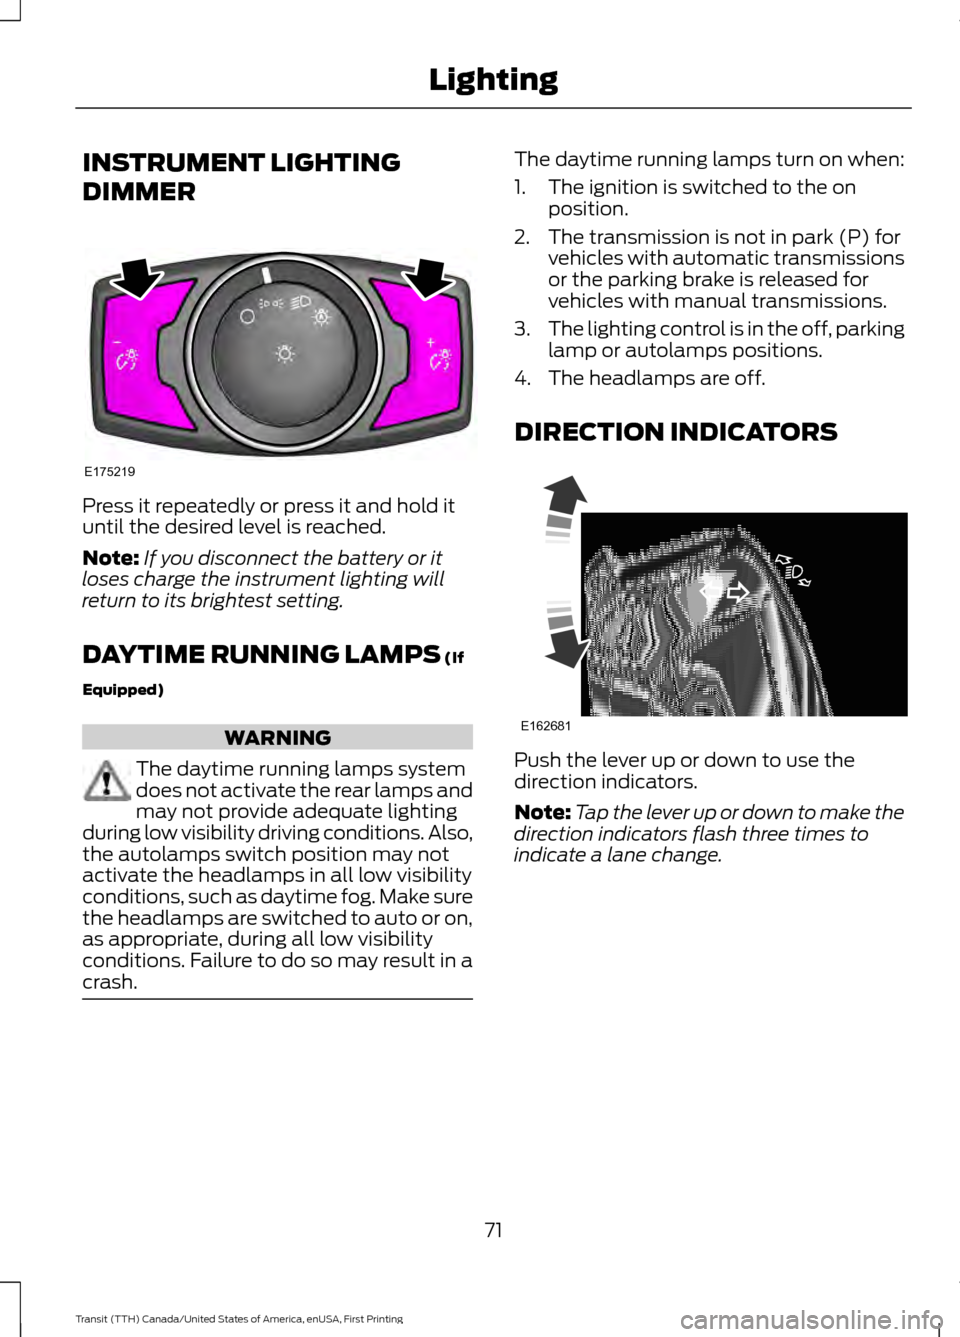
INSTRUMENT LIGHTING
DIMMER
Press it repeatedly or press it and hold it
until the desired level is reached.
Note:
If you disconnect the battery or it
loses charge the instrument lighting will
return to its brightest setting.
DAYTIME RUNNING LAMPS (If
Equipped) WARNING
The daytime running lamps system
does not activate the rear lamps and
may not provide adequate lighting
during low visibility driving conditions. Also,
the autolamps switch position may not
activate the headlamps in all low visibility
conditions, such as daytime fog. Make sure
the headlamps are switched to auto or on,
as appropriate, during all low visibility
conditions. Failure to do so may result in a
crash. The daytime running lamps turn on when:
1. The ignition is switched to the on
position.
2. The transmission is not in park (P) for vehicles with automatic transmissions
or the parking brake is released for
vehicles with manual transmissions.
3. The lighting control is in the off, parking
lamp or autolamps positions.
4. The headlamps are off.
DIRECTION INDICATORS Push the lever up or down to use the
direction indicators.
Note:
Tap the lever up or down to make the
direction indicators flash three times to
indicate a lane change.
71
Transit (TTH) Canada/United States of America, enUSA, First Printing LightingE175219 E162681
Page 75 of 411
INTERIOR LAMPS
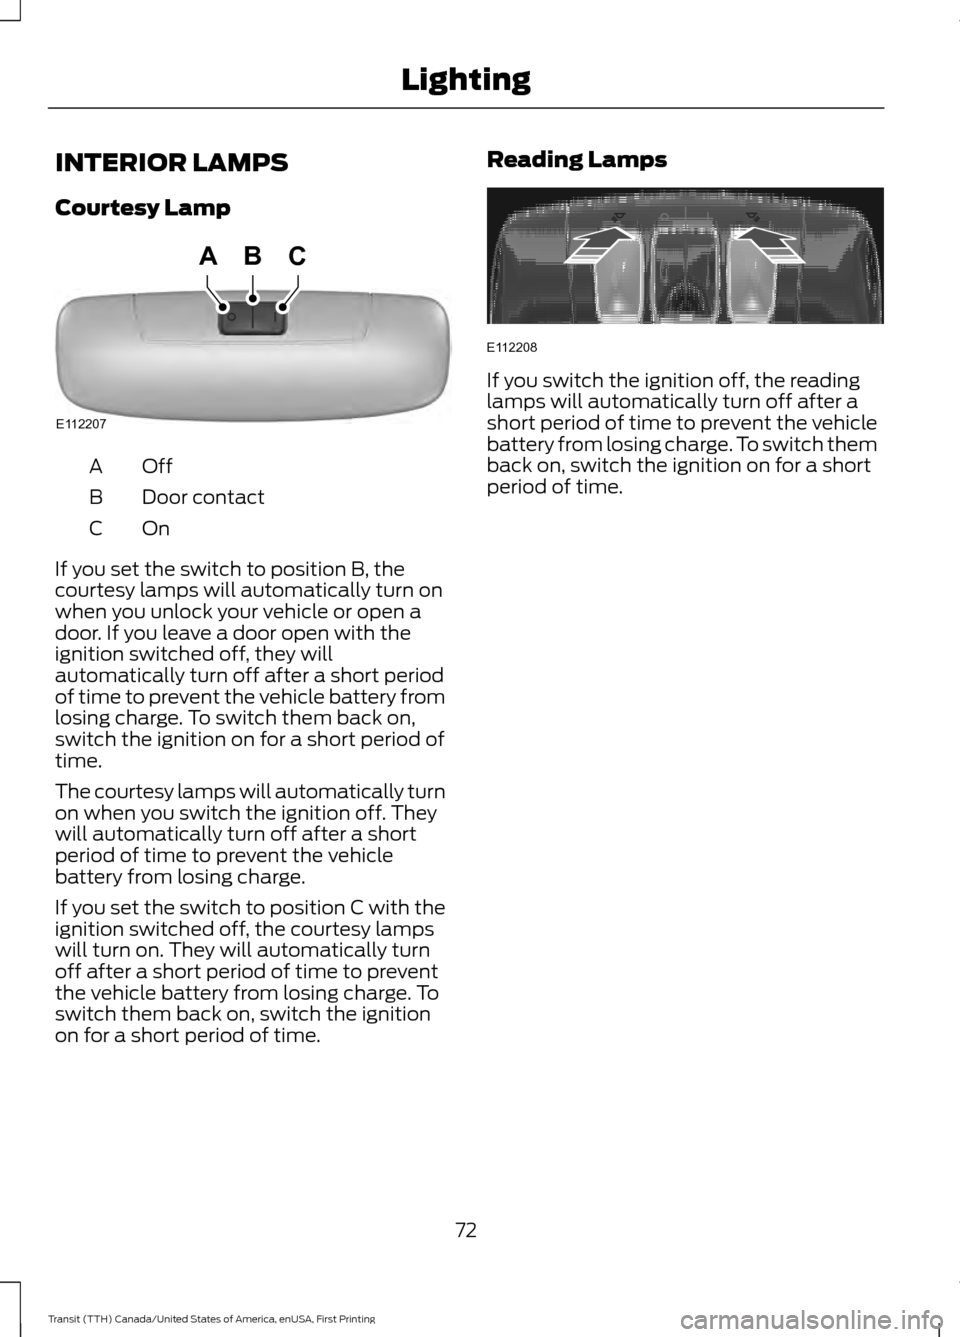
Courtesy Lamp
OffA
Door contact
B
OnC
If you set the switch to position B, the
courtesy lamps will automatically turn on
when you unlock your vehicle or open a
door. If you leave a door open with the
ignition switched off, they will
automatically turn off after a short period
of time to prevent the vehicle battery from
losing charge. To switch them back on,
switch the ignition on for a short period of
time.
The courtesy lamps will automatically turn
on when you switch the ignition off. They
will automatically turn off after a short
period of time to prevent the vehicle
battery from losing charge.
If you set the switch to position C with the
ignition switched off, the courtesy lamps
will turn on. They will automatically turn
off after a short period of time to prevent
the vehicle battery from losing charge. To
switch them back on, switch the ignition
on for a short period of time. Reading Lamps If you switch the ignition off, the reading
lamps will automatically turn off after a
short period of time to prevent the vehicle
battery from losing charge. To switch them
back on, switch the ignition on for a short
period of time.
72
Transit (TTH) Canada/United States of America, enUSA, First Printing LightingE112207
BCA E112208
Page 76 of 411
POWER WINDOWS
WARNINGS
To avoid risk of injury, do not leave
children or pets unattended in your
vehicle.
When closing the power windows,
you should verify they are free of
obstructions and make sure that
children and pets are not in the proximity
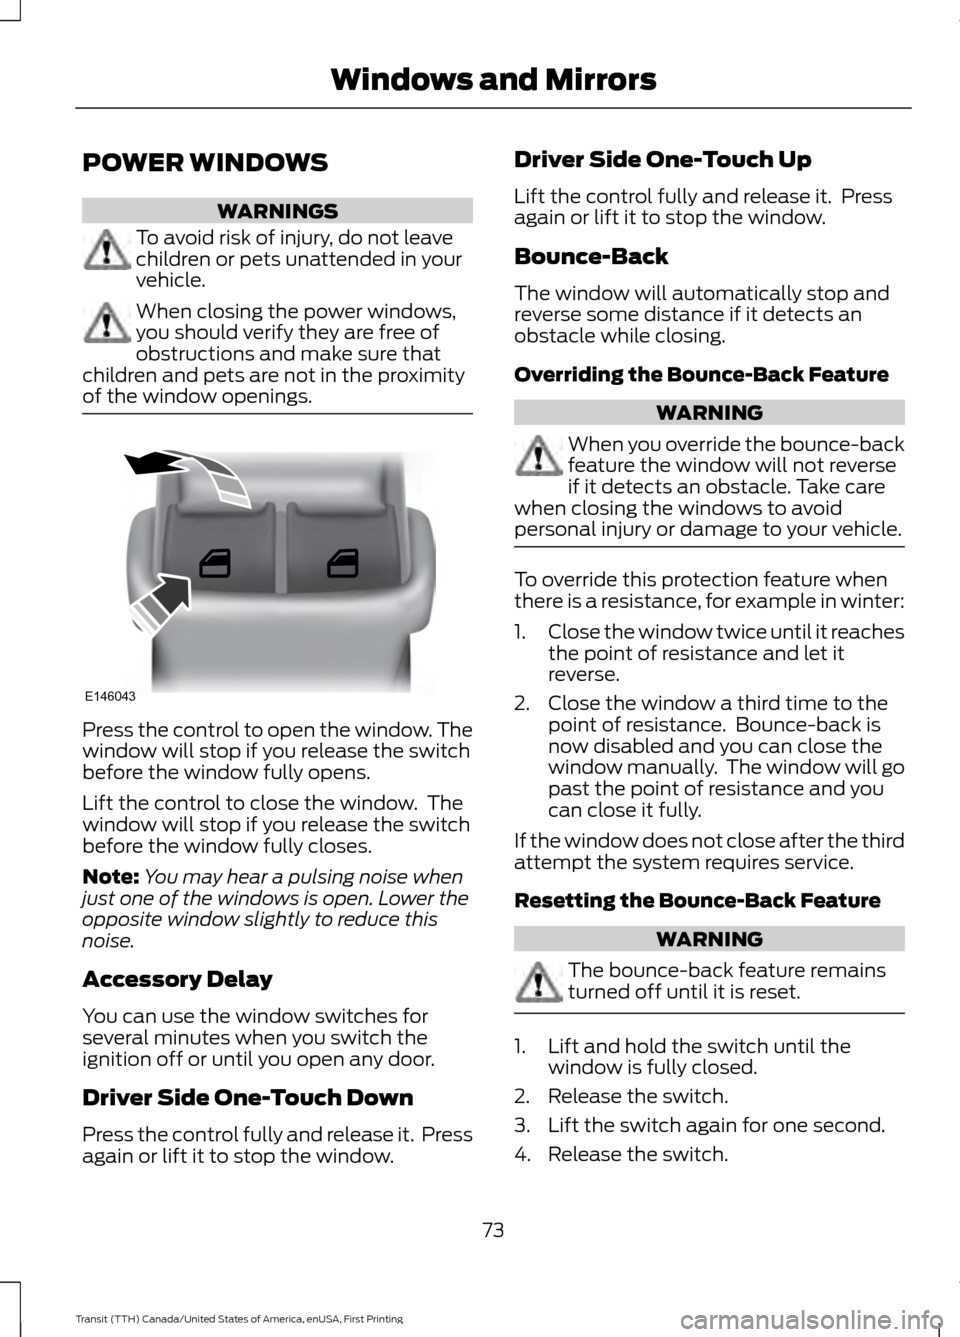
of the window openings. Press the control to open the window. The
window will stop if you release the switch
before the window fully opens.
Lift the control to close the window. The
window will stop if you release the switch
before the window fully closes.
Note:
You may hear a pulsing noise when
just one of the windows is open. Lower the
opposite window slightly to reduce this
noise.
Accessory Delay
You can use the window switches for
several minutes when you switch the
ignition off or until you open any door.
Driver Side One-Touch Down
Press the control fully and release it. Press
again or lift it to stop the window. Driver Side One-Touch Up
Lift the control fully and release it. Press
again or lift it to stop the window.
Bounce-Back
The window will automatically stop and
reverse some distance if it detects an
obstacle while closing.
Overriding the Bounce-Back Feature
WARNING
When you override the bounce-back
feature the window will not reverse
if it detects an obstacle. Take care
when closing the windows to avoid
personal injury or damage to your vehicle. To override this protection feature when
there is a resistance, for example in winter:
1.
Close the window twice until it reaches
the point of resistance and let it
reverse.
2. Close the window a third time to the point of resistance. Bounce-back is
now disabled and you can close the
window manually. The window will go
past the point of resistance and you
can close it fully.
If the window does not close after the third
attempt the system requires service.
Resetting the Bounce-Back Feature WARNING
The bounce-back feature remains
turned off until it is reset.
1. Lift and hold the switch until the
window is fully closed.
2. Release the switch.
3. Lift the switch again for one second.
4. Release the switch.
73
Transit (TTH) Canada/United States of America, enUSA, First Printing Windows and MirrorsE146043
Page 77 of 411
5. Lift the switch again for one second.
6.
Open the window and then try to close
using the one-touch feature.
7. Repeat the procedure if the window does not close using the one-touch
feature.
Note: If you disconnect the battery, you
must reset the bounce-back memory.
EXTERIOR MIRRORS
Power Exterior Mirrors WARNING
Do not adjust the mirrors when your
vehicle is moving. This could result
in the loss of control of your vehicle,
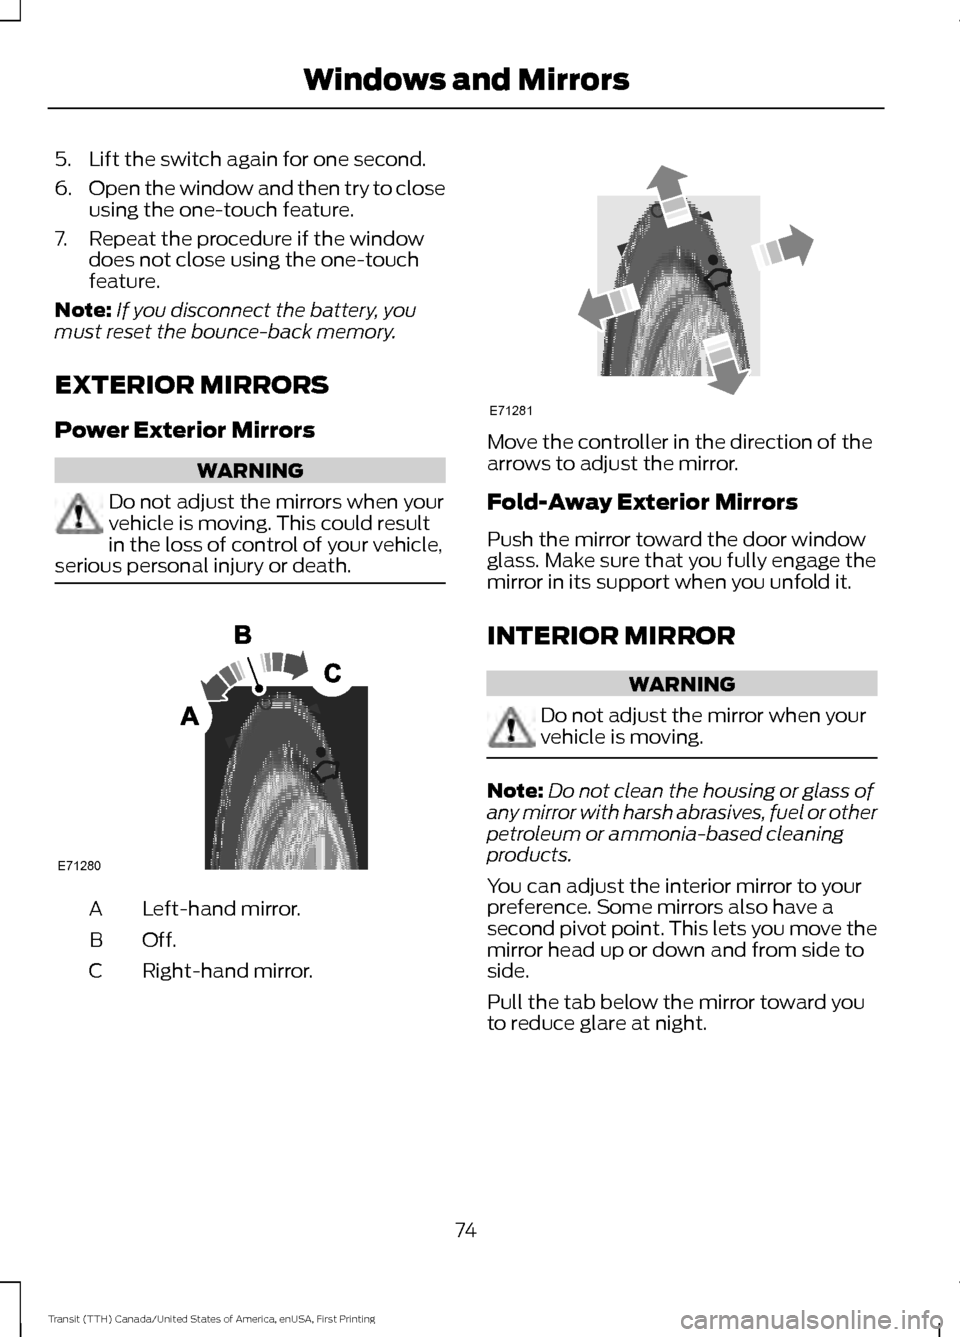
serious personal injury or death. Left-hand mirror.
A
Off.B
Right-hand mirror.
C Move the controller in the direction of the
arrows to adjust the mirror.
Fold-Away Exterior Mirrors
Push the mirror toward the door window
glass. Make sure that you fully engage the
mirror in its support when you unfold it.
INTERIOR MIRROR
WARNING
Do not adjust the mirror when your
vehicle is moving.
Note:
Do not clean the housing or glass of
any mirror with harsh abrasives, fuel or other
petroleum or ammonia-based cleaning
products.
You can adjust the interior mirror to your
preference. Some mirrors also have a
second pivot point. This lets you move the
mirror head up or down and from side to
side.
Pull the tab below the mirror toward you
to reduce glare at night.
74
Transit (TTH) Canada/United States of America, enUSA, First Printing Windows and MirrorsE71280 E71281
Page 78 of 411
Auto-Dimming Mirror (If Equipped)
Note: Do not block the sensors on the front
and back of the mirror. Mirror performance
may be affected. A rear center passenger or
raised rear center head restraint may also
block light from reaching the sensor.
The mirror will dim automatically to reduce
glare when bright lights are detected from
behind your vehicle. It will automatically
return to normal reflection when you select
reverse gear to make sure you have a clear
view when backing up.
REAR QUARTER WINDOWS
Opening the Rear Windows
(If
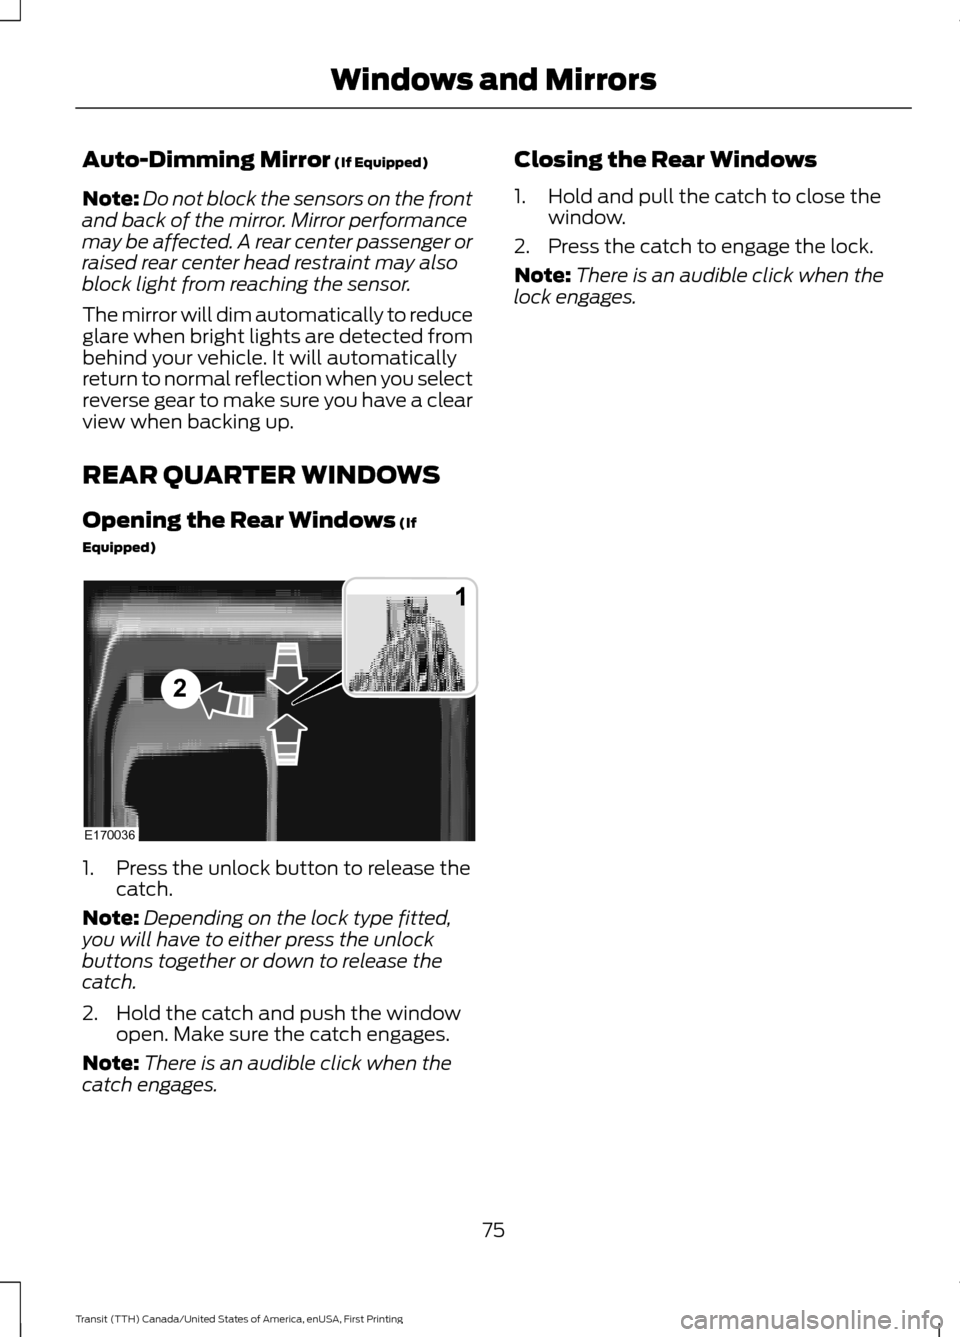
Equipped) 1. Press the unlock button to release the
catch.
Note: Depending on the lock type fitted,
you will have to either press the unlock
buttons together or down to release the
catch.
2. Hold the catch and push the window open. Make sure the catch engages.
Note: There is an audible click when the
catch engages. Closing the Rear Windows
1. Hold and pull the catch to close the
window.
2. Press the catch to engage the lock.
Note: There is an audible click when the
lock engages.
75
Transit (TTH) Canada/United States of America, enUSA, First Printing Windows and MirrorsE170036
1
2
Page 79 of 411
GAUGES
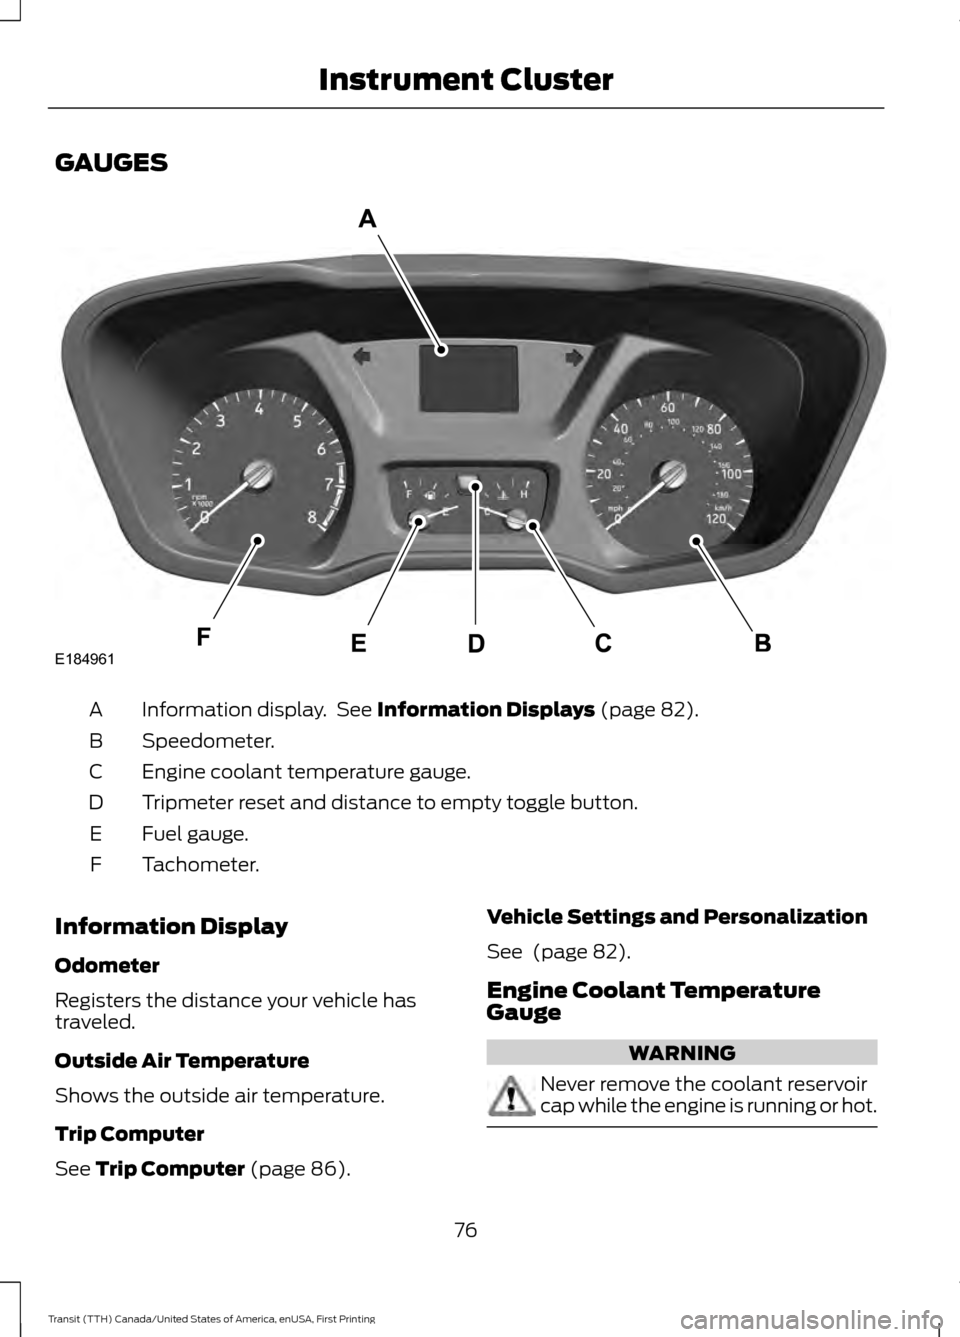
Information display. See Information Displays (page 82).
A
Speedometer.
B
Engine coolant temperature gauge.
C
Tripmeter reset and distance to empty toggle button.
D
Fuel gauge.
E
Tachometer.
F
Information Display
Odometer
Registers the distance your vehicle has
traveled.
Outside Air Temperature
Shows the outside air temperature.
Trip Computer
See
Trip Computer (page 86). Vehicle Settings and Personalization
See
(page 82).
Engine Coolant Temperature
Gauge WARNING
Never remove the coolant reservoir
cap while the engine is running or hot.
76
Transit (TTH) Canada/United States of America, enUSA, First Printing Instrument ClusterE184961
Page 80 of 411
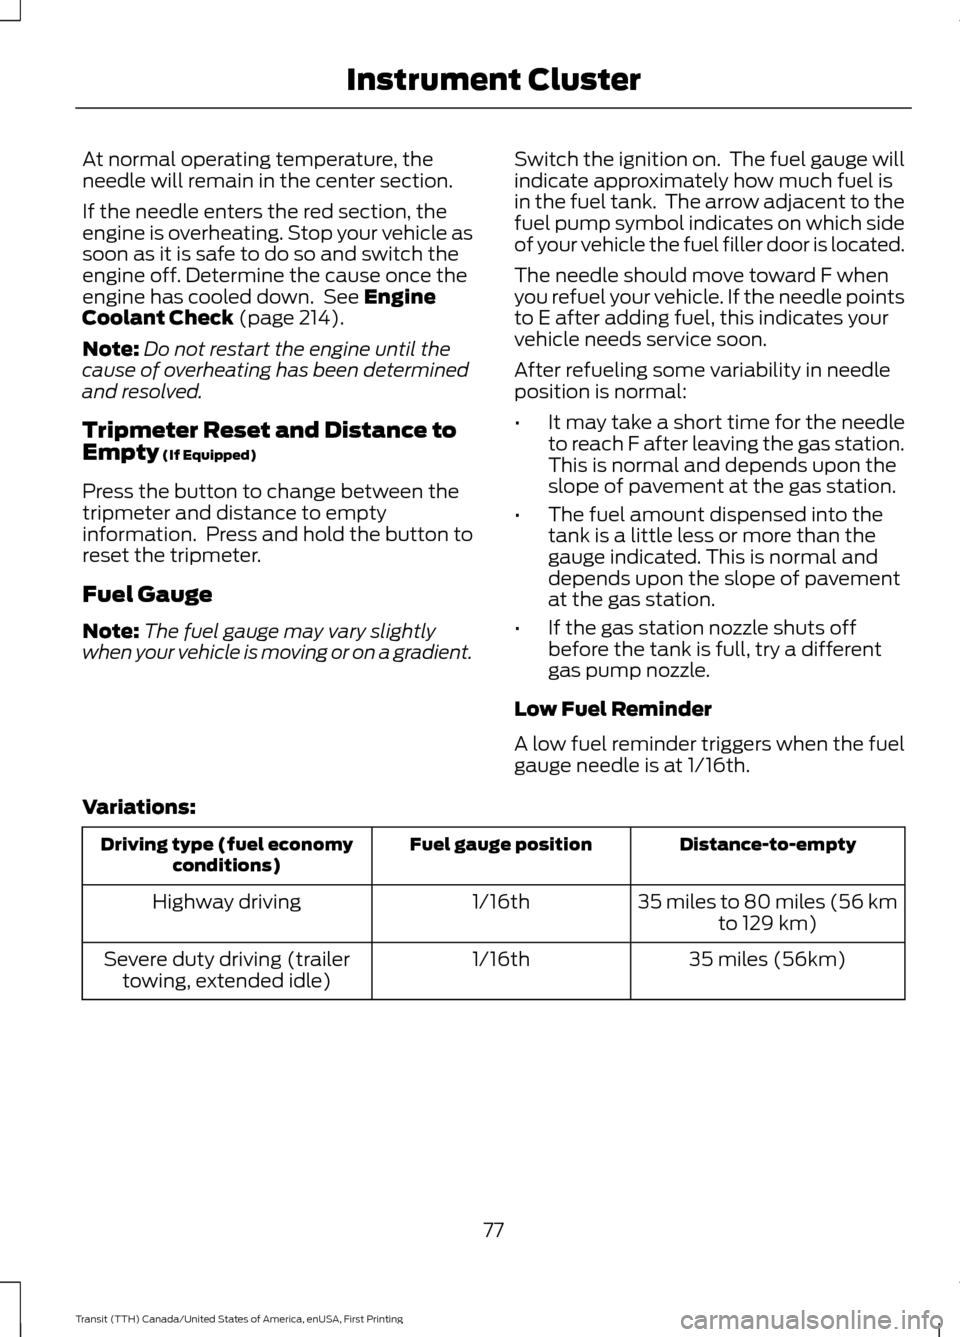
At normal operating temperature, the
needle will remain in the center section.
If the needle enters the red section, the
engine is overheating. Stop your vehicle as
soon as it is safe to do so and switch the
engine off. Determine the cause once the
engine has cooled down. See Engine
Coolant Check (page 214).
Note: Do not restart the engine until the
cause of overheating has been determined
and resolved.
Tripmeter Reset and Distance to
Empty
(If Equipped)
Press the button to change between the
tripmeter and distance to empty
information. Press and hold the button to
reset the tripmeter.
Fuel Gauge
Note: The fuel gauge may vary slightly
when your vehicle is moving or on a gradient. Switch the ignition on. The fuel gauge will
indicate approximately how much fuel is
in the fuel tank. The arrow adjacent to the
fuel pump symbol indicates on which side
of your vehicle the fuel filler door is located.
The needle should move toward F when
you refuel your vehicle. If the needle points
to E after adding fuel, this indicates your
vehicle needs service soon.
After refueling some variability in needle
position is normal:
•
It may take a short time for the needle
to reach F after leaving the gas station.
This is normal and depends upon the
slope of pavement at the gas station.
• The fuel amount dispensed into the
tank is a little less or more than the
gauge indicated. This is normal and
depends upon the slope of pavement
at the gas station.
• If the gas station nozzle shuts off
before the tank is full, try a different
gas pump nozzle.
Low Fuel Reminder
A low fuel reminder triggers when the fuel
gauge needle is at 1/16th.
Variations: Distance-to-empty
Fuel gauge position
Driving type (fuel economy
conditions)
35 miles to 80 miles (56 kmto 129 km)
1/16th
Highway driving
35 miles (56km)
1/16th
Severe duty driving (trailer
towing, extended idle)
77
Transit (TTH) Canada/United States of America, enUSA, First Printing Instrument Cluster