FORD TRANSIT 2016 5.G Owners Manual
Manufacturer: FORD, Model Year: 2016, Model line: TRANSIT, Model: FORD TRANSIT 2016 5.GPages: 411, PDF Size: 5.65 MB
Page 101 of 411
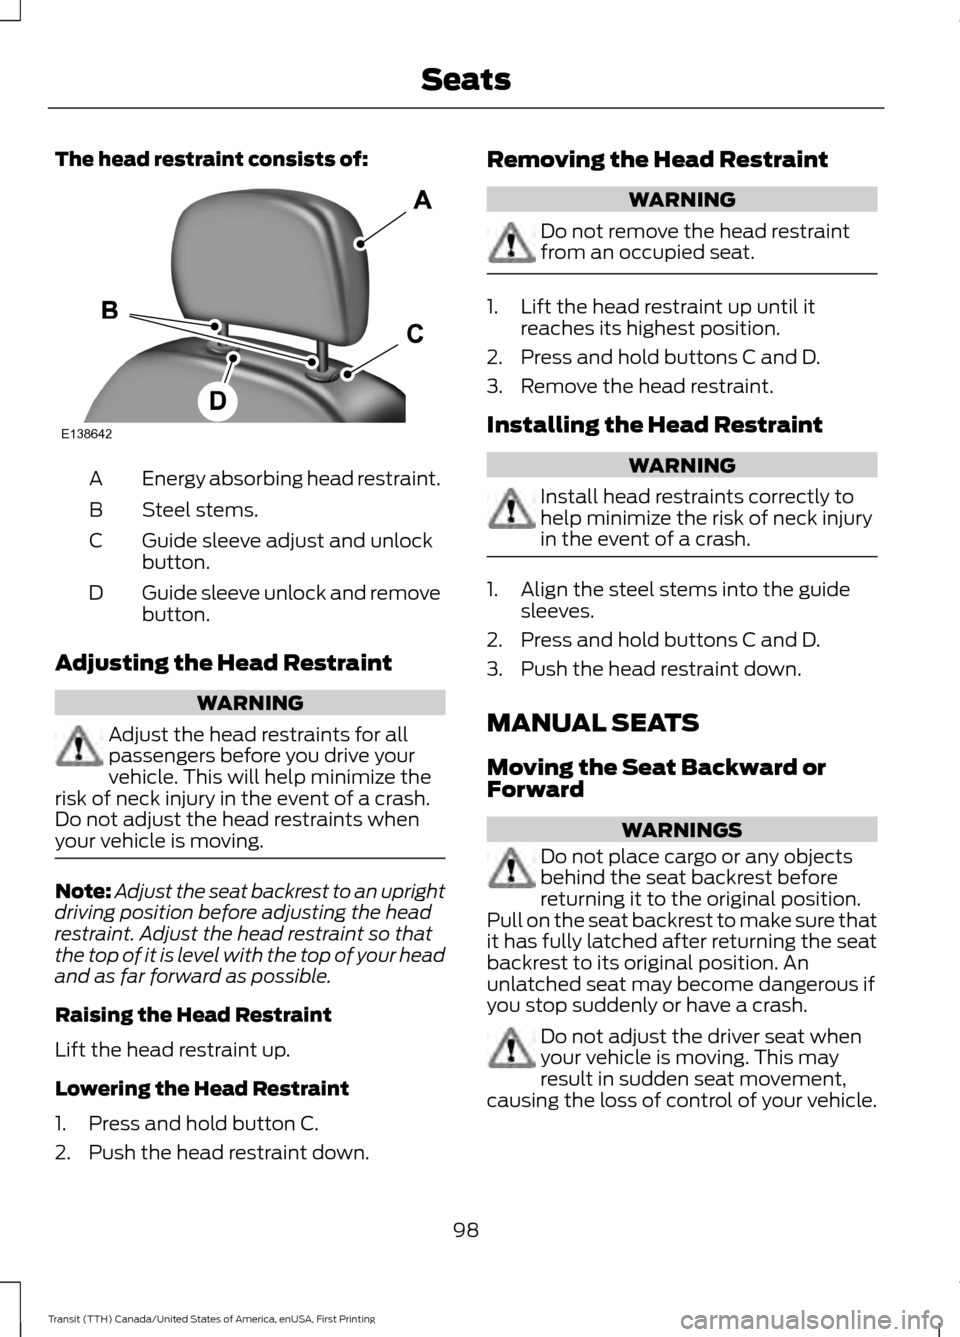
The head restraint consists of:
Energy absorbing head restraint.
A
Steel stems.
B
Guide sleeve adjust and unlock
button.
C
Guide sleeve unlock and remove
button.
D
Adjusting the Head Restraint WARNING
Adjust the head restraints for all
passengers before you drive your
vehicle. This will help minimize the
risk of neck injury in the event of a crash.
Do not adjust the head restraints when
your vehicle is moving. Note:
Adjust the seat backrest to an upright
driving position before adjusting the head
restraint. Adjust the head restraint so that
the top of it is level with the top of your head
and as far forward as possible.
Raising the Head Restraint
Lift the head restraint up.
Lowering the Head Restraint
1. Press and hold button C.
2. Push the head restraint down. Removing the Head Restraint WARNING
Do not remove the head restraint
from an occupied seat.
1. Lift the head restraint up until it
reaches its highest position.
2. Press and hold buttons C and D.
3. Remove the head restraint.
Installing the Head Restraint WARNING
Install head restraints correctly to
help minimize the risk of neck injury
in the event of a crash.
1. Align the steel stems into the guide
sleeves.
2. Press and hold buttons C and D.
3. Push the head restraint down.
MANUAL SEATS
Moving the Seat Backward or
Forward WARNINGS
Do not place cargo or any objects
behind the seat backrest before
returning it to the original position.
Pull on the seat backrest to make sure that
it has fully latched after returning the seat
backrest to its original position. An
unlatched seat may become dangerous if
you stop suddenly or have a crash. Do not adjust the driver seat when
your vehicle is moving. This may
result in sudden seat movement,
causing the loss of control of your vehicle.
98
Transit (TTH) Canada/United States of America, enUSA, First Printing SeatsE138642
Page 102 of 411
WARNINGS
Make sure the driver seat fully locks
into place by rocking it backward and
forward.
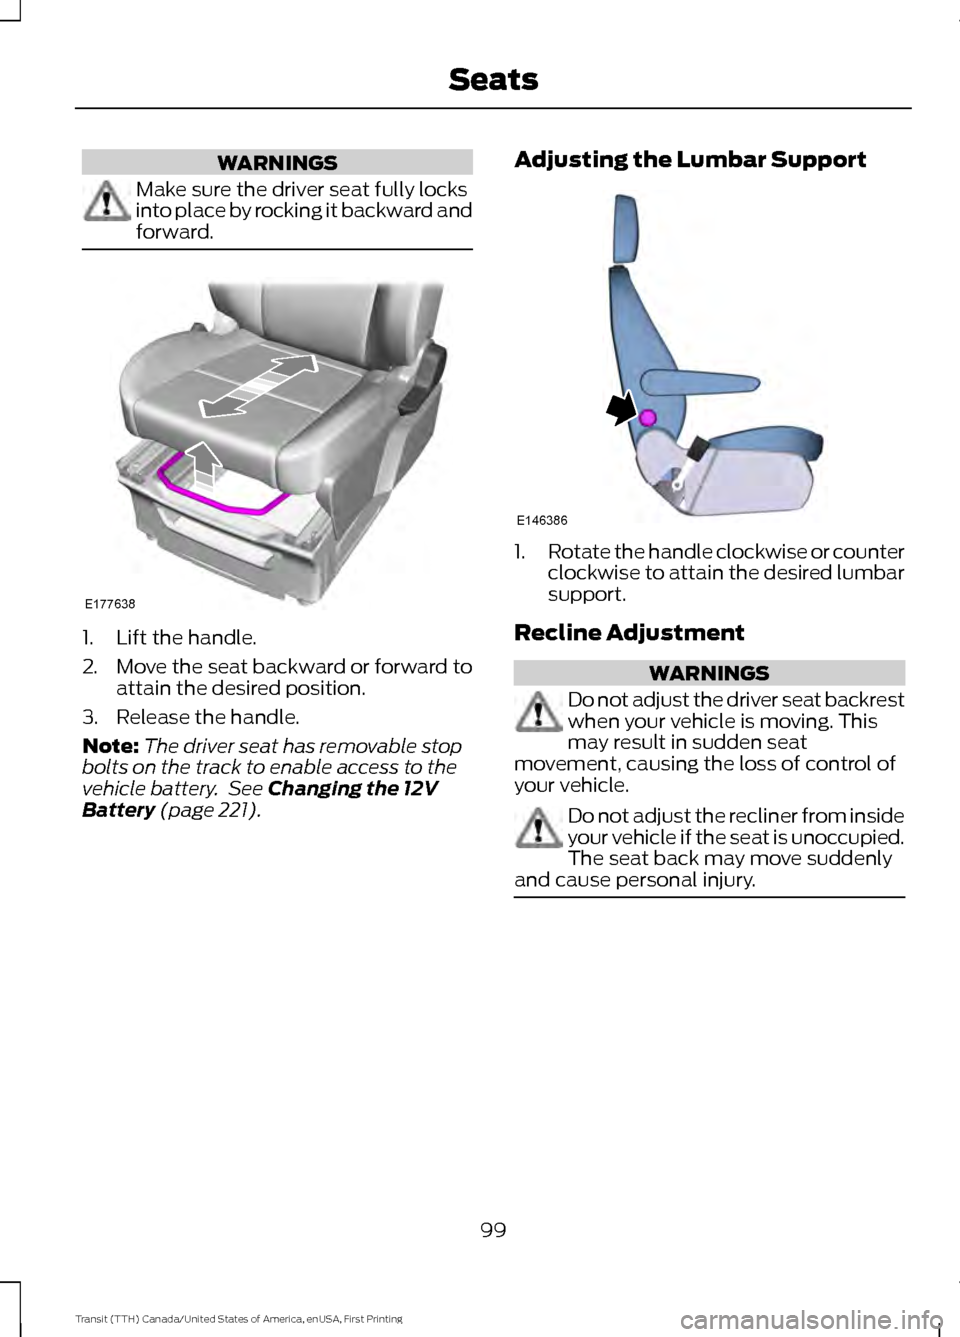
1. Lift the handle.
2. Move the seat backward or forward to
attain the desired position.
3. Release the handle.
Note: The driver seat has removable stop
bolts on the track to enable access to the
vehicle battery. See Changing the 12V
Battery (page 221). Adjusting the Lumbar Support 1.
Rotate the handle clockwise or counter
clockwise to attain the desired lumbar
support.
Recline Adjustment WARNINGS
Do not adjust the driver seat backrest
when your vehicle is moving. This
may result in sudden seat
movement, causing the loss of control of
your vehicle. Do not adjust the recliner from inside
your vehicle if the seat is unoccupied.
The seat back may move suddenly
and cause personal injury. 99
Transit (TTH) Canada/United States of America, enUSA, First Printing SeatsE177638 E146386
Page 103 of 411
1. Lift the handle.
2. Move the seat back backward or
forward to attain the desired position.
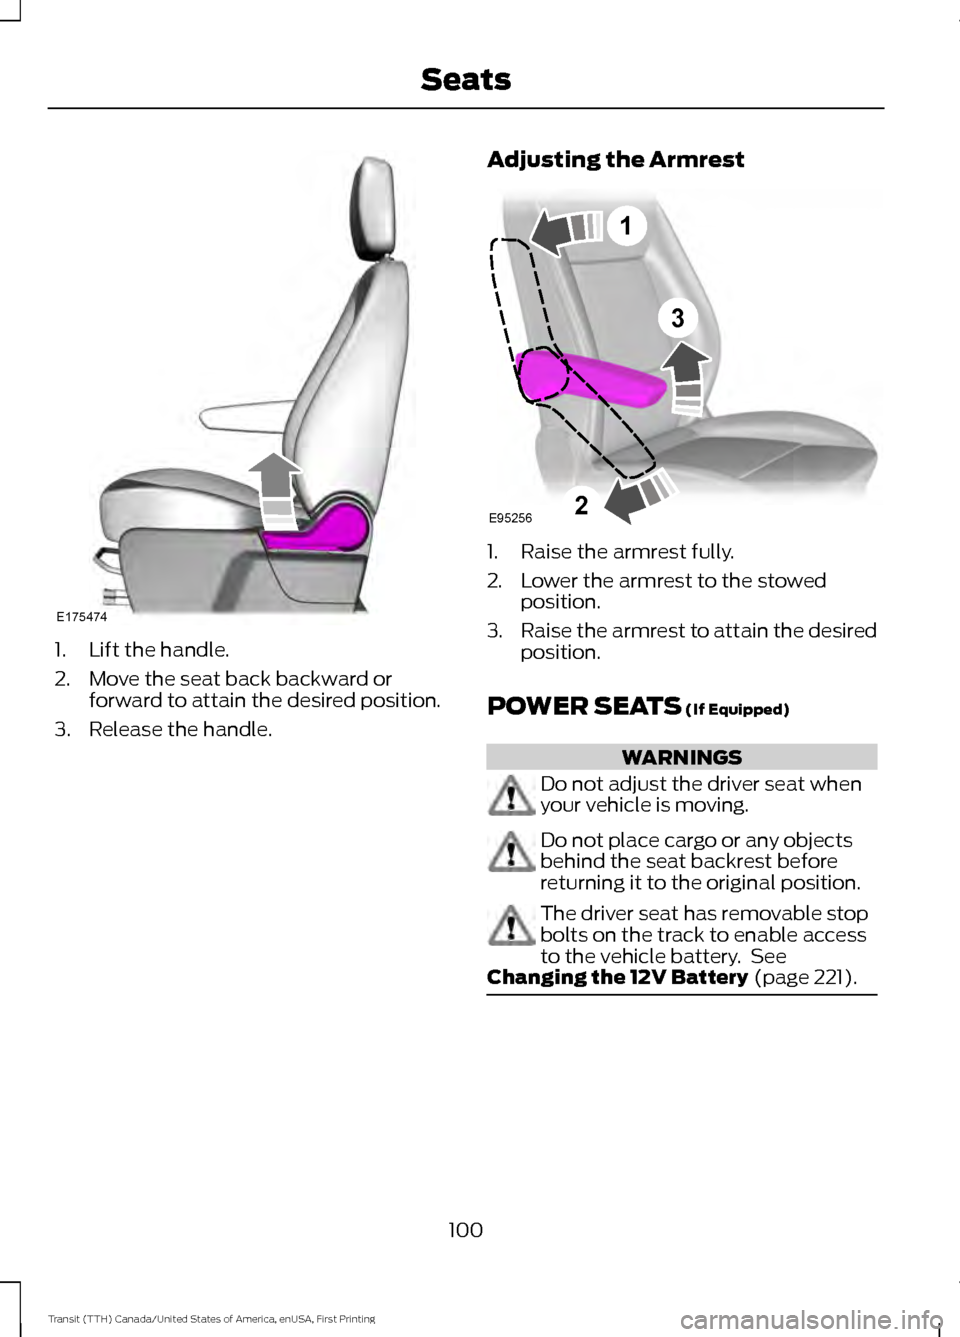
3. Release the handle. Adjusting the Armrest 1. Raise the armrest fully.
2. Lower the armrest to the stowed
position.
3. Raise the armrest to attain the desired
position.
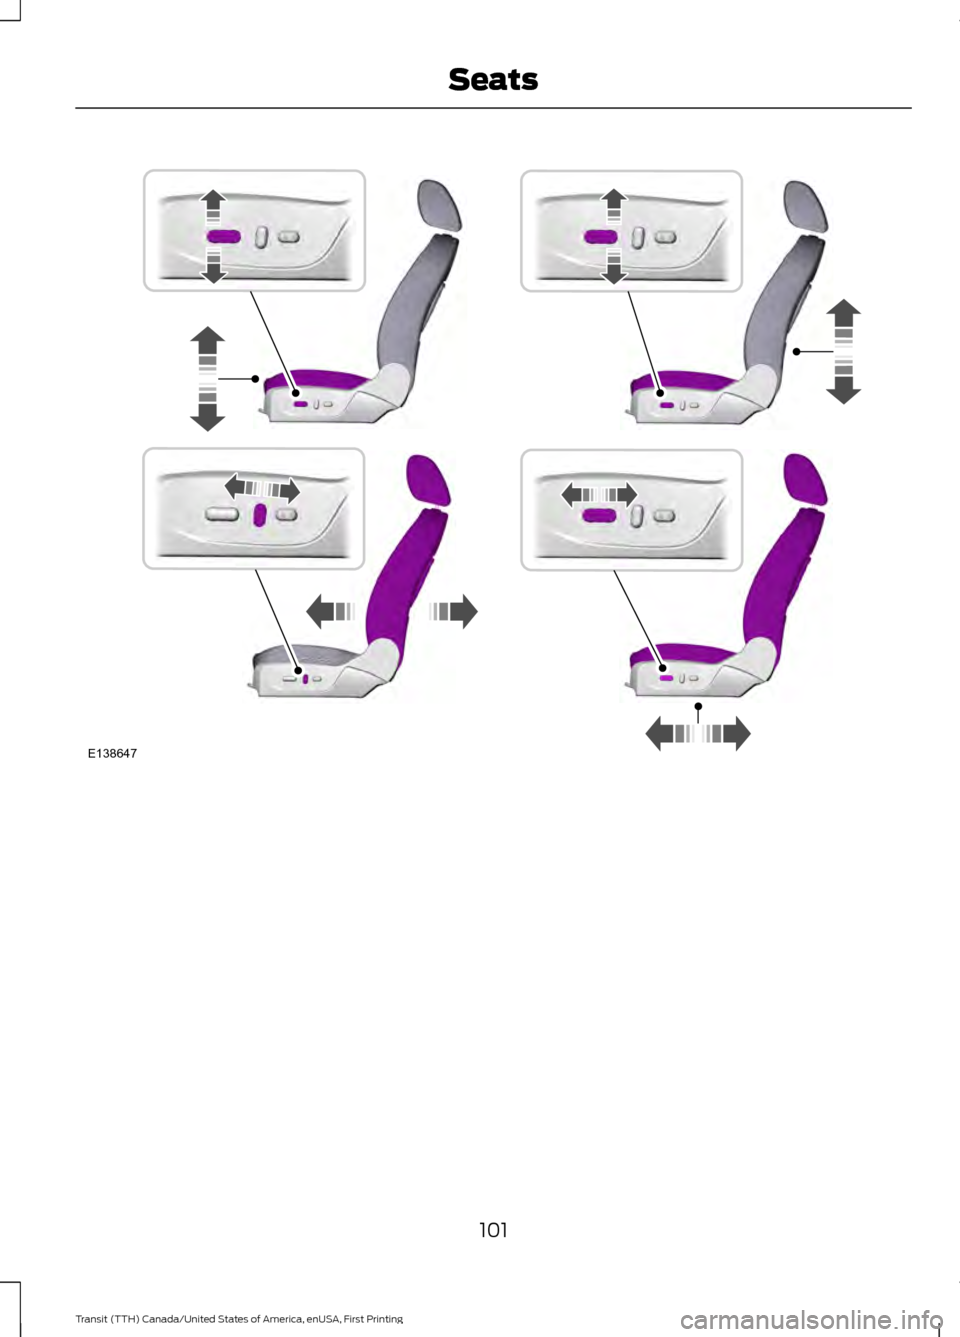
POWER SEATS (If Equipped) WARNINGS
Do not adjust the driver seat when
your vehicle is moving.
Do not place cargo or any objects
behind the seat backrest before
returning it to the original position.
The driver seat has removable stop
bolts on the track to enable access
to the vehicle battery. See
Changing the 12V Battery
(page 221). 100
Transit (TTH) Canada/United States of America, enUSA, First Printing SeatsE175474 3
E95256
1
2
Page 104 of 411
101
Transit (TTH) Canada/United States of America, enUSA, First Printing SeatsE138647
Page 105 of 411
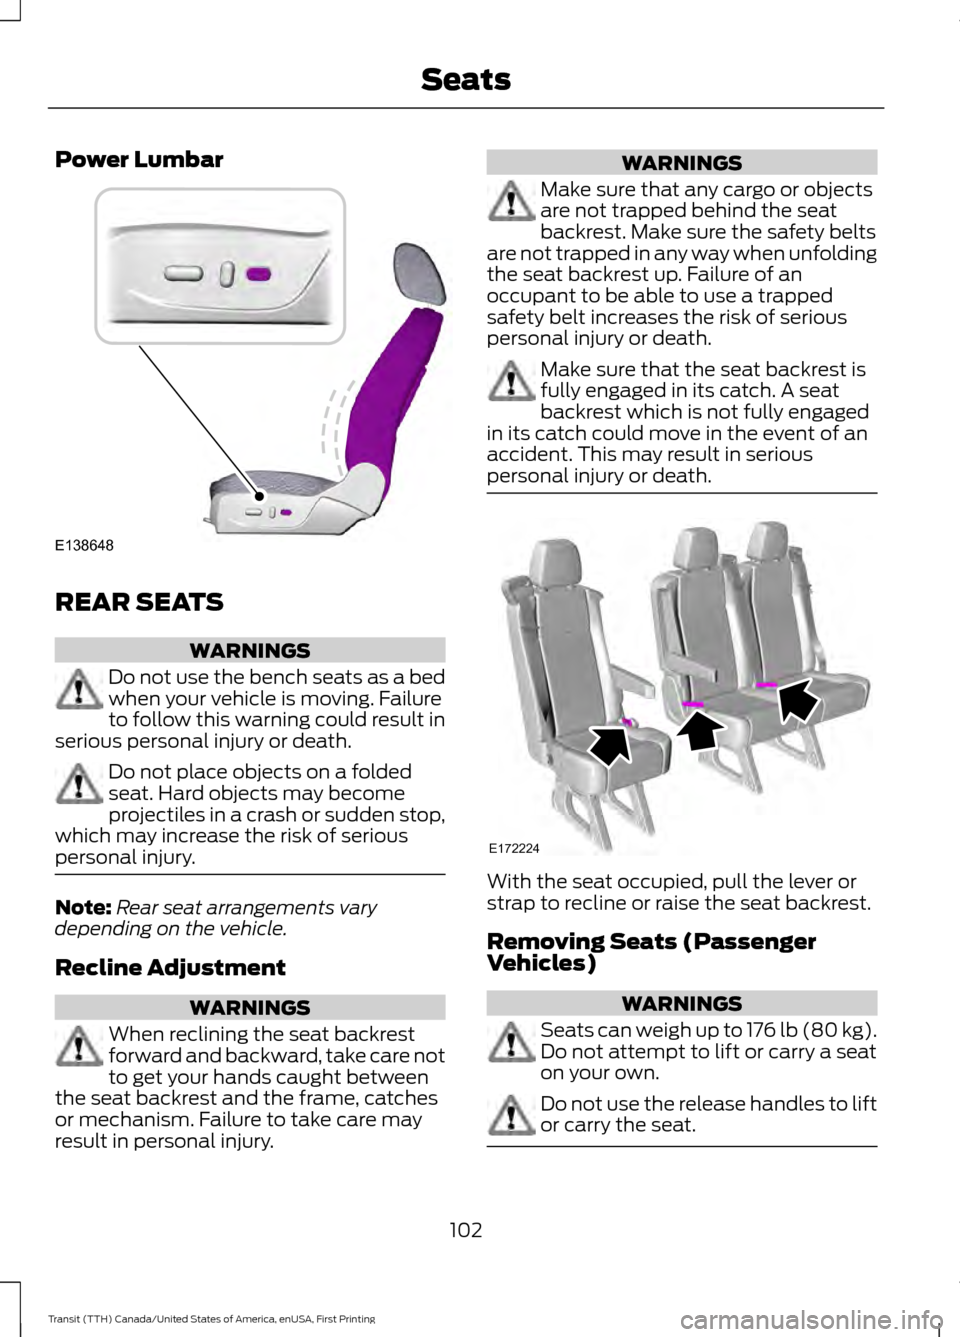
Power Lumbar
REAR SEATS
WARNINGS
Do not use the bench seats as a bed
when your vehicle is moving. Failure
to follow this warning could result in
serious personal injury or death. Do not place objects on a folded
seat. Hard objects may become
projectiles in a crash or sudden stop,
which may increase the risk of serious
personal injury. Note:
Rear seat arrangements vary
depending on the vehicle.
Recline Adjustment WARNINGS
When reclining the seat backrest
forward and backward, take care not
to get your hands caught between
the seat backrest and the frame, catches
or mechanism. Failure to take care may
result in personal injury. WARNINGS
Make sure that any cargo or objects
are not trapped behind the seat
backrest. Make sure the safety belts
are not trapped in any way when unfolding
the seat backrest up. Failure of an
occupant to be able to use a trapped
safety belt increases the risk of serious
personal injury or death. Make sure that the seat backrest is
fully engaged in its catch. A seat
backrest which is not fully engaged
in its catch could move in the event of an
accident. This may result in serious
personal injury or death. With the seat occupied, pull the lever or
strap to recline or raise the seat backrest.
Removing Seats (Passenger
Vehicles)
WARNINGS
Seats can weigh up to 176 lb (80 kg).
Do not attempt to lift or carry a seat
on your own. Do not use the release handles to lift
or carry the seat.
102
Transit (TTH) Canada/United States of America, enUSA, First Printing SeatsE138648 E172224
Page 106 of 411
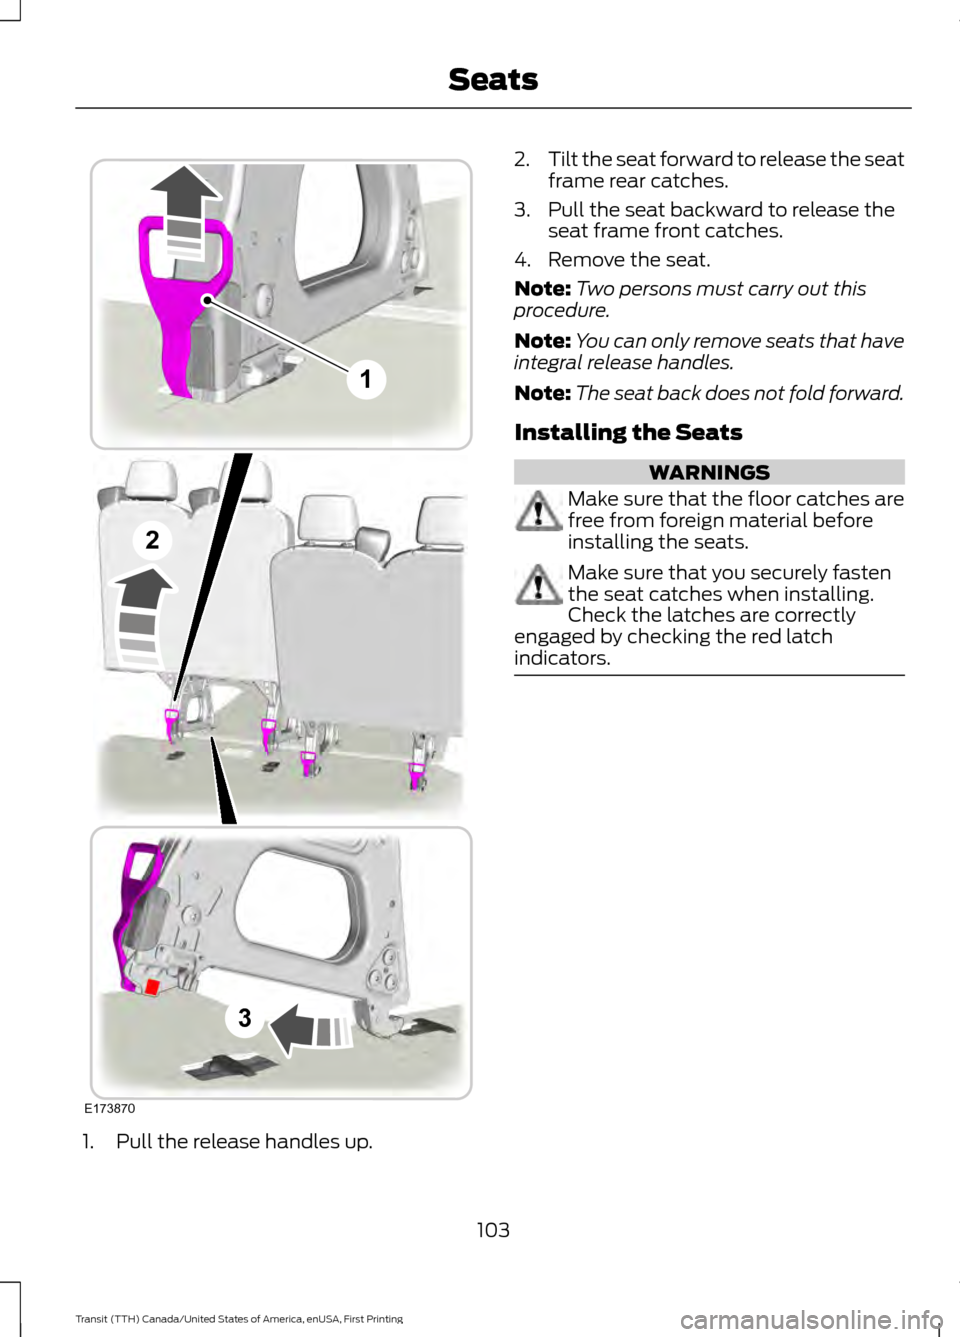
1. Pull the release handles up. 2.
Tilt the seat forward to release the seat
frame rear catches.
3. Pull the seat backward to release the seat frame front catches.
4. Remove the seat.
Note: Two persons must carry out this
procedure.
Note: You can only remove seats that have
integral release handles.
Note: The seat back does not fold forward.
Installing the Seats WARNINGS
Make sure that the floor catches are
free from foreign material before
installing the seats.
Make sure that you securely fasten
the seat catches when installing.
Check the latches are correctly
engaged by checking the red latch
indicators. 103
Transit (TTH) Canada/United States of America, enUSA, First Printing SeatsE173870
1
2
3
Page 107 of 411
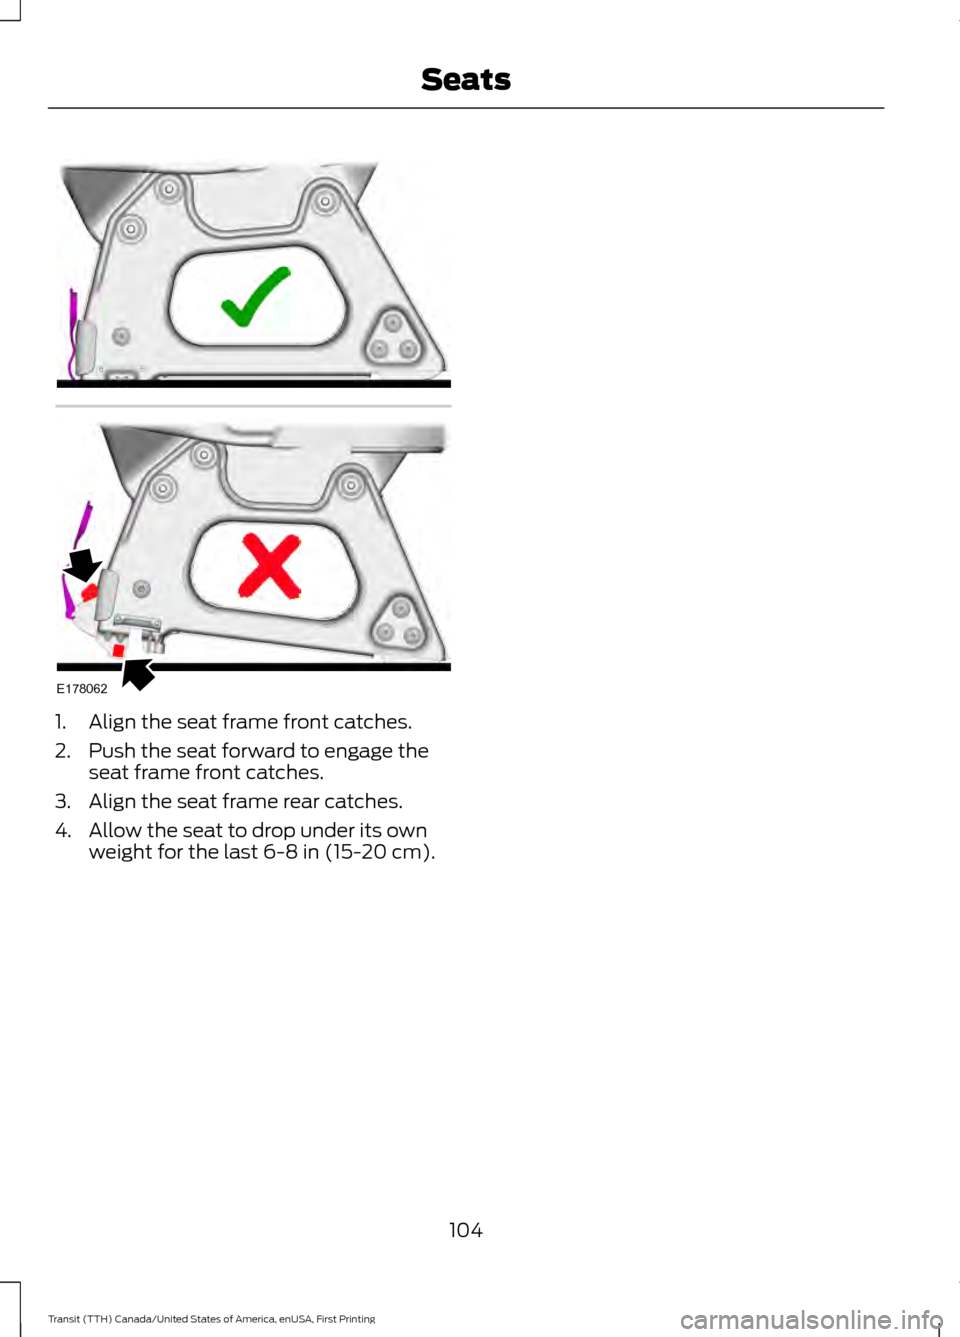
1. Align the seat frame front catches.
2. Push the seat forward to engage the
seat frame front catches.
3. Align the seat frame rear catches.
4. Allow the seat to drop under its own weight for the last 6-8 in (15-20 cm).
104
Transit (TTH) Canada/United States of America, enUSA, First Printing SeatsE178062
Page 108 of 411
12 Volt DC Power Point
WARNINGS
Do not plug optional electrical
accessories into the cigar lighter
socket. Incorrect use of the cigar
lighter can cause damage not covered by
the vehicle warranty, and can result in fire
or serious injury. Do not use a power point for
operating a cigar lighter. Incorrect
use of the power points can cause
damage not covered by the vehicle
warranty, and can result in fire or serious
injury. Note:
When you switch the ignition on, you
can use the socket to power 12 volt
appliances with a maximum current rating
of 15 amps.
If the power supply does not work after you
switch the ignition off, switch the ignition
on.
Note: Do not hang any accessory from the
accessory plug.
Note: Do not use the power point over the
vehicle capacity of 12 volt DC 180 watts or
a fuse may blow.
Note: Always keep the power point caps
closed when not in use.
Do not insert objects other than an
accessory plug into the power point. This
will damage the power point and blow the
fuse.
Run the vehicle for full capacity use of the
power point.
To prevent the battery from running out of
charge:
• Do not use the power point longer than
necessary when the vehicle is not
running.
• Do not leave devices plugged in
overnight or when you park your vehicle
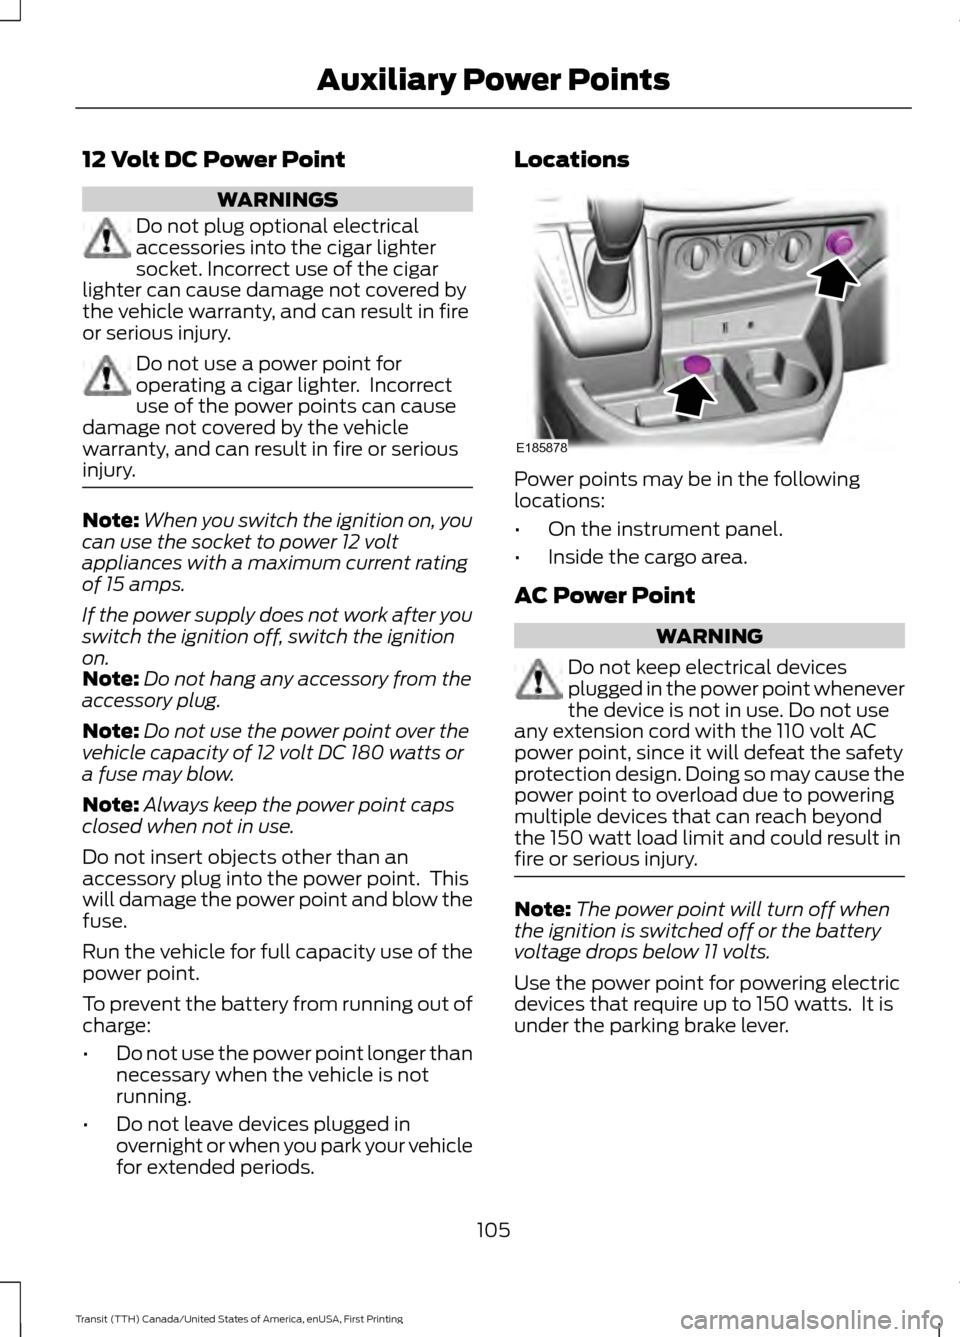
for extended periods. Locations
Power points may be in the following
locations:
•
On the instrument panel.
• Inside the cargo area.
AC Power Point WARNING
Do not keep electrical devices
plugged in the power point whenever
the device is not in use. Do not use
any extension cord with the 110 volt AC
power point, since it will defeat the safety
protection design. Doing so may cause the
power point to overload due to powering
multiple devices that can reach beyond
the 150 watt load limit and could result in
fire or serious injury. Note:
The power point will turn off when
the ignition is switched off or the battery
voltage drops below 11 volts.
Use the power point for powering electric
devices that require up to 150 watts. It is
under the parking brake lever.
105
Transit (TTH) Canada/United States of America, enUSA, First Printing Auxiliary Power PointsE185878
Page 109 of 411
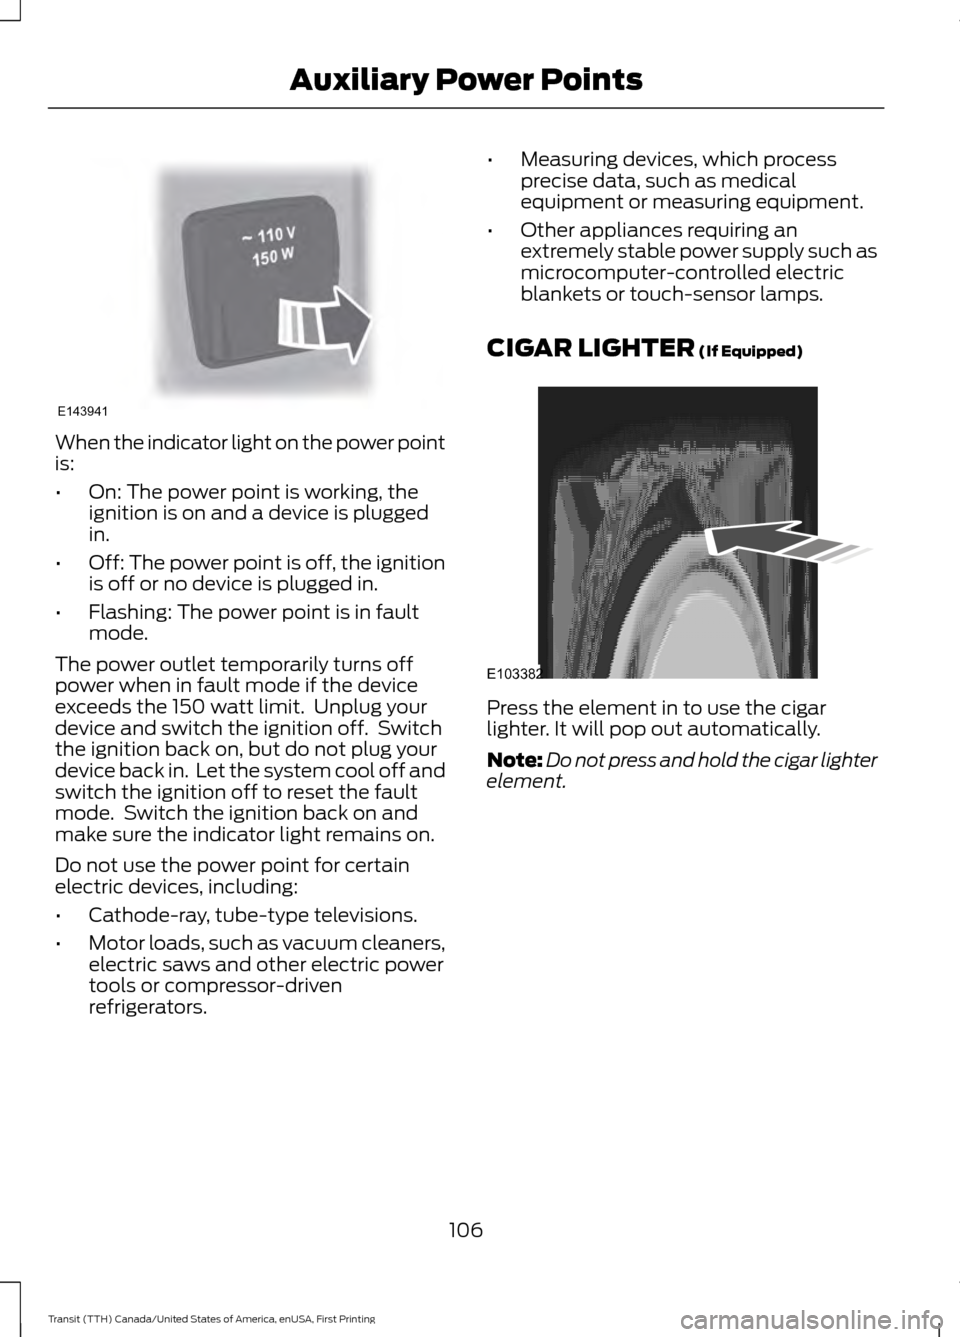
When the indicator light on the power point
is:
•
On: The power point is working, the
ignition is on and a device is plugged
in.
• Off: The power point is off, the ignition
is off or no device is plugged in.
• Flashing: The power point is in fault
mode.
The power outlet temporarily turns off
power when in fault mode if the device
exceeds the 150 watt limit. Unplug your
device and switch the ignition off. Switch
the ignition back on, but do not plug your
device back in. Let the system cool off and
switch the ignition off to reset the fault
mode. Switch the ignition back on and
make sure the indicator light remains on.
Do not use the power point for certain
electric devices, including:
• Cathode-ray, tube-type televisions.
• Motor loads, such as vacuum cleaners,
electric saws and other electric power
tools or compressor-driven
refrigerators. •
Measuring devices, which process
precise data, such as medical
equipment or measuring equipment.
• Other appliances requiring an
extremely stable power supply such as
microcomputer-controlled electric
blankets or touch-sensor lamps.
CIGAR LIGHTER (If Equipped) Press the element in to use the cigar
lighter. It will pop out automatically.
Note:
Do not press and hold the cigar lighter
element.
106
Transit (TTH) Canada/United States of America, enUSA, First Printing Auxiliary Power PointsE143941 E103382
Page 110 of 411
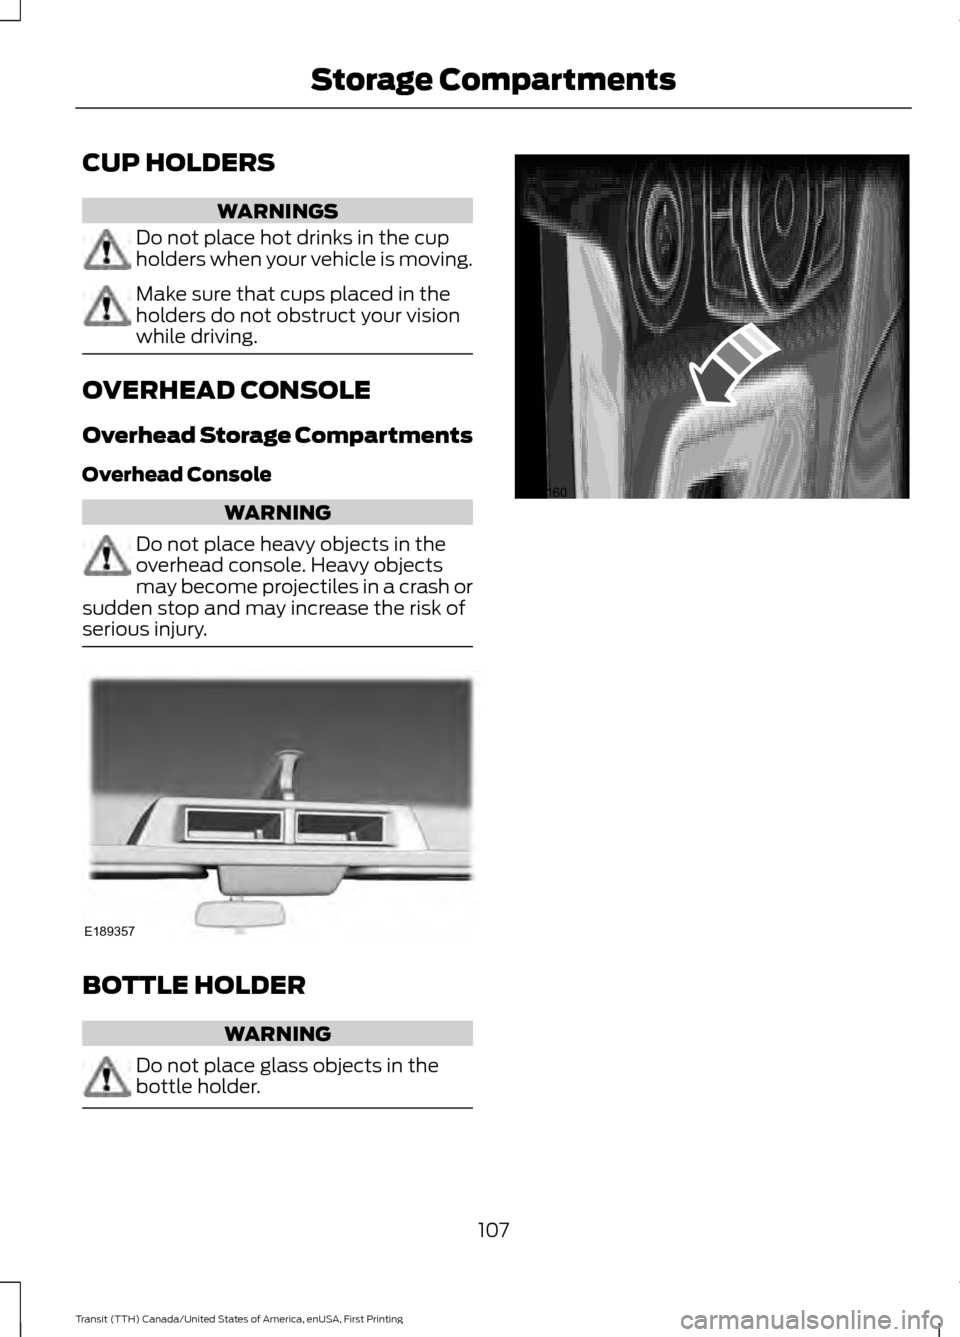
CUP HOLDERS
WARNINGS
Do not place hot drinks in the cup
holders when your vehicle is moving.
Make sure that cups placed in the
holders do not obstruct your vision
while driving.
OVERHEAD CONSOLE
Overhead Storage Compartments
Overhead Console
WARNING
Do not place heavy objects in the
overhead console. Heavy objects
may become projectiles in a crash or
sudden stop and may increase the risk of
serious injury. BOTTLE HOLDER
WARNING
Do not place glass objects in the
bottle holder.
107
Transit (TTH) Canada/United States of America, enUSA, First Printing Storage CompartmentsE189357 E171160