light FORD TRANSIT CONNECT 2020 Owner's Manual
[x] Cancel search | Manufacturer: FORD, Model Year: 2020, Model line: TRANSIT CONNECT, Model: FORD TRANSIT CONNECT 2020Pages: 509, PDF Size: 7.73 MB
Page 88 of 509
HEADLAMP EXIT DELAY
After you switch the ignition off, you can
switch the headlamps on by pulling the
direction indicator lever toward you. You
will hear a short tone. The headlamps will
switch off automatically after three
minutes with any door open or 30 seconds
after the last door has been closed. You
can cancel this feature by pulling the
direction indicator toward you again or
switching the ignition on.
DAYTIME RUNNING LAMPS
WARNING: The daytime running
lamps system does not activate the rear
lamps and may not provide adequate
lighting during low visibility driving
conditions. Also, the autolamps switch
position may not activate the headlamps
in all low visibility conditions, such as
daytime fog. Make sure the headlamps
are switched to auto or on, as
appropriate, during all low visibility
conditions. Failure to do so may result in
a crash.
Type 1 - Conventional (Non-
Configurable)
The daytime running lamps turn on when:
1. The ignition is switched to the on position.
2. The lighting control is in the off, parking
lamp or autolamps positions.
3. The headlamps are off.
Type 2 - Configurable
Switch the daytime running lamps on or
off using the information display controls.
See
Information Displays (page 98). The daytime running lamps turn on when:
1.
They are switched on in the information
display. See
Information Displays
(page 98).
2. The ignition is switched to the on position.
3. The lighting control is in the autolamps
position.
4. The headlamps are off.
The other lighting control switch positions
do not activate the daytime running lamps,
and you can use them to temporarily
override autolamp control.
When switched off in the information
display, the daytime running lamps are off
in all lighting control switch positions.
AUTOMATIC HIGH BEAM
CONTROL WARNING:
The system does not
relieve you of your responsibility to drive
with due care and attention. You may
need to override the system if it does not
turn the high beams on or off. WARNING:
You may need to
override the system when approaching
other road users. WARNING:
You may need to
override the system during inclement
weather. WARNING:
Do not use the system
in poor visibility, for example fog, heavy
rain, spray or snow. WARNING:
The system may not
switch the high beams off if the lights of
oncoming vehicles are hidden by
obstacles, for example guard rails.
84
2020 Transit Connect (CHC) Canada/United States of America, CG3739en enUSA, Edition date: 201903, First-Printing Lighting
Page 89 of 509
WARNING: Inspect and replace
the windshield wiper blades regularly to
make sure the camera sensor has a clear
view. The windshield wiper blades must
be the correct length.
The system is designed to turn the high
beams on if all of the following occur:
• You switched the system on in the
information display.
• You set the lighting control to the
autolamps position.
• The ambient light level is low enough
that high beams are required.
• There is no traffic in front of your
vehicle.
• Your vehicle speed is greater than
approximately
32 mph (51 km/h).
The system is designed to turn the high
beams off if any of the following occur:
• You switch the system off in the
information display.
• You set the lighting control to any
position except autolamps. •
You switch the rear fog lamps on.
• The ambient light level is high enough
that high beams are not required.
• The system detects an approaching
vehicle's headlamps or rear lamps.
• The system detects severe rain, snow
or fog.
• The system detects street lighting.
• The camera has reduced visibility.
• Your vehicle speed falls below
approximately
27 mph (44 km/h).
Note: The deactivation speed is lower on
curves.
Note: High beam reactivation may be
delayed in certain curvy road situations.
Note: Using much larger tires or equipping
vehicle accessories such as snowplows can
modify your vehicle's ride height and
degrade automatic high beam control
performance.
Switching Automatic High Beam Control On or Off
To switch the system on or off, use the information display controls on the steering
wheel to select the following: Action
Menu Item
Press the menu button.
Settings
Press the
OK button.
Vehicle Settings
Press the
OK button.
Lighting
Press the
OK button.
Auto Highbeam
85
2020 Transit Connect (CHC) Canada/United States of America, CG3739en enUSA, Edition date: 201903, First-Printing Lighting
Page 90 of 509
Automatic High Beam Indicator
It illuminates to confirm when
the system is ready to assist.
Overriding Automatic High Beam
Control
Push the lever away from you to switch
between high beam and low beam.
Automatic High Beam Control Information Messages Description
Message
The camera has reduced visibility. Clean the windshield. If
the message continues to appear, have your vehicle checked
as soon as possible.
Front Camera Low Visib-
ility Clean Screen
The camera has malfunctioned. Wait a short period of time
for the camera to cool down. If the message continues to
appear, have your vehicle checked as soon as possible.
Front Camera Tempor-
arily Not Available
FRONT FOG LAMPS
Switching the Front Fog Lamps On
or Off
Only switch the front fog lamps on during
reduced visibility.
You can switch the front fog lamps on if
any of the following occur:
• You set the lighting control to the
parking lamps position.
• You set the lighting control to the
headlamps position.
• You set the lighting control to the
autolamps position and the headlamps
are on. The front fog lamp button is on the lighting
control. Press the button to switch the
front fog lamps on or off.
Note: The brightness of the daytime running
lamps decreases when the front fog lamps
are switched on.
Front Fog Lamp Indicator It illuminates when you switch
the front fog lamps on.
86
2020 Transit Connect (CHC) Canada/United States of America, CG3739en enUSA, Edition date: 201903, First-Printing Lighting
Page 91 of 509
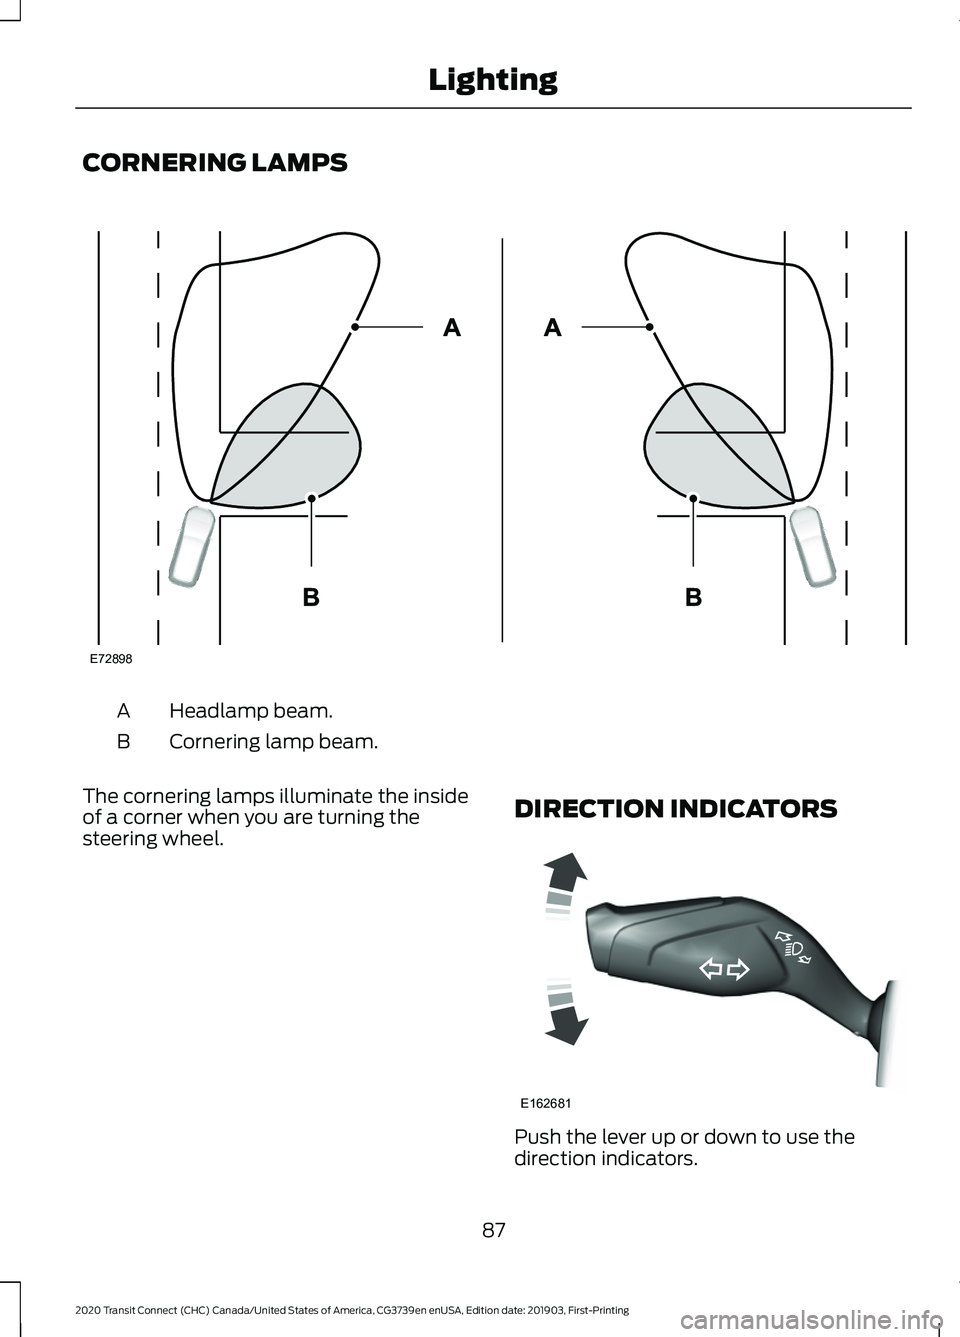
CORNERING LAMPS
Headlamp beam.
A
Cornering lamp beam.
B
The cornering lamps illuminate the inside
of a corner when you are turning the
steering wheel. DIRECTION INDICATORS Push the lever up or down to use the
direction indicators.
87
2020 Transit Connect (CHC) Canada/United States of America, CG3739en enUSA, Edition date: 201903, First-Printing LightingE72898 E162681
Page 92 of 509
Note:
Tap the lever up or down to make the
direction indicators flash three times to
indicate a lane change.
INTERIOR LAMPS
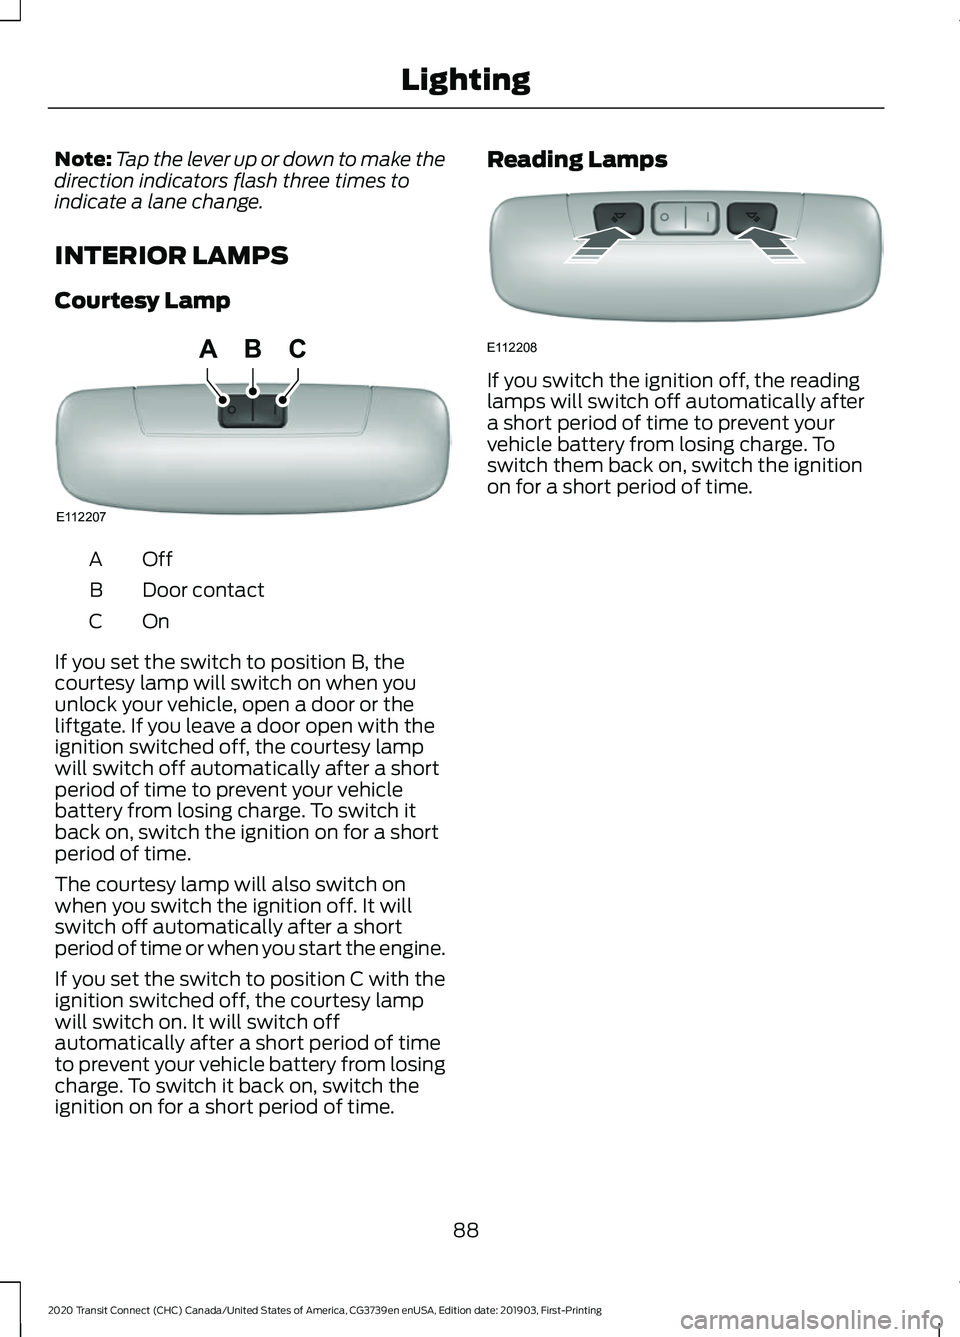
Courtesy Lamp OffA
Door contact
B
OnC
If you set the switch to position B, the
courtesy lamp will switch on when you
unlock your vehicle, open a door or the
liftgate. If you leave a door open with the
ignition switched off, the courtesy lamp
will switch off automatically after a short
period of time to prevent your vehicle
battery from losing charge. To switch it
back on, switch the ignition on for a short
period of time.
The courtesy lamp will also switch on
when you switch the ignition off. It will
switch off automatically after a short
period of time or when you start the engine.
If you set the switch to position C with the
ignition switched off, the courtesy lamp
will switch on. It will switch off
automatically after a short period of time
to prevent your vehicle battery from losing
charge. To switch it back on, switch the
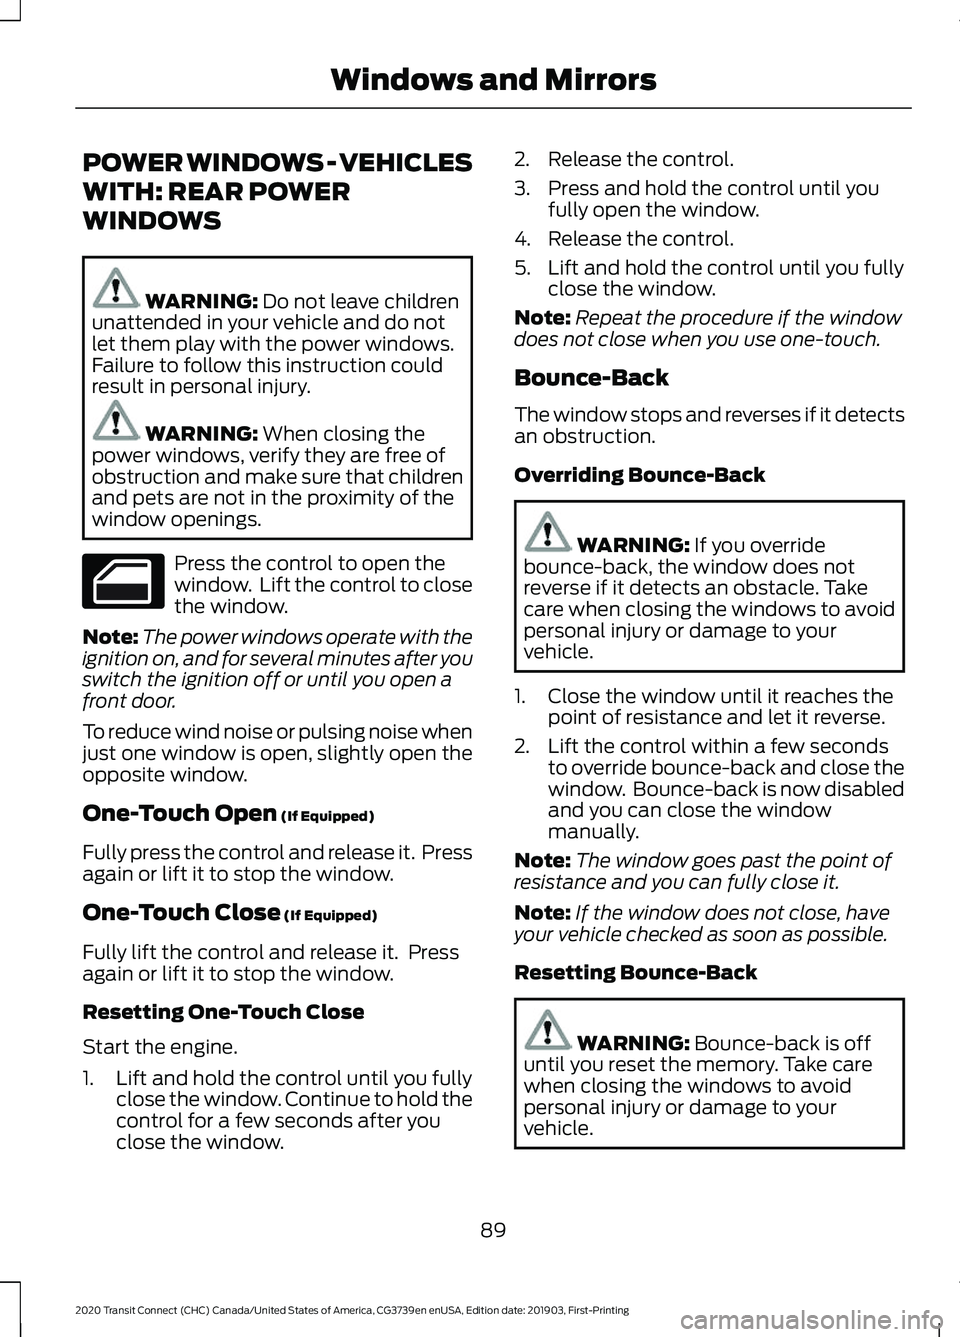
ignition on for a short period of time. Reading Lamps
If you switch the ignition off, the reading
lamps will switch off automatically after
a short period of time to prevent your
vehicle battery from losing charge. To
switch them back on, switch the ignition
on for a short period of time.
88
2020 Transit Connect (CHC) Canada/United States of America, CG3739en enUSA, Edition date: 201903, First-Printing LightingE112207
BCA E112208
Page 93 of 509
POWER WINDOWS - VEHICLES
WITH: REAR POWER
WINDOWS
WARNING: Do not leave children
unattended in your vehicle and do not
let them play with the power windows.
Failure to follow this instruction could
result in personal injury. WARNING:
When closing the
power windows, verify they are free of
obstruction and make sure that children
and pets are not in the proximity of the
window openings. Press the control to open the
window. Lift the control to close
the window.
Note: The power windows operate with the
ignition on, and for several minutes after you
switch the ignition off or until you open a
front door.
To reduce wind noise or pulsing noise when
just one window is open, slightly open the
opposite window.
One-Touch Open
(If Equipped)
Fully press the control and release it. Press
again or lift it to stop the window.
One-Touch Close
(If Equipped)
Fully lift the control and release it. Press
again or lift it to stop the window.
Resetting One-Touch Close
Start the engine.
1. Lift and hold the control until you fully close the window. Continue to hold the
control for a few seconds after you
close the window. 2. Release the control.
3. Press and hold the control until you
fully open the window.
4. Release the control.
5. Lift and hold the control until you fully close the window.
Note: Repeat the procedure if the window
does not close when you use one-touch.
Bounce-Back
The window stops and reverses if it detects
an obstruction.
Overriding Bounce-Back WARNING:
If you override
bounce-back, the window does not
reverse if it detects an obstacle. Take
care when closing the windows to avoid
personal injury or damage to your
vehicle.
1. Close the window until it reaches the point of resistance and let it reverse.
2. Lift the control within a few seconds to override bounce-back and close the
window. Bounce-back is now disabled
and you can close the window
manually.
Note: The window goes past the point of
resistance and you can fully close it.
Note: If the window does not close, have
your vehicle checked as soon as possible.
Resetting Bounce-Back WARNING:
Bounce-back is off
until you reset the memory. Take care
when closing the windows to avoid
personal injury or damage to your
vehicle.
89
2020 Transit Connect (CHC) Canada/United States of America, CG3739en enUSA, Edition date: 201903, First-Printing Windows and Mirrors
Page 94 of 509
Start the engine.
1. Lift and hold the control until you fully
close the window. Continue to hold the
control for a few seconds after you
close the window.
2. Release the control.
3. Press and hold the control until you fully open the window.
4. Release the control.
5. Lift and hold the control until you fully close the window.
Note: Repeat the procedure if the window
does not close when you use one-touch.
Rear Window Lock Press the control to lock or
unlock the rear window controls.
It illuminates when you lock the
rear window controls.
POWER WINDOWS - VEHICLES
WITH: ONE-TOUCH OPEN
DRIVER WINDOW WARNING: Do not leave children
unattended in your vehicle and do not
let them play with the power windows.
Failure to follow this instruction could
result in personal injury. WARNING:
When closing the
power windows, verify they are free of
obstruction and make sure that children
and pets are not in the proximity of the
window openings. Press the control to open the
window. Lift the control to close
the window. Note:
The power windows operate with the
ignition on, and for several minutes after you
switch the ignition off or until you open a
front door.
To reduce wind noise or pulsing noise when
just one window is open, slightly open the
opposite window.
One-Touch Open
(If Equipped)
Fully press the control and release it. Press
again or lift it to stop the window.
GLOBAL OPENING
1. Press and release the unlock button on
the remote control.
2. Press and hold the unlock button on the remote control.
3. Release the button when the windows
start to open.
Press the lock or the unlock button on the
remote control to stop global opening.
Note: You can use global opening for a
short period of time when you unlock your
vehicle using the remote control.
EXTERIOR MIRRORS
Adjusting the Mirrors WARNING:
Do not adjust the
mirrors when your vehicle is moving. This
could result in the loss of control of your
vehicle, serious personal injury or death.
90
2020 Transit Connect (CHC) Canada/United States of America, CG3739en enUSA, Edition date: 201903, First-Printing Windows and Mirrors
Page 95 of 509
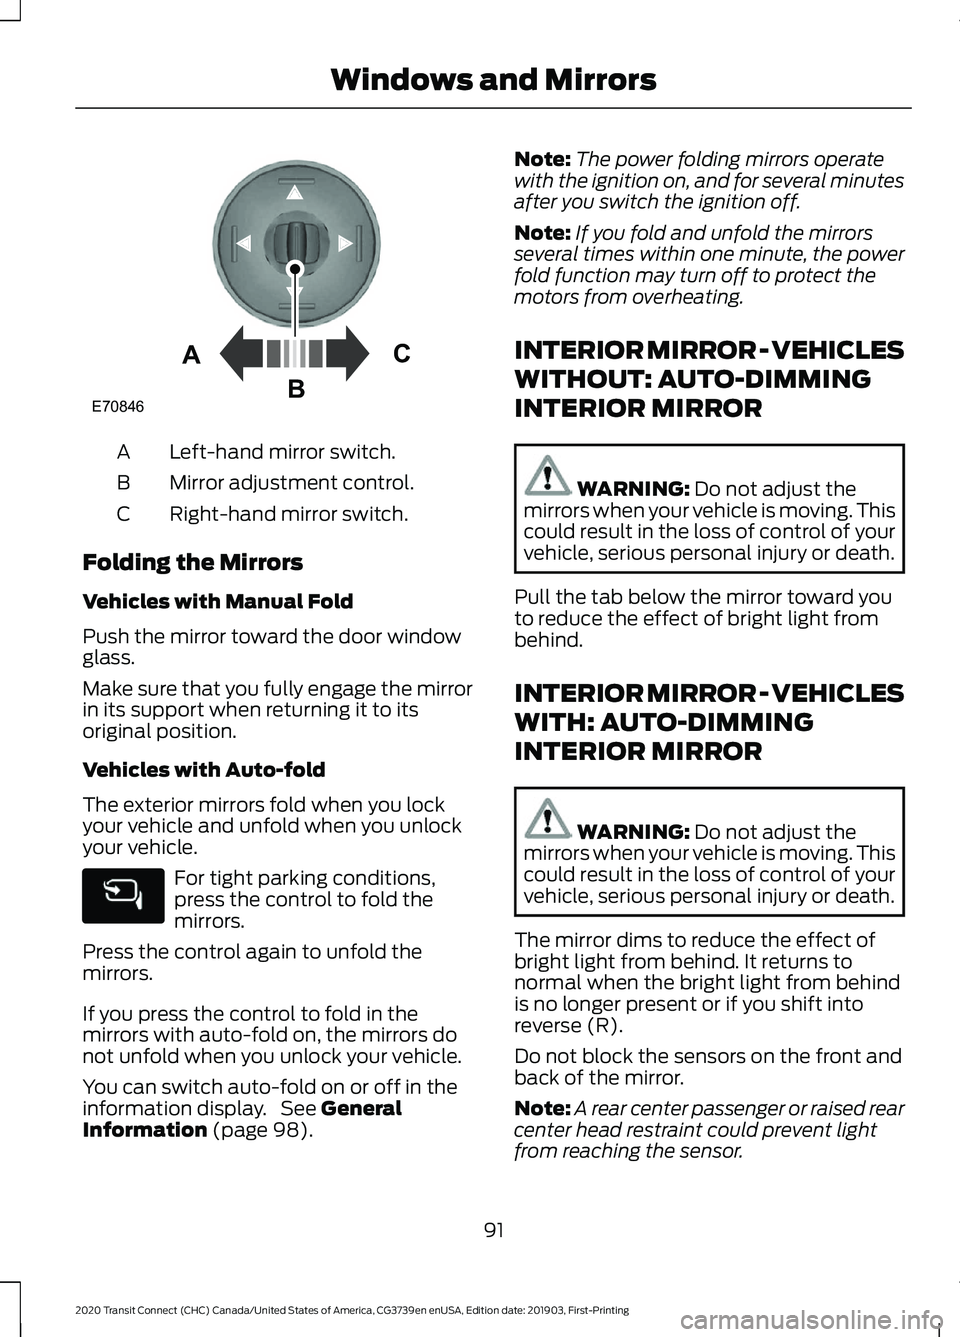
Left-hand mirror switch.
A
Mirror adjustment control.
B
Right-hand mirror switch.
C
Folding the Mirrors
Vehicles with Manual Fold
Push the mirror toward the door window
glass.
Make sure that you fully engage the mirror
in its support when returning it to its
original position.
Vehicles with Auto-fold
The exterior mirrors fold when you lock
your vehicle and unfold when you unlock
your vehicle. For tight parking conditions,
press the control to fold the
mirrors.
Press the control again to unfold the
mirrors.
If you press the control to fold in the
mirrors with auto-fold on, the mirrors do
not unfold when you unlock your vehicle.
You can switch auto-fold on or off in the
information display. See General
Information (page 98). Note:
The power folding mirrors operate
with the ignition on, and for several minutes
after you switch the ignition off.
Note: If you fold and unfold the mirrors
several times within one minute, the power
fold function may turn off to protect the
motors from overheating.
INTERIOR MIRROR - VEHICLES
WITHOUT: AUTO-DIMMING
INTERIOR MIRROR WARNING:
Do not adjust the
mirrors when your vehicle is moving. This
could result in the loss of control of your
vehicle, serious personal injury or death.
Pull the tab below the mirror toward you
to reduce the effect of bright light from
behind.
INTERIOR MIRROR - VEHICLES
WITH: AUTO-DIMMING
INTERIOR MIRROR WARNING:
Do not adjust the
mirrors when your vehicle is moving. This
could result in the loss of control of your
vehicle, serious personal injury or death.
The mirror dims to reduce the effect of
bright light from behind. It returns to
normal when the bright light from behind
is no longer present or if you shift into
reverse (R).
Do not block the sensors on the front and
back of the mirror.
Note: A rear center passenger or raised rear
center head restraint could prevent light
from reaching the sensor.
91
2020 Transit Connect (CHC) Canada/United States of America, CG3739en enUSA, Edition date: 201903, First-Printing Windows and MirrorsE70846A
C
B
Page 118 of 509
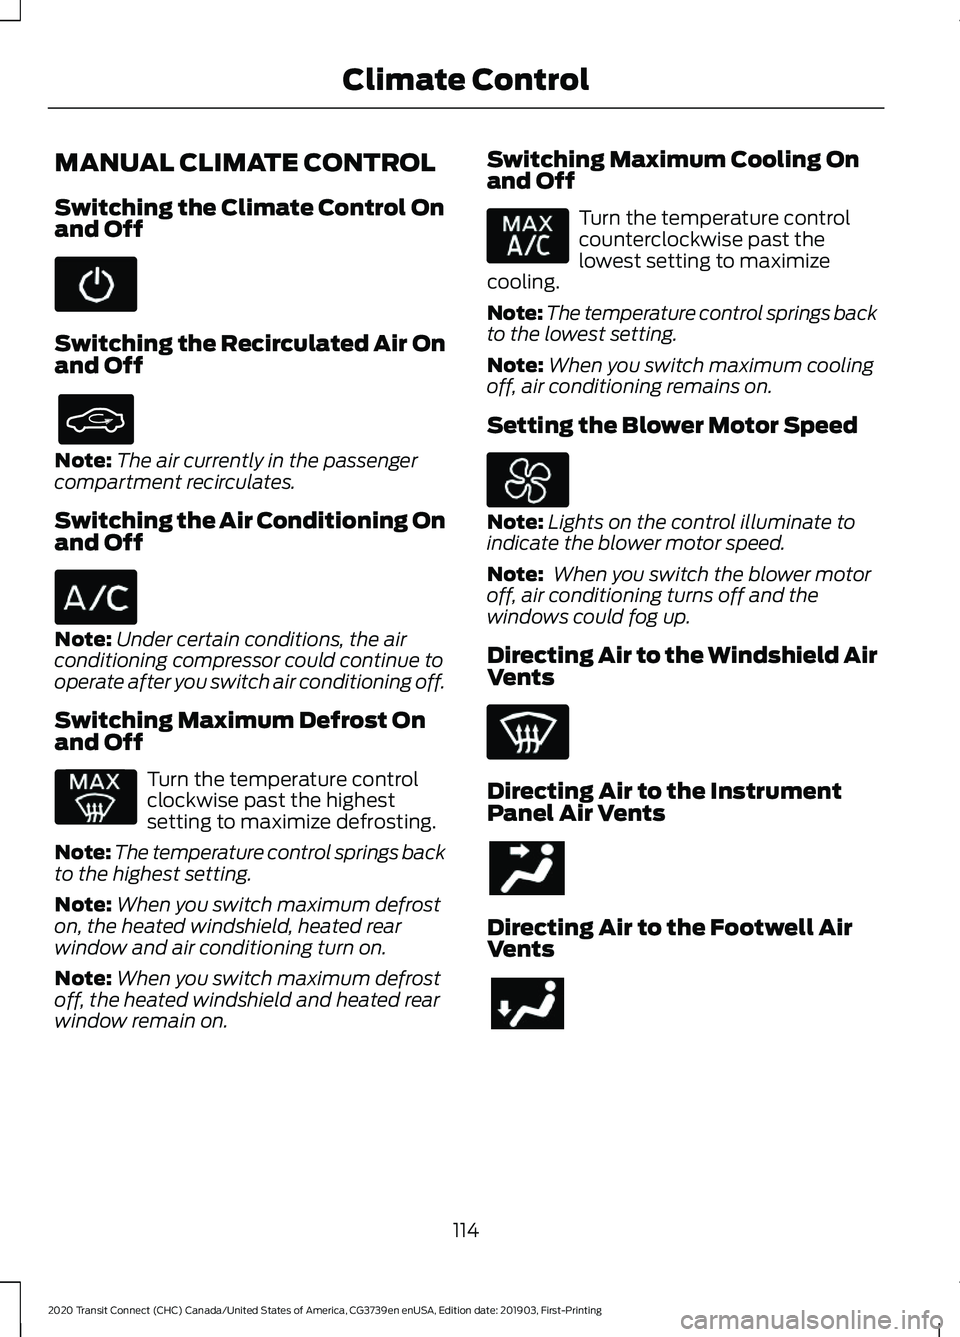
MANUAL CLIMATE CONTROL
Switching the Climate Control On
and Off
Switching the Recirculated Air On
and Off
Note:
The air currently in the passenger
compartment recirculates.
Switching the Air Conditioning On
and Off Note:
Under certain conditions, the air
conditioning compressor could continue to
operate after you switch air conditioning off.
Switching Maximum Defrost On
and Off Turn the temperature control
clockwise past the highest
setting to maximize defrosting.
Note: The temperature control springs back
to the highest setting.
Note: When you switch maximum defrost
on, the heated windshield, heated rear
window and air conditioning turn on.
Note: When you switch maximum defrost
off, the heated windshield and heated rear
window remain on. Switching Maximum Cooling On
and Off Turn the temperature control
counterclockwise past the
lowest setting to maximize
cooling.
Note: The temperature control springs back
to the lowest setting.
Note: When you switch maximum cooling
off, air conditioning remains on.
Setting the Blower Motor Speed Note:
Lights on the control illuminate to
indicate the blower motor speed.
Note: When you switch the blower motor
off, air conditioning turns off and the
windows could fog up.
Directing Air to the Windshield Air
Vents Directing Air to the Instrument
Panel Air Vents
Directing Air to the Footwell Air
Vents
114
2020 Transit Connect (CHC) Canada/United States of America, CG3739en enUSA, Edition date: 201903, First-Printing Climate Control
Page 120 of 509
Setting the Blower Motor Speed
Press and release + or - to set
the volume of air circulated in
the passenger compartment.
Note: Lights on the control illuminate to
indicate the blower motor speed.
Directing Air to the Windshield Air
Vents Directing Air to the Instrument
Panel Air Vents
Directing Air to the Footwell Air
Vents
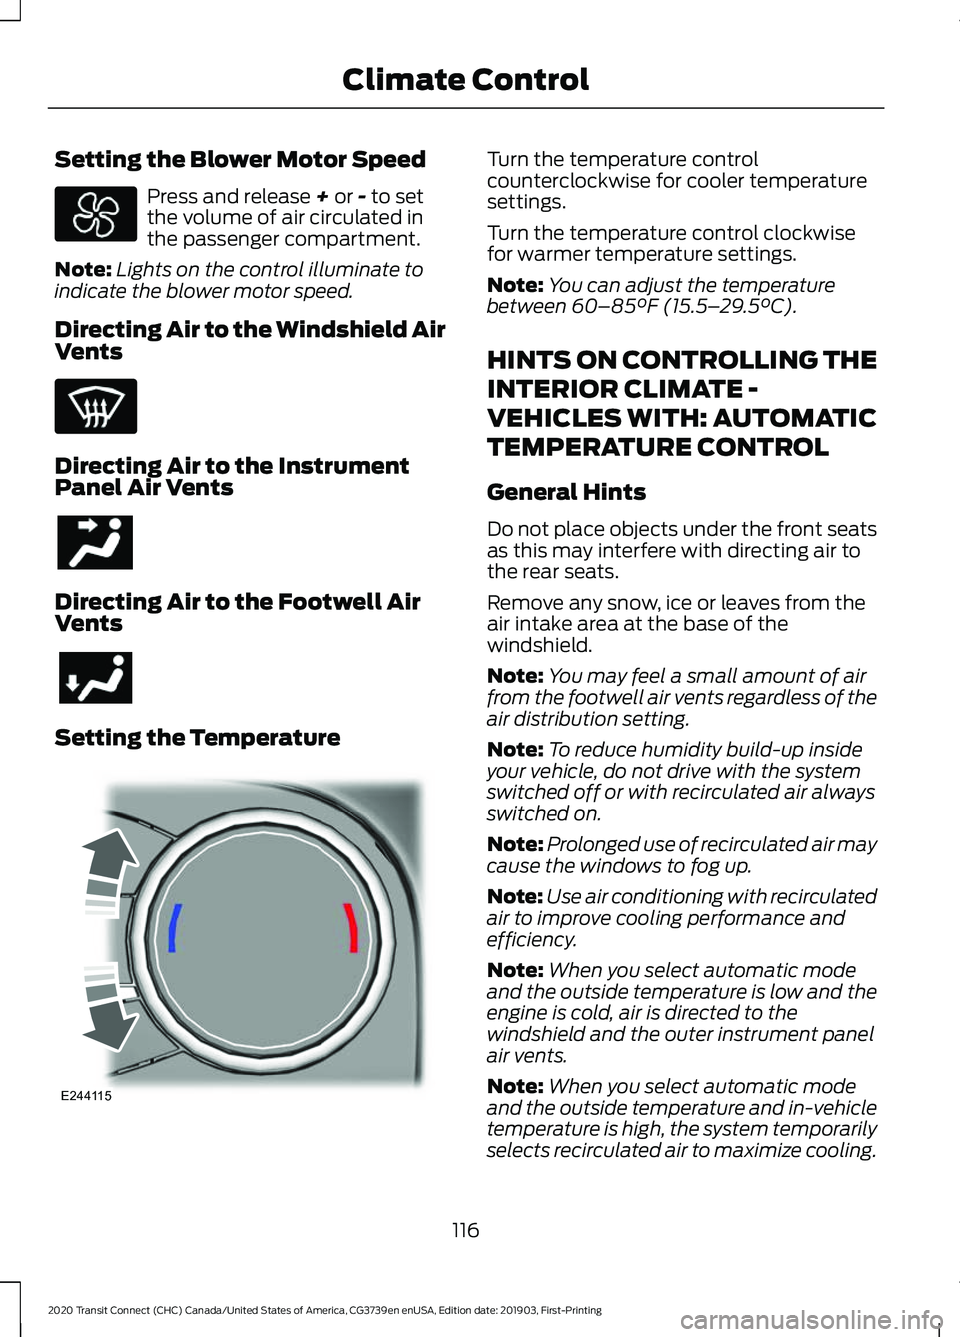
Setting the Temperature Turn the temperature control
counterclockwise for cooler temperature
settings.
Turn the temperature control clockwise
for warmer temperature settings.
Note:
You can adjust the temperature
between
60–85°F (15.5– 29.5°C).
HINTS ON CONTROLLING THE
INTERIOR CLIMATE -
VEHICLES WITH: AUTOMATIC
TEMPERATURE CONTROL
General Hints
Do not place objects under the front seats
as this may interfere with directing air to
the rear seats.
Remove any snow, ice or leaves from the
air intake area at the base of the
windshield.
Note: You may feel a small amount of air
from the footwell air vents regardless of the
air distribution setting.
Note: To reduce humidity build-up inside
your vehicle, do not drive with the system
switched off or with recirculated air always
switched on.
Note: Prolonged use of recirculated air may
cause the windows to fog up.
Note: Use air conditioning with recirculated
air to improve cooling performance and
efficiency.
Note: When you select automatic mode
and the outside temperature is low and the
engine is cold, air is directed to the
windshield and the outer instrument panel
air vents.
Note: When you select automatic mode
and the outside temperature and in-vehicle
temperature is high, the system temporarily
selects recirculated air to maximize cooling.
116
2020 Transit Connect (CHC) Canada/United States of America, CG3739en enUSA, Edition date: 201903, First-Printing Climate Control E244115