light FORD TRANSIT CONNECT 2020 Service Manual
[x] Cancel search | Manufacturer: FORD, Model Year: 2020, Model line: TRANSIT CONNECT, Model: FORD TRANSIT CONNECT 2020Pages: 509, PDF Size: 7.73 MB
Page 171 of 509
Continuing to drive your vehicle may cause
reduced power or the engine to stop.
Failure to respond to a warning lamp may
cause component damage not covered by
the vehicle Warranty. Have your vehicle
checked as soon as possible.
See Warning Lamps and Indicators
(page 94).
SELECTIVE CATALYTIC
REDUCTANT SYSTEM
Your vehicle has a selective catalytic
reductant system to help reduce exhaust
emission levels by injecting diesel exhaust
fluid into the exhaust system. The engine
may not start if you tamper with or disable
the selective catalytic reductant system.
For the system to correctly operate, you
must maintain the fluid level. The
minimum fluid refill quantity required to
restart the engine is
1.3 gal (5 L).
Note: If your vehicle is on a gradient, the
minimum fluid refill quantity required to
restart the engine may be greater than
1.3 gal (5 L)
.
Diesel Exhaust Fluid Guidelines
• Do not put in the vehicle fuel tank. This
can cause engine damage not covered
by the vehicle Warranty.
• Do not overfill the tank.
• Do not dilute with water or any other
liquid.
• Do not re-use an empty fluid container. •
Do not store in direct sunlight.
• Store at temperatures between
23°F
(-5°C) and 68°F (20°C).
• Do not store fluid containers in your
vehicle.
• The fluid is non-flammable, non-toxic,
colorless and water-soluble.
Filling the Diesel Exhaust Fluid
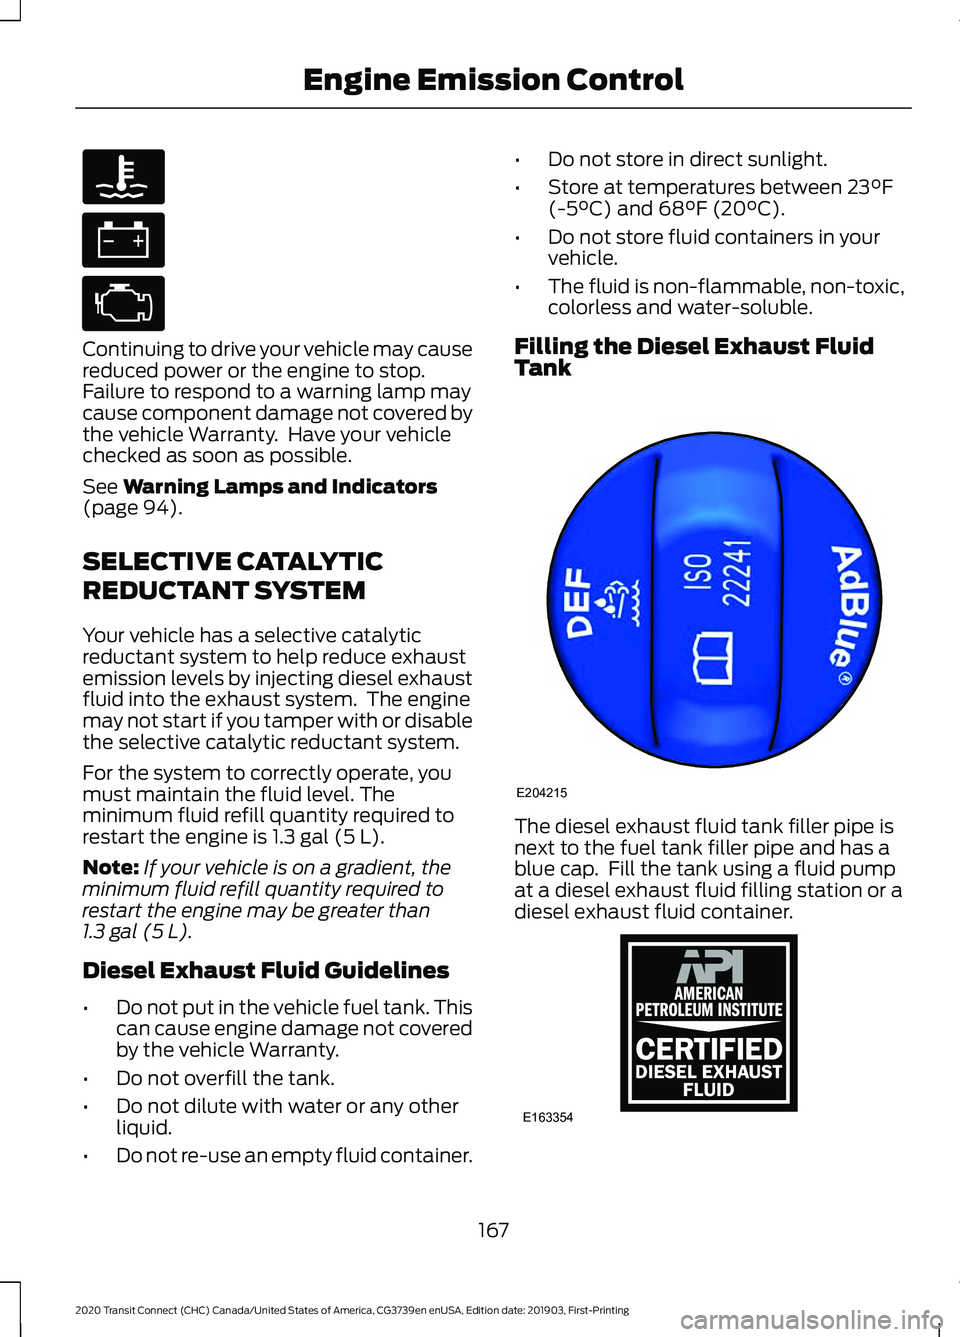
Tank The diesel exhaust fluid tank filler pipe is
next to the fuel tank filler pipe and has a
blue cap. Fill the tank using a fluid pump
at a diesel exhaust fluid filling station or a
diesel exhaust fluid container.
167
2020 Transit Connect (CHC) Canada/United States of America, CG3739en enUSA, Edition date: 201903, First-Printing Engine Emission Control E204215 E163354)E163354
Page 172 of 509
Only use diesel exhaust fluid that is
certified by the American Petroleum
Institute (API). Non-certified diesel
exhaust fluid use can cause damage not
covered by the vehicle Warranty.
Note:
Wash off any fluid that may have
spilled on to a painted surface with soapy
water.
Filling in Cold Climates
Diesel exhaust fluid may freeze when the
temperature is below 12°F (-11°C). Your
vehicle has a preheating system which
allows the fluid to operate below
12°F
(-11°C). If you overfill the diesel exhaust
fluid tank and the fluid freezes, it may
cause damage not covered by the vehicle
Warranty.
Filling the Diesel Exhaust Fluid
Tank Using a Fuel Station Pump WARNING:
Keep diesel exhaust
fluid out of reach of children. Avoid
contact with skin, eyes or clothing. In
case of contact with your eyes, flush
immediately with water and get prompt
medical attention. In case of contact
with your skin, clean immediately with
soap and water. If you swallow any
diesel exhaust fluid, drink plenty of
water, call a physician immediately. WARNING:
Only refill the diesel
exhaust fluid tank in a well ventilated
area. When you remove the diesel
exhaust fluid tank filler cap or a diesel
exhaust fluid container cap, ammonia
vapors may escape. Ammonia vapors
can be irritating to skin, eyes and mucous
membranes. Inhaling ammonia vapors
can cause burning to the eyes, throat and
nose and cause coughing and watery
eyes. Filling the diesel exhaust fluid tank using
a fuel station pump is similar to refueling
your vehicle.
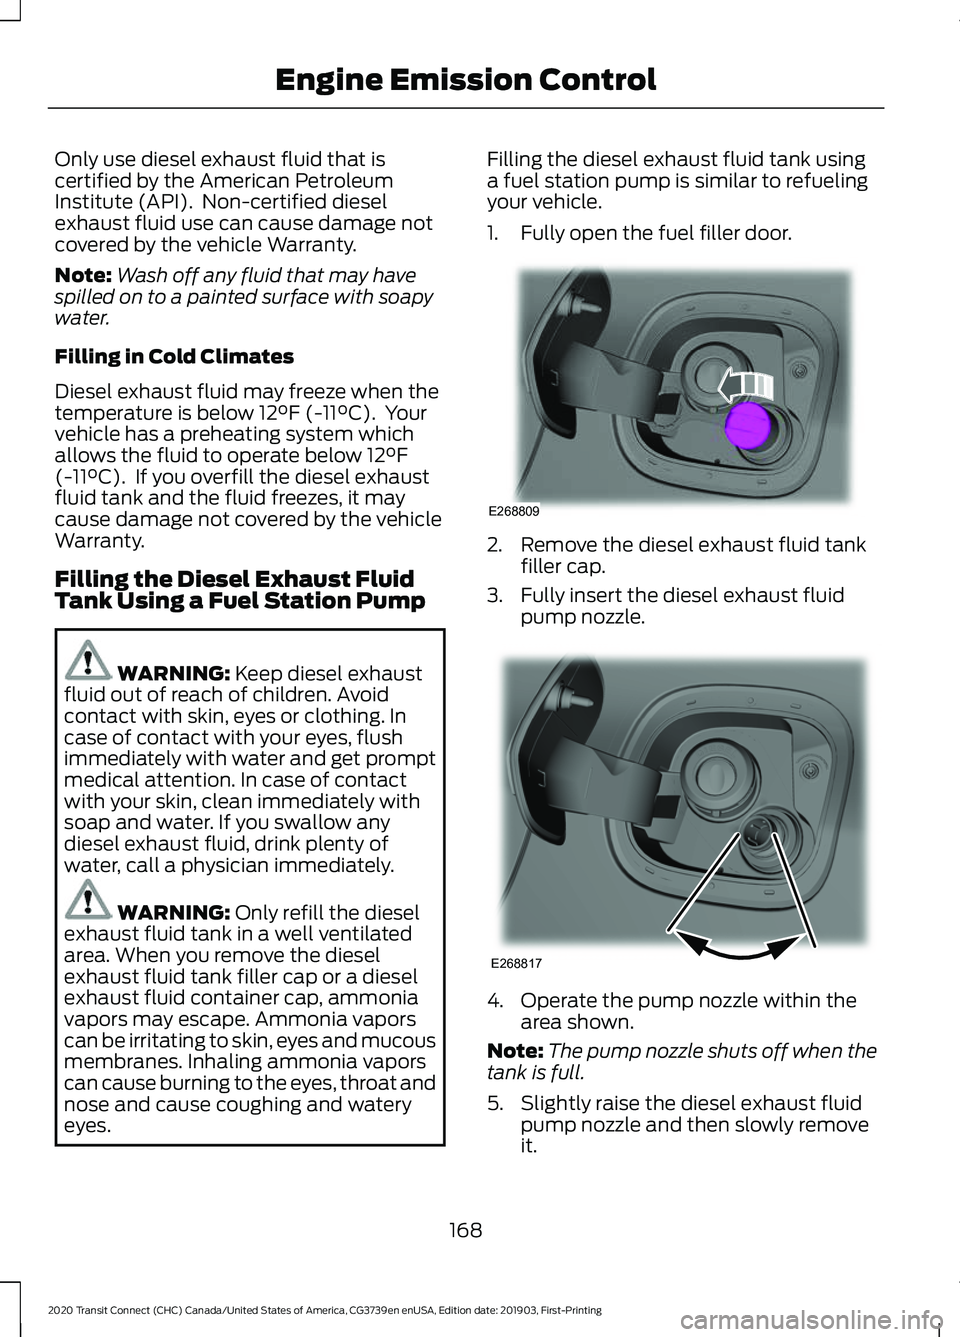
1. Fully open the fuel filler door.
2. Remove the diesel exhaust fluid tank
filler cap.
3. Fully insert the diesel exhaust fluid pump nozzle. 4. Operate the pump nozzle within the
area shown.
Note: The pump nozzle shuts off when the
tank is full.
5. Slightly raise the diesel exhaust fluid pump nozzle and then slowly remove
it.
168
2020 Transit Connect (CHC) Canada/United States of America, CG3739en enUSA, Edition date: 201903, First-Printing Engine Emission ControlE268809 E268817
Page 173 of 509
6. Replace the diesel exhaust fluid tank
filler cap. Turn it clockwise until you
feel a strong resistance.
Do not attempt to start the engine if you
have filled the diesel exhaust fluid tank
with incorrect fluid. Incorrect diesel
exhaust fluid use could cause damage not
covered by the vehicle Warranty. Have your
vehicle immediately checked.
Filling the Diesel Exhaust Fluid
Tank Using a Container WARNING: Keep diesel exhaust
fluid out of reach of children. Avoid
contact with skin, eyes or clothing. In
case of contact with your eyes, flush
immediately with water and get prompt
medical attention. In case of contact
with your skin, clean immediately with
soap and water. If you swallow any
diesel exhaust fluid, drink plenty of
water, call a physician immediately. WARNING:
Only refill the diesel
exhaust fluid tank in a well ventilated
area. When you remove the diesel
exhaust fluid tank filler cap or a diesel
exhaust fluid container cap, ammonia
vapors may escape. Ammonia vapors
can be irritating to skin, eyes and mucous
membranes. Inhaling ammonia vapors
can cause burning to the eyes, throat and
nose and cause coughing and watery
eyes.
Always follow the manufacturer's
instructions.
1. Remove the fluid container cap.
2. Place the spout on to the container and
tighten it until you feel a strong
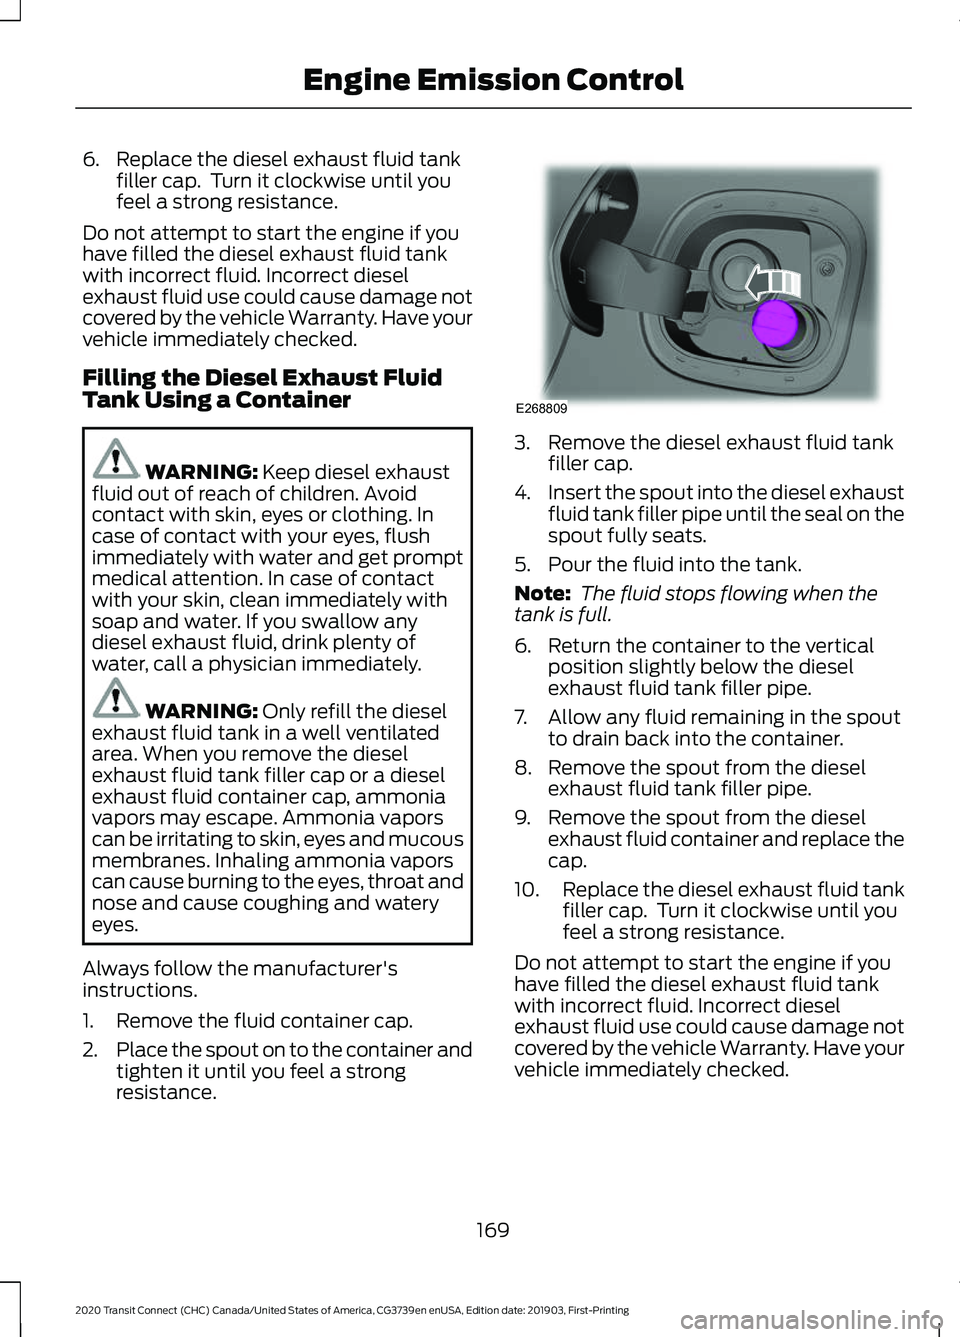
resistance. 3. Remove the diesel exhaust fluid tank
filler cap.
4. Insert the spout into the diesel exhaust
fluid tank filler pipe until the seal on the
spout fully seats.
5. Pour the fluid into the tank.
Note: The fluid stops flowing when the
tank is full.
6. Return the container to the vertical position slightly below the diesel
exhaust fluid tank filler pipe.
7. Allow any fluid remaining in the spout to drain back into the container.
8. Remove the spout from the diesel exhaust fluid tank filler pipe.
9. Remove the spout from the diesel exhaust fluid container and replace the
cap.
10. Replace the diesel exhaust fluid tank
filler cap. Turn it clockwise until you
feel a strong resistance.
Do not attempt to start the engine if you
have filled the diesel exhaust fluid tank
with incorrect fluid. Incorrect diesel
exhaust fluid use could cause damage not
covered by the vehicle Warranty. Have your
vehicle immediately checked.
169
2020 Transit Connect (CHC) Canada/United States of America, CG3739en enUSA, Edition date: 201903, First-Printing Engine Emission ControlE268809
Page 177 of 509
particulate filter. The diesel oxidation
catalytic converter and the diesel
particulate filter heat up to very high
temperatures after only a short period
of engine operation and remain hot after
you switch the engine off.
Diesel particulate filter warning
lamp.
If the diesel particulate filter is
near or at saturation, the warning lamp
appears advising you to initiate diesel
particulate filter manual regeneration.
Before you start manual regeneration, do
the following:
• Park your vehicle outside of any
enclosed structure.
• Make sure the transmission is in park
(P) or neutral (N).
• Make sure the parking brake is on.
• Park your vehicle a minimum of 10 ft
(3 m) from any obstructions and
materials that can easily combust or
melt, for example, paper, leaves, fuels,
plastics and other dry organic material.
• Make sure there is a minimum of 3.2 gal
(12 L)
of fuel in the fuel tank.
• Check the engine oil level.
• Check the engine coolant level.
Manual Regeneration
Where vehicle use has significant engine
idle operation, frequent vehicle speed less
than
25 mph (40 km/h), or driving short
distances where the engine does not fully
warm up, manual regeneration allows you
to start diesel particulate filter cleaning
when the engine is idling. Use the manual regeneration feature
when:
•
You are not able to drive in a manner
that allows effective automatic
cleaning. See
Diesel Particulate
Filter Automatic Regeneration.
• You choose to manually start the
regeneration process when the engine
is idling.
Note: Changes in the engine or exhaust
sound may be heard during the regeneration
process.
Note: During regeneration at low speed or
engine idle, you may smell a hot metallic
odor and could notice a clicking metallic
sound. This is due to the high temperatures
reached during the regeneration process.
This is normal.
Starting Manual Regeneration
You can only start manual regeneration
with the engine running at normal
operating temperature using the
information display. See
Information
Messages (page 100).
Note: During the use of manual
regeneration, you may observe a light
amount of white smoke. This is normal.
Note: If you press any pedal during manual
regeneration the engine may turn off. To
protect the exhaust system you may not be
able to restart the engine for 10 minutes. If a warning illuminates you may
not be able to start manual
regeneration.
173
2020 Transit Connect (CHC) Canada/United States of America, CG3739en enUSA, Edition date: 201903, First-Printing Engine Emission ControlE95449
Page 185 of 509
GENERAL INFORMATION
Wet brakes result in reduced braking
efficiency. Gently press the brake pedal a
few times when driving from a car wash or
standing water to dry the brakes.
Note:
Occasional brake noise is normal. If
a metal-to-metal, continuous grinding or
continuous squeal sound is present, the
brake linings may be worn-out. Have the
system checked by an authorized dealer. If
your vehicle has continuous vibration or
shudder in the steering wheel while braking,
have it checked by an authorized dealer.
Note: Brake dust may accumulate on the
wheels, even under normal driving
conditions. Some dust is inevitable as the
brakes wear and does not contribute to
brake noise. See Cleaning the Wheels
(page 302).
Note: Depending on applicable laws and
regulations in the country for which your
vehicle was originally built, the brake lamps
could flash during heavy braking. Following
this, the hazard lights could also flash when
your vehicle comes to a stop.
Brake Over Accelerator
In the event that the accelerator pedal
becomes stuck or entrapped, apply steady
and firm pressure to the brake pedal to
slow your vehicle and reduce engine
power. If you experience this condition,
apply the brakes and bring your vehicle to
a safe stop. Move the transmission to park
(P), switch the engine off and apply the
parking brake. Inspect the accelerator
pedal for any interference. If none are
found and the condition persists, have your
vehicle towed to the nearest authorized
dealer. Brake Assist
Brake assist detects when you rapidly
brake by measuring the rate at which you
press the brake pedal. It provides
maximum braking efficiency as long as you
press the pedal, and can reduce stopping
distances in critical situations
Anti-Lock Brake System
This system helps you maintain steering
control during emergency stops by keeping
the brakes from locking.
If it illuminates when you are
driving, this indicates a
malfunction. Your vehicle
continues to have normal braking without
the anti-lock brake system function. Have
your vehicle checked as soon as possible.
It also momentarily illuminates when you
switch the ignition on to confirm the lamp
is functional. If it does not illuminate when
you switch the ignition on, or begins to
flash at any time, have the system checked
by an authorized dealer. It illuminates when you engage
the parking brake and the
ignition is on.
If it illuminates when your vehicle is
moving, make sure the parking brake is
disengaged. If the parking brake is
disengaged, this indicates low brake fluid
level or a brake system fault. Have your
vehicle immediately checked.
It also momentarily illuminates when you
switch the ignition on to confirm the lamp
is functional. If it does not illuminate when
you switch the ignition on, or begins to
flash at any time, have the system checked
by an authorized dealer.
181
2020 Transit Connect (CHC) Canada/United States of America, CG3739en enUSA, Edition date: 201903, First-Printing Brakes E138644
Page 186 of 509
HINTS ON DRIVING WITH
ANTI-LOCK BRAKES
The anti-lock braking system does not
eliminate the risks when:
•
You drive too closely to the vehicle in
front of you.
• Your vehicle is hydroplaning.
• You take corners too fast.
• The road surface is poor.
Note: If the system activates, the brake
pedal may pulse and may travel further.
Maintain pressure on the brake pedal. You
may also hear a noise from the system. This
is normal.
PARKING BRAKE WARNING: Always fully apply the
parking brake and make sure you shift
into park (P). Switch the ignition off and
remove the key whenever you leave your
vehicle.
To apply the parking brake:
1. Firmly press the brake pedal.
2. Pull the parking brake lever upward to its fullest extent.
Note: Do not press the release button when
pulling the parking brake lever upward.
Note: If you park your vehicle on a hill and
facing uphill, shift into park (P) and turn the
steering wheel away from the curb.
Note: If you park your vehicle on a hill and
facing downhill, shift into park (P) and turn
the steering wheel toward the curb.
To release the parking brake:
1. Firmly press the brake pedal.
2. Slightly pull the parking brake lever upward. 3. Press the release button and push the
parking brake lever downward.
HILL START ASSIST WARNING:
The system does not
replace the parking brake. When you
leave your vehicle, always apply the
parking brake. Failure to leave your
vehicle securely parked may lead to a
crash or injury. See
Parking Brake
(page 182). WARNING:
You must remain in
your vehicle once the system activates.
Failure to follow this warning could result
in serious personal injury or death. WARNING:
During all times, you
are responsible for controlling your
vehicle, supervising the system and
intervening, if required. Failure to take
care may result in the loss of control of
your vehicle, serious personal injury or
death. WARNING:
The system will turn
off if a malfunction is apparent or if you
rev the engine excessively. Failure to take
care may result in the loss of control of
your vehicle, serious personal injury or
death.
The system makes it easier to pull away
when your vehicle is on a slope without the
need to use the parking brake.
When the system is active, your vehicle will
remain stationary on the slope for two to
three seconds after you release the brake
pedal. This allows time to move your foot
from the brake to the accelerator pedal.
The brakes are released automatically
182
2020 Transit Connect (CHC) Canada/United States of America, CG3739en enUSA, Edition date: 201903, First-Printing Brakes
Page 187 of 509
once the engine has developed sufficient
torque to prevent your vehicle from rolling
down the slope. This is an advantage when
pulling away on a slope, for example from
a car park ramp, traffic lights or when
reversing uphill into a parking space.
The system will turn on automatically on
any slope which can result in significant
vehicle rollback.
Using Hill Start Assist
1. Press the brake pedal to bring your
vehicle to a complete standstill. Keep
the brake pedal pressed. If equipped
with a manual transmission, also press
the clutch pedal.
2. If the sensors detect that your vehicle is on a slope, the system will activate
automatically.
3. When you remove your foot from the brake pedal, your vehicle will remain
on the slope without rolling away for
approximately two to three seconds.
This hold time will automatically be
extended if you are in the process of
driving off.
4. Drive off in the normal manner. The brakes will be released automatically.
Switching the System On and Off
Vehicles with Manual Transmission
You can switch this feature on or off in the
information display. The system
remembers the last setting when you start
your vehicle.
Vehicles with Automatic Transmission
You cannot turn the system on or off.
When you switch the ignition on, the
system automatically turns on.
183
2020 Transit Connect (CHC) Canada/United States of America, CG3739en enUSA, Edition date: 201903, First-Printing Brakes
Page 188 of 509
PRINCIPLE OF OPERATION
The traction control system helps avoid
drive wheel spin and loss of traction.
If your vehicle begins to slide, the system
applies the brakes to individual wheels
and, when needed, reduces engine power
at the same time. If the wheels spin when
accelerating on slippery or loose surfaces,
the system reduces engine power in order
to increase traction.
USING TRACTION CONTROL
WARNING: The stability and
traction control light illuminates steadily
if the system detects a failure. Make sure
you did not manually disable the traction
control system using the information
display controls or the switch. If the
stability control and traction control light
is still illuminating steadily, have the
system serviced by an authorized dealer
immediately. Operating your vehicle with
the traction control disabled could lead
to an increased risk of loss of vehicle
control, vehicle rollover, personal injury
and death.
If your vehicle is stuck in mud or snow,
switching traction control off may be
beneficial as this allows the wheels to spin.
Switching Traction Control On or
Off Press the button on the center
console.
Note: The system turns on when you switch
the ignition on.
Note: If you switch traction control off,
stability control remains on.
Note: The system turns off if there is a
malfunction. Traction Control Off Warning
Lamp Illuminates when you switch the
system off.
Traction Control Indicator Flashes during operation.
If it does not illuminate when you
switch the ignition on, or remains
on when the engine is running, this
indicates a malfunction. Have your vehicle
checked as soon as possible.
184
2020 Transit Connect (CHC) Canada/United States of America, CG3739en enUSA, Edition date: 201903, First-Printing Traction ControlE194301 E130458 E252028
Page 189 of 509
PRINCIPLE OF OPERATION
WARNING: Vehicle modifications
involving braking system, aftermarket
roof racks, suspension, steering system,
tire construction and wheel and tire size
may change the handling characteristics
of your vehicle and may adversely affect
the performance of the electronic
stability control system. In addition,
installing any stereo loudspeakers may
interfere with and adversely affect the
electronic stability control system. Install
any aftermarket stereo loudspeaker as
far as possible from the front center
console, the tunnel, and the front seats
in order to minimize the risk of interfering
with the electronic stability control
sensors. Reducing the effectiveness of
the electronic stability control system
could lead to an increased risk of loss of
vehicle control, vehicle rollover, personal
injury and death. WARNING:
Remember that even
advanced technology cannot defy the
laws of physics. It’ s always possible to
lose control of a vehicle due to
inappropriate driver input for the
conditions. Aggressive driving on any
road condition can cause you to lose
control of your vehicle increasing the risk
of personal injury or property damage.
Activation of the electronic stability
control system is an indication that at
least some of the tires have exceeded
their ability to grip the road; this could
reduce the operator ’s ability to control
the vehicle potentially resulting in a loss
of vehicle control, vehicle rollover,
personal injury and death. If your
electronic stability control system
activates, SLOW DOWN.
The system automatically turns on each
time you switch the ignition on. If a fault occurs in either the stability
control or the traction control system, you
may experience the following conditions:
•
The stability and traction control light
illuminates steadily.
• The stability control and traction
control systems do not enhance your
vehicle's ability to maintain traction of
the wheels.
If a driving condition activates either the
stability control or the traction control
system you may experience the following
conditions:
• The stability and traction control light
flashes.
• Your vehicle slows down.
• Reduced engine power.
• A vibration in the brake pedal.
• The brake pedal is stiffer than usual.
• If the driving condition is severe and
your foot is not on the brake, the brake
pedal may move as the system applies
higher brake force.
The stability control system has several
features built into it to help you maintain
control of your vehicle:
Electronic Stability Control
The system enhances your vehicle ’s ability
to prevent skids or lateral slides by
applying brakes to one or more of the
wheels individually and, if necessary,
reducing engine power.
Roll Stability Control
The system enhances your vehicle ’s ability
to prevent rollovers by detecting your
vehicle ’s roll motion and the rate at which
it changes by applying the brakes to one
or more wheels individually.
185
2020 Transit Connect (CHC) Canada/United States of America, CG3739en enUSA, Edition date: 201903, First-Printing Stability Control
Page 205 of 509
WARNING: Use caution when the
rear cargo door is ajar. If the rear cargo
door is ajar, the camera will be out of
position and the video image could be
incorrect. All guide lines disappear when
the rear cargo door is ajar. Failure to
follow this instruction could result in
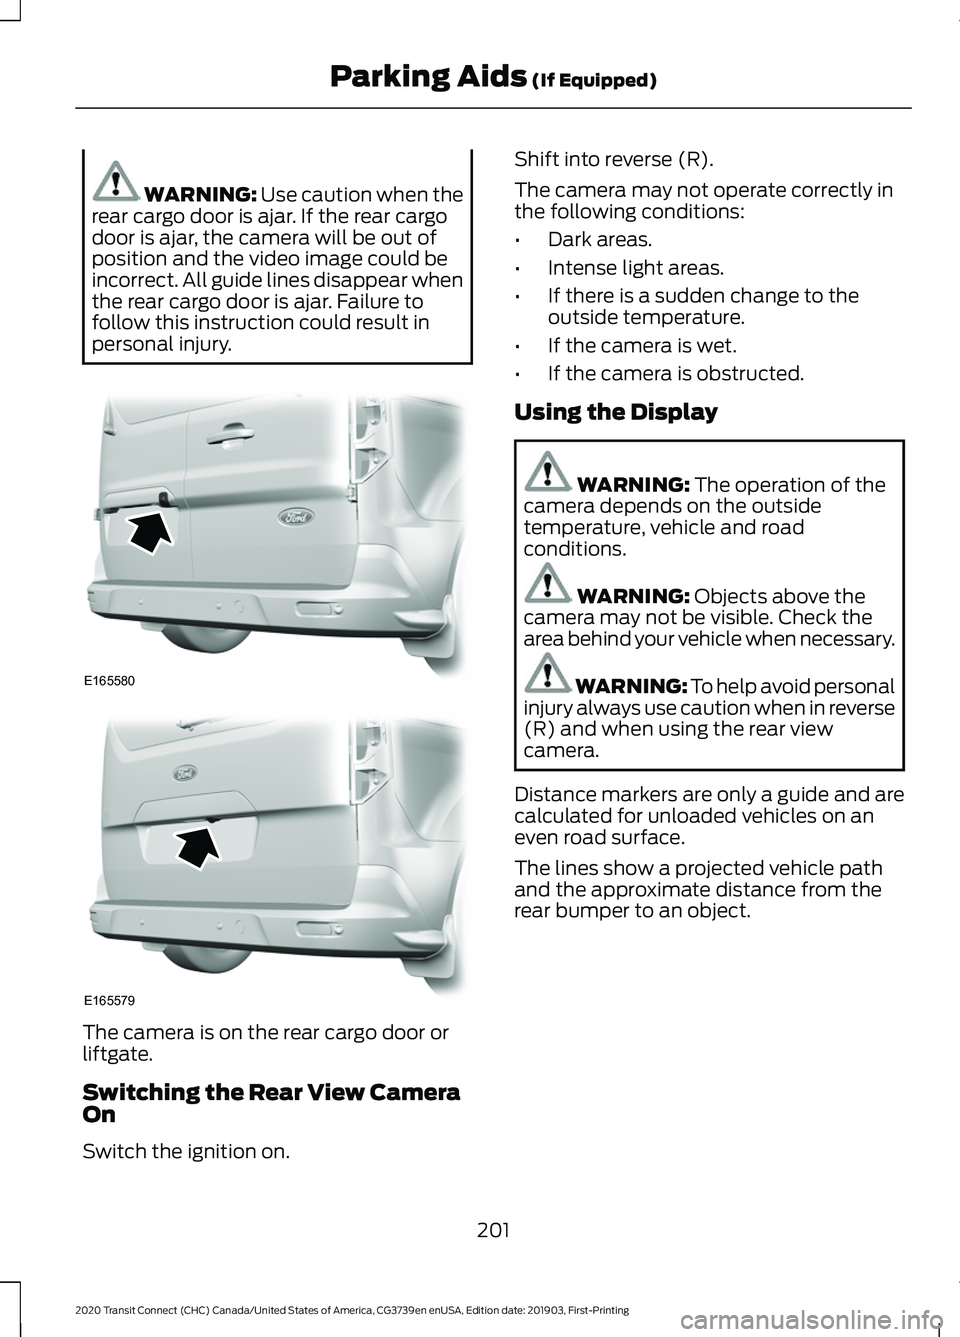
personal injury. The camera is on the rear cargo door or
liftgate.
Switching the Rear View Camera
On
Switch the ignition on. Shift into reverse (R).
The camera may not operate correctly in
the following conditions:
•
Dark areas.
• Intense light areas.
• If there is a sudden change to the
outside temperature.
• If the camera is wet.
• If the camera is obstructed.
Using the Display WARNING:
The operation of the
camera depends on the outside
temperature, vehicle and road
conditions. WARNING:
Objects above the
camera may not be visible. Check the
area behind your vehicle when necessary. WARNING: To help avoid personal
injury always use caution when in reverse
(R) and when using the rear view
camera.
Distance markers are only a guide and are
calculated for unloaded vehicles on an
even road surface.
The lines show a projected vehicle path
and the approximate distance from the
rear bumper to an object.
201
2020 Transit Connect (CHC) Canada/United States of America, CG3739en enUSA, Edition date: 201903, First-Printing Parking Aids
(If Equipped)E165580 E165579