display GMC SIERRA 2021 User Guide
[x] Cancel search | Manufacturer: GMC, Model Year: 2021, Model line: SIERRA, Model: GMC SIERRA 2021Pages: 461, PDF Size: 11.84 MB
Page 41 of 461
GMC Sierra/Sierra Denali 1500 Owner Manual (GMNA-Localizing-U.S./
Canada/Mexico-14632426) - 2021 - CRC - 11/5/20
40 Keys, Doors, and Windows
{Warning
The Rear Camera Mirror (RCM) has a
limited view. Portions of the road,
vehicles, and other objects may not be
seen. Do not drive or park the vehicle
using only this camera. Objects may
appear closer than they are. Check the
outside mirrors or glance over your
shoulder when making lane changes or
merging. Failure to use proper care may
result in injury, death, or vehicle damage.
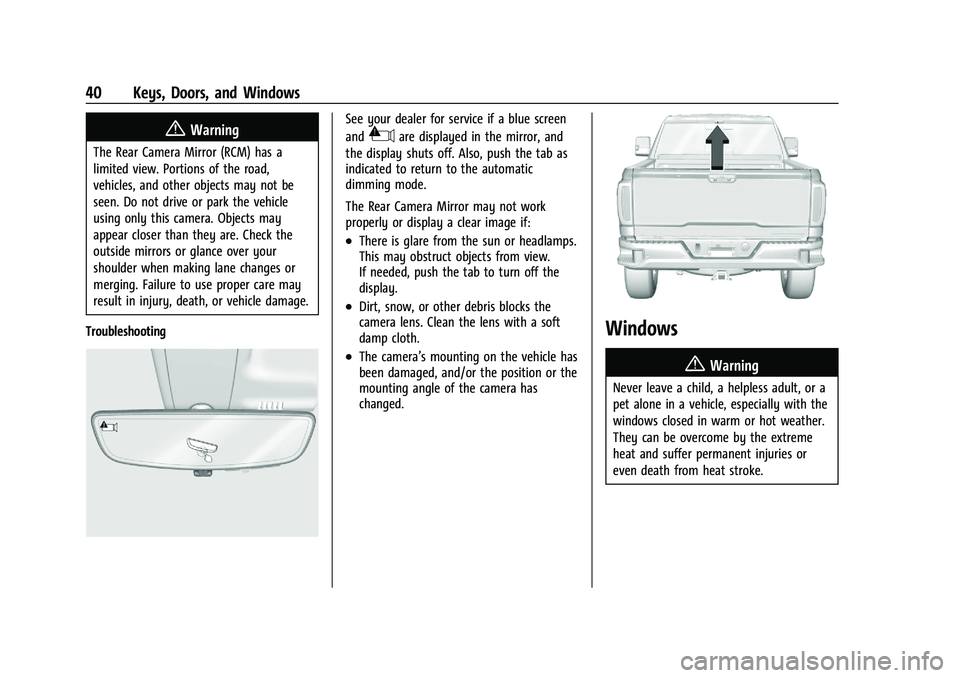
Troubleshooting
See your dealer for service if a blue screen
and
3are displayed in the mirror, and
the display shuts off. Also, push the tab as
indicated to return to the automatic
dimming mode.
The Rear Camera Mirror may not work
properly or display a clear image if:
.There is glare from the sun or headlamps.
This may obstruct objects from view.
If needed, push the tab to turn off the
display.
.Dirt, snow, or other debris blocks the
camera lens. Clean the lens with a soft
damp cloth.
.The camera’s mounting on the vehicle has
been damaged, and/or the position or the
mounting angle of the camera has
changed.
Windows
{
Warning
Never leave a child, a helpless adult, or a
pet alone in a vehicle, especially with the
windows closed in warm or hot weather.
They can be overcome by the extreme
heat and suffer permanent injuries or
even death from heat stroke.
Page 51 of 461
GMC Sierra/Sierra Denali 1500 Owner Manual (GMNA-Localizing-U.S./
Canada/Mexico-14632426) - 2021 - CRC - 11/5/20
50 Seats and Restraints
hold 1, 2, orBuntil the saved position is
reached. Follow the instructions under
“Saving Memory Positions.”
The vehicle identifies the current driver’s RKE
transmitter number (1–8). See Remote
Keyless Entry (RKE) System Operation (Key
Access) 010 or
Remote Keyless Entry (RKE) System
Operation (Keyless Access) 013. Only RKE
transmitters 1 and 2 can be used for
automatic memory recalls. A Driver
Information Center (DIC) welcome message
indicating the transmitter number may
display for the first few ignition cycles
following a transmitter change. For Seat
Entry Memory to work properly, save the
positions to the memory button (1 or 2)
matching the RKE transmitter number
displayed in the DIC welcome message.
Carry the linked RKE transmitter when
entering the vehicle.
Vehicle Personalization Settings
.To have the Seat Entry Memory
movement begin when the vehicle is
started, select the Settings menu, then
Vehicle, then Seating Position, and then
Seat Entry Memory. Select On or Off. See
“Seat Entry Memory” later in this section.
.To begin Seat Exit Memory movement
when the vehicle is turned off and the
driver door is opened, or when the vehicle
is turned off with the driver door already
opened, select the Settings menu, then
Vehicle, then Seating Position, and then
Seat Exit Memory. Select On or Off. See
“Seat Exit Memory”later in this section.
.SeeVehicle Personalization 0131 for
additional setting information.
Identifying Driver Number
To identify the driver number: 1. Move your RKE transmitter away from the vehicle.
2. Start the vehicle with another key or RKE transmitter. The DIC should display the
driver number for the other RKE
transmitter. Turn the vehicle off and
remove the key or RKE transmitter from
the vehicle.
3. Start the vehicle with the initial key or RKE transmitter. The DIC should display
the driver number of your RKE
transmitter.
Saving Memory Positions
Read these instructions completely before
saving memory positions. To save preferred driving positions 1 and 2:
1. Turn the vehicle on or to ACC/ ACCESSORY.
A DIC welcome message may indicate
driver number 1 or 2.
2. Adjust all available memory features to the desired driving position.
3. Press and release SET; a beep will sound.
4. Immediately press and hold the 1 or 2 memory button matching the above
DIC welcome message until two beeps
sound.
If too much time passes between
releasing SET and pressing 1, the
memory position will not be saved and
two beeps will not sound. Repeat
Steps 3 and 4.
1 or 2 corresponds to the driver number.
See “Identifying Driver Number”
previously in this section.
5. Repeat Steps 1–4 for a second driver using 1 or 2. RKE transmitters 3–8 will
not save memory positions.
To save the position for
Band Seat Exit
Memory features, repeat Steps 1–4 using
B. This saves the position for getting out
of the vehicle.
Page 54 of 461
GMC Sierra/Sierra Denali 1500 Owner Manual (GMNA-Localizing-U.S./
Canada/Mexico-14632426) - 2021 - CRC - 11/5/20
Seats and Restraints 53
Remote Start Heated and Ventilated Seats
If equipped, the heated seats will turn on
automatically during a remote start if it is
cold outside and the ventilated seats will
turn on automatically if it is hot outside.
If equipped, the heated steering wheel will
turn on automatically during a remote start
if it is cold outside. The heated and
ventilated seat indicators and heated
steering wheel indicator may not come on
during this operation.
The heated and ventilated seats and heated
steering wheel may cancel when the vehicle
is started. These features can be manually
selected after the ignition is turned on.
The temperature performance of an
unoccupied seat may be reduced. This is
normal.
The heated or ventilated seats will not turn
on during a remote start unless they are
enabled in vehicle personalization. See
Remote Vehicle Start020 and
Vehicle Personalization 0131.Rear Seats
Rear Seat Reminder
If equipped, the message REAR SEAT
REMINDER LOOK IN REAR SEAT displays
under certain conditions indicating there
may be an item or passenger in the rear
seat. Check before exiting the vehicle.
This feature will activate when a second row
door is opened while the vehicle is on or up
to 10 minutes before the vehicle is turned
on. There will be an alert when the vehicle
is turned off. The alert does not directly
detect objects in the rear seat; instead,
under certain conditions, it detects when a
rear door is opened and closed, indicating
that there may be something in the
rear seat.
The feature is active only once each time
the vehicle is turned on and off, and will
require reactivation by opening and closing
the second row doors. There may be an
alert even when there is nothing in the rear
seat; for example, if a child entered the
vehicle through the rear door and left the
vehicle without the vehicle being shut off.
The feature can be turned on or off. See
Vehicle Personalization 0131.
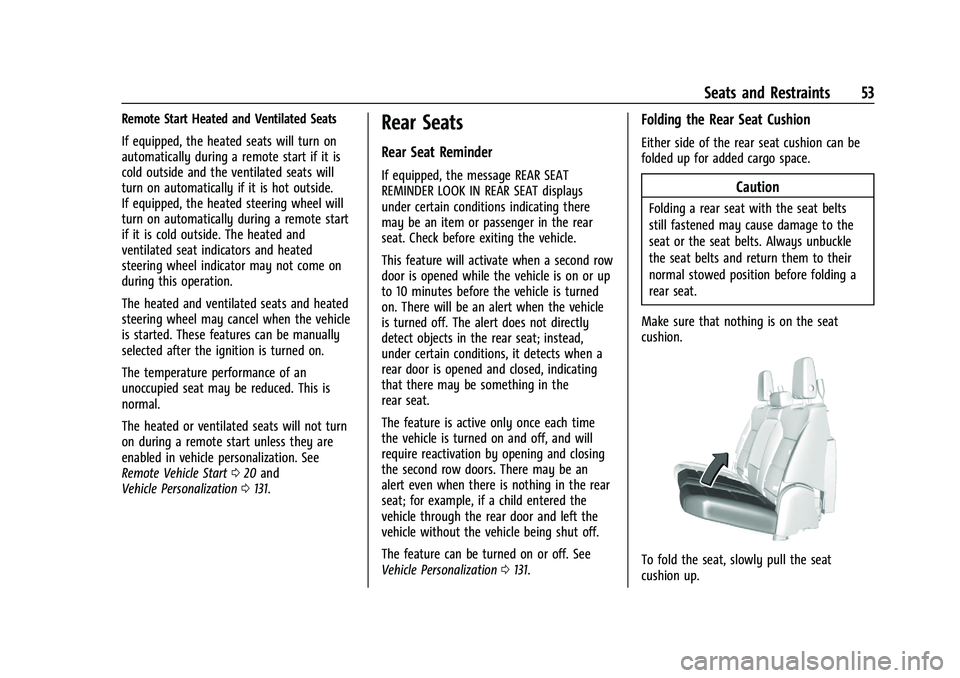
Folding the Rear Seat Cushion
Either side of the rear seat cushion can be
folded up for added cargo space.
Caution
Folding a rear seat with the seat belts
still fastened may cause damage to the
seat or the seat belts. Always unbuckle
the seat belts and return them to their
normal stowed position before folding a
rear seat.
Make sure that nothing is on the seat
cushion.
To fold the seat, slowly pull the seat
cushion up.
Page 55 of 461
GMC Sierra/Sierra Denali 1500 Owner Manual (GMNA-Localizing-U.S./
Canada/Mexico-14632426) - 2021 - CRC - 11/5/20
54 Seats and Restraints
To return the seat to the normal seating
position, slowly pull the seat cushion down.
{Warning
A seat belt that is improperly routed, not
properly attached, or twisted will not
provide the protection needed in a crash.
The person wearing the belt could be
seriously injured. After raising the rear
seatback, always check to be sure that
the seat belts are properly routed and
attached, and are not twisted.
Heated Rear Seats
{Warning
If you cannot feel temperature change or
pain to the skin, the seat heater may
cause burns. See the Warning under
Heated and Ventilated Front Seats052.
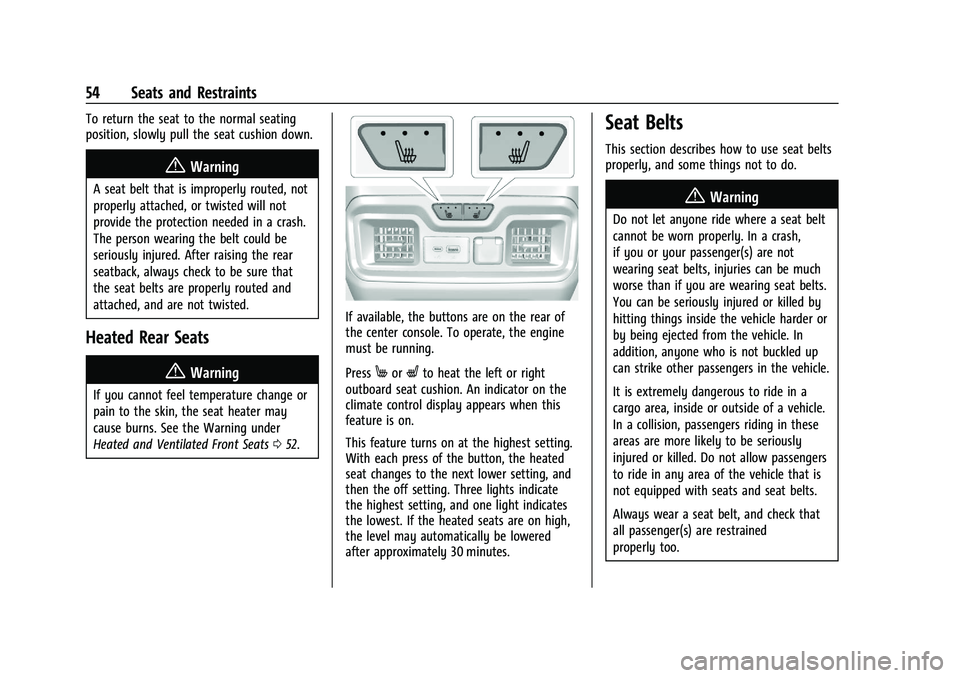
If available, the buttons are on the rear of
the center console. To operate, the engine
must be running.
Press
MorLto heat the left or right
outboard seat cushion. An indicator on the
climate control display appears when this
feature is on.
This feature turns on at the highest setting.
With each press of the button, the heated
seat changes to the next lower setting, and
then the off setting. Three lights indicate
the highest setting, and one light indicates
the lowest. If the heated seats are on high,
the level may automatically be lowered
after approximately 30 minutes.
Seat Belts
This section describes how to use seat belts
properly, and some things not to do.
{Warning
Do not let anyone ride where a seat belt
cannot be worn properly. In a crash,
if you or your passenger(s) are not
wearing seat belts, injuries can be much
worse than if you are wearing seat belts.
You can be seriously injured or killed by
hitting things inside the vehicle harder or
by being ejected from the vehicle. In
addition, anyone who is not buckled up
can strike other passengers in the vehicle.
It is extremely dangerous to ride in a
cargo area, inside or outside of a vehicle.
In a collision, passengers riding in these
areas are more likely to be seriously
injured or killed. Do not allow passengers
to ride in any area of the vehicle that is
not equipped with seats and seat belts.
Always wear a seat belt, and check that
all passenger(s) are restrained
properly too.
Page 100 of 461
GMC Sierra/Sierra Denali 1500 Owner Manual (GMNA-Localizing-U.S./
Canada/Mexico-14632426) - 2021 - CRC - 11/5/20
Instruments and Controls 99
Instruments and Controls
Controls
Steering Wheel Adjustment . . . . . . . . . . . 100
Steering Wheel Controls . . . . . . . . . . . . . . 100
Heated Steering Wheel . . . . . . . . . . . . . . . . 100
Horn . . . . . . . . . . . . . . . . . . . . . . . . . . . . . . . . . . . 101
Windshield Wiper/Washer . . . . . . . . . . . . . 101
Compass . . . . . . . . . . . . . . . . . . . . . . . . . . . . . . . 102
Clock . . . . . . . . . . . . . . . . . . . . . . . . . . . . . . . . . . 102
Power Outlets . . . . . . . . . . . . . . . . . . . . . . . . . 102
Wireless Charging . . . . . . . . . . . . . . . . . . . . . 103
Warning Lights, Gauges, and Indicators
Warning Lights, Gauges, andIndicators . . . . . . . . . . . . . . . . . . . . . . . . . . . . 106
Instrument Cluster . . . . . . . . . . . . . . . . . . . . 106
Speedometer . . . . . . . . . . . . . . . . . . . . . . . . . . 110
Odometer . . . . . . . . . . . . . . . . . . . . . . . . . . . . . . 110
Trip Odometer . . . . . . . . . . . . . . . . . . . . . . . . . 110
Tachometer . . . . . . . . . . . . . . . . . . . . . . . . . . . . 110
Fuel Gauge . . . . . . . . . . . . . . . . . . . . . . . . . . . . 110
Engine Oil Pressure Gauge . . . . . . . . . . . . . 111
Engine Coolant Temperature Gauge . . . . 112
Voltmeter Gauge . . . . . . . . . . . . . . . . . . . . . . . 113
Seat Belt Reminders . . . . . . . . . . . . . . . . . . . . 113
Airbag Readiness Light . . . . . . . . . . . . . . . . . 114
Passenger Airbag Status Indicator . . . . . . 114
Charging System Light . . . . . . . . . . . . . . . . . 115 Malfunction Indicator Lamp (Check
Engine Light) . . . . . . . . . . . . . . . . . . . . . . . . . 115
Brake System Warning Light . . . . . . . . . . . 117
Electric Parking Brake Light . . . . . . . . . . . . 117
Service Electric Parking Brake Light . . . . 118
Antilock Brake System (ABS) Warning Light . . . . . . . . . . . . . . . . . . . . . . . . . . . . . . . . . 118
Four-Wheel-Drive Light . . . . . . . . . . . . . . . . . 118
Tow/Haul Mode Light . . . . . . . . . . . . . . . . . 119
Hill Descent Control Light . . . . . . . . . . . . . . 119
Lane Keep Assist (LKA) Light . . . . . . . . . . . 119
Vehicle Ahead Indicator . . . . . . . . . . . . . . . . 119
Pedestrian Ahead Indicator . . . . . . . . . . . . 119
Traction Off Light . . . . . . . . . . . . . . . . . . . . . . 120
Traction Control System (TCS)/Electronic Stability Control Light . . . . . . . . . . . . . . . 120
Electronic Stability Control (ESC) Off Light . . . . . . . . . . . . . . . . . . . . . . . . . . . . . . . . . 120
Engine Coolant Temperature Warning Light . . . . . . . . . . . . . . . . . . . . . . . . . . . . . . . . . 121
Driver Mode Control Light . . . . . . . . . . . . . 121
Tire Pressure Light . . . . . . . . . . . . . . . . . . . . . 122
Engine Oil Pressure Light (Uplevel Cluster) . . . . . . . . . . . . . . . . . . . . . . . . . . . . . . 122
Low Fuel Warning Light . . . . . . . . . . . . . . . . 122
Security Light . . . . . . . . . . . . . . . . . . . . . . . . . . 122
High-Beam On Light . . . . . . . . . . . . . . . . . . . 123
Front Fog Lamp Light . . . . . . . . . . . . . . . . . . 123
Lamps On Reminder . . . . . . . . . . . . . . . . . . . 123
Cruise Control Light . . . . . . . . . . . . . . . . . . . . 123 Door Ajar Light . . . . . . . . . . . . . . . . . . . . . . . . 124
Information Displays
Driver Information Center (DIC) (Base
Level) . . . . . . . . . . . . . . . . . . . . . . . . . . . . . . . . 124
Driver Information Center (DIC) (Midlevel and Uplevel) . . . . . . . . . . . . . . . 125
Head-Up Display (HUD) . . . . . . . . . . . . . . . . 128
Vehicle Messages
Vehicle Messages . . . . . . . . . . . . . . . . . . . . . . 130
Engine Power Messages . . . . . . . . . . . . . . . . 131
Vehicle Speed Messages . . . . . . . . . . . . . . . 131
Vehicle Personalization
Vehicle Personalization . . . . . . . . . . . . . . . . . 131
Universal Remote System
Universal Remote System . . . . . . . . . . . . . 136
Universal Remote System Programming . . . . . . . . . . . . . . . . . . . . . . . . 136
Universal Remote System Operation . . . 138
Page 101 of 461
GMC Sierra/Sierra Denali 1500 Owner Manual (GMNA-Localizing-U.S./
Canada/Mexico-14632426) - 2021 - CRC - 11/5/20
100 Instruments and Controls
Controls
Steering Wheel Adjustment
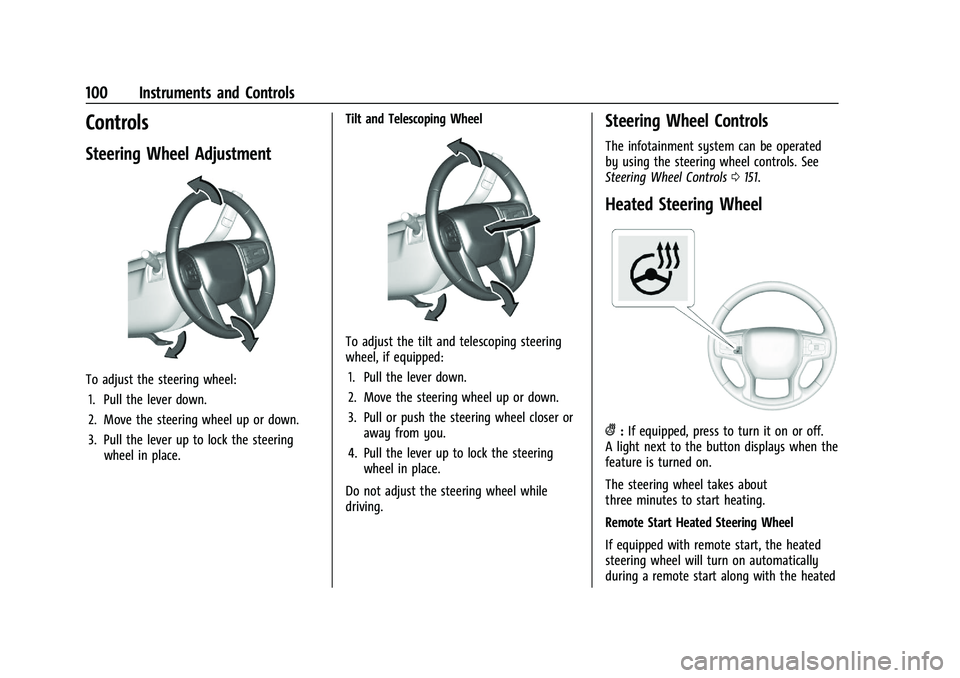
To adjust the steering wheel:1. Pull the lever down.
2. Move the steering wheel up or down.
3. Pull the lever up to lock the steering wheel in place. Tilt and Telescoping Wheel
To adjust the tilt and telescoping steering
wheel, if equipped:
1. Pull the lever down.
2. Move the steering wheel up or down.
3. Pull or push the steering wheel closer or away from you.
4. Pull the lever up to lock the steering wheel in place.
Do not adjust the steering wheel while
driving.
Steering Wheel Controls
The infotainment system can be operated
by using the steering wheel controls. See
Steering Wheel Controls 0151.
Heated Steering Wheel
(:If equipped, press to turn it on or off.
A light next to the button displays when the
feature is turned on.
The steering wheel takes about
three minutes to start heating.
Remote Start Heated Steering Wheel
If equipped with remote start, the heated
steering wheel will turn on automatically
during a remote start along with the heated
Page 103 of 461
GMC Sierra/Sierra Denali 1500 Owner Manual (GMNA-Localizing-U.S./
Canada/Mexico-14632426) - 2021 - CRC - 11/5/20
102 Instruments and Controls
If the ignition is turned off while the wipers
are performing wipes due to windshield
washing, the wipers continue to run until
they reach the base of the windshield.
Compass
The vehicle may have a compass display on
the Driver Information Center (DIC). The
compass receives its heading and other
information from the Global Positioning
System (GPS) antenna, Electronic Stability
Control (ESC), and vehicle speed information.
The compass system is designed to operate
for a certain number of miles or degrees of
turn before needing a signal from the GPS
satellites. When the compass display shows
CAL, drive the vehicle for a short distance in
an open area where it can receive a GPS
signal. The compass system will
automatically determine when a GPS signal
is restored and provide a heading again.
Clock
Set the time and date using the
infotainment system. See "Time / Date"
underSettings 0186.
Power Outlets
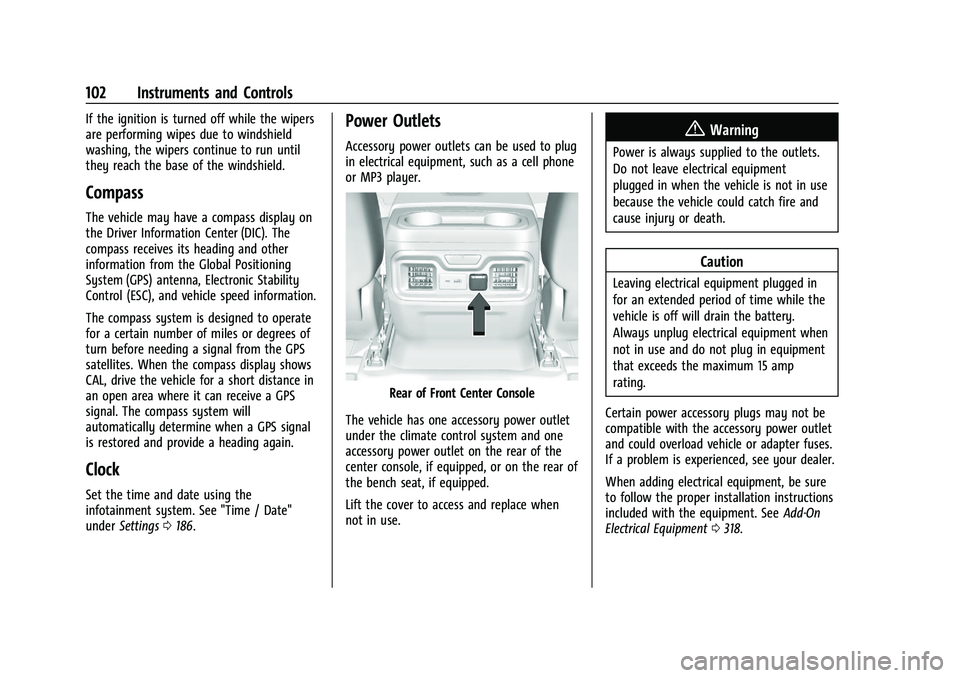
Accessory power outlets can be used to plug
in electrical equipment, such as a cell phone
or MP3 player.
Rear of Front Center Console
The vehicle has one accessory power outlet
under the climate control system and one
accessory power outlet on the rear of the
center console, if equipped, or on the rear of
the bench seat, if equipped.
Lift the cover to access and replace when
not in use.
{Warning
Power is always supplied to the outlets.
Do not leave electrical equipment
plugged in when the vehicle is not in use
because the vehicle could catch fire and
cause injury or death.
Caution
Leaving electrical equipment plugged in
for an extended period of time while the
vehicle is off will drain the battery.
Always unplug electrical equipment when
not in use and do not plug in equipment
that exceeds the maximum 15 amp
rating.
Certain power accessory plugs may not be
compatible with the accessory power outlet
and could overload vehicle or adapter fuses.
If a problem is experienced, see your dealer.
When adding electrical equipment, be sure
to follow the proper installation instructions
included with the equipment. See Add-On
Electrical Equipment 0318.
Page 105 of 461
GMC Sierra/Sierra Denali 1500 Owner Manual (GMNA-Localizing-U.S./
Canada/Mexico-14632426) - 2021 - CRC - 11/5/20
104 Instruments and Controls
and wirelessly charges one Qi compatible
smartphone. The power output of the
system is capable of charging at a rate up
to 3 amp (19.5 W) as requested by the
compatible smartphone. SeeRadio
Frequency Statement 0436.
{Warning
Wireless charging can affect the
operation of an implanted pacemaker or
other medical devices. If you have one, it
is recommended to consult with your
doctor before using the wireless charging
system.
The vehicle must be on, in ACC/ACCESSORY,
or Retained Accessory Power (RAP) must be
active. The wireless charging feature may
not correctly indicate charging when the
vehicle is in RAP, or during Bluetooth phone
calls. See Retained Accessory Power (RAP)
0 236.
The operating temperature is −20 °C (−4 °F)
to 60 °C (140 °F) for the charging system
and 0 °C (32 °F) to 35 °C (95 °F) for the
smartphone.
{Warning
Remove all objects from the charging pad
before charging your compatible
smartphone. Objects, such as coins, keys,
rings, paper clips, or cards, between the
smartphone and charging pad will
become very hot. On the rare occasion
that the charging system does not detect
an object, and the object gets wedged
between the smartphone and charger,
remove the smartphone and allow the
object to cool before removing it from
the charging pad, to prevent burns.
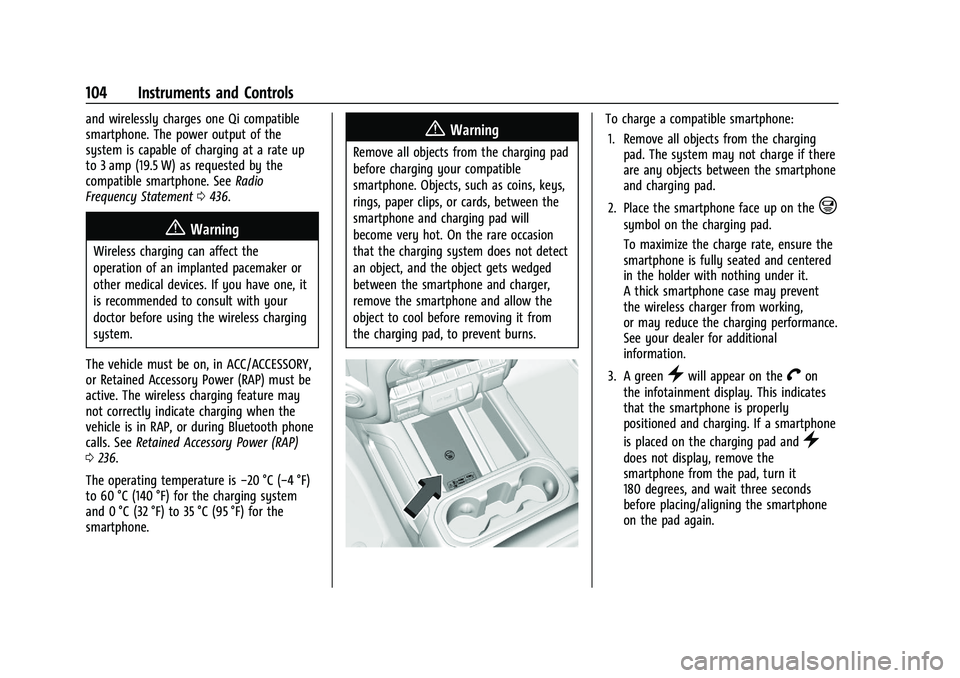
To charge a compatible smartphone:
1. Remove all objects from the charging pad. The system may not charge if there
are any objects between the smartphone
and charging pad.
2. Place the smartphone face up on the
@
symbol on the charging pad.
To maximize the charge rate, ensure the
smartphone is fully seated and centered
in the holder with nothing under it.
A thick smartphone case may prevent
the wireless charger from working,
or may reduce the charging performance.
See your dealer for additional
information.
3. A green
}will appear on theVon
the infotainment display. This indicates
that the smartphone is properly
positioned and charging. If a smartphone
is placed on the charging pad and
}
does not display, remove the
smartphone from the pad, turn it
180 degrees, and wait three seconds
before placing/aligning the smartphone
on the pad again.
Page 109 of 461
GMC Sierra/Sierra Denali 1500 Owner Manual (GMNA-Localizing-U.S./
Canada/Mexico-14632426) - 2021 - CRC - 11/5/20
108 Instruments and Controls
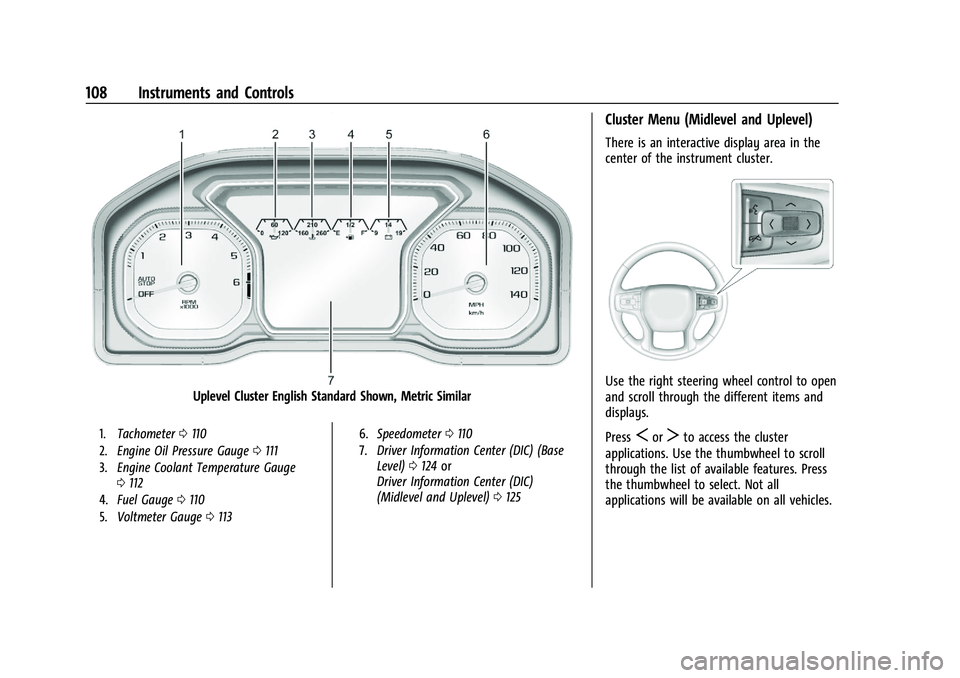
Uplevel Cluster English Standard Shown, Metric Similar
1.Tachometer 0110
2. Engine Oil Pressure Gauge 0111
3. Engine Coolant Temperature Gauge
0112
4. Fuel Gauge 0110
5. Voltmeter Gauge 0113 6.
Speedometer 0110
7. Driver Information Center (DIC) (Base
Level) 0124 or
Driver Information Center (DIC)
(Midlevel and Uplevel) 0125
Cluster Menu (Midlevel and Uplevel)
There is an interactive display area in the
center of the instrument cluster.
Use the right steering wheel control to open
and scroll through the different items and
displays.
Press
SorTto access the cluster
applications. Use the thumbwheel to scroll
through the list of available features. Press
the thumbwheel to select. Not all
applications will be available on all vehicles.
Page 110 of 461
GMC Sierra/Sierra Denali 1500 Owner Manual (GMNA-Localizing-U.S./
Canada/Mexico-14632426) - 2021 - CRC - 11/5/20
Instruments and Controls 109
.Home
.Info App. This is where the selected Driver
Information Center (DIC) displays can be
viewed. See“Driver Information Center
(DIC) (Uplevel)” in the Index.
.Audio
.Navigation
.Phone
.Options
Home
Information displayed here can be
customized from the Options menu.
Speedometer : Displays how fast the vehicle
is moving in either kilometers per hour
(km/h) or miles per hour (mph).
Speed Sign : Shows sign information, which
comes from a roadway database in the
onboard navigation, if equipped.
Time : Displays the current time.
Fuel Range : Displays the approximate
distance the vehicle can be driven without
refueling. The fuel range estimate is based
on an average of the vehicle’s fuel economy
over recent driving history and the amount
of fuel remaining in the fuel tank. Fuel
range cannot be reset. Audio
In the Audio menu, use the thumbwheel to
scroll through options, browse for music,
select from favorites, or change the audio
source. In the main view, scroll to change
the station or go to the next or previous
track.
Navigation
In the Navigation menu, if there is no active
route, a compass will be displayed. If there
is an active route, press the thumbwheel to
cancel or resume route guidance, mute or
unmute voice guidance, or access Recents or
Favorites.
Phone
In the Phone menu, if there is no active
phone call, view recent calls, scroll through
contacts, select from the favorites, or change
the phone source. If there is an active call,
mute the phone or switch to handset
operation.
Options
Use the thumbwheel to scroll through items
in the Options menu.
Head-up Display (HUD) :
If equipped, this
feature allows for adjusting the angle of the
HUD image and changing or turning off the
Speed Limit Sign.
HUD Rotation: Press the thumbwheel while
Adjust Rotation is highlighted to enter
Adjust Mode. Scroll to adjust the angle of
the HUD display. Press the thumbwheel to
confirm and save the setting. This feature
may only be available in P (Park).
Speed Limit Style: Press the thumbwheel
while Speed Limit Style is highlighted to
change the speed sign style or to turn it off.
Units : Press the thumbwheel while Units is
displayed to enter the Units menu. Choose
US or metric units by pressing the
thumbwheel while the desired item is
highlighted. A selected mark will be
displayed next to the selected item.
Info Page Options : Press the thumbwheel
while Info Page Options is displayed to
enter and select the items to be displayed
in the Info app. A selected mark will be
displayed next to the selected item.