GMC YUKON HYBRID 2010 Workshop Manual
Manufacturer: GMC, Model Year: 2010, Model line: YUKON HYBRID, Model: GMC YUKON HYBRID 2010Pages: 120, PDF Size: 1.03 MB
Page 51 of 120
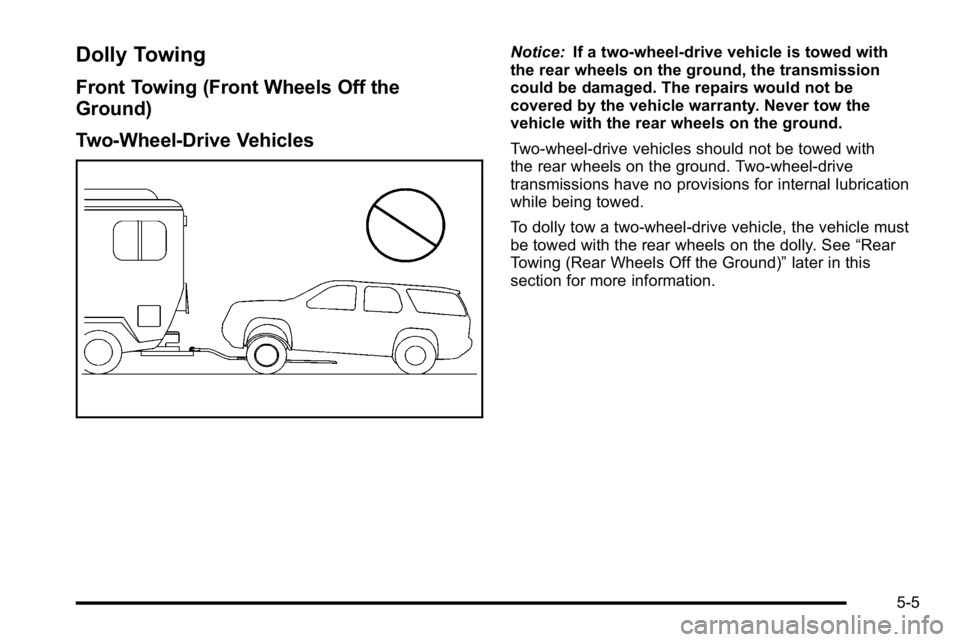
Dolly Towing
Front Towing (Front Wheels Off the
Ground)
Two-Wheel-Drive Vehicles
Notice:If a two-wheel-drive vehicle is towed with
the rear wheels on the ground, the transmission
could be damaged. The repairs would not be
covered by the vehicle warranty. Never tow the
vehicle with the rear wheels on the ground.
Two-wheel-drive vehicles should not be towed with
the rear wheels on the ground. Two-wheel-drive
transmissions have no provisions for internal lubrication
while being towed.
To dolly tow a two‐wheel‐drive vehicle, the vehicle must
be towed with the rear wheels on the dolly. See “Rear
Towing (Rear Wheels Off the Ground)” later in this
section for more information.
5-5
Page 52 of 120
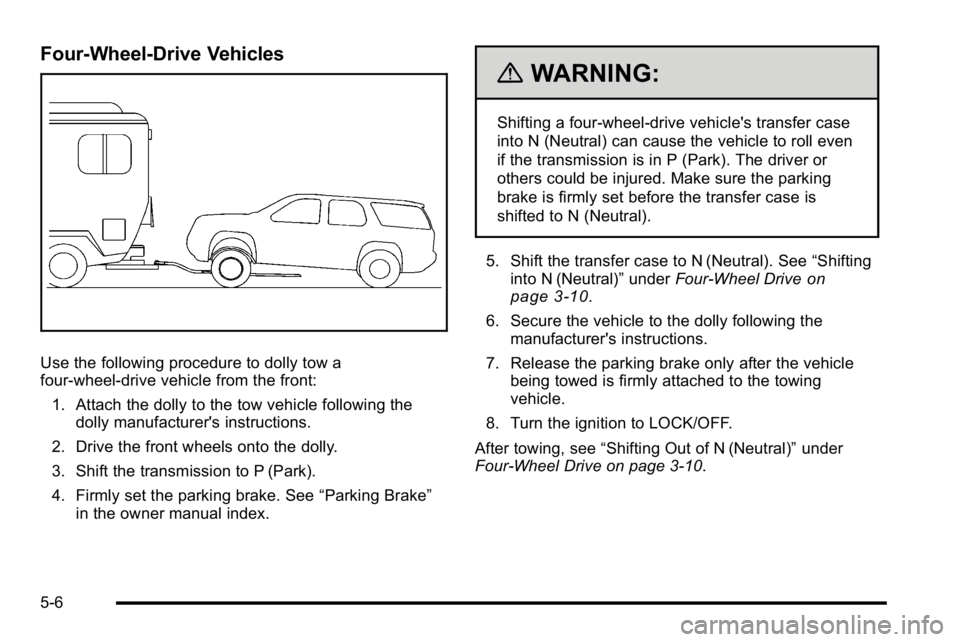
Four-Wheel-Drive Vehicles
Use the following procedure to dolly tow a
four-wheel-drive vehicle from the front:1. Attach the dolly to the tow vehicle following the dolly manufacturer's instructions.
2. Drive the front wheels onto the dolly.
3. Shift the transmission to P (Park).
4. Firmly set the parking brake. See “Parking Brake”
in the owner manual index.
{WARNING:
Shifting a four-wheel-drive vehicle's transfer case
into N (Neutral) can cause the vehicle to roll even
if the transmission is in P (Park). The driver or
others could be injured. Make sure the parking
brake is firmly set before the transfer case is
shifted to N (Neutral).
5. Shift the transfer case to N (Neutral). See “Shifting
into N (Neutral)” underFour-Wheel Drive
on
page 3‑10.
6. Secure the vehicle to the dolly following the manufacturer's instructions.
7. Release the parking brake only after the vehicle being towed is firmly attached to the towing
vehicle.
8. Turn the ignition to LOCK/OFF.
After towing, see “Shifting Out of N (Neutral)” under
Four-Wheel Drive on page 3‑10.
5-6
Page 53 of 120
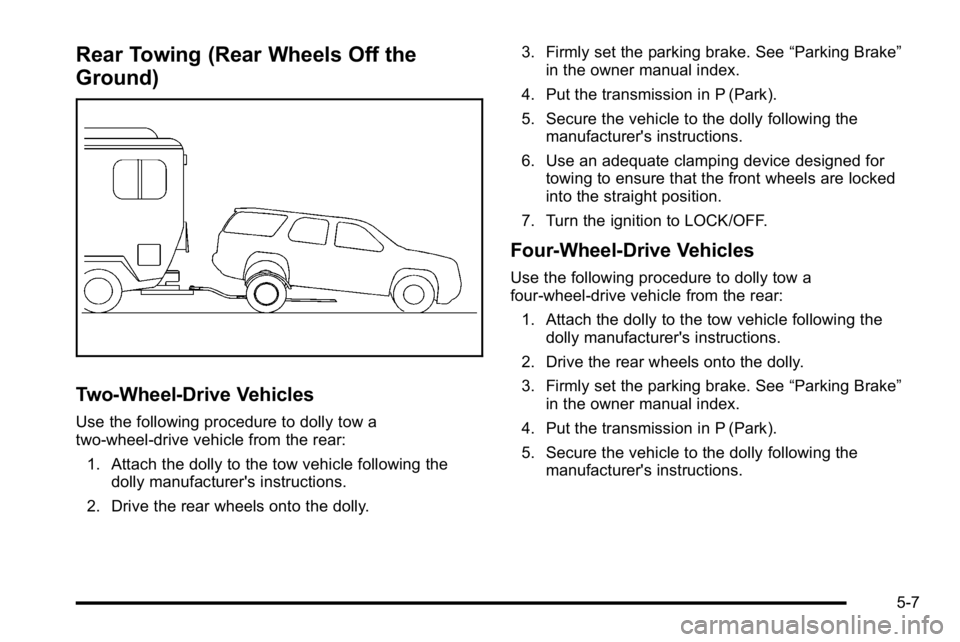
Rear Towing (Rear Wheels Off the
Ground)
Two‐Wheel‐Drive Vehicles
Use the following procedure to dolly tow a
two-wheel-drive vehicle from the rear:
1. Attach the dolly to the tow vehicle following the dolly manufacturer's instructions.
2. Drive the rear wheels onto the dolly. 3. Firmly set the parking brake. See
“Parking Brake”
in the owner manual index.
4. Put the transmission in P (Park).
5. Secure the vehicle to the dolly following the manufacturer's instructions.
6. Use an adequate clamping device designed for towing to ensure that the front wheels are locked
into the straight position.
7. Turn the ignition to LOCK/OFF.
Four‐Wheel‐Drive Vehicles
Use the following procedure to dolly tow a
four-wheel-drive vehicle from the rear: 1. Attach the dolly to the tow vehicle following the dolly manufacturer's instructions.
2. Drive the rear wheels onto the dolly.
3. Firmly set the parking brake. See “Parking Brake”
in the owner manual index.
4. Put the transmission in P (Park).
5. Secure the vehicle to the dolly following the manufacturer's instructions.
5-7
Page 54 of 120
6. Use an adequate clamping device designed fortowing to ensure that the front wheels are locked
into the straight position.
{WARNING:
Shifting a four-wheel-drive vehicle's transfer case
into N (Neutral) can cause the vehicle to roll even
if the transmission is in P (Park). The driver or
others could be injured. Make sure the parking
brake is firmly set before the transfer case is
shifted to N (Neutral).
7. Shift the transfer case to N (Neutral). See “Shifting
into N (Neutral)” underFour-Wheel Drive
on
page 3‑10
8. Turn the ignition to LOCK/OFF.
After towing, see “Shifting Out of N (Neutral)” under
Four-Wheel Drive on page 3‑10.
Towing a Trailer
For more information, see “Towing a Trailer”in the
owner manual Index.
Weight of the Trailer
How heavy can a trailer safely be?
It depends on how the rig is used. For example, speed,
altitude, road grades, outside temperature and how
much the vehicle is used to pull a trailer are all
important. It can depend on any special equipment
on the vehicle, and the amount of tongue weight the
vehicle can carry.
Maximum trailer weight is calculated assuming only the
driver is in the tow vehicle and it has all the required
trailering equipment. The weight of additional optional
equipment, passengers and cargo in the tow vehicle
must be subtracted from the maximum trailer weight.
Use the following charts to determine how much the
vehicle can weigh, based upon the vehicle model and
options.
5-8
Page 55 of 120
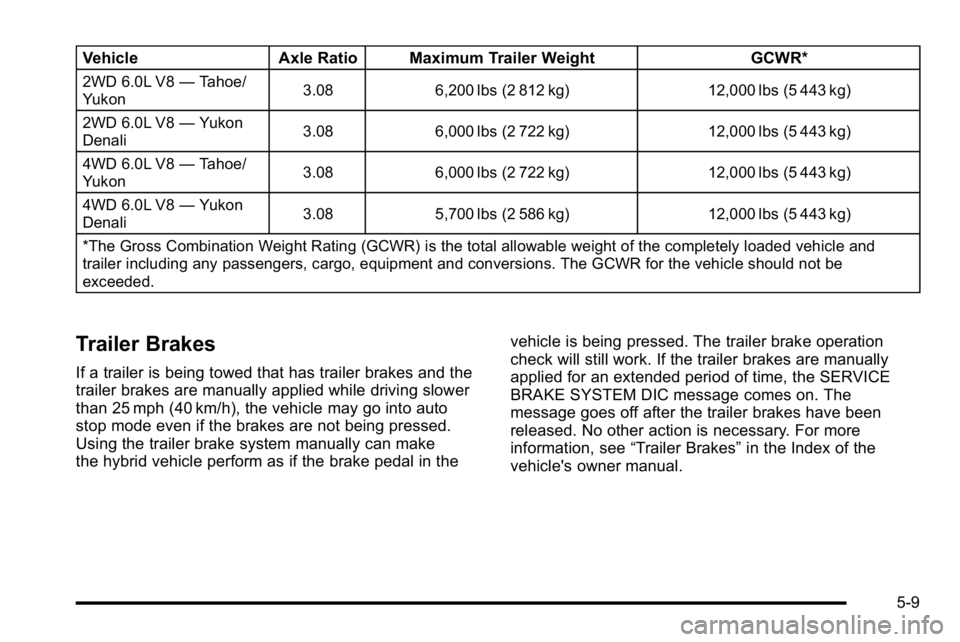
VehicleAxle Ratio Maximum Trailer Weight GCWR*
2WD 6.0L V8—Tahoe/
Yukon 3.08 6,200 lbs (2 812 kg) 12,000 lbs (5 443 kg)
2WD 6.0L V8 —Yukon
Denali 3.08 6,000 lbs (2 722 kg) 12,000 lbs (5 443 kg)
4WD 6.0L V8 —Tahoe/
Yukon 3.08 6,000 lbs (2 722 kg) 12,000 lbs (5 443 kg)
4WD 6.0L V8 —Yukon
Denali 3.08 5,700 lbs (2 586 kg) 12,000 lbs (5 443 kg)
*The Gross Combination Weight Rating (GCWR) is the total allowable weight of the completely loaded vehicle and
trailer including any passengers, cargo, equipment and conversions. The GCWR for the vehicle should not be
exceeded.
Trailer Brakes
If a trailer is being towed that has trailer brakes and the
trailer brakes are manually applied while driving slower
than 25 mph (40 km/h), the vehicle may go into auto
stop mode even if the brakes are not being pressed.
Using the trailer brake system manually can make
the hybrid vehicle perform as if the brake pedal in the vehicle is being pressed. The trailer brake operation
check will still work. If the trailer brakes are manually
applied for an extended period of time, the SERVICE
BRAKE SYSTEM DIC message comes on. The
message goes off after the trailer brakes have been
released. No other action is necessary. For more
information, see
“Trailer Brakes”in the Index of the
vehicle's owner manual.
5-9
Page 56 of 120

2NOTES
5-10
Page 57 of 120
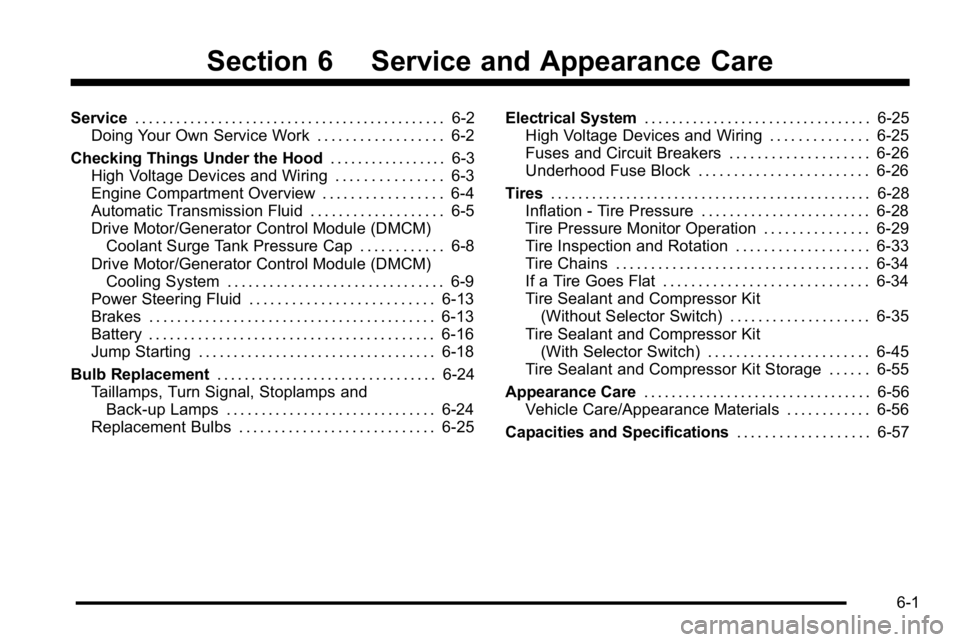
Section 6 Service and Appearance Care
Service. . . . . . . . . . . . . . . . . . . . . . . . . . . . . . . . . . . . . . . . . . . . . 6-2
Doing Your Own Service Work . . . . . . . . . . . . . . . . . . 6-2
Checking Things Under the Hood . . . . . . . . . . . . . . . . .6-3
High Voltage Devices and Wiring . . . . . . . . . . . . . . . 6-3
Engine Compartment Overview . . . . . . . . . . . . . . . . . 6-4
Automatic Transmission Fluid . . . . . . . . . . . . . . . . . . . 6-5
Drive Motor/Generator Control Module (DMCM) Coolant Surge Tank Pressure Cap . . . . . . . . . . . . 6-8
Drive Motor/Generator Control Module (DMCM) Cooling System . . . . . . . . . . . . . . . . . . . . . . . . . . . . . . . 6-9
Power Steering Fluid . . . . . . . . . . . . . . . . . . . . . . . . . . 6-13
Brakes . . . . . . . . . . . . . . . . . . . . . . . . . . . . . . . . . . . . . . . . . 6-13
Battery . . . . . . . . . . . . . . . . . . . . . . . . . . . . . . . . . . . . . . . . . 6-16
Jump Starting . . . . . . . . . . . . . . . . . . . . . . . . . . . . . . . . . . 6-18
Bulb Replacement . . . . . . . . . . . . . . . . . . . . . . . . . . . . . . . . 6-24
Taillamps, Turn Signal, Stoplamps and Back-up Lamps . . . . . . . . . . . . . . . . . . . . . . . . . . . . . . 6-24
Replacement Bulbs . . . . . . . . . . . . . . . . . . . . . . . . . . . . 6-25 Electrical System
. . . . . . . . . . . . . . . . . . . . . . . . . . . . . . . . . 6-25
High Voltage Devices and Wiring . . . . . . . . . . . . . . 6-25
Fuses and Circuit Breakers . . . . . . . . . . . . . . . . . . . . 6-26
Underhood Fuse Block . . . . . . . . . . . . . . . . . . . . . . . . 6-26
Tires . . . . . . . . . . . . . . . . . . . . . . . . . . . . . . . . . . . . . . . . . . . . . . . 6-28
Inflation - Tire Pressure . . . . . . . . . . . . . . . . . . . . . . . . 6-28
Tire Pressure Monitor Operation . . . . . . . . . . . . . . . 6-29
Tire Inspection and Rotation . . . . . . . . . . . . . . . . . . . 6-33
Tire Chains . . . . . . . . . . . . . . . . . . . . . . . . . . . . . . . . . . . . 6-34
If a Tire Goes Flat . . . . . . . . . . . . . . . . . . . . . . . . . . . . . 6-34
Tire Sealant and Compressor Kit (Without Selector Switch) . . . . . . . . . . . . . . . . . . . . 6-35
Tire Sealant and Compressor Kit (With Selector Switch) . . . . . . . . . . . . . . . . . . . . . . . 6-45
Tire Sealant and Compressor Kit Storage . . . . . . 6-55
Appearance Care . . . . . . . . . . . . . . . . . . . . . . . . . . . . . . . . . 6-56
Vehicle Care/Appearance Materials . . . . . . . . . . . . 6-56
Capacities and Specifications . . . . . . . . . . . . . . . . . . .6-57
6-1
Page 58 of 120
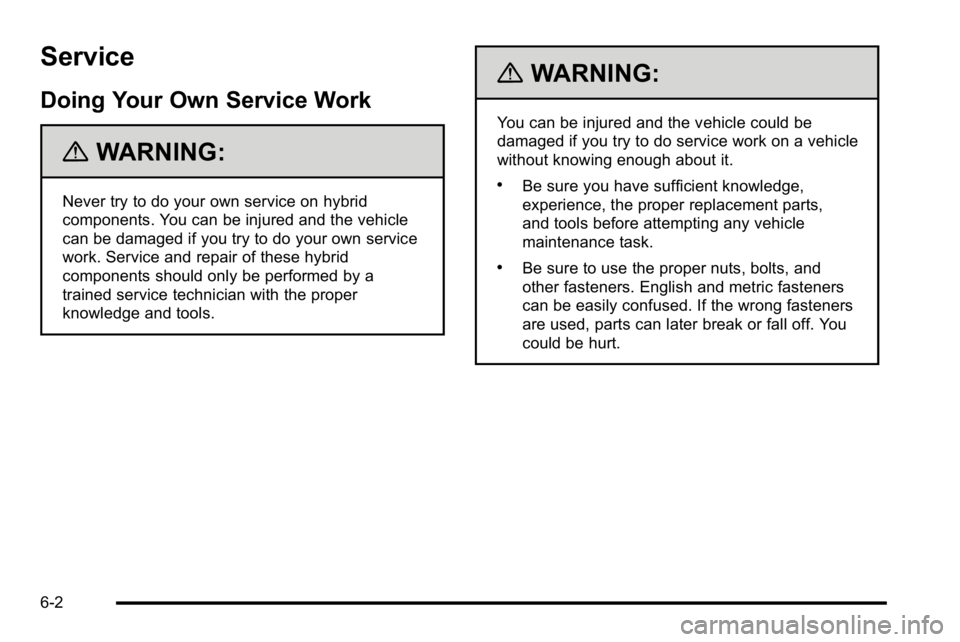
Service
Doing Your Own Service Work
{WARNING:
Never try to do your own service on hybrid
components. You can be injured and the vehicle
can be damaged if you try to do your own service
work. Service and repair of these hybrid
components should only be performed by a
trained service technician with the proper
knowledge and tools.
{WARNING:
You can be injured and the vehicle could be
damaged if you try to do service work on a vehicle
without knowing enough about it.
.Be sure you have sufficient knowledge,
experience, the proper replacement parts,
and tools before attempting any vehicle
maintenance task.
.Be sure to use the proper nuts, bolts, and
other fasteners. English and metric fasteners
can be easily confused. If the wrong fasteners
are used, parts can later break or fall off. You
could be hurt.
6-2
Page 59 of 120
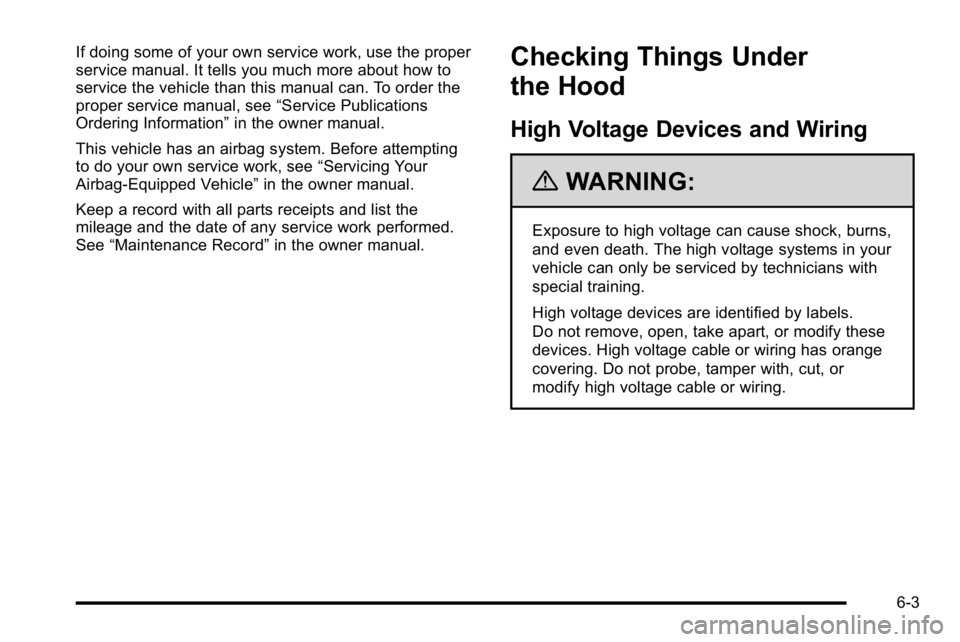
If doing some of your own service work, use the proper
service manual. It tells you much more about how to
service the vehicle than this manual can. To order the
proper service manual, see“Service Publications
Ordering Information” in the owner manual.
This vehicle has an airbag system. Before attempting
to do your own service work, see “Servicing Your
Airbag‐Equipped Vehicle” in the owner manual.
Keep a record with all parts receipts and list the
mileage and the date of any service work performed.
See “Maintenance Record” in the owner manual.Checking Things Under
the Hood
High Voltage Devices and Wiring
{WARNING:
Exposure to high voltage can cause shock, burns,
and even death. The high voltage systems in your
vehicle can only be serviced by technicians with
special training.
High voltage devices are identified by labels.
Do not remove, open, take apart, or modify these
devices. High voltage cable or wiring has orange
covering. Do not probe, tamper with, cut, or
modify high voltage cable or wiring.
6-3
Page 60 of 120
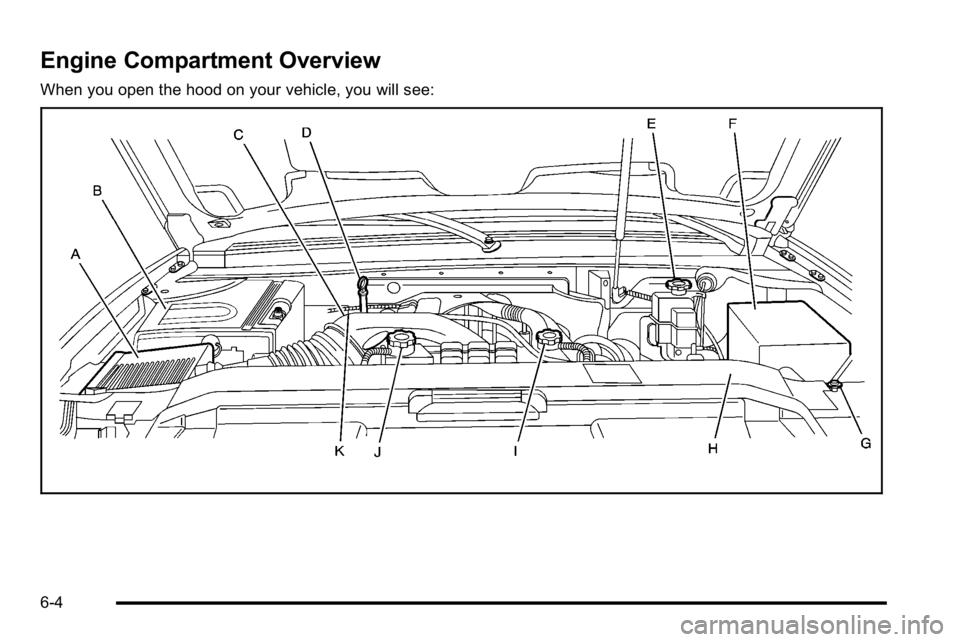
Engine Compartment Overview
When you open the hood on your vehicle, you will see:
6-4