HONDA ACCORD 2002 CL7 / 7.G Owners Manual
Manufacturer: HONDA, Model Year: 2002, Model line: ACCORD, Model: HONDA ACCORD 2002 CL7 / 7.GPages: 223, PDF Size: 3.8 MB
Page 131 of 223

Be sure electronic accessories do
not overload electrical circuits
(see page ).
Have the installer contact your
Honda dealer f or assistance bef ore
installing any electronic accessory.
If possible, have your dealer inspect
the f inal installation.
Bef ore installing any accessory:
Modif ying your car, or installing
some non-Honda accessories, can
make your car unsaf e. Bef ore you
make any modif ications or add any
accessories,besuretoreadthe
f ollowing inf ormation.
Your dealer has Genuine Honda
accessories that allow you to
personalize your car. These
accessories have been designed and
approved f or your car, and are
covered by warranty.
Non-Honda accessories are usually
designed f or universal applications.
Although aftermarket accessories
may f it on your car, they may not
meet f actory specif ications, and
could adversely af f ect your car’s
handling and stability. (See
‘‘Modif ications’’ on page f or
additional information.)
However, if electronic accessories
are improperly installed, or exceed
your car’s electrical system capacity,
they can interfere with the operationof your car, or even cause the
airbags to deploy.
Make sure the accessory does not
obscure any lights, or interf ere
with proper car operation or
perf ormance.
When properly installed, cellular
phones, alarms, two-way radios, and
low-powered audio systems should
not interf ere with your car’s
computer-controlled systems, such
as the SRS and anti-lock brake
system. 331
203
A ccessories
A ccessories and Modif ications
Bef ore Driving202
Improper accessories or
modifications can affect your
car’s handling, stability and
performance, and cause a
crash in which you can be hurt
or killed.
Follow all instructions in this
owner’s manual regarding
accessories and modifications.
Page 132 of 223

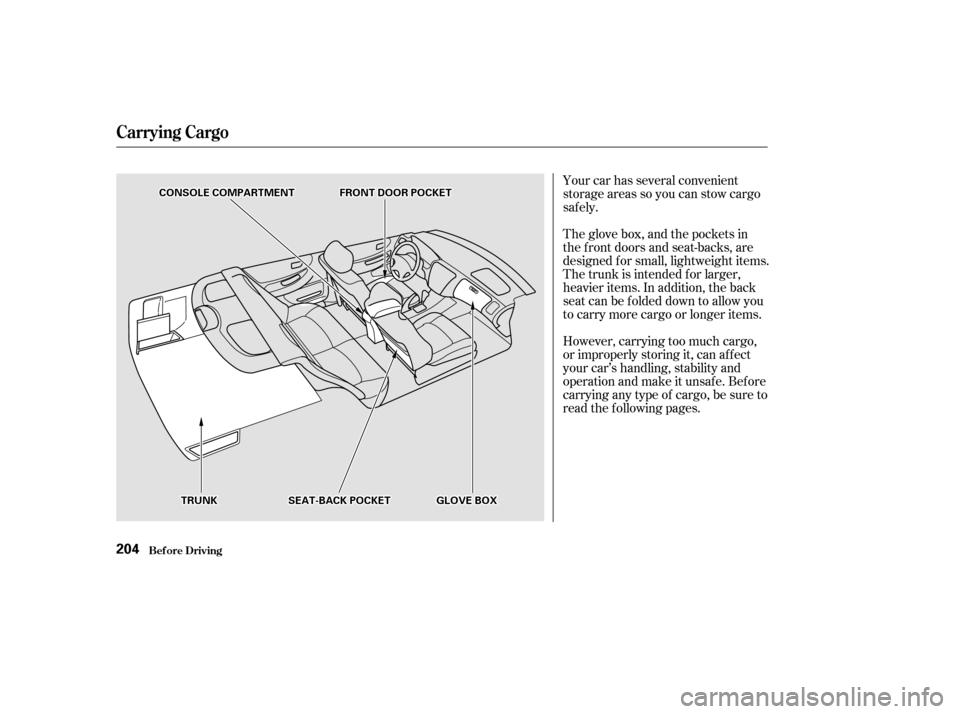
The glove box, and the pockets in
the f ront doors and seat-backs, are
designed f or small, lightweight items.
The trunk is intended f or larger,
heavier items. In addition, the back
seatcanbefoldeddowntoallowyou
to carry more cargo or longer items.
Your car has several convenient
storage areas so you can stow cargo
saf ely.
However, carrying too much cargo,
or improperly storing it, can af f ect
your car’s handling, stability and
operation and make it unsafe. Before
carrying any type of cargo, be sure to
read the f ollowing pages.
Carrying Cargo
Bef ore Driving204
FFRROONNTTDDOOOORRPPOOCCKKEETTCCOONNSSOOLLEECCOOMMPPAARRTTMMEENNTT
GGLLOOVVEEBBOOXXSSEEAATT--BBAACCKKPPOOCCKKEETTTTRRUUNNKK
Page 133 of 223

This section gives you tips on
starting the engine under various
conditions, and how to operate the
5-speed manual and automatic
transmissions. It also includes
important inf ormation on parking
your car, the braking system, the
Traction Control System, and facts
you need if you are planning to tow a
trailer.........................
Preparing to Drive . 208
.......................
Starting the Engine . 209
Starting in Cold Weather ....................
at High Altitude . 210
....
5-speed Manual Transmission . 211
.....
Recommended Shif t Points . 212
..............
Engine Speed Limiter . 212
..............
Automatic Transmission . 212
.
Shif t Lever Position Indicator . 213
................
Shif t Lever Positions . 213
..............
Engine Speed Limiter . 216
....................
Shif t Lock Release . 216
...........................................
Parking . 218
.....................
The Braking System . 219
.............
Brake Wear Indicators . 219
...............
Brake System Design . 220
.......................
Anti-lock Brakes . 220
Important Saf ety .........................
Reminders . 221
........................
ABS Indicator . 221
..............
Traction Control System . 222
...............
TCS ON/OFF Switch . 223
............................
TCS Indicator . 223
...............
Driving in Bad Weather . 225
...........................
Towing a Trailer . 227
Driving
Driving207
Page 134 of 223

Make sure all windows, mirrors,
and outside lights are clean and
unobstructed. Remove f rost, snow,
or ice.
Check that the hood and trunk are
f ully closed.Check the adjustment of the seat
(see page ).
Check the adjustment of the
inside and outside mirrors (see
page ).
Check the adjustment of the
steering wheel (see page ).
Make sure the doors are securely
closed and locked.
Fasten your seat belt. Check that
your passengers have f astened
their seat belts (see page ).Turn the ignition switch ON (II).
Check the indicator lights in the
instrument panel.
Start the engine (see page ).
Check the gauges and indicator
lights in the instrument panel (see
page ).
Check that any items you may be
carrying with you inside are stored
properly or f astened down
securely.
Visually check the tires. If a tire
looks low, use a gauge to check its
pressure.
Youshoulddothefollowingchecks
and adjustments every day bef ore
you drive your car.
3.2.
1.
4. 5.
6. 7. 8. 9. 11.
12. 10.
82
93 69
15 209
55
Preparing to Drive
Driving208
Page 135 of 223

Push the clutch pedal down all the
way. START (III) does not
f unction unless the clutch pedal is
depressed.
Apply the parking brake.
In cold weather, turn of f all
electrical accessories to reduce
the drain on the battery.
Make sure the shif t lever is in
Park. Press on the brake pedal. If the engine still does not start,
press the accelerator pedal all the
way down and hold it there while
starting in order to clear f looding.
As bef ore, keep the ignition key in
the START (III) position f or no
more than 15 seconds. Return to
step 5 if the engine does not start.
If it starts, lif t your f oot of f the
accelerator pedal so the engine
does not race.
Without touching the accelerator
pedal, turn the ignition key to the
START (III) position. If the engine
does not start right away, do not
hold the key in START (III) f or
more than 15 seconds at a time.
Pause f or at least 10 seconds
bef ore trying again.
If the engine does not start within
15 seconds, or starts but stalls
right away, repeat step 4 with the
accelerator pedal pressed half-way
down. If the engine starts, release
pressure on the accelerator pedal
so the engine does not race.
1. 2. 3.
4. 5.6.
Automatic Transmission:
Manual Transmission:
Starting the Engine
Driving209
Page 136 of 223

Use the f ollowing procedure:Turn of f all electrical accessories
to reduce the drain on the battery.
Push the accelerator pedal half-
way to the f loor and hold it there
while starting the engine. Do not
hold the ignition key in START
(III) f or more than 15 seconds.
When the engine starts, release
the accelerator pedal gradually as
the engine speeds up and smooths
out.
An engine is harder to start in cold
weather. The thinner air f ound at
high altitude above 8,000 f eet (2,400
meters) adds to the problem.
If the engine fails to start in step 2,
push the accelerator pedal to the
f loor and hold it there while you
try to start the engine for no more
than 15 seconds. If the engine
does not start, return to step 2.
1. 2. 3.
Driving
Starting in Cold Weather at High
A ltitude (A bove 8,000 f eet/
2,400 meters)
Starting the Engine
210
Page 137 of 223

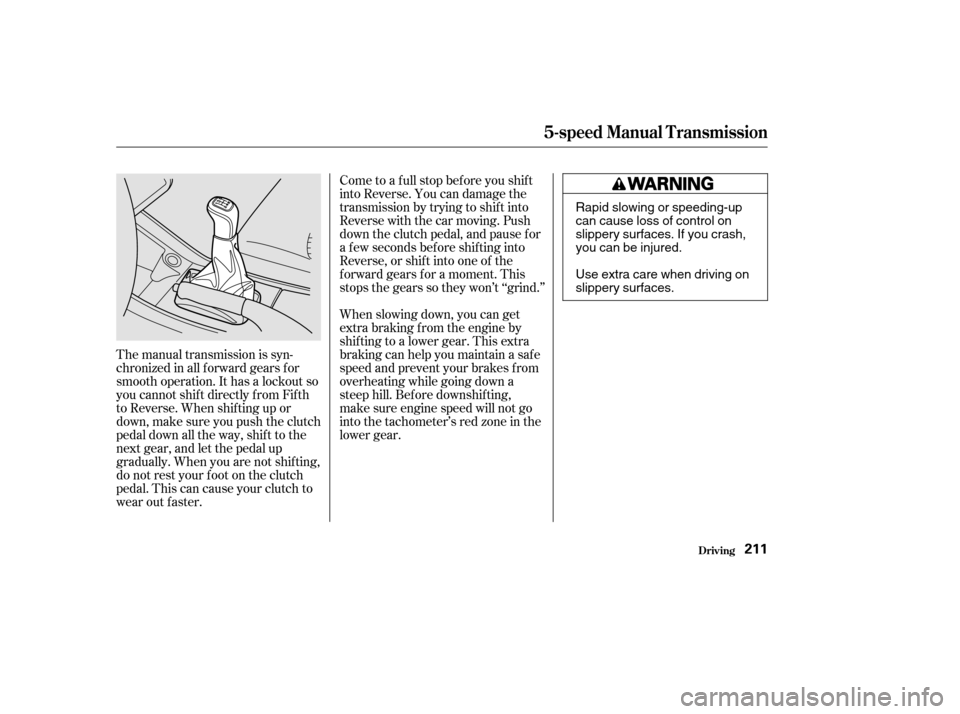
Come to a full stop before you shift
into Reverse. You can damage the
transmission by trying to shif t into
Reverse with the car moving. Push
down the clutch pedal, and pause f or
a f ew seconds bef ore shif ting into
Reverse, or shif t into one of the
f orward gears f or a moment. This
stops the gears so they won’t ‘‘grind.’’
When slowing down, you can get
extra braking f rom the engine by
shifting to a lower gear. This extra
braking can help you maintain a safe
speed and prevent your brakes f rom
overheating while going down a
steep hill. Bef ore downshif ting,
make sure engine speed will not go
into the tachometer’s red zone in the
lower gear.
The manual transmission is syn-
chronizedinallforwardgearsfor
smooth operation. It has a lockout so
you cannot shift directly from Fifth
to Reverse. When shif ting up or
down,makesureyoupushtheclutch
pedal down all the way, shift to the
next gear, and let the pedal up
gradually. When you are not shif ting,
do not rest your f oot on the clutch
pedal. This can cause your clutch to
wear out faster.
Driving
5-speed Manual T ransmission
211
Rapid slowing or speeding-up
can cause loss of control on
slippery surfaces. If you crash,
you can be injured.
Use extra care when driving on
slippery surfaces.
Page 138 of 223

Your Honda’s transmission has f our
f orward speeds, and is electronically
controlled f or smoother shif ting. It
also has a ‘‘lock-up’’ torque converter
forbetterfueleconomy.Youmay
f eel what seems like another shif t
when the converter locks.
Drive in the highest gear that lets
the engine run and accelerate
smoothly. This will give you the best
f uel economy and ef f ective emis-
sions control. The f ollowing shif t
points are recommended:
Shif t up
1st to 2nd
2nd to 3rd 3rd to 4th4th to 5th
Shif t up
1st to 2nd
2nd to 3rd 3rd to 4th4th to 5th Normal acceleration
15 mph (24 km/h)
28 mph (45 km/h)
41 mph (66 km/h)
52 mph (84 km/h)
Cruise acceleration 7mph(11km/h)
22 mph (35 km/h)
33 mph (53 km/h)
48 mph (77 km/h) If you exceed the maximum speed
f or the gear you are in, the engine
speed will enter into the tachometer’s
red zone. If this occurs, you may f eel
the engine cut in and out. This is
caused by a limiter in the engine’s
computer controls. The engine will
run normally when you reduce the
RPM below the red zone.
Bef ore downshif ting, make sure the
engine will not go into the
tachometer’s red zone.
5-speed Manual T ransmission, A ut omat ic T ransmission
Driving
Automatic Transmission
Recommended Shif t Points Engine Speed L imiter
212
Page 139 of 223

CONT INUED
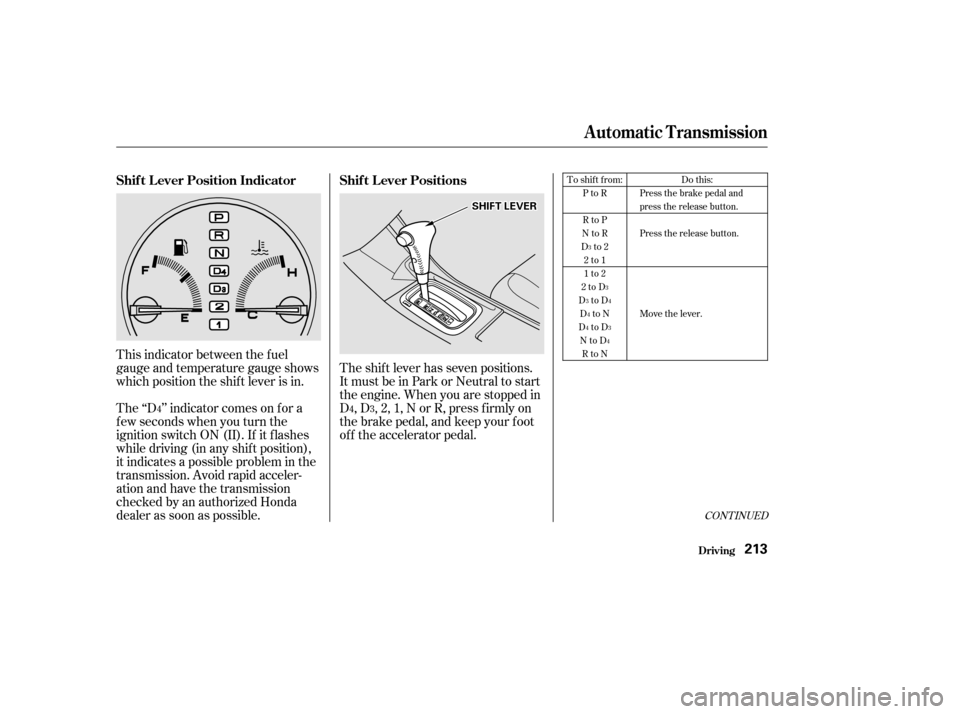
The shift lever has seven positions.
It must be in Park or Neutral to start
the engine. When you are stopped in
D,D,2,1,NorR,pressfirmlyon
the brake pedal, and keep your f oot
of f the accelerator pedal.
This indicator between the f uel
gauge and temperature gauge shows
which position the shif t lever is in.
The ‘‘D ’’ indicator comes on f or a
f ew seconds when you turn the
ignition switch ON (II). If it f lashes
while driving (in any shif t position),
it indicates a possible problem in the
transmission. Avoid rapid acceler-
ation and have the transmission
checkedbyanauthorizedHonda
dealer as soon as possible.
43 To shift from:
PtoR
RtoP
NtoR
Dto2 2to1
1to2
2toD
DtoD
DtoN
DtoD NtoD RtoN Do this:
Press the brake pedal and
press the release button.
Press the release button.
Move the lever.
4
3 3
34 4
43 4
Driving
Automatic Transmission
Shif t L ever Position Indicator Shif t L ever Positions
213
SSHHIIFFTTLLEEVVEERR
Page 140 of 223

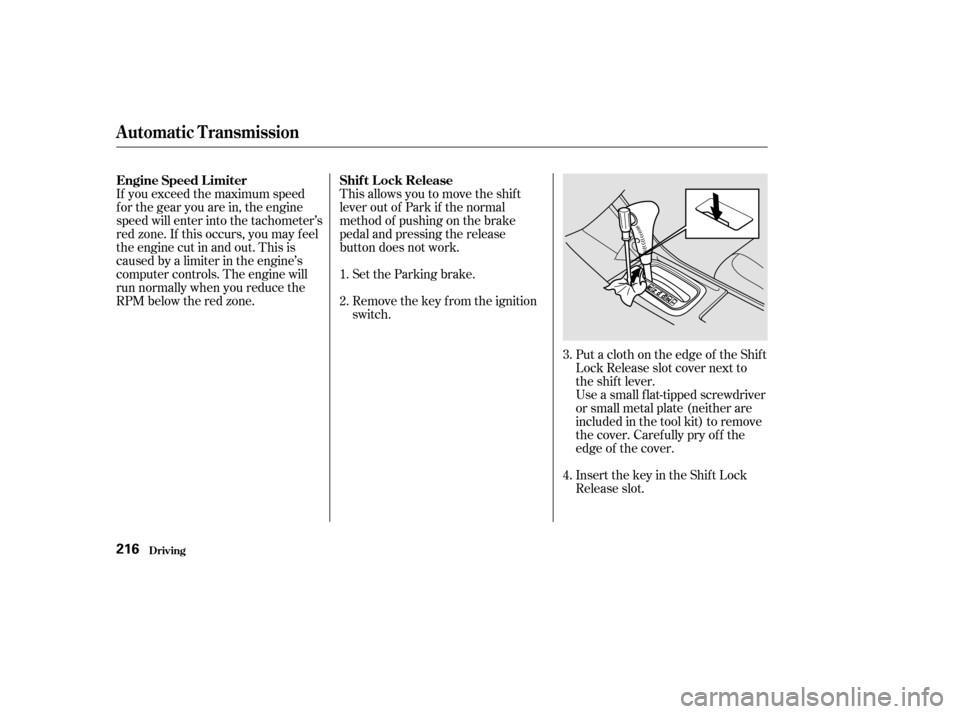
This allows you to move the shif t
lever out of Park if the normal
method of pushing on the brake
pedal and pressing the release
button does not work.Set the Parking brake.
Remove the key from the ignition
switch.
Insert the key in the Shift Lock
Release slot.
If you exceed the maximum speed
f or the gear you are in, the engine
speed will enter into the tachometer’s
red zone. If this occurs, you may f eel
the engine cut in and out. This is
caused by a limiter in the engine’s
computer controls. The engine will
run normally when you reduce the
RPM below the red zone.
Put a cloth on the edge of the Shif t
Lock Release slot cover next to
the shift lever.
Use a small flat-tipped screwdriver
or small metal plate (neither are
included in the tool kit) to remove
the cover. Caref ully pry of f the
edge of the cover.
1. 2.
3. 4.
Automatic Transmission
Driving
Shif t L ock Release
Engine Speed L imiter
216