start stop button HONDA CR-V 2015 RM1, RM3, RM4 / 4.G Workshop Manual
[x] Cancel search | Manufacturer: HONDA, Model Year: 2015, Model line: CR-V, Model: HONDA CR-V 2015 RM1, RM3, RM4 / 4.GPages: 533, PDF Size: 24.82 MB
Page 343 of 533
342
Features
Compass
When you turn the ignition switch to ON (w*1, the compass self-calibrates, and the
compass display appears.
Compass Calibration
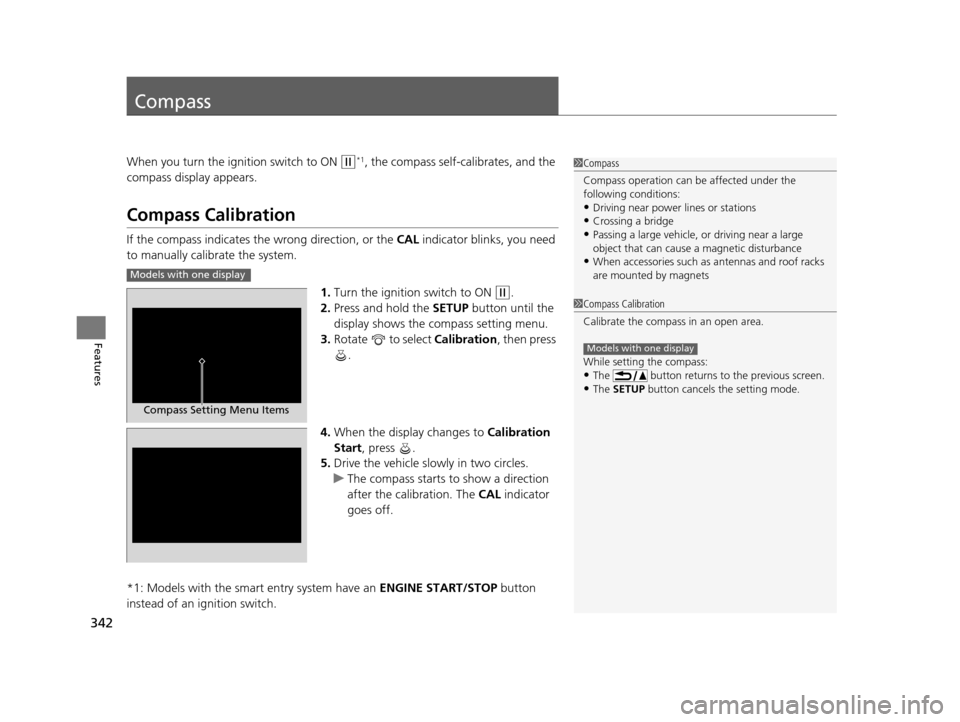
If the compass indicates the wrong direction, or the CAL indicator blinks, you need
to manually calibrate the system.
1.Turn the ignition switch to ON
(w.
2. Press and hold the SETUP button until the
display shows the compass setting menu.
3. Rotate to select Calibration, then press
.
4. When the display changes to Calibration
Start, press .
5. Drive the vehicle slowly in two circles.
u The compass starts to show a direction
after the calibration. The CAL indicator
goes off.
*1: Models with the smart entry system have an ENGINE START/STOP button
instead of an ignition switch.
1 Compass
Compass operation can be affected under the
following conditions:
•Driving near power lines or stations•Crossing a bridge
•Passing a large vehicle, or driving near a large
object that can cause a magnetic disturbance
•When accessories such as antennas and roof racks
are mounted by magnetsModels with one display
Compass Setting Menu Items
1 Compass Calibration
Calibrate the compass in an open area.
While setting the compass:
•The button returns to the previous screen.•The SETUP button cancels the setting mode.
Models with one display
15 CR-V-31T0A6300.book 342 ページ 2015年2月2日 月曜日 午前10時35分
Page 348 of 533
347
Driving
This chapter discusses driving, refueling, and information on items such as accessories.
Before Driving................................... 348
Towing a Trailer
Towing Preparation .......................... 353
Driving Safely with a Trailer .............. 356
Towing Your Vehicle ........................ 357
Off-Highway Driving Guidelines General Information ......................... 358
Important Safety Precautions............ 358
Avoiding Trouble ............................. 359
When Driving
Starting the Engine .......................... 360
Starting the Engine .......................... 362
Models without smart entry system
Models with smart entry system
Precautions While Driving ................ 366
Continuously Variable Transmission... 367
Shifting ............................................ 368
ECON Button ................................... 370
Cruise Control
*............................... 371
Front Sensor Camera*..................... 374
Adaptive Cruise Control (ACC)*....... 375
Lane Departure Warning (LDW)*..... 386
Lane Keeping Assist System (LKAS)*.. 390Vehicle Stability Assist (VSA®), aka Electronic
Stability Control (ESC), System............. 396
Real Time AWD with Intelligent Control
SystemTM*...................................... 400Tire Pressure Monitoring System (TPMS) ... 401
Tire Pressure Monitoring System (TPMS) - Required Federal Explanation ......... 403
Braking Brake System ................................... 405
Anti-lock Brake System (ABS) ........... 407
Brake Assist System ......................... 408
Collision Mitigation Braking System
TM
(CMBSTM)*..................................... 409
Parking Your Vehicle When Stopped ................................ 416
Multi-View Rear Camera
*................ 417
Refueling ........................................... 420
Fuel Economy .................................... 423
Accessories and Modifications ........ 424
* Not available on all models
15 CR-V-31T0A6300.book 347 ページ 2015年2月2日 月曜日 午前10時35分
Page 364 of 533
Continued363
uuWhen Driving uStarting the Engine
Driving
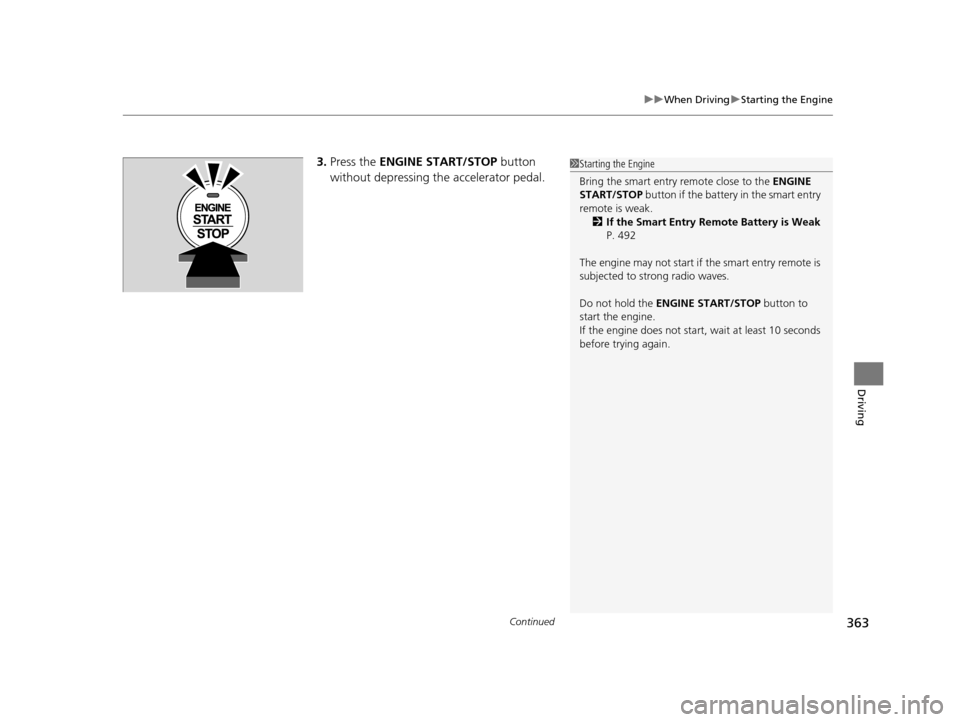
3. Press the ENGINE START/STOP button
without depressing the accelerator pedal.1 Starting the Engine
Bring the smart entry remote close to the ENGINE
START/STOP button if the battery in the smart entry
remote is weak. 2 If the Smart Entry Remote Battery is Weak
P. 492
The engine may not start if the smart entry remote is
subjected to strong radio waves.
Do not hold the ENGINE START/STOP button to
start the engine.
If the engine does not start, wait at least 10 seconds
before trying again.
15 CR-V-31T0A6300.book 363 ページ 2015年2月2日 月曜日 午前10時35分
Page 365 of 533
364
uuWhen Driving uStarting the Engine
Driving
You can turn the engine off when the vehicle is completely stopped.
1. Shift to
(P.
2. Press the ENGINE START/STOP button.
1. Keeping your right foot on the brake peda l, release the parking brake. Check that
the parking brake indicator has gone off.
2 Parking Brake P. 405
2.Put the shift lever in (D. Select (R when reversing.
3. Gradually release the brake pedal and gently depress the accelerator pedal to pull
away.
■Stopping the Engine
■Starting to Drive
15 CR-V-31T0A6300.book 364 ページ 2015年2月2日 月曜日 午前10時35分
Page 368 of 533
367
uuWhen Driving uContinuously Variable Transmission
Driving
Continuously Variable Transmission
The engine runs at a higher id le speed and creeping increases.
Keep the brake pedal firmly depressed when stopped.
Quickly depressing the accelerator peda l while driving uphill may cause the
transmission to drop to a lower gear, unex pectedly increasing vehicle speed. Depress
the accelerator pedal carefully, especi ally on slippery roads and curves.
■Creeping
■Kickdown
1Precautions While Driving
If the ignition switch is turned to ACCESSORY
(q or
LOCK ( 0*1 while driving, the e ngine will shut down
and all steering and brake pow er assist functions will
stop, making it difficult to control the vehicle.
Do not put the shift lever in
( N, as you will lose
engine braking (and acce leration) performance.
During the first 600 miles (1,000 km) of operation,
avoid sudden acceleration or full throttle operation so
as to not damage the engine or powertrain.
Avoid hard braking for the first 200 miles (300 km).
You should also follow this when the brake pads are
replaced.
*1: Models with the smart entry system have an
ENGINE START/STOP button instead of an ignition
switch.
1 Driving Guidelines for Your Utility Vehicle
Failure to operate your vehi cle correctly might result
in a crash or a rollover. 2 Important Handling Information P. 30
2 Precautions While Driving P. 366
15 CR-V-31T0A6300.book 367 ページ 2015年2月2日 月曜日 午前10時35分
Page 369 of 533
368
uuWhen Driving uShifting
Driving
Shifting
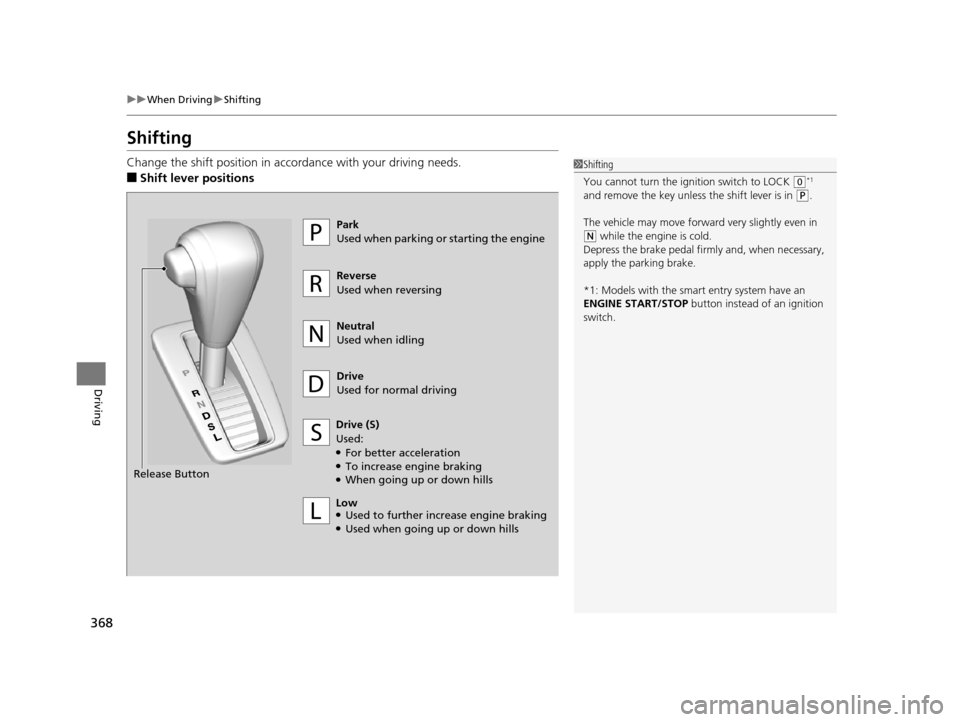
Change the shift position in accordance with your driving needs.
■Shift lever positions
1Shifting
You cannot turn the ignition switch to LOCK
(0*1
and remove the key unless the shift lever is in
( P.
The vehicle may move forward very slightly even in
(N while the engine is cold.
Depress the brake pe dal firmly and, when necessary,
apply the parking brake.
*1: Models with the smart entry system have an
ENGINE START/STOP button instead of an ignition
switch.
Drive
Used for normal driving
Park
Used when parking or starting the engine
Reverse
Used when reversing
Neutral
Used when idling
Drive (S)
Used:
●For better acceleration●To increase engine braking●When going up or down hills
Release Button
Low
●Used to further increase engine braking●Used when going up or down hills
15 CR-V-31T0A6300.book 368 ページ 2015年2月2日 月曜日 午前10時35分
Page 393 of 533
uuWhen Driving uLane Keeping Assist System (LKAS)*
392
Driving
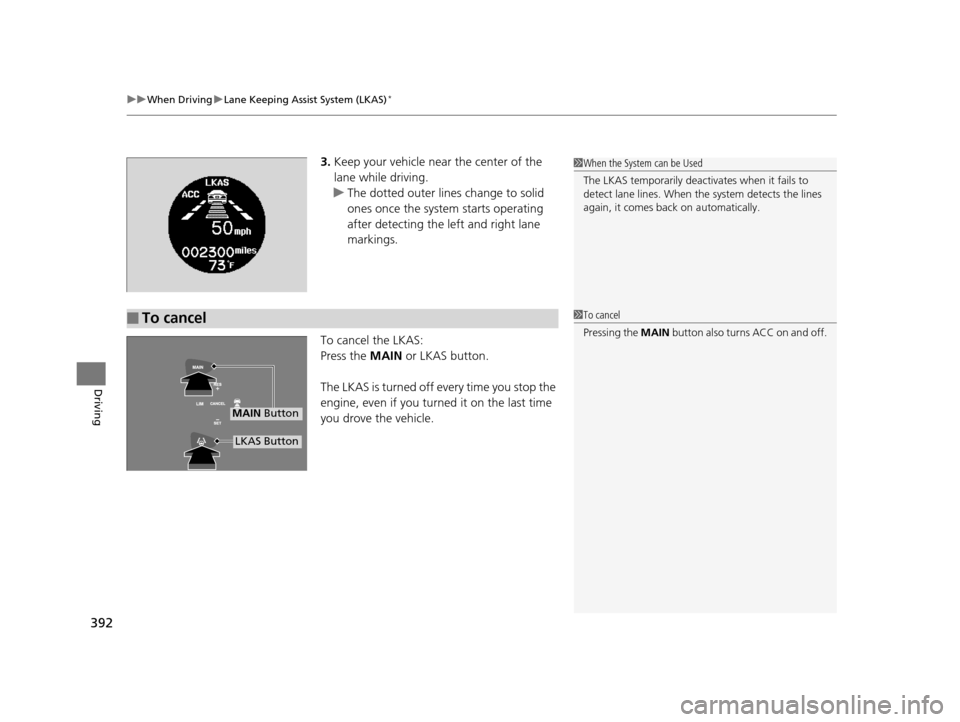
3. Keep your vehicle near the center of the
lane while driving.
u The dotted outer lines change to solid
ones once the system starts operating
after detecting the left and right lane
markings.
To cancel the LKAS:
Press the MAIN or LKAS button.
The LKAS is turned off every time you stop the
engine, even if you turned it on the last time
you drove the vehicle.
■To cancel
1 When the System can be Used
The LKAS temporarily deactivates when it fails to
detect lane lines. When the system detects the lines
again, it comes back on automatically.
1To cancel
Pressing the MAIN button also turns ACC on and off.
MAIN Button
LKAS Button
15 CR-V-31T0A6300.book 392 ページ 2015年2月2日 月曜日 午前10時35分
Page 398 of 533
397
uuWhen Driving uVehicle Stability Assist (VSA ®), aka Electronic Stability Control (ESC), System
Driving
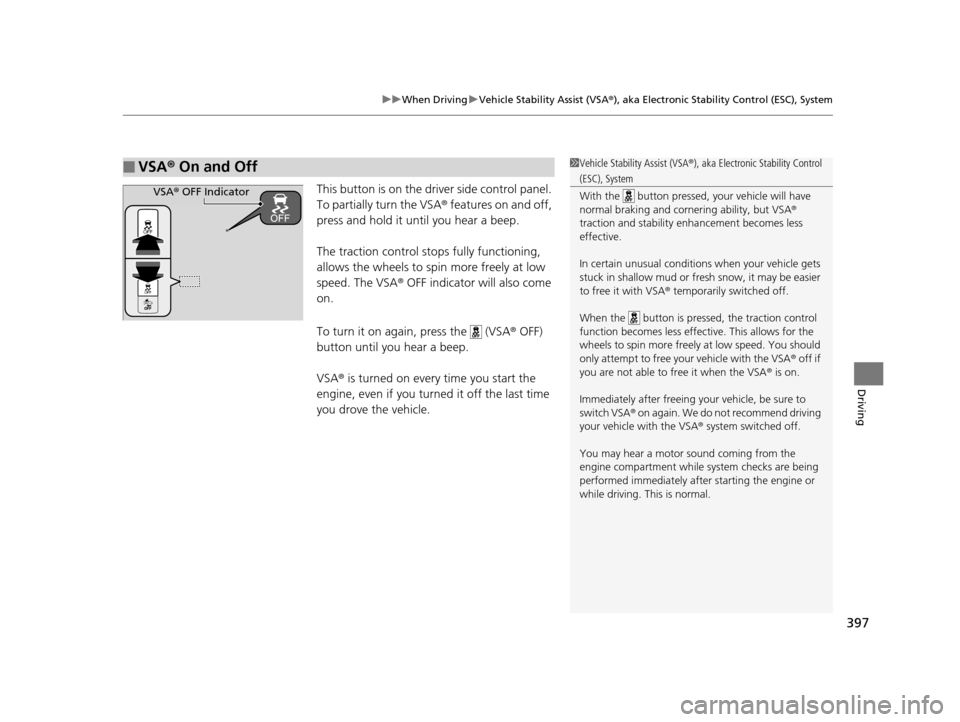
This button is on the driver side control panel.
To partially turn the VSA® features on and off,
press and hold it until you hear a beep.
The traction control stop s fully functioning,
allows the wheels to sp in more freely at low
speed. The VSA ® OFF indicator will also come
on.
To turn it on agai n, press the (VSA ® OFF)
button until you hear a beep.
VSA ® is turned on every time you start the
engine, even if you turned it off the last time
you drove the vehicle.
■VSA ® On and Off1 Vehicle Stability Assist (VSA ®), aka Electronic Stability Control
(ESC), System
With the button pressed, your vehicle will have
normal braking and corn ering ability, but VSA®
traction and stability enhancement becomes less
effective.
In certain unusual conditions when your vehicle gets
stuck in shallow mud or fr esh snow, it may be easier
to free it with VSA® temporarily switched off.
When the button is pressed, the traction control
function becomes less effective. This allows for the
wheels to spin more freely at low speed. You should
only attempt to free your vehicle with the VSA ® off if
you are not able to free it when the VSA ® is on.
Immediately after freeing your vehicle, be sure to
switch VSA ® on again. We do not recommend driving
your vehicle with the VSA ® system switched off.
You may hear a motor sound coming from the
engine compartment while system checks are being
performed immediately after starting the engine or
while driving. This is normal.VSA ® OFF Indicator
15 CR-V-31T0A6300.book 397 ページ 2015年2月2日 月曜日 午前10時35分
Page 402 of 533
401
uuWhen Driving uTire Pressure Monitoring System (TPMS)
Continued
Driving
Tire Pressure Monitoring System (TPMS)
Instead of directly measuring the pressure in each tire, the TPMS on this vehicle
monitors and compares the rolling radius and rotational characteristics of each
wheel and tire while you are driving to determine if one or more tires are
significantly under-inflated. This will caus e the low tire pressure/TPMS indicator to
come on and a message to appear on the multi-information display
*.
You must start TPMS calibration every time you:
• Adjust the pressure in one or more tires.
• Rotate the tires.
• Replace one or more tires.
u Before calibrating the TPMS, turn the ignition switch to ON
(w*1, and make
sure that the vehicle is at a complete stop.
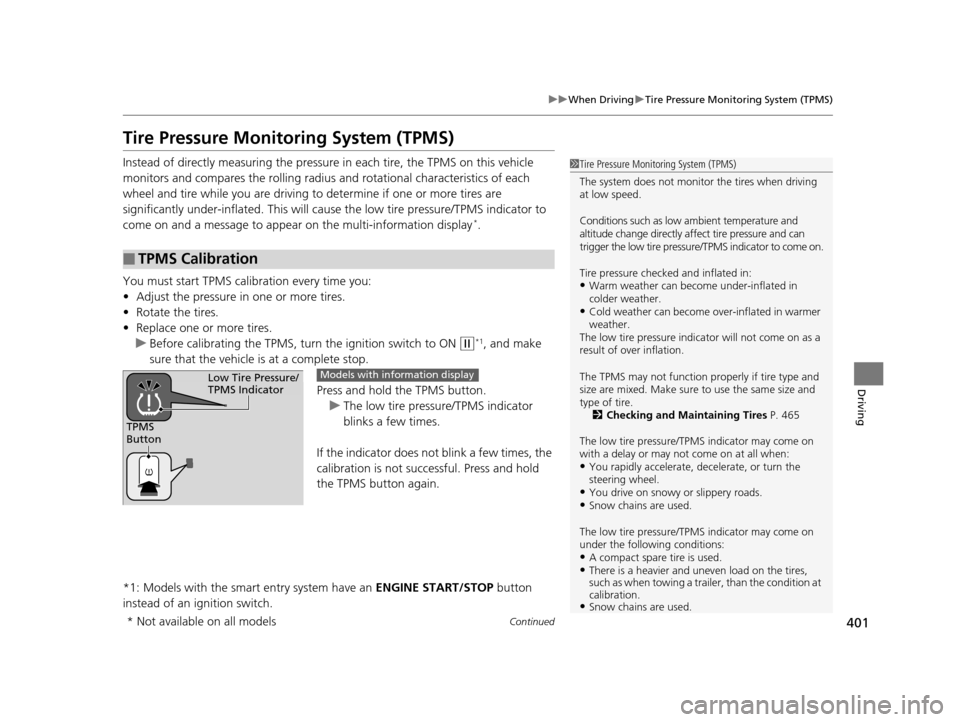
Press and hold the TPMS button.
u The low tire pressure/TPMS indicator
blinks a few times.
If the indicator does not blink a few times, the
calibration is not successful. Press and hold
the TPMS button again.
*1: Models with the smart entry system have an ENGINE START/STOP button
instead of an ignition switch.
■TPMS Calibration
1 Tire Pressure Monitoring System (TPMS)
The system does not monitor the tires when driving
at low speed.
Conditions such as low ambient temperature and
altitude change directly a ffect tire pressure and can
trigger the low tire pressure/TPMS indicator to come on.
Tire pressure checked and inflated in:
•Warm weather can beco me under-inflated in
colder weather.
•Cold weather can become over-inflated in warmer
weather.
The low tire pressure indica tor will not come on as a
result of over inflation.
The TPMS may not function pr operly if tire type and
size are mixed. Make sure to use the same size and
type of tire. 2 Checking and Maintaining Tires P. 465
The low tire pressure/TPMS indicator may come on
with a delay or may not come on at all when:
•You rapidly accelerate, decelerate, or turn the
steering wheel.
•You drive on snowy or slippery roads.•Snow chains are used.
The low tire pressure/TPMS indicator may come on
under the following conditions:
•A compact spare tire is used.•There is a heavier and une ven load on the tires,
such as when towing a trailer, than the condition at
calibration.
•Snow chains are used.
TPMS
Button
Low Tire Pressure/
TPMS IndicatorModels with info rmation display
* Not available on all models
15 CR-V-31T0A6300.book 401 ページ 2015年2月2日 月曜日 午前10時35分
Page 403 of 533
uuWhen Driving uTire Pressure Monitoring System (TPMS)
402
Driving
You can calibrate the system from the cust omized features on the multi-information
display.
1. Press button to select TPMS CALIBRATION, then press the SEL/RESET
button.
2. Press the SEL/RESET button.
u The display switches to th e customization setup screen, where you can select
Cancel or Calibrate .
3. Press the button and select Calibrate, then press the SEL/RESET button.
u Calibration Started screen appears, then th e display returns to the
customization menu screen.
If the Calibration Failed to Start message appears, repeat steps 2-3.
1TPMS Calibration
•TPMS cannot be calibrated if a compact spare tire is
installed.
•The calibration process requires approximately 30
minutes of cumulative dr iving at speeds between
30-60 mph (48-97 km/h).
•During this period, if the ignition is turned on*1 and
the vehicle is not move d within 45 seconds, you
may notice the low tire pressure indicator comes on
briefly. This is normal and indicates that the
calibration process is not yet complete.
If the snow chains are installed, remove them before
calibrating the TPMS.
If the low tire pressure/TPMS indicator comes on even
when the properly inflated specified regular tires are
installed, have the vehi cle checked by a dealer.
We recommend that the tires be replaced with the
same brand, model, and size as the originals. Ask a
dealer for details.
*1: Models with the smart entry system have an
ENGINE START/STOP button instead of an ignition
switch.
Models with multi- information display
15 CR-V-31T0A6300.book 402 ページ 2015年2月2日 月曜日 午前10時35分