HONDA HR-V 2016 2.G Navigation Manual
Manufacturer: HONDA, Model Year: 2016, Model line: HR-V, Model: HONDA HR-V 2016 2.GPages: 250, PDF Size: 4.84 MB
Page 41 of 250
40
uu Routing u Unverified Routing
System Setup
Unverified Routing
H HOME u Settings u Navigation u Routing tab u Unverified Routing
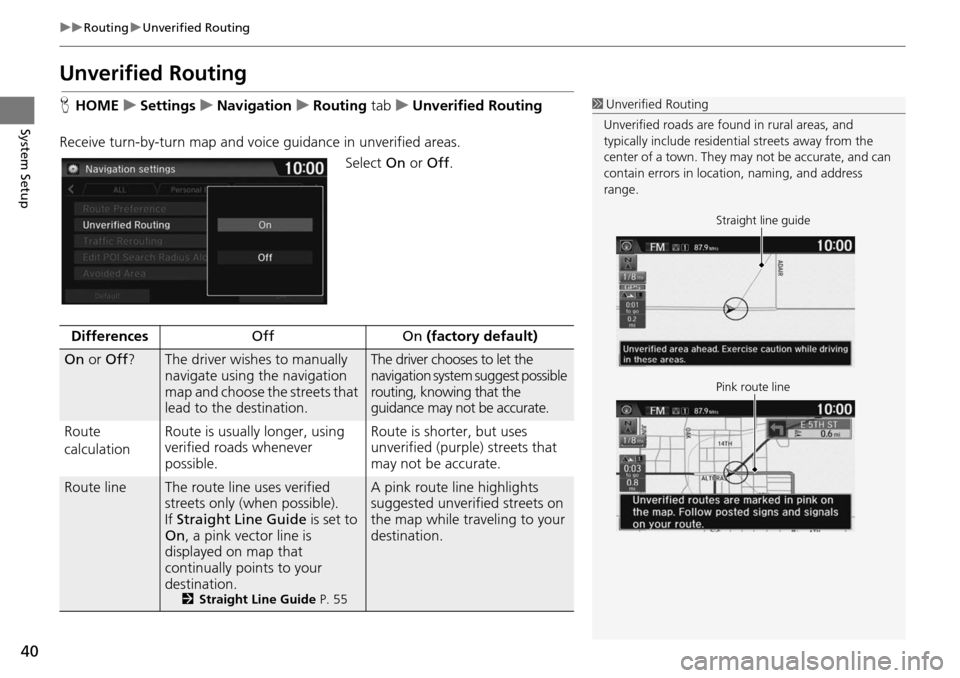
Receive turn-by-turn map
and voice guidance in unverified areas.
Select On or Off .
1Unverified Routing
Unverified roads are found in rural areas, and
typically include residentia l streets away from the
center of a town. They ma y not be accurate, and can
contain errors in locati on, naming, and address
range.
Straight line guide
Pink route line
DifferencesOffOn (factory default)
On or Off ?The driver wishes to manually
navigate using the navigation
map and choose the streets that
lead to the destination.The driver chooses to let the
navigation system suggest possible
routing, knowing that the
guidance may not be accurate.
Route
c a
lculation Route is usually longer, using
veri
fied roads whenever
possible.Route is shorter, but uses
unverified (purple) streets that
may not be accurate.
Route lineThe route line uses verified
streets only (when possible).
If Straight Line Guide is
set to
On , a pink vector line is
displayed on map that
continually points to your
destination.
2 Straight Line Guide P. 55
A pink route line highlights
suggested unverified streets on
the map while traveling to your
destination.
Page 42 of 250
41
uu Routing u Unverified Routing
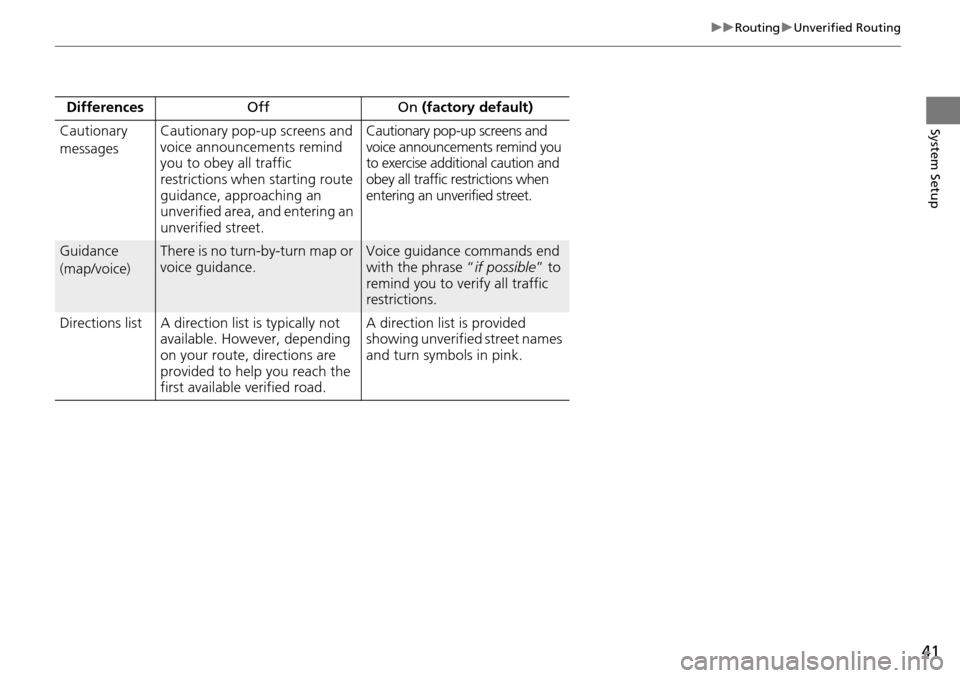
System SetupCautionary
messagesCautionary pop-up screens and
voice announcements remind
you to obey all traffic
restrictions when starting route
guidance, approaching an
unverified area, and entering an
unverified street.Cautionary pop-up screens and
voice announcements remind you
to exercise additional caution and
obey all traffic restrictions when
entering an unverified street.
Guidance
(map/voice)There is no turn-by-turn map or
voice guidance.Voice guidance commands end
with the phrase “ if possible” to
remind you to verify all traffic
restrictions.
Directions list A direction list is typically not
available. Ho
wever, depending
on your route, directions are
provided to help you reach the
first available verified road. A direction list is provided
showing unverified street names
an
d tu
rn symbols in pink.
Differences
OffO
n (factory default)
Page 43 of 250
42
uu Routing u Traffic Rerouting
System Setup
Traffic Rerouting
H HOME u Settings u Navigation u Routing tab u Traffic Rerouting
A faster route can be calculated based on continuously updated tr
affic information.
2Traffic ReroutingTM P. 109
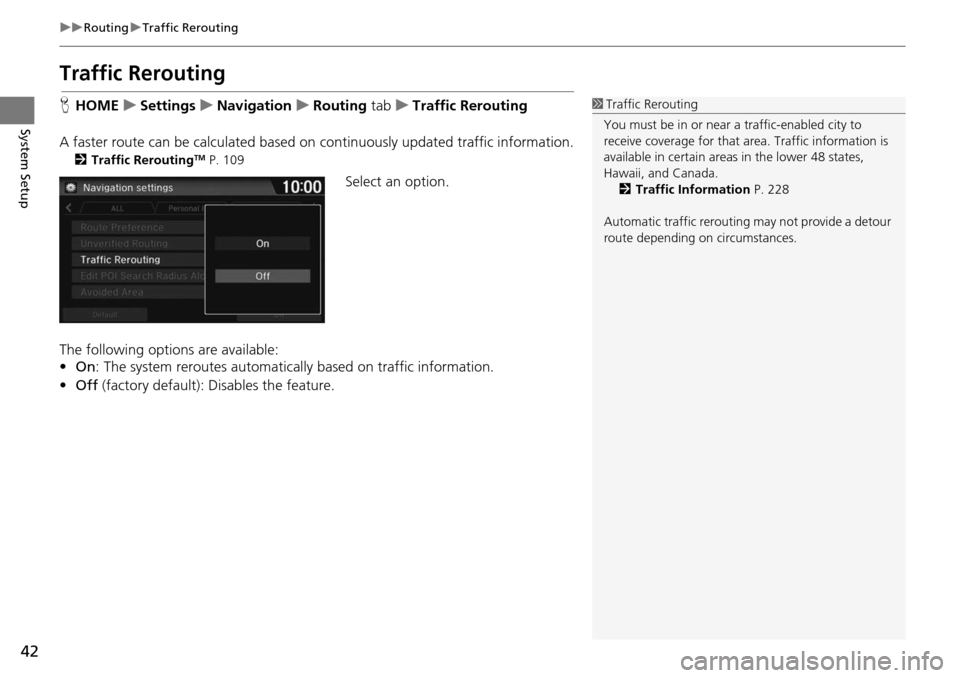
Select an option.
The following options are available:
• On : The system reroutes automatica lly based on
traffic information.
• Off (factory default): Disables the feature.
1Traffic Rerouting
You must be in or near a traffic-enabled city to
receive coverage for that area. Traffic information is
available in certain areas in the lower 48 states,
Hawaii, and Canada. 2 Traffic Information P. 228
Automatic traffic rerouting may not provide a detour
route depending on circumstances.
Page 44 of 250
43
uu Routing u Edit POI Search Radius Along Route
System Setup
Edit POI Search Ra dius Along Route
HHOME u Settings u Navigation u Routing tab u Edit POI Se arch Radius
Alon
g Route
Select the distance from your highlighted ro ute line (on eit
her side of your route)
that the system will search for a waypoint.
2Adding Waypoints P. 112
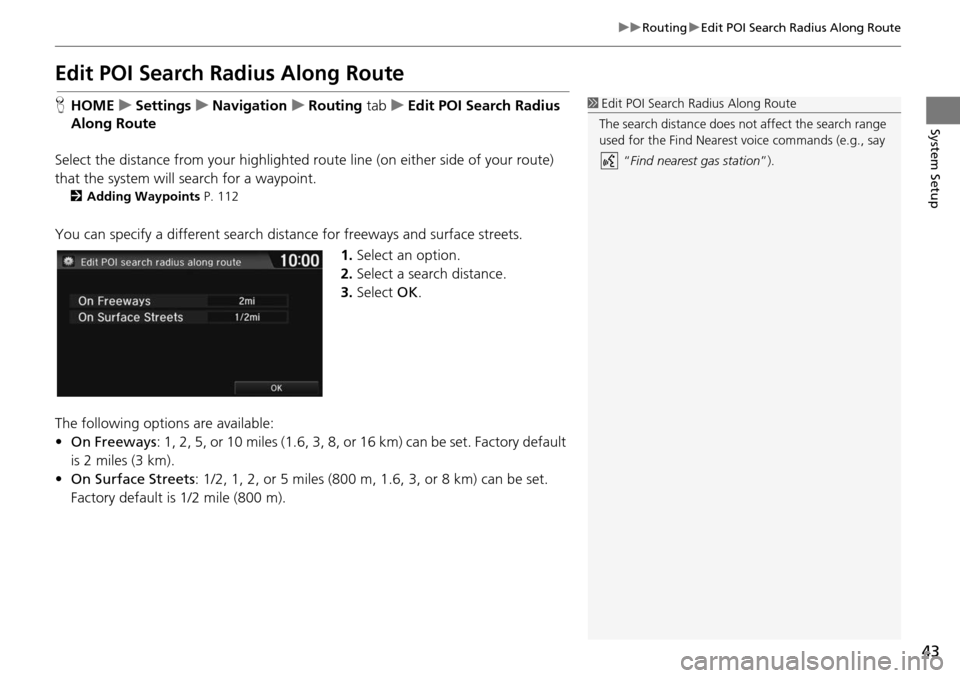
You can specify a different search dist ance for freeways and surface streets.
1.Select an option.
2. Select a search distance.
3. Select OK.
The following options
are available:
• On Freeways : 1, 2,
5, or 10 miles (1.6, 3, 8, or 16 km) can be set. Factory default
is 2 miles (3 km).
• On Surf ace Streets :
1/2, 1, 2, or 5 miles (800 m, 1.6, 3, or 8 km) can be set.
Factory default is 1/2 mile (800 m).
1 Edit POI Search Radius Along Route
The search distance does not affect the search range
used for the Find Nearest voice commands (e.g., say
“Find nearest gas station ”).
Page 45 of 250
44
uu Routing u Avoided Area
System Setup
Avoided Area
H HOME u Settings u Navigation u Routing tab u Avoided Area
Specify up to five areas to avoid (e
.g., road construction, closures), if possible, when
the system calculates rout es to your destination.
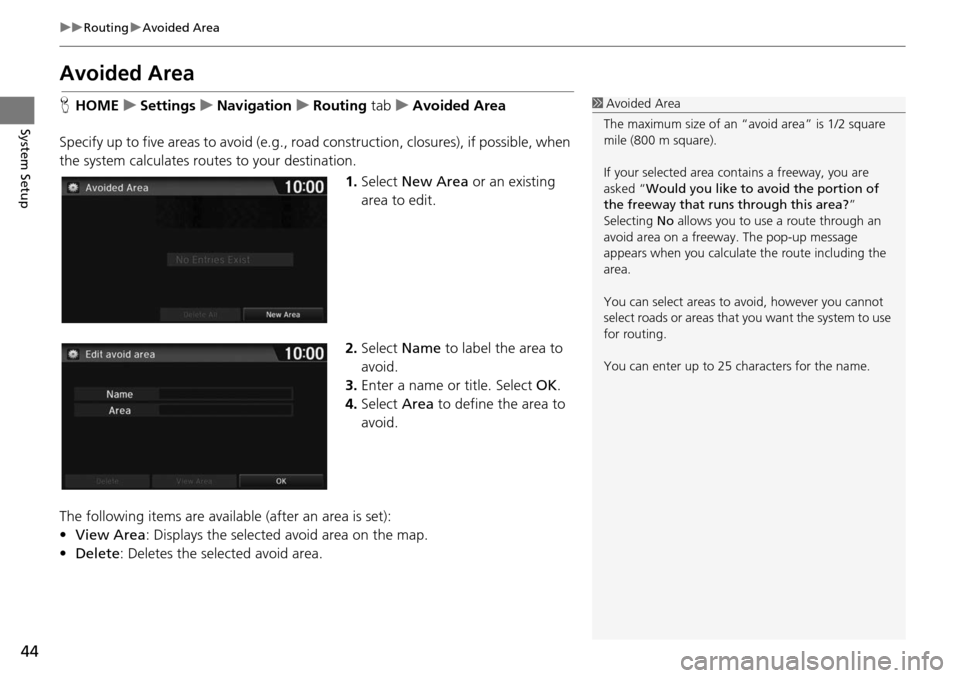
1.Select New Are
a or an existing
area to edit.
2. Select Name
to label the area to
avoid.
3. Enter a name or title. Select OK.
4. Select Area to define the area to
av
oid.
The following items are availa ble (after an
area is set):
• View Area : Displays the selecte
d avoid area on the map.
• Delete: Deletes the selected avoid area.
1Avoided Area
The maximum size of an “a void area” is 1/2 square
mile (800 m square).
If your selected area contains a freeway, you are
asked “Would you like to avoid the portion of
the freeway that runs through this area? ”
Selecting No allows you to use a route through an
avoid area on a freeway . The pop-up message
appears when you calculat e the route including the
area.
You can select areas to avoid, however you cannot
select roads or areas that you want the system to use
for routing.
You can enter up to 25 ch aracters for the name.
Page 46 of 250
45
uu Routing u Avoided Area
System Setup
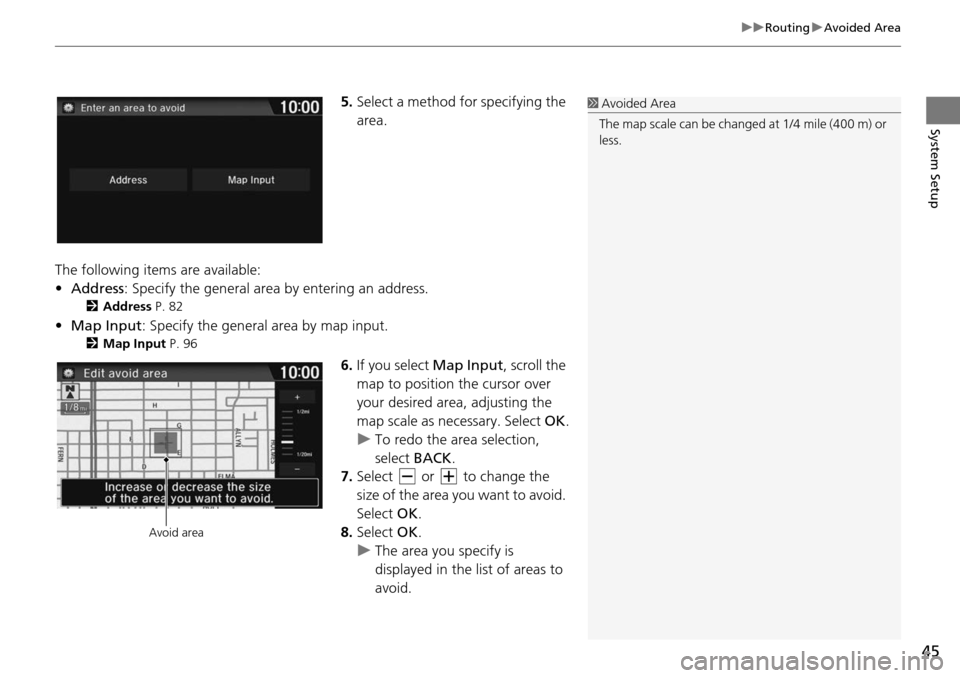
5. Select a method for specifying the
area.
The following items are available:
•Address : Specif
y the general area by entering an address.
2Address P. 82
•Map Input : Specify the general area by map input.
2Map Input P. 96
6. If you select Map Input, scroll the
map to position the cursor over
your desired area, adjusting the
map scale as necessary. Select OK.
u To redo the area select
ion,
select BACK.
7. Select or to change the
size of the area you want to avoid.
Select OK.
8. Select OK.
u The ar
ea you specify is
dis
played in the list of areas to
avoid.
1 Avoided Area
The map scale can be change d at 1/4 mile (400 m) or
less.
Avoid area
Page 47 of 250
46
System Setup
Guidance
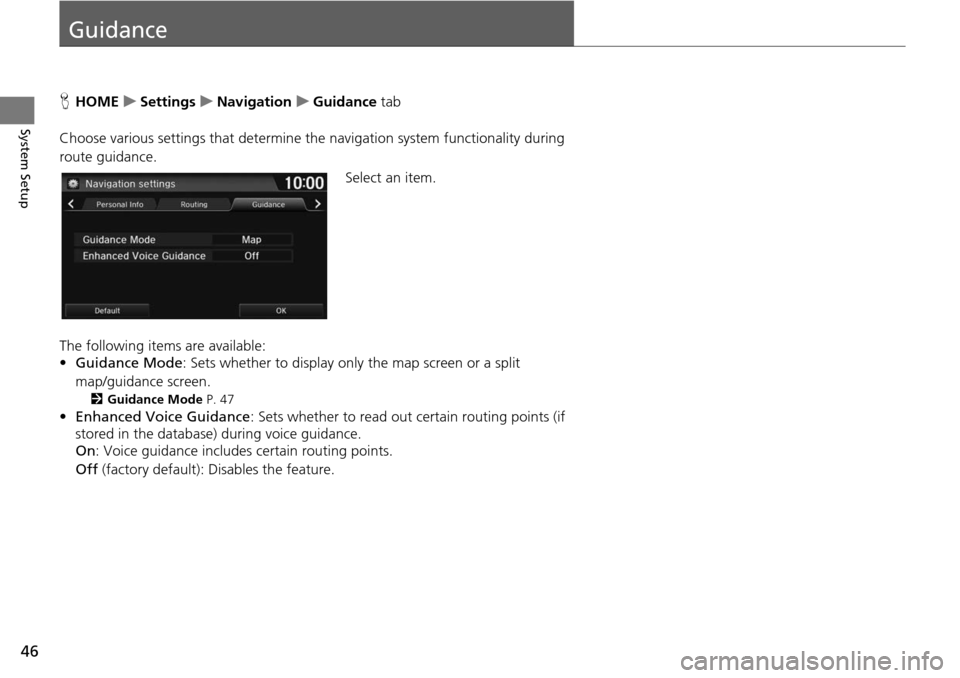
HHOME u Settings u Navigation u Guidance tab
Choose various settings that determine th e n
avigation system functionality during
route guidance.
Select an item.
The following items are available:
• Guidance Mode: Sets
whether to display only the map screen or a split
map/guidance screen.
2 Guidance Mode P. 47
•Enhanced Voice Guidance : Sets whether to read out certain routing points (if
stored in the database) during voice guidance.
On : Voi ce guidance includes certain routing points.
Off (factory default): Disables the feature.
Page 48 of 250
47
uu Guidance u Guidance Mode
Continued
System Setup
Guidance Mode
H HOME u Settings u Navigation u Guidance tab u Gu idance Mode
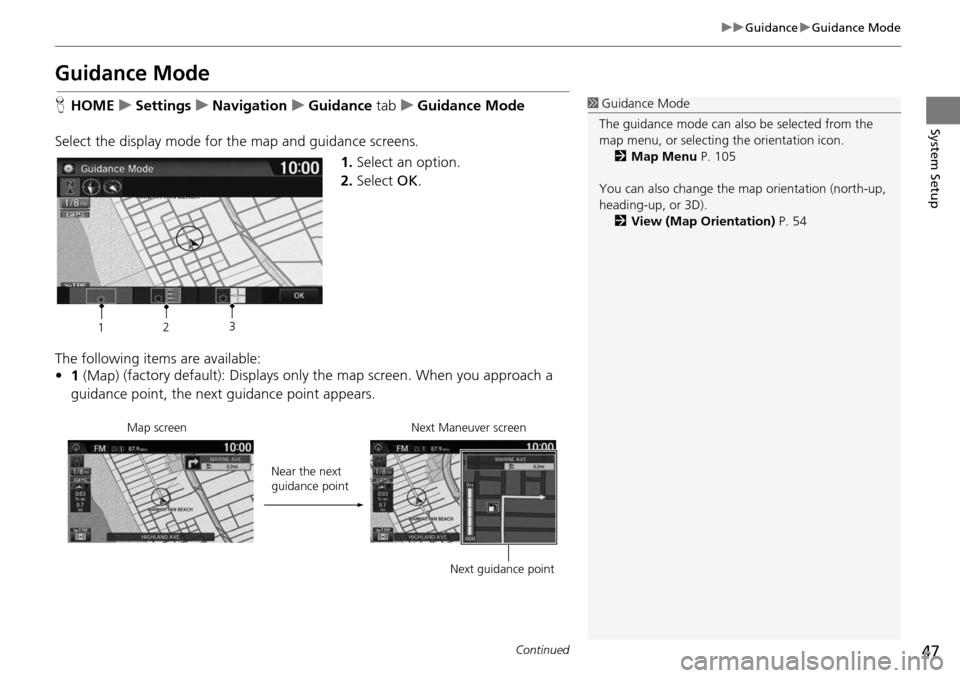
Select the display mode for the map and guidance screens. 1.Select an option.
2. Select OK.
The following items are available:
• 1 (Map) (factory default): Displays only
the ma
p screen. When you approach a
guidance point, the next guidance point appears.
1Guidance Mode
The guidance mode can also be selected from the
map menu, or selecti ng the orientation icon.
2 Map Menu P. 105
You can also change the ma p orientation (north-up,
heading-up, or 3D). 2 View (Map Orientation) P. 54
12 3
Near the next
guidance point
Map screen Next Maneuver screen
Next guidance point
Page 49 of 250
48
uu Guidance u Guidance Mode
System Setup
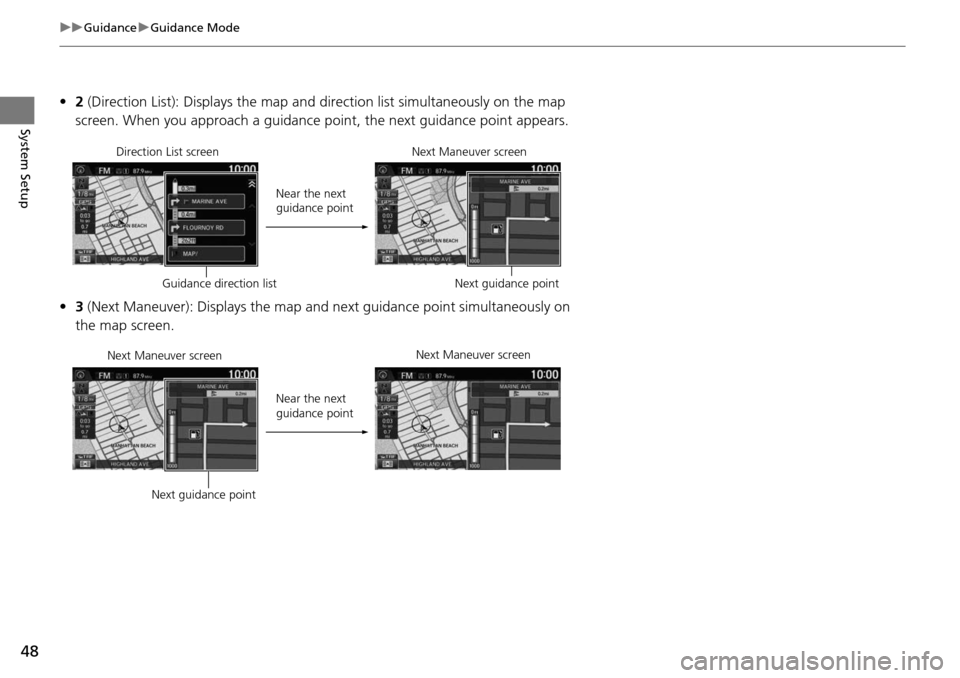
• 2 (Direction List): Displays the map and direction list simultaneously on the map
screen. When you approach a guidance point, the next guidance point appears.
• 3 (Next Maneuver): Displays the map and next guidance point simultaneously on
the map screen.
Near the next
guidance point
Direction List screen
Next Maneuver screen
Next guidance point
Guidance direction list
Near the next
guidance point
Next Maneuver screen
Next Maneuver screen
Next guidance point
Page 50 of 250
49Continued
System Setup
Map
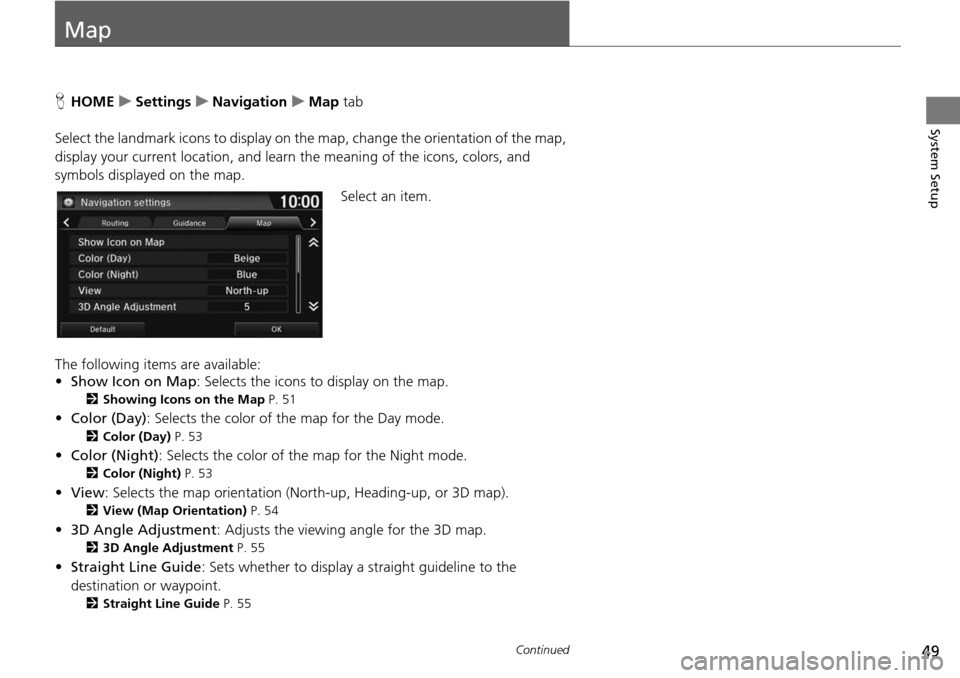
HHOME u Settings u Navigation u Map tab
Select the landmark icons to display on the map,
change the orientation of the map,
display your current location, and learn the meaning of the icons, colors, and
symbols displayed on the map.
Select an item.
The following items are available:
• Sh ow Icon on Map :
Selects the icons to display on the map.
2Showing Icons on the Map P. 51
• Color (Day) : Selects the color of the map for the Day mode.
2Color (Day) P. 53
• Color (Night) : Selects the color of the map for the Night mode.
2Color (Night) P. 53
• View : Selects the map orientation (North-up, Heading-up, or 3D map).
2View (Map Orientation) P. 54
• 3D Angle Adjustment : Adjusts the viewing angle for the 3D map.
23D Angle Adjustment P. 55
• Straight Line Guide : Sets whether to display a straight guideline to the
destination or waypoint.
2 Straight Line Guide P. 55